|
|
|

|
|
| Search | Car Forums | Gallery | Articles | Helper | AF 350Z | IgorSushko.com | Corporate |
|
| Latest | 0 Rplys |
|
|||||||
| WIP - Street Post topics for any "Works In Progress" street vehicles projects in this sub-forum. |
 |
 Show Printable Version | Show Printable Version |  Email this Page | Email this Page |  Subscribe to this Thread
|
|
|
Thread Tools |
 11-16-2015, 12:32 PM
|
#1 | |
|
Image Hosting Exceeded
 Join Date: May 2003
Location: Flying in circles
Posts: 4,233
Thanks: 23
Thanked 95 Times in 86 Posts
|
BMW 318i (E36)
I'm working lately on Hasegawa's BMW E36 318i.
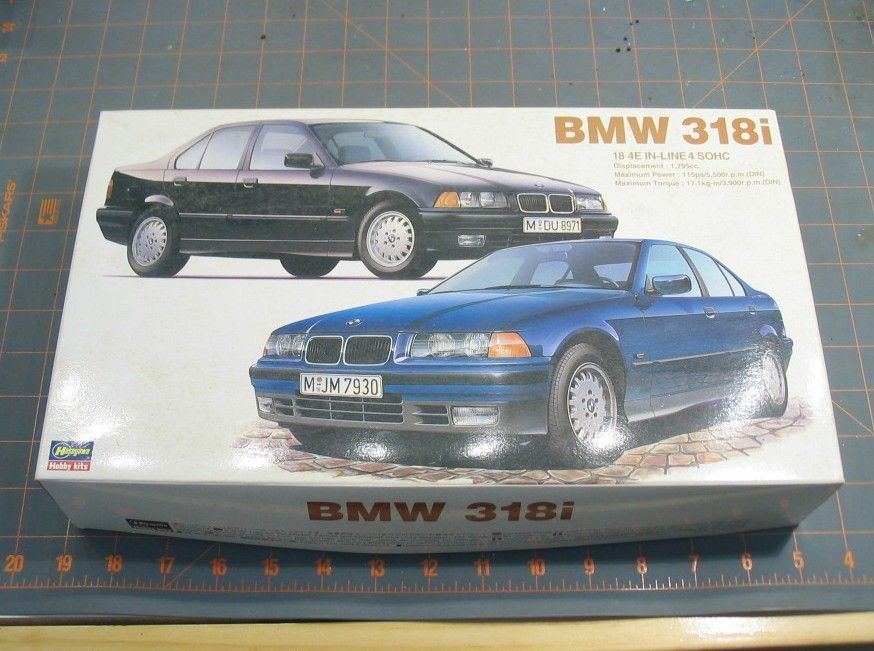 As I pointed out in a recent thread, this is probably the most mundane kit in my collection. But I love the E36, even the "plain, boring" versions. I own two of them, and I have to say it is a lot of fun working on a build of a car that you are familiar with. This is not a new build for me. In fact, it is one of my oldest. I got the kit well before the turn of the century (back when the E36 was still hot in production), and probably started it almost immediately. At the time, I really wanted to convert it to an M3. But happily I soon found Dragon's M3 kit (such as it is), and converting this one became pointless. So it sat in limbo for many years. It probably could have been a fast, easy build at one point, but I didn't really get back to it. I couldn't seem to pick wheels for it, or a color for it- and I felt like I should do something to it, so that it wouldn't be quite so plain. And then I stared to realize that I rather like the plain version. (Maybe because there aren't nearly as many of them running around as there were 15+ years ago.) I even like the original stock wheels now. So then I had an idea!- Build it completely stock, plain, untampered with, except- working angel eyes. We will see how it goes. The kit itself is pretty decent. The body looks great, the wheels are quite good, and the chassis is good. The interior has a strange annoying feature or two, but nothing catastrophic. 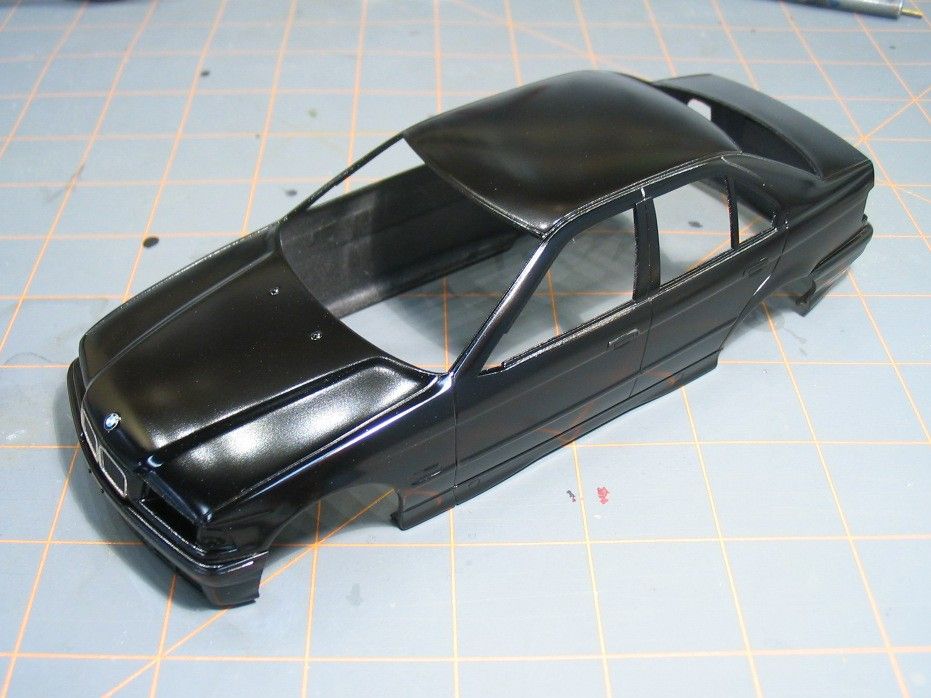 Black! Here is the body painted and clear coated, waiting for polishing. Thank you again to BVC500 for some decals!!- unfortunately the originals didn't fare well over the years. 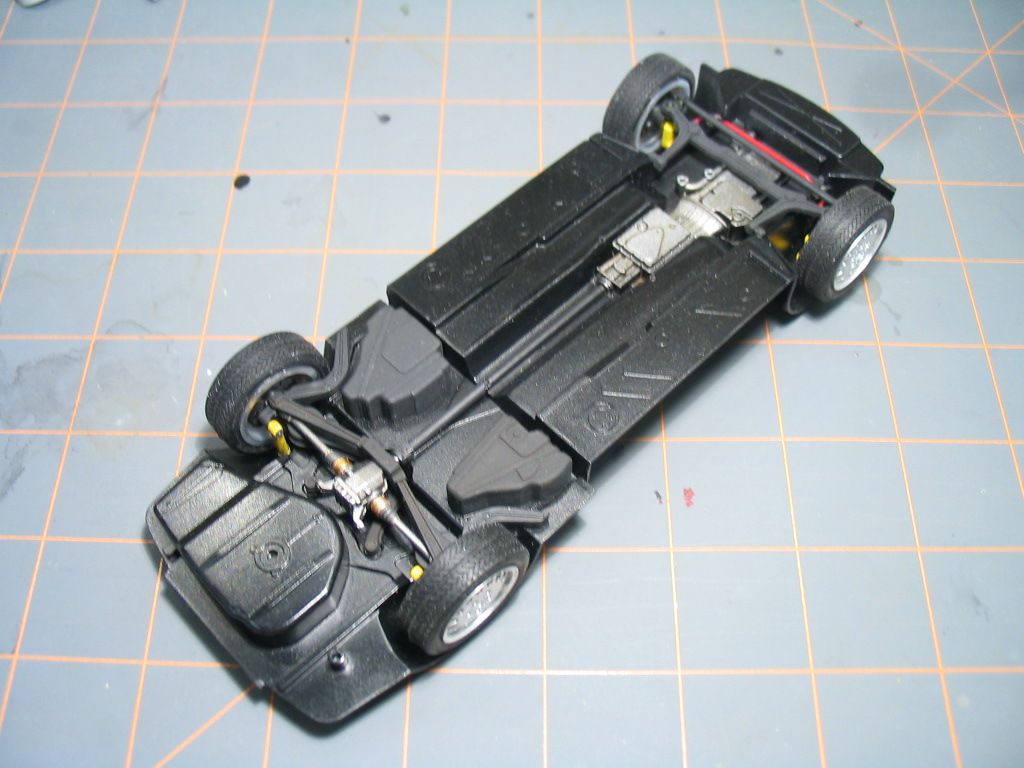 The chassis is pretty straightforward. (But the dark color is giving me some trouble with focus!  ) )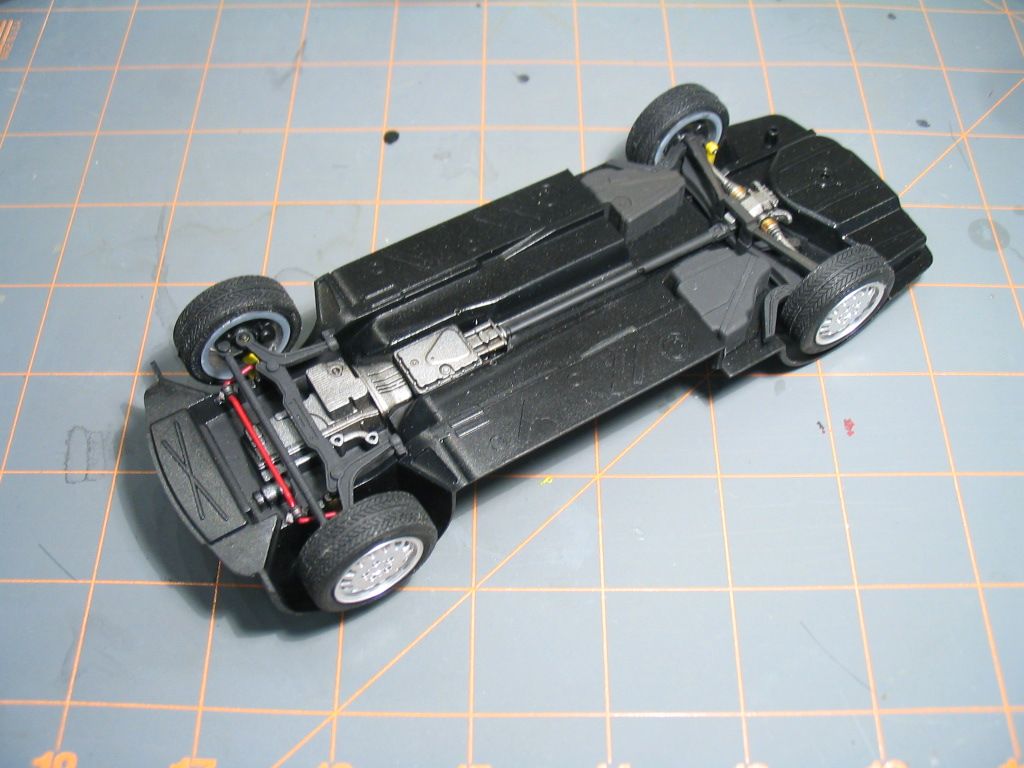 Bilstein shocks/struts and Eibach sway bar- highly recommended upgrades on full size E36s, and they help break up the otherwise monotonous black of the underside. (The 850 is getting the same treatment  ) Exhaust system yet to come, and the wheels need to be painted something other than chrome. ) Exhaust system yet to come, and the wheels need to be painted something other than chrome.  So far, so good- it looks a bit like a BMW. 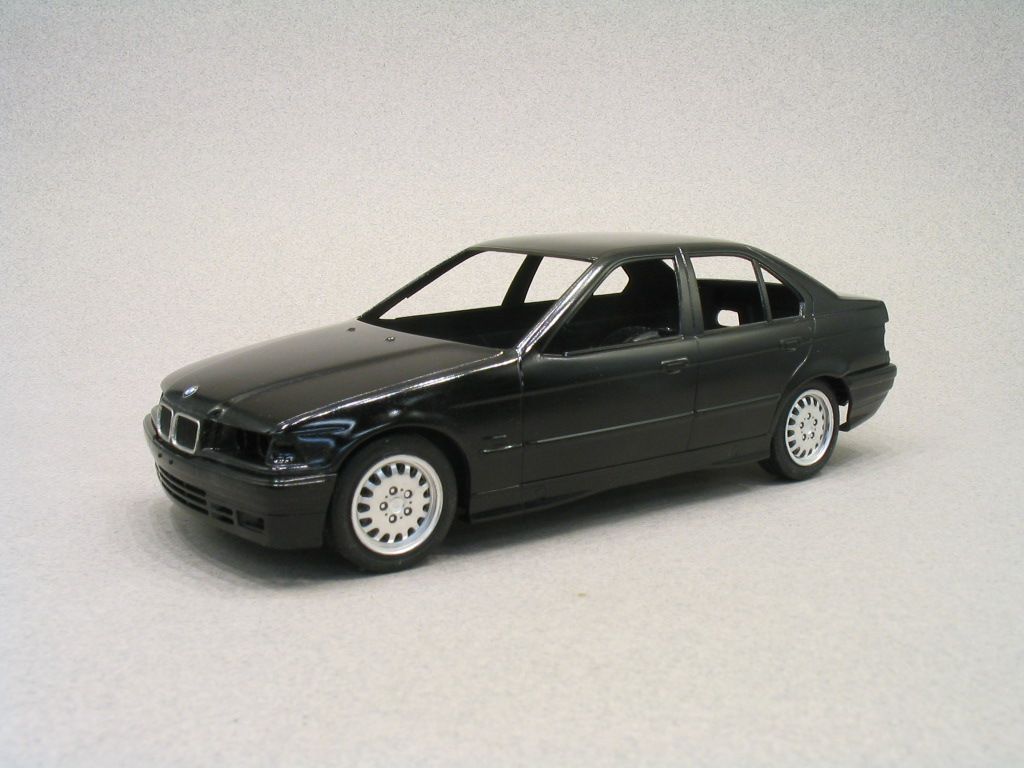 There is more to come. This kit has suddenly become my finish by the end of the year project. We will see if I can make that happen. 
__________________
PHOTOBUCKET SUCKS |
|

|

|
|
11-16-2015, 01:47 PM
|
#2 | |
|
AF Enthusiast
Join Date: Jan 2002
Location: Washington, Washington DC
Posts: 2,383
Thanks: 129
Thanked 102 Times in 95 Posts
|
Re: BMW 318i (E36)
Looking good! Are the rear wheels sitting a little too inboard?
What color interior? The silver-gray two tone would look good. I used to have the Hasegawa E36. I sold it, but only after I made multiple resin copies of the correct airbag-style steering wheel. BTW Andy, if you need one for the 850i project, let me know. Funny thing, after all these years, there are now M3 transkits and wheels available for this and the Revell version. |
|
|
|
|
|
11-17-2015, 09:12 AM
|
#3 | ||
|
Image Hosting Exceeded
Join Date: May 2003
Location: Flying in circles
Posts: 4,233
Thanks: 23
Thanked 95 Times in 86 Posts
|
Re: BMW 318i (E36)
Quote:
 What else!? Seriously, the two tone silver grey is a good option- it is what I have in my M3, so it will obviously go in the 1/24 M3 (when I ever get around to finishing it). But the best factory interior scheme I think I've seen in a 318 is black with dark red inserts- so that's what I'm going to go with here. I hadn't noticed it before, but the rears do look inset a bit don't they? The fronts and rears are exactly the same width (2.4", as measured at the brake rotor hubs). But if I need to increase the offset a bit I may add some spacers. I like the three spoke wheel in the 850i kit. I haven't given the 850 interior much thought, and I haven't even looked to see if it's correct. But it will be silver/grey.
__________________
PHOTOBUCKET SUCKS |
||
|
|
|
|
11-17-2015, 09:21 AM
|
#4 | |
|
AF Enthusiast
Join Date: Jan 2002
Location: Washington, Washington DC
Posts: 2,383
Thanks: 129
Thanked 102 Times in 95 Posts
|
Re: BMW 318i (E36)
I should say correct for the US market steering wheel. The 3 spoker in the 850 is correct for the euro market. You know what would be nice - a 850csi transkit.
|
|
|
|
|
|
11-17-2015, 11:09 AM
|
#5 | |
|
Image Hosting Exceeded
Join Date: May 2003
Location: Flying in circles
Posts: 4,233
Thanks: 23
Thanked 95 Times in 86 Posts
|
Re: BMW 318i (E36)
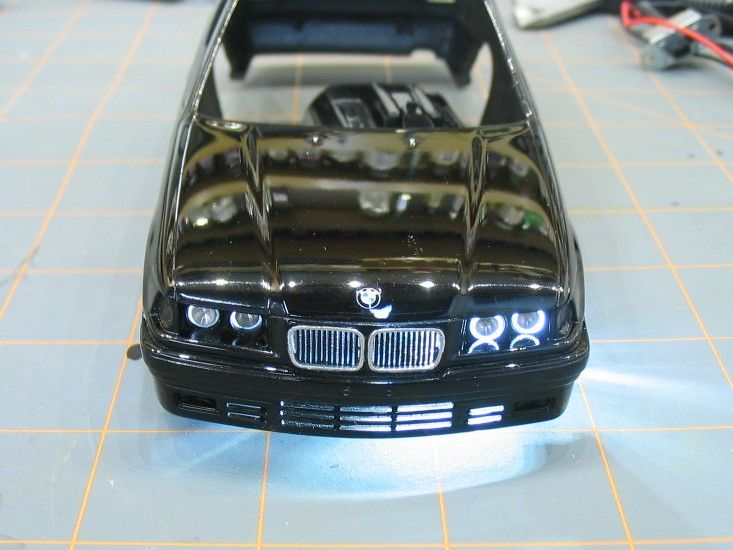
A preview of what's to come....
__________________
PHOTOBUCKET SUCKS |
|
|
|
|
| The Following User Says Thank You to MPWR For This Useful Post: |
BVC500 (11-17-2015)
|
|
11-17-2015, 08:43 PM
|
#6 | |
|
AF Fanatic

Join Date: Feb 2004
Location: Hartford, Connecticut
Posts: 5,601
Thanks: 7
Thanked 108 Times in 103 Posts
|
Re: BMW 318i (E36)
I have a few of these in my collection, I love the e36. Great old start, the halos look awesome. They are fiber optics?
__________________
In Progress    
|
|
|
|
|
|
11-19-2015, 02:27 PM
|
#7 | ||
|
Image Hosting Exceeded
Join Date: May 2003
Location: Flying in circles
Posts: 4,233
Thanks: 23
Thanked 95 Times in 86 Posts
|
Re: BMW 318i (E36)
Quote:
__________________
PHOTOBUCKET SUCKS |
||
|
|
|
|
11-29-2015, 02:33 PM
|
#8 | |
|
Image Hosting Exceeded
Join Date: May 2003
Location: Flying in circles
Posts: 4,233
Thanks: 23
Thanked 95 Times in 86 Posts
|
Re: BMW 318i (E36)
The body is being polished and detailed- should be finished soon. That means it's time for the electrical system.
I've never bothered to light a car model before. It's one of those things (like opening hinged doors) that I think more often ruins a model instead of making it better. It can be very challenging to make headlights work on a car, and at the same time make them look good. But that has changed a bit recently with the proliferation of LED lighting on cars. In the last 10 years, a lot of different manufacturers are now building LED accents into their cars. Ferrari, Audi, Honda, Toyota, Range Rover, and now many others now have LEDs. There are two big advantages to LED accents for car modelers. 1- LEDs are realatively easy to work with. They are small, bright, easy to power, very long lasting, and don't put out much heat. Nearly all 1/24 cars have enough space in them for a couple of LEDs and a power source. 2- Lighting for accent is much easier to do than lighting for illumination. Supplemental style lighting isn't designed to light up the roadway ahead for the driver. Rather, it serves simply to make the car more visible and recognisable- for obvious safety benefits, but also to make the car look more sporty/modern/cool/expensive/etc. But as these lights are not nearly so bright as a projection light like a headlight, it is much easier to build them into a model (and to photograph them, for that matter). BMW might be to blame for starting this trend in LED style lighting. The E39 5 series in 2000 was the first car to appear with illuminated headlight rings- dubbed "angel eyes". They quickly became extremely popular, and BMW soon adopted them as a brand image feature- nearly every BMW made for the past 10+ years has them. Of course, many other manufacturers have since followed. The E36 was never made with angel eyes (production of the E36 had just ended and the E46 was starting), but it has been a popular retrofit on all BMWs of this era. The electrical system for this build requires three elements: lights, a power source, and an on/off switch. The choice for lights is simple- 3mm superbright clear LEDs seemed the obvious choice. I use these for supplemental lighting in my machine shop. I get them from Tayda or Futurlec. For a power source, I decided that I wanted on board power- so I could put the lights on and leave the model entirely freestanding. Again, there is plenty of unused interior space on this build- the boot and engine areas are empty. I could easily fit a blocky 9V in the trunk, and get a decade or more use out of it. But a 9V would require a voltage regulator or at least a fat resistor to step the power down to a useful level- and these generate heat. A couple of AA or AAA batteries would be a more practical option. But the option I settled on was a coin battery. This meant that I would have to build a battery holder as well, but that's a pretty simple matter. 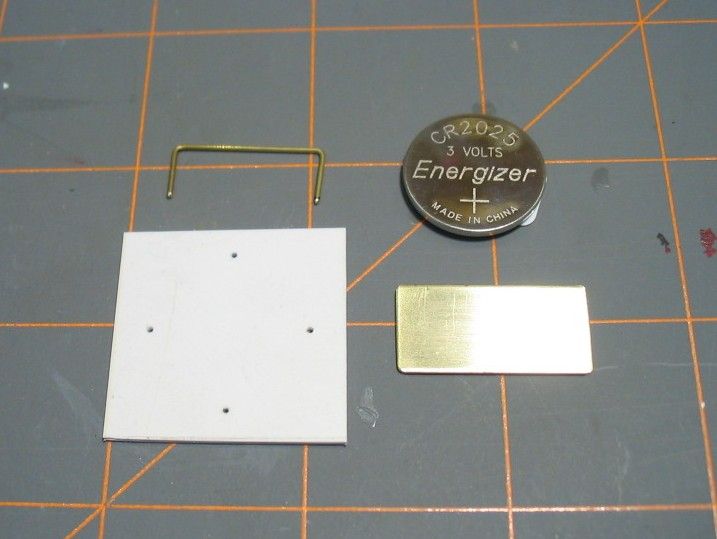 The base of the holder is just a piece of thick styrene card. The electrical contacts are brass strip and rod. 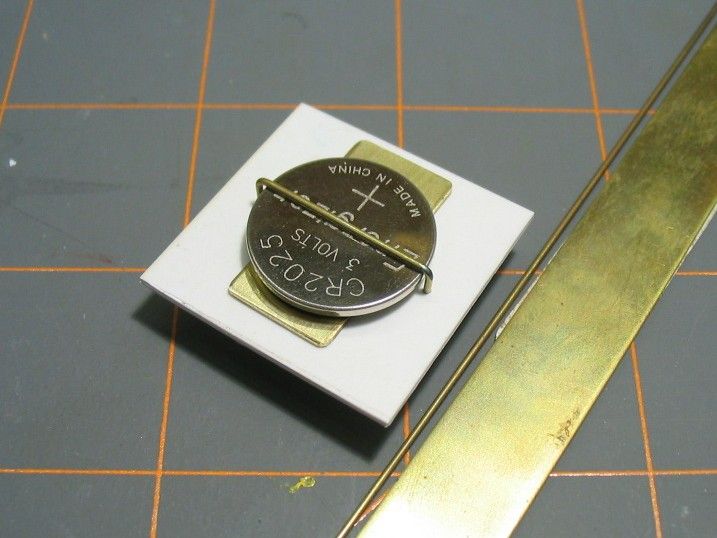 Solder a couple of wires in place and done. The on/off switch proved to be more complicated. I wanted something as small and discrete as possible, so that it would not visually effect the finished model. But searching through options, I could find nothing small enough that I was happy with. There were also a few other factors. While I definitely wanted on board power (for model shows and the like), I also realised that it would be nice to add the ability for remote swtiching- say a wired switch with which I could control the lighting without having to disturb the model (think displaying it on a shelf). Ideally, it would also be great to be able to run the lighting off of an external power source also- so as not to run down the on board battery. Fortunately, this tall wish list suggested a very practical solution. I realised that instead of bothering with a switch, I could connect the LEDs and battery to a header- and then select the mode of operation I wanted with a jumper. This gives the ability to run either on board power, onboard power with remote switching, or remote power and switching. Even better, using a jumper as a switch is the smallest, simplest, and least visually impactful solution I could imagine. 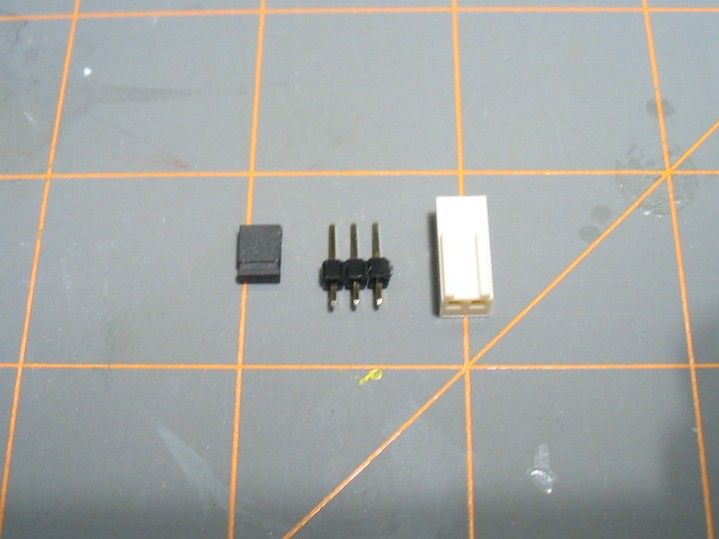 The header is the three prong thing in the center. On the left is the jumper (which connects two pins), and on the right is a connector. As ever, the grid is 1" for scale- these are fairly small components.  Headers come in long strips. You clip off as many as you need, and then solder them onto a circuit board. In this case, three pins will give me all the capabilities I want. 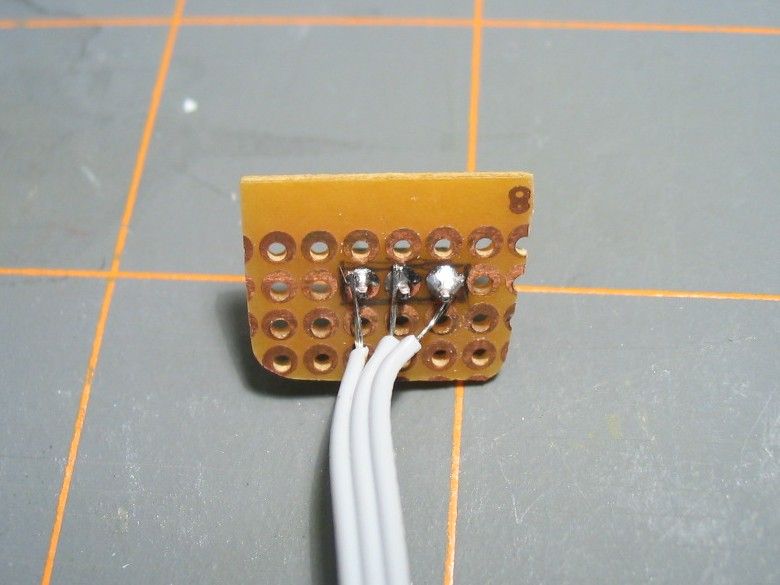 Not the prettiest soldering job, but fully functional. 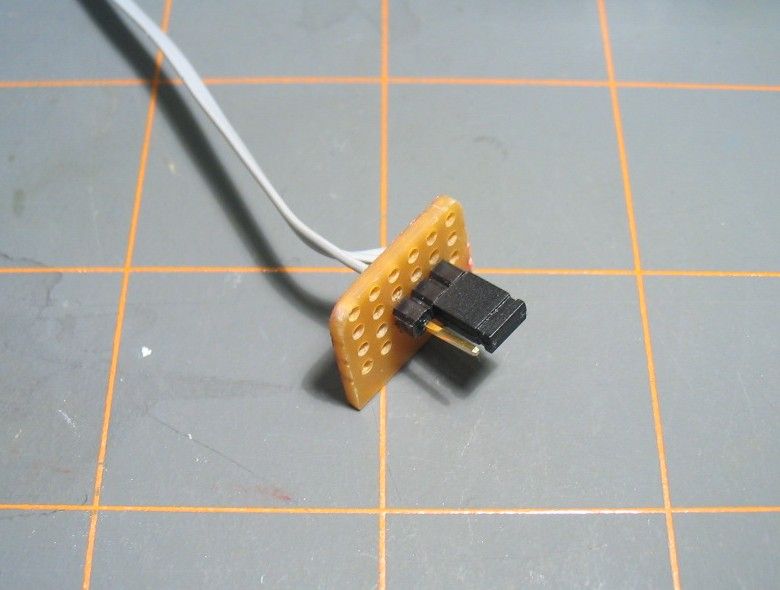 Putting the jumper on the right two pins will close the circuit and turn on the lights. If the jumper is removed (or on the other two pins), the lights are off and the battery is not being discharged. 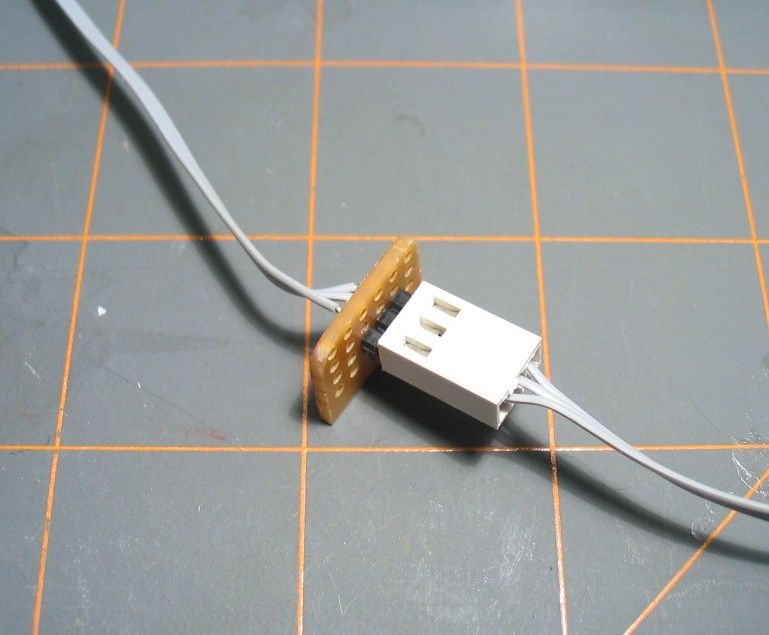 Or I can remove the jumper and substitute a connector- which will give me the ability for remote power and/or switching. 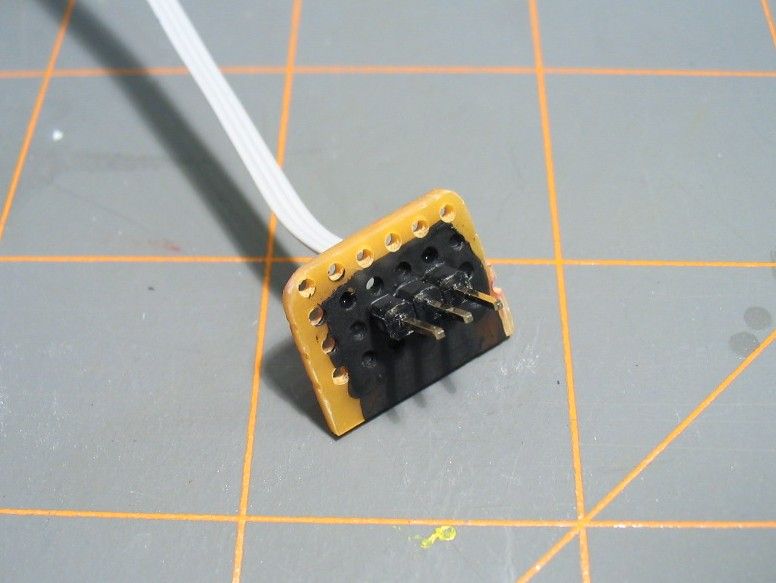 Painted black and ready for installation. It just needs to be glued in place in a suitable location. So, where to put all this? As the header is the only externally accessible component of the electrical system, I wanted to put it somewhere out of the way- a rear corner seemed like a good choice. 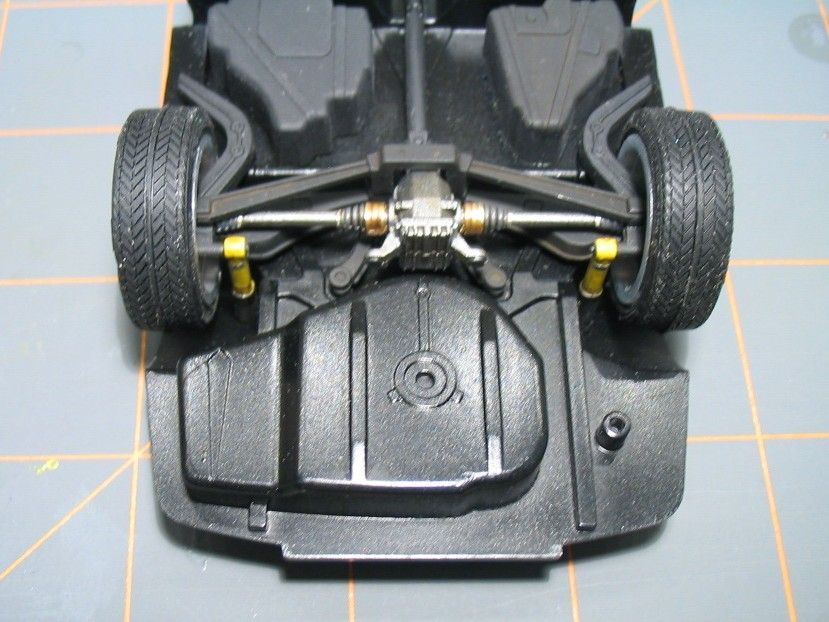 The muffler will go on the right side here- but the left side is a good option. Ironically, the rectangular area next to the spare wheel is where the battery is on the full size car! So simply drill and file a suitably sized and shaped hole here.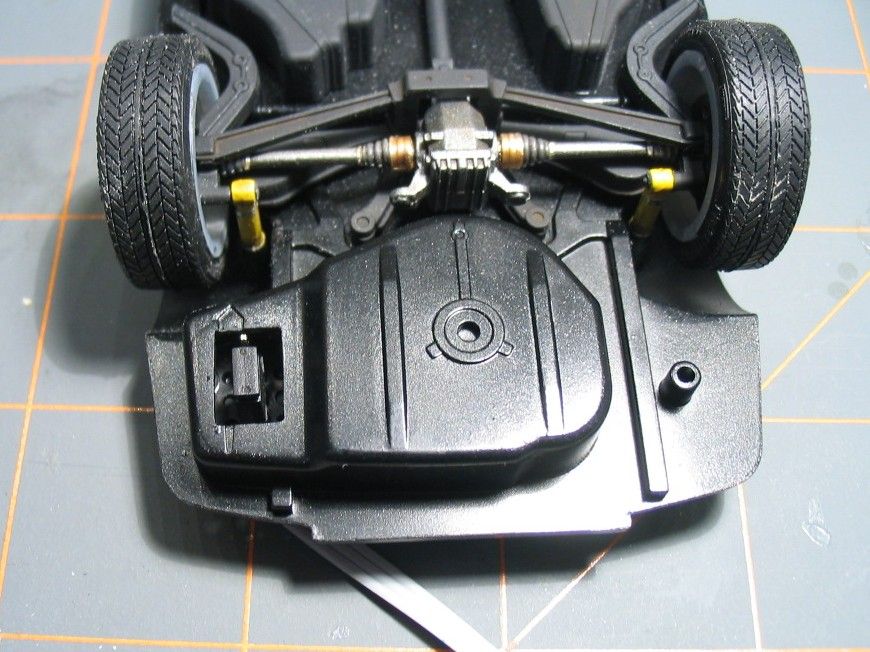 Glued in place. Here, the jumper is in the "off" position. It isn't necessary to have it in this position for the lights to be off- but it makes a great place to store the jumper. 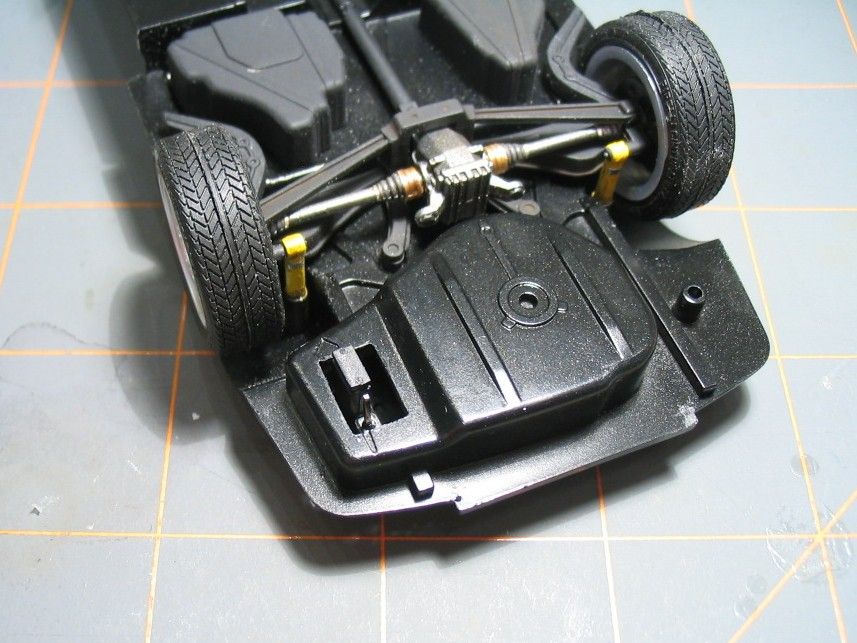 And here is the jumper in the "on" position. With the body on the chassis, this installation is next to invisible. 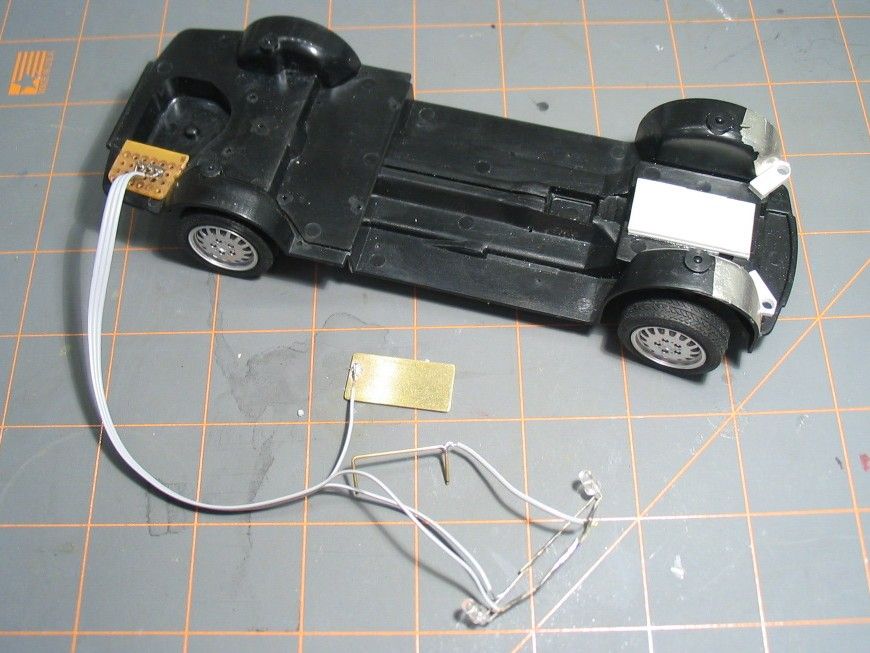 Here are the other components soldered together. The 'legs' of the LEDs are bent to the side and soldered together (make sure they are connected properly, or one or both will not work!!!). The positive and negative connectors for the battery are also soldered in place. 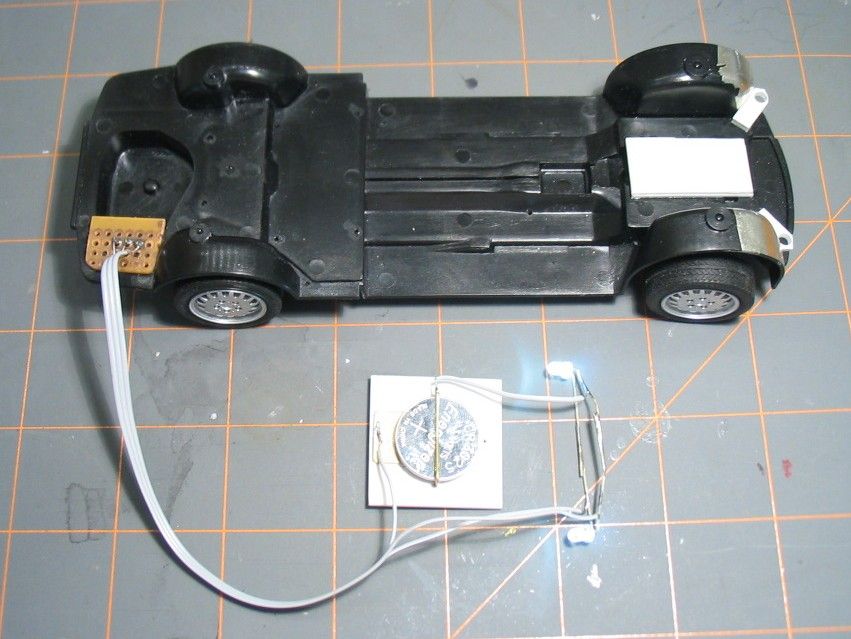 With the battery holder assembled and the jumper in the proper position, the LEDs light up! The positive connector has its ends placed through the styrene card and then bent outwards to hold them in place. The negative connector is simply stuck to the styrene with double sided tape. A downward bend in the brass rod keeps the battery in place. 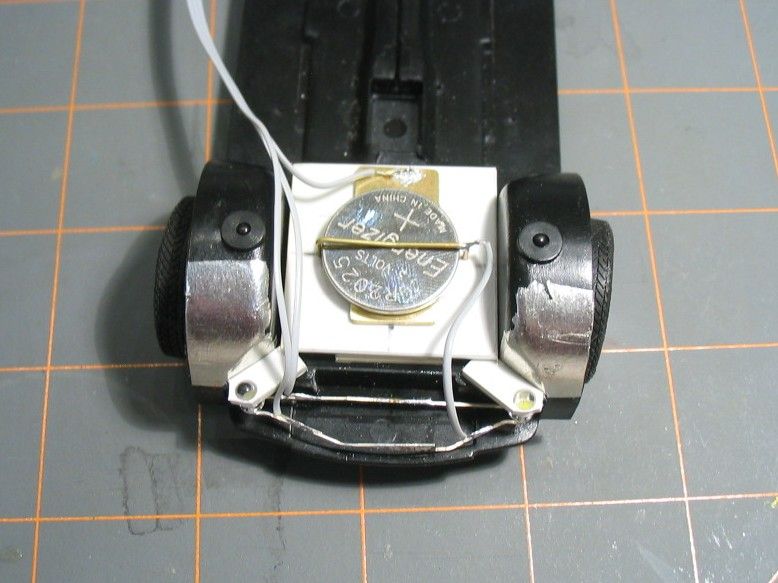 All in place. 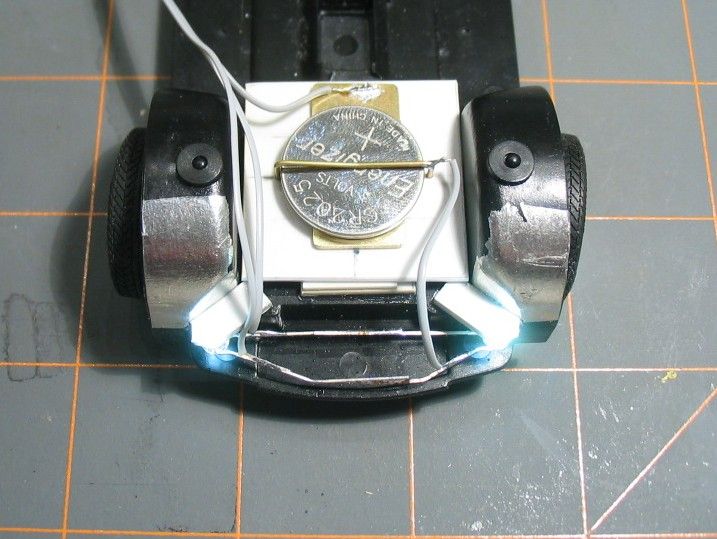 All on! More to come.
__________________
PHOTOBUCKET SUCKS |
|
|
|
|
|
11-29-2015, 05:55 PM
|
#9 | |
|
AF Regular
Join Date: Mar 2005
Location: San Marcos, California
Posts: 331
Thanks: 52
Thanked 17 Times in 15 Posts
|
Re: BMW 318i (E36)
 |
|
|
|
|
|
11-29-2015, 07:05 PM
|
#10 | |
|
Sweet, sweet tiny Hondas.
 Join Date: Jul 2003
Location: Austin, Texas
Posts: 5,720
Thanks: 48
Thanked 89 Times in 65 Posts
|
Re: BMW 318i (E36)
Very elegant solution! Very nice!
__________________
It ain't cool 'till your wife hates it. Imagine a world without Alabama Recent builds: Rocket Bunny FR-S and stock BRZ Toyota bB Bro-style Civic K20 powered SiR converted EK WIP I build slowly and poorly. 
|
|
|
|
|
|
12-11-2015, 01:17 AM
|
#11 | |
|
AF Regular

Join Date: Feb 2007
Location: York, Pennsylvania
Posts: 310
Thanks: 38
Thanked 13 Times in 12 Posts
|
Re: BMW 318i (E36)
Wow! My real-life halos don't look that clean. Well done, and looking forward to seeing more progress.
|
|
|
|
|
|
12-18-2015, 02:33 PM
|
#12 | |
|
AF Regular

Join Date: Feb 2008
Location: St. Petersburg/Vantaa
Posts: 292
Thanks: 67
Thanked 29 Times in 28 Posts
|
Re: BMW 318i (E36)
Great job on the angel eyes! This kit is the one that I take out of the box the most often. I never can make any decision about the color or the wheels, so I just look at it and put it back on the shelf.
 Would be great to see one finished. Would be great to see one finished. |
|
|
|
|
|
01-24-2016, 12:20 PM
|
#13 | |
|
Image Hosting Exceeded
Join Date: May 2003
Location: Flying in circles
Posts: 4,233
Thanks: 23
Thanked 95 Times in 86 Posts
|
Re: BMW 318i (E36)
Time for an update. The kit interior isn't much to look at. The dash is nicely detailed and the front seats are decent. But the cockpit tub is utterly sparse, and the rear seat- well, we'll get to the rear seat.
I must have tried to hand paint the tub sometime in the last century. 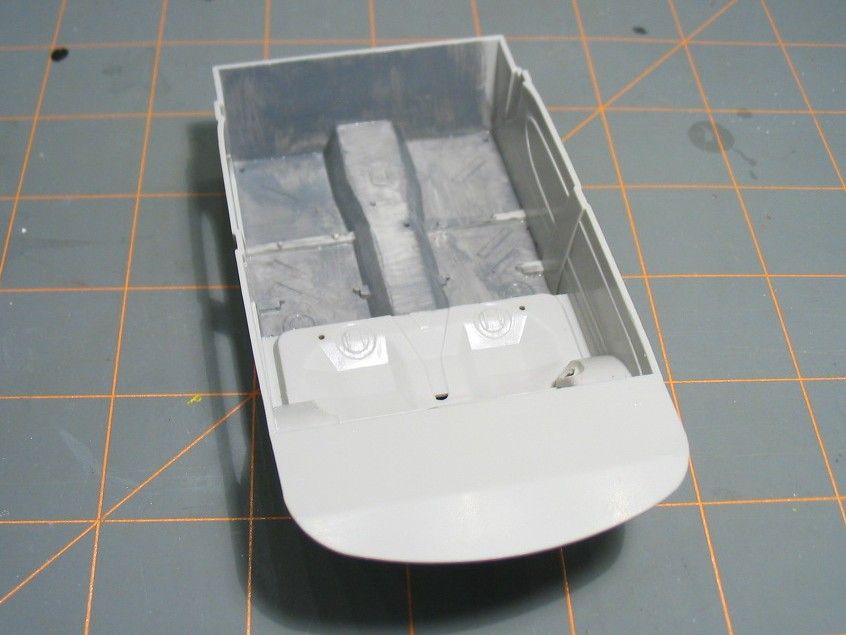 The sidewalls are almost entirely featureless. 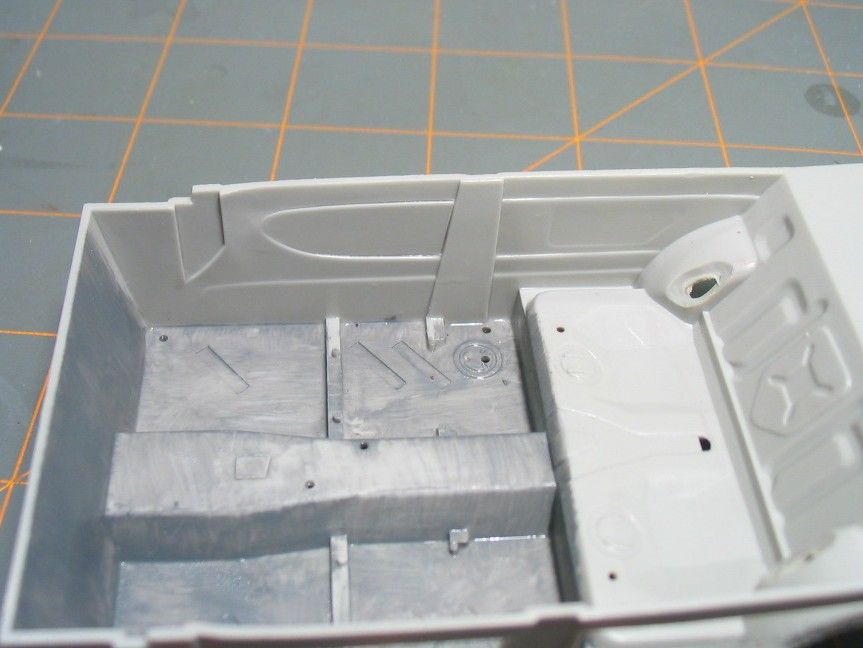 I've really wanted to just finish this thing, and that I didn't need a perfect replica of a true BMW interior. But the sidewalls were pretty pathetic- so I decided they could afford a little improvement. I scribed along the edges of where the recessed panels should go, and then cut them out. 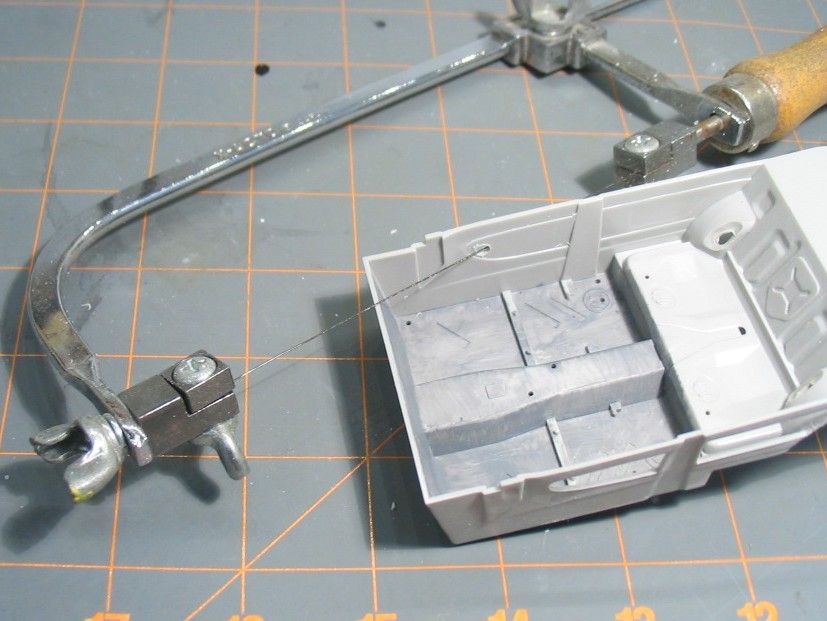 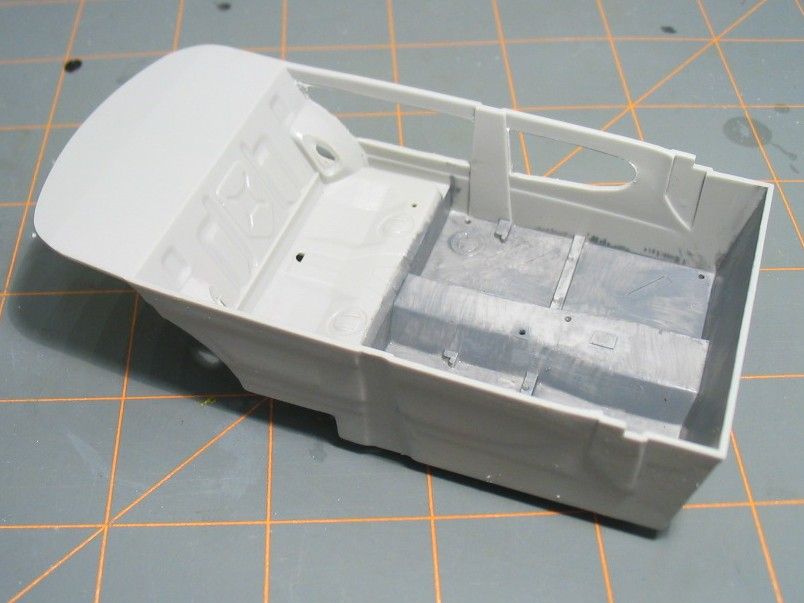 I cut some styrene sheet to laminate against the sidewalls, to create the backwall for the recessed panels. 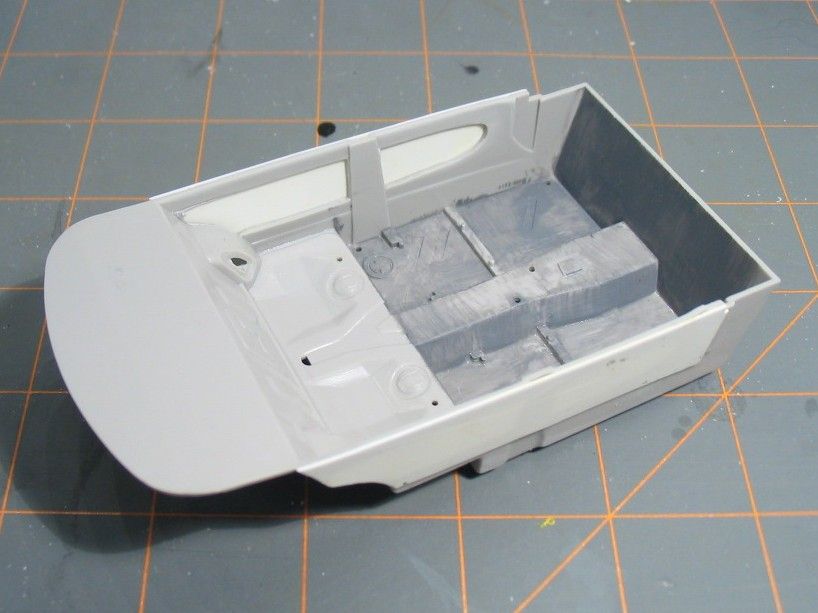 Because the recesses would be painted in a contrast color, this seemed like a good time to make some masks. Tamiya tape was placed over the hole, and the shape of the cutout was traced with a pencil. 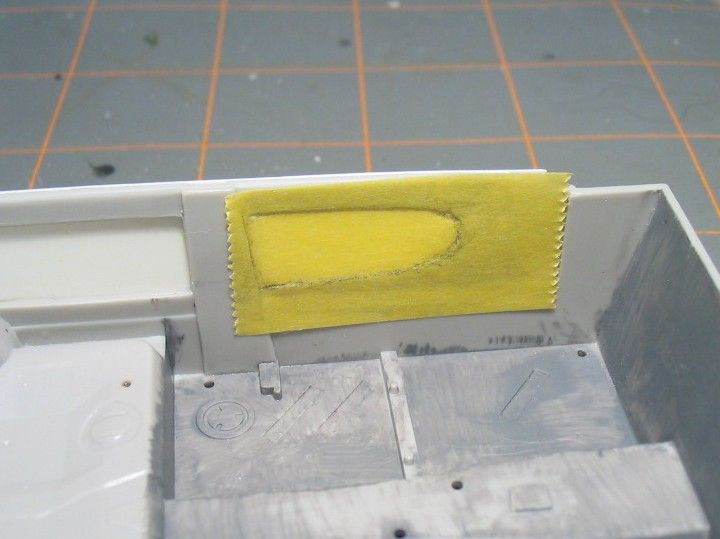 Then the tape was stuck onto a mailing label backer, and then cut to shape. 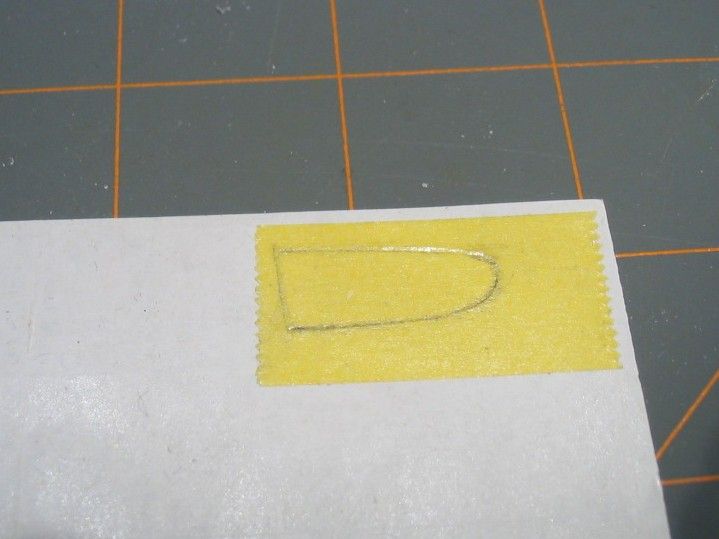 A set of custom cut peel-and-stick masks. 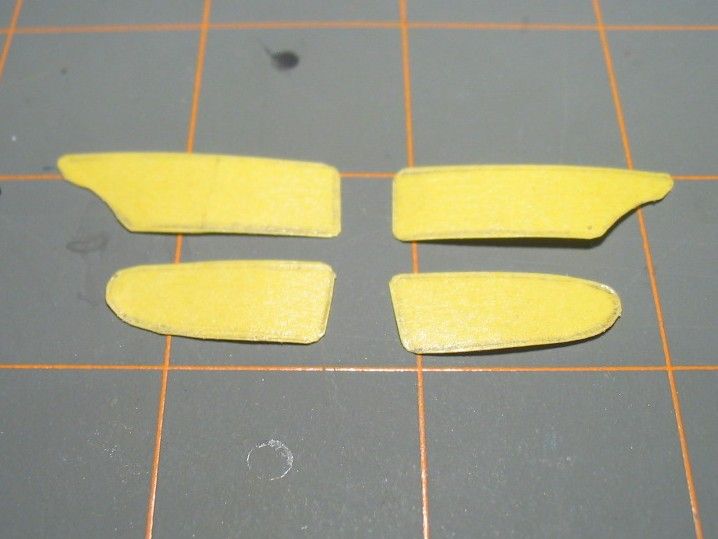 The corners of the recesses were then filled with epoxy putty and contoured to shape. 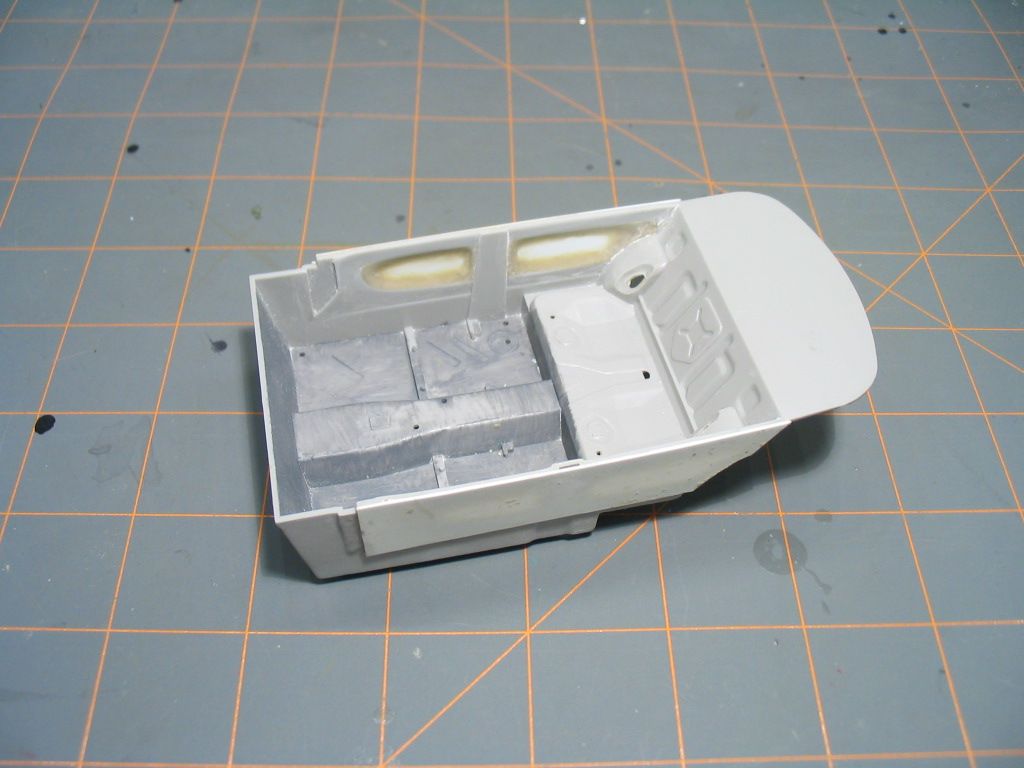 And that brings up the rear seat. Probably the reason that this kit sat for so long unfinished in my collection was the shape of the seatback. The incline looks more suitable for a waterslide than a rear seat. 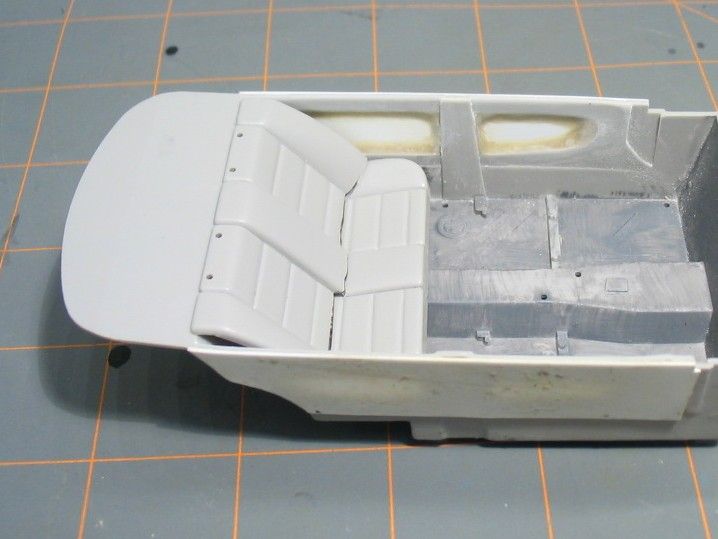 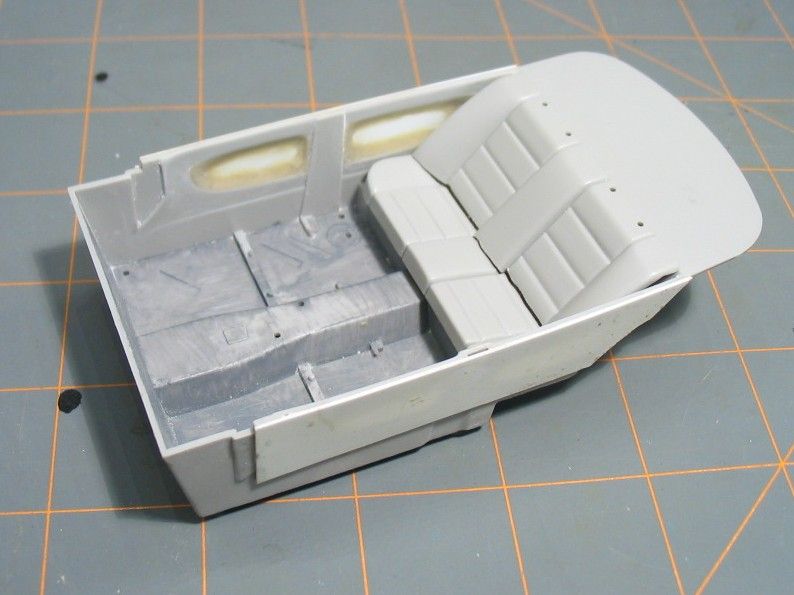 I cut it apart, figuring that I would fix it with some surgery- 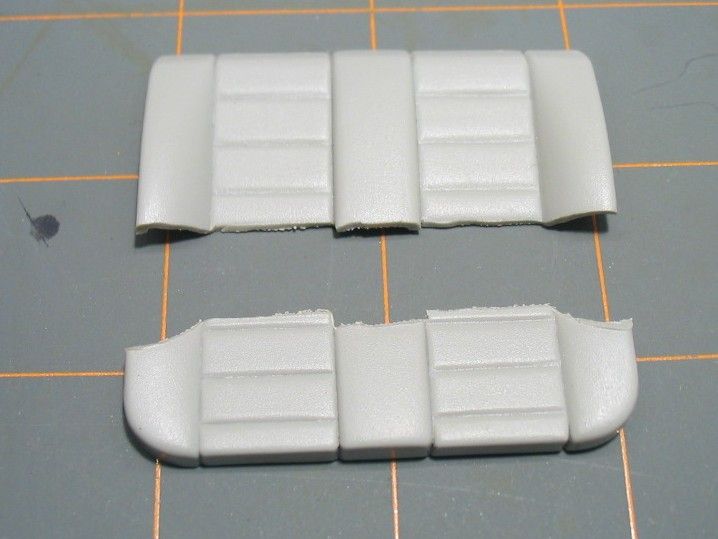 -but there didn't seem to be an obvious way to correct it. Scratchbuilding a new one was more effort than I cared to apply to what was still going to be a rather uninteresting interior anyway. The rear seat from the Dragon M3 looks much better- but of course is going to get used in the M3. 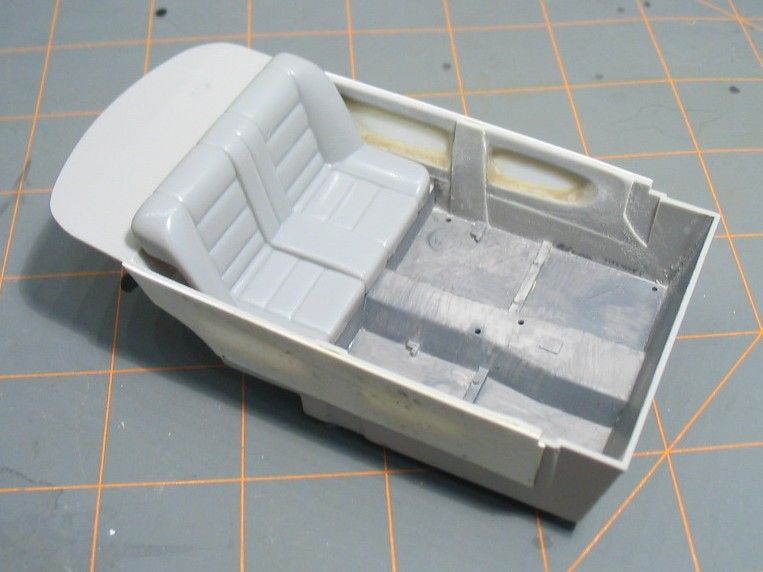 So I came up with another solution- use the kit part more or less as is, and tint the rear windows.  Lazy, maybe- but it seemed like it would get the job done. Lazy, maybe- but it seemed like it would get the job done.So, ready for paint. 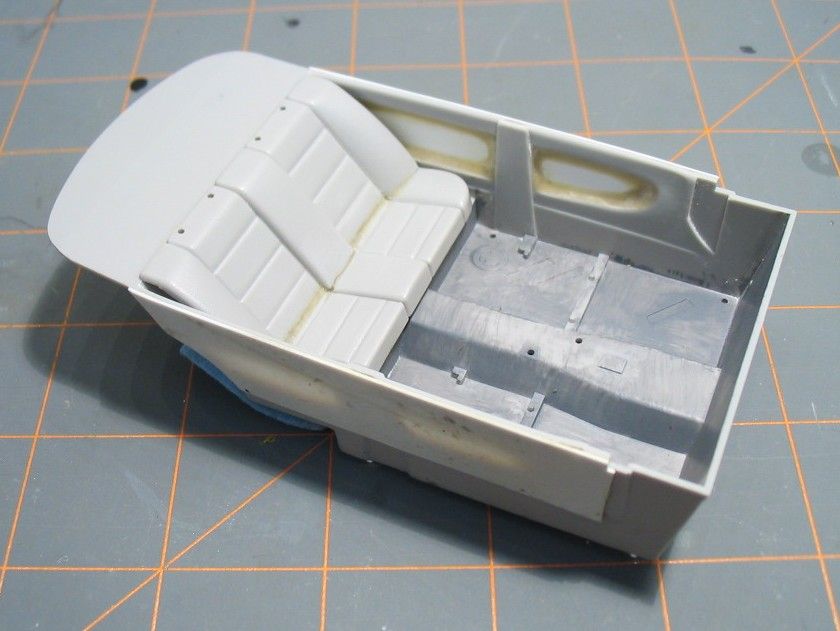 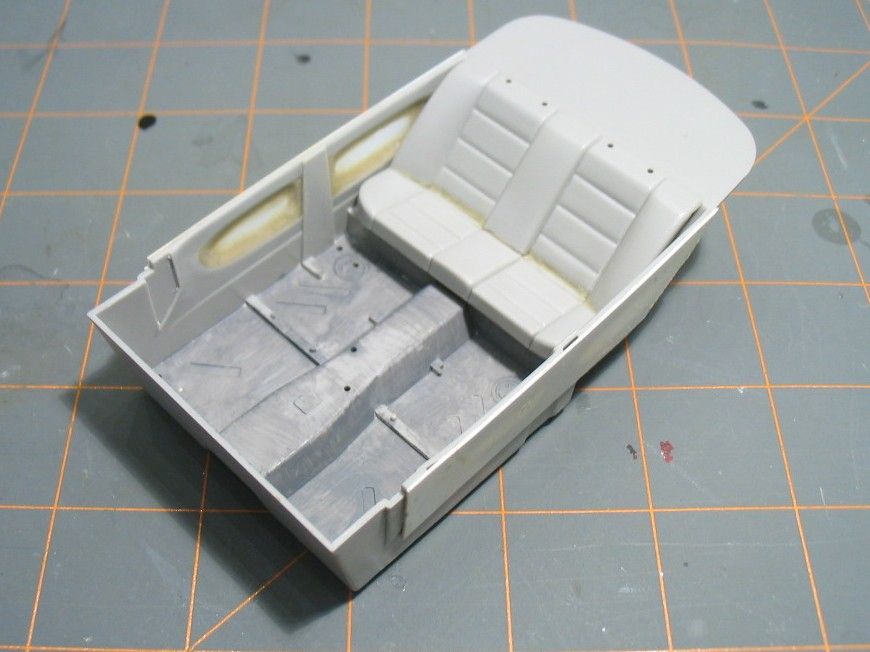 Done. 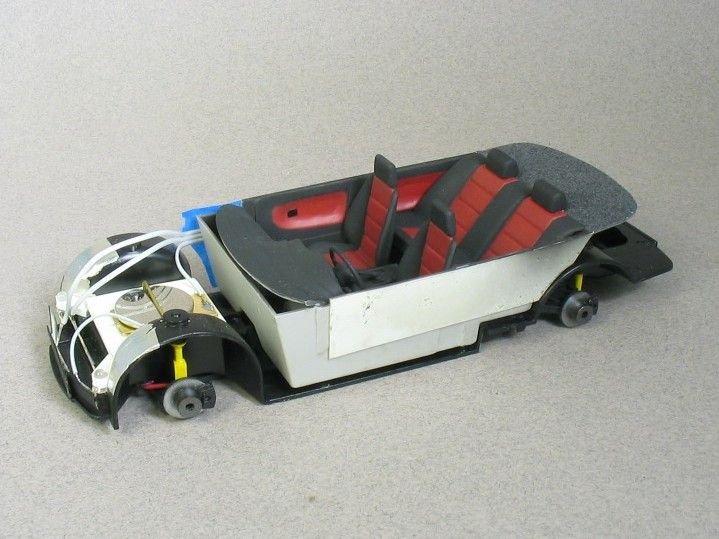 My favorite ever interior for an E36 was offered on late model 318ti's- black and dark red. I doubt it was ever done on a 318i, but I think it adds an element of visual interest to what otherwise could be a very boring looking car. You can see the absurd angle of the rear seat. 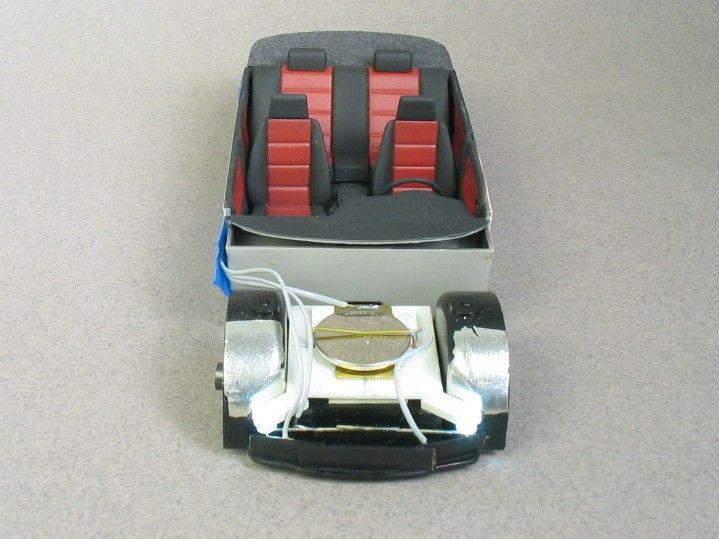 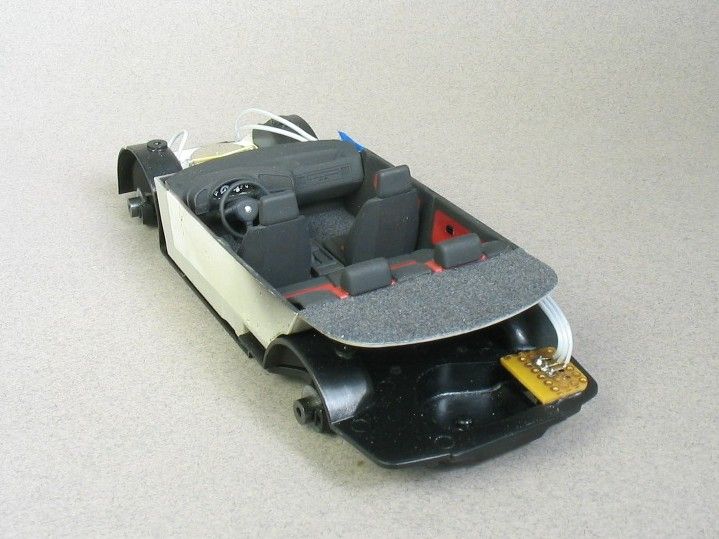 Next it will be time to do the headlights, and put it all together. Thanks for watching!
__________________
PHOTOBUCKET SUCKS |
|
|
|
|
|
01-24-2016, 01:31 PM
|
#14 | |
|
AF Regular
Join Date: Mar 2005
Location: San Marcos, California
Posts: 331
Thanks: 52
Thanked 17 Times in 15 Posts
|
Re: BMW 318i (E36)
Nice work.
Trevor |
|
|
|
|
|
01-24-2016, 06:37 PM
|
#15 | |
|
AF Enthusiast
Join Date: Jan 2002
Location: Washington, Washington DC
Posts: 2,383
Thanks: 129
Thanked 102 Times in 95 Posts
|
Re: BMW 318i (E36)
Looking good! You're right about that rear seat, but it doesn't look horrible. At least there's a roof, and as you said, tinted windows, to hide it, unlike the Aoshima Mercedes SL63, where the front seats are inclined nearly vertical. Easier surgery to fix them than your rear seat though.
|
|
|
|
|
|
|
POST REPLY TO THIS THREAD |
 |
|
|


