|
|
|

|
|
| Search | Car Forums | Gallery | Articles | Helper | AF 350Z | IgorSushko.com | Corporate |
|
| Latest | 0 Rplys |
|
|||||||
| WIP - Motorsports Post topics for any "Work In Process" motorsports vehicles in this sub-forum. |
 |
 Show Printable Version | Show Printable Version |  Email this Page | Email this Page |  Subscribe to this Thread
|
|
|
Thread Tools |
 09-11-2006, 11:33 PM
|
#46 | |
|
AF Regular
 Join Date: Aug 2006
Location: Richmond, Virginia
Posts: 260
Thanks: 0
Thanked 0 Times in 0 Posts
|
Re: Wip 3 Merc Benz DTM D2;Telle;Warsteiner
I can add to decaling on a semi-gloss surface. If you get silvering, the gloss will not make that go away. It's caused by air trapped behind the decals. Using a hairdryer will also help making the decals conform to curves and in tricky spots. Just be careful not to melt the plastic. MicroSol/Set are also a must for these types of decals.
Your final outcome looks great though... top notch job! |
|

|

|
|
09-12-2006, 08:22 AM
|
#47 | |
|
AF Enthusiast
Thread starter

Join Date: Nov 2005
Location: singapore
Posts: 730
Thanks: 0
Thanked 0 Times in 0 Posts
|
Re: Wip 3 Merc Benz DTM D2;Telle;Warsteiner
Ok interior update... Damn detailing is really hard to do... I wish i could produce really beautiful interior like the many experienced modellers out there
 Wiring done , CF done and half the seatbelts are made... The CF are cut out to shape... the two "X"s are the spots the two "boxes" are located so as to let it be opened when applying the CF 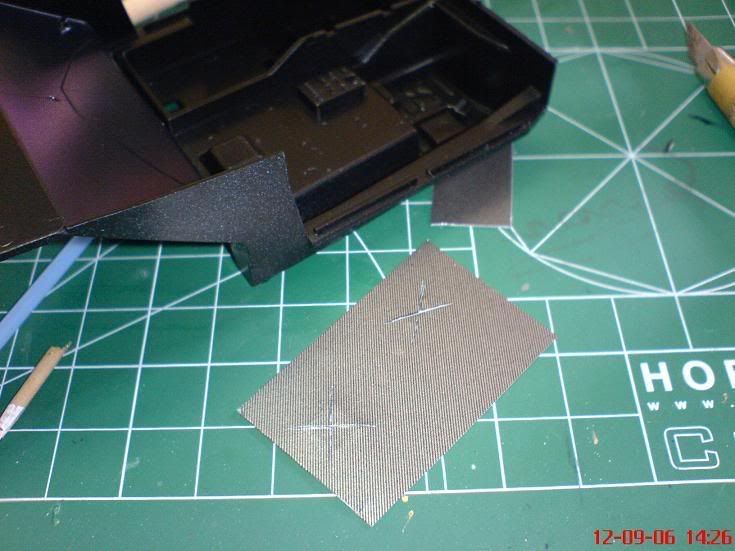 After CF is applied... Process is applying decal softer then drying under hairdryer first with hot air then blowing cool air till its cooled then repeat from decal softer until i got this result 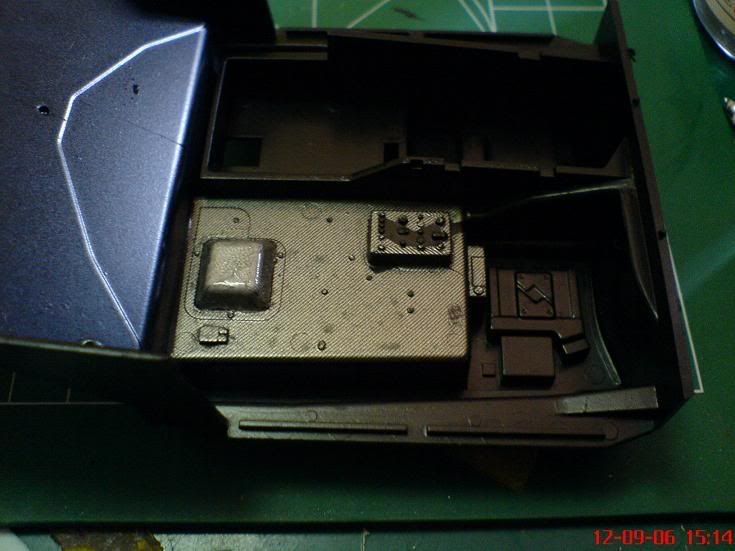 Applied CF on the Switch Box This is after a few rounds of the process described above 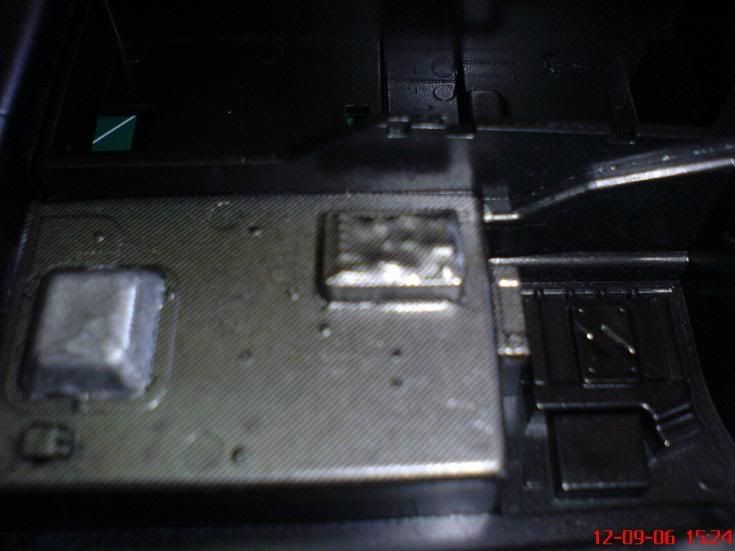 After multiple runs finally some good results.. 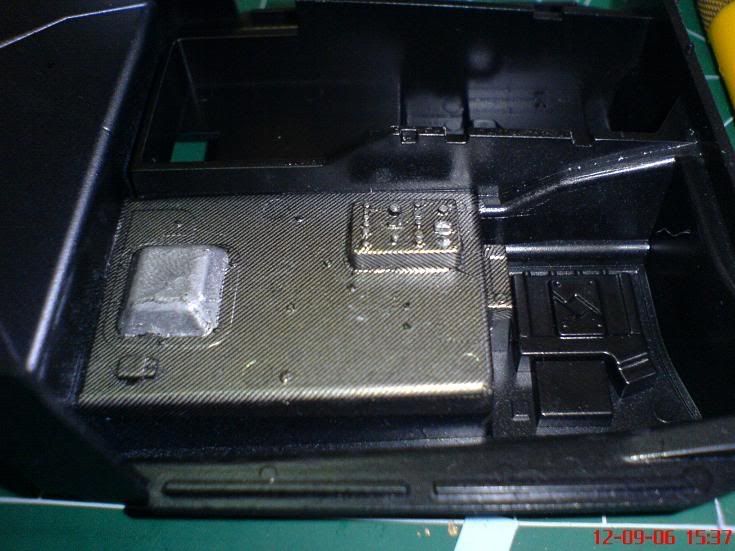 Touch ups done then followed by wiring... Mr Model wiring 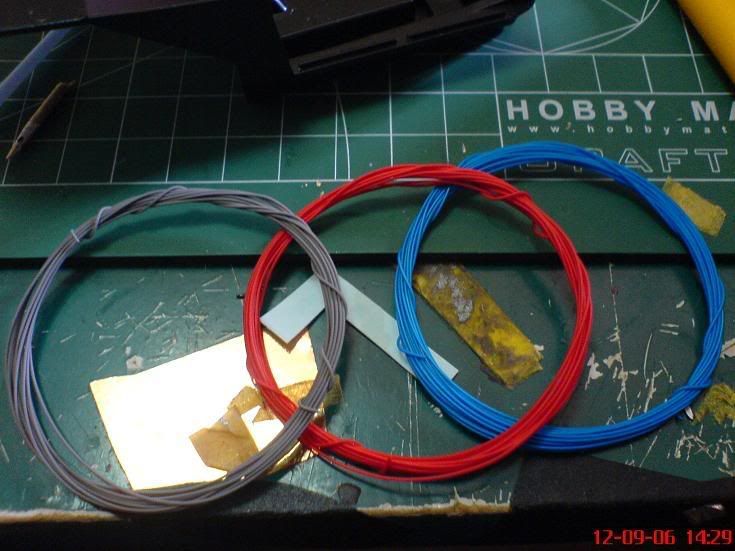 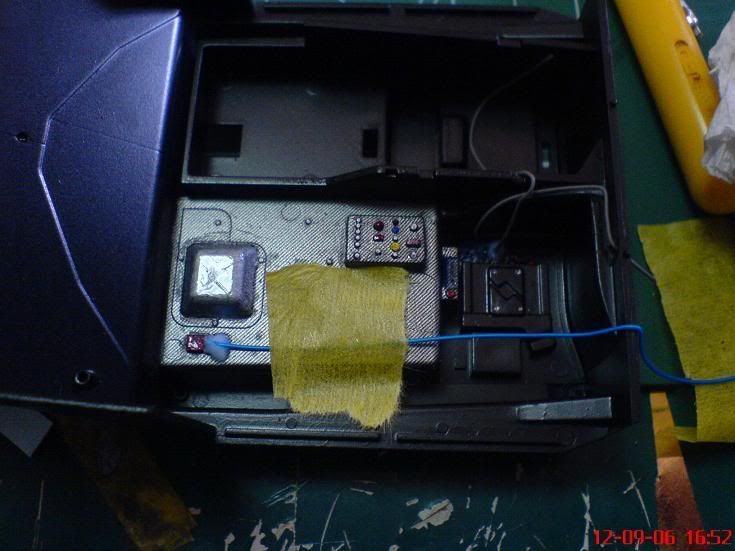 Seatbelt PE by tamiya 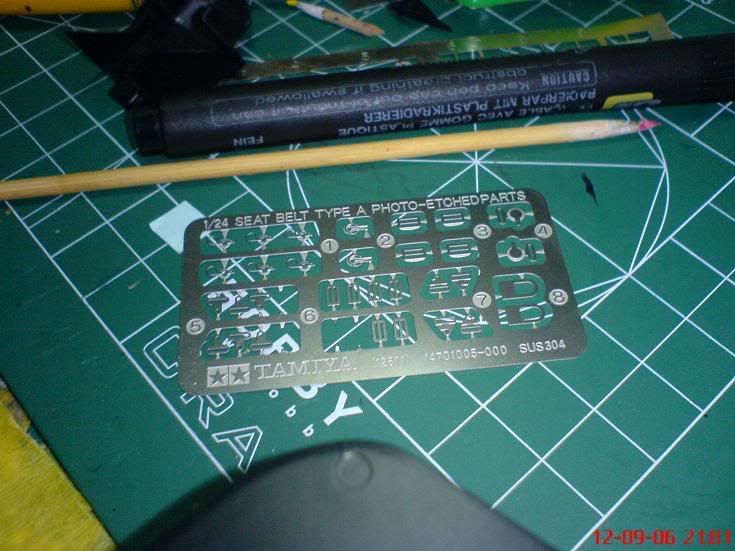 This is what the interior is now... More CF will be applied soon 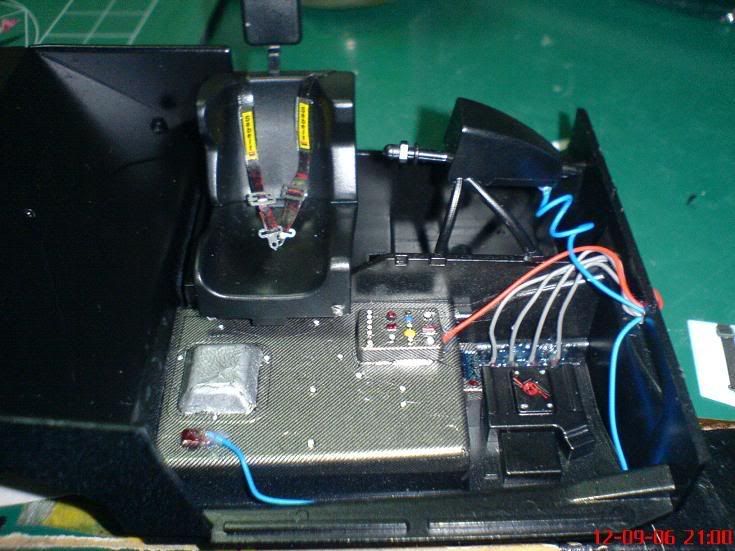 STAY TUNED And BIG THANKS TO ALL WHO FEEDBACK 
__________________

|
|
|
|
|
|
09-12-2006, 11:23 AM
|
#48 | |
|
AF Enthusiast

Join Date: Feb 2006
Location: London
Posts: 1,158
Thanks: 2
Thanked 1 Time in 1 Post
|
Re: Wip 3 Merc Benz DTM D2;Telle;Warsteiner
Wow, great progress so far and very well done to the cf decal you applied to the switch box thingy. Nice wiring work too, can't wait for more updates.
__________________

|
|
|
|
|
|
09-20-2006, 11:42 AM
|
#49 | ||
|
AF Enthusiast
Thread starter
Join Date: Nov 2005
Location: singapore
Posts: 730
Thanks: 0
Thanked 0 Times in 0 Posts
|
Re: Wip 3 Merc Benz DTM D2;Telle;Warsteiner
Quote:

__________________
|
||
|
|
|
|
|
POST REPLY TO THIS THREAD |
 |
|
|

