|
|
|

|
|
| Search | Car Forums | Gallery | Articles | Helper | AF 350Z | IgorSushko.com | Corporate |
|
| Latest | 0 Rplys |
|
|||||||
| WIP - Motorsports Post topics for any "Work In Process" motorsports vehicles in this sub-forum. |
 |
 Show Printable Version | Show Printable Version |  Email this Page | Email this Page |  Subscribe to this Thread
|
|
|
Thread Tools |
 06-17-2005, 04:24 AM
|
#31 | |
|
AF Enthusiast
Thread starter

Join Date: Feb 2004
Location: Brisbane
Posts: 751
Thanks: 0
Thanked 9 Times in 9 Posts
|
Time for an update...
And time to start on these wonderful photo-etch parts! At first I wasn't sure how to actually remove them from the piece they were attached to. I finally figured the best and safest way was to place the PE parts flat on a cutting board, placing a rounded blade exactly on the point where I want the part removed, apply pressure, and off it comes! I found that I couldn't sand them flat where needed, so had to cut them perfectly from the sprue (if that's the right term). The pic below gives you an idea of what I did (sorry about the slight blur and poor lighting). 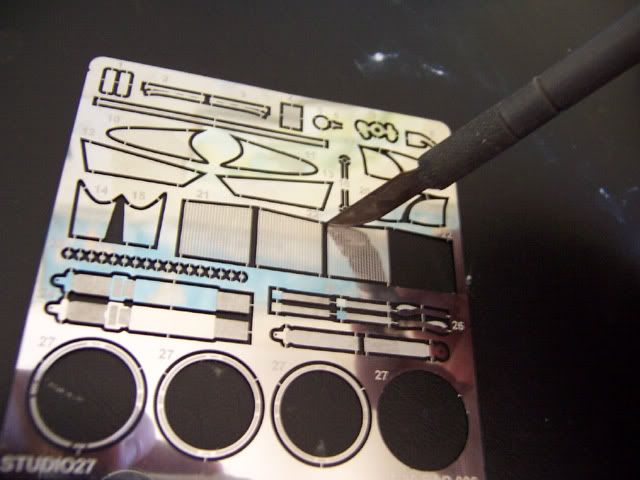 Time to glue the radiators into the radiator housing. I used Araldite (Australian product, not sure if it's available outside Australia), which is basically a type of epoxy. This particular one is 90 second epoxy, but I found I generally had a little more time before it hardened than 90 seconds. Which suits me, as I don't really want to wait much longer than that for it to set anyhow! As you can also see, the housing is a woeful representation of the true radiator housing (which I've never seen). It's only really there to hold the PE pieces which unfortunately are barely visible on the finished kit anyway. 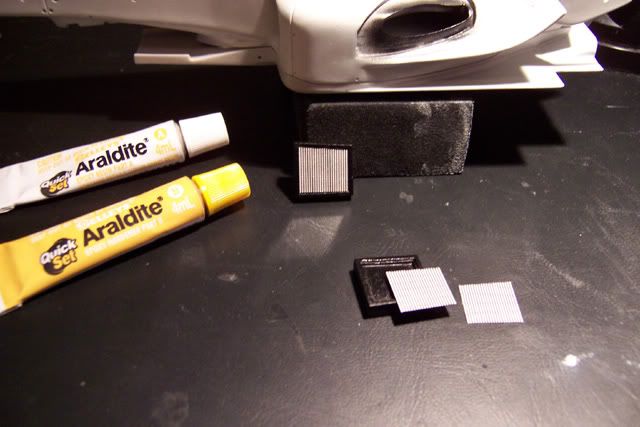 And finally a shot of the radiators and the kit so far, with some of the black areas painted.  Unfortunately my digicam is being comandeered(sp) by my other half, while she's off on her 5 week holiday to Scandinavia...! So, no photo updates for a while. For you guys sake, hopefully I don't get much done in that time... hehehe. If anyone has any further tips or comments, I'd love to hear them! Cheers all.
__________________
 
|
|

|

|
|
06-20-2005, 01:26 PM
|
#32 | |
|
AF Regular
 
Join Date: Oct 2003
Location: Victoria
Posts: 143
Thanks: 0
Thanked 0 Times in 0 Posts
|
Re: F1 - STUDIO27 BAR 006 (1/20) - Progress Pics
Captain Mark,
I finally finished my BAR 006...until I get my website updated, here's a link to a few pics of the model: http://members.shaw.ca/motorsportsin...AR006_Temp.htm Bil Attridge
__________________
Bil Attridge   |
|
|
|
|
|
06-20-2005, 04:36 PM
|
#33 | |
|
AF Enthusiast
Thread starter
Join Date: Feb 2004
Location: Brisbane
Posts: 751
Thanks: 0
Thanked 9 Times in 9 Posts
|
Hi bil,
Yeah I saw the link over on f1m.com actually, very nice!!! Glad to see you finally got it completed! Having got this far in my kit, I can now see why you get a little exasperated with the resin kits, and are hanging out to get back onto a plastic one. Cheers, Mark
__________________
|
|
|
|
|
|
06-26-2005, 04:28 AM
|
#34 | |
|
AF Enthusiast
Thread starter
Join Date: Feb 2004
Location: Brisbane
Posts: 751
Thanks: 0
Thanked 9 Times in 9 Posts
|
This kit is driving me insane... plain and simple.
The amount of times I've top-coated something just to find it no longer fits is getting ridiculous! For those unfamiliar with resin kits here's my advice (coming from a beginner who's learning the hard way); - Before you even start the kit, for the love of god, test fit the parts. - After you've primed something, test fit the parts. - After you sand something, test fit the parts. - Once you top coat something, test fit the parts. - If you do ANYTHING to a part of the kit, test fit the parts. - If you sneeze within 5-6 meters of your work area, test fit the parts! You just never know... This body is about to have its third top coat now... hehehe Apologies for not providing any pics. My digicam is currently in Finland - which isn't ordinarilly a problem... except that I live in Australia. At least with my other half away on holiday (hence the camera being gone), I can get in some serious modeling time! (Babe, in case you read this, that last sentence was man code for, "I love you... I wish you were here... ummm, I can't wait to have you home... and I'm sorry..." Back me up here guys...) Anyway, back to the topic. For those doing their first resin kit, be prepared to spend AT LEAST three times the amount of time on it compared to a plastic kit, and that's being conservative. I've really got an extra appreciation for the precision of the plastic kits now. Not that resin kits are bad, just different, and take a little more TLC. Here's hoping I finish this kit before 2006...!
__________________
Last edited by Captain Mark; 07-27-2005 at 01:30 AM. |
|
|
|
|
|
08-06-2005, 04:14 AM
|
#35 | |
|
AF Enthusiast
Thread starter
Join Date: Feb 2004
Location: Brisbane
Posts: 751
Thanks: 0
Thanked 9 Times in 9 Posts
|
Progress is still being made, albeit slowly at times. I've got two relevant build points to share (or reiterate perhaps) since my last update:
1. Finished parts chip easily! On the odd occasion I've had a top-coated piece of the kit (given lots of time to cure) fall or tip over just a few milimeters onto another hard object, and this has resulted in chipped paint. I thought I was being very careful, but I'd often come back to my work area and find suspension pieces chipped, with no idea of how it happened. I think it may have something to do with the metal under the paint not 'giving' as much when bumped, as compared to plastic parts. Hence the easier chipping - I could be wrong, but that's my observation so far. I've now resorted to bagging up every individual piece that's completed, and storing them in a safe place where they won't be moved or bothered. 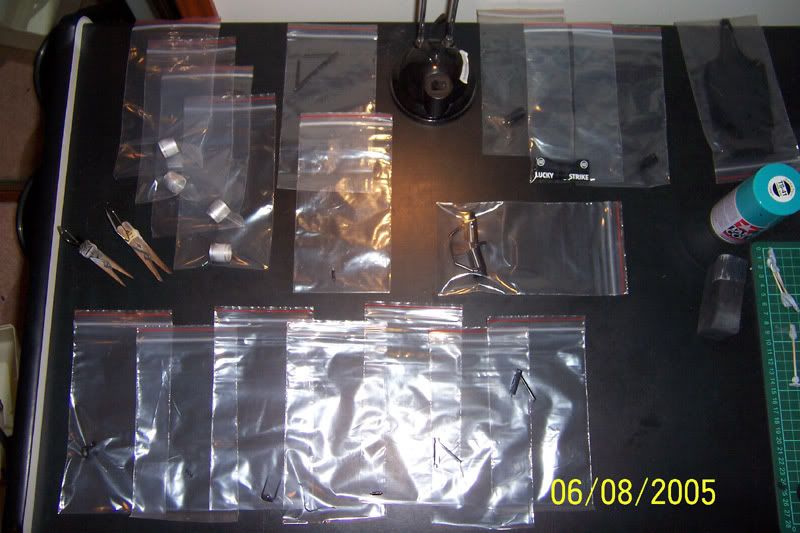 (Bit of a dodgy picture, but you get the idea.) 2. Building a resin kit is a cyclical process. I saw the term 'cyclical' used on www.f1m.com (can't remember who quoted it, sorry), and I couldn't describe it better. Because of the need to test fit and alter many pieces so often, it's rather useless to follow the instructions in a linear fashion, as you would for say a Tamiya kit. I've found the best thing to do to avoid annoying delays and screw-ups on the body of the kit, is to: a) prime and prepare the body b) then totally finish virtually EVERYTHING else and bag all pieces up c) complete the body d) finally attach all other finished pieces to the completed body. This is annoying as I find the body is the most fun to do, and would prefer not to leave until the very last, but it should be a very quick final buildup once the body is complete. Will post more progress pics soon. Cheers, M
__________________
|
|
|
|
|
|
08-13-2005, 11:04 PM
|
#36 | |
|
AF Enthusiast
Thread starter
Join Date: Feb 2004
Location: Brisbane
Posts: 751
Thanks: 0
Thanked 9 Times in 9 Posts
|
Now we're getting somewhere...
First up, the front wing. Coated in gloss black, sponsor decals applied, and then sealed with Tamiya clear. The decals stood up to the clear perfectly, which I was a little concerned about. I did find that I perhaps put the clear on a little thin though, as I could feel the decal under my polishing cloths when rubbing it out to a nice shine. I'm rather inexperienced with clear coating, so I'm quite pleased with my efforts. I found that the end plates had very little contact with the front wing, due to the shape of the pieces and fitment. So I had to be very careful in placing just a small amount of glue in the correct place, and then forcing the end plates inwards towards the wing, as you'll see below. You'll notice the bluetac (Australian product) holding the end plates firmly against the wing, where they'll stay for a few days to make sure the small amount of epoxy has enough time to fully harden. 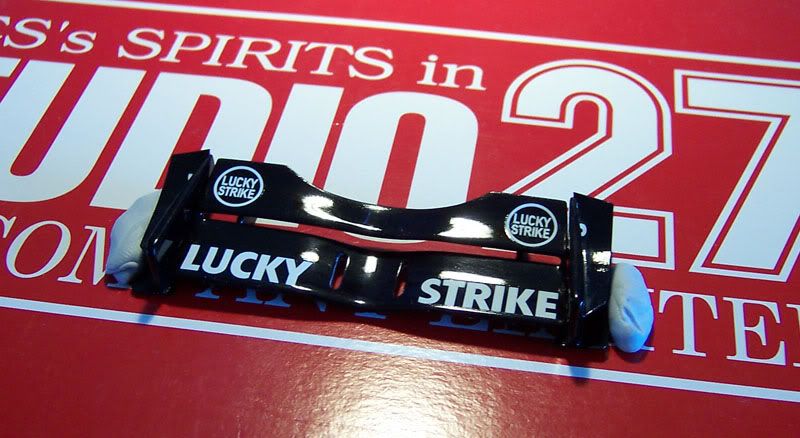 Tyres - rare that we see a Michelin shod F1 car in the forums, so it's nice to see something different in this case. The wheels have caused me a bit of trouble actually... The rims are too wide for the tyres. I could have knuckled down and spent a lot of hours thinning various points on the rims, but to be honest I couldn't be bothered. It's not a massive problem, and probably wouldn't be noticed by the average person. I'll also suggest to those building this (or maybe similar) kits, to finish building the rims (three parts), paint it all silver, then sand ALL of the paint off the part of the rims that the tyre will cover. Otherwise you'll find the wall of the tyre grabs a LOT of dried paint while you're putting it on the rim, and it's a mongrel to remove! The other problem I've noticed is that the tyres aren't flat when sitting on the rim. They bow in towards the middle, and sometimes one side is higher than the other. I think it's just Stuidio27 not paying enough attention to getting the original moudling correct. But... they do still look good when finished... 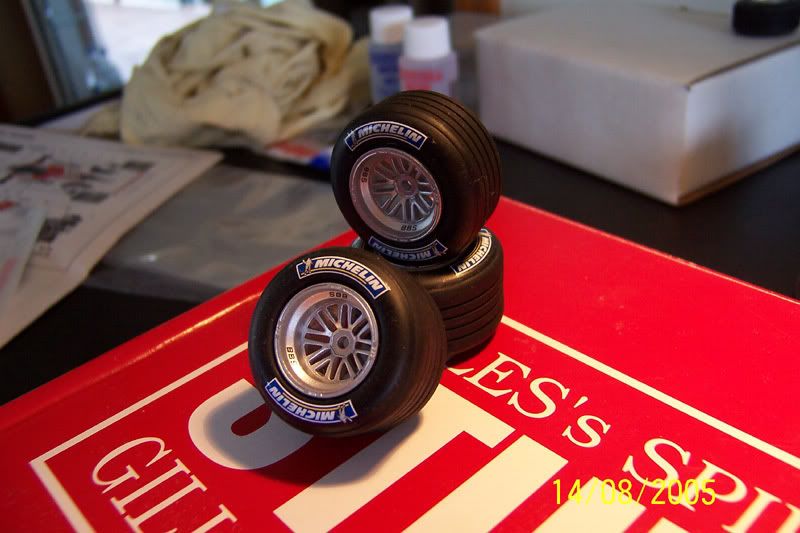 The body has also received its first medium/intermediate topcoat of Tamiya Pure White (spray can). I keep forgetting how quick this stuff fires out of the can, and have ended up with a few runs... but I'm getting there. 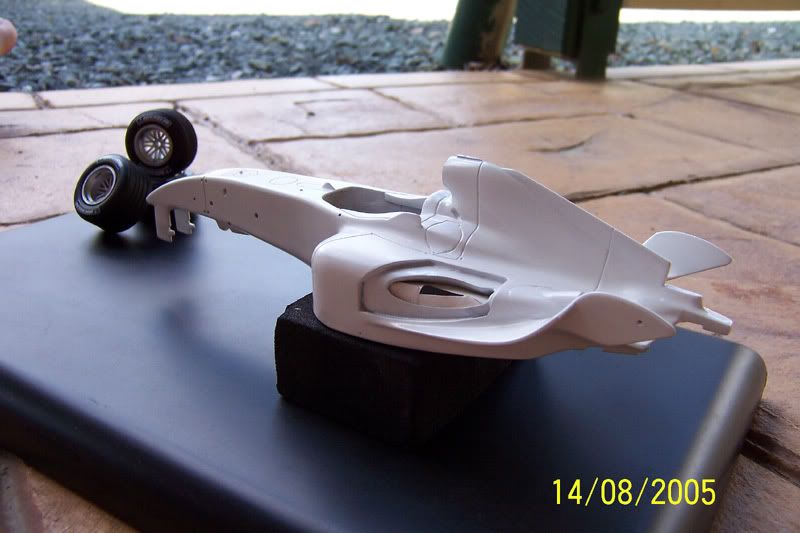 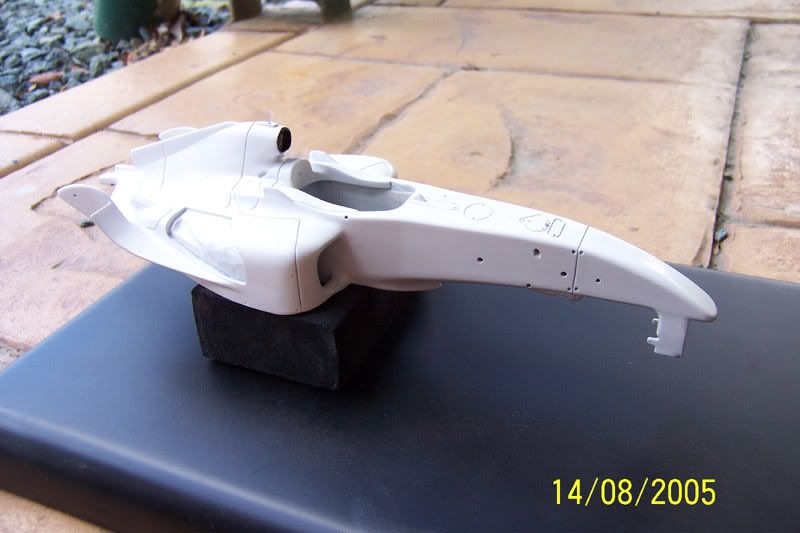 In the above picture, you'll notice the black centre air intake (above the drivers seat). I've been able to keep this black when topcoating with white, by pushing a small piece of bluetac into the indentation. It seals the indent perfectly, and doesn't get in the way of spraying the body white. It pops out easily when done also, and doesn't effect the black paint behind it in the slightest. I've often found that bluetac is a good masking material for odd/difficult shaped areas on all types of kits. Thanks for looking folks. Hope you're finding it interesting and informative. Appreciate any comments and/or advice. Cheers, M
__________________
|
|
|
|
|
|
08-14-2005, 03:12 AM
|
#37 | ||
|
AF Enthusiast

Join Date: Feb 2003
Location: F1...
Posts: 1,410
Thanks: 3
Thanked 3 Times in 3 Posts
|
Re: F1 - STUDIO27 BAR 006 (1/20) - Progress Pics
Wow, looks great!!! Front wing looks very shiny, I like that..
 Quote:
 !!! !!! |
||
|
|
|
|
08-15-2005, 12:45 AM
|
#38 | |
|
AF Enthusiast
Thread starter
Join Date: Feb 2004
Location: Brisbane
Posts: 751
Thanks: 0
Thanked 9 Times in 9 Posts
|
Something I forgot to mention about the wheels...
I'm sure everyone reading this is familiar with the feeling of realising something potentially major has just royally screwed up on a project... your jaw hits the floor, your heart virtually stops, you look unbelievingly at the problem seemingly frozen for a few seconds... LOL Decals that have moved and set when you weren't looking, mistakenly shooting the wrong colour from the spray can, etc. Anyway, let me recount my similar experience and what I did about it. It seemed I put one of the rear tyres on one of the front rims. Fit perfectly, but wasn't until the tyre decals were on (and set) that I found my mistake. So off comes the tyre, and oh my god the decals just went completely to hell! The tyre shape is different depending on if it's on the rim or off... so when I took it off the dried decals started crinkling and cracking everywhere! (Read points above about heart stopping, jaw dropping, momentary mindless incomprehension, etc.) It turned out to be an easy fix really, but there was a few minutes of intense cursing and general ranting... I quickly put the tyre on the correct rim, and the decals flattened out to a large degree, but the cracking was still there. Out comes the trusty MicroSol, and many many applications later, the decal had conformed again and the cracks and wrinkles were gone! I can't even remember which of the rear tyres it was on anymore, that's how good the fix was. Lucky me huh... 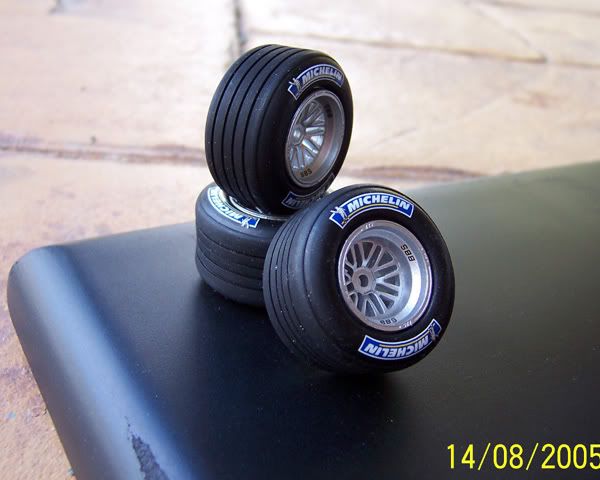 Cheers all, M
__________________
|
|
|
|
|
|
08-15-2005, 03:50 AM
|
#39 | |
|
AF Enthusiast

Join Date: Dec 2004
Location: Germany
Posts: 3,431
Thanks: 28
Thanked 79 Times in 73 Posts
|
Hi,
great project, nice progress so far.
__________________
Micha       
|
|
|
|
|
|
08-15-2005, 05:01 AM
|
#40 | |
|
AF Fanatic
 
Join Date: Jan 2005
Location: Anywhere but here
Posts: 1,676
Thanks: 0
Thanked 0 Times in 0 Posts
|
This is a fantastic build. The wheels look superb. I just wish I could afford and have enough skill to buy one these kits, as the BAR is about the only reason I watch F1 now. Williams is another team I follow, but BAR have the Honda, and I'm a fan of Honda power. Keep this up, as I'm looking foward to seeing this one in the completed section.
|
|
|
|
|
|
08-16-2005, 04:42 AM
|
#41 | |
|
AF Enthusiast
Thread starter
Join Date: Feb 2004
Location: Brisbane
Posts: 751
Thanks: 0
Thanked 9 Times in 9 Posts
|
TheSaint111 & sportracer02: thanks for the positive comments!
mickbench: you know after seeing your 300ZX buildup, I'm pretty sure your skills are better than mine actually. I think I just tend to jump into difficult projects and end up in over my head... then have to fight to overcome the challenges of the kit. So far I've been lucky... hehehe Lets see how things go when it comes to the red body decals, and the few splashes of carbon fiber I'll be putting on this machine. Wish me luck... again!
__________________
|
|
|
|
|
|
08-19-2005, 08:08 AM
|
#42 | |
|
AF Enthusiast
Thread starter
Join Date: Feb 2004
Location: Brisbane
Posts: 751
Thanks: 0
Thanked 9 Times in 9 Posts
|
A few more bits and pieces for you to see...
Firstly the floor pan with seat, radiators, and rear diffuser. I sprayed the seat flat black, and also added a generous amount of flat base. I wanted to give the seat a quite soft look (even if it's not technically correct) and I think I achieved it. You can quite easily see the contrast of the seat to the front of the floor pan (glossy - which also requires a little more polishing). 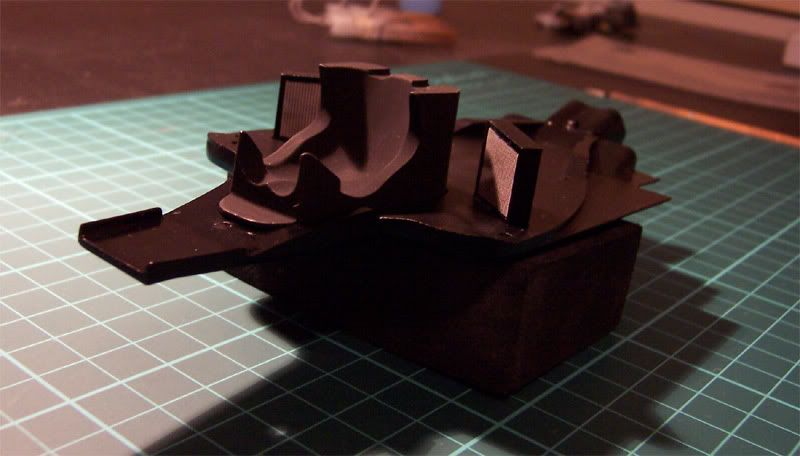 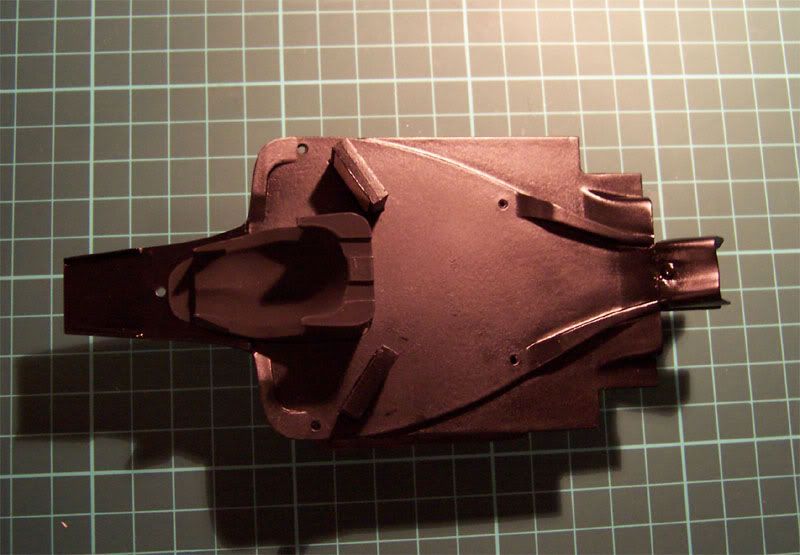 Next up the gearbox and rear suspension. It's not overly flash really - I'm normally used to quite fine detail on gearbox and rear wing supports, but it's pretty bland in these kits as you can see. Luckily it's mostly covered when the kit is complete. Also, the rear suspension doesn't go together squarly... it's all over the shop! Plus the actual body it attaches to isn't an equal width on either side relative to the centre of the car. In short, there's a lot of adjusting and work to do to get everything dead centre, and I won't know if I've fully succeeded until I have virtually finished the kit and glue it all together... fingers crossed! 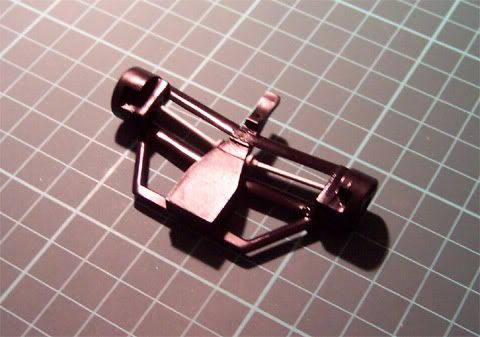 I've tried a few things on tyres to get them nice and black looking, and mostly tend to use McGuires Gold Class Trim Detailer. I'm not confident with spraying clear over them yet. Anyway, there's a few pics below showing the LEFT tyre with nothing on it, and the RIGHT tyre with the Trim Detailer on it. I tried a few different lighting effects to help bring out the difference, but only partially succeeded. Hopefully it's enough for you to see what I mean. In real life the right tyre has a much deeper, blacker finish to it, and it also makes it look a lot cleaner. 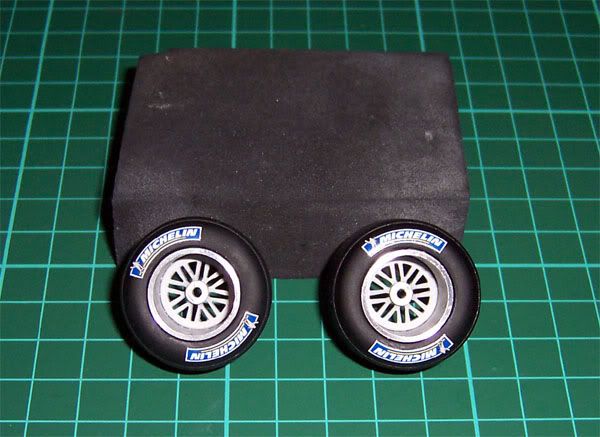 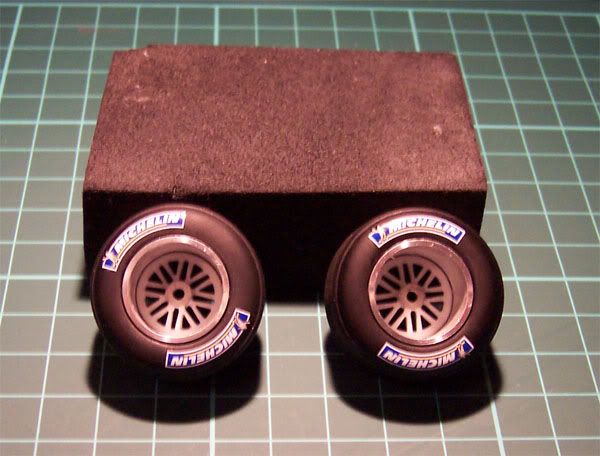 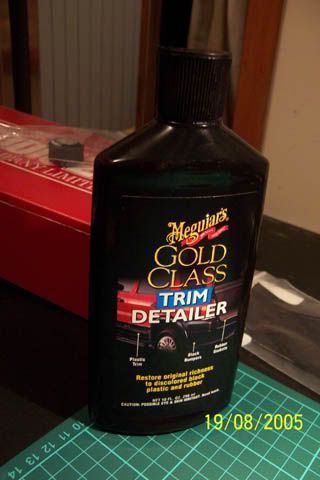 There's some VERY difficult areas that require masking and painting black. You can see below the start of my attempt to mask the areas, and all I really achieved was slicing up paintwork with my hobby knife while experimenting with masking templates. Lesson learnt. I was considering putting carbon fiber decals down on these areas, but I think I'll actually end up masking the section with Bluetac (I always come back to this stuff), and airbrushing the black on. There's three very difficult sections of this kit I'm going to find extra challenging, and painting this black section is number two... hopefully I'll have good news for you soon! 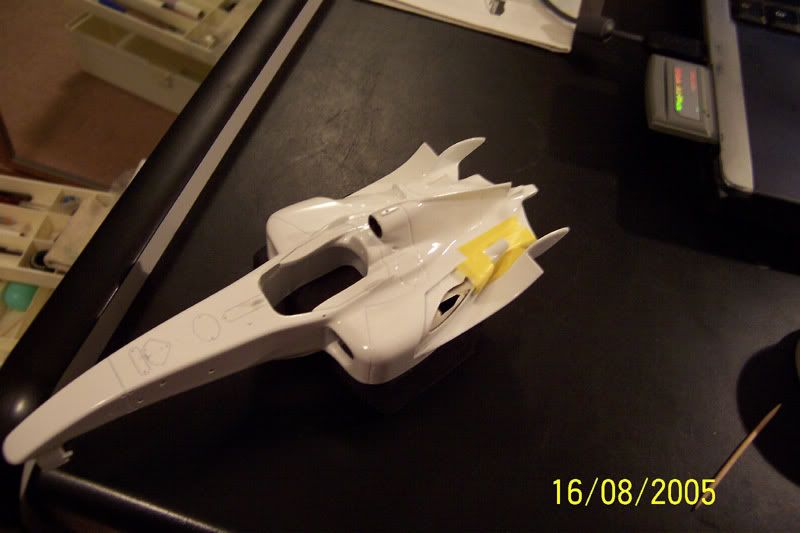 Some test fitting of various completed parts - always an enjoyable thing to do.  I've been working on this kit on and off since January now. I've been putting in a determined effort recently however, and have set myself the goal of completing it by the end of this years Formula 1 season - October 16. I'm hoping that putting my goal up here on the thread will put some extra positive pressure on me to get it done! Cheers all, M
__________________
|
|
|
|
|
|
08-19-2005, 08:27 AM
|
#43 | |
|
AF Regular

Join Date: Dec 2003
Location: Stockholm
Posts: 427
Thanks: 0
Thanked 0 Times in 0 Posts
|
Re: F1 - STUDIO27 BAR 006 (1/20) - Progress Pics
Very interesting build up.
Keep it up !
__________________
Latest progress: Ferrari F40 LM Fujimi 1/16 and Porsche 959 Fujimi 1/16 Finished: 1940 Ford pickup and Lotus Super Twelve 
|
|
|
|
|
|
08-19-2005, 09:22 AM
|
#44 | |
|
AF Regular
Join Date: Aug 2005
Location: paris
Posts: 143
Thanks: 0
Thanked 0 Times in 0 Posts
|
Re: Re: F1 - STUDIO27 BAR 006 (1/20) - Progress Pics
Your wheels are nice.
But ST27 made a misake in it, Their "Y" is too big.... even o nthe williams and maclaren, they use the same wheels as the manufacturers and the scheme is different.... Nice work so far !!!!!! love the seat texture Enjoy MANU |
|
|
|
|
|
08-19-2005, 09:44 AM
|
#45 | |
|
Sweet, sweet tiny Hondas.
 Join Date: Jul 2003
Location: Austin, Texas
Posts: 5,720
Thanks: 48
Thanked 89 Times in 65 Posts
|
Re: F1 - STUDIO27 BAR 006 (1/20) - Progress Pics
I'm glad you've stuck by this build despite all the trouble it's given you. This is just a great build up. I've been waiting for a BAR F1 in plastic but after this season I guess we'll have to keep waiting, so I'm also pleased you've gone ahead and made all the mistakes that I would make and you've documented them so they can be avoided. Thanks for a wonderful thread!
__________________
It ain't cool 'till your wife hates it. Imagine a world without Alabama Recent builds: Rocket Bunny FR-S and stock BRZ Toyota bB Bro-style Civic K20 powered SiR converted EK WIP I build slowly and poorly. 
|
|
|
|
|
|
|
POST REPLY TO THIS THREAD |
 |
|
|

