|
|
|

|
|
| Search | Car Forums | Gallery | Articles | Helper | AF 350Z | IgorSushko.com | Corporate |
|
| Latest | 0 Rplys |
|
|||||||
| WIP - Motorsports Post topics for any "Work In Process" motorsports vehicles in this sub-forum. |
 |
 Show Printable Version | Show Printable Version |  Email this Page | Email this Page |  Subscribe to this Thread
|
|
|
Thread Tools |
 08-15-2010, 06:04 PM
|
#1 | |
|
AF Newbie

Join Date: May 2008
Location: phoenix, Arizona
Posts: 16
Thanks: 0
Thanked 0 Times in 0 Posts
|
Benetton-Ford B188 Build starting
Hi Everyone, I'm thinking about starting a build on the Tamiya, Benetton-Ford B188. Not much out here on this kit that I can find.
I'm new at this so bare with me on the posting of pictures. 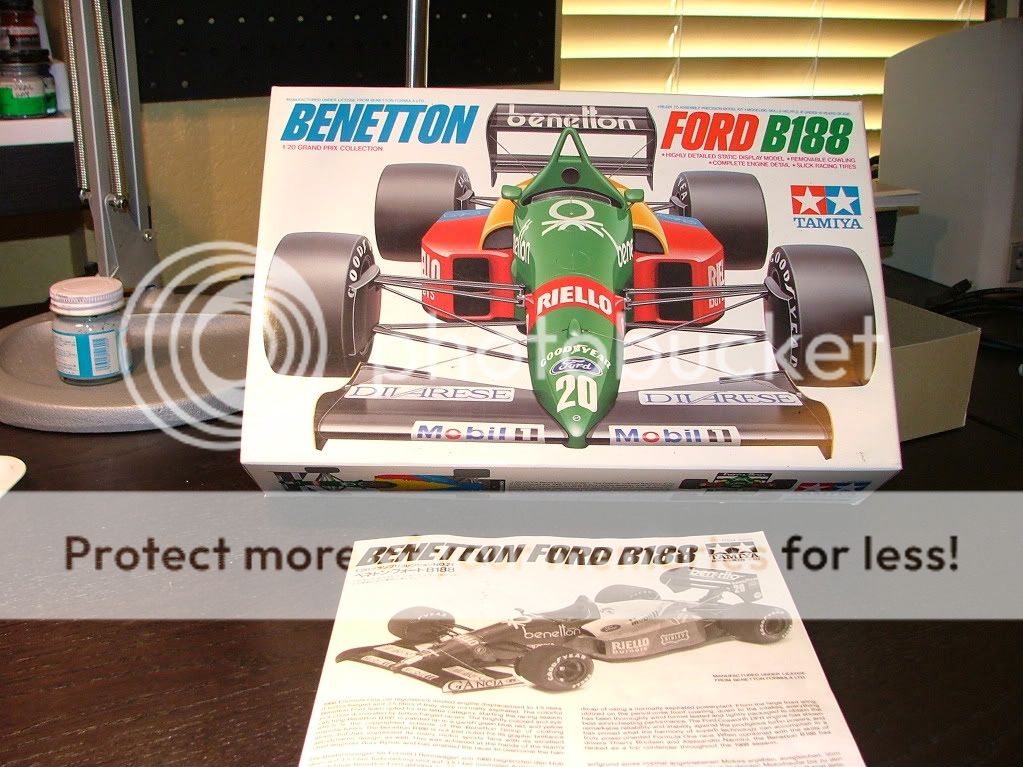 I have had this kit for quite some time. Not many parts actually. Mostly a good paint job and a few detials parts here and there to spruce it up. Lets see how this thread goes and happy reading. gmd72858
__________________
Greg Davis Phoenix, Az. USA ---------- 
|
|

|

|
|
08-15-2010, 06:07 PM
|
#2 | |
|
AF Newbie
Thread starter
Join Date: May 2008
Location: phoenix, Arizona
Posts: 16
Thanks: 0
Thanked 0 Times in 0 Posts
|
Re: Benetton-Ford B188 Build starting
Here are a few snap shots of the part trees.
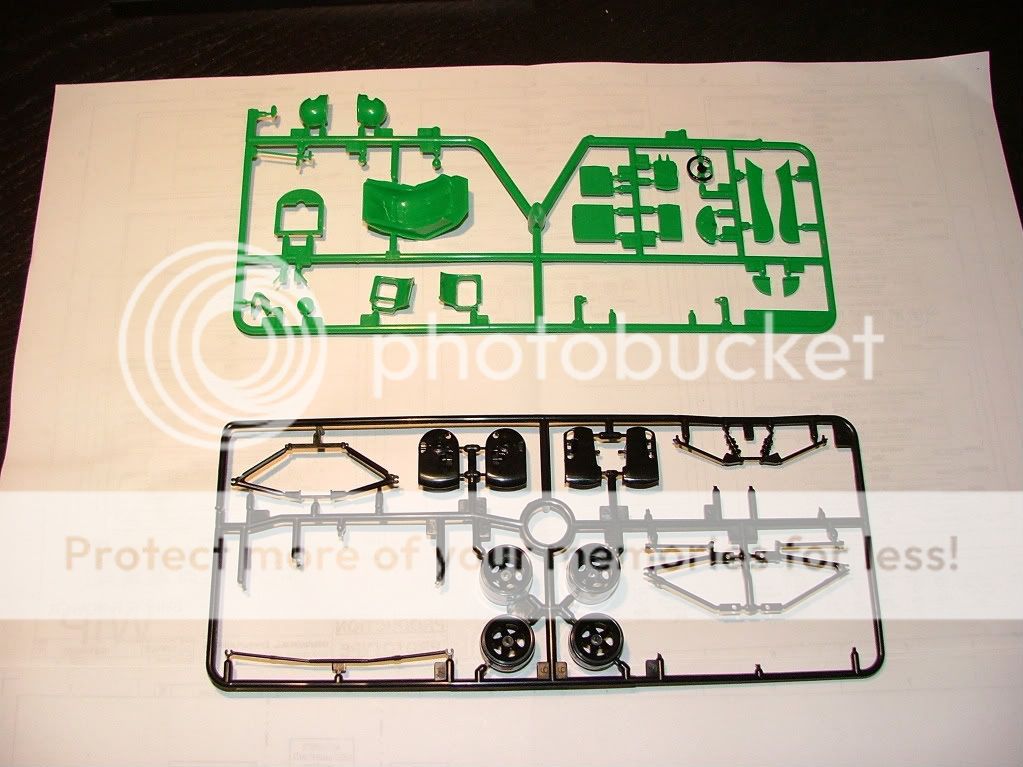 As you can see, not many parts. 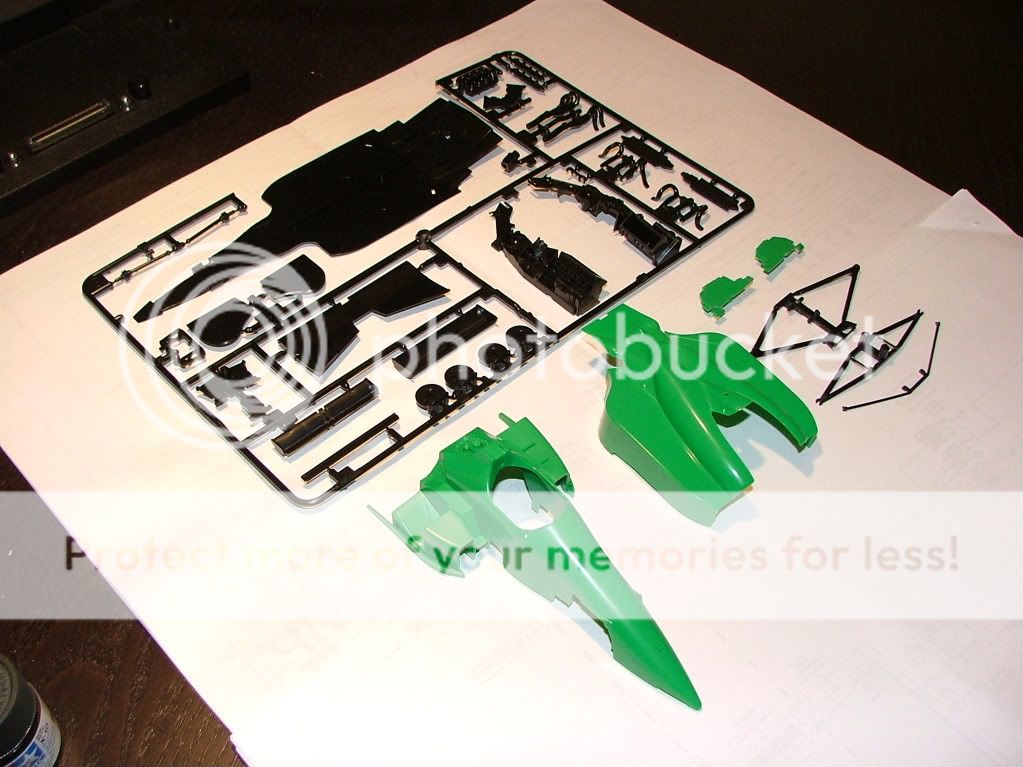
__________________
Greg Davis Phoenix, Az. USA ----------
Last edited by gmd72858; 08-18-2010 at 11:48 PM. |
|
|
|
|
|
08-15-2010, 06:43 PM
|
#3 | |
|
AF Newbie
Thread starter
Join Date: May 2008
Location: phoenix, Arizona
Posts: 16
Thanks: 0
Thanked 0 Times in 0 Posts
|
Re: Benetton-Ford B188 Build starting
This car is going to require some sanding and front suspension modifications.
The instructions show how to assemble the front suspension. Not a great sub-assembly and it makes the chassis look terrible when built. 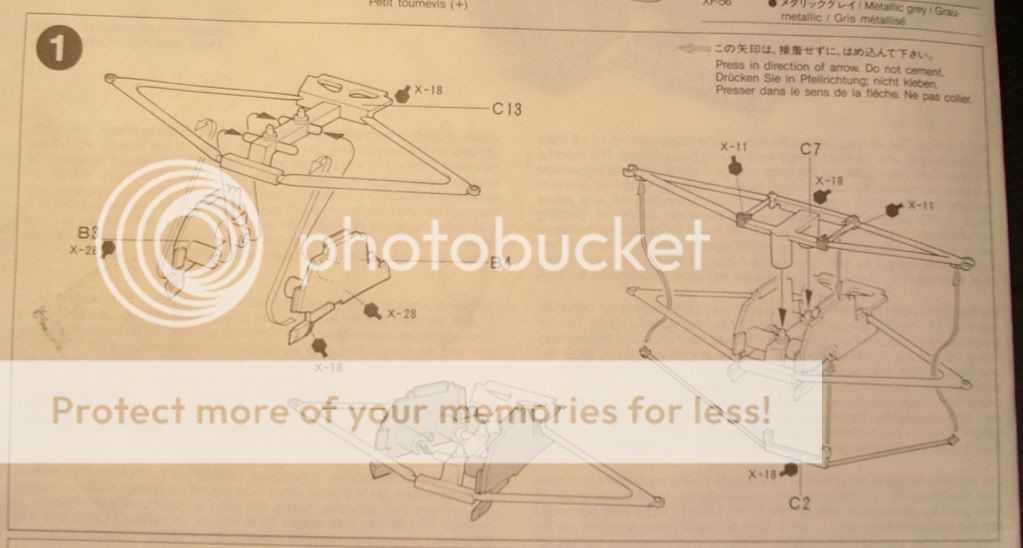 Here is a shot of the chassis and one of the front suspnsion side panels. Nasty fit issues here for sure. 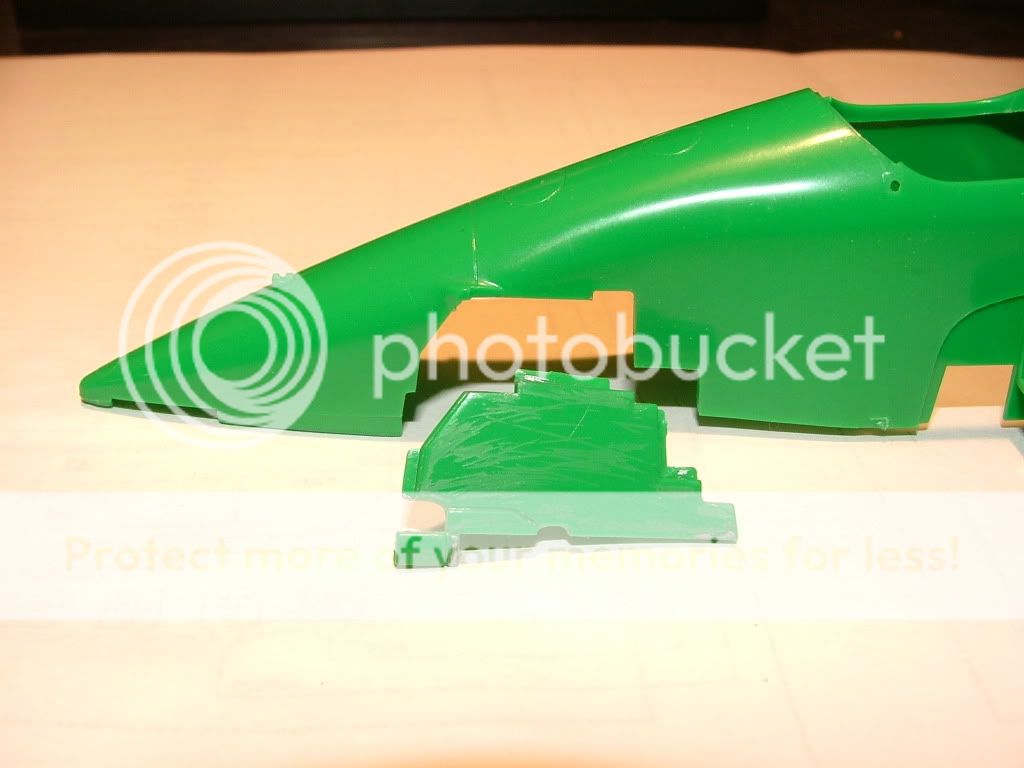 When the front is built up per the instructions, it looks like this image below. 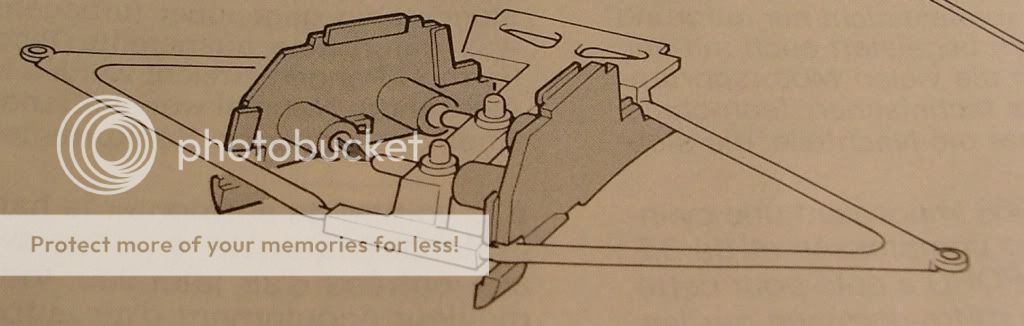 You can see by this picture, that a lot of filling and sanding is needed. 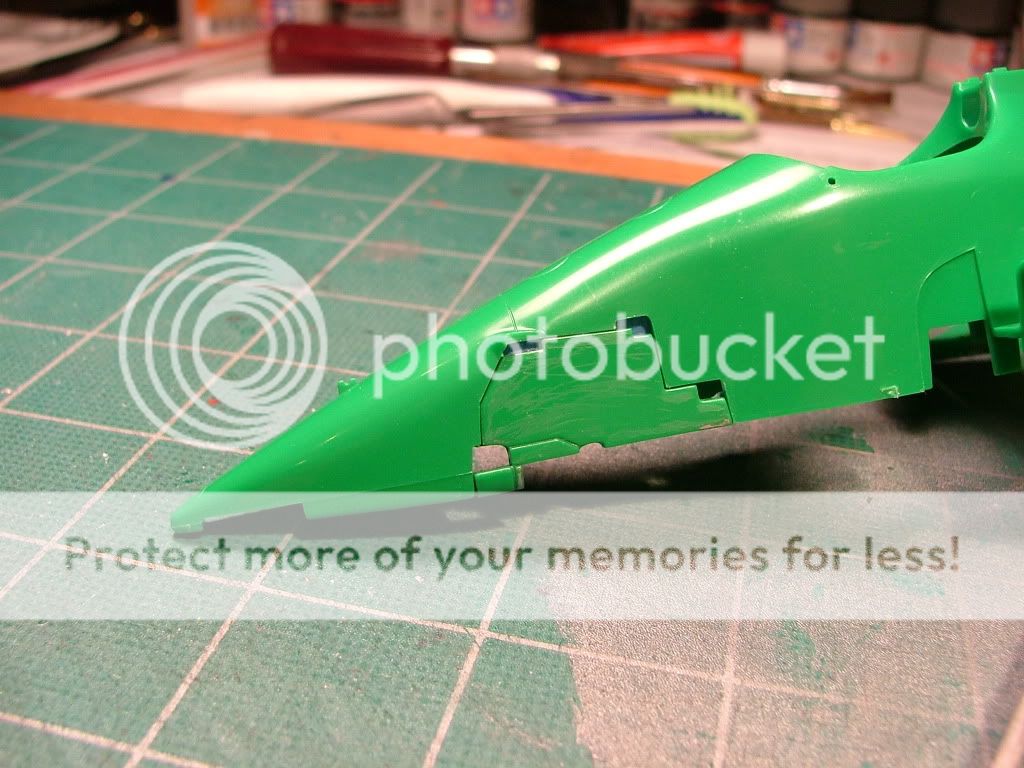 Think about trying to install the front suspension clip, fill the seams, and sand the parts without breaking the suspension parts? No way. I'm going to cut the front struts and slip them into the chassis after all the sanding is done. It'll be a bit tricky but it can be done. 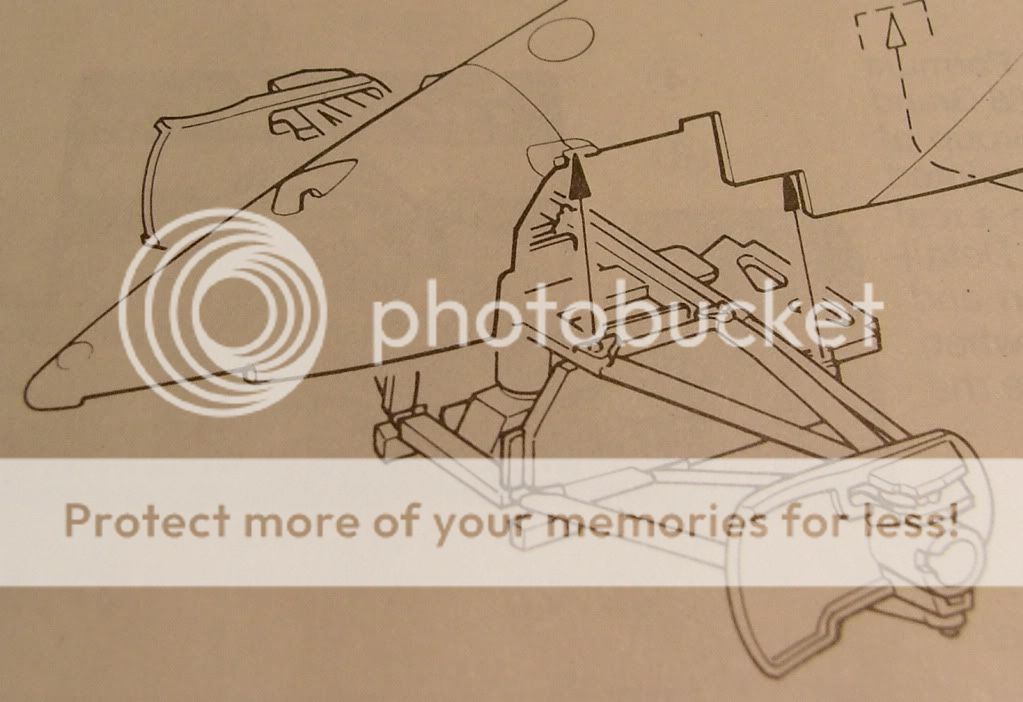 Here is a shot of the suspension side panels glued in place and the side pod air inlets. 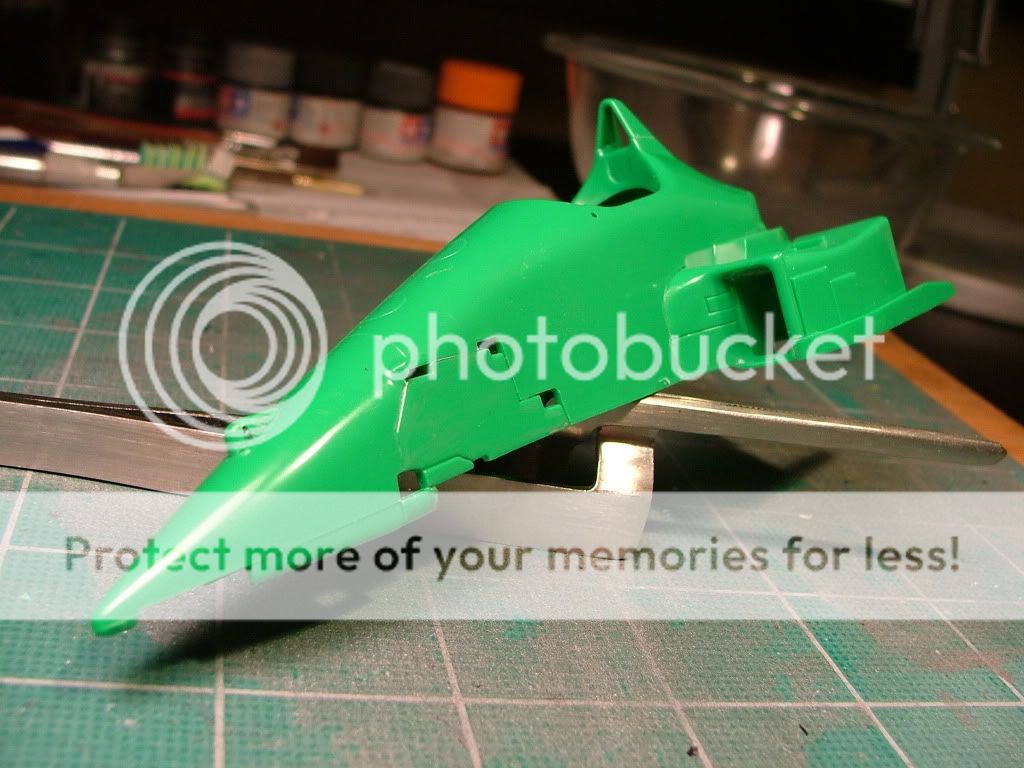 Next step, filling and sanding.
__________________
Greg Davis Phoenix, Az. USA ----------
|
|
|
|
|
|
08-16-2010, 03:49 PM
|
#4 | |
|
AF Newbie

Join Date: Oct 2006
Location: Bridgend
Posts: 32
Thanks: 1
Thanked 0 Times in 0 Posts
|
Re: Benetton-Ford B188 Build starting
Nice subject, don't see many of there some up.
I built one of these when it first came out, I built it straight as per the kit instructions, will be interested to see how you handle inserting the front suspension parts after fitting the monocoque sides. Love the paint job on this car, just IIRC a pain to mask and spray. Looking forward to seeing more Happy modelling Ant Last edited by Ant Phillips; 08-23-2010 at 04:58 PM. |
|
|
|
|
|
08-16-2010, 07:24 PM
|
#5 | |
|
AF Enthusiast

Join Date: Oct 2008
Location: Auckland
Posts: 2,761
Thanks: 51
Thanked 136 Times in 134 Posts
|
Re: Benetton-Ford B188 Build starting
Cant wait to see more
__________________
 It's Not wheather you Win or Lose, its how you look while you play the Game |
|
|
|
|
|
08-17-2010, 11:05 AM
|
#6 | |
|
AF Newbie

Join Date: Oct 2005
Location: Campinas
Posts: 74
Thanks: 5
Thanked 0 Times in 0 Posts

|
Re: Benetton-Ford B188 Build starting
I have the same kit and intend to build it as soon as I have some time to spare. Maybe yours will give me inspiration to start. It´s a Beautiful car.
|
|
|
|
|
|
08-22-2010, 05:56 PM
|
#7 | |
|
AF Newbie
Thread starter
Join Date: May 2008
Location: phoenix, Arizona
Posts: 16
Thanks: 0
Thanked 0 Times in 0 Posts
|
Re: Benetton-Ford B188 Build starting
Thanks for the heads up Ant on the brokn image link. I believe I have it fixed now.
Well, the sanding and filling is done in the monocoque and it's looking prety good. I decided to work some of the simple items first like the tires, front and rear wings. I'll be posting some more progress pictures this wek. Be on the look out.
__________________
Greg Davis Phoenix, Az. USA ----------
|
|
|
|
|
|
08-23-2010, 02:17 AM
|
#8 | |
|
AF Newbie

Join Date: Aug 2010
Location: Ipswich,Queensland
Posts: 71
Thanks: 0
Thanked 1 Time in 1 Post
|
Re: Benetton-Ford B188 Build starting
I also built it years ago .I'll be interested see how you go.The masking is pain in the..
|
|
|
|
|
|
08-27-2010, 02:57 PM
|
#9 | |
|
AF Newbie
Thread starter
Join Date: May 2008
Location: phoenix, Arizona
Posts: 16
Thanks: 0
Thanked 0 Times in 0 Posts
|
Re: Benetton-Ford B188 Build starting
Well hello again to anyone who may be looking in on this post about my Benetton B188 build.
I’ve decided to build this kits front end differently than the kit suggests. I’m planning on cutting the front struts/wishbones and slide them into the monocoque. Then, I’ll support the members on the inside of the chassis. I’ve thought this one through a bit, and since I will be chopping up the front suspension somewhat, I’ll set this up so the front wheels can’t be turned left or right. First things first …. Filling and sanding. Here are a few shots of the wing sections and pan. As you can see the usual molding “dots” that have to dealt with. 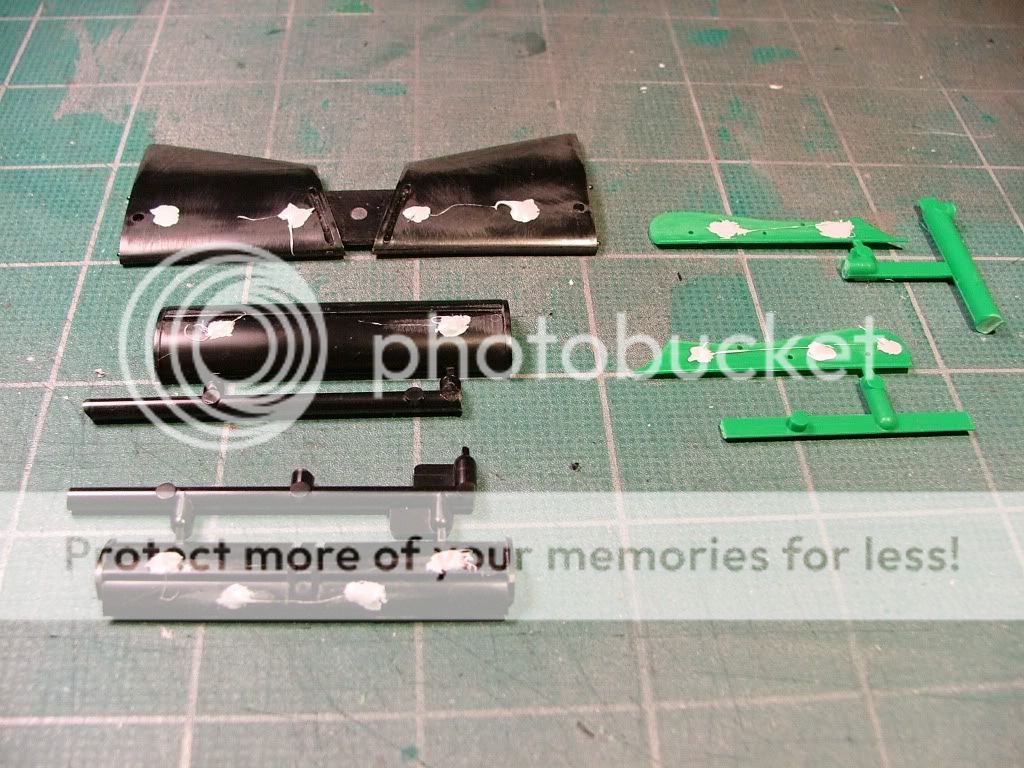 this shot might not be so clear but I thought I would include it. 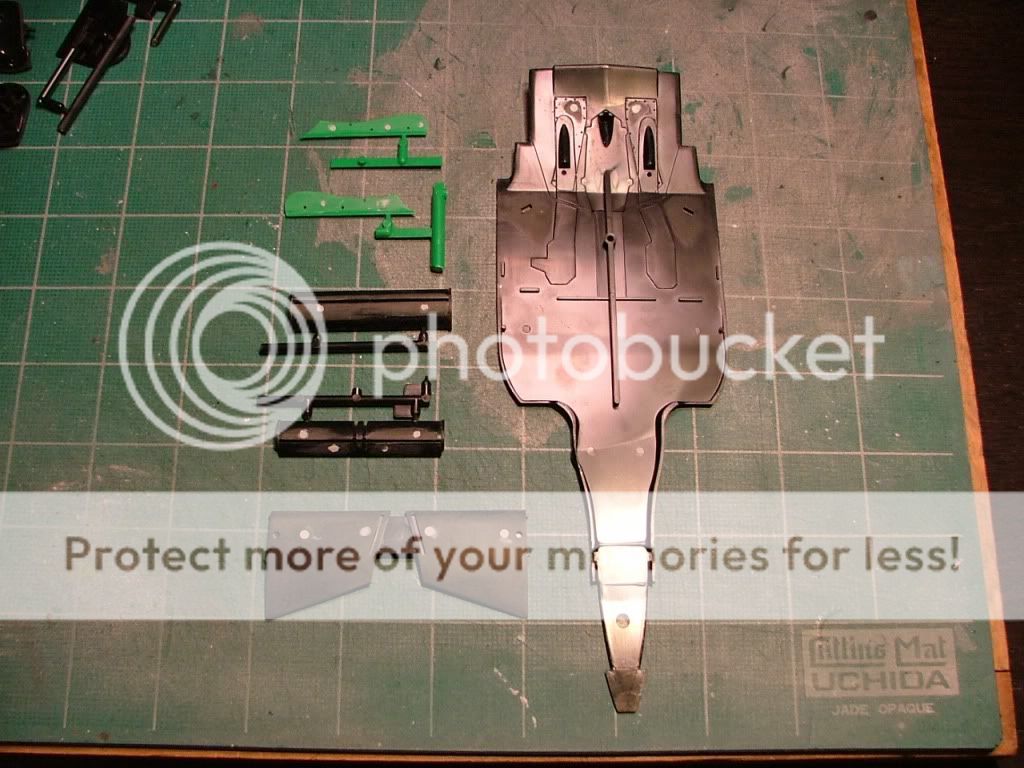 This is the wing sections with most all of the sanding done. 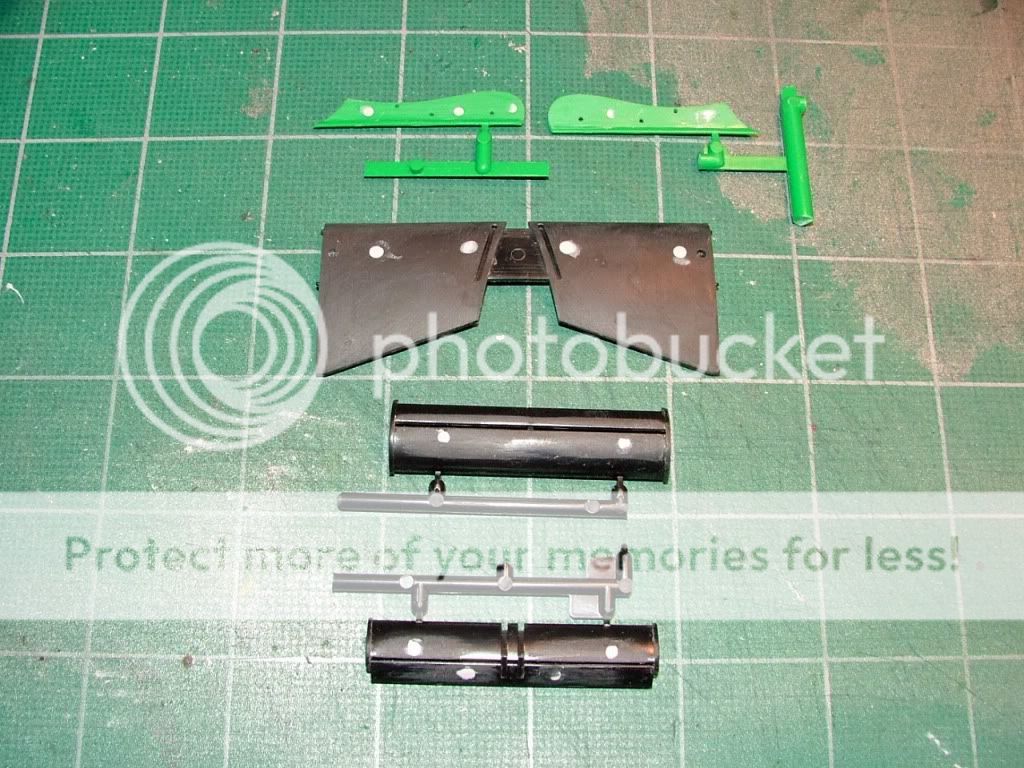 the rear diffuser area 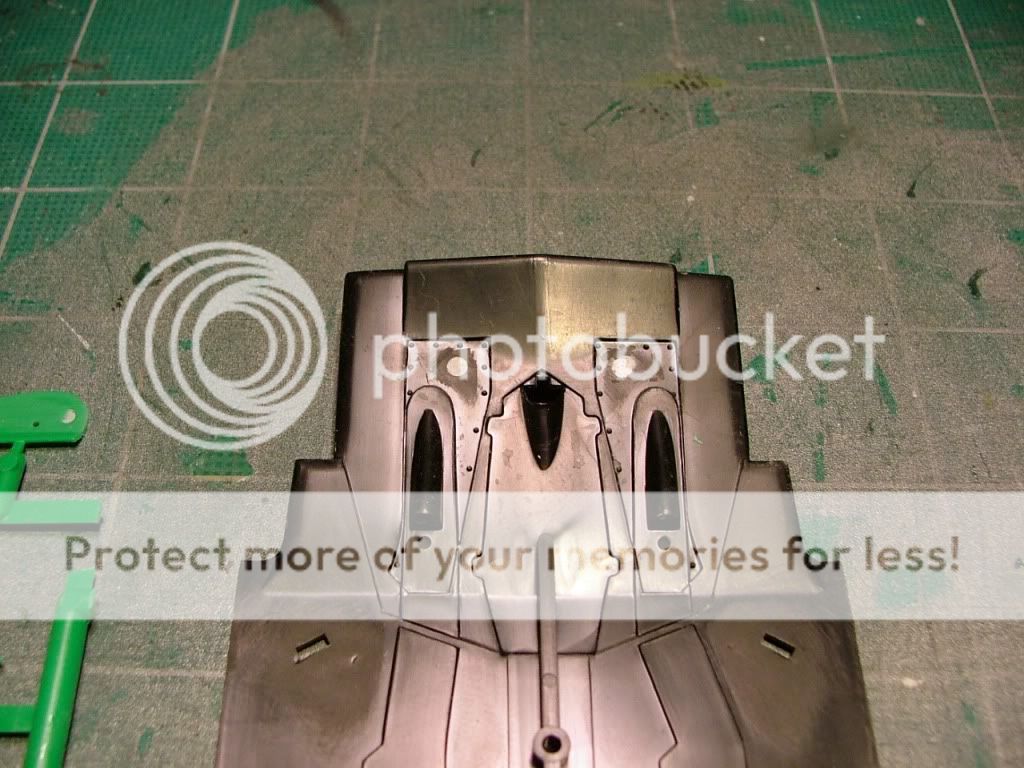 here are a few shots of the monocoque after I have sanded off the bulk of the putty. I use the Squadron shop fast drying white putty.  here is the other side of the chassis. 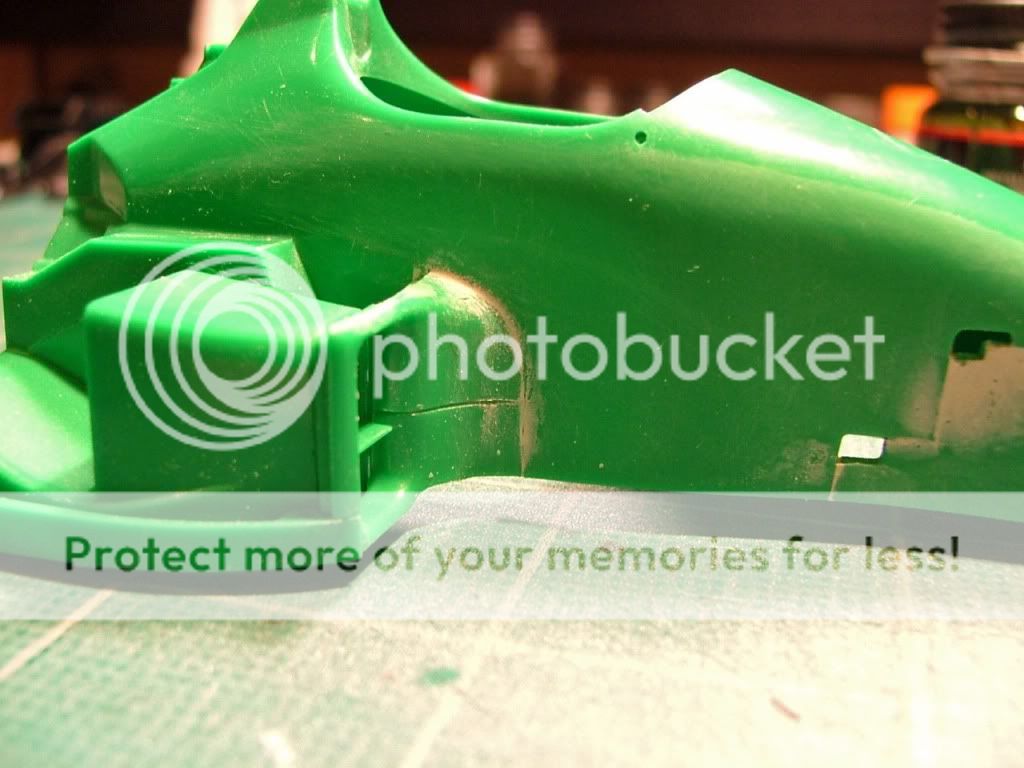 and a bit closer. 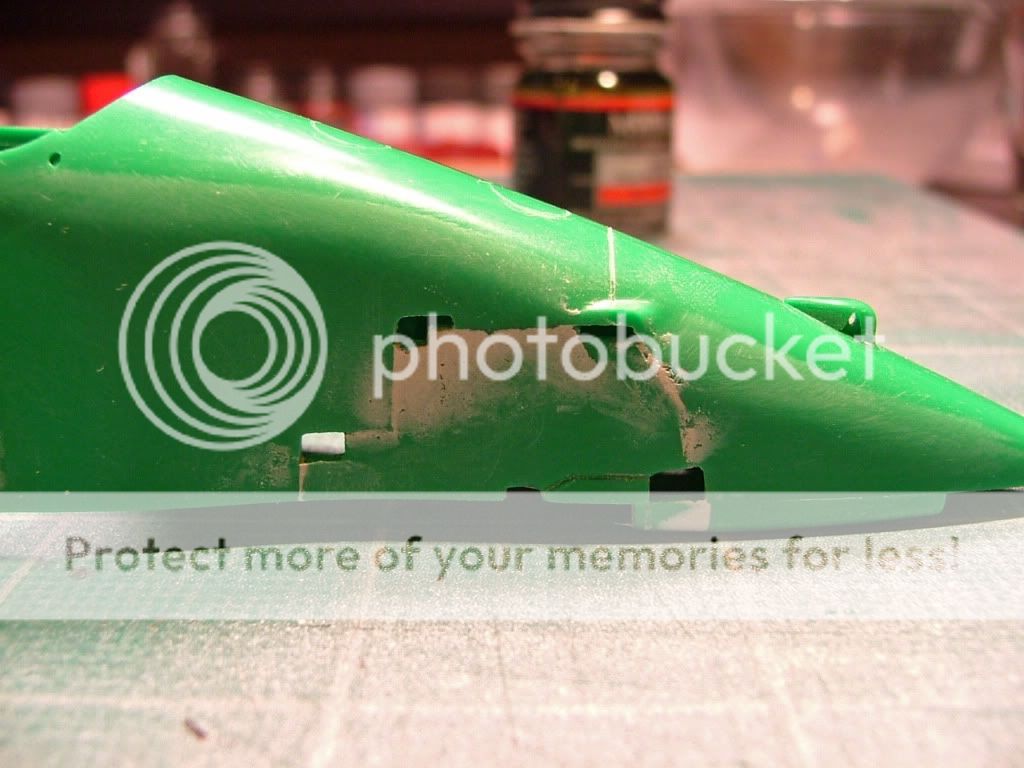 Now you can see the results of some light primering and sanding 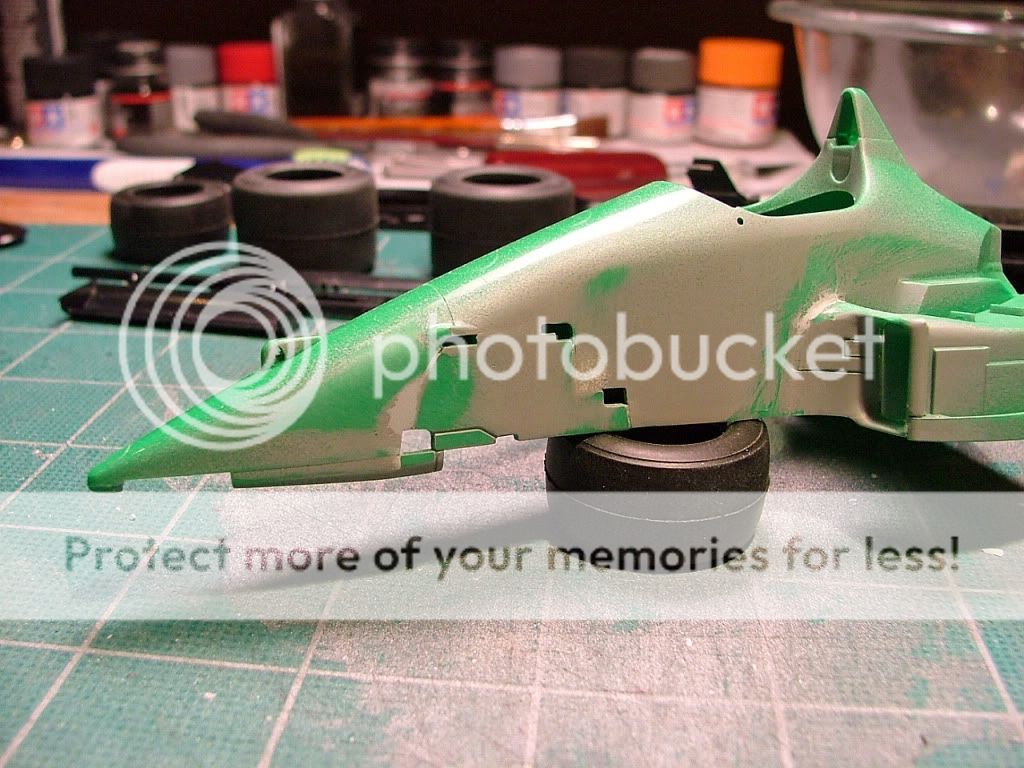 I also like to use a filling compound that is a bit more liquid. I prefer the Gunze Sangyo filler. I use the 500 grit type. It works grea for fillin in areas like where the side pod meets the monocoque. 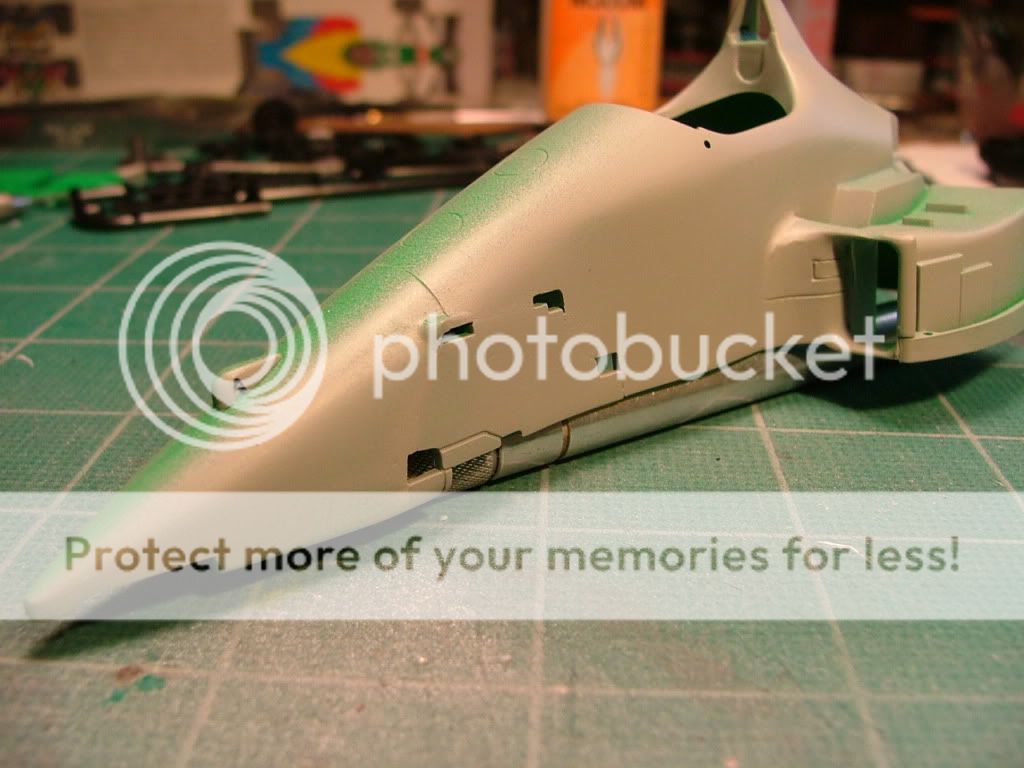 not too bad huh? I think it will look MUCH better when all done. At least we won't have to look at the parting lines on the side panels.  More info to come soon. I'm going to shift over to some of the simple stuff like the tires and wings. I plan on showing a really simple tire sanding tool i use in my building. To be continued: . . . Enjoy gang and happy building !!
__________________
Greg Davis Phoenix, Az. USA ----------
Last edited by gmd72858; 08-27-2010 at 09:30 PM. |
|
|
|
|
|
08-28-2010, 08:02 AM
|
#10 | |
|
AF Enthusiast

Join Date: Sep 2006
Location: USA, Florida
Posts: 590
Thanks: 3
Thanked 6 Times in 6 Posts
|
Re: Benetton-Ford B188 Build starting
Great work Greg filling all those sink marks is never any fun I will have to get some of that Gunze Sangyo filler and give it a try.
__________________
Regards, Dave |
|
|
|
|
|
08-28-2010, 08:03 AM
|
#11 | |
|
AF Newbie

Join Date: Oct 2009
Location: Oulu-Uleåborg
Posts: 83
Thanks: 0
Thanked 3 Times in 3 Posts
|
Re: Benetton-Ford B188 Build starting
Howdy! This will be very interesting Topic to follow
 . I've never seen a Build of this Model Kit anywhere. . I've never seen a Build of this Model Kit anywhere. |
|
|
|
|
|
08-28-2010, 12:21 PM
|
#12 | ||
|
AF Newbie
Join Date: Oct 2006
Location: Bridgend
Posts: 32
Thanks: 1
Thanked 0 Times in 0 Posts
|
Re: Benetton-Ford B188 Build starting
Quote:
|
||
|
|
|
|
08-29-2010, 03:58 PM
|
#13 | |
|
AF Newbie
Join Date: Jan 2009
Location: Pitt Meadows
Posts: 38
Thanks: 0
Thanked 0 Times in 0 Posts
|
Re: Benetton-Ford B188 Build starting
Looking forward to following your progress on this. I too built it many years ago OOB. The masking was fairly complex, but very enjoyable. It is one of the prettier cars of it's generation.
TIM
__________________
 My hardhat has racing stripes. https://www.facebook.com/pages/Cameo...s/365886440252 |
|
|
|
|
|
09-06-2010, 06:53 PM
|
#14 | |
|
AF Newbie
Thread starter
Join Date: May 2008
Location: phoenix, Arizona
Posts: 16
Thanks: 0
Thanked 0 Times in 0 Posts
|
Re: Benetton-Ford B188 Build starting
Hello again everyone. I hope you are finding some of my pictures informative and helpful.
I mentioned at the end of my last post, that I would show you a simple tire scuffing tool I have made. I‘ve been using this thing for some time now and it works pretty well. All you need is a variable speed drill and some flat washers, a bolt or screw and a hex nut. The size of the hardware I used to make this tool is good for 1/20th and 1/24th scale tires. If you are going to scuff tires for a larger scale, 1/18th or 1/12th, then I would just scale up the hardware accordingly. You could use Metric or American Standard hardware. I went to my local Home Depot store and bought my selection of flat washers, a hex nut, and a long screw. I took a set of Tamiya tires along with me from one of my F1 kits, so that I could pick the correct sized washers that I needed. This is a simple screw, washer and hex nut hardware stack up, and it cost me all of a $1.50 US to make. REALLY SIMPLE and CHEAP!! Here is what I use and the quantity: Large flat washer, qty 2 ( rear tires, approx 1.25 outside diameter ) Medium size flat washer, qty 2, ( front tires, approx. 1.00 diameter ) Small flat washer, qty 2, ( needed to help align screw when tightened to tires) Screw, ¼-20 x 2.00 long, qty 1, ( I used a flat head screw so it self aligns to the smaller washer ) Here is a shot of the hardware I used. 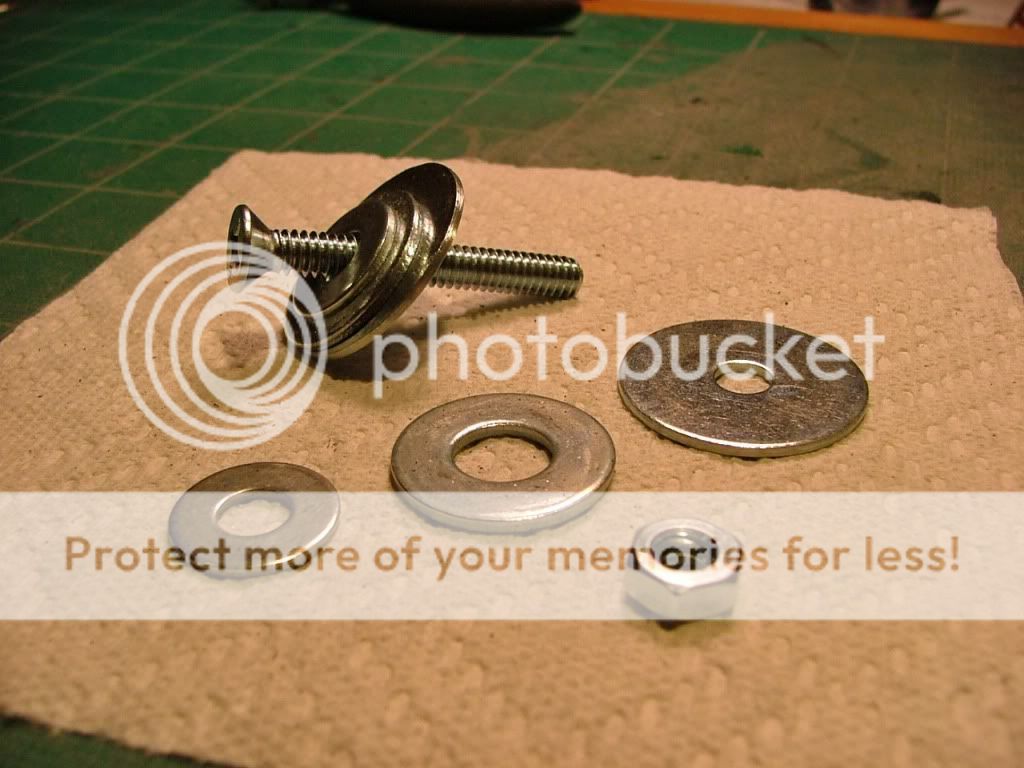 And this is another shot built up. 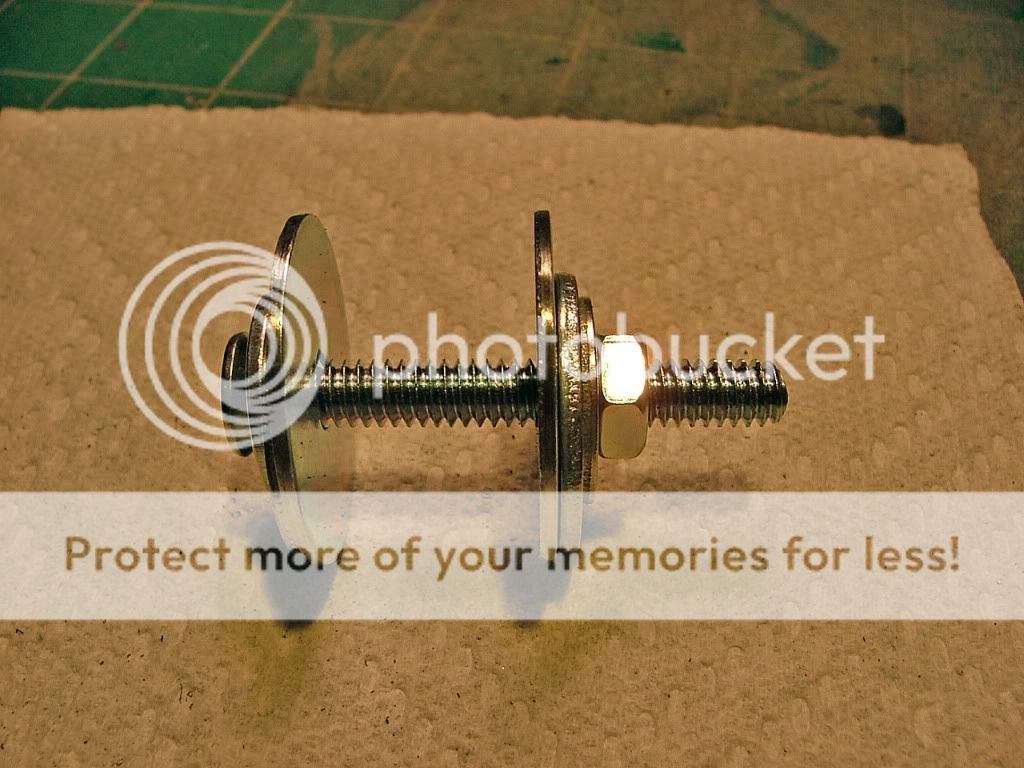 I felt the outside diameter of the washers was important because you don’t want the washer diameter to exceed the tire diameter. If the flat washer is larger than the tire you’re scuffing, it will make scuffing the “shoulders” of the tires difficult. For that reason, you want the flat washers to be just a bit smaller than the tires. Front tires on F1 cars are smaller than the rear tires and you’ll see in the pictures what I mean by the tire and washer being close in size for scuffing. This is what the tool looks like when assembled. I don’t worry too much about trying to “center up” or “align” the tool right through the center axis of the tire. I align the outer diameter of the washers as I tighten the hex nut. I purposely used a flat head bolt because the conical shape head, self aligns in the hole on the flat washers. One thing I also like to do is tighten the washers just enough to “crown” the tire. This makes it easy to remove the center mold flashing line found on most tires. It also makes it easy to roll across the entire surface of the tire and control just where you scuff, and how much you scuff. Lovely mold lines there huh? This is a rear tire. 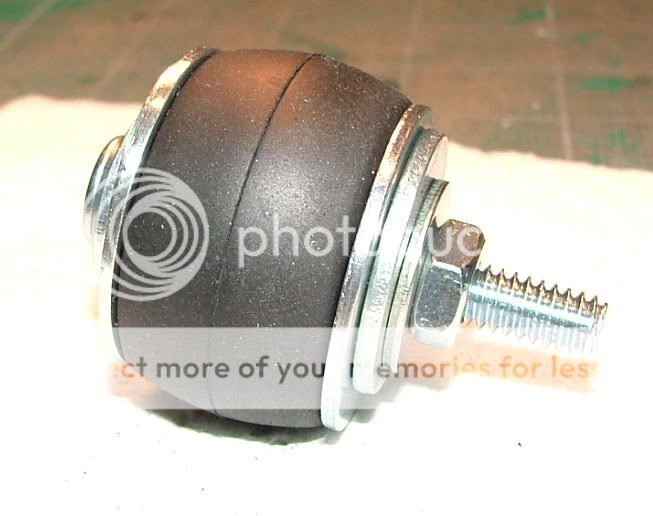 All you need to do is chuck the tool into your drill, start rotating the tire slowly and apply your favorite sand paper. I like using a small sanding block to scuff the tire, plus, it’s a hard surface and works best for applying pressure to the tire surface. 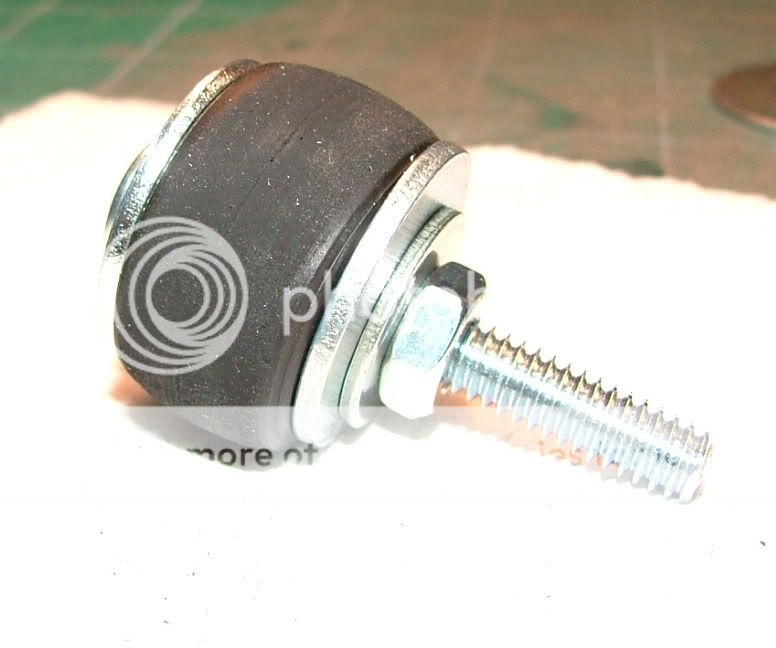 This is the after shoot. Much nicer. 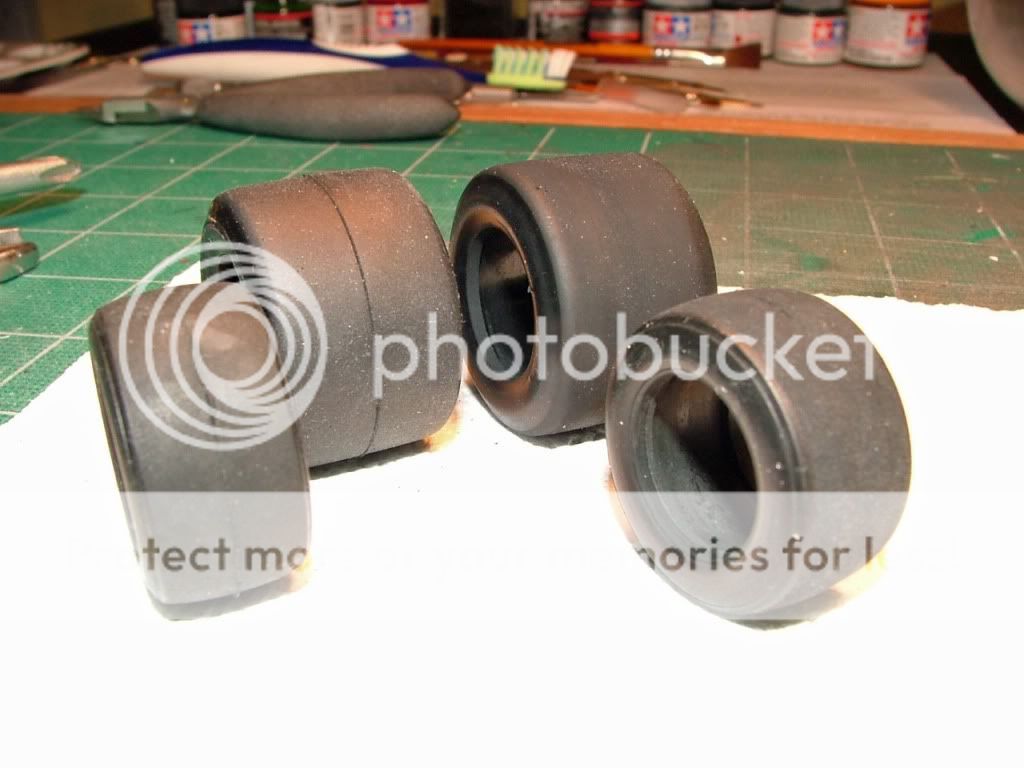 I like the Tamiya tire decals, but I don’t really like the glossy material that can be left behind after you apply them to the tire. They look good and after I weather them a bit at final assembly, they should look a little better I bet. 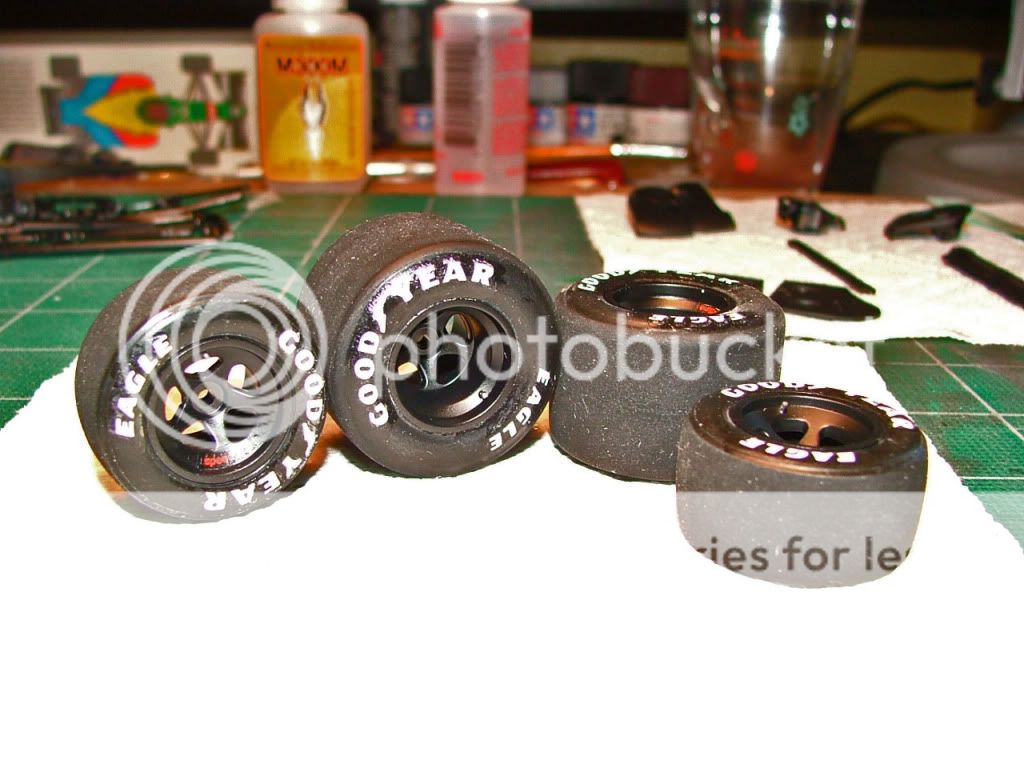 And another shot. 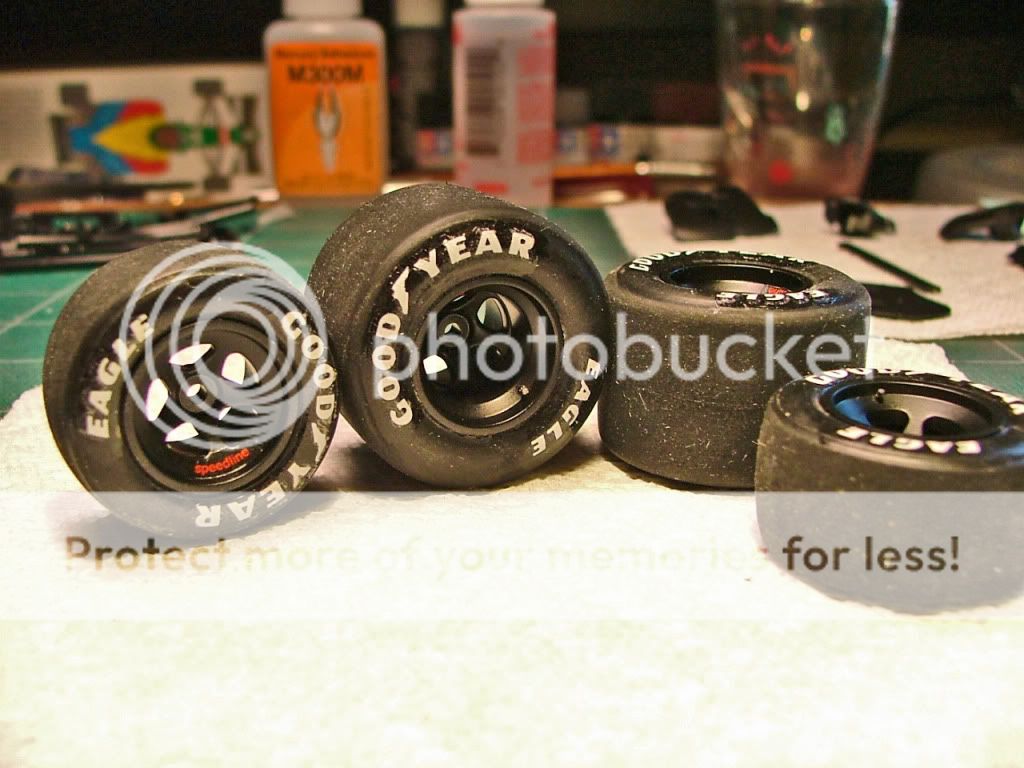 I hope some of this info was helpful and maybe you’ll be making an El Cheap-o tire tool like I did. My next post will show the front and rear wings built up and maybe, just maybe, the body painted. Most likely just pictures of the dang thing all taped up ready to paint. Works been a bit slow on this kit for me. I’ll be posting more soon so be on the lookout for more. Enjoy and happy building!!
__________________
Greg Davis Phoenix, Az. USA ----------
|
|
|
|
|
|
09-07-2010, 01:04 AM
|
#15 | |
|
AF Newbie
Join Date: Mar 2010
Location: Seoul
Posts: 33
Thanks: 0
Thanked 1 Time in 1 Post
|
Re: Benetton-Ford B188 Build starting
Looks great so far!
Keep up the postin'....
__________________
www.tomatograndprix.com |
|
|
|
|
|
|
POST REPLY TO THIS THREAD |
 |
|
|


