|
|
|

|
|
| Search | Car Forums | Gallery | Articles | Helper | AF 350Z | IgorSushko.com | Corporate |
|
| Latest | 0 Rplys |
|
|||||||
| Car Modeling Share your passion for car modeling here! Includes sub-forum for "in progress" and "completed" vehicles. |
 |
 Show Printable Version | Show Printable Version |  Email this Page | Email this Page |  Subscribe to this Thread
|
|
|
Thread Tools |
 06-15-2012, 05:37 PM
|
#1 | |
|
AF Enthusiast

Join Date: Dec 2009
Location: Hamme
Posts: 535
Thanks: 77
Thanked 21 Times in 17 Posts
|
Troubles, troubles and troubles
Hi guys,
Troubles, troubles, troubles. A few weeks ago i putted some paint(Zero Paints Bullitt Green) on the body from the Bullitt Mustang. The paint went on like a charm, so no problems there. A few months back, when i was in the UK for a small holiday, i dropped in a Halfords store and bought some primer, paint and clear in spray cans. I always heard good things about these products so i figured why not. So back to the troubles. I cleared the body with Halfords clear straight from the can and had no runner for the first time in my life, so i was a happy camper. So letting the body dry for a week or 2, i started to polish the body with 6000 and 8000 micromesh. The sanding went fine, but when i started to use the polishing compound(Finisher's fine and micro) i polished thru the clear and paint. I only saw it when in cleaned the compound residue from the car with some soapy water. So here are some pics from the body where i polished thru the paint and clear. 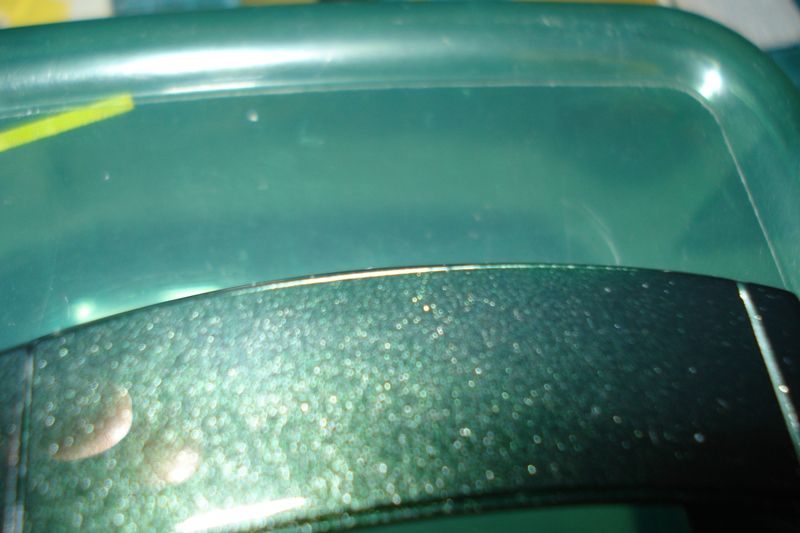  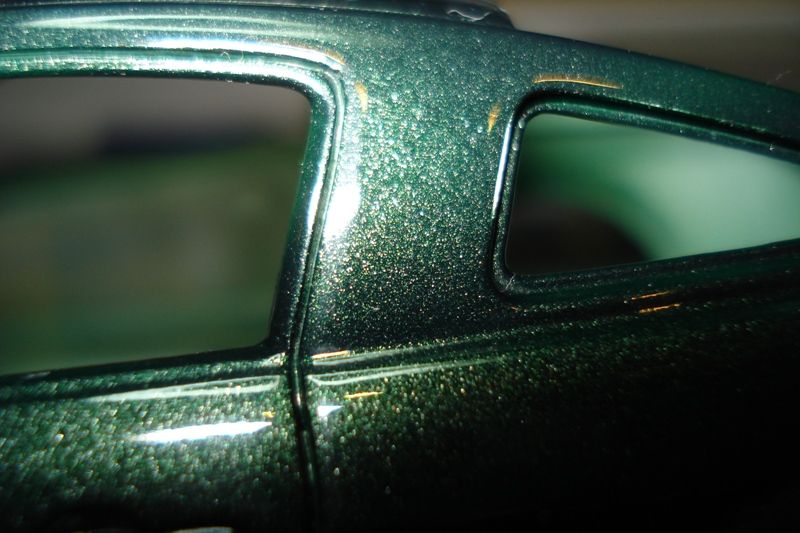 So i have a question. What can i do about this. Because the body had a very nice shine to it. Here are some pics: 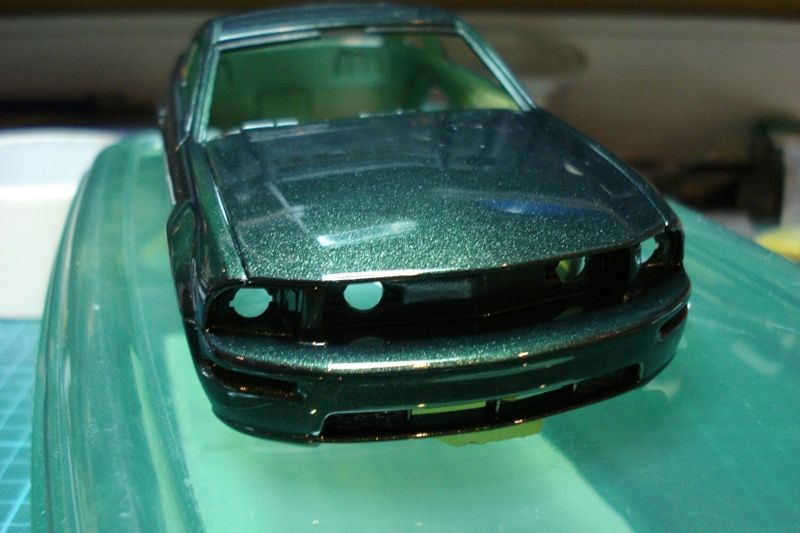 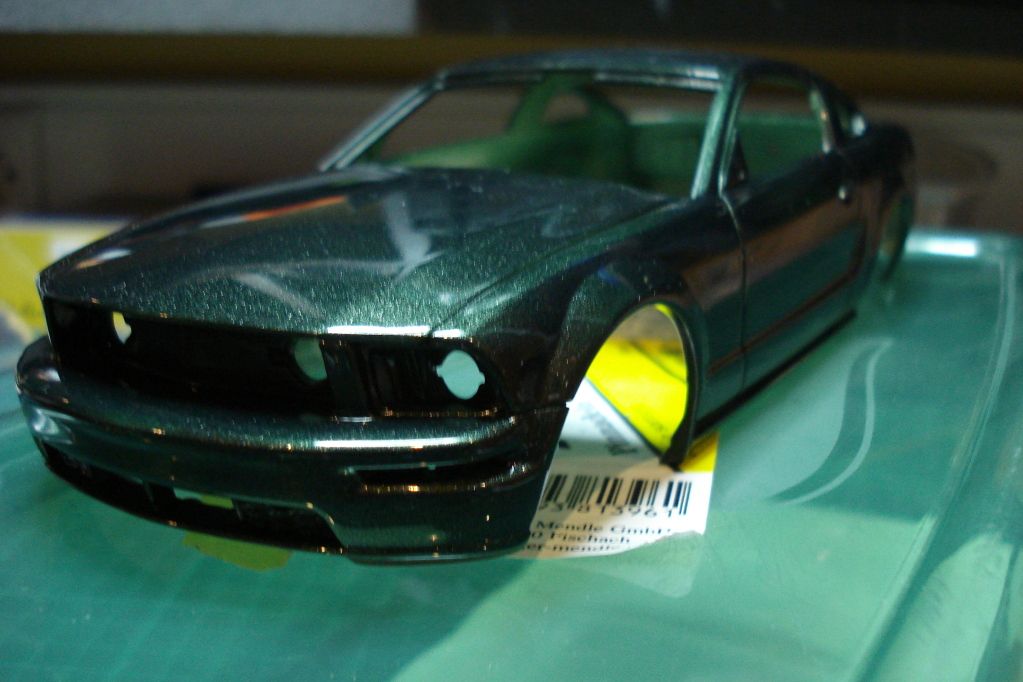  I already sanded dow the body again with 3600 grit to have a matt finish. I'm going to repaint the body and when dry clear it with 2K clear from Zero Paints, but i'm a bit sceptic about this. Does any of you know if the halfords clear will react with the zero paints color or do i need to sand more? Let me know. Any advice would be great. Best regards, Lesley |
|

|

|
|
06-16-2012, 12:30 AM
|
#2 | |
|
AF Fanatic

Join Date: Feb 2004
Location: Hartford, Connecticut
Posts: 5,601
Thanks: 7
Thanked 108 Times in 103 Posts
|
Re: Troubles, troubles and troubles
What i would do is what cifenet did on his c6r build. I used this method before as it saves time and a lot of time. And most of the time you can't tell where the repair was.
http://www.automotiveforums.com/vbul...=984203&page=3
__________________
In Progress    
|
|
|
|
|
|
06-16-2012, 12:36 AM
|
#3 | |
|
AF Regular

Join Date: Jun 2008
Location: Slovakia
Posts: 227
Thanks: 0
Thanked 12 Times in 12 Posts
|
Re: Troubles, troubles and troubles
It has nothing to do with paint type or brand or compound. you just burned trough the paint on exposed areas or edges, most fragile places when polishing. more coats of clear before polishing cures the problem
|
|
|
|
|
|
06-16-2012, 04:51 AM
|
#4 | |
|
AF Enthusiast
Join Date: Jun 2007
Location: Vienna
Posts: 2,399
Thanks: 57
Thanked 27 Times in 26 Posts
|
Re: Troubles, troubles and troubles
It's all about taking care when you polish it.
Or alternatively give it several clear coats, but again take care when you polish as you might burn through it again. |
|
|
|
|
|
06-16-2012, 06:45 AM
|
#5 | |
|
AF Enthusiast
Thread starter
Join Date: Dec 2009
Location: Hamme
Posts: 535
Thanks: 77
Thanked 21 Times in 17 Posts
|
Re: Troubles, troubles and troubles
Hi guys,
Thanks for all the info. I'm think i'm going to put the body in a nice isopropyl alcohol bath and start all over again. I think it's the best way. Or do you guys have another suggestion? Best regards, Lesley |
|
|
|
|
|
06-16-2012, 07:01 AM
|
#6 | |
|
AF Enthusiast

Join Date: May 2003
Location: Sunshine Coast, AUSTRALIA
Posts: 2,215
Thanks: 16
Thanked 8 Times in 8 Posts
|
Re: Troubles, troubles and troubles
To me it looks like you either put too much primer on or too much of the base colour paint. See how it's rubbed through away from the edge which suggests that one of those layers had built up in that area. Usually you see this with the new 2 part clear coats (and it's easy to do) but if you had done that it would have polished out without rubbing through like you have. To fix it make sure you sand the primer nice and smooth (this is THE most important layer) imagine the primer is your clear coat and try to get it that smooth. Then the base coat can be applied nice and thin in mist coats until you have the desired colour. After that looking at how nice your clear coat is you'll have a perfect finish...
__________________
Rob 
|
|
|
|
|
|
06-16-2012, 09:25 PM
|
#7 | |
|
AF Fanatic
Join Date: Feb 2004
Location: Hartford, Connecticut
Posts: 5,601
Thanks: 7
Thanked 108 Times in 103 Posts
|
Re: Troubles, troubles and troubles
Also when you polish clear coat keep an eye on the rag. Once you start getting paint residue on your rag you know you went through the clear coat and maybe stop.

__________________
In Progress
|
|
|
|
|
|
06-19-2012, 09:04 AM
|
#8 | |
|
AF Enthusiast

Join Date: Nov 2002
Location: London
Posts: 1,402
Thanks: 0
Thanked 7 Times in 6 Posts
|
Re: Troubles, troubles and troubles
Like everybody has said, you have rubbed through the lacquer and paint. It always happens on the most protuded edges as they have the least coverage. I have been caught out a lot of times!
|
|
|
|
|
|
06-19-2012, 09:16 AM
|
#9 | |
|
AF Enthusiast
Thread starter
Join Date: Dec 2009
Location: Hamme
Posts: 535
Thanks: 77
Thanked 21 Times in 17 Posts
|
Re: Troubles, troubles and troubles
Hi guys,
Thanks for all the info. In the future i'm going to prepare the body better, so i don't make this mistake again. About the Mustang. I decided to give the body another few light coats of Zero Bullitt Green. I had no reaction to the Halfords clear. Today i gave it a couple of coats of 2k clear and all is shiny again. Now i'll wait until it's dry, so i can start polish again. Let's hope all my troubles are over. Best regards, Lesley |
|
|
|
|
|
06-21-2012, 03:33 AM
|
#10 | |
|
AF Regular

Join Date: Oct 2006
Location: Most
Posts: 151
Thanks: 0
Thanked 3 Times in 3 Posts
|
Re: Troubles, troubles and troubles
Also do not polish the edges, polish the areas around them as close as possible but be careful not to polish edges.
I have been through that process too. I decided to sand the place with smooth sandpapers, airbrush it again and seal it with clearcoat  Like this (in the middle of the page) http://www.scalecars.cz/forum/viewto...=5582&start=25 |
|
|
|
|
|
06-22-2012, 01:16 PM
|
#11 | |
|
AF Newbie
Join Date: Apr 2006
Location: Eastpointe, Michigan
Posts: 47
Thanks: 0
Thanked 0 Times in 0 Posts
|
Re: Troubles, troubles and troubles
I've had success repairing burn throughs like this by putting some of the color into a small cup and applying it to the affected area(s) with a small (#o or finer-depending the size of the area)brush.Once the color coat dries, apply some clear (if used originally) in the same manner then polish the repaired areas gently.It's very difficult for the casual observer to see the repaired areas.This method works VERY well with Tamiya and Testors non one coat One Coat paints because these paints are hot enough to melt into the existing paint work.I haven't tried to repair other paints so I don't know how well they may turn out. Caveat emptor.
__________________
Tony Buglione |
|
|
|
|
|
10-15-2012, 05:35 PM
|
#12 | |
|
AF Enthusiast
Join Date: Apr 2007
Location: Pasadena, California
Posts: 827
Thanks: 2
Thanked 3 Times in 3 Posts
|
Re: Troubles, troubles and troubles
Touching-up with a brush works nicely.
Using a #11 blade, you can even dig a little nick at the spot where you burned through. Fill the "hole" with a little more color coat than it takes to fill the nick. Leave it for a couple of days and use 1500- 2000 grit paper to flatten it, making it even with the top coat. After compounding, the repair should be invisible.
__________________
D D M S |
|
|
|
|
|
10-15-2012, 07:19 PM
|
#13 | ||
|
AF Regular

Join Date: Nov 2005
Location: Auckland
Posts: 490
Thanks: 60
Thanked 73 Times in 60 Posts
|
Re: Troubles, troubles and troubles
Quote:
|
||
|
|
|
|
10-16-2012, 06:34 PM
|
#14 | |
|
AF Enthusiast

Join Date: Oct 2008
Location: Auckland
Posts: 2,761
Thanks: 51
Thanked 136 Times in 134 Posts
|
Re: Troubles, troubles and troubles
What the others said...
But if you thin down the last 2K clearcoat you shouldnt have to do too much polishing. Ive hardly done any in over a year! Heres my F50 TDF Blue as an example. Only clearcoated, has not been polished. That banana tree is 4m away (about 12ft) 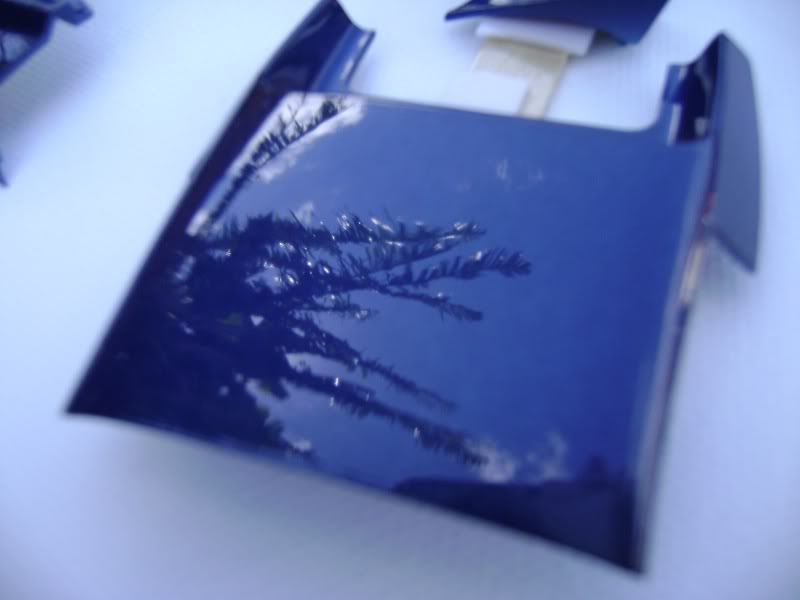 Heres what I did. Step 1: 2K clearcoat - at least 2 coats Step 2: Sand with 2000 Step 3: 2K clearcoat - 1 coat at usual mixture Step 4: Add thinners & mix well (about 40-50% thiners to already mixed paint) Does take longer to dry so dont touch for awhile But also what Robrex said Primer is the MOST important layer, every layer of paint needs to be smooth before the next coat Good luck! Also thats a damn sexy colour! Love the Bullit Mustang!
__________________
 It's Not wheather you Win or Lose, its how you look while you play the Game |
|
|
|
|
|
10-16-2012, 06:47 PM
|
#15 | |
|
AF Enthusiast
Thread starter
Join Date: Dec 2009
Location: Hamme
Posts: 535
Thanks: 77
Thanked 21 Times in 17 Posts
|
Re: Troubles, troubles and troubles
Hi guys,
I feel the need to response to this topic, because i started it. I finished the Mustang months ago and want to tell you what i did. I didn't put the body in a isopropyl alcohol bath. I sanded the clear coat with 4000 grit micromesh. Then i gave a few more coats of Bullitt Green and after the paint was dry i gave it a few coats of 2k clear from zero paints. I did the first 2 coats as discribed on the label and then started to thin it down with thinner until the clear started to levell out on it's own and left it to dry. The result is amazing, if i may say so. Here is a link from the finished result: http://www.automotiveforums.com/vbul....php?t=1080551 Best regards, Lesley |
|
|
|
|
| ||||||||||||||||||||||||||||||||||||||
|
POST REPLY TO THIS THREAD |
 |
|
|


