|
|
|

|
|
| Search | Car Forums | Gallery | Articles | Helper | AF 350Z | IgorSushko.com | Corporate |
|
| Latest | 0 Rplys |
|
|||||||
| WIP - Street Post topics for any "Works In Progress" street vehicles projects in this sub-forum. |
 |
 Show Printable Version | Show Printable Version |  Email this Page | Email this Page |  Subscribe to this Thread
|
|
|
Thread Tools |
 02-14-2008, 12:53 PM
|
#121 | |
|
AF Enthusiast

Join Date: Nov 2002
Location: Charlotte, North Carolina
Posts: 614
Thanks: 34
Thanked 6 Times in 6 Posts


|
Re: Ferrari 360 Modena, fully open
I have been watching this thread from the beginning, and I've got to tip my hat to you..great work, excellent paint skills, detailing, and man those engine lid shocks...just wow...great stuff man. I look forward to seeing the finished product. I'd say you are now up there with the top builders up here, and as I say with everyone else's top notch work, yours inspires me to try a liittle harder on each kit I build.
Great work man..good luck with the rest of the build. Gray Last edited by stryfe101; 03-04-2008 at 09:44 AM. |
|

|

|
|
02-16-2008, 12:30 AM
|
#122 | |
|
AF Regular
Join Date: Jul 2003
Posts: 446
Thanks: 5
Thanked 1 Time in 1 Post
|
Re: Ferrari 360 Modena, fully open
Not much else to add other than IT'S AWESOME WORK THERE!
It's also great narration and pics that you are using on the WIP thread that adds to the fun of it. I am looking forward to seeing the completed car.  Nenad
__________________

|
|
|
|
|
|
02-16-2008, 05:02 AM
|
#123 | |
|
AF Enthusiast

Join Date: Oct 2005
Location: Monza
Posts: 1,150
Thanks: 21
Thanked 56 Times in 38 Posts
|
Re: Ferrari 360 Modena, fully open
Oustanding craftmanship and neatness !!!
R  |
|
|
|
|
|
02-16-2008, 05:27 AM
|
#124 | |
|
Forza Schumacher
 
Join Date: Mar 2001
Location: Tallinn
Posts: 6,695
Thanks: 9
Thanked 19 Times in 19 Posts
|
Re: Ferrari 360 Modena, fully open
There are so many things in this build that I want(ed) to incorporate in some of mine! And now I have seen great ingenuous ways to do them. Absolutely fantastic work.
__________________
 Would love to resume my duties as AF's own official thread bastardizer!!!   1:29:53.435 || 207.316 || 310.596 |
|
|
|
|
|
02-17-2008, 11:44 PM
|
#125 | |
|
AF Newbie
 Join Date: Sep 2007
Location: Oklahoma city, Oklahoma
Posts: 17
Thanks: 0
Thanked 0 Times in 0 Posts
|
Re: Ferrari 360 Modena, fully open
You are doing a simply amazing job! Every time i lax off on mine i come look at yours and it inspires me to do better and get back to work on mine. I should have mine done in a week or 2. Hopefully.
Awesome job man, i almost wish i wasn't doing mine box stock and could incorporate some of the ideas and techniques you are using... Amazing |
|
|
|
|
|
02-18-2008, 07:28 AM
|
#126 | |
|
AF Newbie
Join Date: Jan 2005
Location: Cape town
Posts: 42
Thanks: 0
Thanked 0 Times in 0 Posts
|
Re: Ferrari 360 Modena, fully open
I just can't believe the effort you have gone into.....Amazing...you have definitely given me a few ideas for my projects.
|
|
|
|
|
|
02-18-2008, 09:59 PM
|
#127 | |
|
Getting Old...
 Join Date: May 2003
Location: Lugano, Switzerland
Posts: 753
Thanks: 0
Thanked 0 Times in 0 Posts
|
Re: Ferrari 360 Modena, fully open
Really great work on those gas struts for the back hatch. I would have made that much harder and more complicated.... Great stuff.
Thanks for the education... Murray |
|
|
|
|
|
02-19-2008, 06:59 PM
|
#128 | |
|
AF Newbie
 Join Date: Dec 2007
Location: Columbia
Posts: 77
Thanks: 0
Thanked 0 Times in 0 Posts
|
Re: Ferrari 360 Modena, fully open
i'm not sure if some one has asked this yetor if it is acurate, but is there some way to polish the PE parts or maybe create a brushed look on the cowl??
|
|
|
|
|
|
02-19-2008, 08:20 PM
|
#129 | ||
|
AF Enthusiast
Thread starter

Join Date: Feb 2007
Location: San Francisco, California
Posts: 950
Thanks: 1
Thanked 0 Times in 0 Posts
|
Re: Ferrari 360 Modena, fully open
Thanks for the comments. I'll try to get back to the updates soon, but I'm a bit busy here with work stuff. The good news is that I solved a problem that was holding things up a bit, just a painting issue, nothing that interesting. Oh, and one of the headlight lenses fell out!, so I got to try Joe's Future suggestion, and it works beautifully - no mess, no runs, and it's holding well.
Quote:
|
||
|
|
|
|
02-20-2008, 07:38 PM
|
#130 | |
|
AF Newbie
Join Date: Dec 2007
Location: Columbia
Posts: 77
Thanks: 0
Thanked 0 Times in 0 Posts
|
Re: Ferrari 360 Modena, fully open
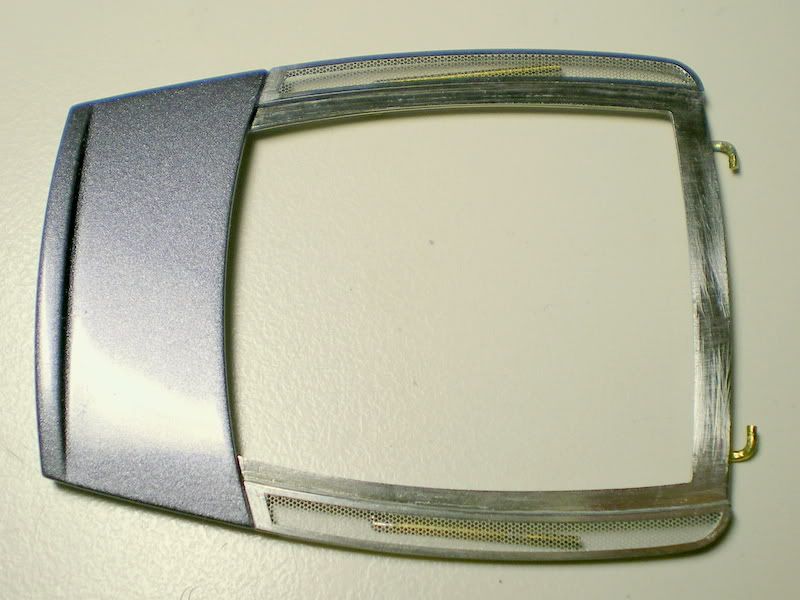
Sorry that what i said was misleading but what i ment was that the PE parts that made up the rear cowl looked rough(as in scratched and sanded) and i was wondering if there was a way to make it to look smoother. Like in this pic, it appears rough.
 |
|
|
|
|
|
02-21-2008, 08:16 AM
|
#131 | |
|
AF Enthusiast
Join Date: Sep 2004
Location: Tuttle, Oklahoma
Posts: 2,176
Thanks: 0
Thanked 24 Times in 21 Posts
|
Re: Ferrari 360 Modena, fully open
That only rquires a drop of primer to fill the scratches on stuff like that. Metal shows scratches SO much more than any other material...well, except glass maybe.
__________________
There is a very fine line between "hobby" and "mental illness." 
|
|
|
|
|
|
02-21-2008, 08:40 AM
|
#132 | ||
|
AF Newbie
Join Date: Feb 2006
Location: Berlin
Posts: 51
Thanks: 0
Thanked 0 Times in 0 Posts
|
Re: Ferrari 360 Modena, fully open
Quote:
Thomas |
||
|
|
|
|
02-29-2008, 02:56 PM
|
#133 | |
|
AF Regular
Join Date: Dec 2007
Location: Atlanta, Georgia
Posts: 136
Thanks: 0
Thanked 2 Times in 2 Posts
|
Re: Ferrari 360 Modena, fully open
Very nice work. What psi did you use on your mist and heavy coats for the base and clear?
|
|
|
|
|
|
03-11-2008, 06:09 AM
|
#134 | |
|
AF Enthusiast
Thread starter
Join Date: Feb 2007
Location: San Francisco, California
Posts: 950
Thanks: 1
Thanked 0 Times in 0 Posts
|
Re: Ferrari 360 Modena, fully open
Well, I've been going pretty slowly, in dribs and drabs but I've got a few items to show now. Actually there was a very big West Coast show last weekend (NNL West) which I wanted to attend and maybe meet some AFers. So I had to toss something together for that. I'll post a thread on NNL West soon, it was an amazing meet - unbelievable builds and plenty of amazing characters to meet.
I needed to finish up some big ticket items for the show. The biggest were the doors and windows. As I said in another thread somewhere, I wanted the windows to be removable, for that summer feel Didn't really know if it would work out, but here's how I set about it...After trimming off the molded-in trim, I had to polish the glass up. I used micromesh on a hard flat surface to prevent any rounding over of the window edges. 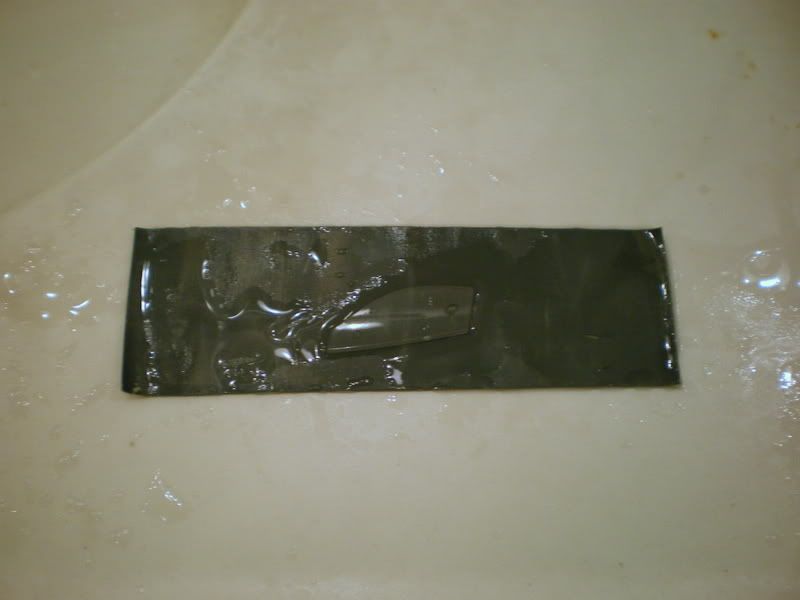 I didn't think it was possible really, but they came up very well. No more fear of polishing glass, err, I mean plastic...  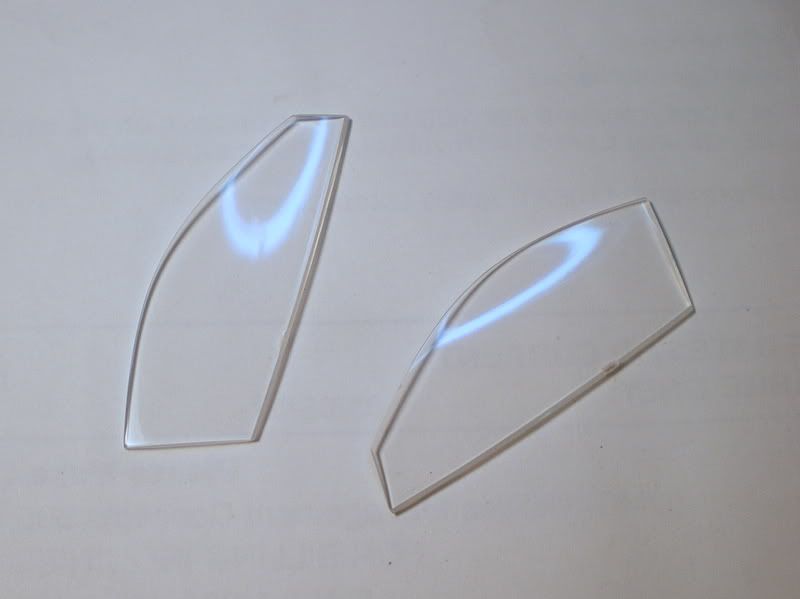 To hold the windows in place I used PE CA'd into a little notch. The sprue tabs left some damage in the window, damn it. It's barely noticeable on the car, so nothing too disastrous. I tried soaking some glue into it but only got marginal improvement. I might have been able to sand them down, but didn't realize until it was too late. Oh well, live and learn... 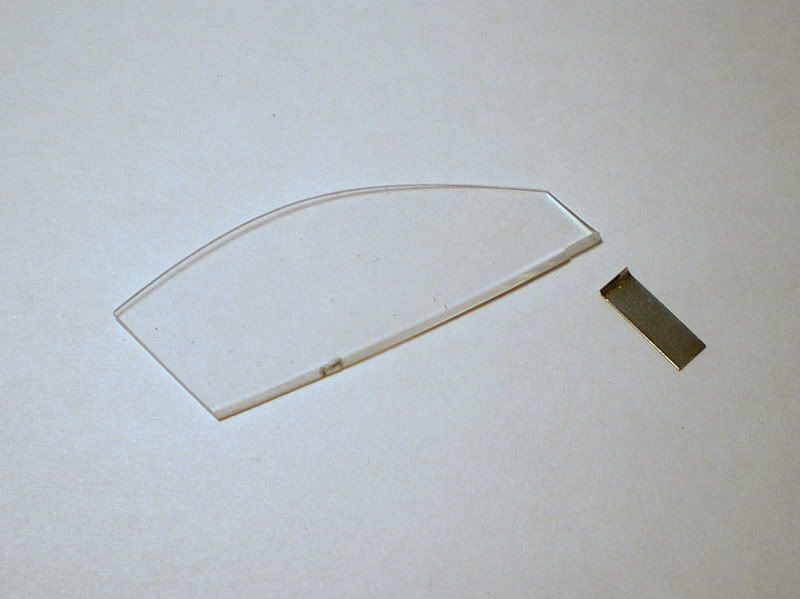 This joint is surprisingly strong, I though it would just fall apart. 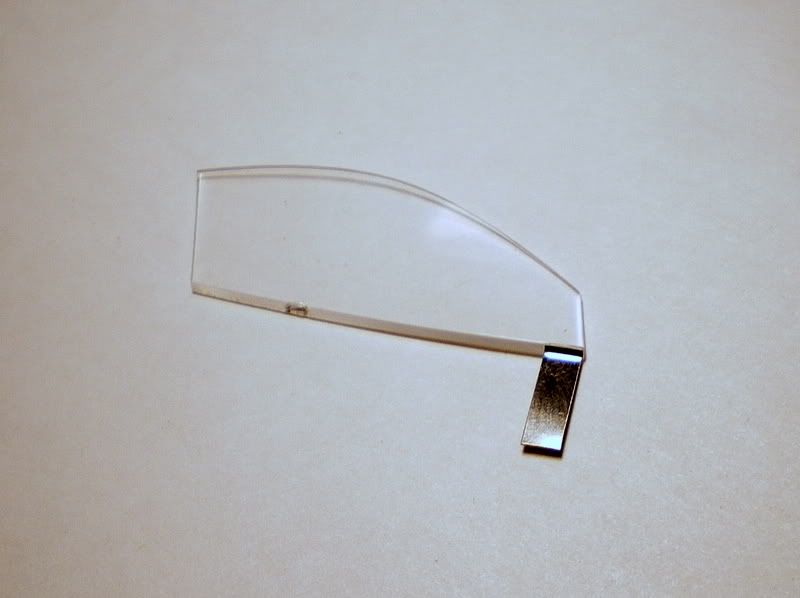 Et voila... 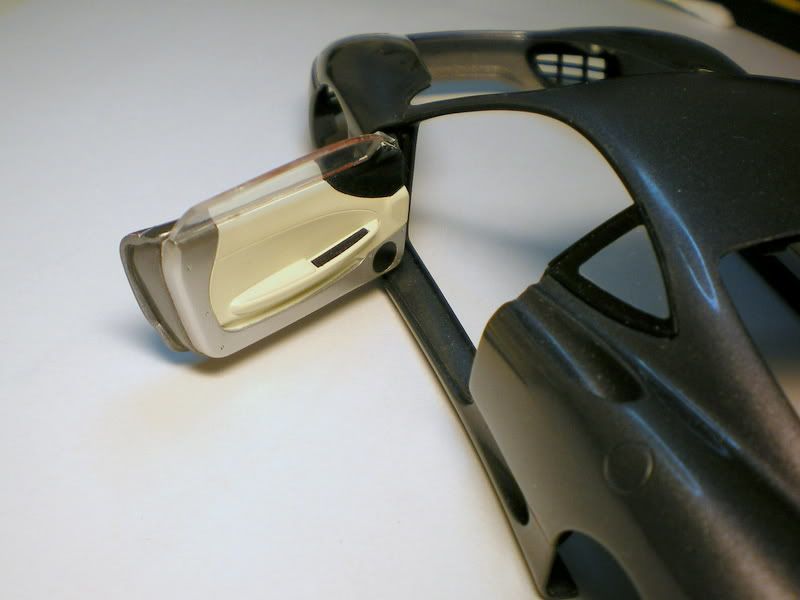 Fit is good, thank Dog. 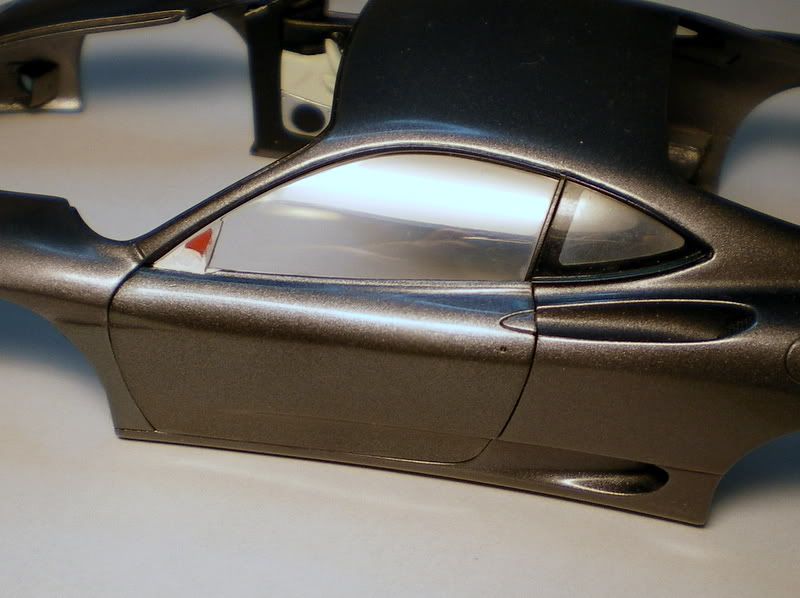 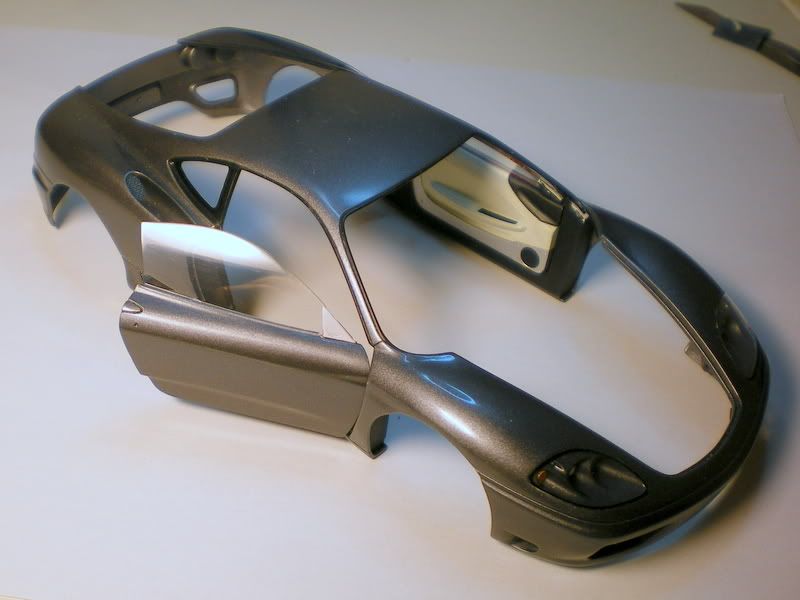 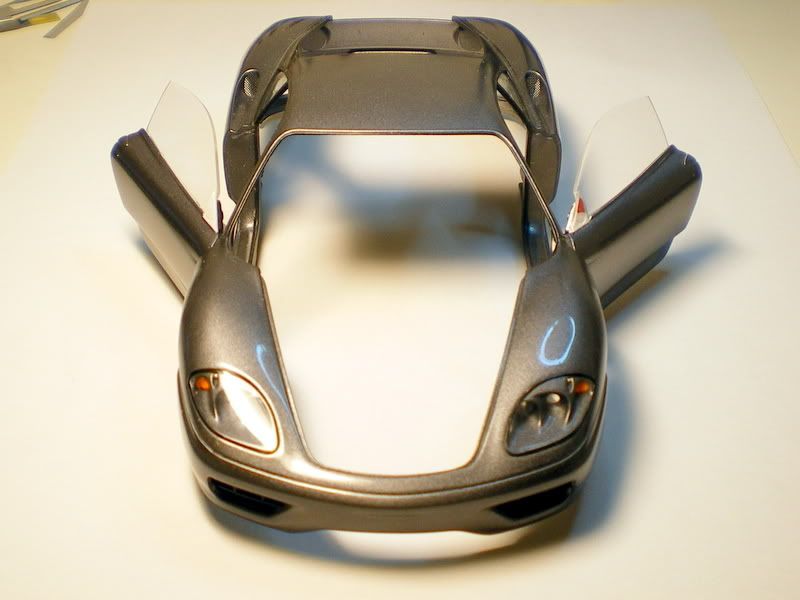  Here's an interesting challenge. I did some experiments and much prefered using cement to hold the mirror on - it creates a joint that looks just like the 1:1. But one mistake and it's curtains!!! This little arrangement has the tweezers carefullly balanced so that I can line up, glue, and then lower the mirror very slowly and very precisely into place. It worked beautifully - seriously, the mirror joint looks amazing! (lol, time to see a shrink I think  ) ) The grills were done earlier - from the kit mesh, it looks best by far on the diagonal I think. The PE set had them done square, so I didn't use them, the kit mesh looked better anyway imho. 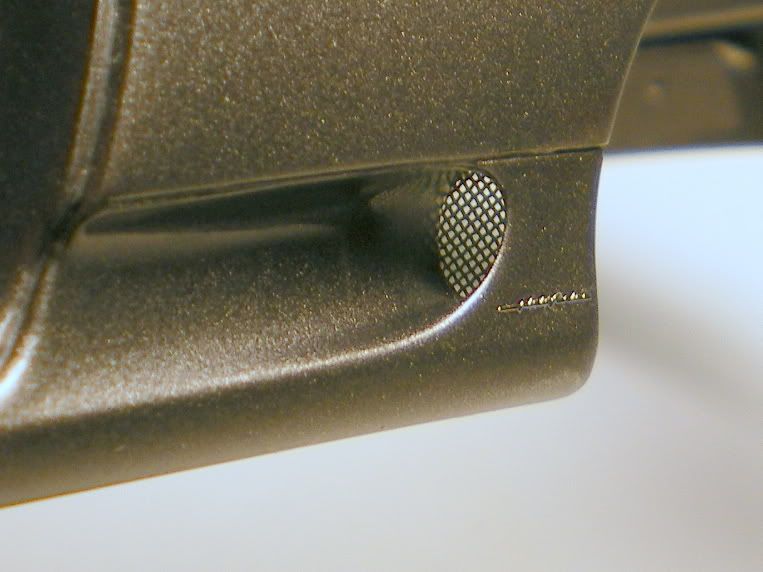 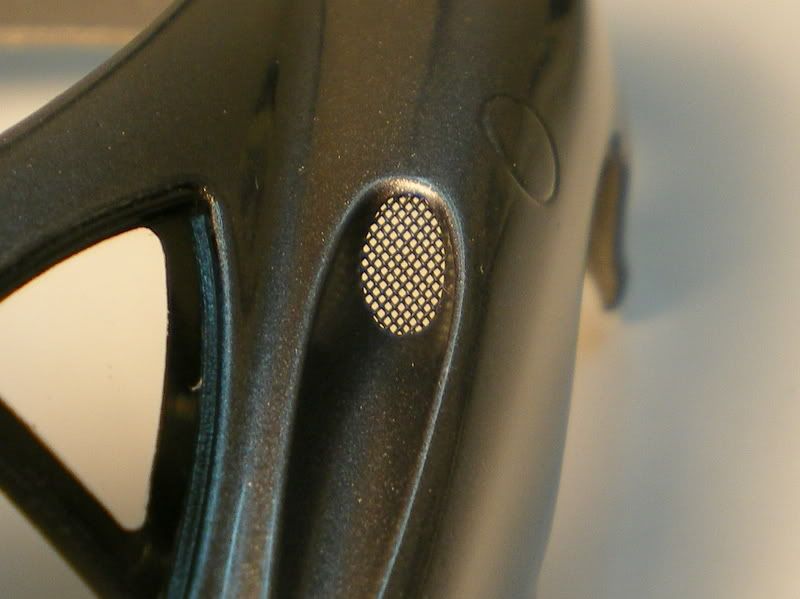 Metal stickers and license plate done. Extremely ugly molded-in kit exhaust grills were cut out and replaced with nice PE version (nice, but a lousy fit).  Nice and shiny for the big show! But nowhere near finished (NNL West thread coming soon)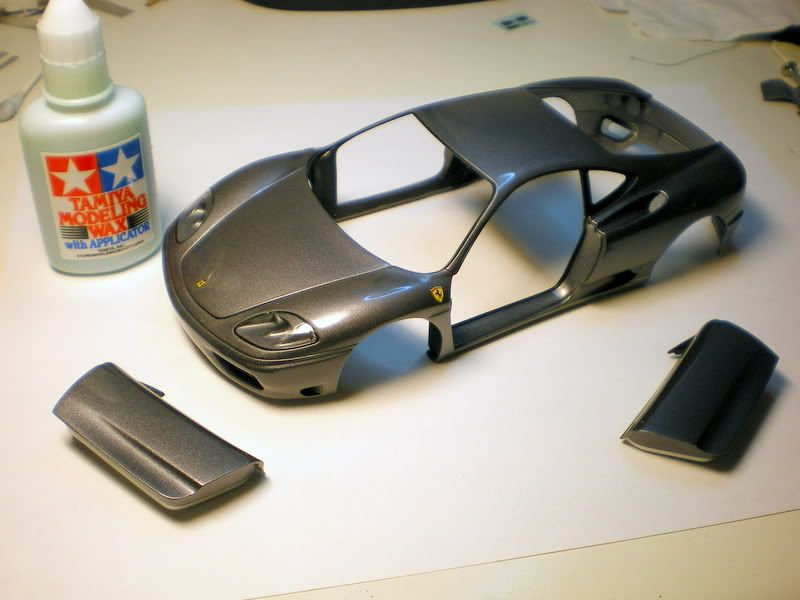  Here's some work I completed since the show last weekend. Stripped the chrome off the kit exhaust tips... 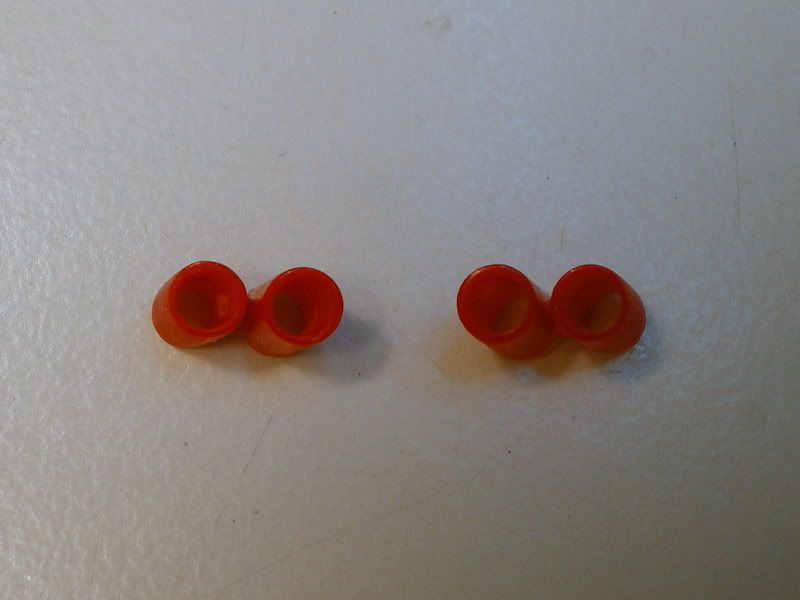 Then accidentally gave them a swim in lacquer thinner. DOH!!!!  Oh well, they were junk anyway, so I made some polished aluminium tips. Oh well, they were junk anyway, so I made some polished aluminium tips. 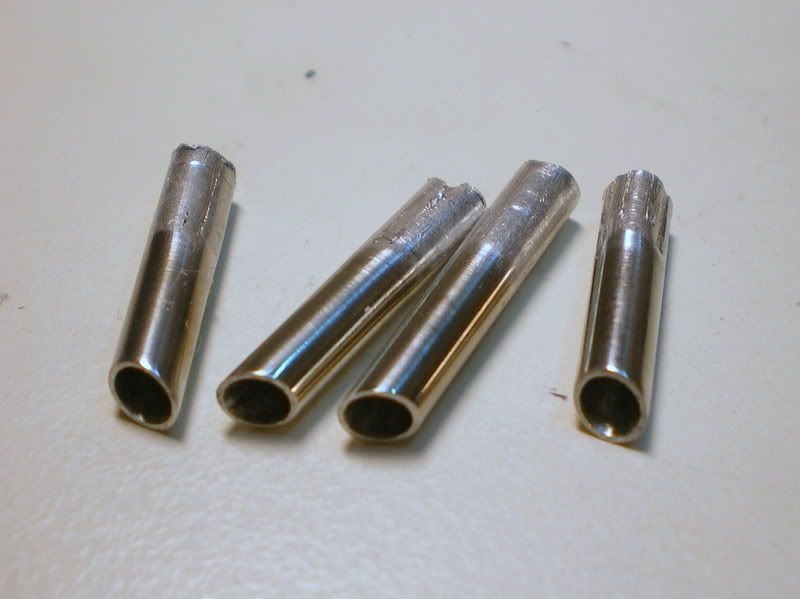 Now here is something different. I insist on the body being detachable from completed model. This is really hard to do with this kit - it has you glue the tips on after the body is closed up. Shock horror - NO WAY!!!! I computed several sneaky ways to get around this, but in the end kept coming back to this whacky idea. I will hang the tips off the internal rear light frames on the body, instead of attaching them to the exhaust pipes on the chassis! Seems nuts, but it works for me!  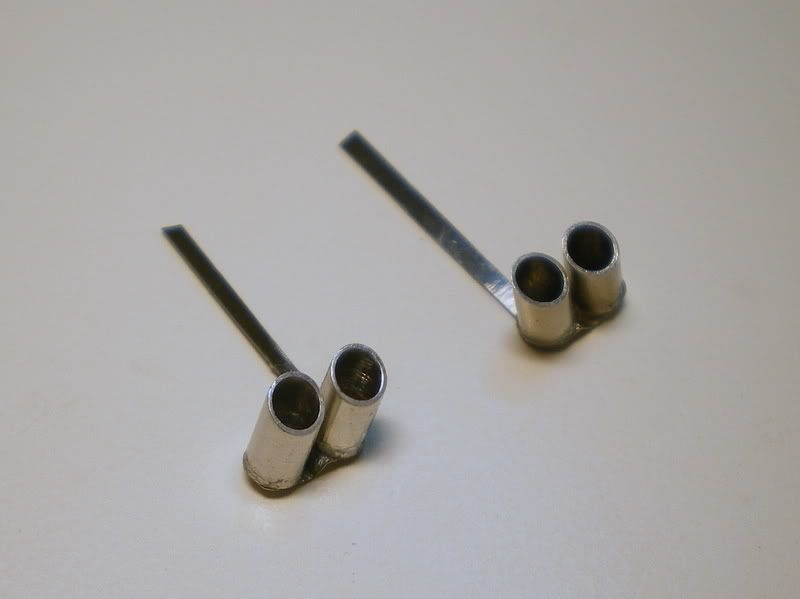 The tips are CA'd onto PE frames. They're super shiny - basically mirrors. I hope it doesn't start to look weird with oxidization over time. I'll repolish and clear them if that happens.  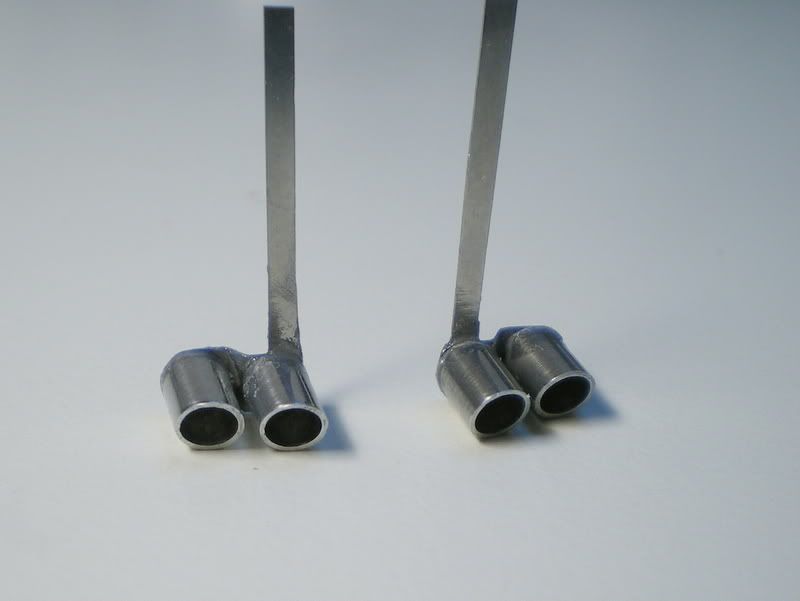 Da da!!! Kinda weird, but hey, what can I say?? 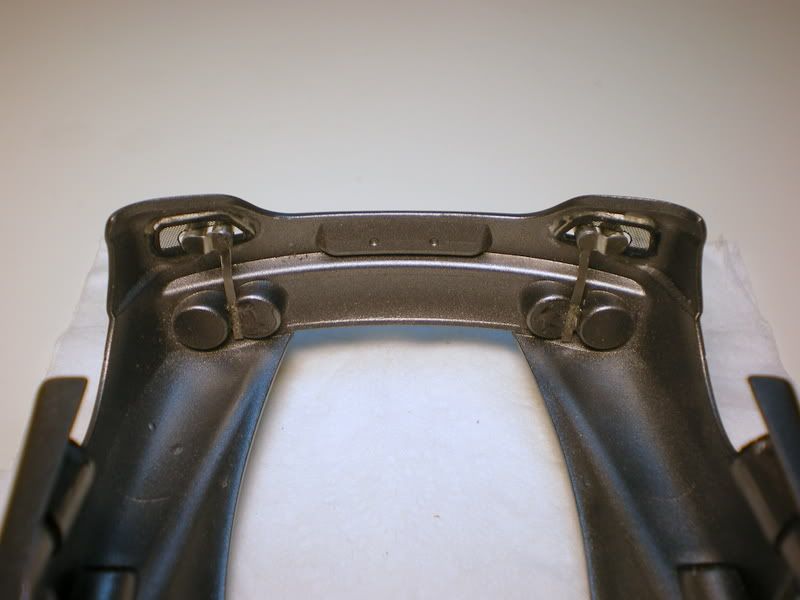 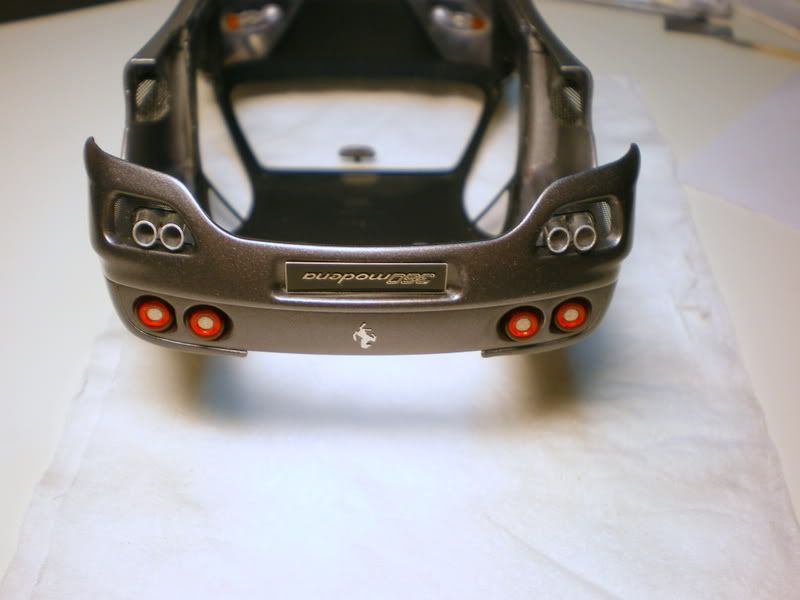 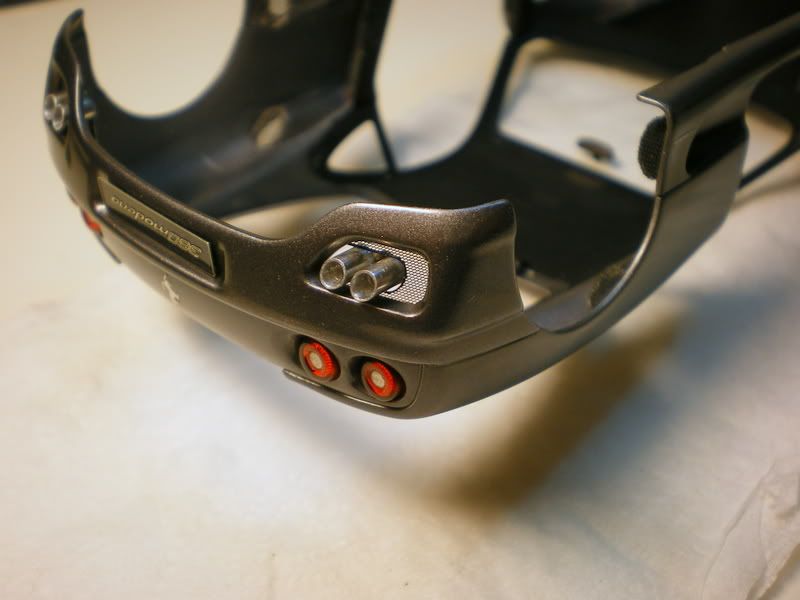 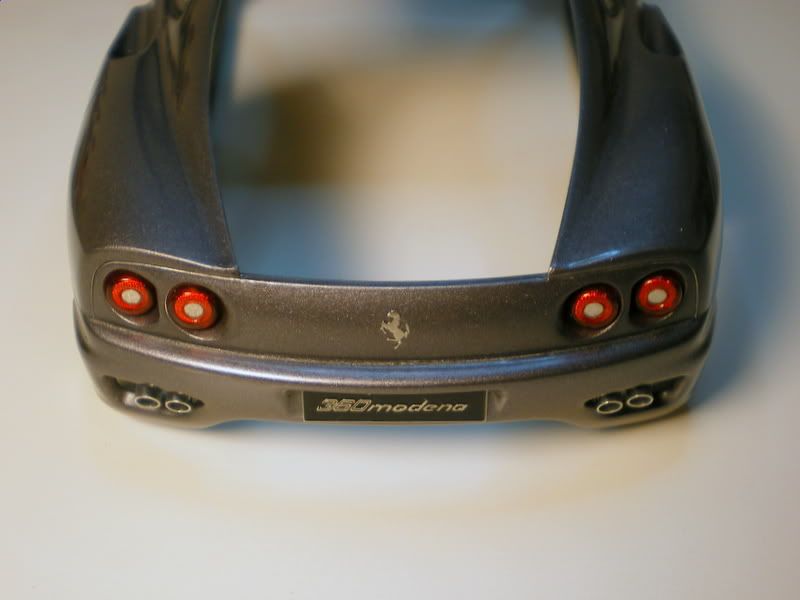 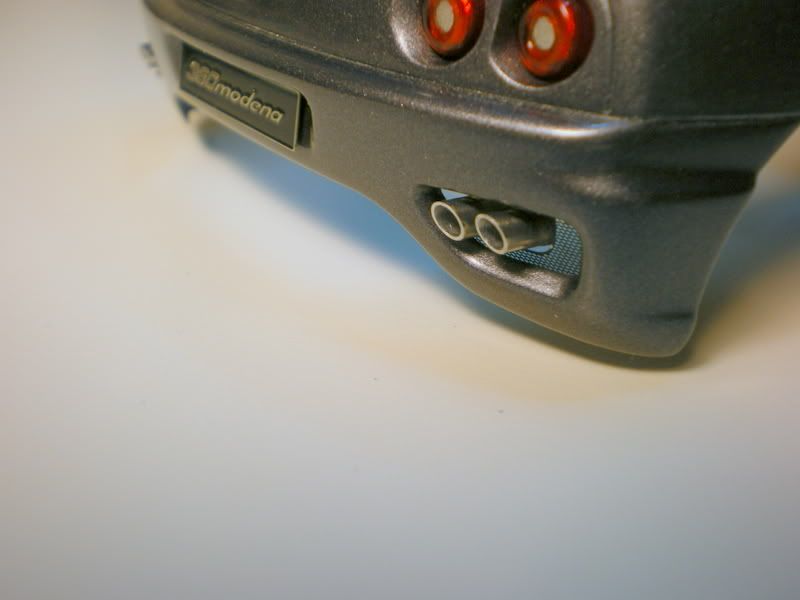 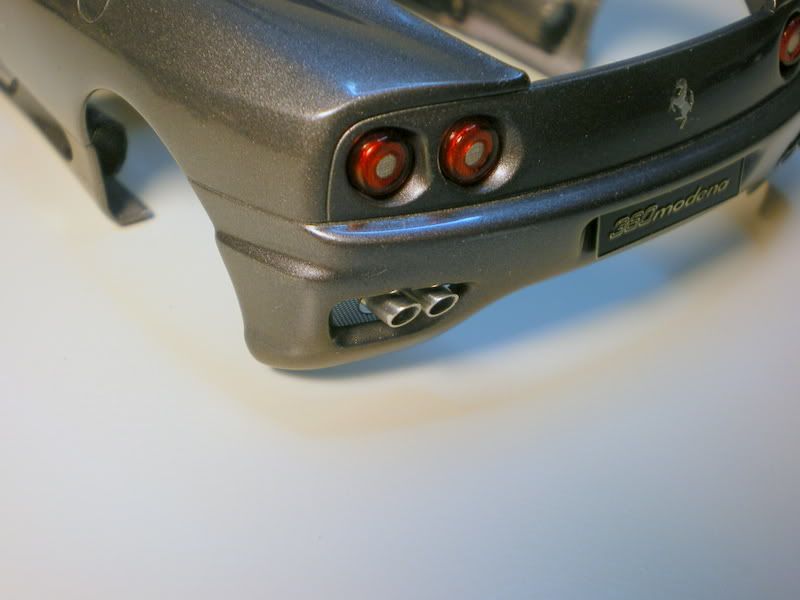 Just a tad larger than the kit tips, they look nice and fat! 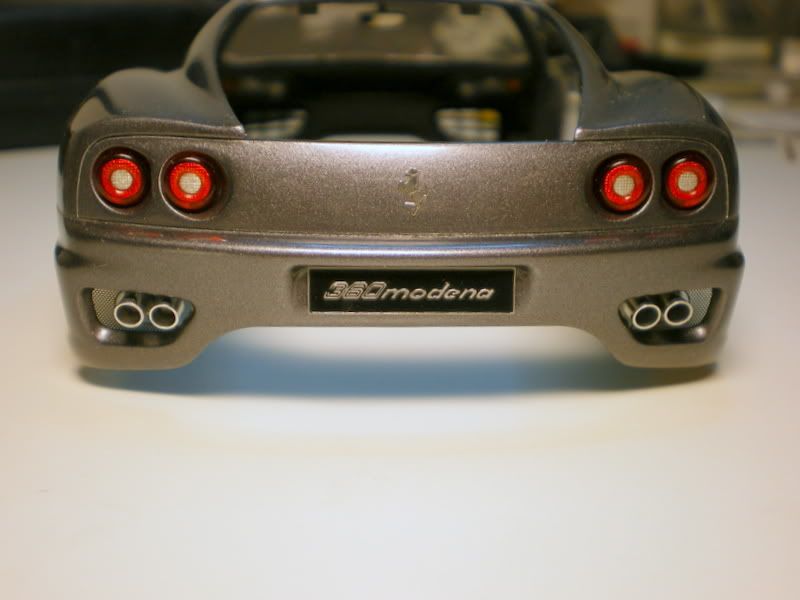 I can't believe it's still not finished, but the last little details seem to soak up a lot of my (limited;-() time. But real soon now!!!  opcorn: opcorn: |
|
|
|
|
|
03-11-2008, 06:20 AM
|
#135 | ||
|
AF Enthusiast
Thread starter
Join Date: Feb 2007
Location: San Francisco, California
Posts: 950
Thanks: 1
Thanked 0 Times in 0 Posts
|
Re: Ferrari 360 Modena, fully open
Quote:
NSX Fan: Those scratches are microscopic, paint covers easily, and actually, I think it's best to slightly rough up the PE before painting. Thanks for the questions. |
||
|
|
|
|
|
POST REPLY TO THIS THREAD |
 |
|
|