|
|
|

|
|
| Search | Car Forums | Gallery | Articles | Helper | AF 350Z | IgorSushko.com | Corporate |
|
| Latest | 0 Rplys |
|
|||||||
| WIP - Motorbikes Post topics for any "Works In Progress" motobikes projects in this sub-forum. |
 |
 Show Printable Version | Show Printable Version |  Email this Page | Email this Page |  Subscribe to this Thread
|
|
|
Thread Tools |
 09-08-2010, 11:07 PM
|
#1 | |
|
AF Newbie
Join Date: Aug 2010
Location: panama city, Florida
Posts: 14
Thanks: 0
Thanked 0 Times in 0 Posts
|
Intro, WIP (2005 M1) & Help!
Hello,
I've been stalking the forums for a little while and I am completely in awe at the work you guys produce, very inspirational. I hope to be able to progress to the level of detail you produce. I started building 1/12 scale motorcycles about five years ago. After a while I was getting very disgruntled as I could not reproduce to the results I would see on the web, so I took almost a three year hiatus. I have recently returned and my first build back is the Laguna 2005 M1. Nothing really impressive in my build (and nothing you probably haven't seen 100 times already)but I do need some help. Below are the pictures of the side fairings. The Tamiya set has each fairing in two pieces. The problem I am having is I cannot get the fill correct. Too much and it gets into places I cannot get the sandpaper. Too little and the seam is still shows through the primer. I am almost to the point where I am going to cut the part at the seam out, re-glue and live with it. I am hoping someone can give me some advice on how they did it. Any and all comments are welcome. I have thick skin so if you think something looks like crap feel free to point it out. I only ask if you are going to do that help me fix it! My goal is to get better!    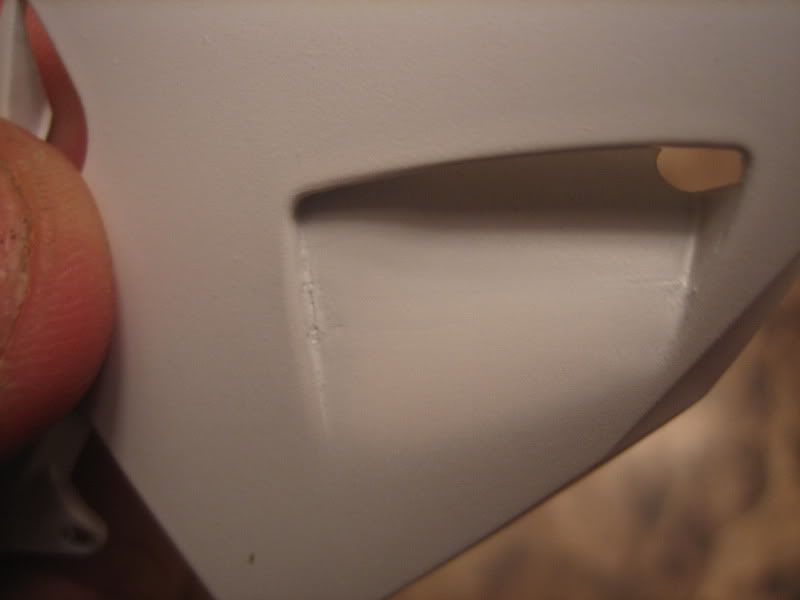 WIP pics (sorry for the bad lighting)   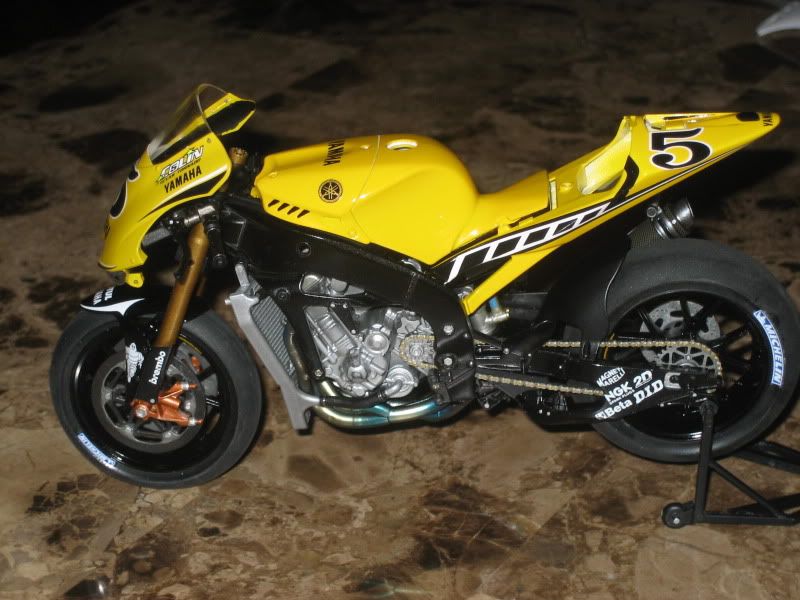 Thank you in advanced! Erik |
|

|

|
|
09-08-2010, 11:52 PM
|
#2 | |
|
AF Fanatic

Join Date: Feb 2004
Location: Hartford, Connecticut
Posts: 5,601
Thanks: 7
Thanked 108 Times in 103 Posts
|
Re: Intro, WIP (2005 M1) & Help!
Welcome aboard. That m1 looks good even with bad lighting. For the gaps i would use course sand paper like 800-600 or so to sand down the putty. The thing is the better you apply the putty the less sanding you will have so using the right tools is key. Like small sculpting tools work wonders, but your average #2 blade will do also. Try to apply the putty thin, and if not enough when sanded apply more and repeat. Also micro files work good when trying to get into the tiny places your fingers cant. Small pieces of sand paper bent work good too. Its really going to depend on your way of tackling it.
I typically use regular tamiya,mr hobby, or super glue gel for seams. Bigger gaps i use milliput which is my favorite 2-part epoxy. Just becareful theres been a few times i got it and it was too old (expired and hard as a rock). So check it if you can when you buy it, should be soft. Good luck.
__________________
In Progress    
|
|
|
|
|
|
09-09-2010, 07:27 AM
|
#3 | |
|
AF Enthusiast

Join Date: Dec 2005
Location: Southampton
Posts: 701
Thanks: 27
Thanked 8 Times in 8 Posts
|
Re: Intro, WIP (2005 M1) & Help!
From the wip pictures it does'nt look like your doing anything wrong, clean paint, correct colours, nice looking build.
For seam filling I used to use putty's etc, but found similar problems that you have. Now I use super glue, dried off quickly with zip kicker. I glue to two parts together (super glue) and then sand the seam a little. This helps key the part. I then run a line of glue along each seam using a cocktail stick and then cure with the Zip Kicker, It instantly ready for sanding. I then gently use a 600 grit paper to level off the glue and finish with 1500 grit. I like the fact that you dont get air pockets with glue and for me this method adds strength to the joint too. On awkward areas I just use rolled up sanding paper (the wet n dry type) on a cocktail stick. I've used this method for some years now for basic seam work and it's never failed me.
__________________
Paul On the bench; 2003 LV Rossi Honda RC211V |
|
|
|
|
|
09-09-2010, 08:51 AM
|
#4 | ||
|
AF Regular

Join Date: Sep 2008
Location: Jacksonville, Florida
Posts: 310
Thanks: 11
Thanked 3 Times in 3 Posts
|
Re: Intro, WIP (2005 M1) & Help!
Quote:
Stuart p.s. welcome fellow Floridian! |
||
|
|
|
|
09-09-2010, 10:16 AM
|
#5 | |
|
AF Newbie
Thread starter
Join Date: Aug 2010
Location: panama city, Florida
Posts: 14
Thanks: 0
Thanked 0 Times in 0 Posts
|
Re: Intro, WIP (2005 M1) & Help!
I appreciate the feedback.
I will definitely try the superglue method with the zip kicker. I assume that the zip kicker can be found at any local hardware store? Does this method work on the smaller parts as well? One thing I have always found annoying is that on the smaller parts it was too messy to try and fill in with putty and sand so I end up having all these smaller parts with seams in it. Again, thank you very much for the help. Erik |
|
|
|
|
|
09-09-2010, 05:12 PM
|
#6 | |
|
AF Newbie
Thread starter
Join Date: Aug 2010
Location: panama city, Florida
Posts: 14
Thanks: 0
Thanked 0 Times in 0 Posts
|
Re: Intro, WIP (2005 M1) & Help!
After more sanding, priming, sanding, priming, sanding and priming than I care to admit, I have it as best as I can get it. It is still not perfect however, it's something I will be able to live with.
I applied the base coats with Tamiya TS47 chrome yellow. I will allow this to dry over night, assemble the side fairings with the upper and lower so I can apply decals, then clear coat. Again, thank you for the help! 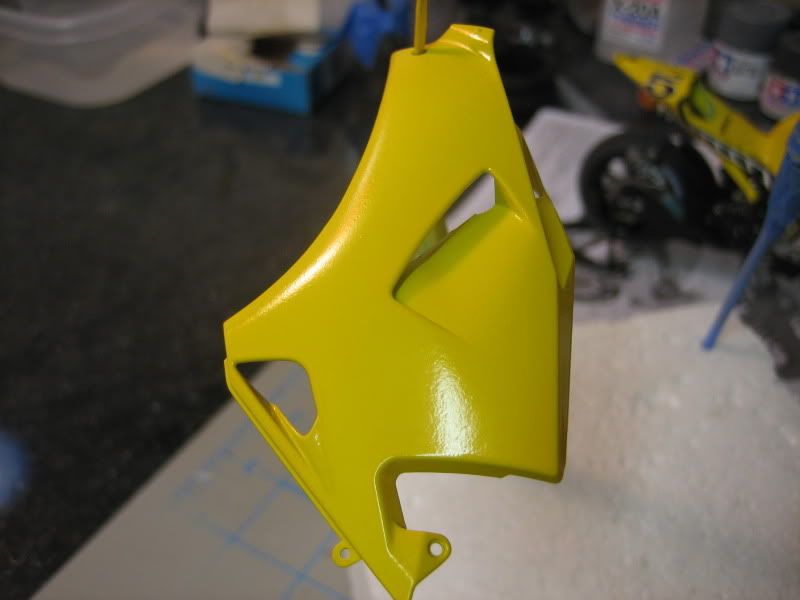 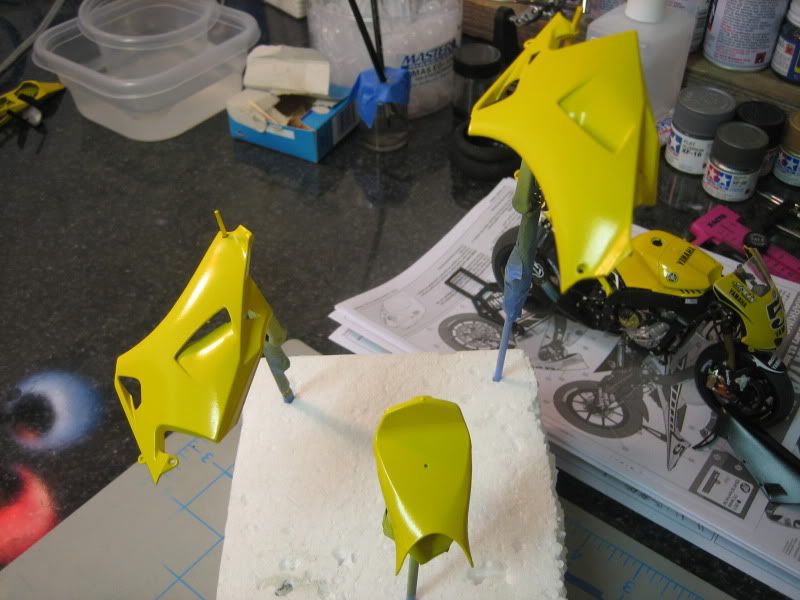 Erik Last edited by luke76; 09-09-2010 at 05:13 PM. Reason: I need to learn how to spell.......... |
|
|
|
|
|
09-13-2010, 06:18 PM
|
#7 | |
|
AF Newbie
Thread starter
Join Date: Aug 2010
Location: panama city, Florida
Posts: 14
Thanks: 0
Thanked 0 Times in 0 Posts
|
Almost done
The only thing I have left to do is to paint and assemble the rear brake reservoir. I would take care of it real quick but I am sitting here awaiting for the A/C repairman to show up at my house. Apparently my A/C unit decided that it would kick the bucket today, you know, when the heat index is 105 F.
I still do not have a photo booth fabricated yet, so bear with me on the photo quality. Thanks for looking. Erik 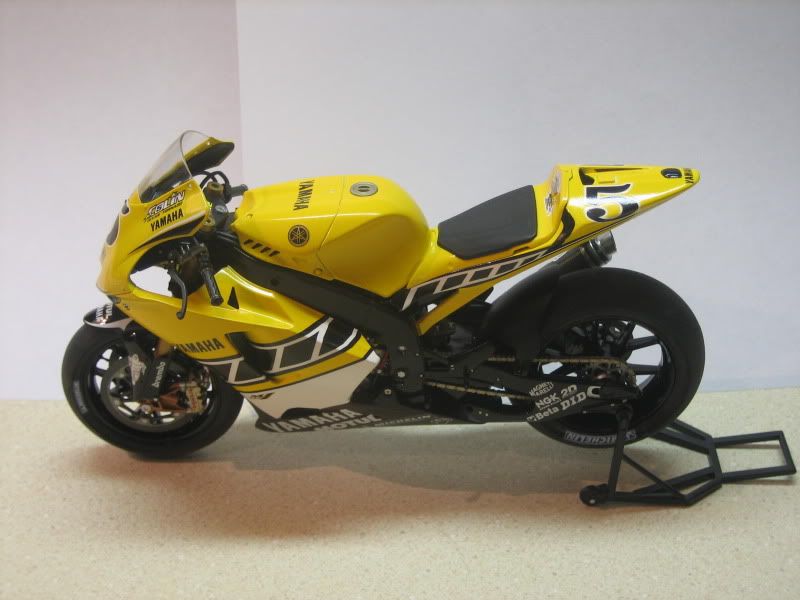  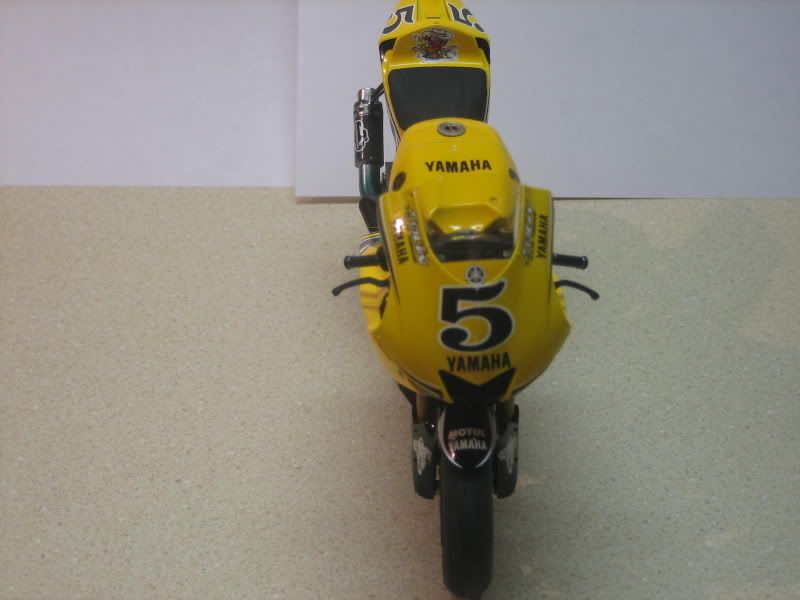  Safety wire for hand controls were done using bare wire from a coax cable, wound tight using a pin vise.  |
|
|
|
|
|
|
POST REPLY TO THIS THREAD |
 |
|
|


