|
|
|

|
|
| Search | Car Forums | Gallery | Articles | Helper | AF 350Z | IgorSushko.com | Corporate |
|
| Latest | 0 Rplys |
|
|||||||
| WIP - Motorbikes Post topics for any "Works In Progress" motobikes projects in this sub-forum. |
 |
 Show Printable Version | Show Printable Version |  Email this Page | Email this Page |  Subscribe to this Thread
|
|
|
Thread Tools |
 02-15-2012, 05:19 PM
|
#16 | |
|
AF Enthusiast

Join Date: Feb 2006
Location: beringen
Posts: 682
Thanks: 0
Thanked 6 Times in 6 Posts
|
Re: Harley Samurai Chopper
great job can't wait to see the result. I'll be following this one.
__________________

|
|

|

|
|
02-28-2012, 02:45 PM
|
#17 | |
|
AF Regular
Thread starter

Join Date: Nov 2009
Location: Italy
Posts: 143
Thanks: 4
Thanked 1 Time in 1 Post
|
Re: Harley Samurai Chopper
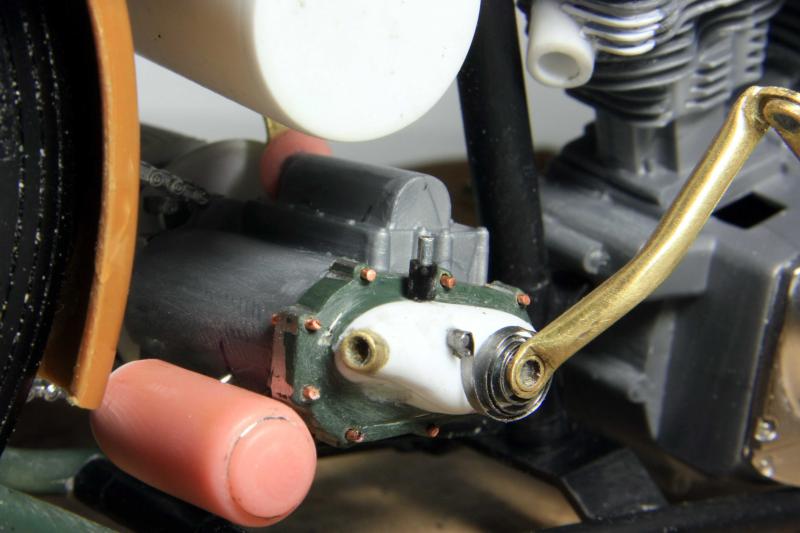
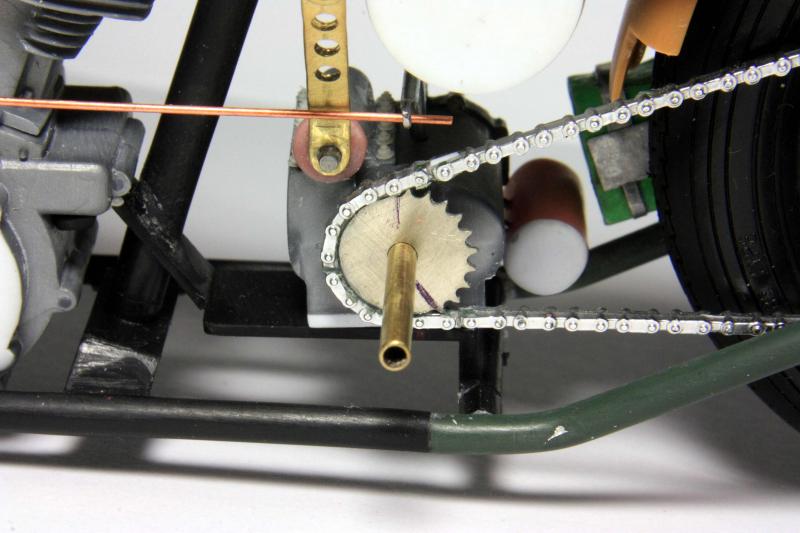
These days I built the carburator..
I saw some pictures on the web and I was inspired to build it. I used a tube of brass, a sheet of plasticard and bits of wire. 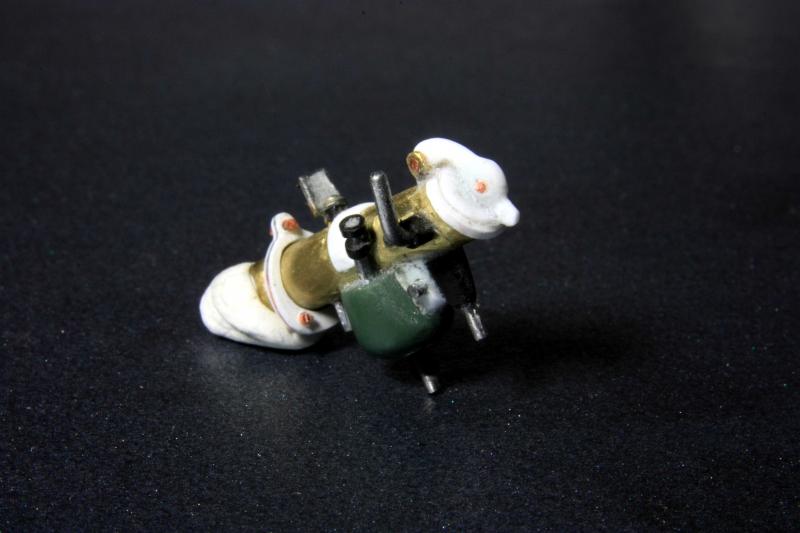 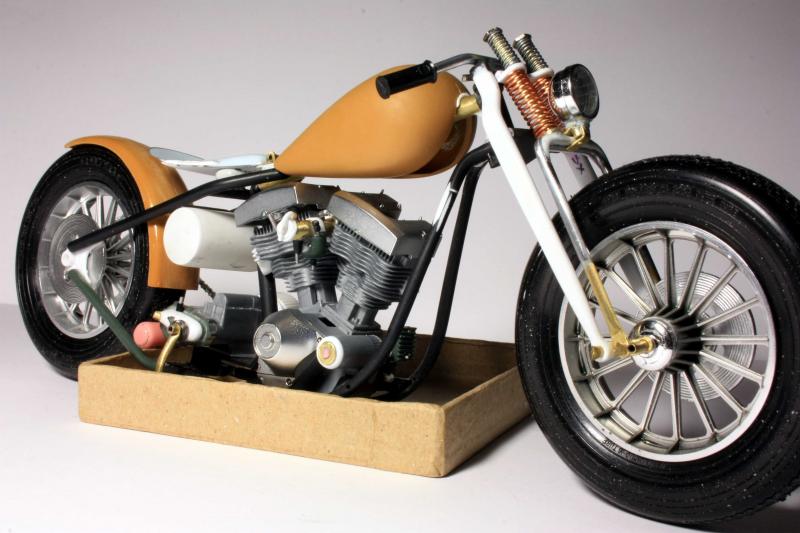 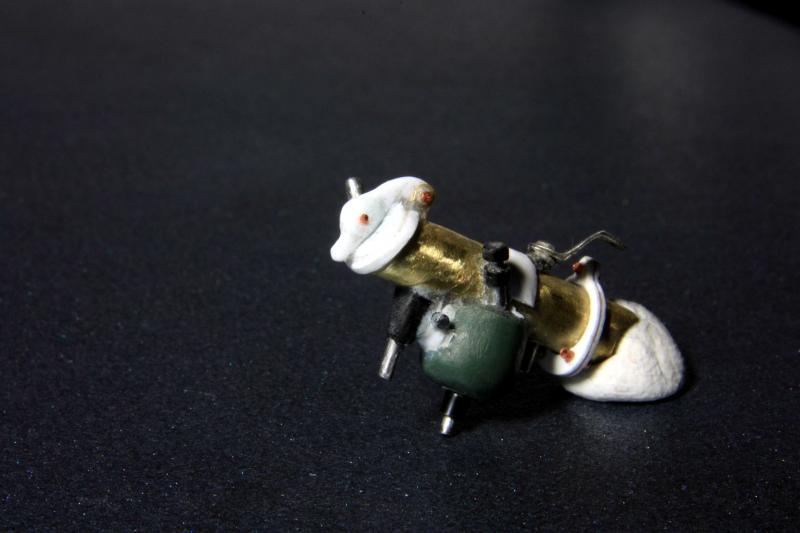 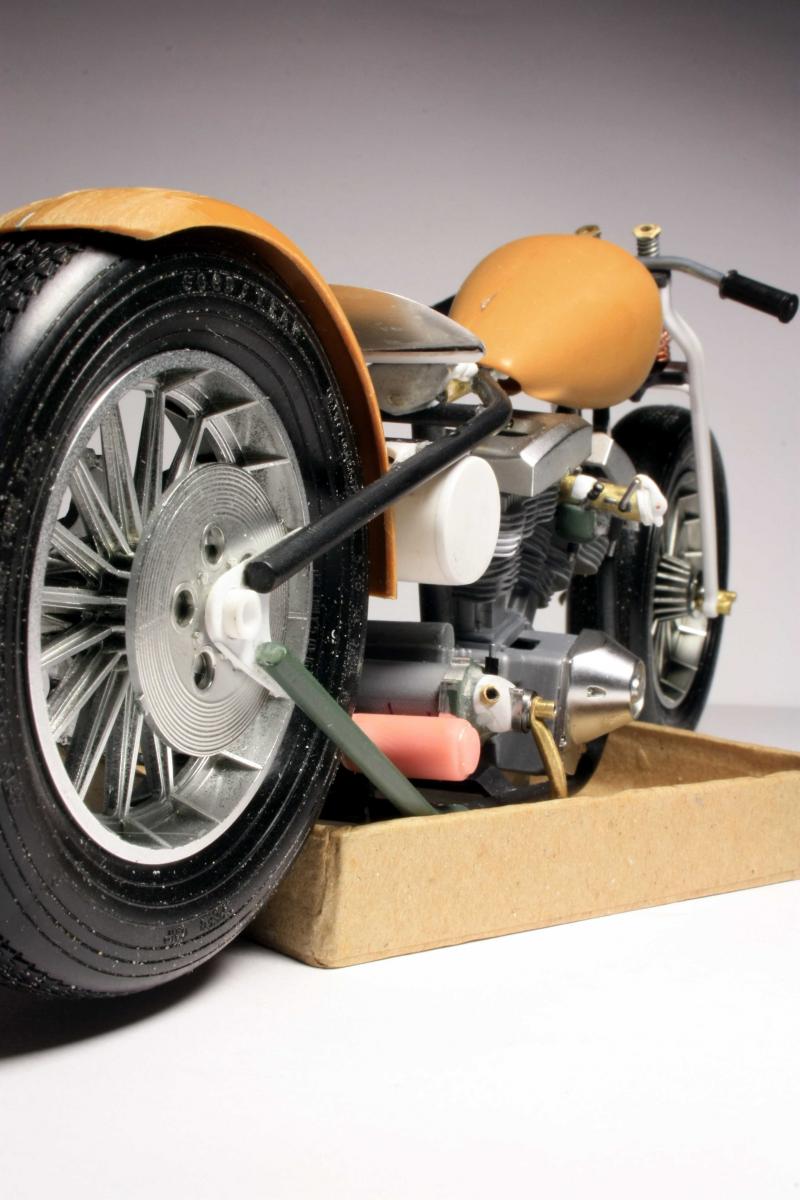 |
|
|
|
|
|
03-05-2012, 03:50 PM
|
#18 | |
|
AF Regular
Thread starter
Join Date: Nov 2009
Location: Italy
Posts: 143
Thanks: 4
Thanked 1 Time in 1 Post
|
Re: Harley Samurai Chopper
     |
|
|
|
|
|
03-07-2012, 03:58 PM
|
#19 | |
|
AF Regular
Thread starter
Join Date: Nov 2009
Location: Italy
Posts: 143
Thanks: 4
Thanked 1 Time in 1 Post
|
Re: Harley Samurai Chopper
      |
|
|
|
|
|
03-19-2012, 08:16 AM
|
#20 | |
|
AF Regular
Thread starter
Join Date: Nov 2009
Location: Italy
Posts: 143
Thanks: 4
Thanked 1 Time in 1 Post
|
Re: Harley Samurai Chopper
    |
|
|
|
|
|
03-19-2012, 08:17 AM
|
#21 | |
|
AF Regular
Thread starter
Join Date: Nov 2009
Location: Italy
Posts: 143
Thanks: 4
Thanked 1 Time in 1 Post
|
Re: Harley Samurai Chopper
        |
|
|
|
|
|
03-21-2012, 07:50 AM
|
#22 | |
|
AF Regular
Thread starter
Join Date: Nov 2009
Location: Italy
Posts: 143
Thanks: 4
Thanked 1 Time in 1 Post
|
Re: Harley Samurai Chopper
I scratched exhaust using plasticard, brass and 2k putty.
It must already be well-finished.. 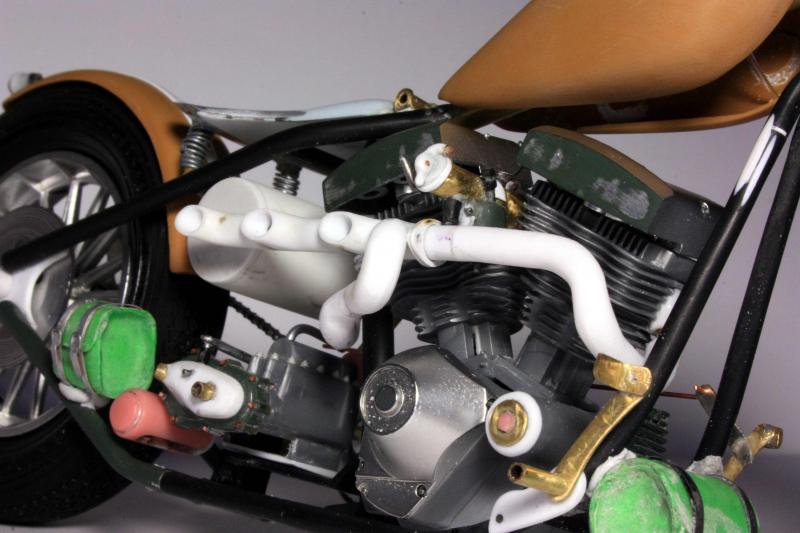 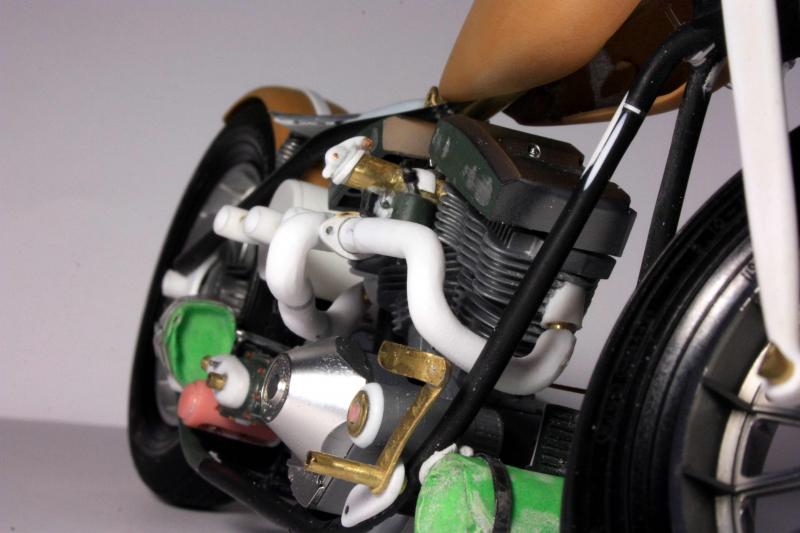 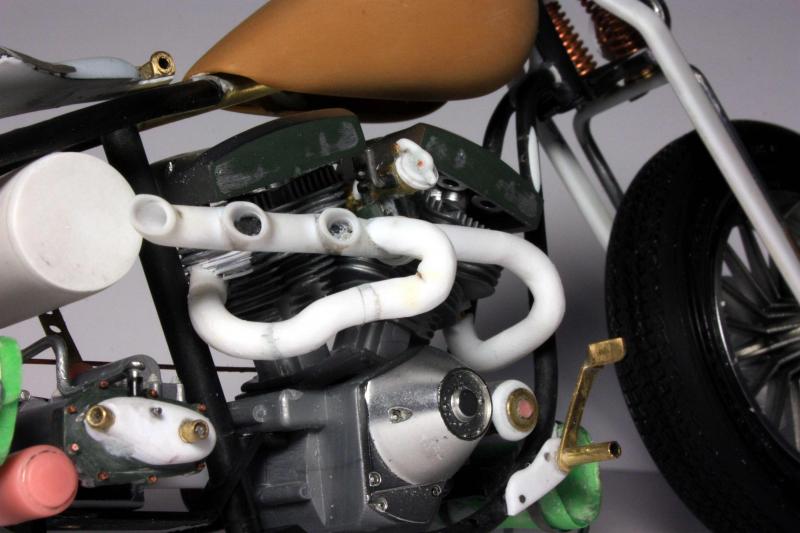 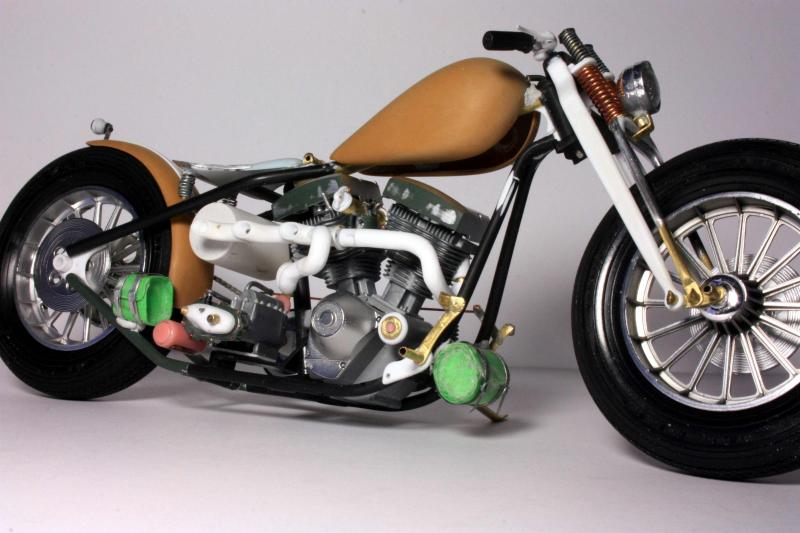 Last edited by Disca92; 03-30-2012 at 03:54 PM. |
|
|
|
|
|
03-21-2012, 01:55 PM
|
#23 | |
|
AF Enthusiast
Join Date: Feb 2006
Location: beringen
Posts: 682
Thanks: 0
Thanked 6 Times in 6 Posts
|
Re: Harley Samurai Chopper
This is looking great. I can't wait to see this one painted.
__________________
|
|
|
|
|
|
03-21-2012, 07:24 PM
|
#24 | |
|
Registered User
Join Date: Nov 2009
Location: Seoul, South Korea
Posts: 174
Thanks: 0
Thanked 3 Times in 3 Posts
|
Re: Harley Samurai Chopper
I love those details you made. Very nice.
|
|
|
|
|
|
03-30-2012, 04:05 PM
|
#25 | |
|
AF Regular
Thread starter
Join Date: Nov 2009
Location: Italy
Posts: 143
Thanks: 4
Thanked 1 Time in 1 Post
|
Re: Harley Samurai Chopper
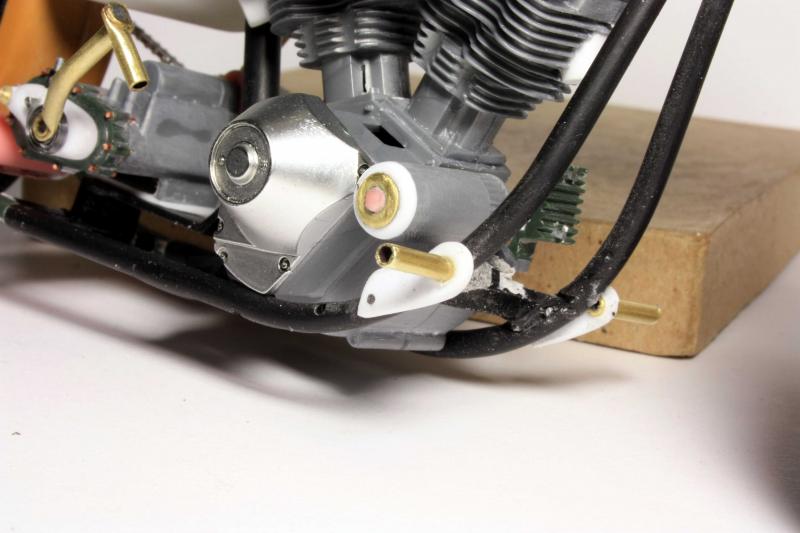
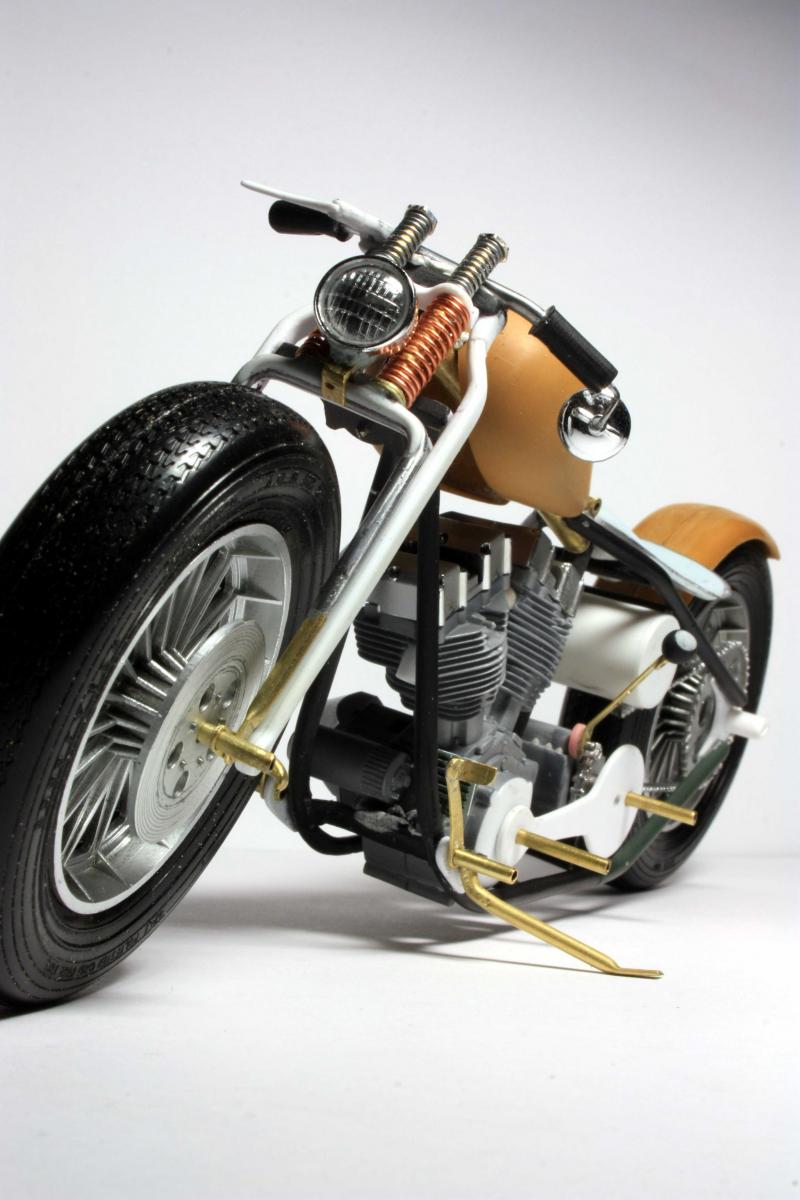
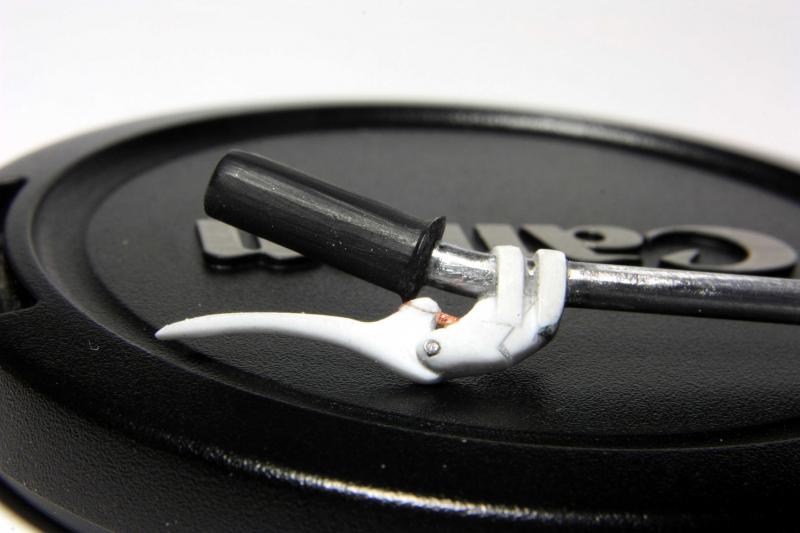
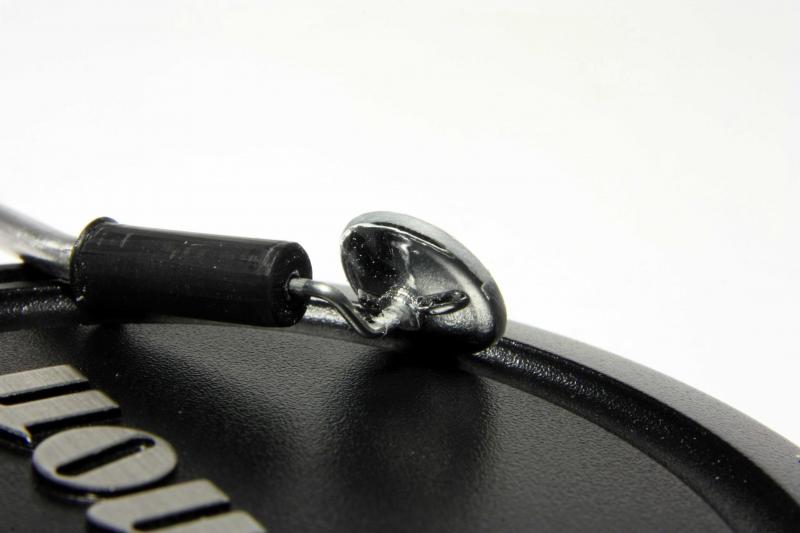
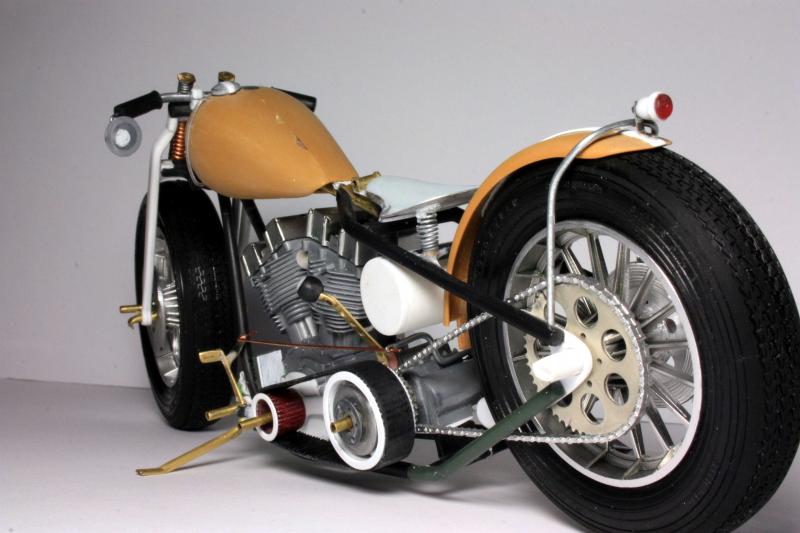
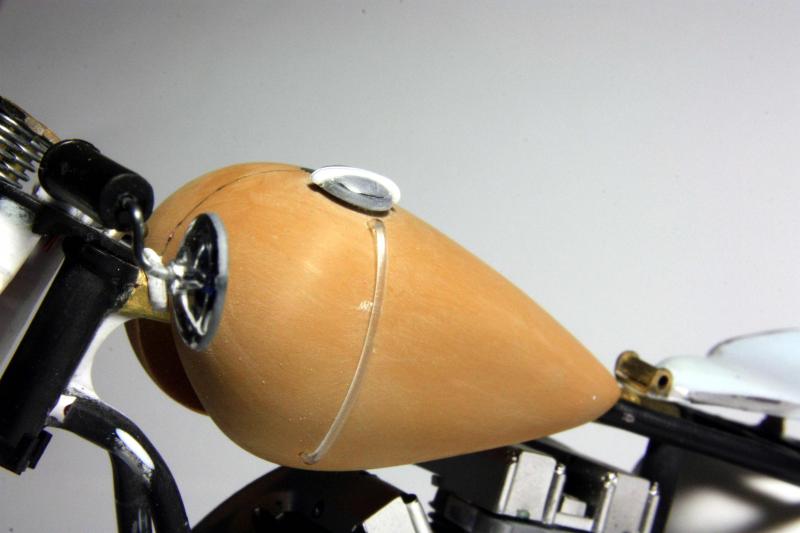
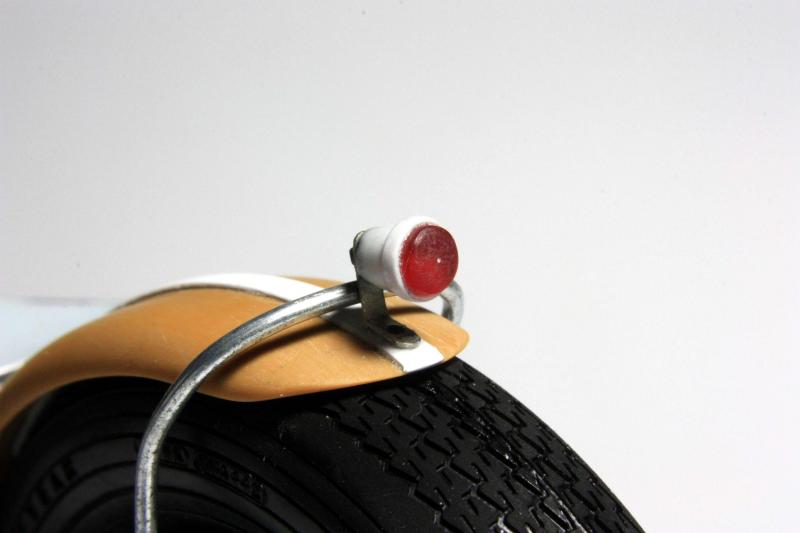
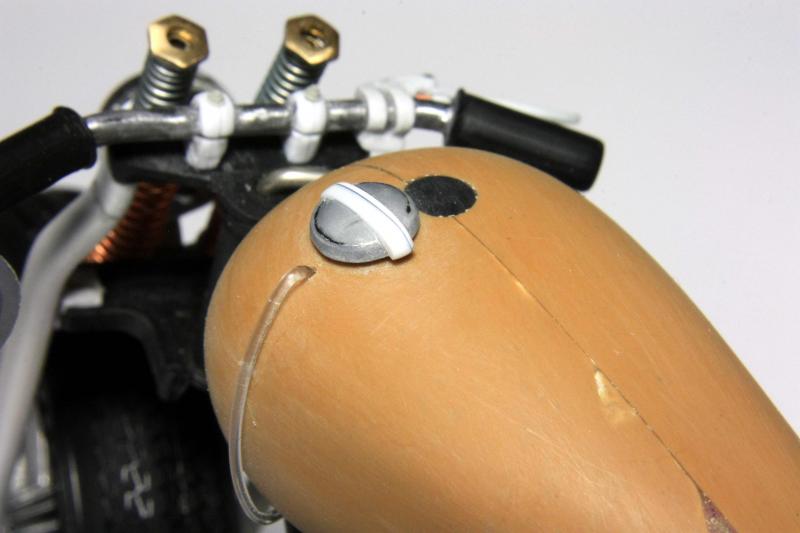
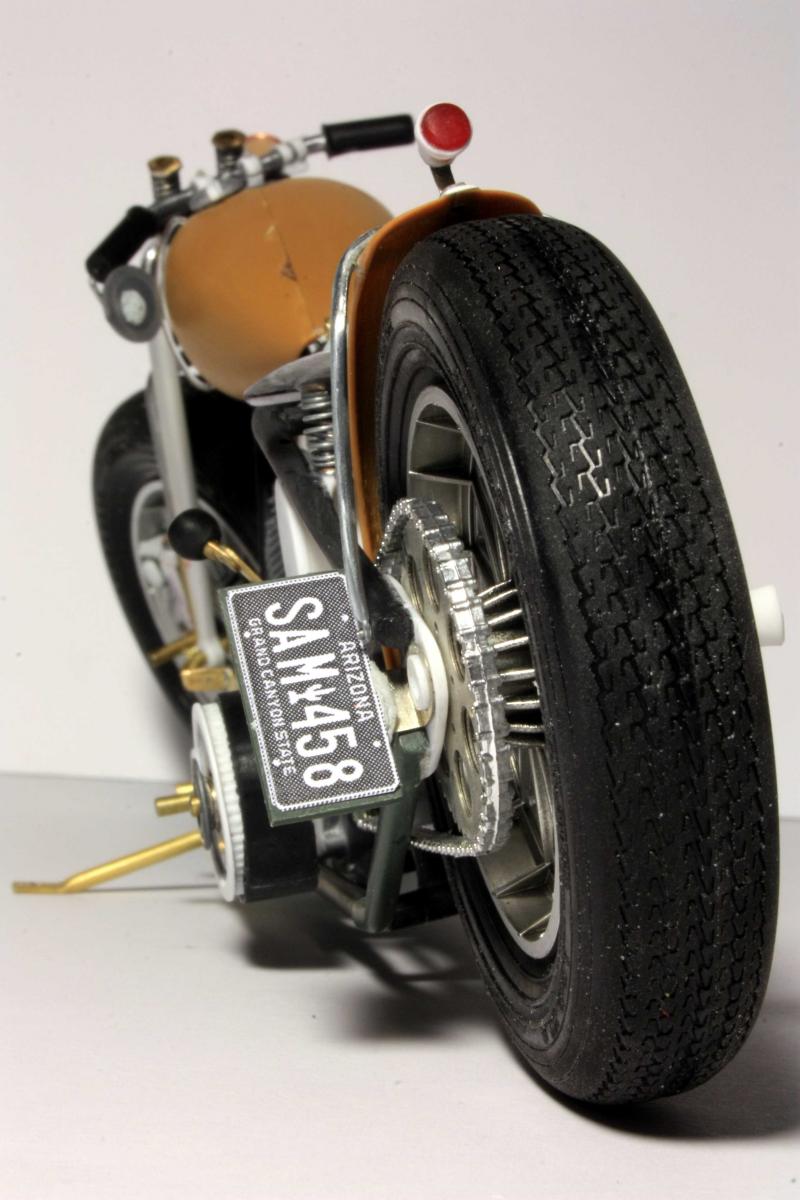
I modified the exhaust manifolds lowering them, then covered with wraps simulated with a medical adhesive gauze. I also scratched the speedometer and the license plate support
      |
|
|
|
|
|
04-05-2012, 10:23 AM
|
#26 | |
|
AF Regular
Thread starter
Join Date: Nov 2009
Location: Italy
Posts: 143
Thanks: 4
Thanked 1 Time in 1 Post
|
Re: Harley Samurai Chopper
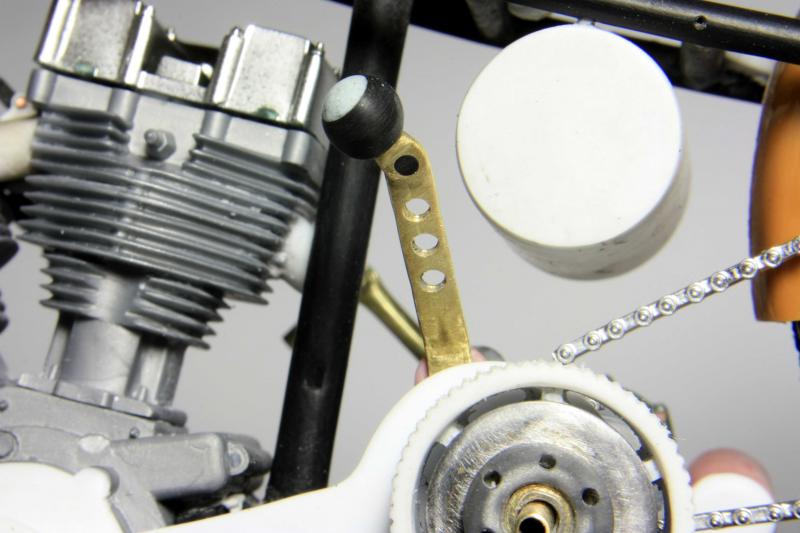
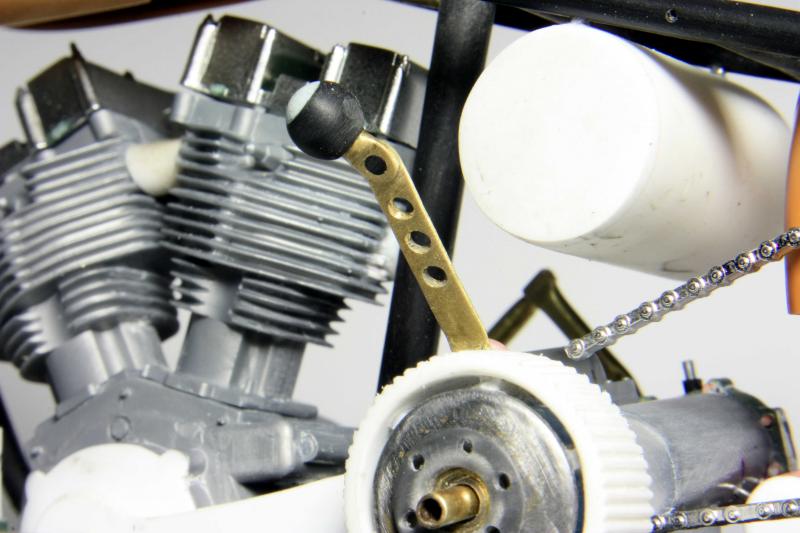
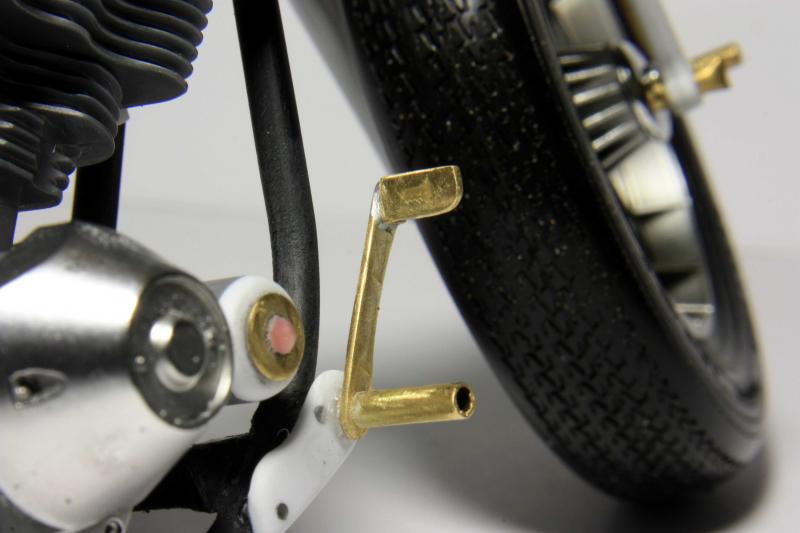
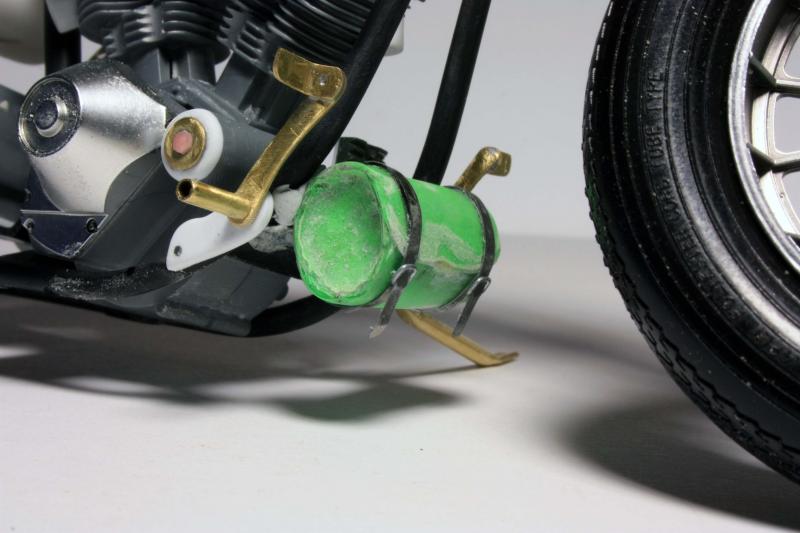
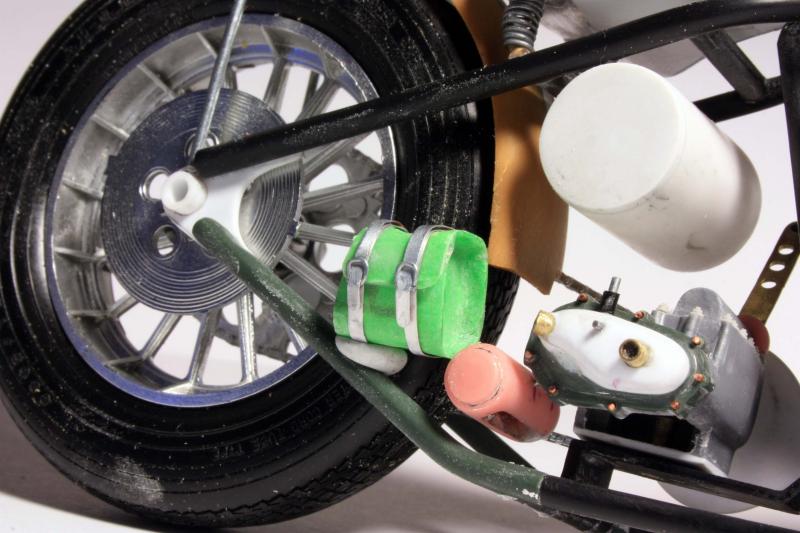
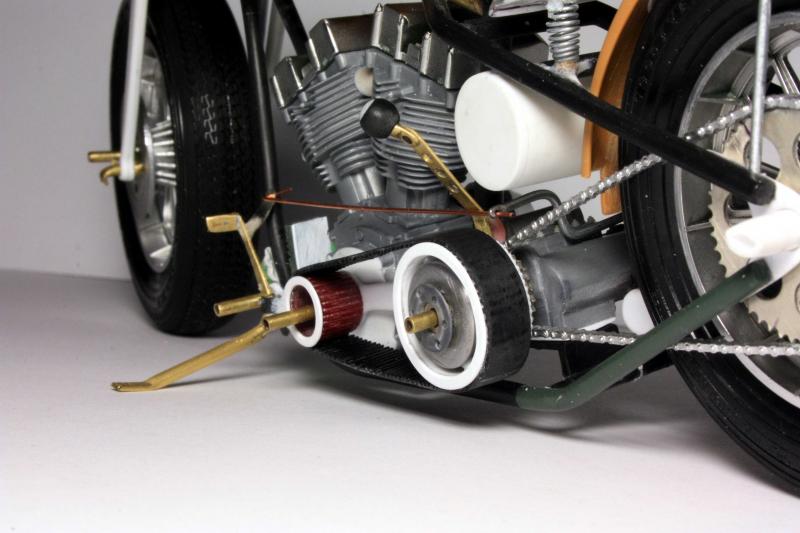
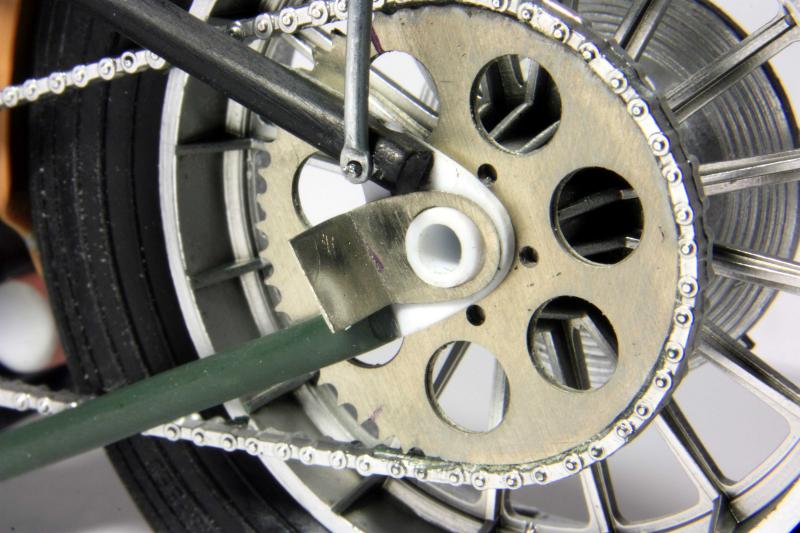
waiting for good weather to start painting I built the rear brake lever.
They then started with a paper clip and a few tubes of brass to get an E-link system connected to the piston of the disc brake. 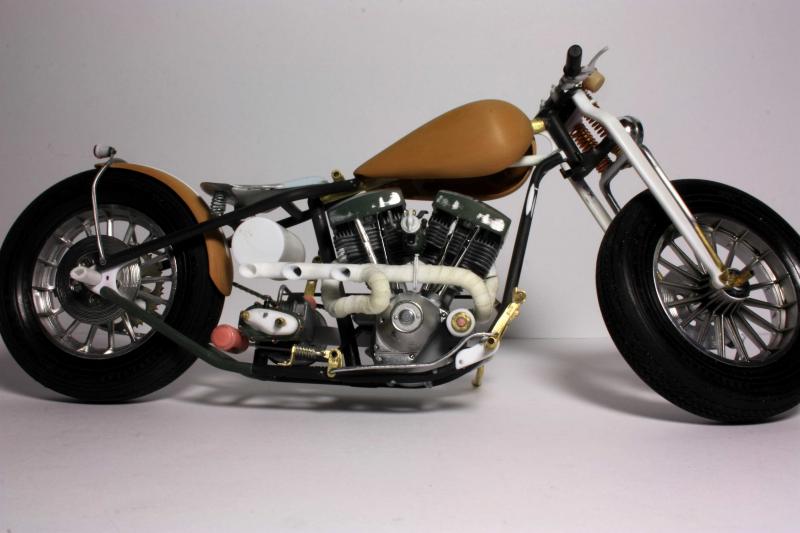 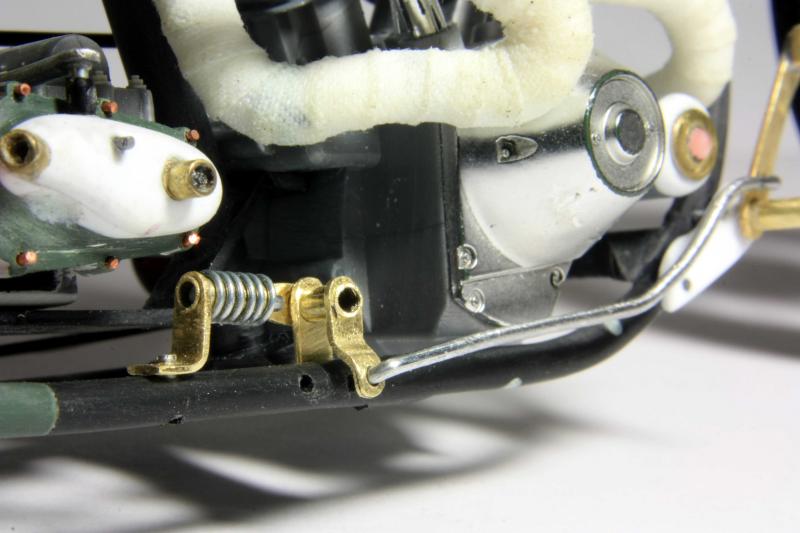  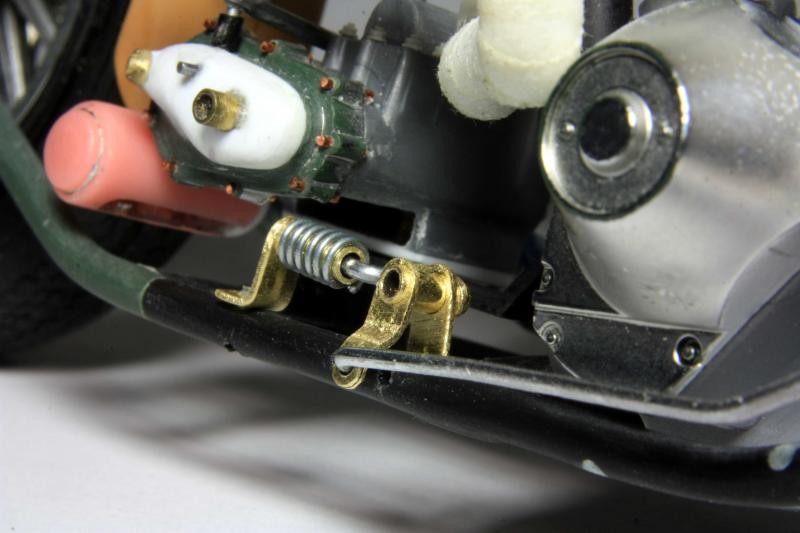 |
|
|
|
|
|
04-05-2012, 12:29 PM
|
#27 | |
|
AF Enthusiast

Join Date: Dec 2004
Location: Germany
Posts: 3,431
Thanks: 28
Thanked 79 Times in 73 Posts
|
Re: Harley Samurai Chopper
Wow, great skill in making details
__________________
Micha       
|
|
|
|
|
|
04-12-2012, 01:23 AM
|
#28 | |
|
AF Regular
Thread starter
Join Date: Nov 2009
Location: Italy
Posts: 143
Thanks: 4
Thanked 1 Time in 1 Post
|
Re: Harley Samurai Chopper
Thanks sportracer!
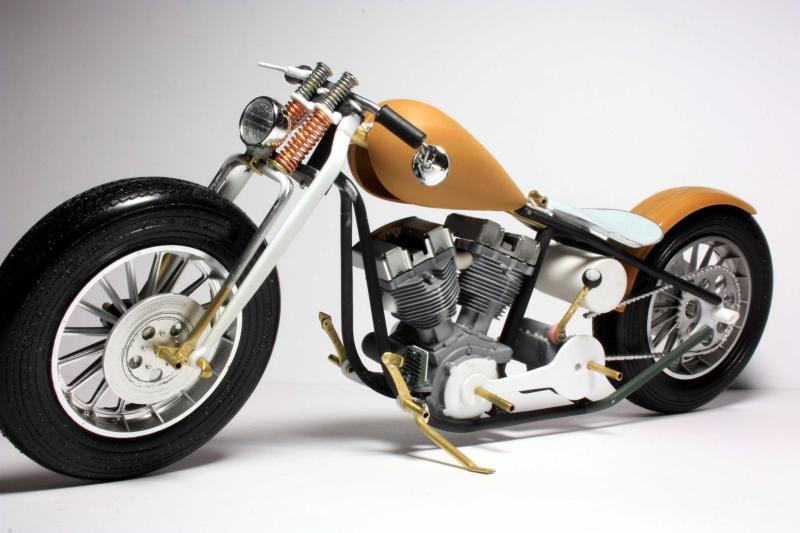
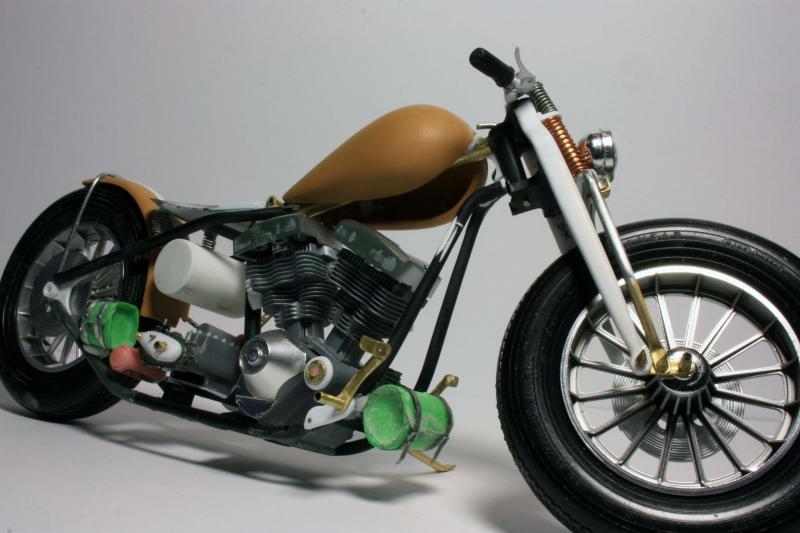
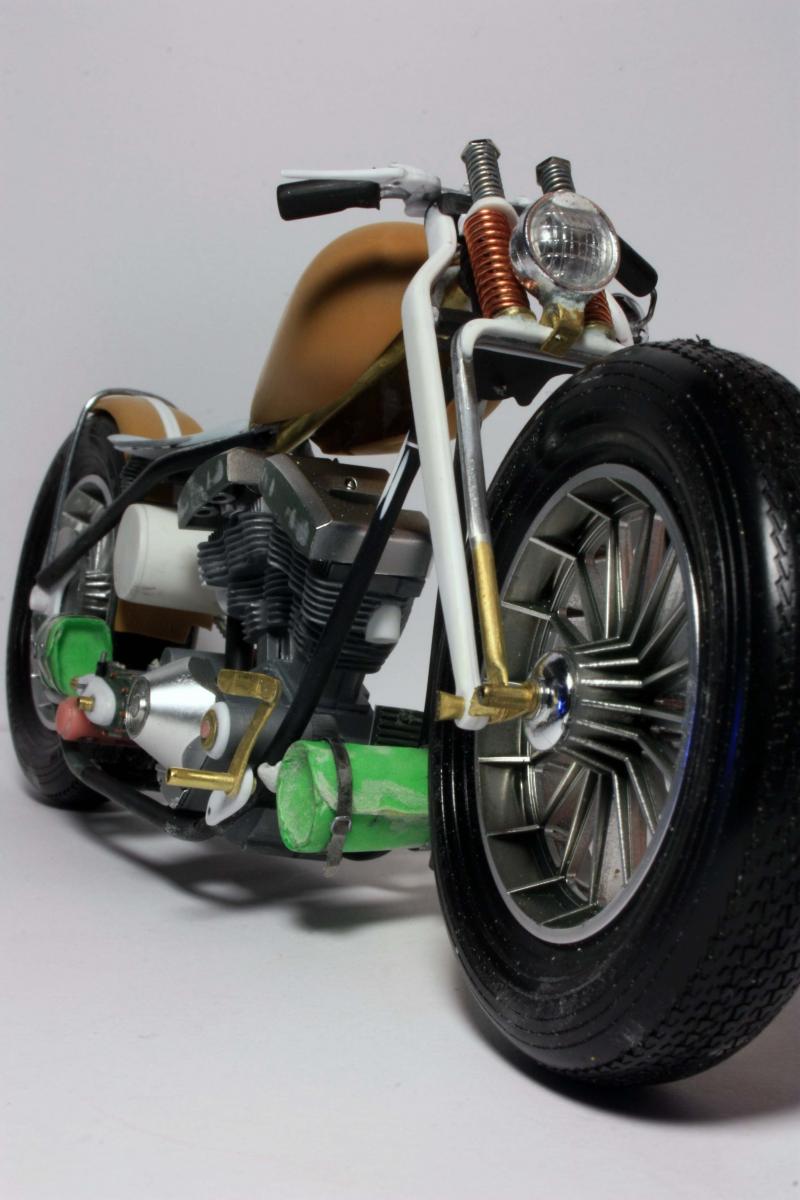
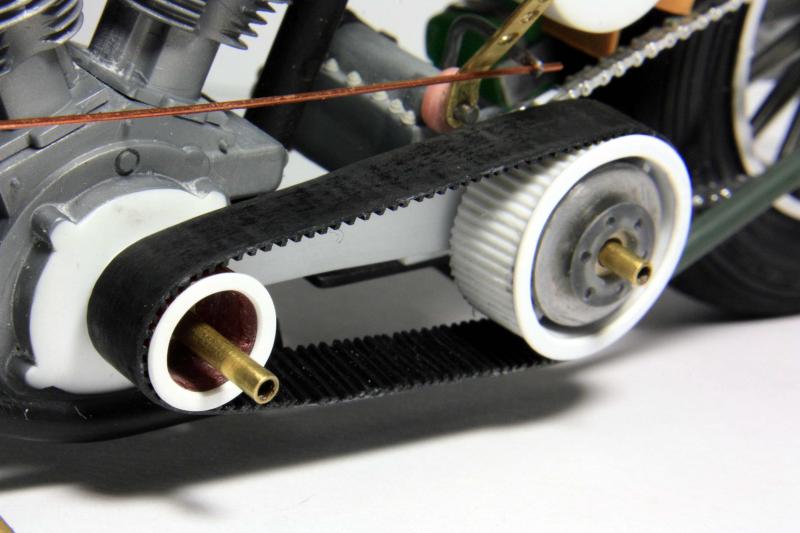
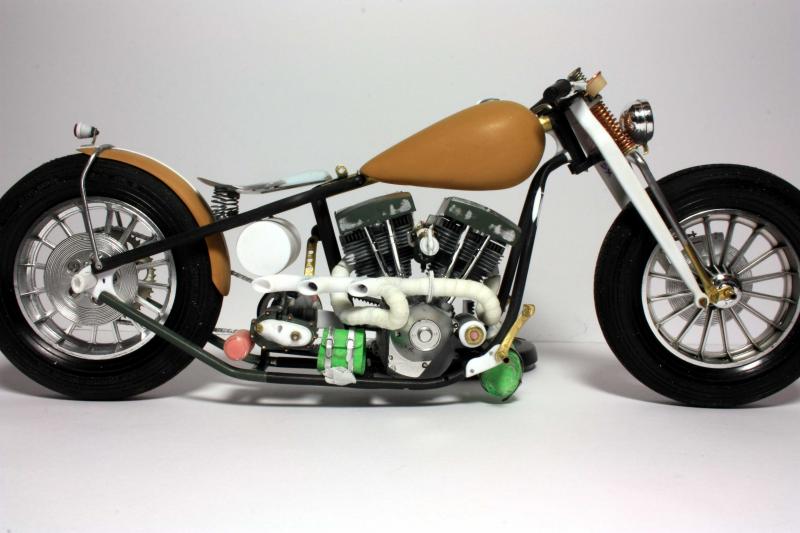
These days I added some details to the engine and finally I started painting.. First layer of gloss black over every single part of engine, exhaust and gear. Then I used "metalizers colors" on cylinders and exhaust; engine block, heads and gear has been sprayed with alclad II "polished aluminium". 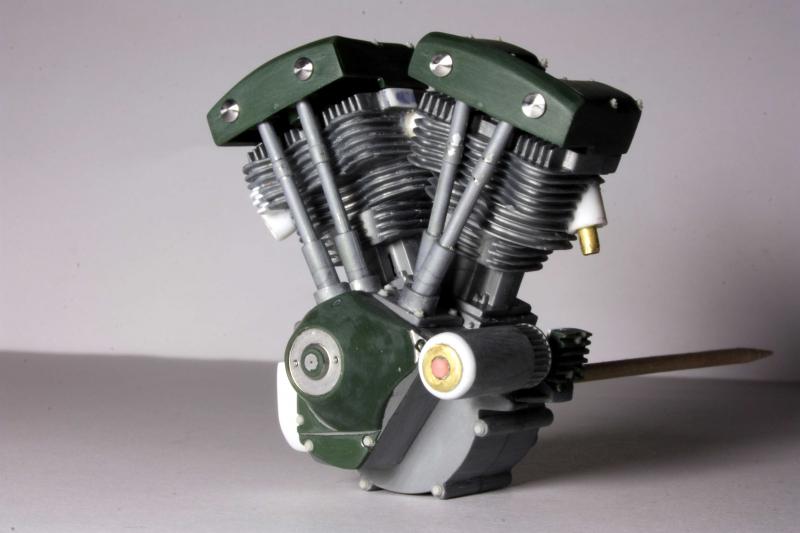 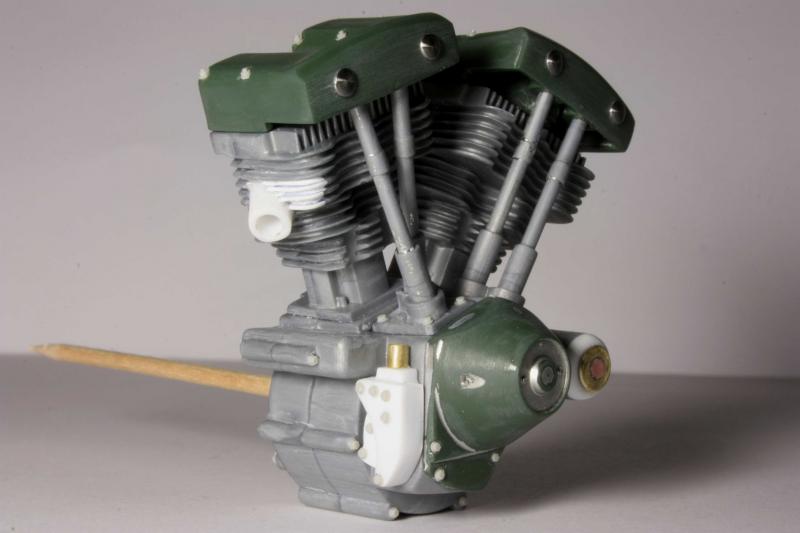 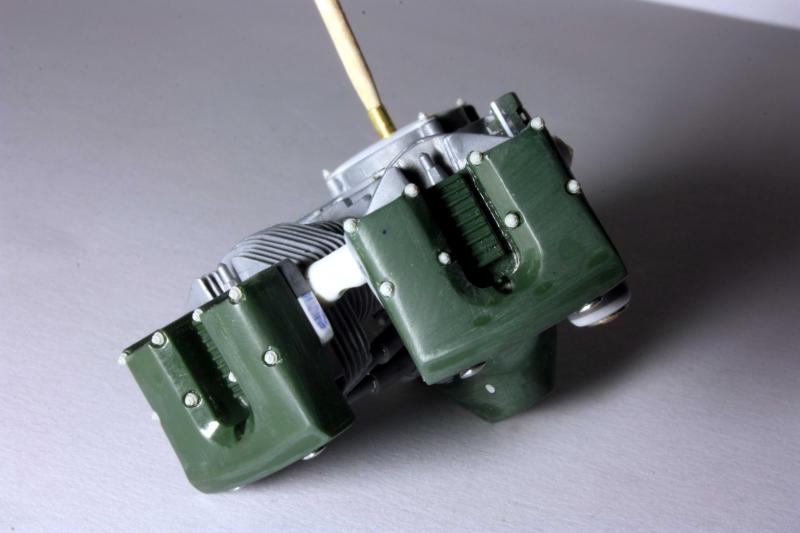 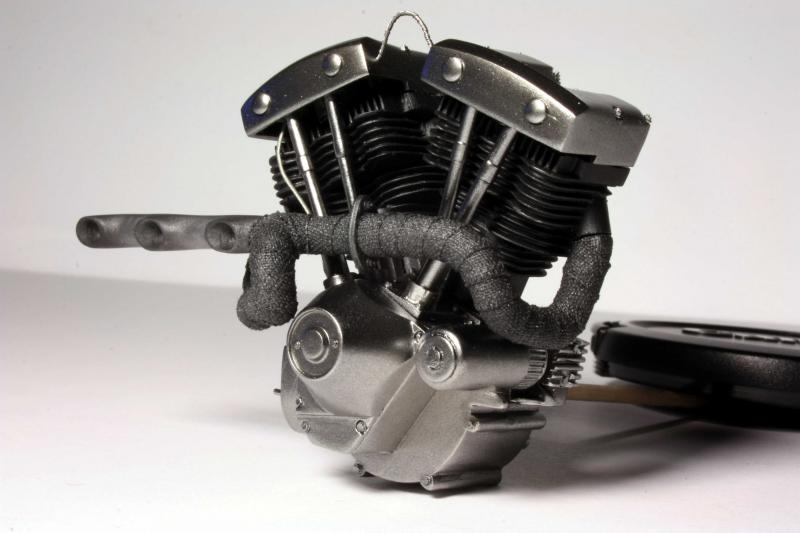 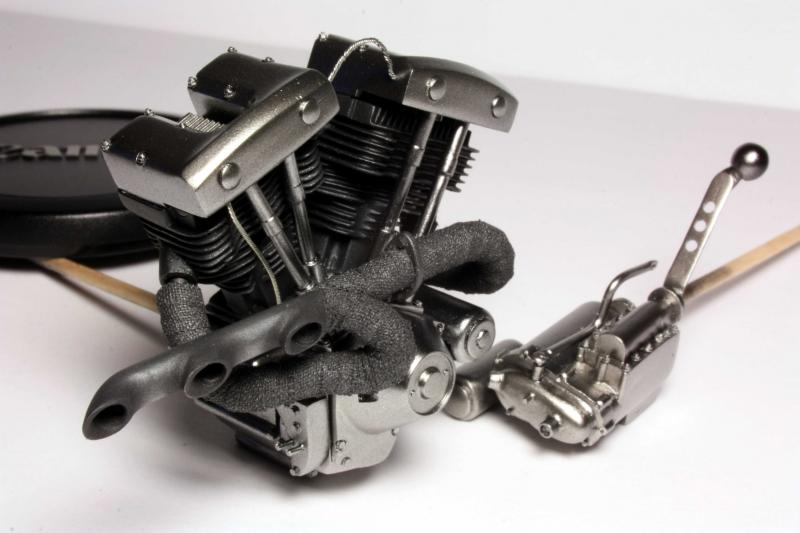  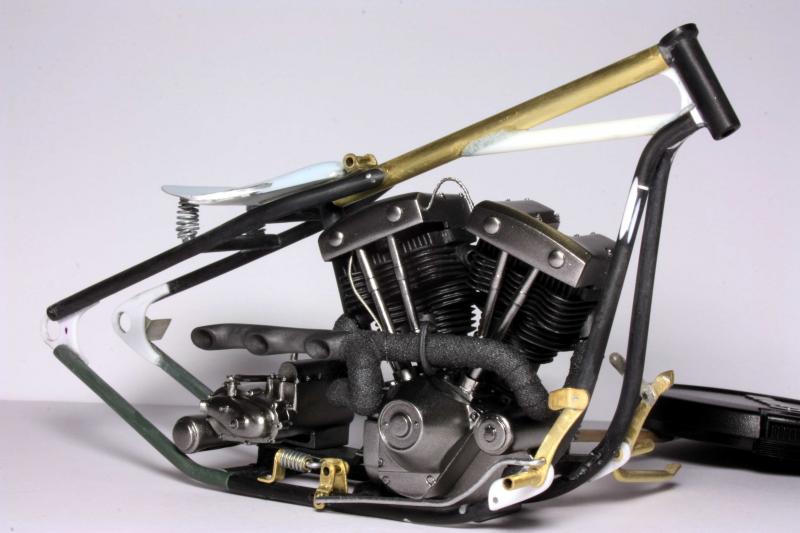 |
|
|
|
|
|
04-12-2012, 01:32 AM
|
#29 | |
|
AF Regular
Thread starter
Join Date: Nov 2009
Location: Italy
Posts: 143
Thanks: 4
Thanked 1 Time in 1 Post
|
Re: Harley Samurai Chopper
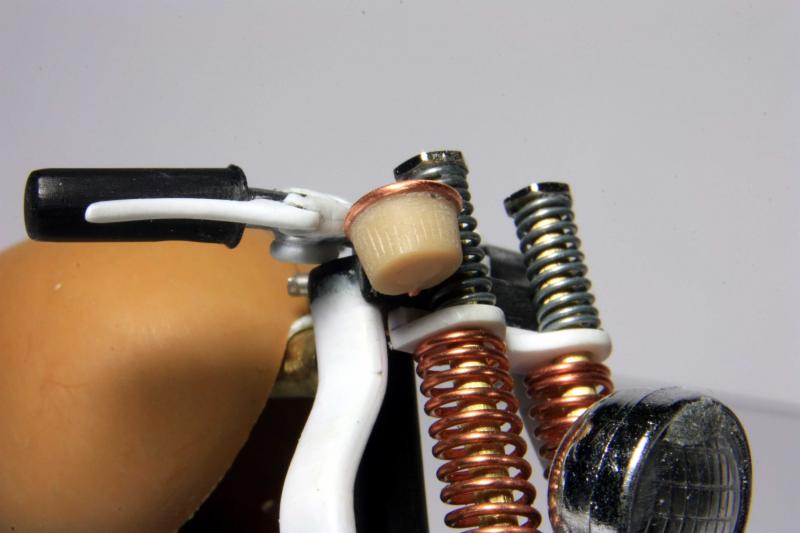
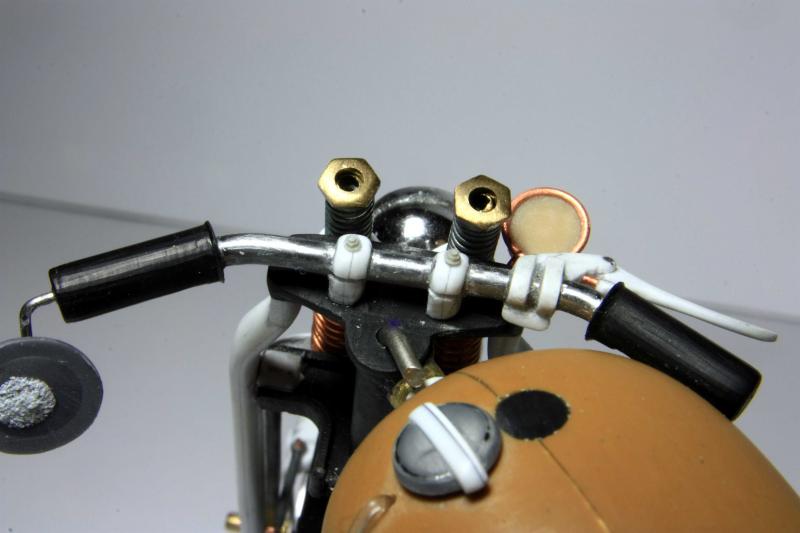
Waiting for the return of the sun to continue with the painting, I took the opportunity to prepare the frame by adding the last details and sanding any imperfections.
I then added all the welds, simulated by a thin copper wire. The wire was rolled on a 0.5 mm drill bit, obtaining a spring which was then slightly stretched and then flattened. The whole has been glued on the engine with a drop of glue and shaped with a toothpick, to look like a hand-made TIG weld. 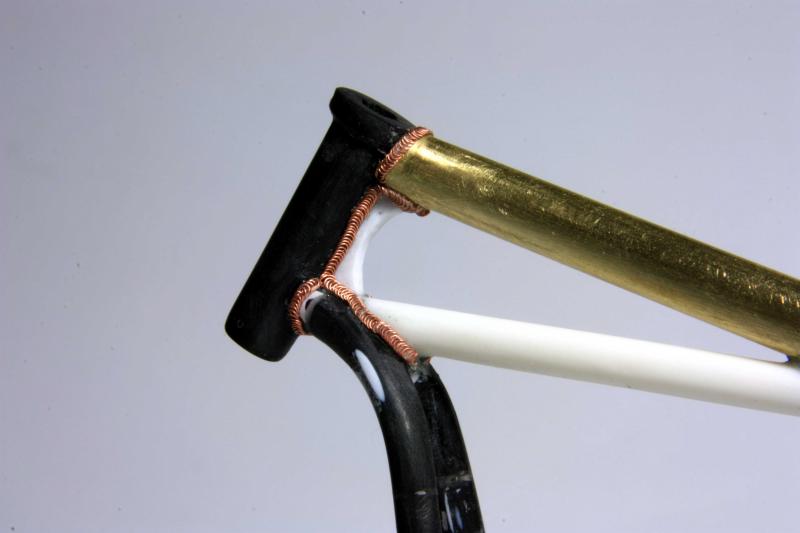 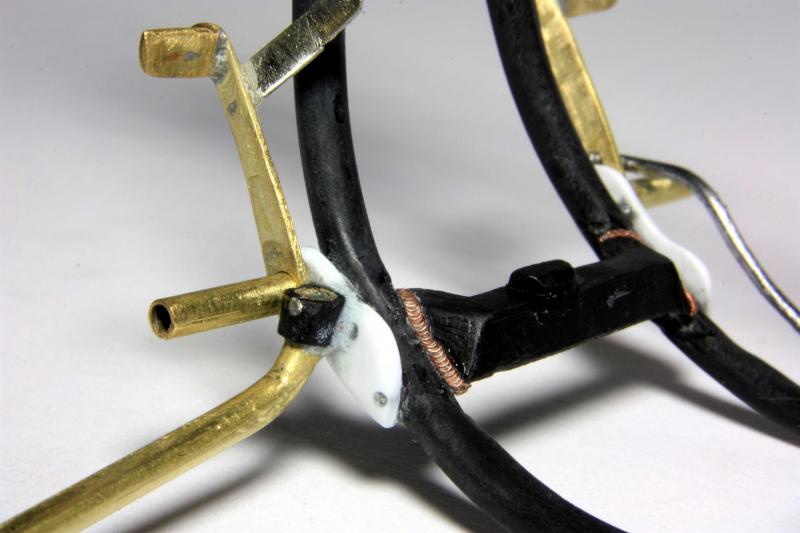 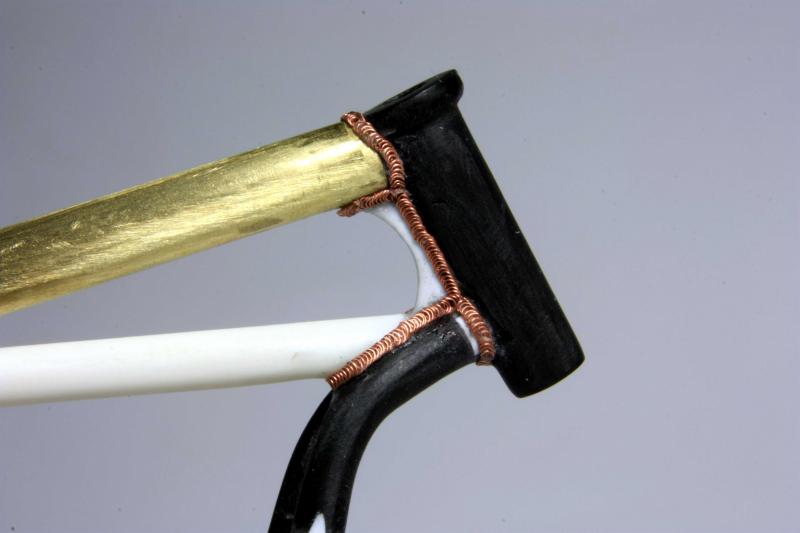 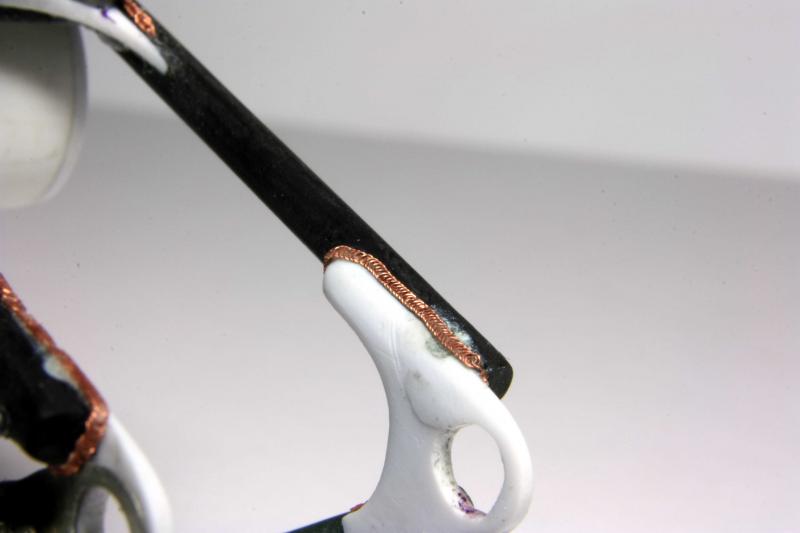 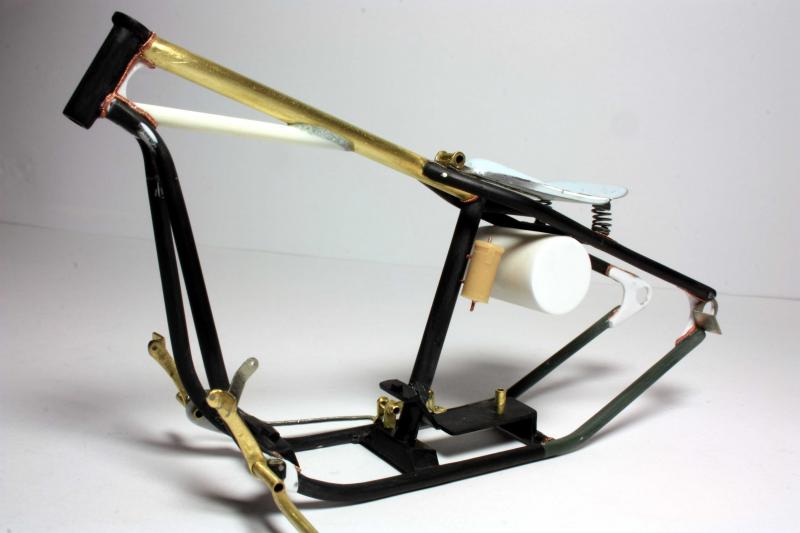 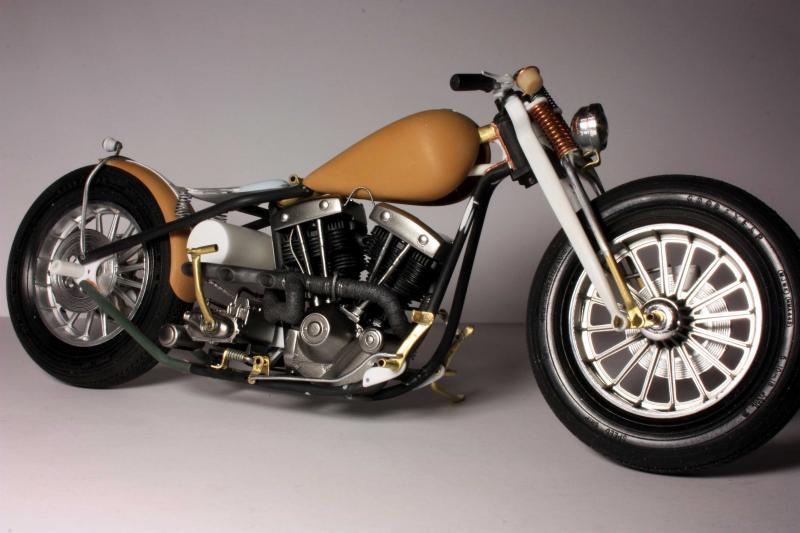 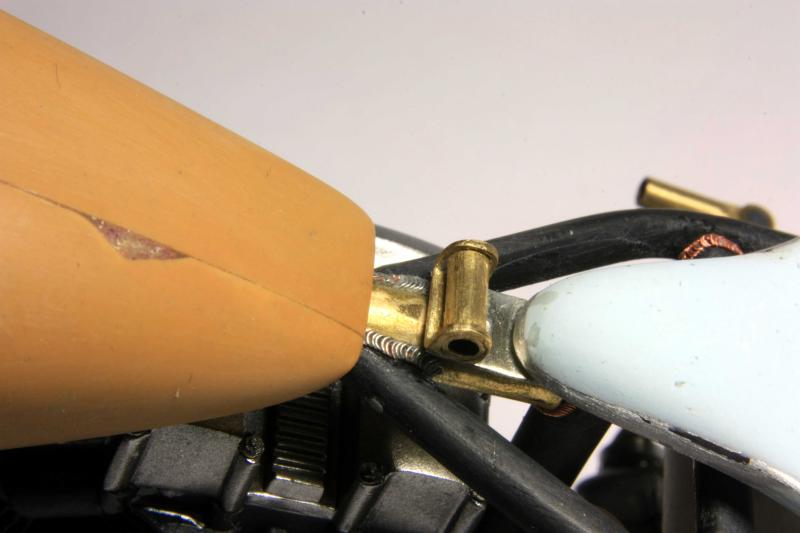 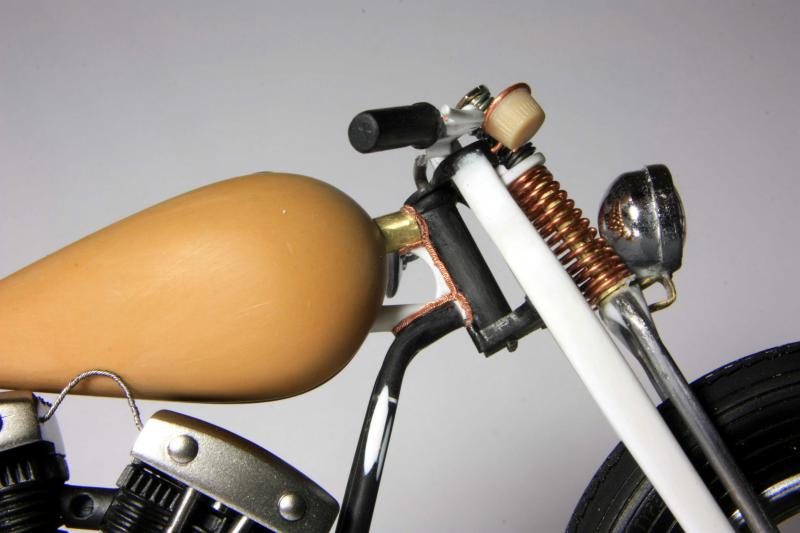 |
|
|
|
|
|
04-22-2012, 02:23 AM
|
#30 | |
|
AF Regular

Join Date: Oct 2005
Location: seattle, Washington
Posts: 101
Thanks: 8
Thanked 3 Times in 3 Posts
|
Re: Harley Samurai Chopper
Those welds look great, thanks for sharing the technique.
|
|
|
|
|
| |||||||||||||||||||||||||||||||||
|
POST REPLY TO THIS THREAD |
 |
|
|


