|
|
| Search | Car Forums | Gallery | Articles | Helper | Air Dried Fresh Beef Dog Food | IgorSushko.com | Corporate |
|
|||||||
| WIP - Motorsports Post topics for any "Work In Process" motorsports vehicles in this sub-forum. |
 |
 Show Printable Version | Show Printable Version |  Subscribe to this Thread
|
|
|
Thread Tools |
|
#1
 02-06-2008, 02:12 PM
|
|||
|
|||
|
WIP-Saving a 10 year old model, JACCS FERIO
Since I don't work on the motorsports side of scale modeling very often and I'm nearing completion of two other models in the WIP-Street forum, I thought now would be a good time to try something I've always thought about doing.
Here's the situation. I purchased and started this model probably 10 years ago and was building it along side the JACCS Civic hatchback and JACCS Accord. I applied the decals and did a fairly poor job. It's a given that my skills 10 years ago are no where near where they are today (and I'm still learning each time I build). So here was my idea. I was planning to strip off the decals and paint the entire JACCS scheme onto the body. Sound simple enough right? It seems like a good idea especially since the colors of the decals don't seem to be accurate anyway. But then I thought, what if I totally screw up and discover that I am in way over my head? I've never ever even attempted a paint job as tough as this one will be. So I thought to myself, "I wish I had another Ferio body that was still virgin." That's when it hit me...I do have a virgin Ferio body!! LOL It's a small sacrifice but my new plan is to take the virgin body and paint the JACCS scheme onto it. What's the sacrifice you might ask? Well, Hasegawa Ferio models in general are fairly rare. The extra body I have is a virgin because I've been sitting on that model for years, waiting for the right time to build it and it happens to be the PIAA Ferio. I figure if I'm successful, I can strip the old body and use it for the PIAA scheme. If I fail, I can strip the virgin body and try again or just save it for when I'm ready to build the PIAA Ferio. Either way, I'll have the original decals intact on the old body and once the new body is complete I can determine if the old one is better than the new one. This should be interesting. I haven't hosted the start of the paint job progress yet, but here are a few pics I took a couple of years ago of the original model to get the thread started. 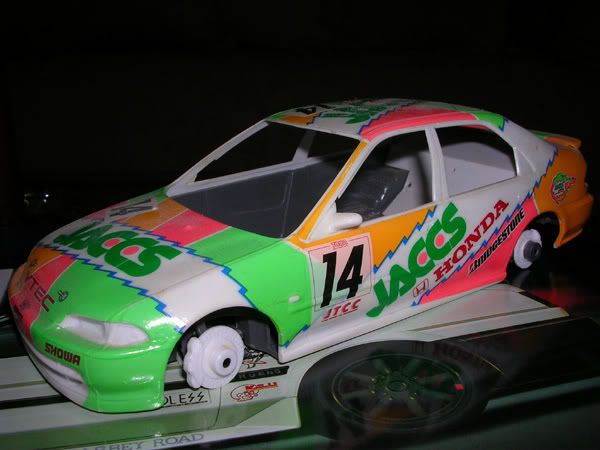 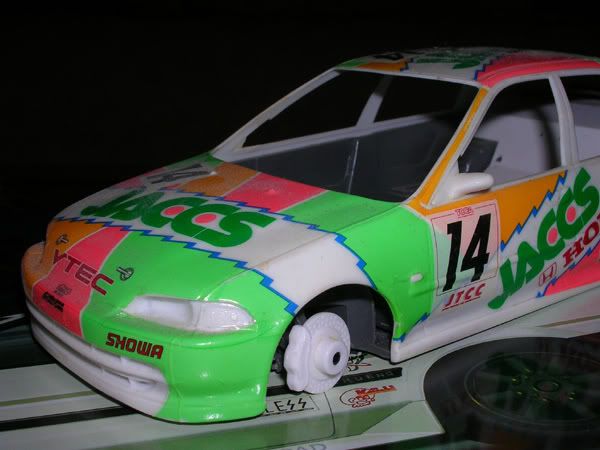   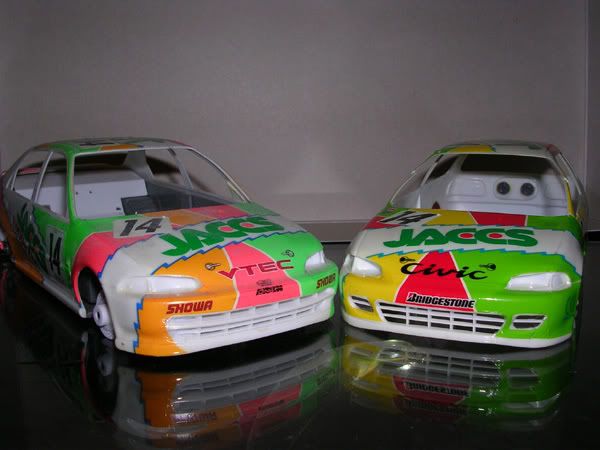
__________________


|
|
#2
02-07-2008, 03:39 AM
|
|||
|
|||
|
Re: WIP-Saving a 10 year old model, JACCS FERIO
Alright, pictures uploaded and it looks like this will be my most picture intensive build. Enjoy the progress!
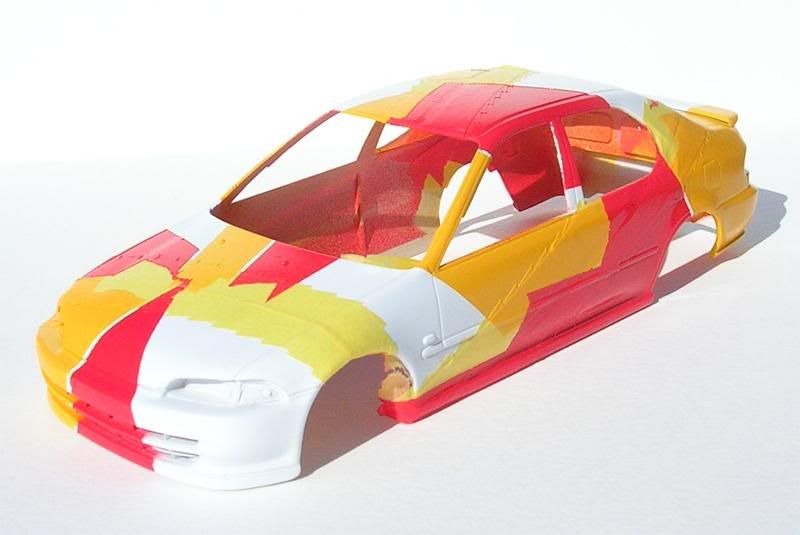
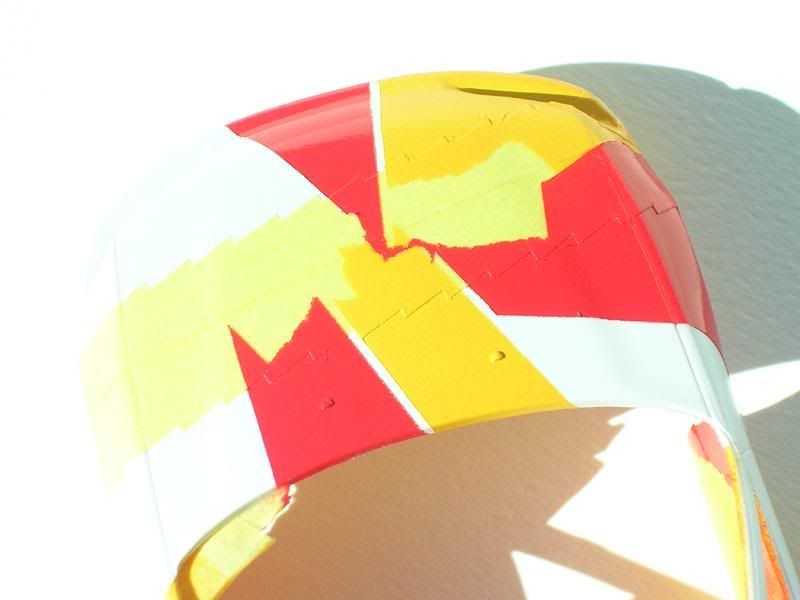
First things first, let's grab that virgin Ferio model 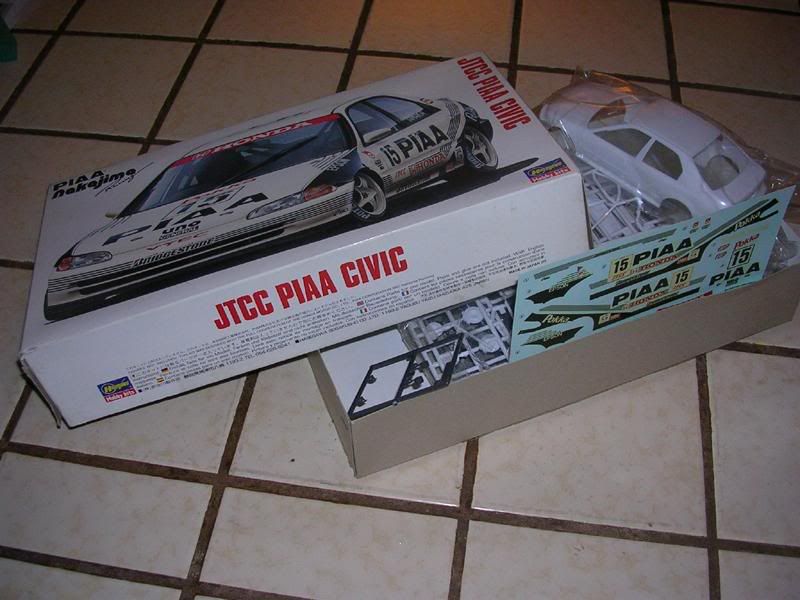 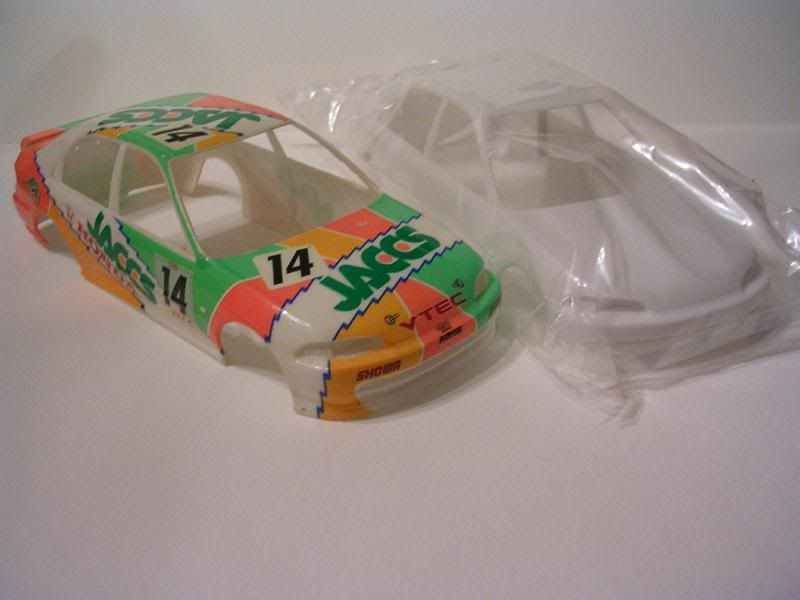 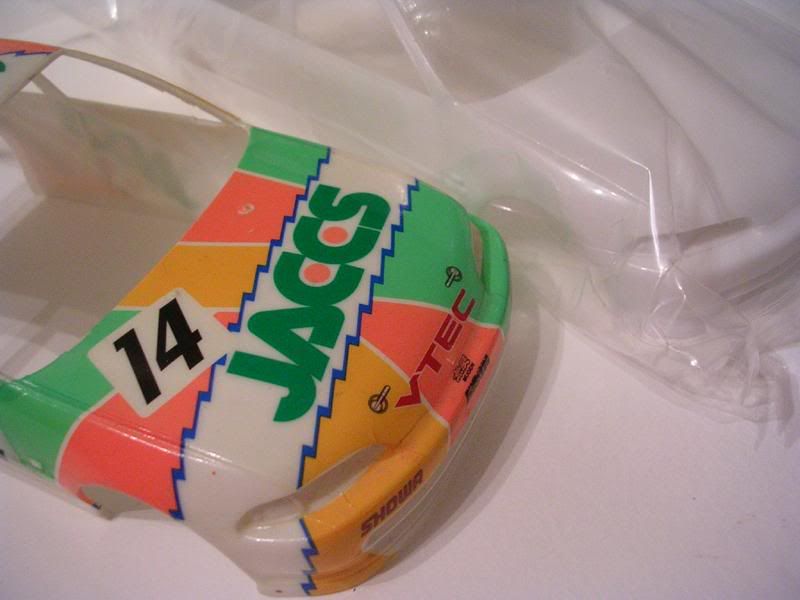 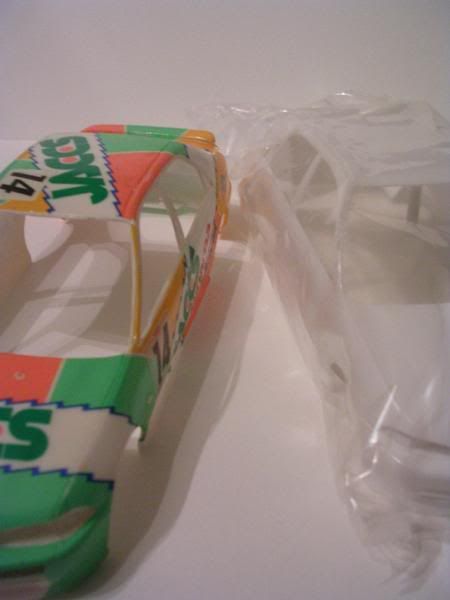 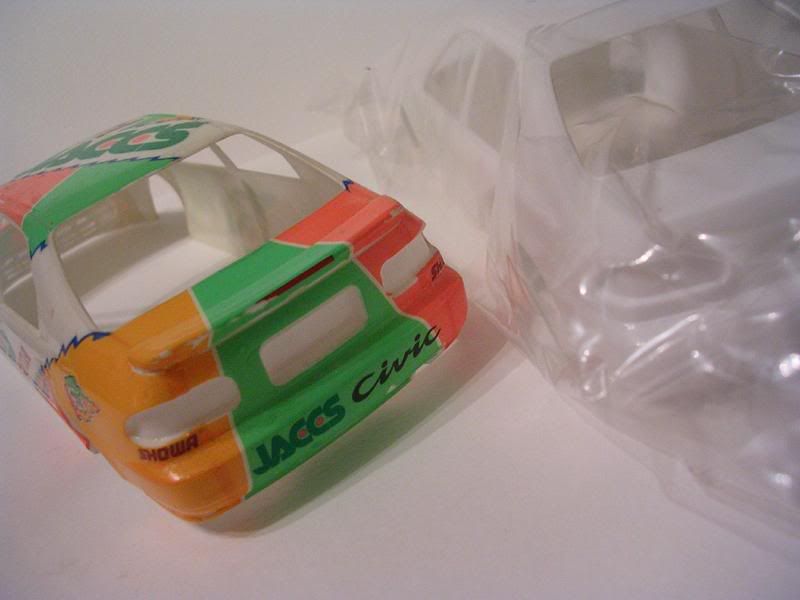 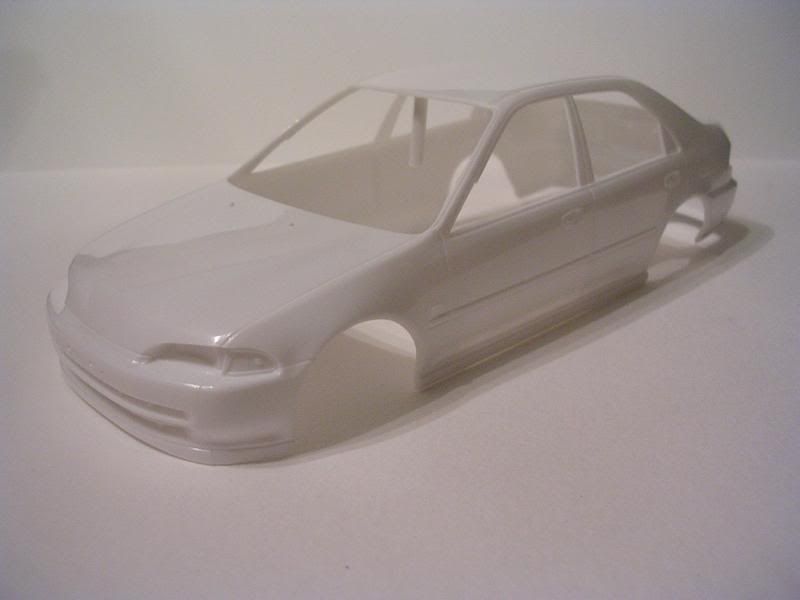 So my first order of business is body prep. I'll admit, I rushed this part because I was so excited to see if I can really pull off this paint job. I started by filling the front license plate holes on the front bumper. I usually just use putty but I saw this method on here where you fill the holes with melted seperated sprue pieces so I thought why not give it a try.  The holes weren't all the way through so I drilled them out before moving forward. 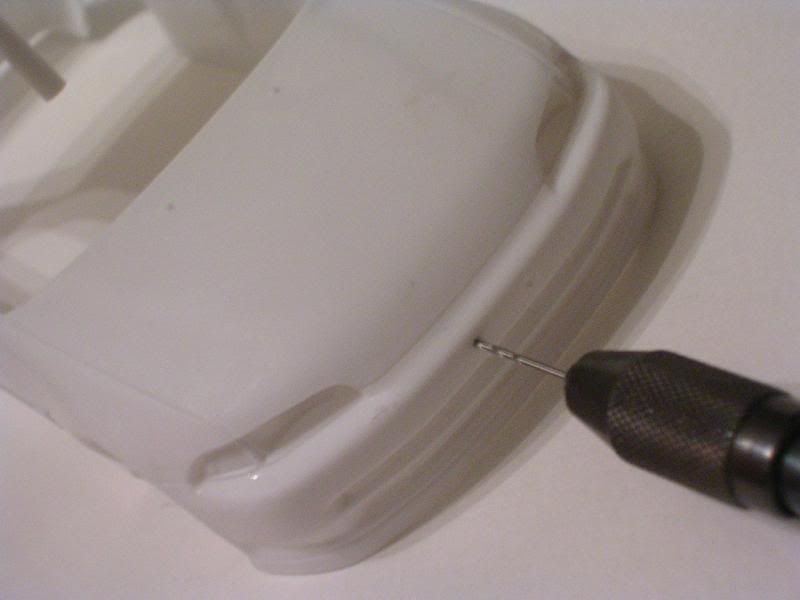 Then I glued in the separated parts tree "fillers" into place.  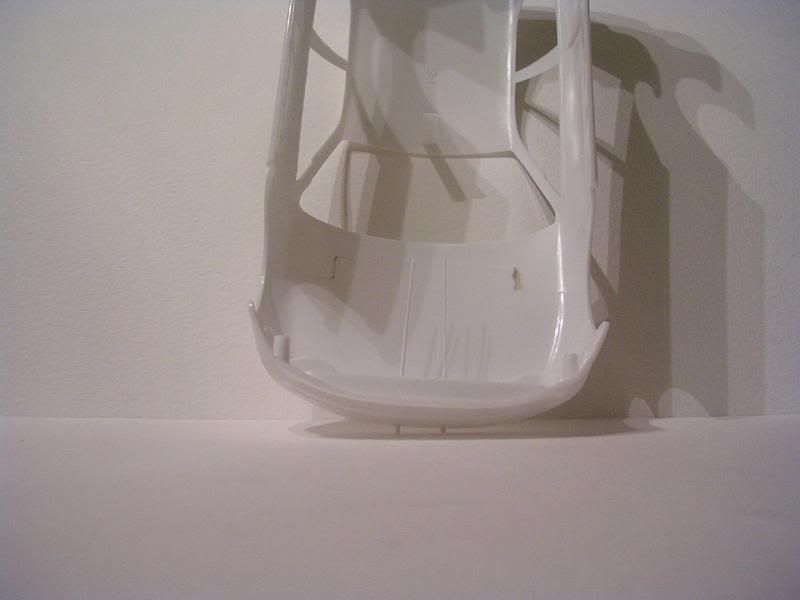 Next, I filled and filed down the rest of what little bit of hole was still showing on the bumper, clipped the other end of those fillers, and primed the body. After, I sprayed the base coat which is Matte White. That was the easy part of the paint job. No masks, no planning, just paint the entire thing. From here on out is going to be a very challenging process. Since I got the base down, I needed to start making a mask to protect what I wanted to keep white on the body. I had borrowed a pair of special scissors to make the main mask with the jagged edge to make life easier on me but not only was it terribly hard to cut the masking tape with, it wasn't as accurate compared to the paint scheme as I thought it would be. So in the end, I used a regular exacto knife and traced out the pattern from the old body. Wasn't too hard after the 3rd try. 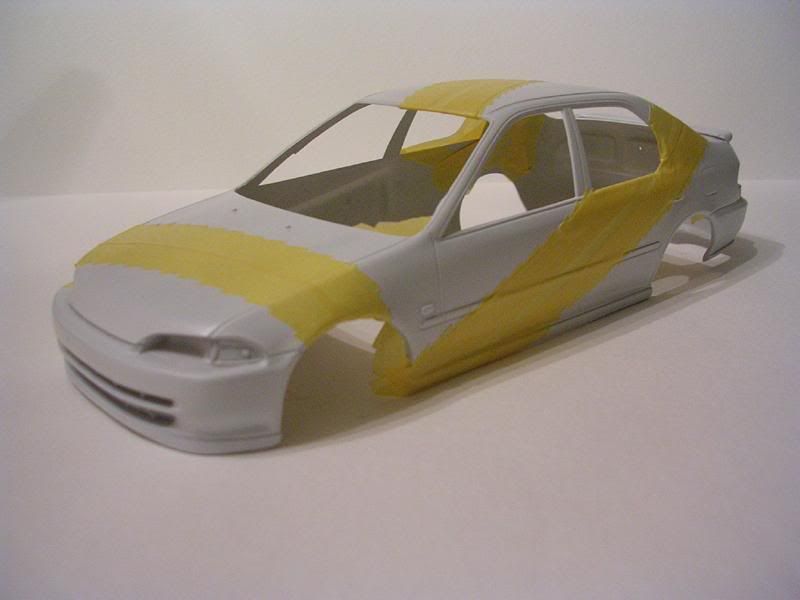 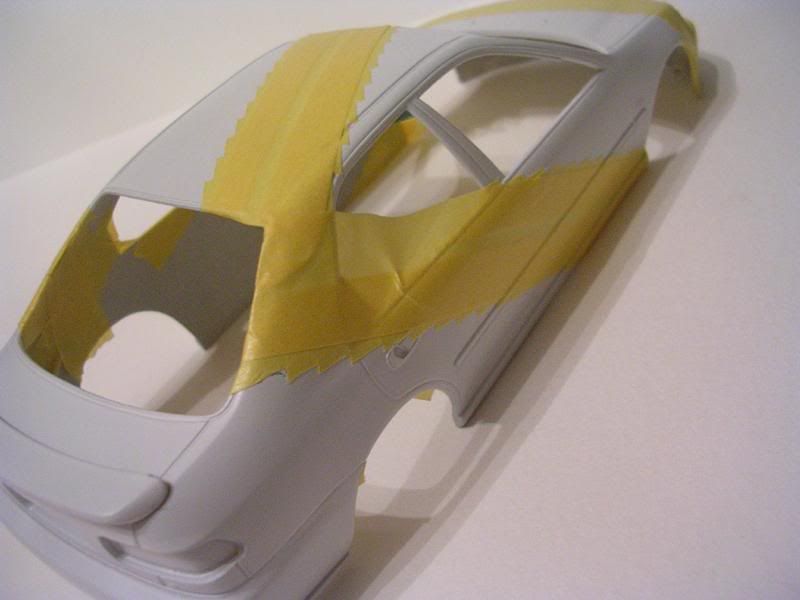 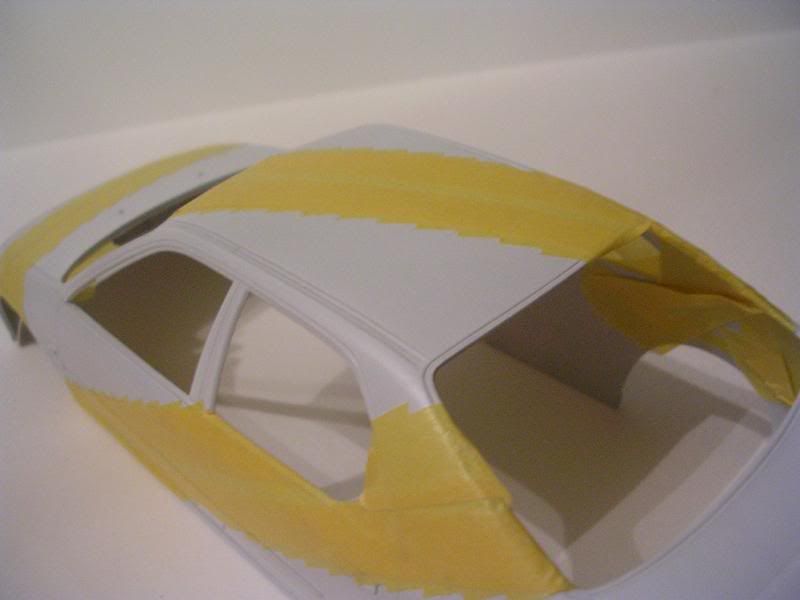 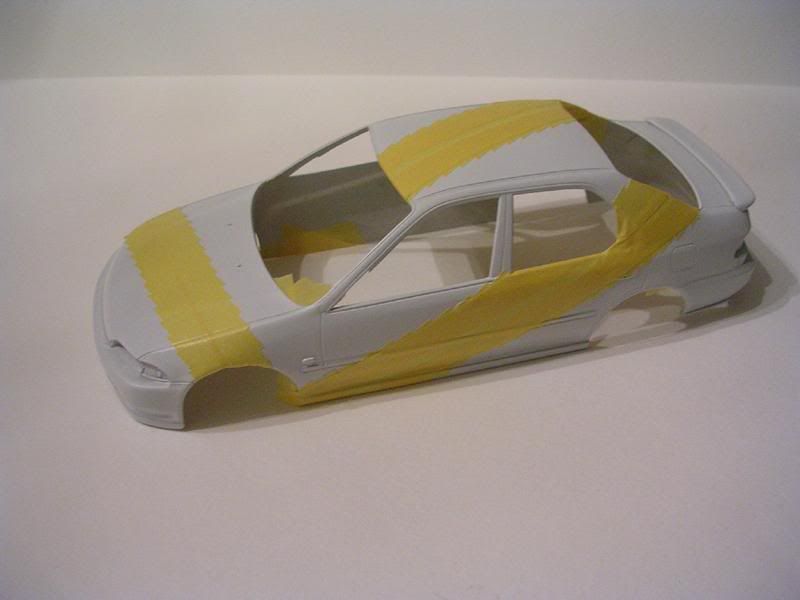 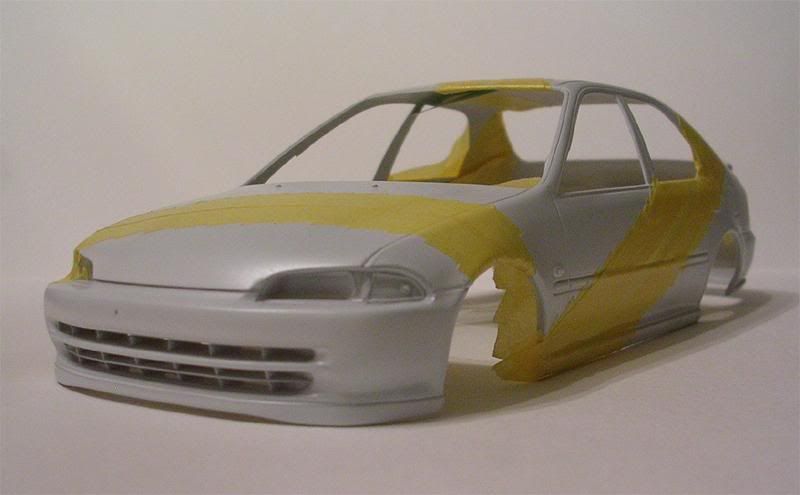 Now that the main pattern of white had been taken care of, I needed to decide on which color to start with for the remaining part of the paint scheme. I decided to go with the lightest of the three colors. I masked off the body once more, leaving only the areas to be painted yellow exposed. 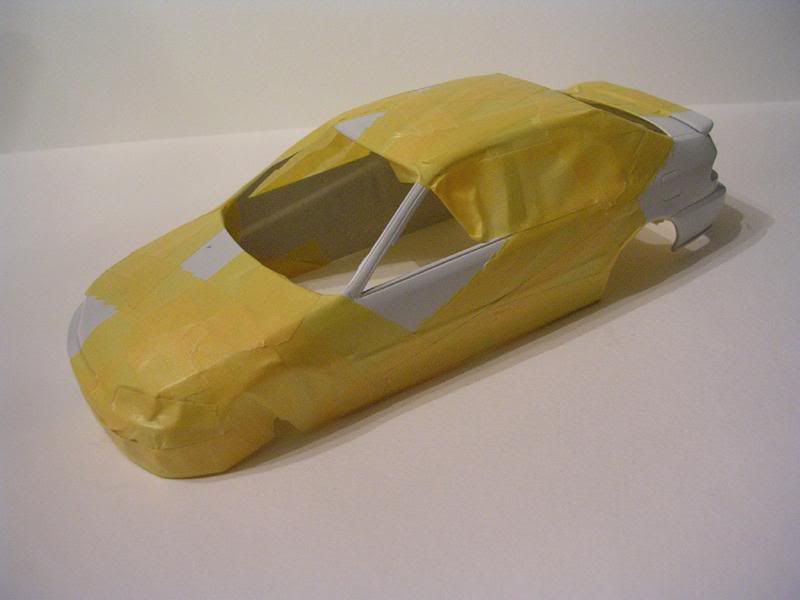  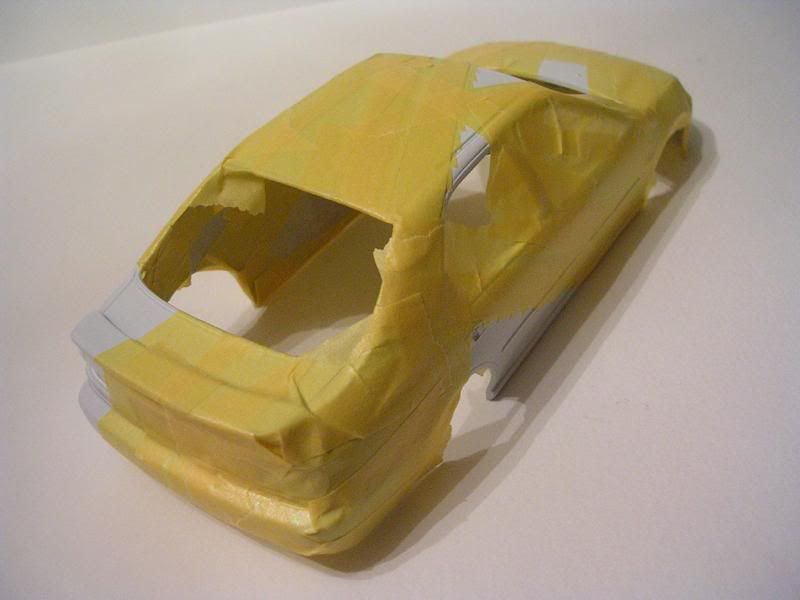 With everything fully masked, I was ready to get some color on the body. I used Camel Yellow for the first color coat. After it was dry, I peeled off the masking and this is how it turned out (I love having the sun out to take pictures in, it's so much better). 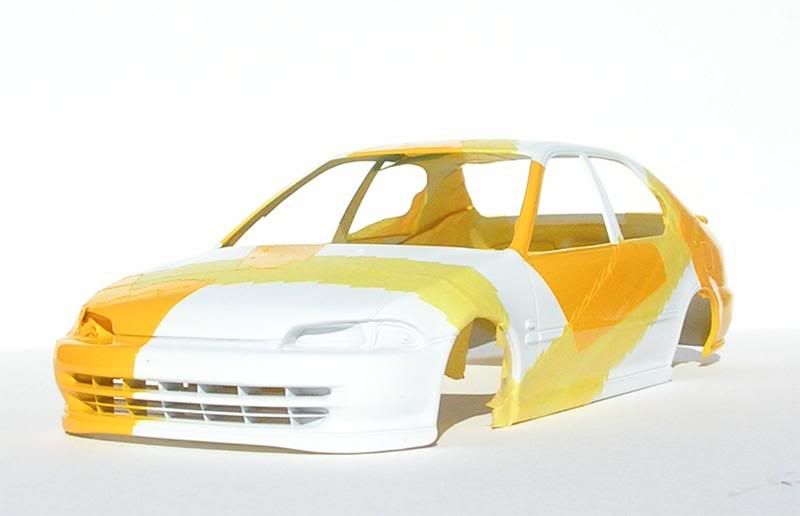 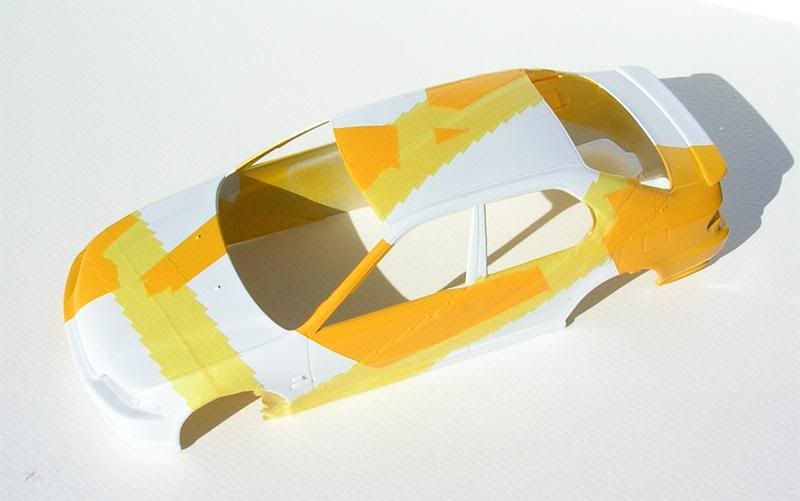 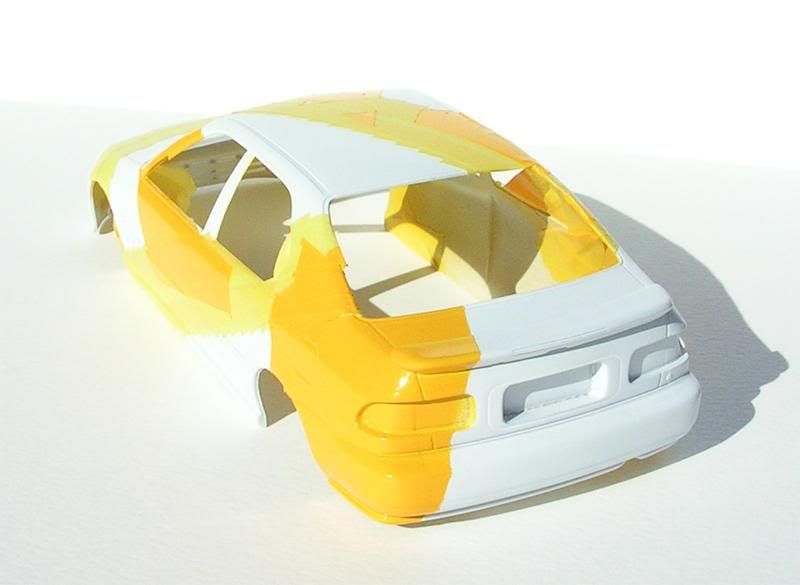 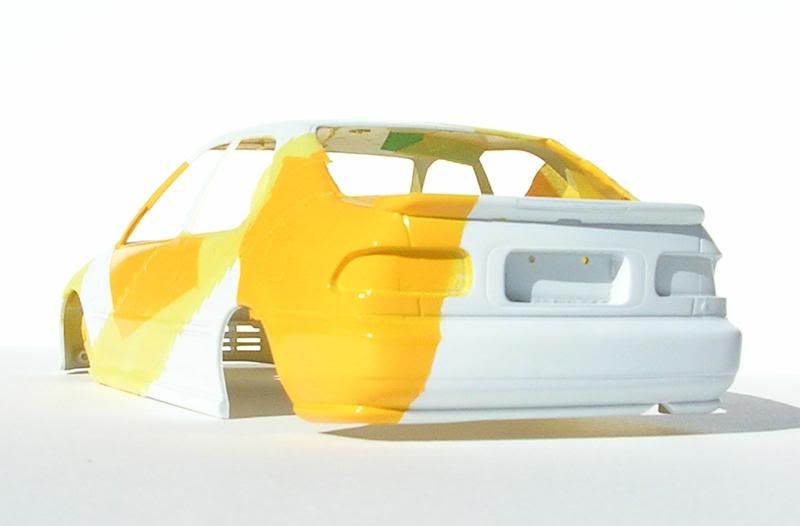 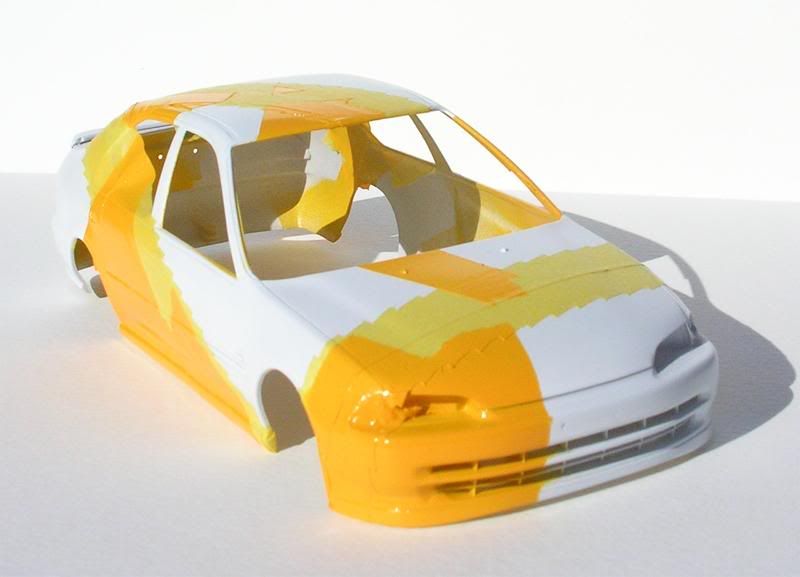 So far so good. Everything seems to be going according to plan. Next up, I decided to take care of the red areas because I didn't have green yet. I masked accordingly and sprayed the red paint all over. 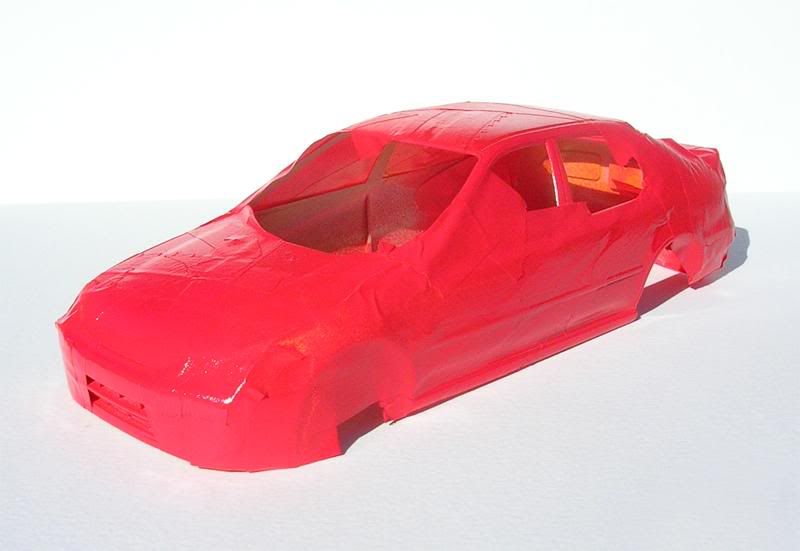 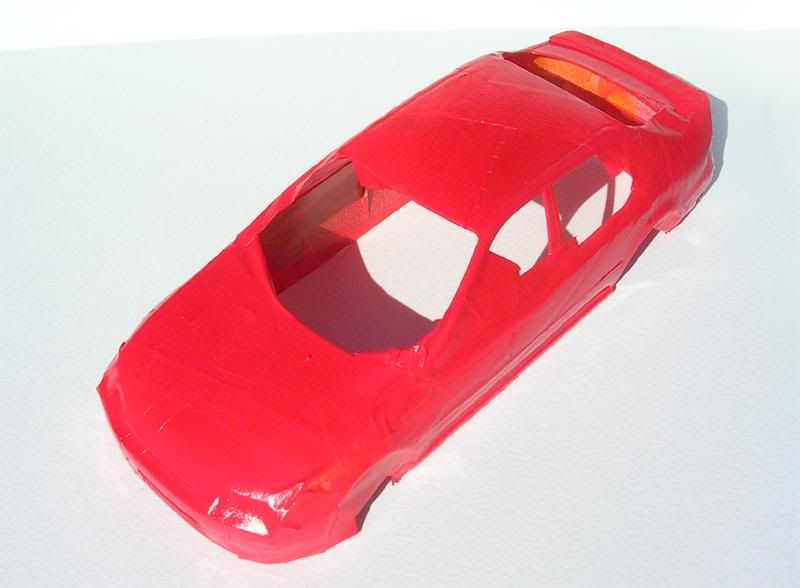 Now this is where it got scary. I didn't realize that when I had reached for a can of red paint that I had actually grabbed a can of red paint meant for RC car bodies!! I remembered doing that with another model before and the paint didn't seem to be a problem. Too late now anyway. Oh well, we'll see what happens when I peel the masks off tomorrow. Questions/comments/critisms welcome.
__________________
|
|
#3
02-07-2008, 12:47 PM
|
|||
|
|||
|
Re: WIP-Saving a 10 year old model, JACCS FERIO
I got some really good progress on the paint job. I peeled back the masks to reveal the red areas.
 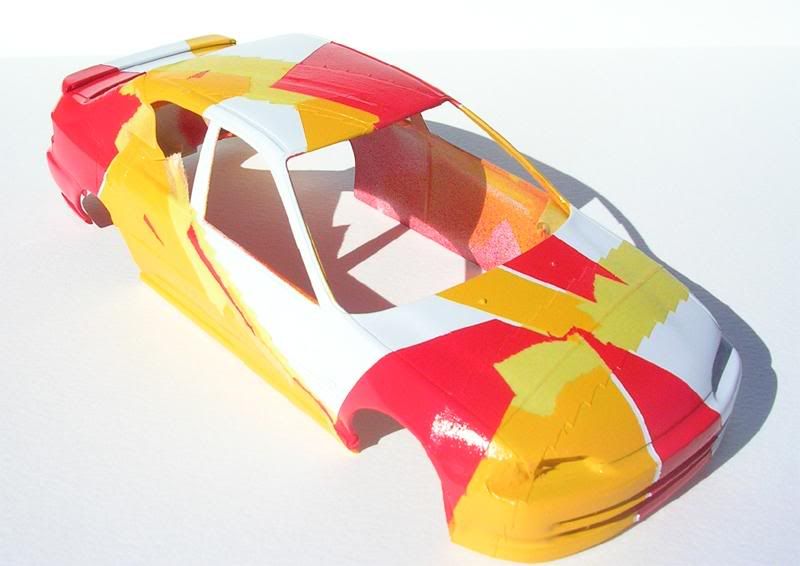 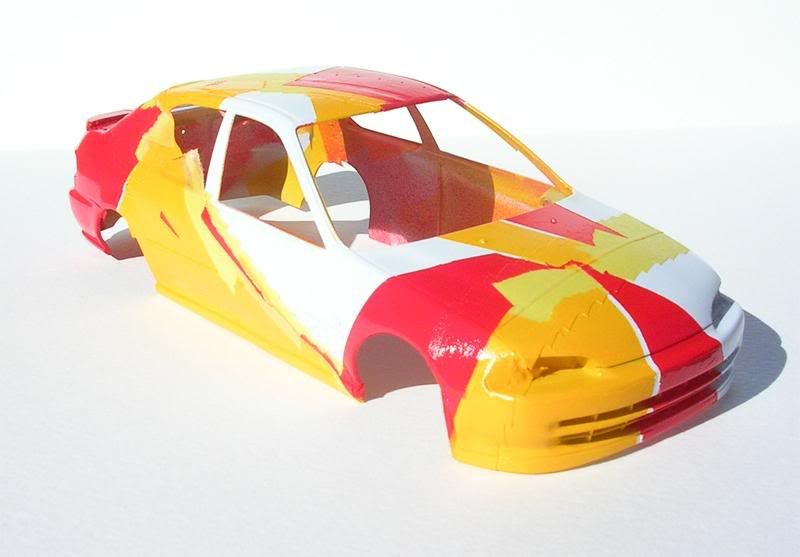   After making sure that the red was completely dry, I proceeded to mask off the last areas for the final color and then let loose with the green paint. I waited a short while for the green to dry and then peeled off the masks for the green areas. 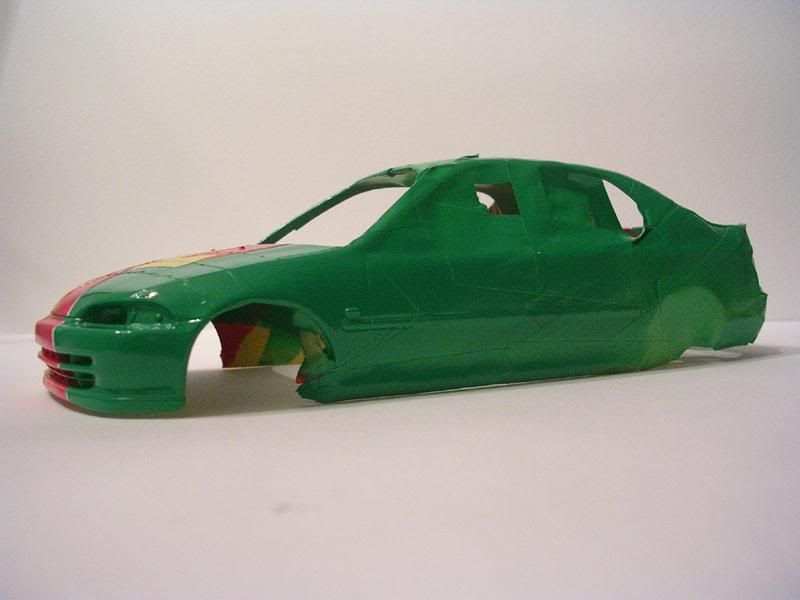 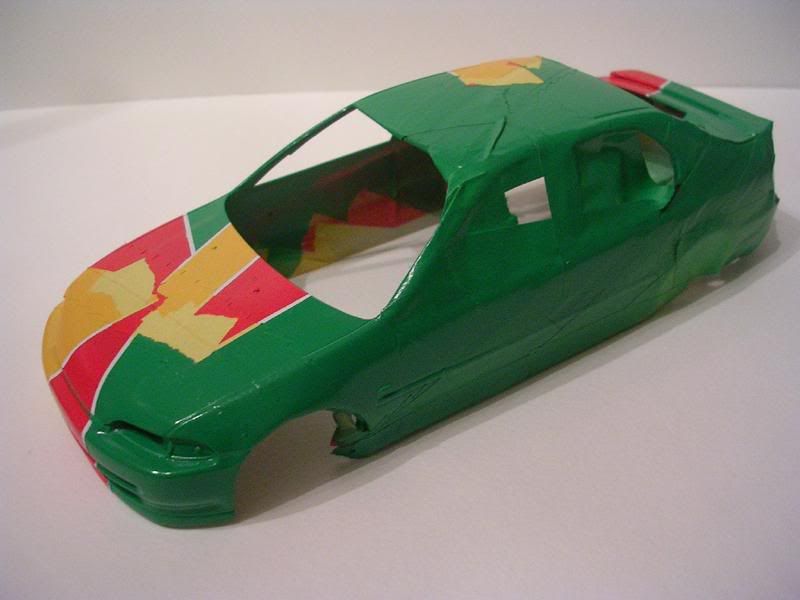 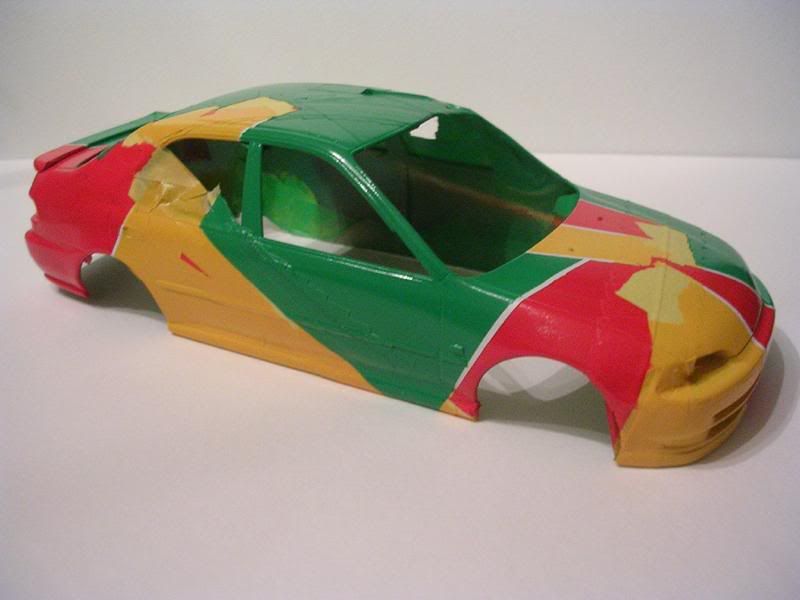 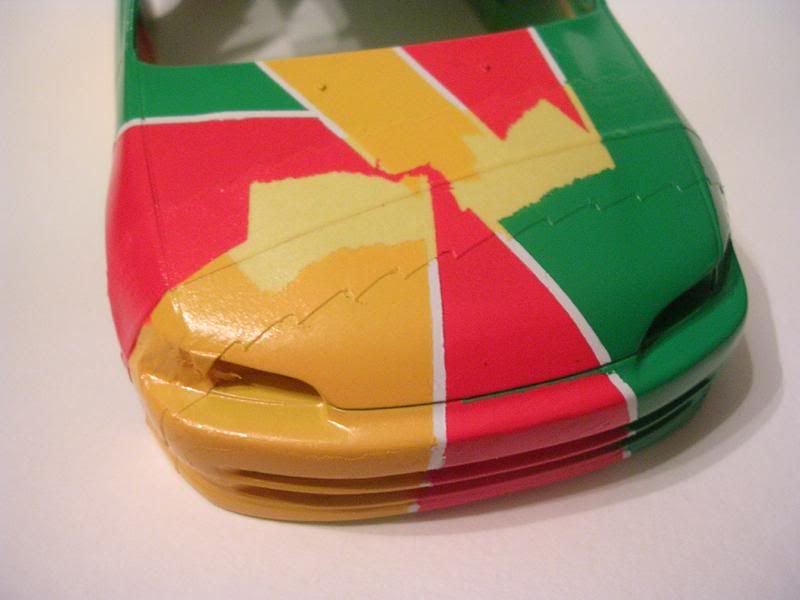 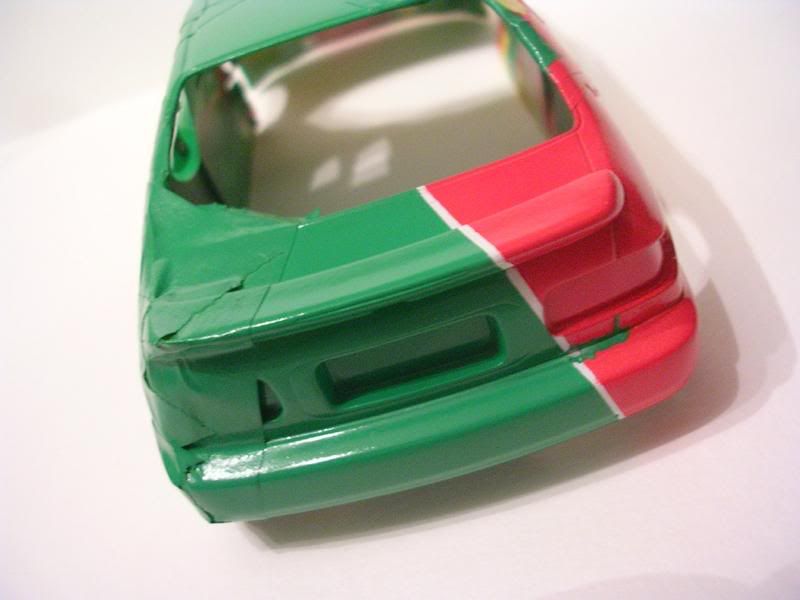 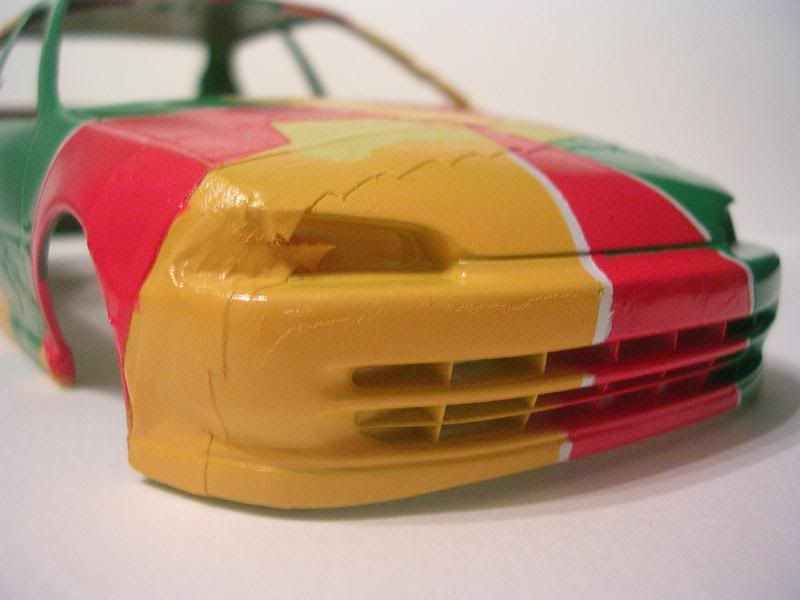 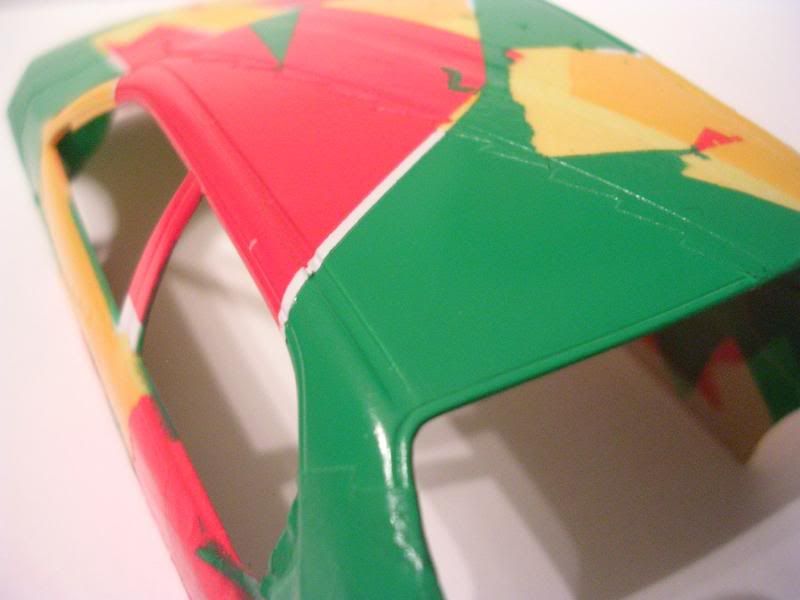 A short play by play of peeling the mask on one side 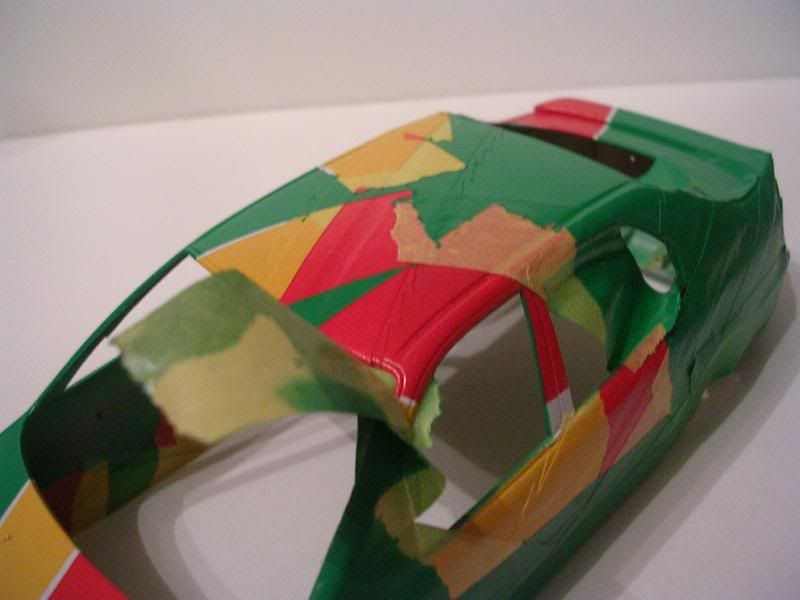 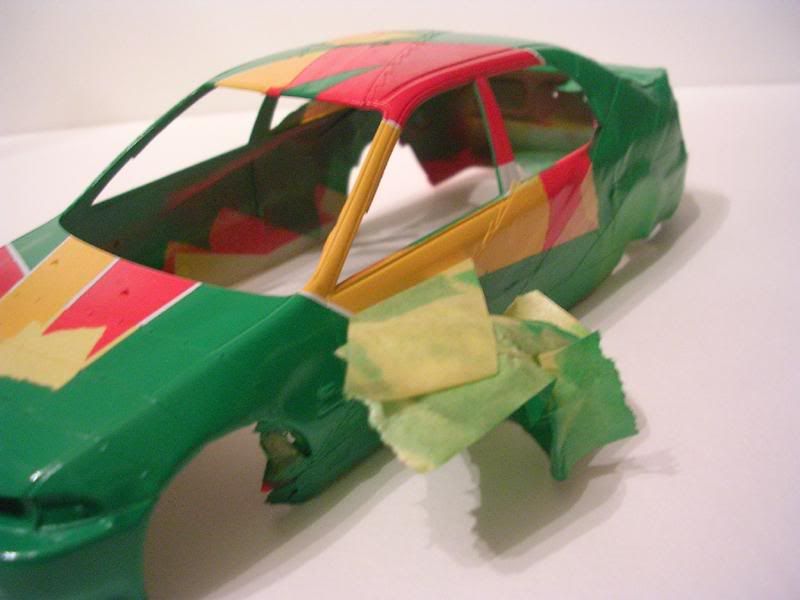 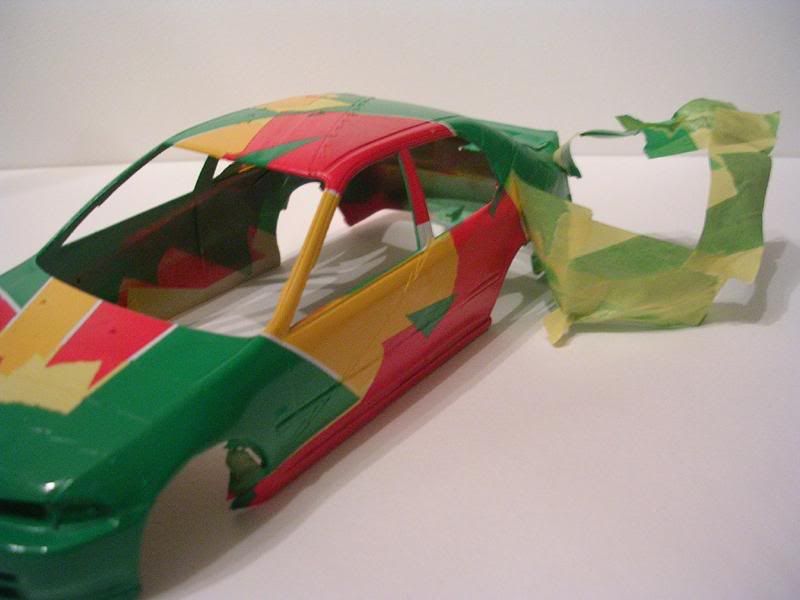 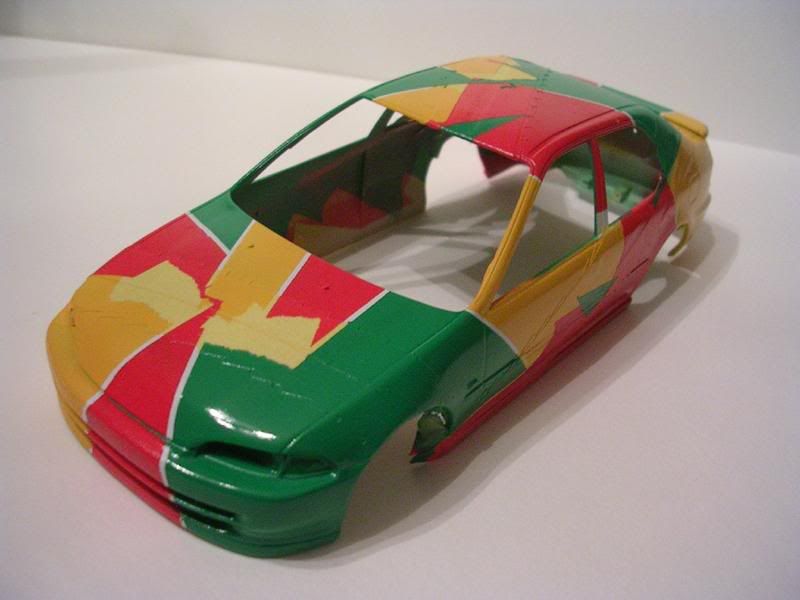 And now the final masks to be removed, the jagged edged white areas. I went pretty slowly on this part and the results were pretty good. 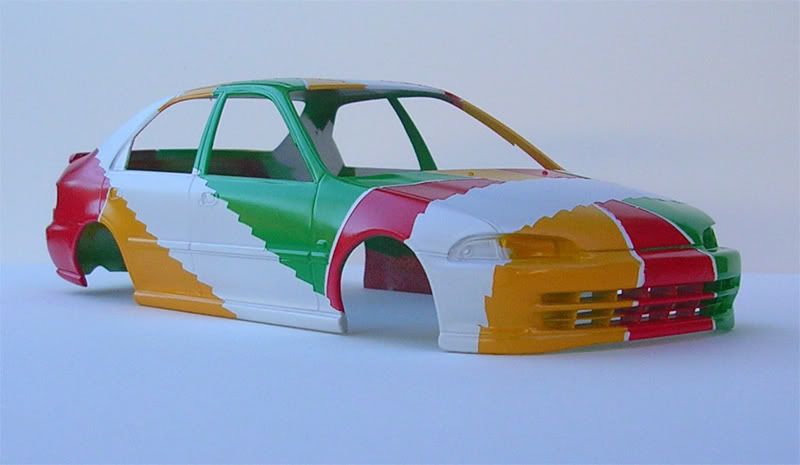 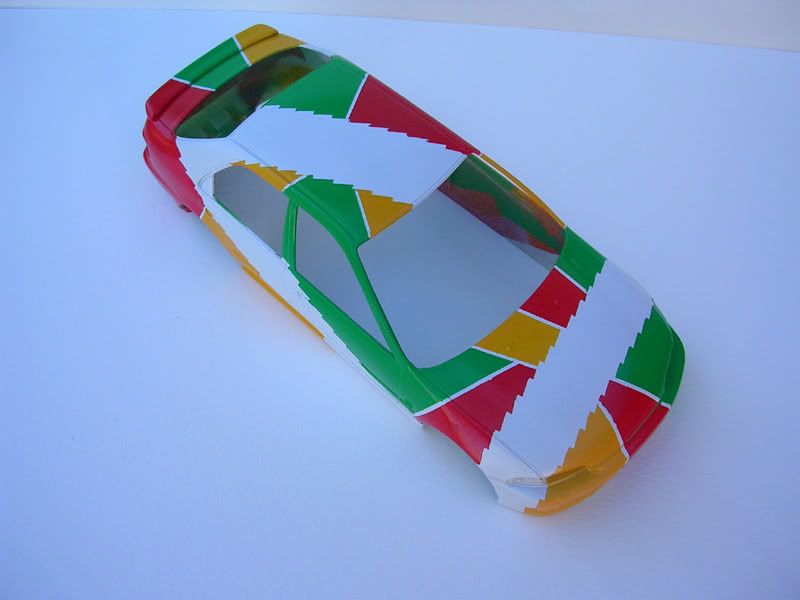 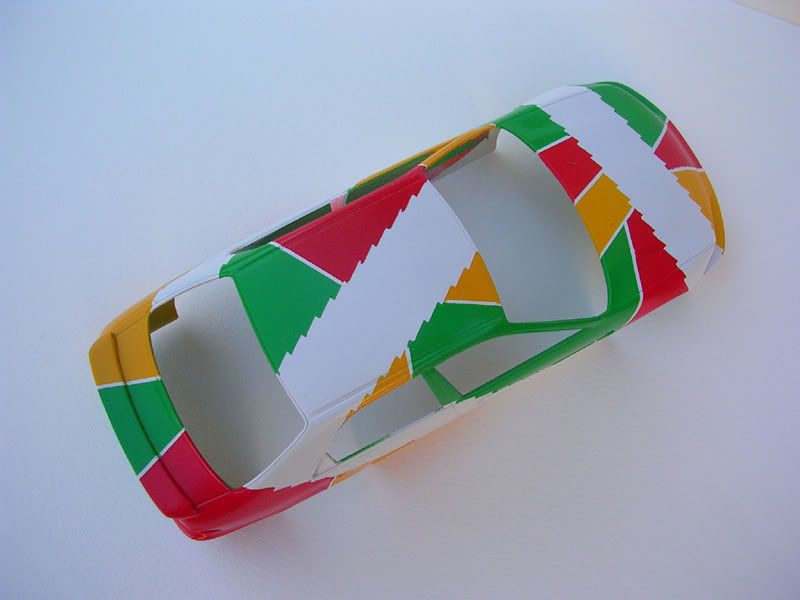 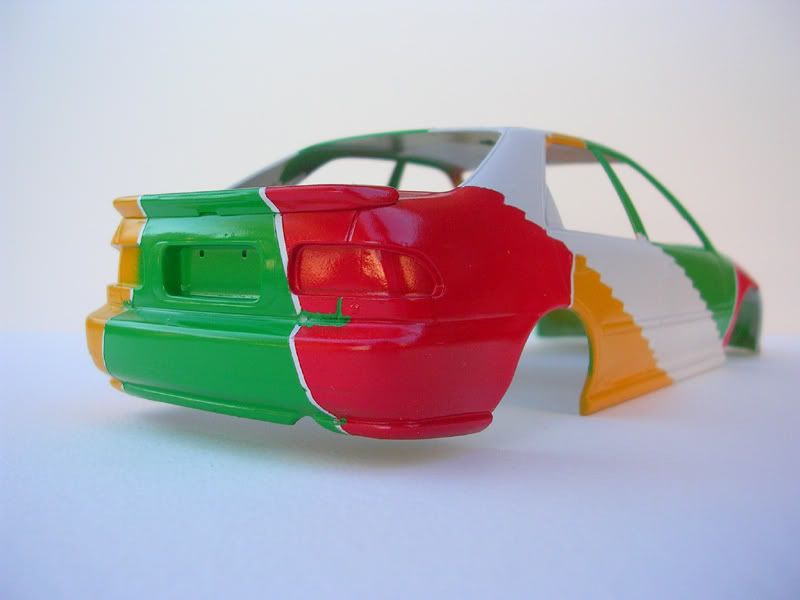 So that is where I'm at on the paint job side of the build. I'm fairly satisfied with how it turned out but it's far from perfect. The yellow and the red went on without any issues but the green bled on a couple of areas. Aside from that, I found some reference photos of the real car and it seems that I chose a green paint that is a darker shade. I slept on it and decided to strip the whole thing and start all over. The body is sitting in a tub of brake fluid as I'm typing this. I'll be starting over on the paint job come Friday night and hopefully I'll have the whole thing painted and cleared by Sunday.
__________________
|
|
#4
02-07-2008, 01:32 PM
|
||||
|
||||
|
Re: WIP-Saving a 10 year old model, JACCS FERIO
Nice, I like your enthusiasm for that Jaccs livery as I'm making Jaccs Accord from Tamiya and it's realy scary
 You handle it well, shame that the green one went wrong, but keep it up, every mistake makes your progress further 
|
|
#5
02-07-2008, 02:55 PM
|
||||
|
||||
|
Re: WIP-Saving a 10 year old model, JACCS FERIO
You have to be kidding me. This is just way out of a sane idea... Gee, I love your effort!! You really try to achieve something. And doing it another time - I couldn´t take it. So great respect to you!
__________________
Recently finished Projects:
Porsche 911 Carrera RS 3.0 Current Projects: Ferrari 250 GTO LM 1962 (chassis #3387)  
|
|
#6
02-07-2008, 03:48 PM
|
||||
|
||||
|
Re: WIP-Saving a 10 year old model, JACCS FERIO
wow, that is an amazing masking job. I can't believe you're stripping it and doing it all over again.
Do you have another set of the JACCS and the blue zigzag decals or are you planning on masking and spraying that on as well?
|
|
#7
02-07-2008, 04:14 PM
|
|||
|
|||
|
Re: WIP-Saving a 10 year old model, JACCS FERIO
holy hell you have some rare models..!!!!
love the effort to paint on the jaccs theme!!! good work!!!
|
|
#8
02-07-2008, 05:05 PM
|
|||
|
|||
|
Re: WIP-Saving a 10 year old model, JACCS FERIO
Thanks for comments everyone.
davezilla-The kit came with the zig zag decals already attached to the colored body portions and it also came with separate zig zags by themself (extra I guess? maybe for errors because they knew putting on decals like that is a huge pain? LOL). So I still have the extra separate pieces still unused and I initially was planning on using them but I thought, what if they don't line up with the masks I cut out? So then I made the decision to paint in the zig zag pattern with blue paint and a regular brush, using the mask as a guide. Should be simple enough. But since I'm starting over, I think what I'm gonna do is after the body colors are sprayed, I'll leave the masks over the white areas and cut more zig zig masks to put on to define the blue zig zag edges. Then I'll let loose with a can of blue paint. Also, I've just been using regular Tamiya spray cans but I might try and do this second paint job with my airbrush (I hardly ever use it, too lazy to clean and mix paint, etc). I figure that maybe with the airbrush, I'll have slightly better results in the thickness of the paint itself at the color breaks and at the same time better control to avoid the paint from running/bleeding. I also thought about using BMF for the mask. Reason being is that since it's so thin the paint will have less of a "wall" to build up against compared to the masking tape when it's sprayed, ultimately giving me less problems later when it's time to wetsand and polish it out. As for the JACCS decals, "ImolaEK" traded me a set of Tamiya JACCS Accord decals years ago and I never used them. I was planning on using them but once again, using the reference photos I have the decals are the wrong color. The original decals for the JACCS logo are green on the Hasegawa sheet as is the one's from the Tamiya Accord kit but the reference pics shows the Ferio specifically with the JACCS logo in black so I think what I'll have to do is scan the decals and print a new set in black. Not a big deal since I'll have to print the remaining sponsor decals anyway. Another big decision is whether or not I should keep the body as is or how it is depicted in the reference photos I have. I'll scan them later so you can see what I'm talking about but the pics show the same car with a carbon fiber lip and carbon fiber wing as well as different wheels. Anyone have any additional pics of the real car that might help me out? I'd greatly appreciate it.
__________________
|
|
#9
02-08-2008, 03:08 AM
|
|||
|
|||
|
Re: WIP-Saving a 10 year old model, JACCS FERIO
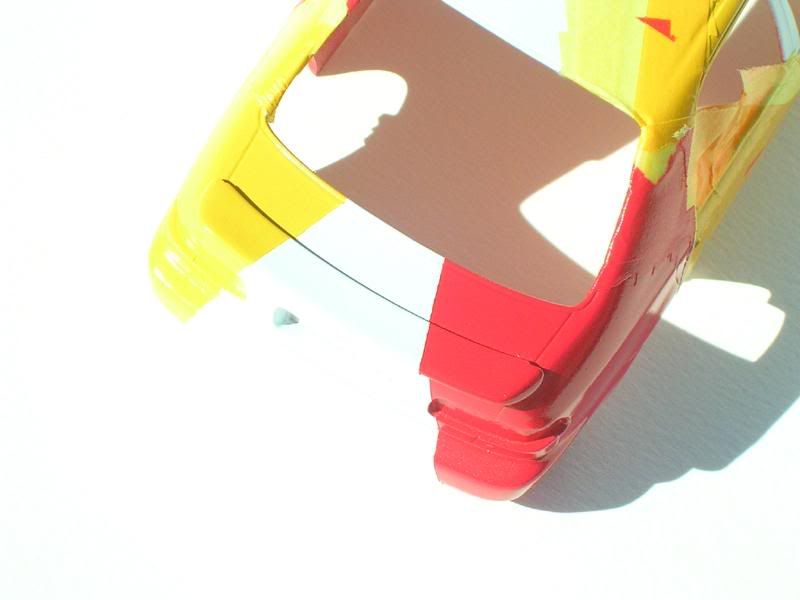
I went out and checked on the body earlier. Here's how it is currently:
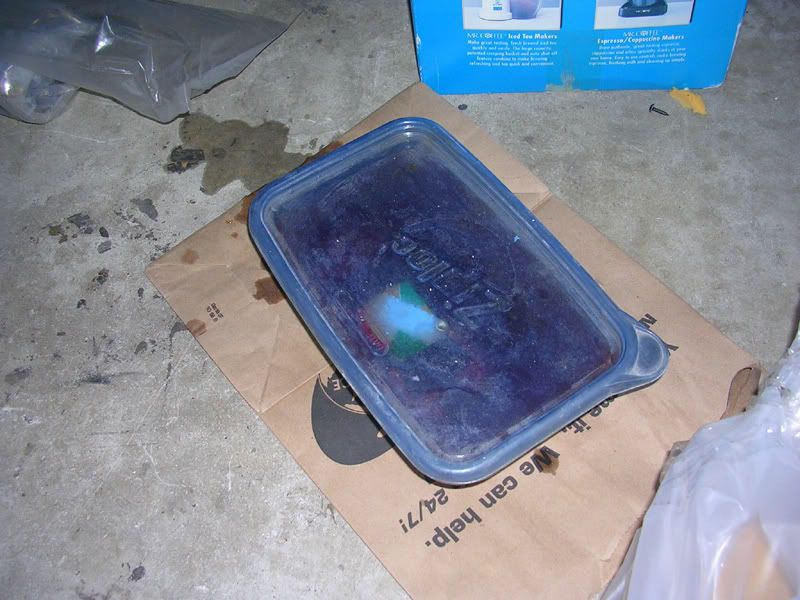 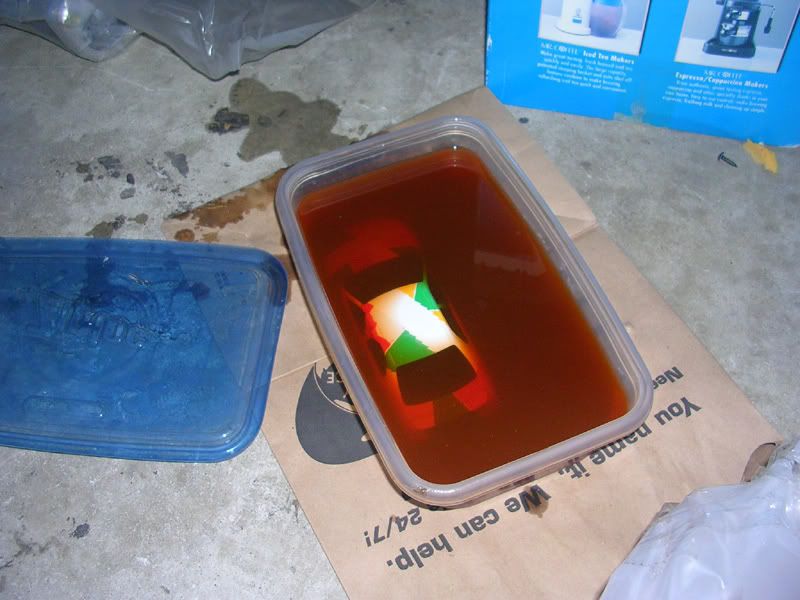 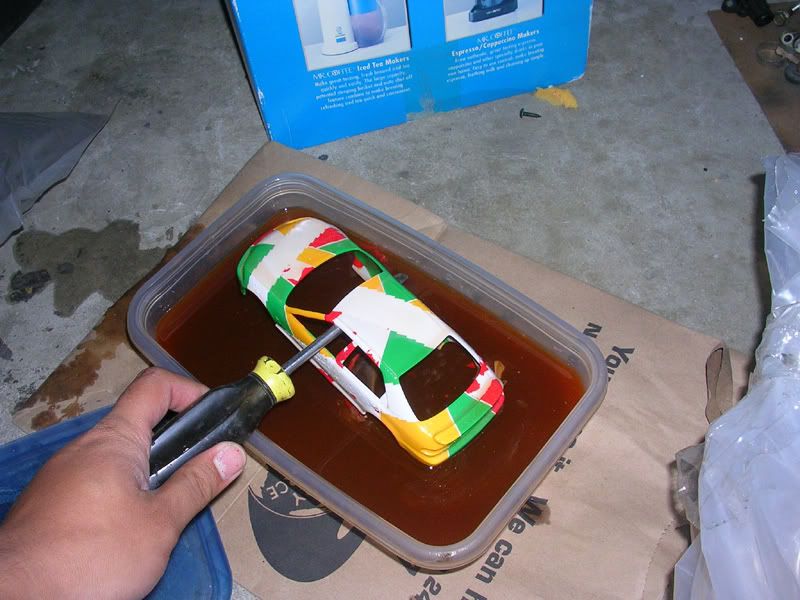 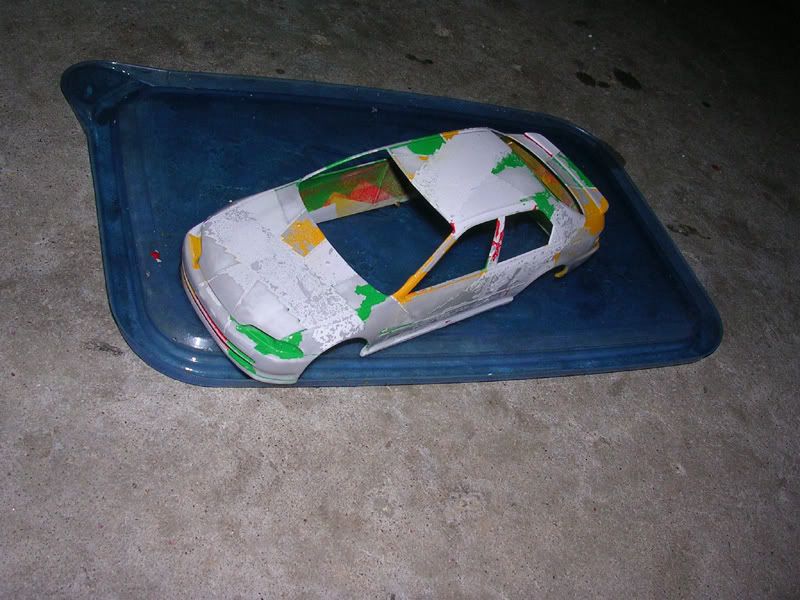 I rubbed the body with my fingers in that last picture and the paint was rubbing off. I put it back in the brake fluid. I'll let it sit till tomorrow night and hopefully the rest will come off by then.
__________________
|
|
#10
02-08-2008, 06:33 AM
|
|||
|
|||
|
Re: WIP-Saving a 10 year old model, JACCS FERIO
awesome work, i was planning to do the same masking work on the JACCS accord.... but never had the guts !!
good luck with the second time on masking ! and hopefully zeropaints will make some paints for the JACCS colours in the possible future:P
__________________
   
|
|
#11
02-11-2008, 01:45 AM
|
|||
|
|||
|
Re: WIP-Saving a 10 year old model, JACCS FERIO
Finally, I had a chance to work on the paint job this weekend. I ran into some small problems but nothing too drastic. One of the problems was the similarity in color of the yellow paint and the masking tape. I thought I had everything masked after I sprayed yellow, preparing for the red paint. After the red was sprayed, I peeled off the masking tape only to discover that two areas of yellow weren't covered. Not too big of a deal, just remask and paint accordingly. The bigger problem I had was a piece of dust/lint that got partially underneath the mask on the rear bumper. I tried to pick it out after I had just sprayed the red paint and dug my finger nail into the paint. I had to sit back and wait for it to fully dry so that I could sand it down and do a quick touch up.
Here it is after the brake fluid bath and fully wetsanded. 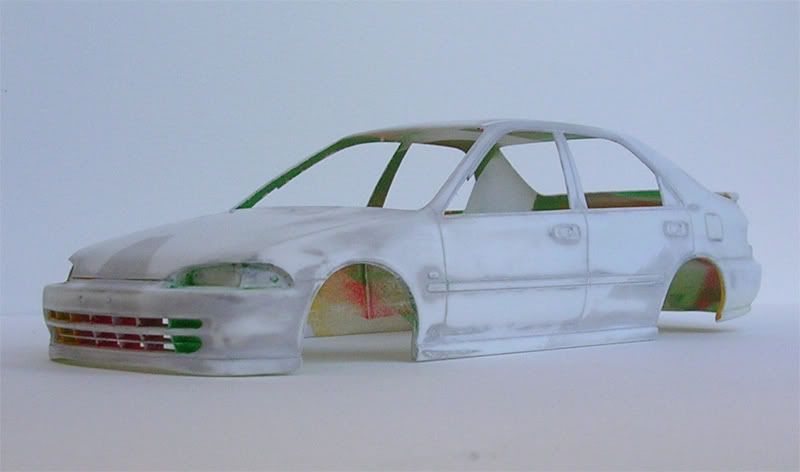  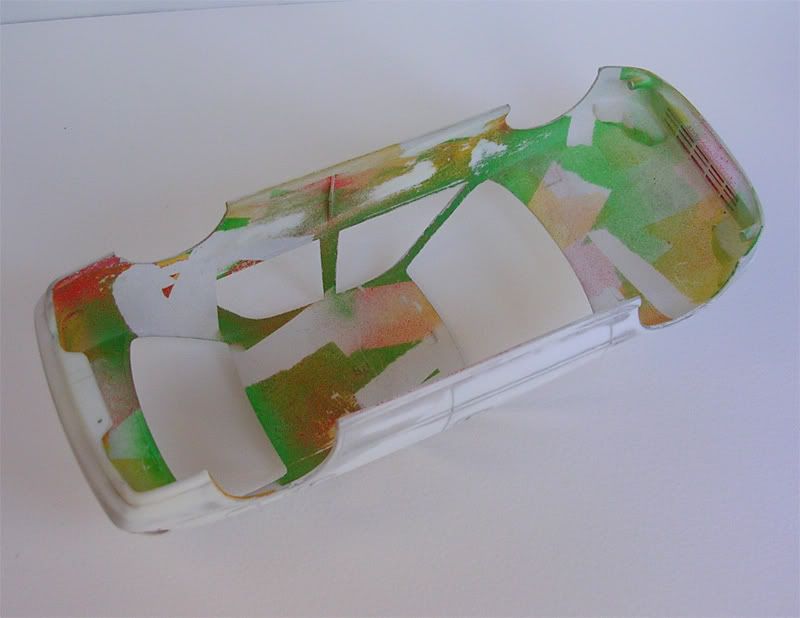 I primed the body and began the paint job once again. I didn't take pics of this process since it's the same as above but I did take a few pics of the problem I encountered on the rear bumper. Sanded down: 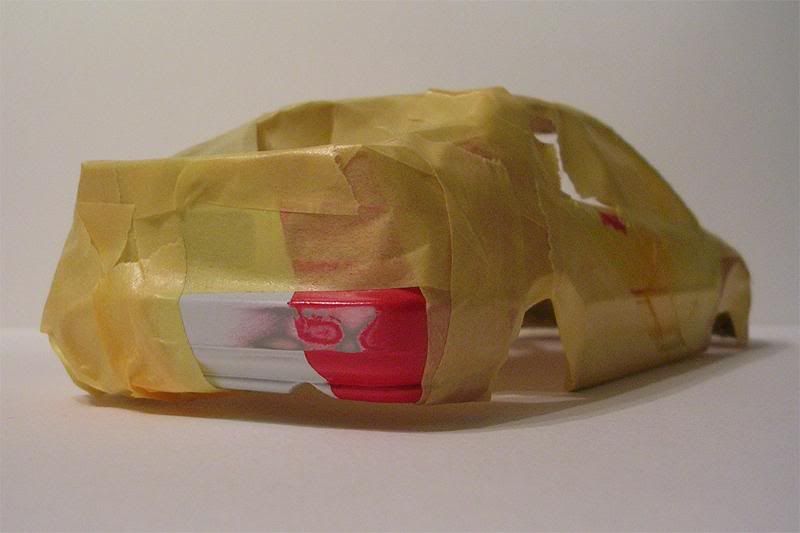 Quick spray of Matte White: 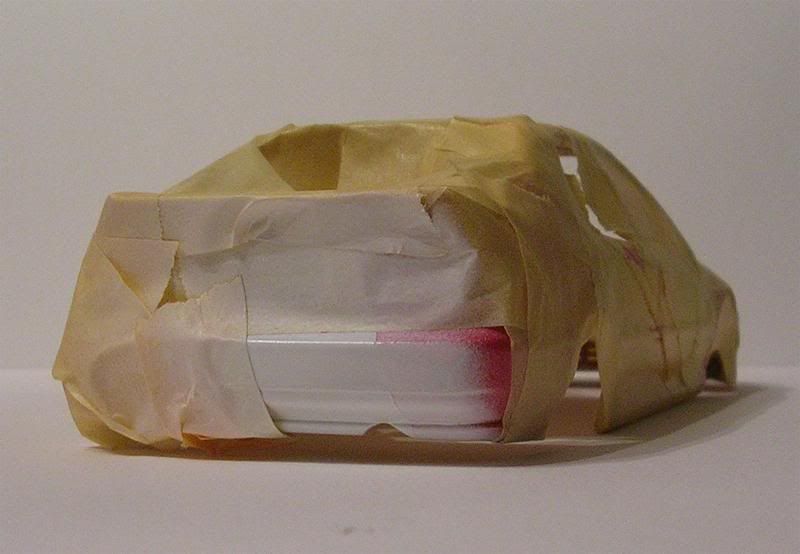 Mask off the color break: 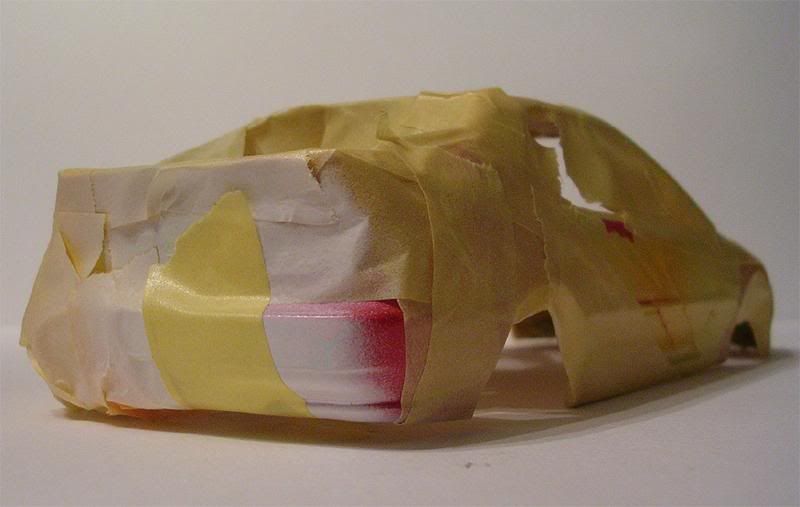 And spray the Italian Red (correct model paint this time, not RC car paint LOL): 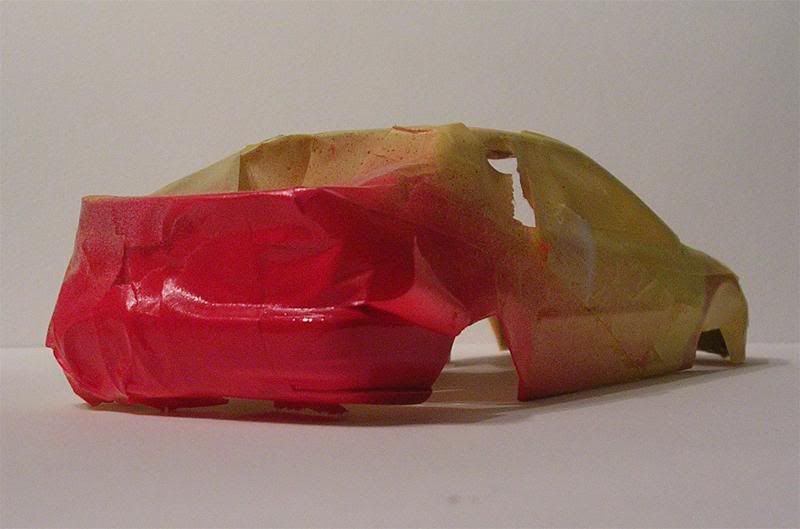 And then after it was dry to the touch, time to start peeling the masking tape off: 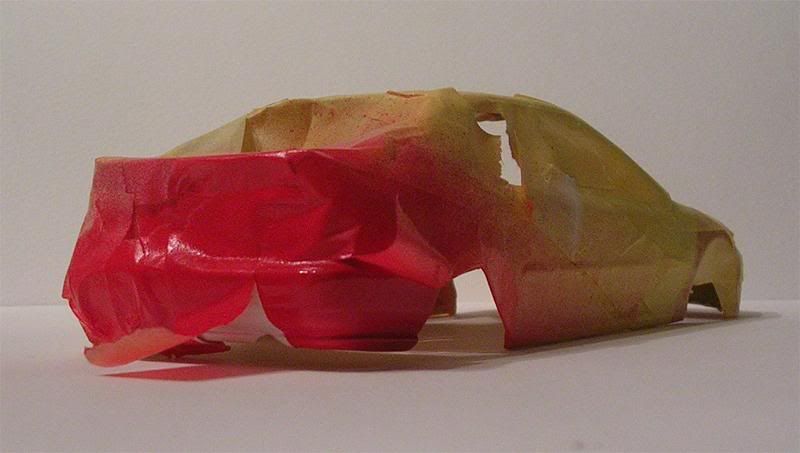 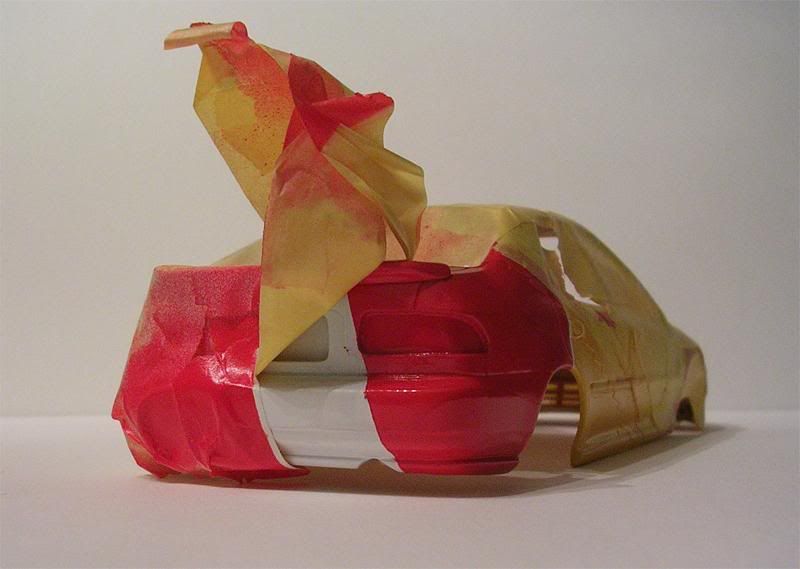 After that was all dry, I masked off the body for the last color. The first time around I used Park Green. It came out too dark. I went back to the store and bought a can of Light Green. I remember passing on that the first time I was shopping for paint because it just looked too light. Well, it was time to find out if it was worth the time spent redoing this paint job just for that color.   Looks better to me!! Time to peel off the masking tape and reveal what the body looks like... 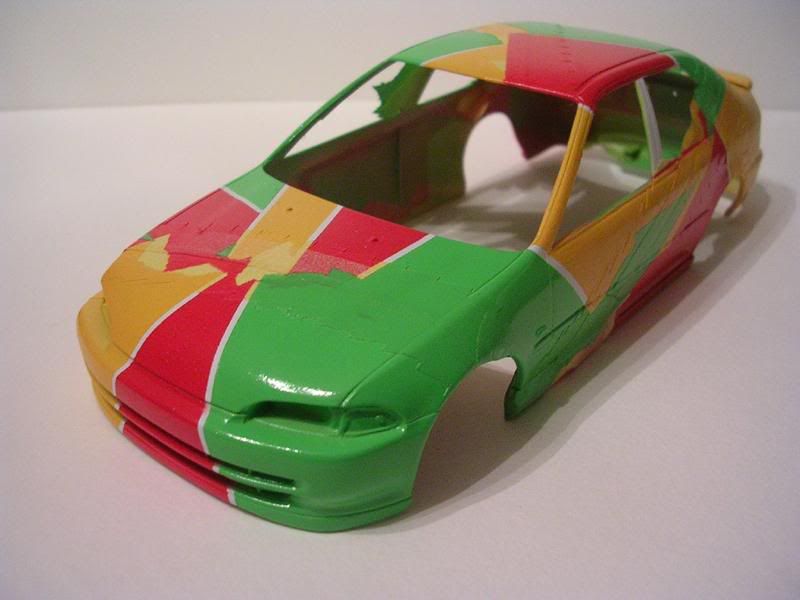 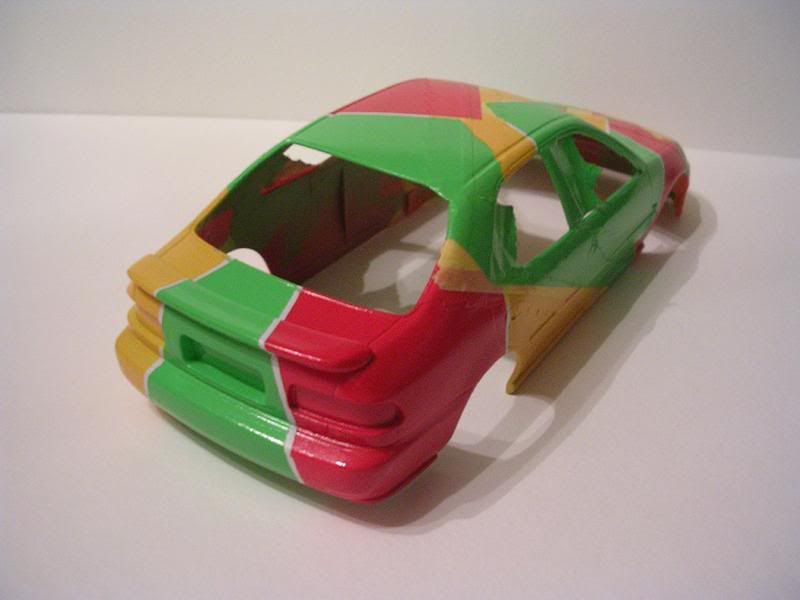 I think it's nearly a perfect match!! Time to go and mask off the jagged edge one last time so that I can finish the paint job with the blue edging.
__________________
|
|
#13
02-11-2008, 04:40 AM
|
|||
|
|||
|
Re: WIP-Saving a 10 year old model, JACCS FERIO
It isn't really too hard. The hardest thing is cutting the masking tape to shape. Other than that, the way the color patterns are set are completely random and aren't symmetrical so even if the pattern isn't exactly replicated no one would really be able to tell.
I made some more progress before the night was over...well, morning now. Masked off the blue areas. 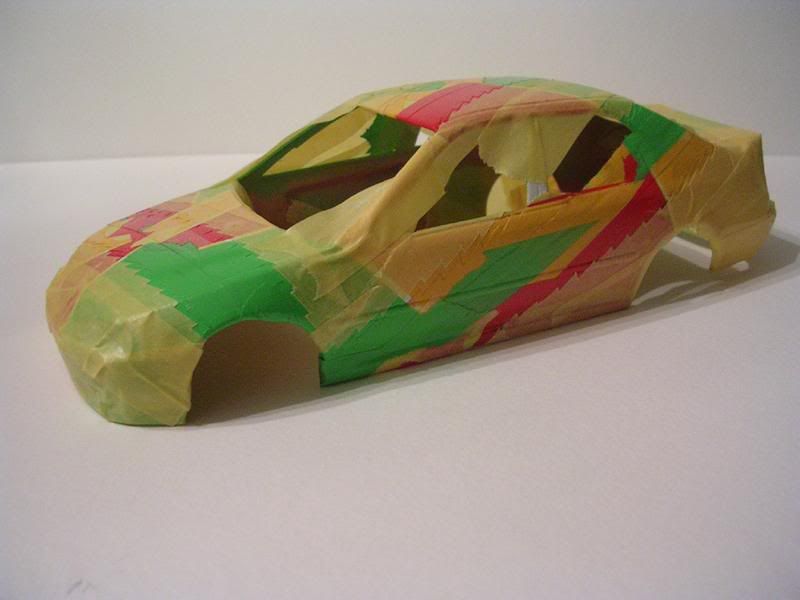 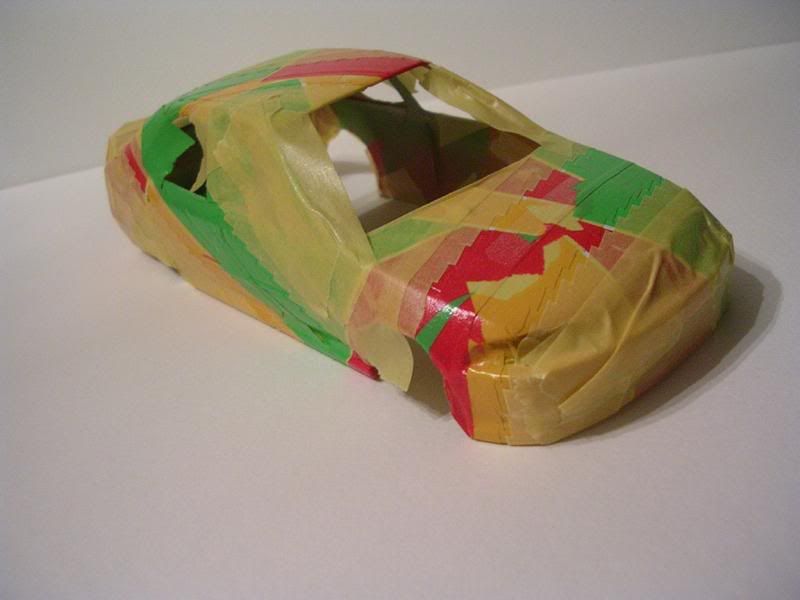 Sprayed on Tamiya Brilliant Blue. 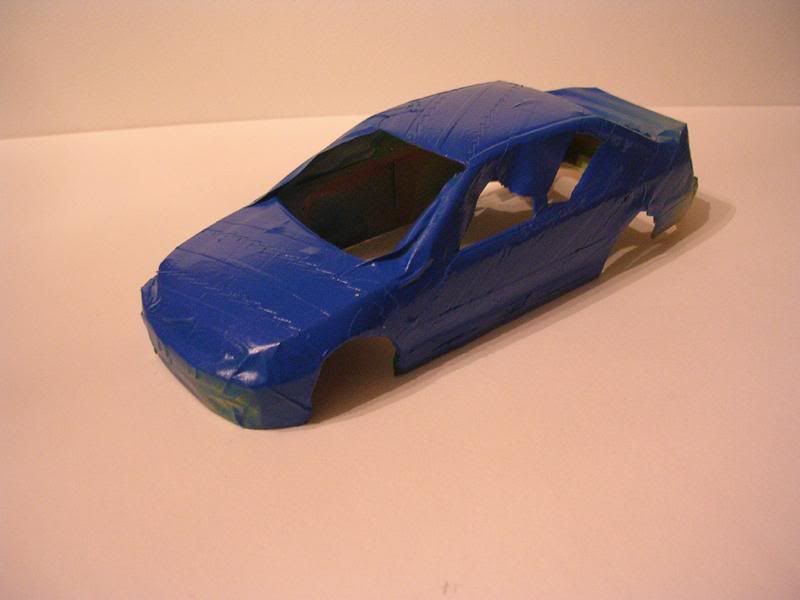 After it was dry, it was time to remove all the masking tape so that the final product can be revealed. 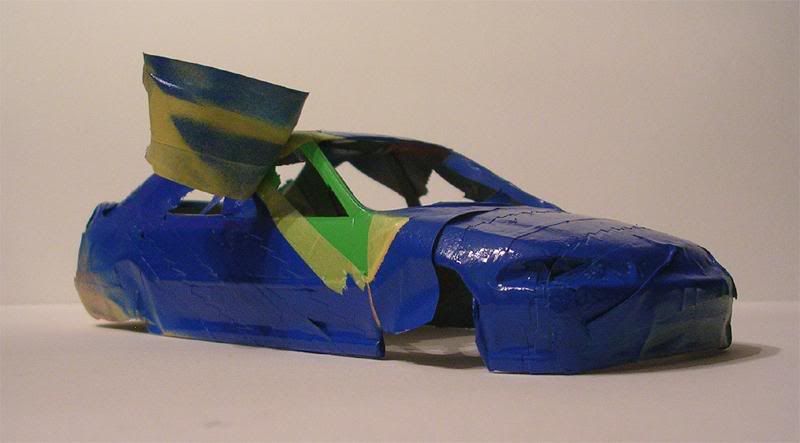 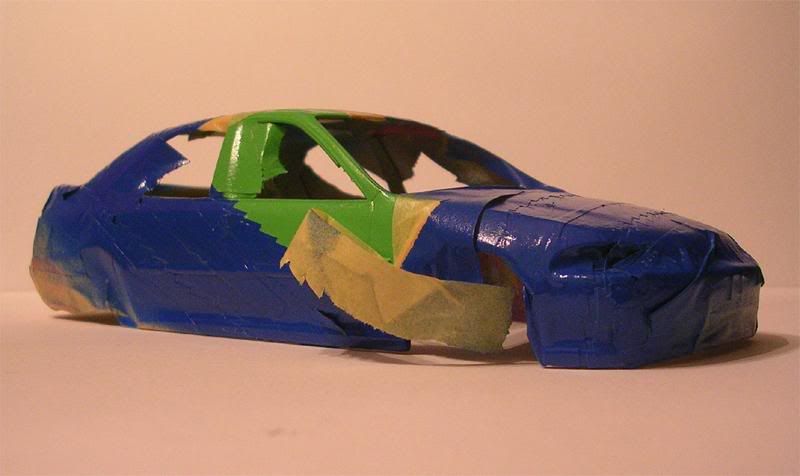 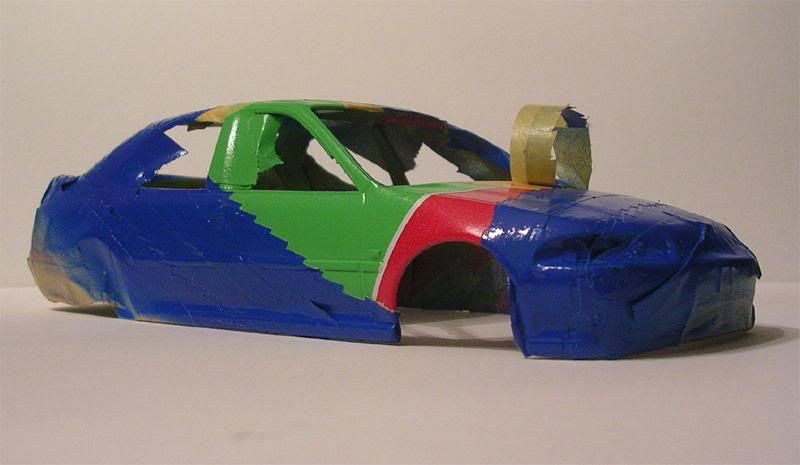 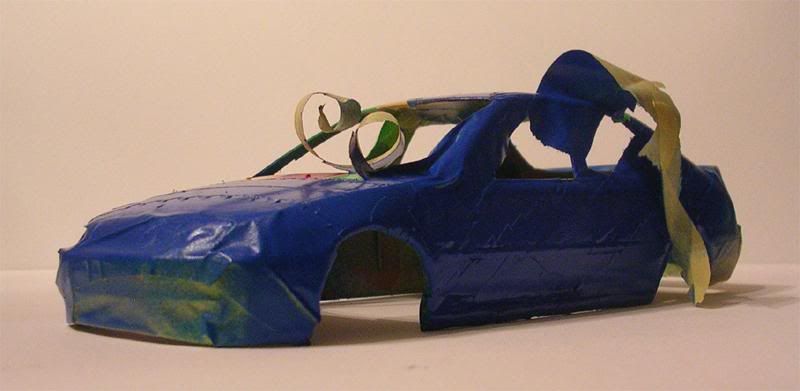 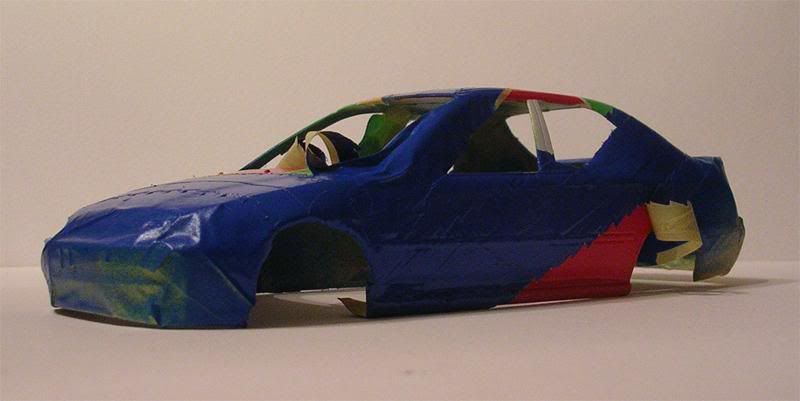 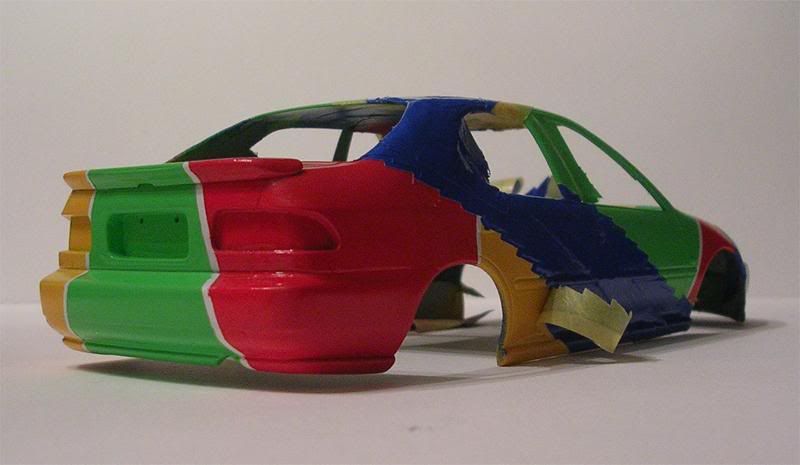 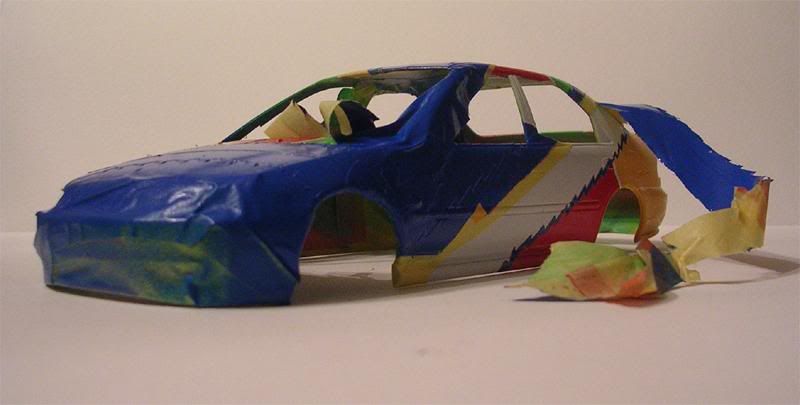 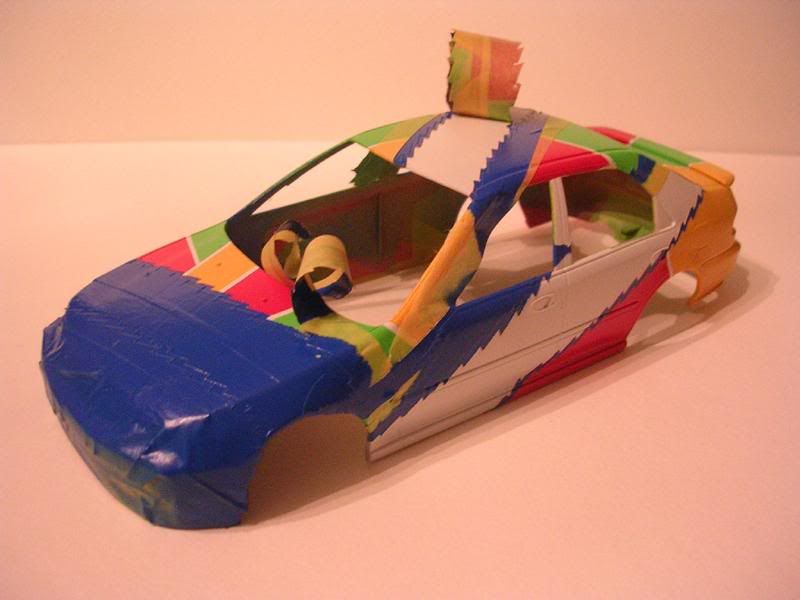 One more section to go!! 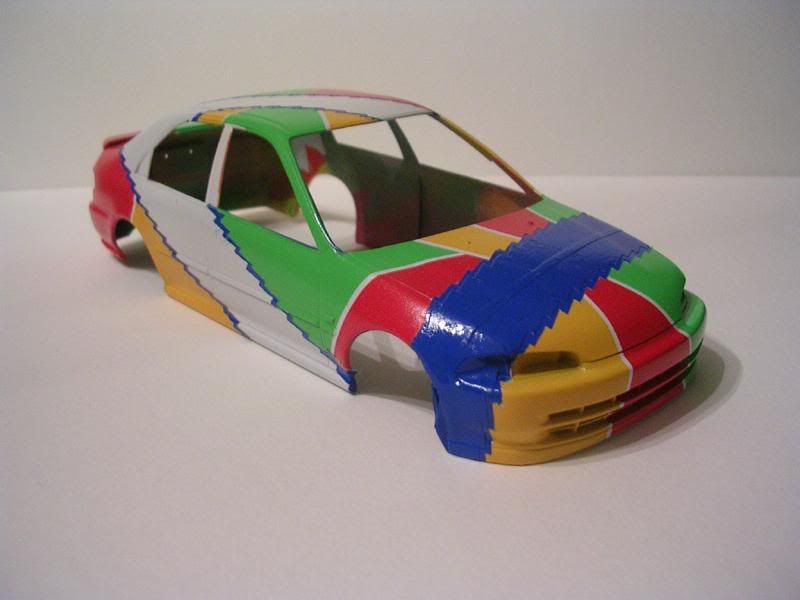 And I'm spent. 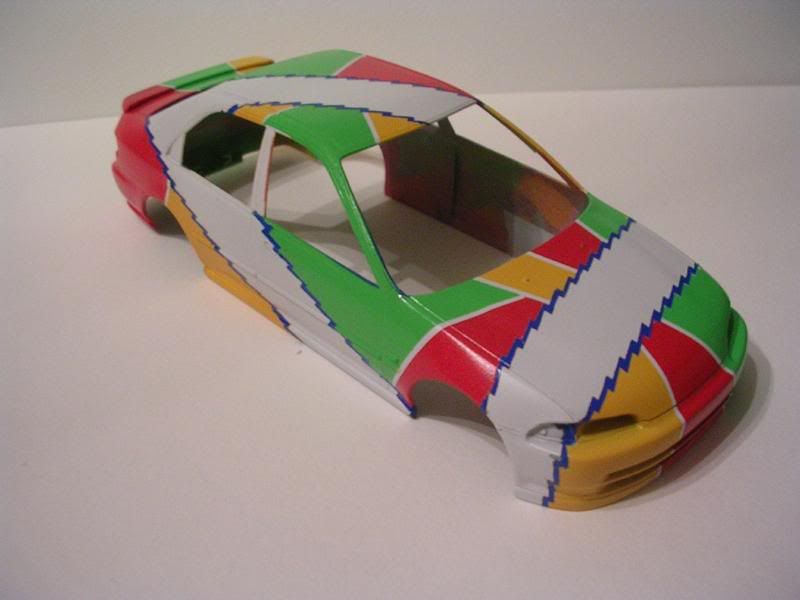 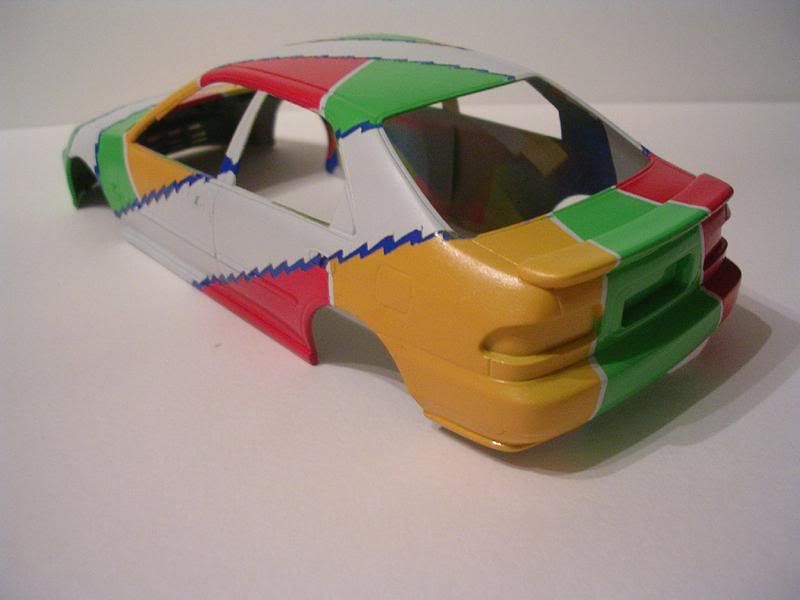 After the last mask was removed, I gave the body 3 good coats of Mr. Hobby Clear Top Coat to get everything "sealed" and secure. I took a moment and mounted the old built chassis to see what it looks like with wheels. It doesn't look too bad at all. Funny thing is, I recall the suspension using the stock struts of the street version with an offset hub for the brakes. This makes the wheels sit in a higher position than they are suppose to be, giving the overall stance a lowered look (and cambered too). After putting it on, it still looks very high so I'll probably end up redoing the suspension when the time comes. 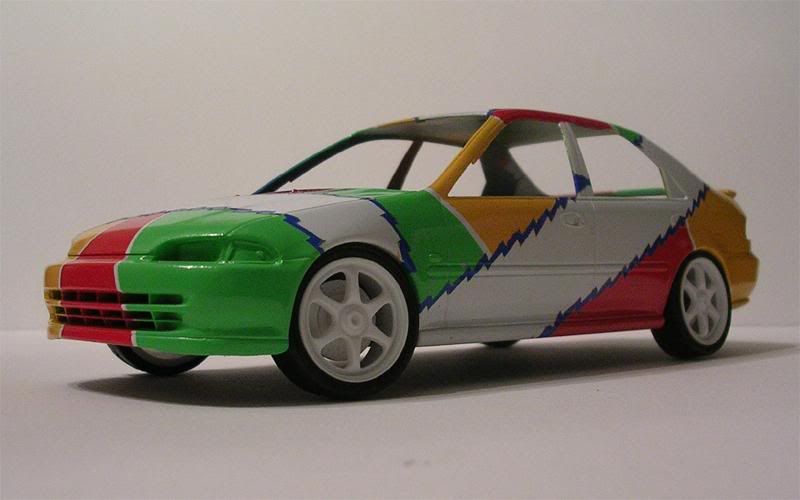 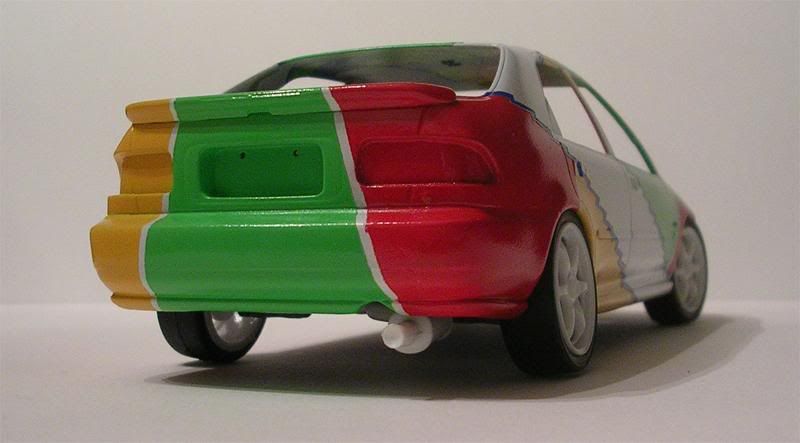
__________________
|
|
#14
02-11-2008, 08:28 AM
|
||||
|
||||
|
Re: WIP-Saving a 10 year old model, JACCS FERIO
That blue zig-zag strip look to be pretty difficult for masking. Paint needs some minor corrections, but you did great job.

|
|
|
POST REPLY TO THIS THREAD |
 |
|
|


