|
|
|

|
|
| Search | Car Forums | Gallery | Articles | Helper | AF 350Z | IgorSushko.com | Corporate |
|
| Latest | 0 Rplys |
|
|||||||
| WIP - Street Post topics for any "Works In Progress" street vehicles projects in this sub-forum. |
 |
 Show Printable Version | Show Printable Version |  Email this Page | Email this Page |  Subscribe to this Thread
|
|
|
Thread Tools |
 07-05-2022, 04:20 AM
|
#1 | |
|
AF Regular
Join Date: Feb 2009
Location: Moscow, Russia
Posts: 294
Thanks: 5
Thanked 14 Times in 14 Posts
|
1973 Chevrolet El Camino
Hello, Gents!
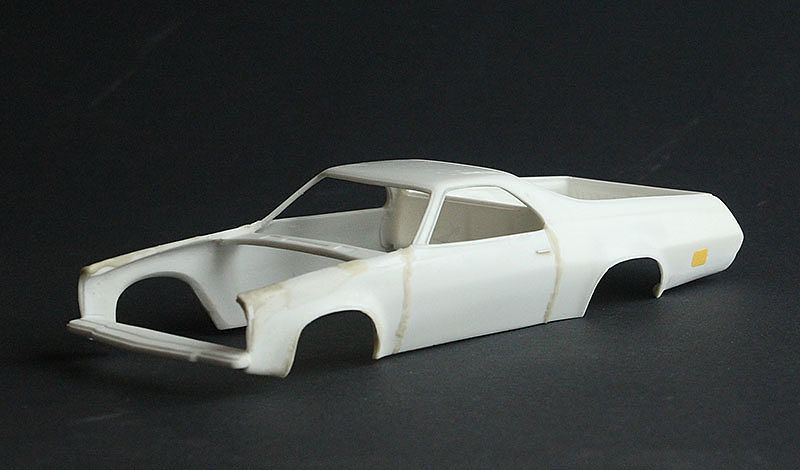
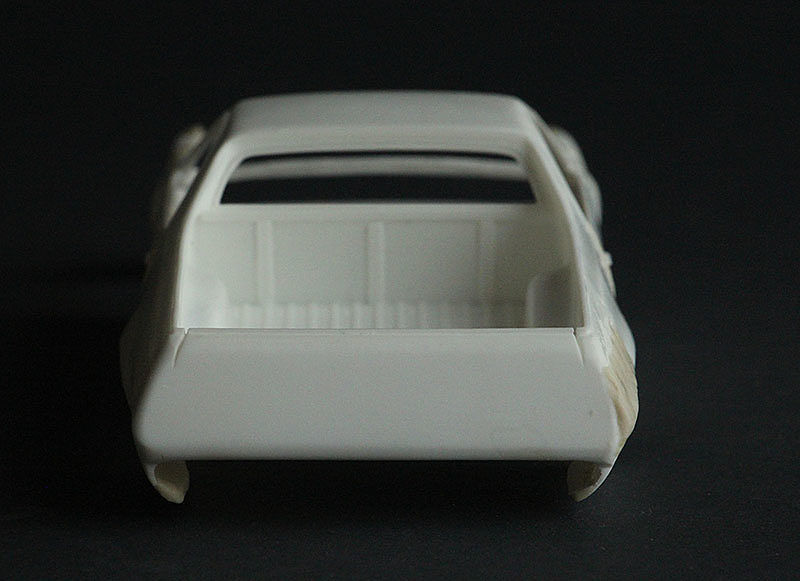
As all of my current projects are paused for different reasons I decided to start fourth generation of El Camino! It looked like this: 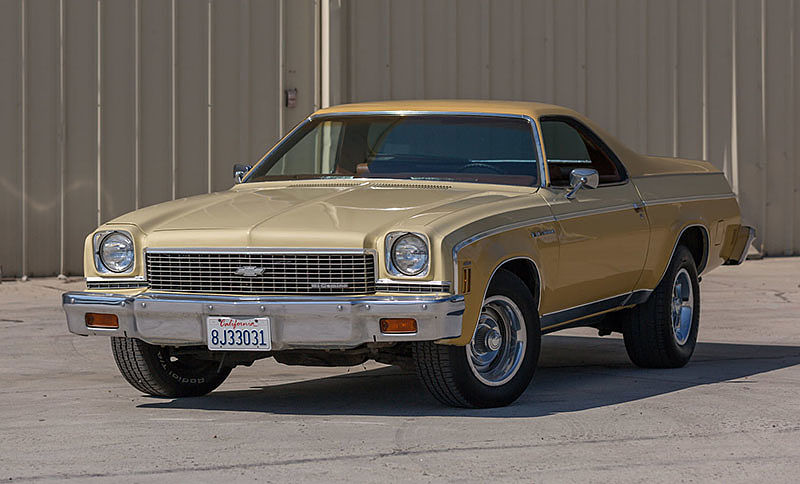 or like this in 74-75  So: the resin kit contains almost everything you need to build a handsome car, except for the rear axle, suspensions, wheels, cardan shaft and mufflers 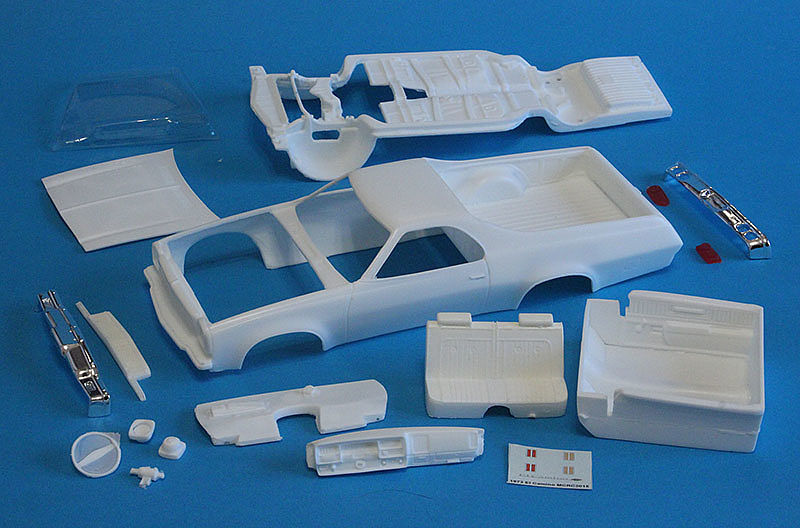 But there are some bugs 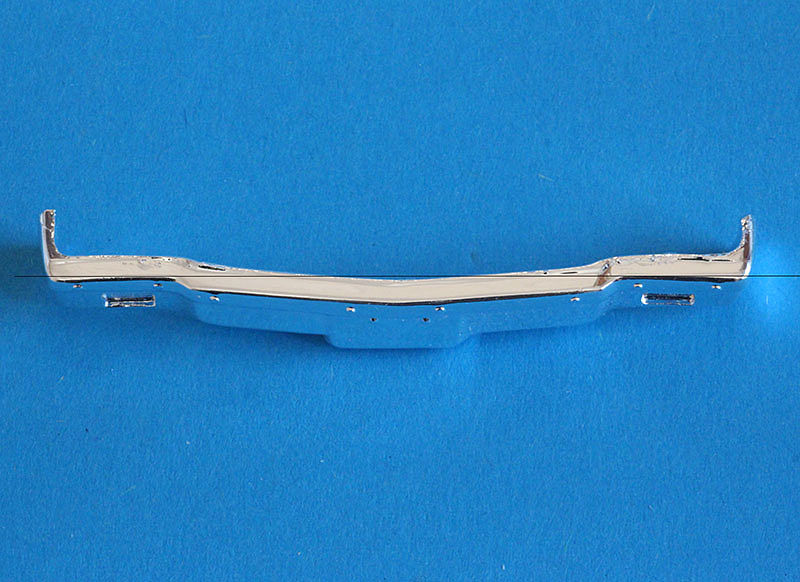 The front bumper is slightly curved outward. That's just it's already covered with chrome and you need to unbend it more carefully.  A separate hood is curved, but there is no engine. You can also glue it tightly 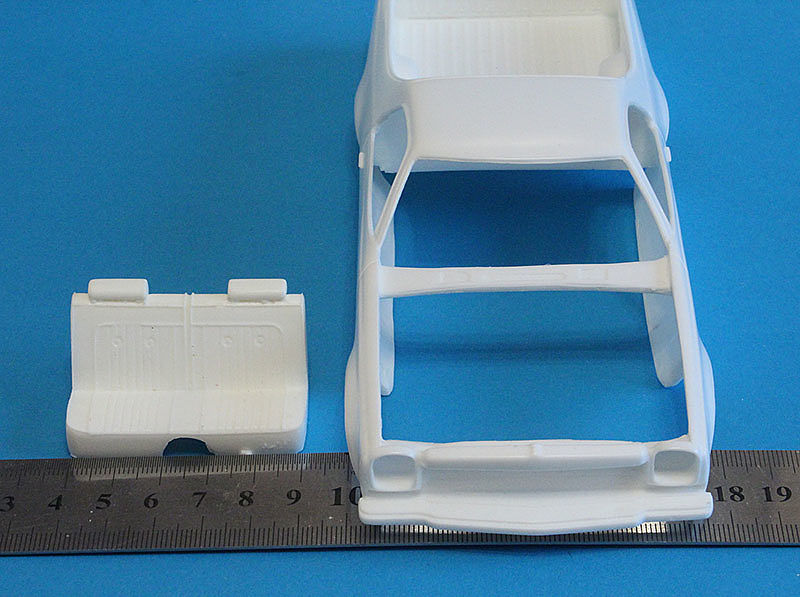 The bench seems small relative to the width of the body. However, after digging in the network, I found such a drawing 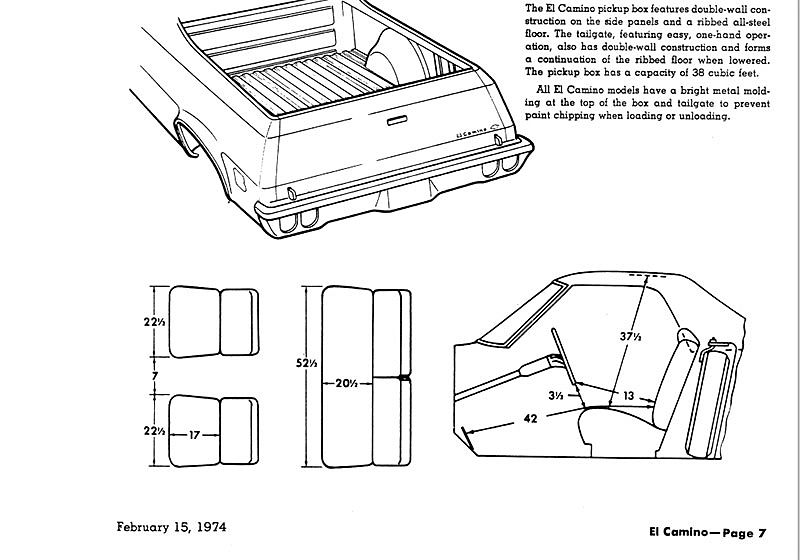 That is, the length is almost necessary, but the depth of the seat is shorter by 4mm. I don't know what to do with it yet. I'll decide along the way. 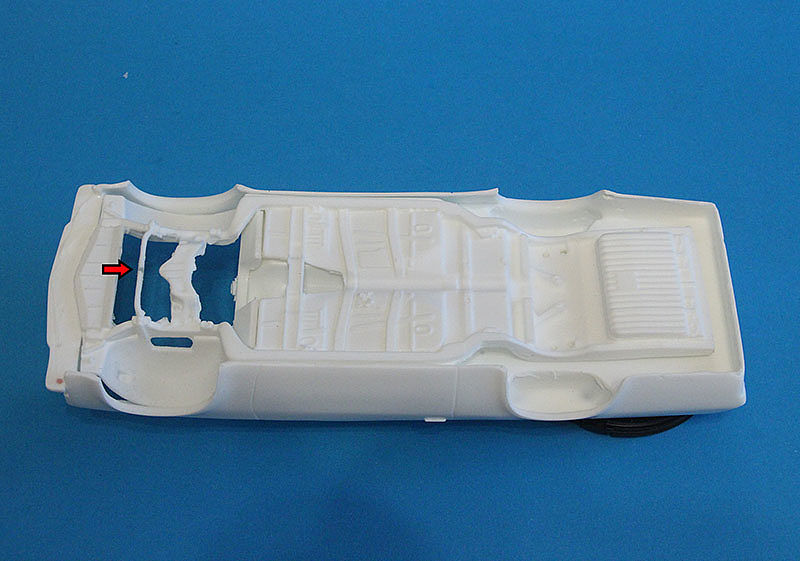 The bottom, apparently copied from a similar whale. Perhaps it is 69'Olds 442, which is why it is recommended as a donor for the suspension. It can be seen that the caster himself repaired the bubble on the front stabilizer. 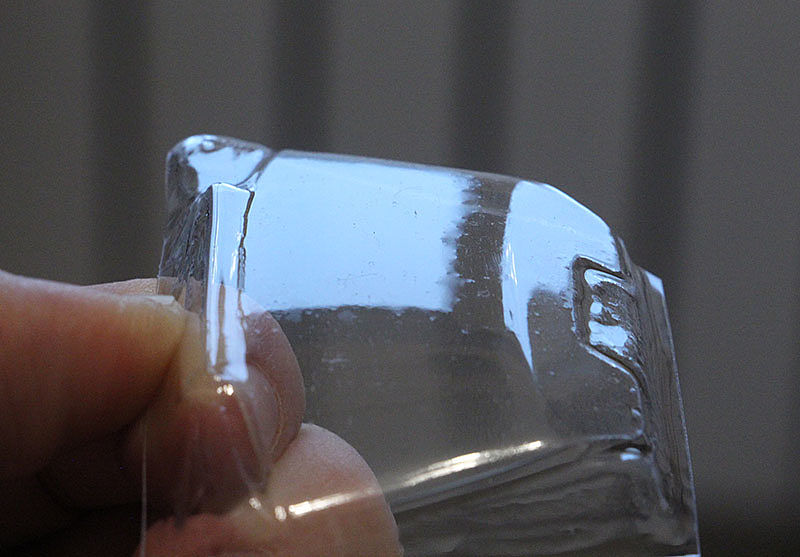 The wind screen is vacuum formed and, as we can see, is covered in bumps from bubbles.  And these are the taillights, which should be made of transparent resin, in theory. But obviously the stars didn't come together and the red dye probably killed the transparency. 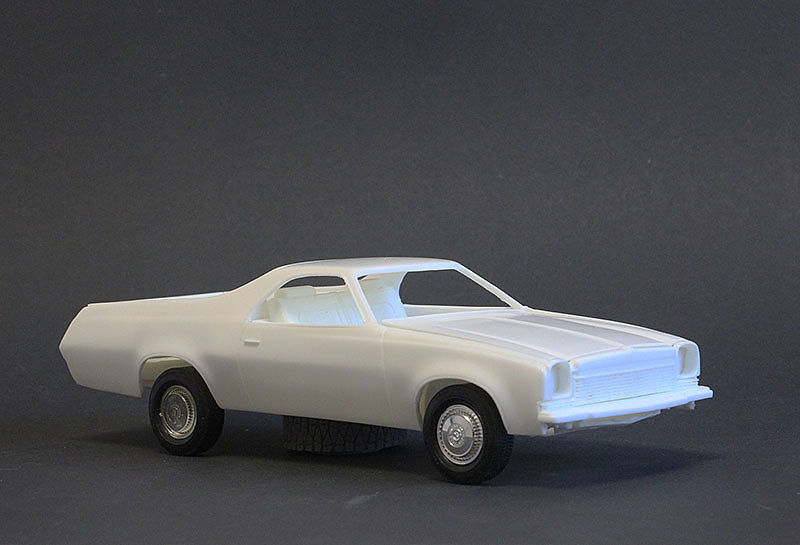 But there is also good news: I have already estimated the wheels from the 77 Ford. It is only necessary to sand down the caps. They stick out too much. 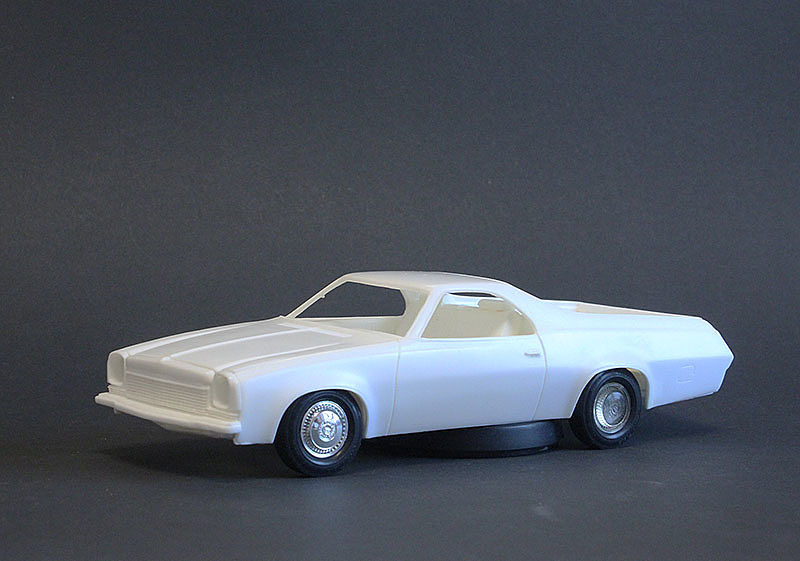 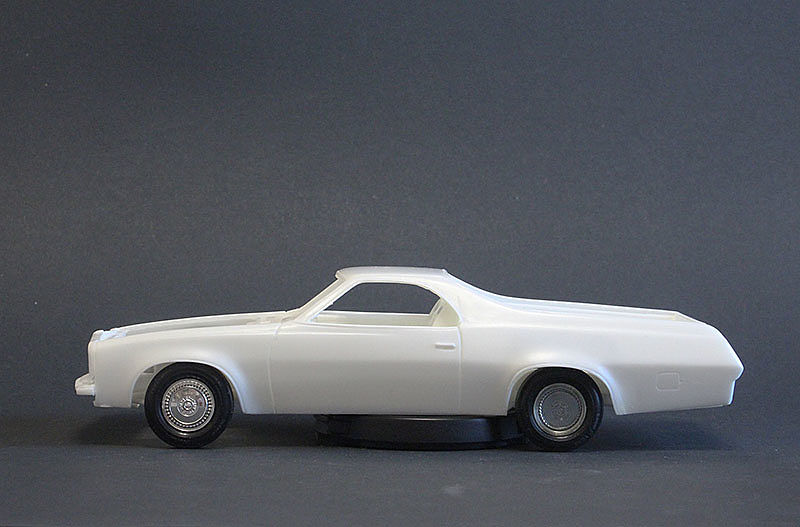 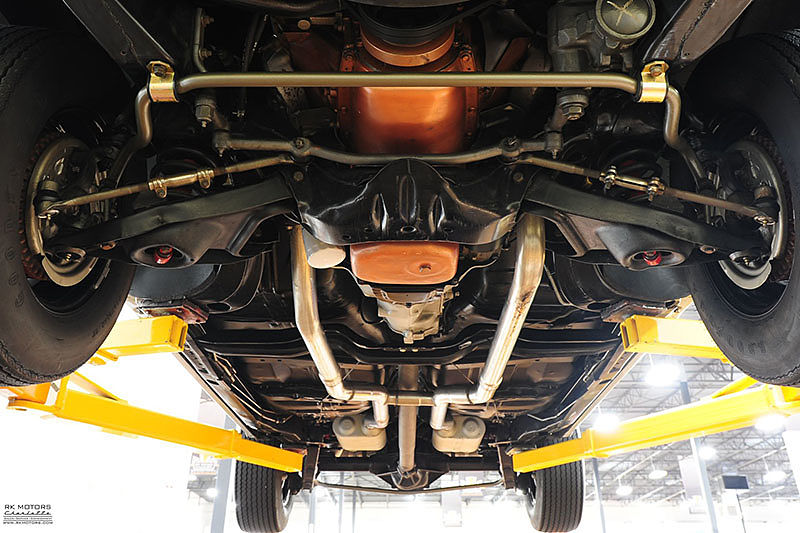 I guess I was lucky to found some pictures of Camino*bottom. Though it's 1968 model the bottom looks mostly the same. By the way: what is the right name for car bottom to write down in search window? Here we can see lower wheel arms, which I don't have. But looking at the next photo of repaired Camino I have found the way to make new arms. 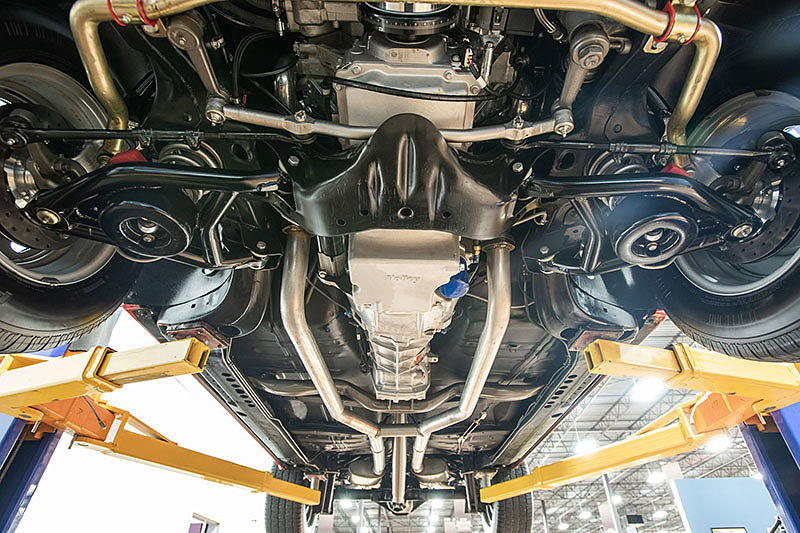 I can make it from brass wire 0,8mm. But first I should fill rectangular hole in wheel wells with a piece of 2mm plastic. 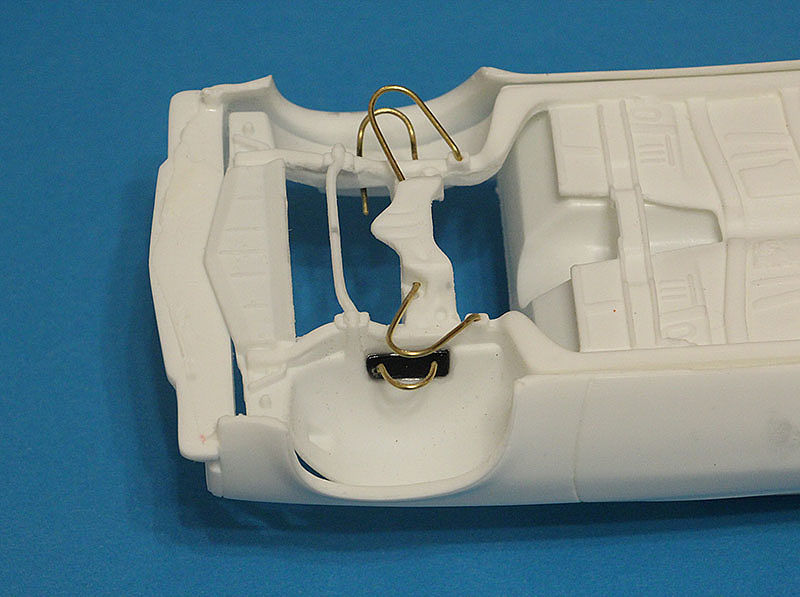  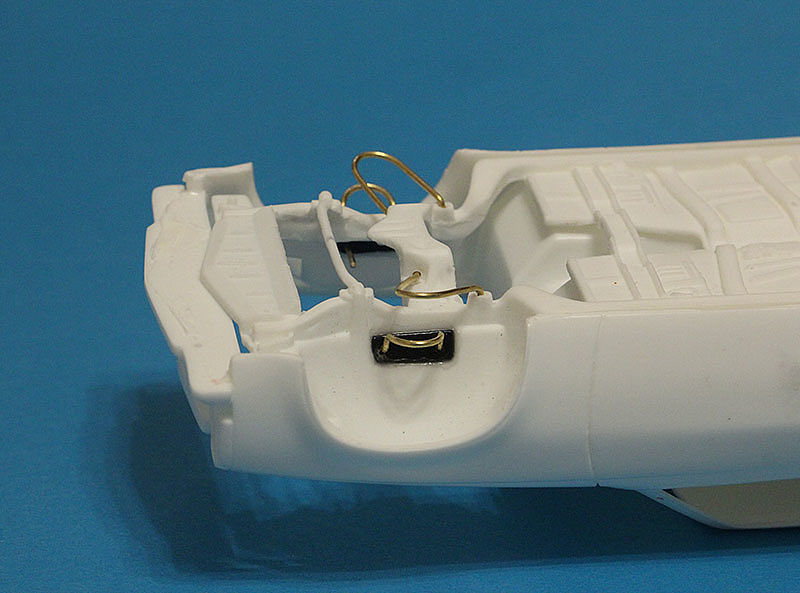 There is how upper arms looks 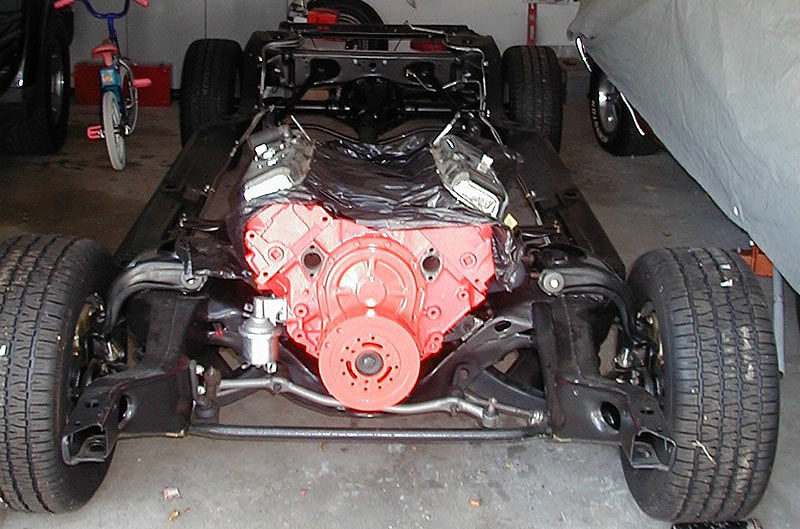 Here are some billets for arms: front semi axles, wells for springs and*rotary fists (if I call it right) 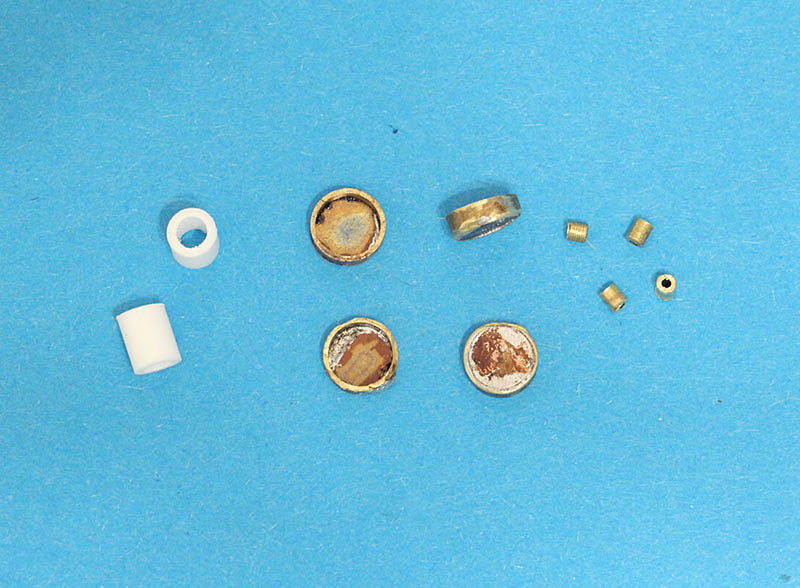 Semi axles in place 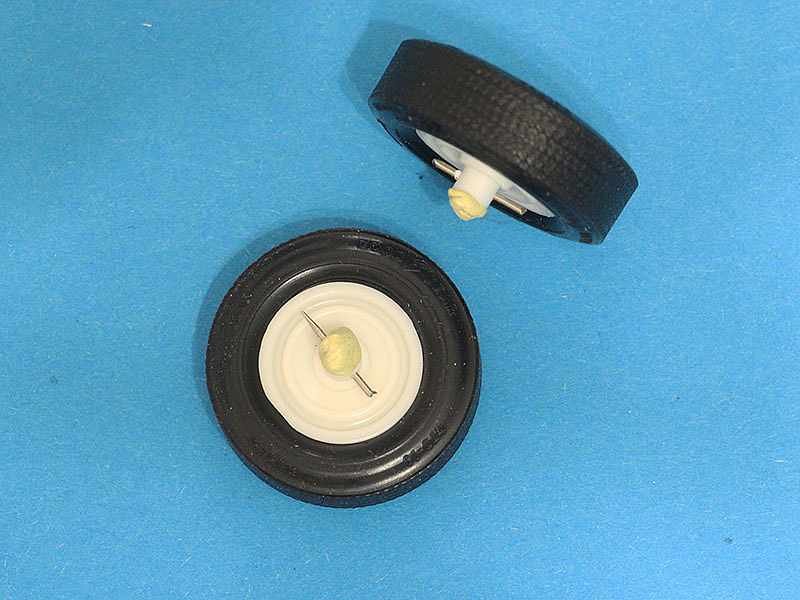 Now let's solder all this mess 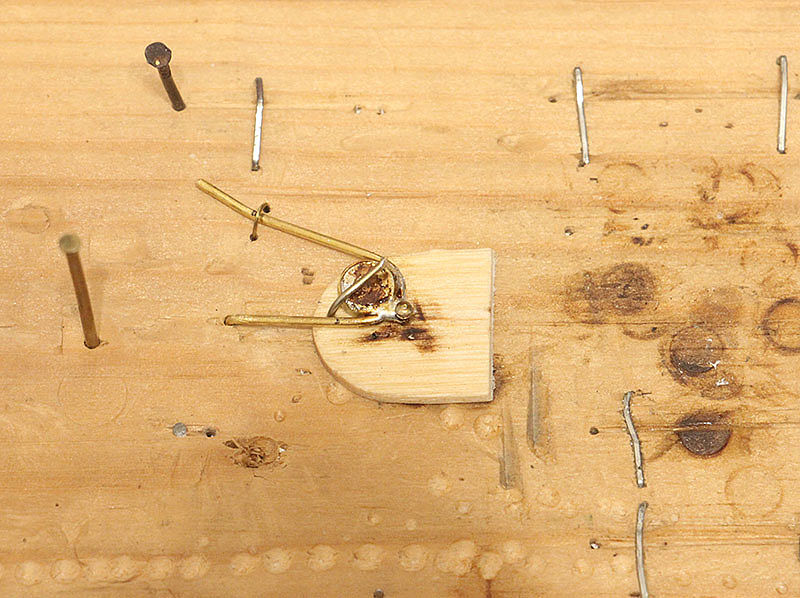 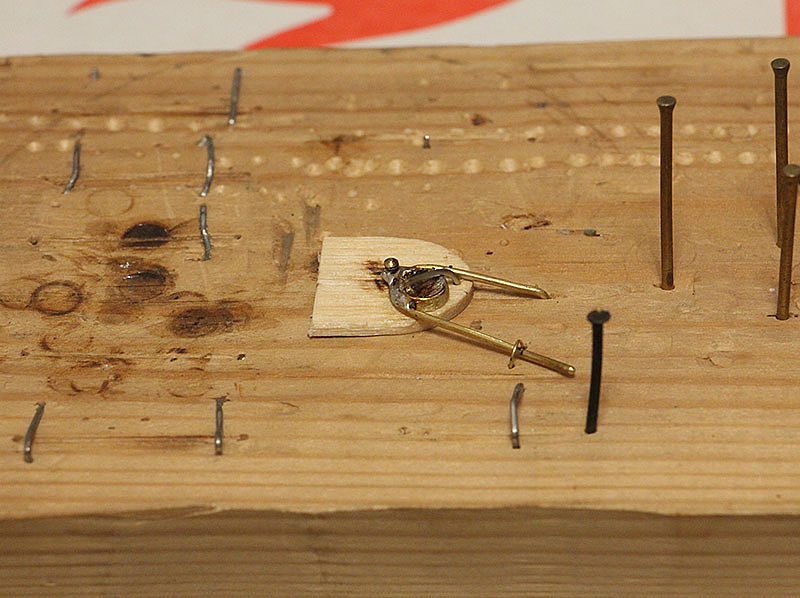 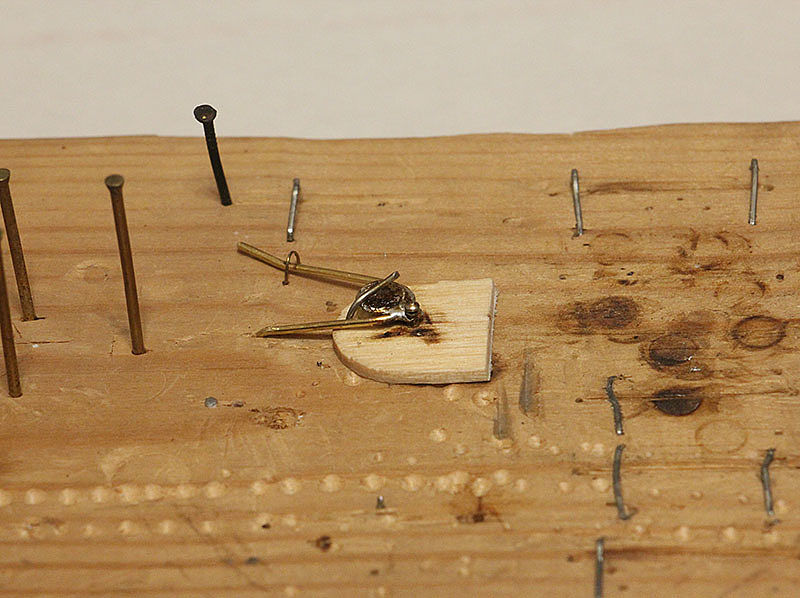 And there are copies of muffler and differential drilled & pierced with 3mm plastic tube and 2mm steel spike inside. 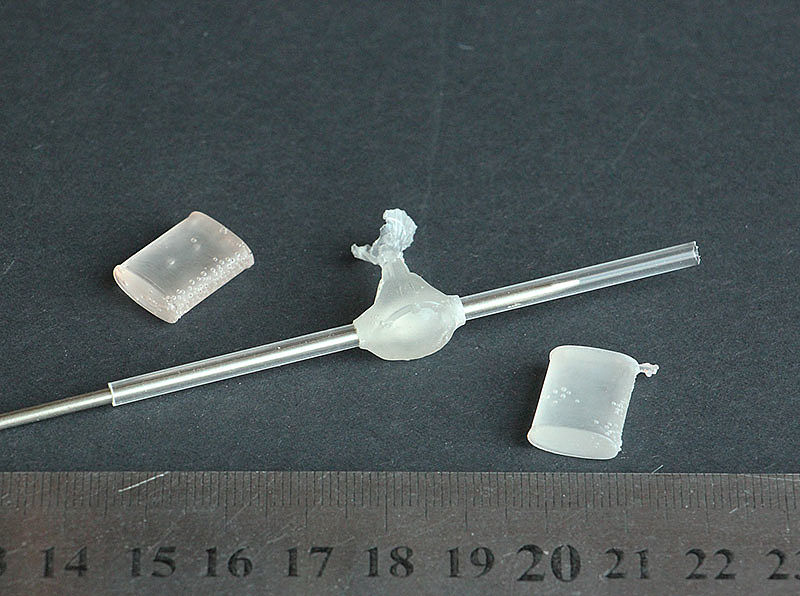 Don't pay attention to the bell in front of*differential. It is injection sprue to be deleted. Comments are welcome! 
__________________
 "Precious and fragile things Needs special handling.." "Precious and fragile things Needs special handling.."
Last edited by Serioga; 07-05-2022 at 04:55 AM. |
|

|

|
| The Following 2 Users Say Thank You to Serioga For This Useful Post: |
fafnir (07-05-2022)
|
|
07-05-2022, 09:19 AM
|
#2 | |
|
AF Regular
Join Date: Feb 2005
Location: Kaatsheuvel
Posts: 221
Thanks: 26
Thanked 45 Times in 40 Posts
|
Re: 1973 Chevrolet El Camino
Ahh a new project amongst the road vehicles. Cool to see a Camino dropped in the mix. Not my favorite of cars, but cool to see the work you are putting in.
If you put the bend parts in hot water, are you able to bend them back in shape? (and quickly cool them in cold water to remain that shape) Arno |
|
|
|
|
|
07-05-2022, 01:13 PM
|
#3 | |
|
AF Regular

Join Date: Nov 2012
Location: Kamloops
Posts: 310
Thanks: 77
Thanked 51 Times in 51 Posts
|
Re: 1973 Chevrolet El Camino
Looking forward to seeing this built!.
|
|
|
|
|
|
08-24-2022, 07:13 AM
|
#4 | |
|
AF Regular
Thread starter
Join Date: Feb 2009
Location: Moscow, Russia
Posts: 294
Thanks: 5
Thanked 14 Times in 14 Posts
|
Re: 1973 Chevrolet El Camino
Hello, dear colleagues!
Here is what I got with front spring 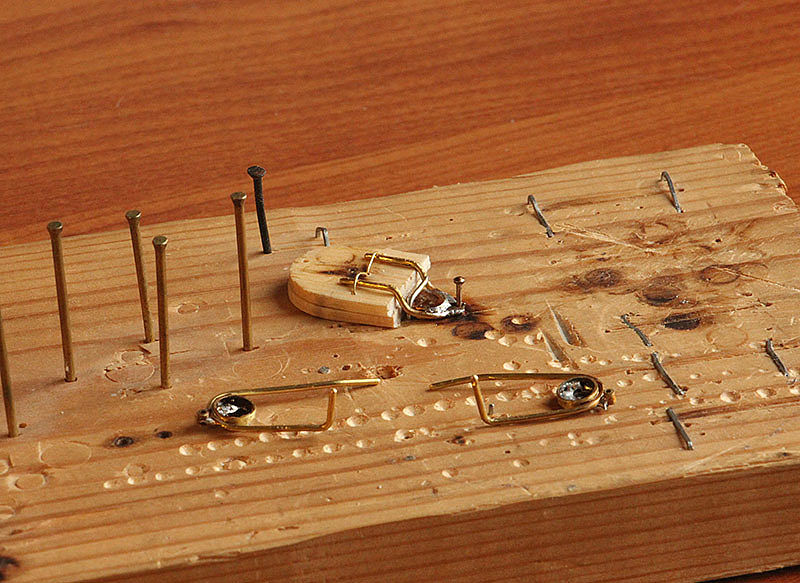 It's a upper arm 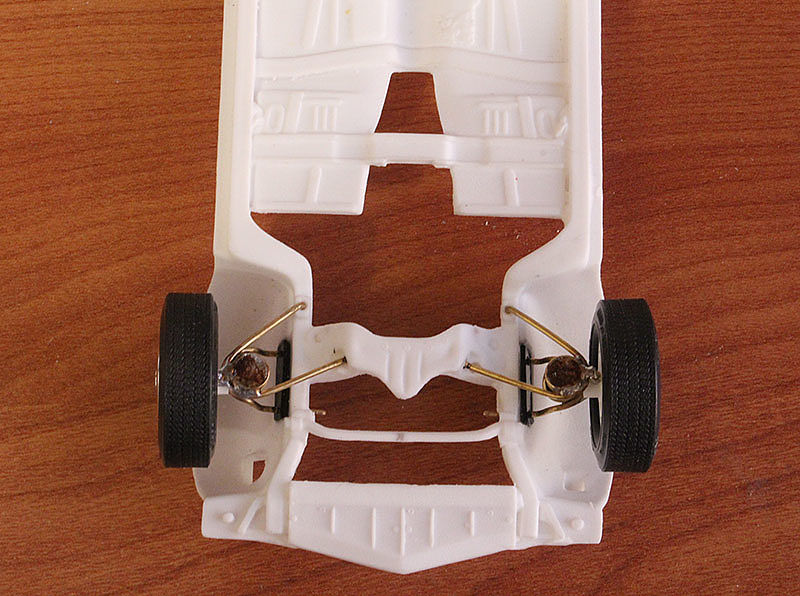 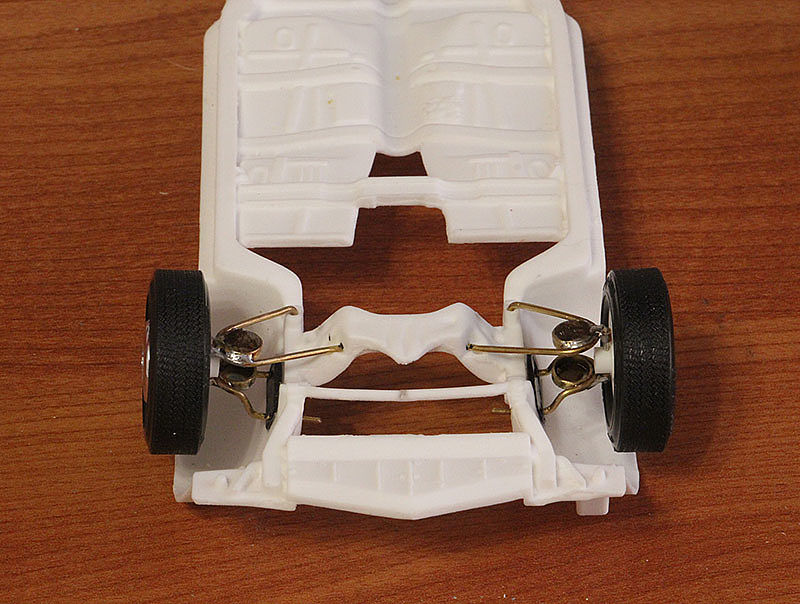 Try on. Not everything is level for now, but I will try my best. 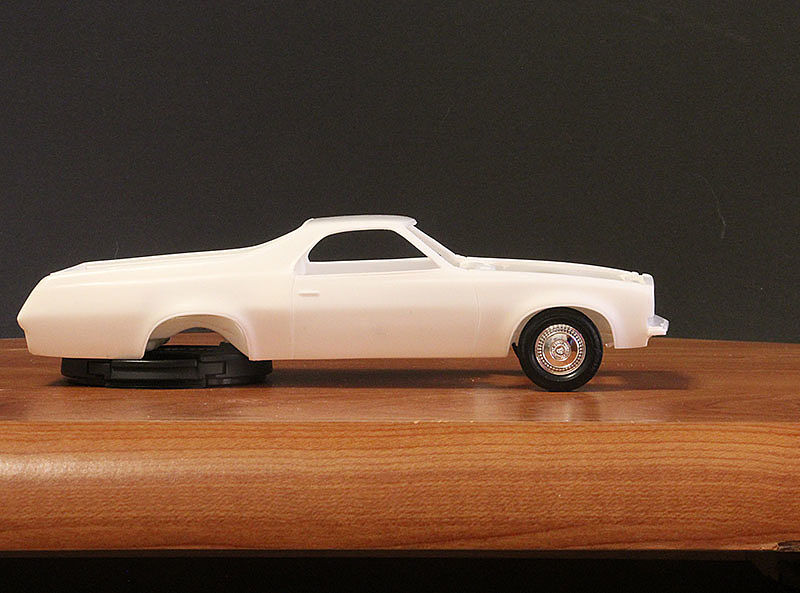 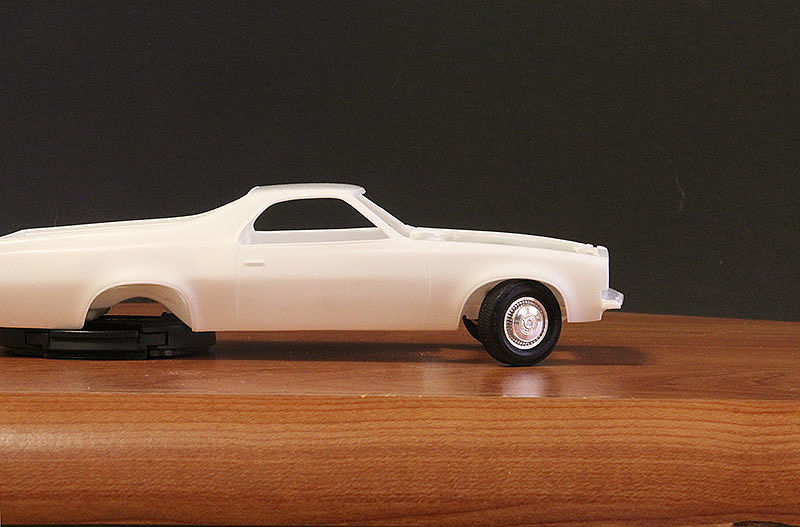 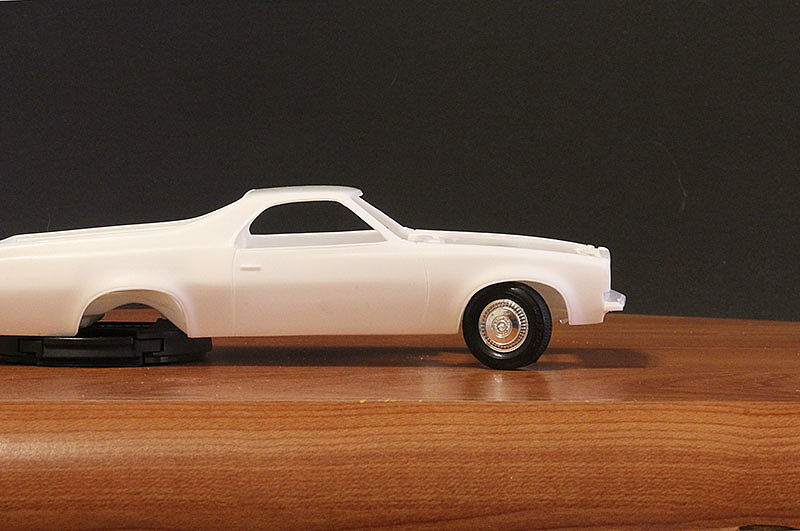 the axis of rotation of the wheel should be deeper, inside the disc, since the turned wheel is not in the center of the arch. I have already started working with the inside of the disk. I cut out the brake drum to reglue it deeper. I scratched the wheels from the inside and that's what I got (the right wheel). Now the track is what it should. 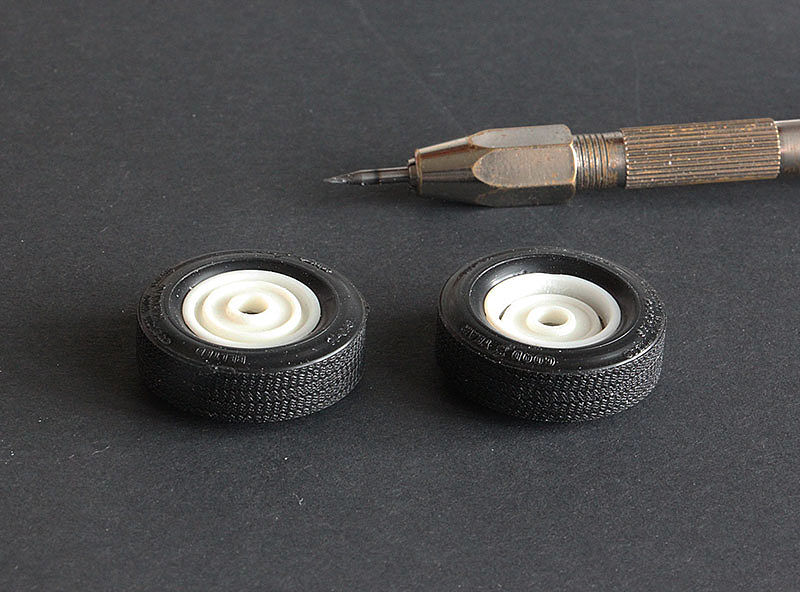 Poked around outside the wheel disc in an attempt to get Chevrolet hubcaps 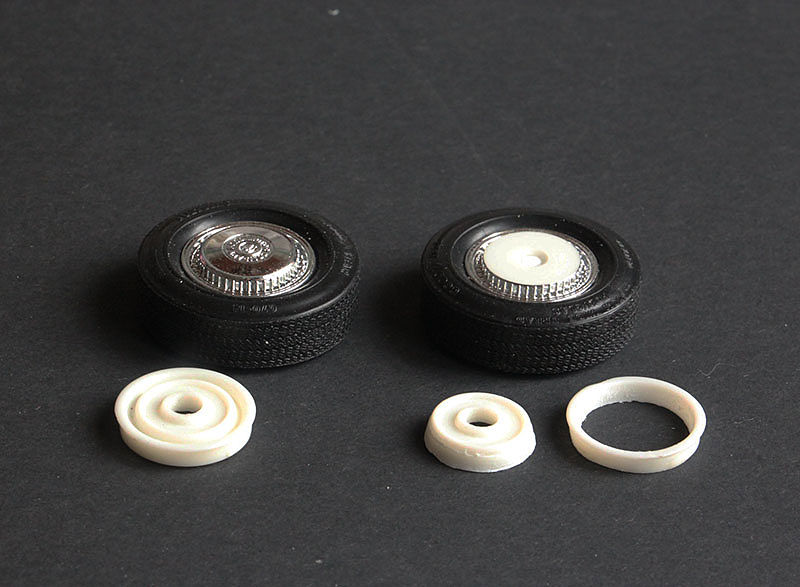 Wound springs on a 3.2mm drill bit 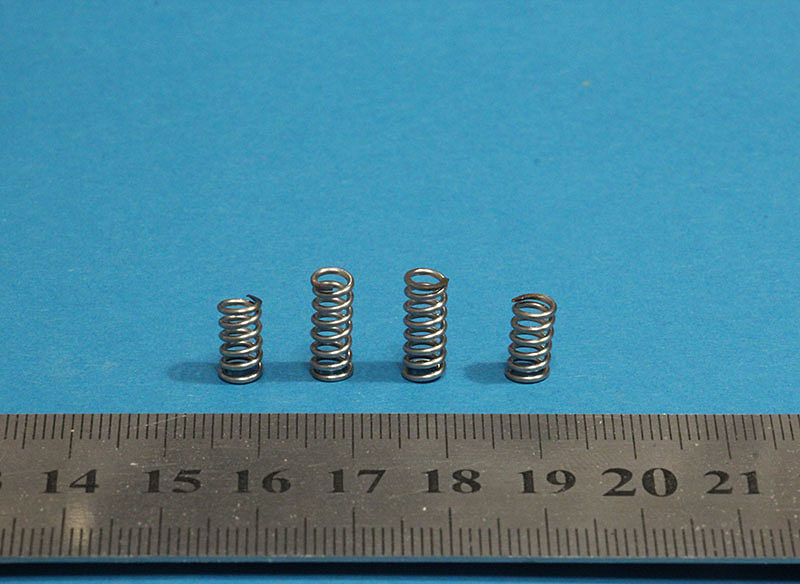 In this photo, you can see that the frame in the rear overhang curves to the left 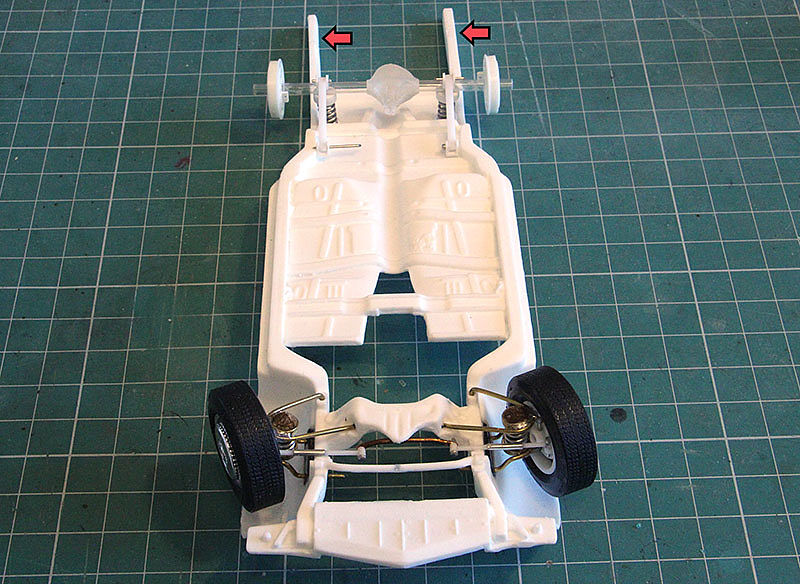 Therefore, the gas tank is cut out. After editing the frame, it will return to its place at the assembly stage. 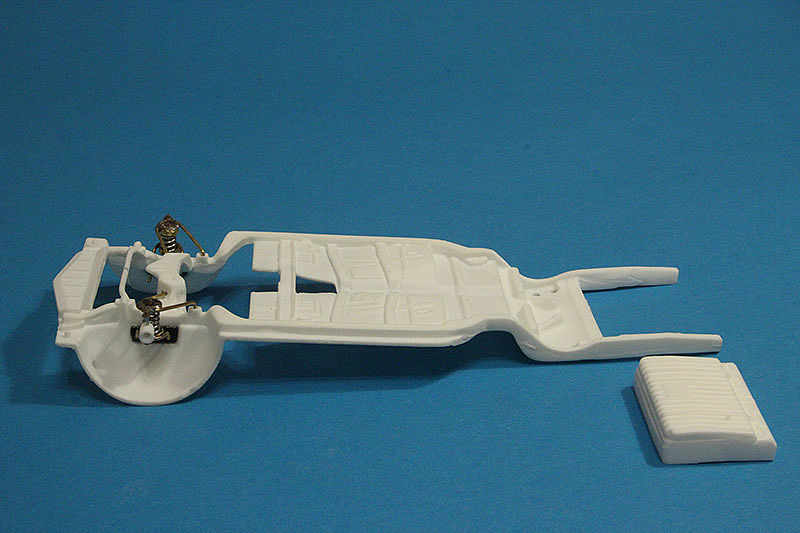 It seems to have finished with the front suspension. I made a 3-section link between the wheels. The small tubes marked with arrows serve to adjust the length of the link "in place".  I started the rear suspension. I haven't trimmed the axle yet. 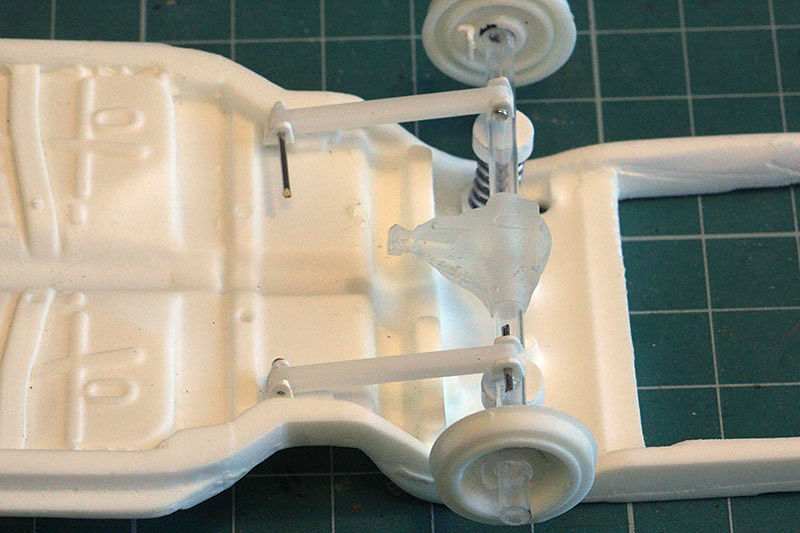 Intermediate result 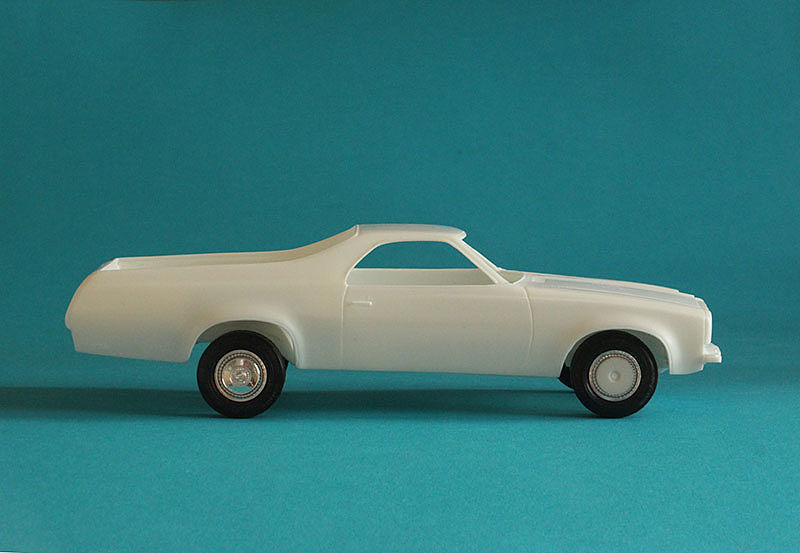  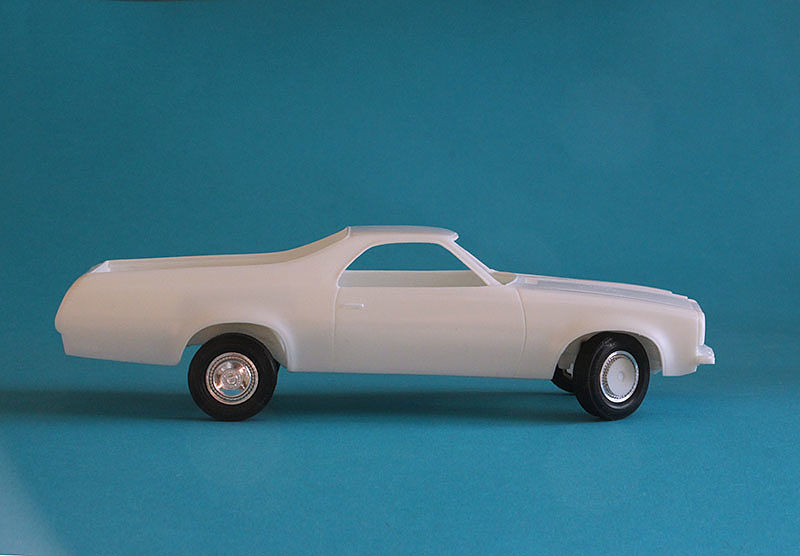 I haven't touched the body yet. just removed the thickness at the bottom of the rear overhang to make it easier to bend. And sand off tail gate a little, because the body is too long/  Next time I'll show you the rear shock absorbers. Good luck to everyone!
__________________
"Precious and fragile things Needs special handling.."
|
|
|
|
|
|
04-19-2023, 04:07 AM
|
#5 | |
|
AF Regular
Thread starter
Join Date: Feb 2009
Location: Moscow, Russia
Posts: 294
Thanks: 5
Thanked 14 Times in 14 Posts
|
Re: 1973 Chevrolet El Camino
Let's shake the dust off the topic!
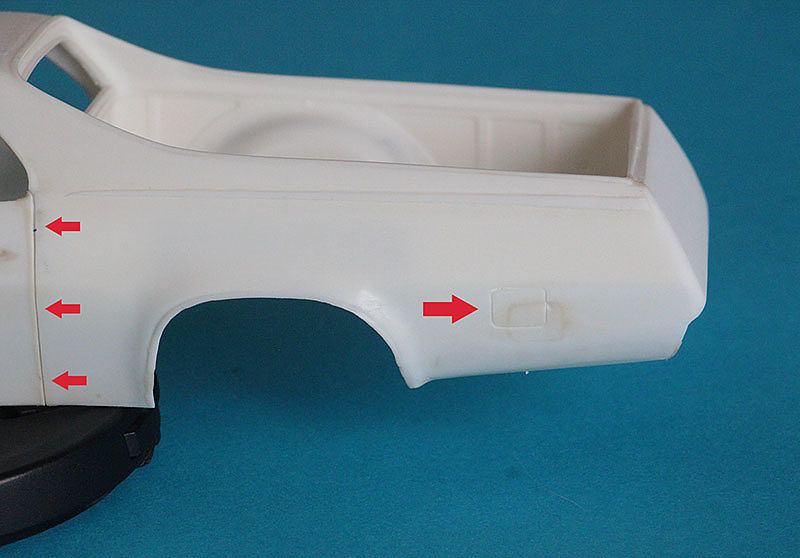
As promised in August - rear shock absorbers: 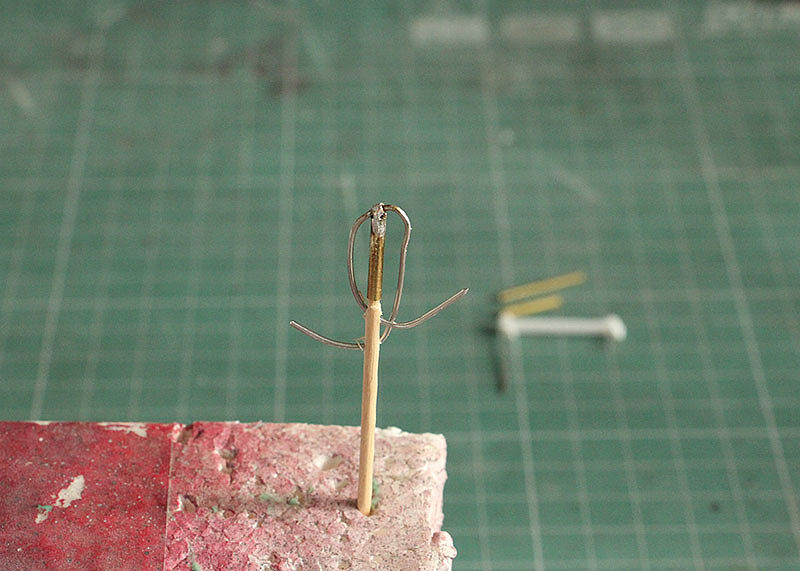 Finally installed, and at the same time adjusted the tail of the frame in hot water. Due to the deformation of the silicone mold, the left frame rail "went to the left" and became shorter than the right by 2mm. 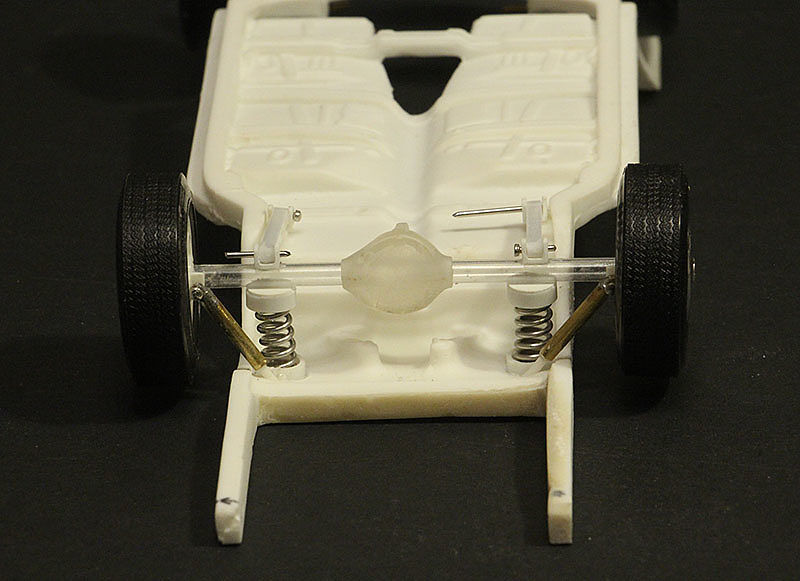 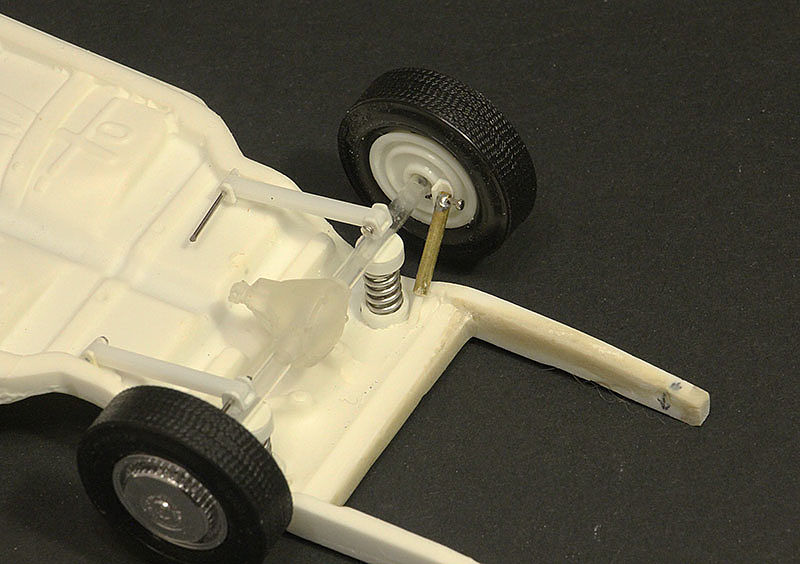 The same frame rails, but with a tank 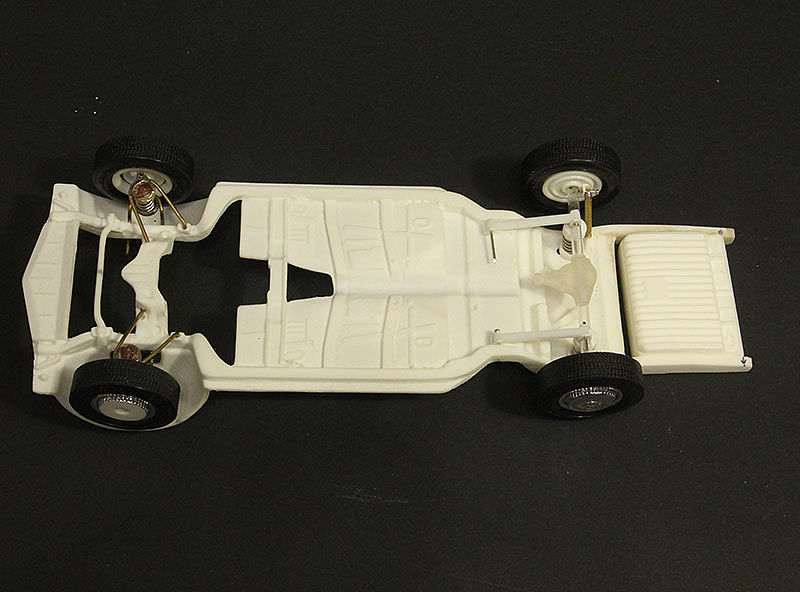 Yes, I was looking at the reference photo here and realized that not only the front of the wing has a negative slope, but also the entire front panel 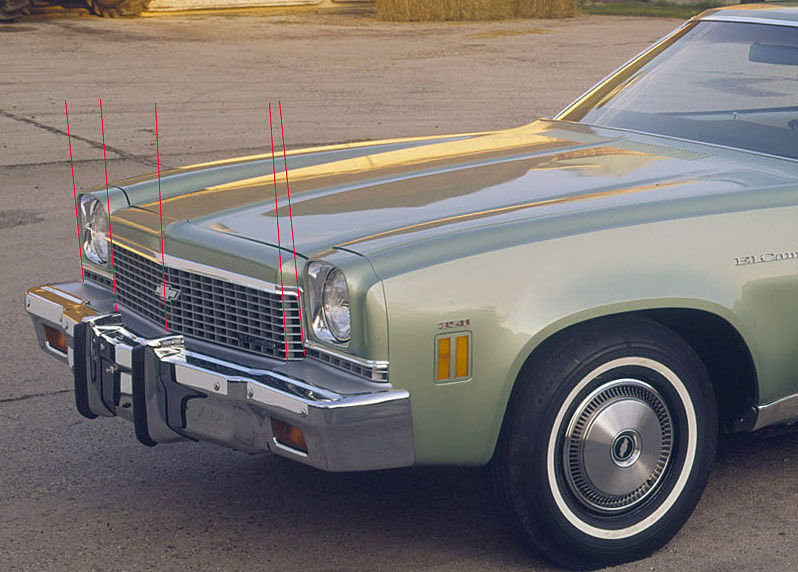 But trans-kit has it vertical 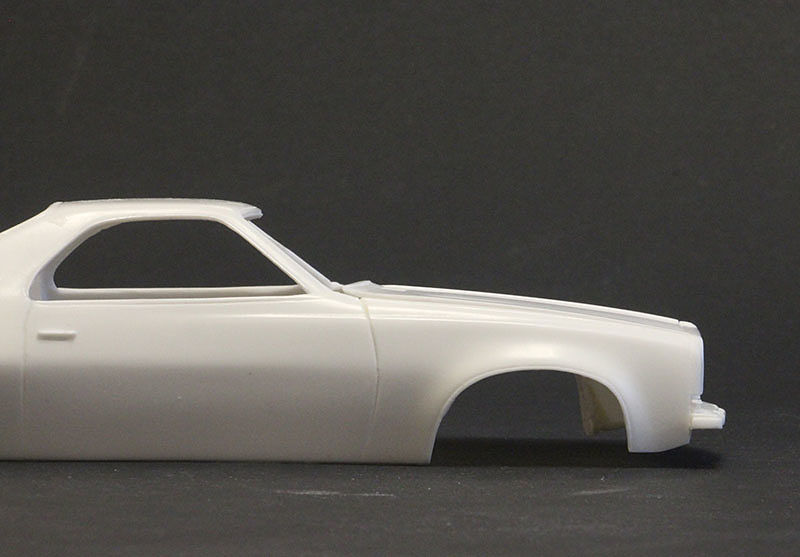 That is, before giving the right slope to the front of the wing, which I have already started to do (hurried) from the left side... 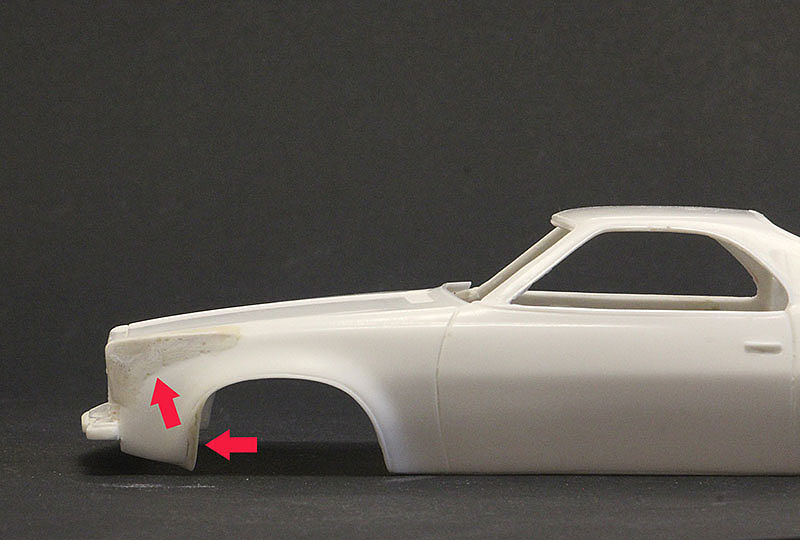 ....I still need to cut off the front end at the panel line, give the end a negative slope with a putty and glue the front end back, but higher, because it will not work to raise the wing from above / in front, leaving the headlights and grill at the same level. 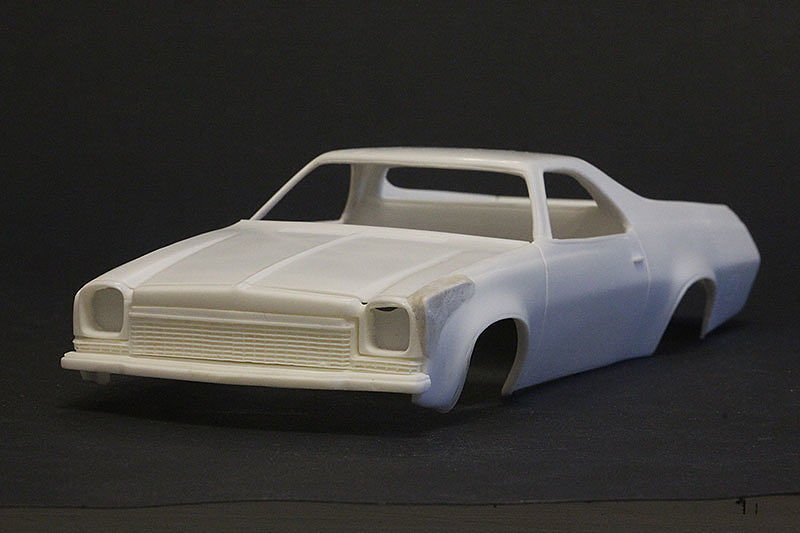 In addition, a slight strabismus of the headlights was found, which also requires correction in the sawn state. 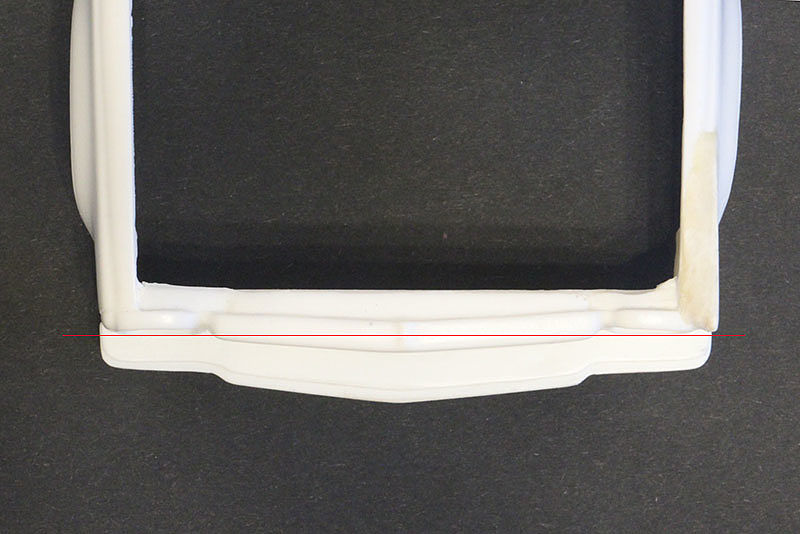 Fortunately, the grill is a separate part here. I hope I will manage without losses. 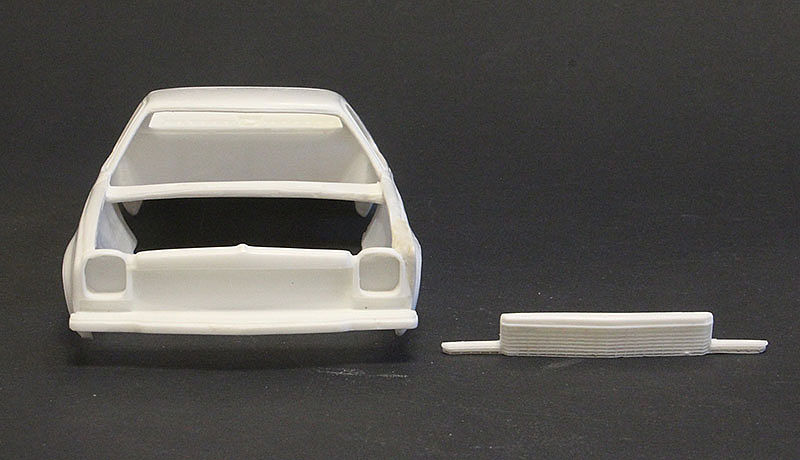 Stay turned!
__________________
"Precious and fragile things Needs special handling.."
|
|
|
|
|
|
04-19-2023, 04:19 AM
|
#6 | |
|
AF Regular
Thread starter
Join Date: Feb 2009
Location: Moscow, Russia
Posts: 294
Thanks: 5
Thanked 14 Times in 14 Posts
|
Re: 1973 Chevrolet El Camino
Some body work
   While putty is gaining firmness, I remembered how wonderful the "out-of-the-box" modeling was 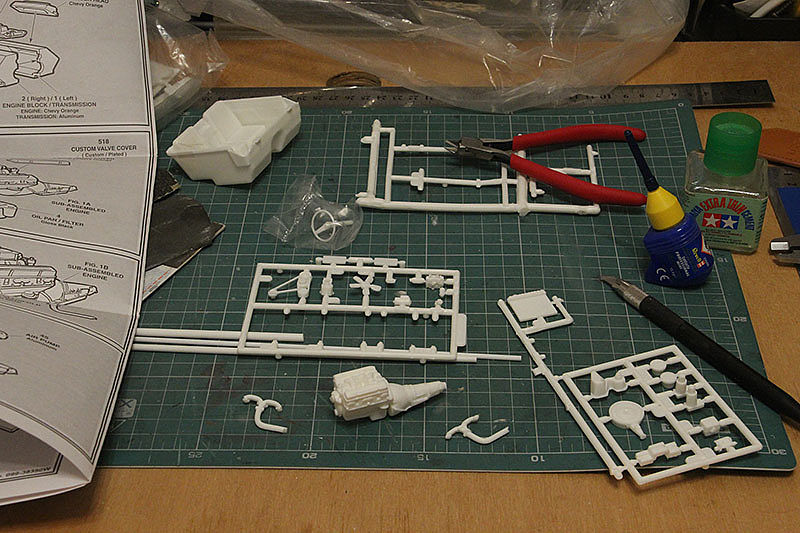 One of my 4 cats help me not to lose small parts 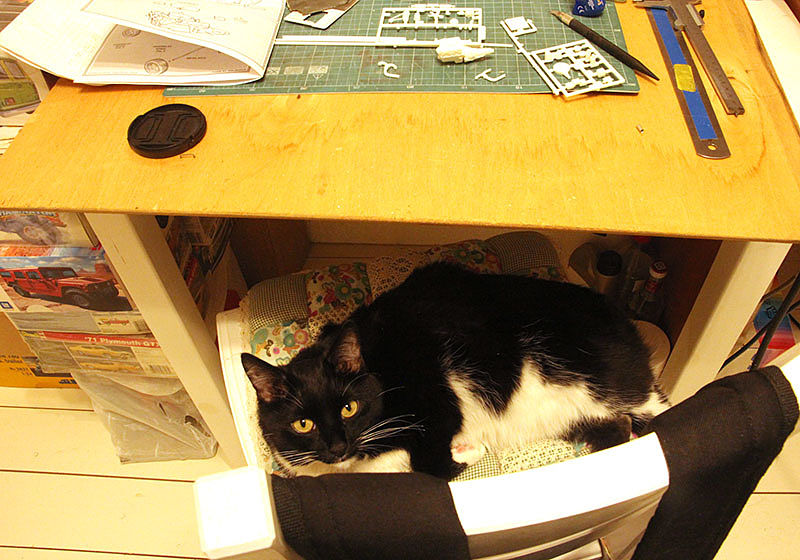 I’ve found suitable engine in my spares It came from a model 1972 Chevy Pickup Well, the first thing I had to saw off was the gearbox crankcase  It's a little cramped for him there... and you can't slip the driveshaft in this position 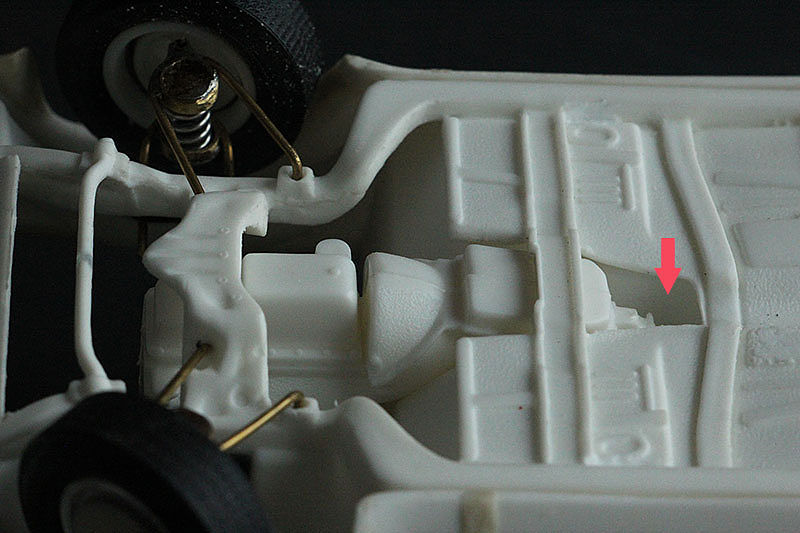 And the lower part of the engine crankcase should also be (and will be) shortly  I’ve used these reference pictures as a base: I had to take my Proxxon and modify the chassis.  Now the driveshaft should fit. It remains to make it  I tried the engine on. It seems to fit 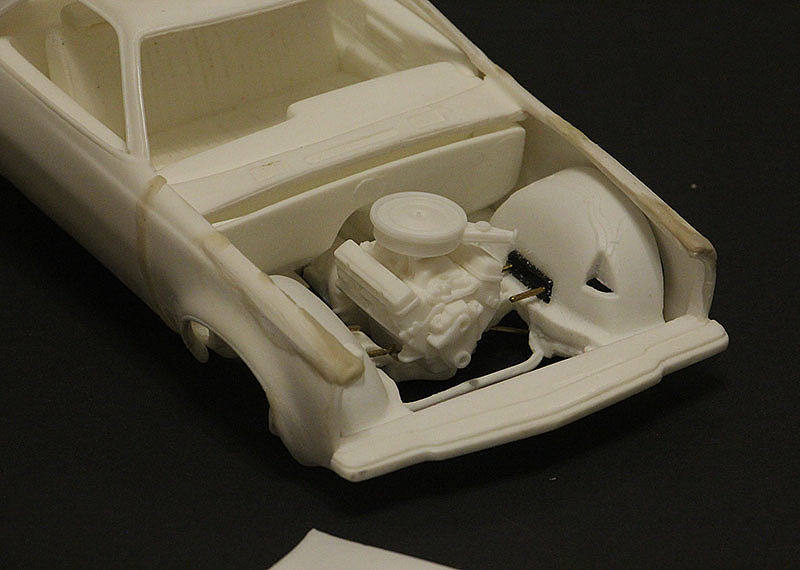 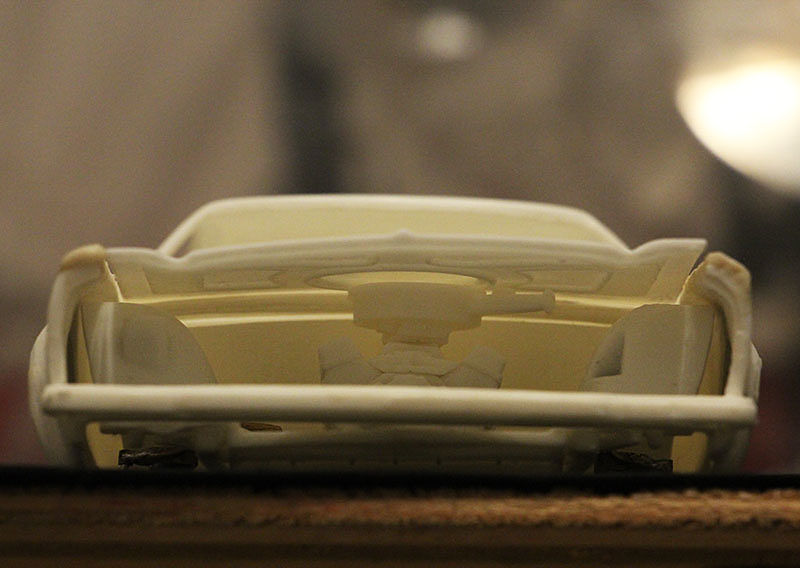 Let's move on. Taking the opportunity, I have made silicon moulds from various under-the-hood (and not only) small parts.  Gray details from the Mobius 1969 F-100. After all, how much modern models have advanced in detail (although failures also take place here)! There are even horns!
__________________
"Precious and fragile things Needs special handling.."
|
|
|
|
|
|
04-19-2023, 04:25 AM
|
#7 | |
|
AF Regular
Thread starter
Join Date: Feb 2009
Location: Moscow, Russia
Posts: 294
Thanks: 5
Thanked 14 Times in 14 Posts
|
Re: 1973 Chevrolet El Camino
So, after I made shafts for IronHide, it's time to do so for El Camino
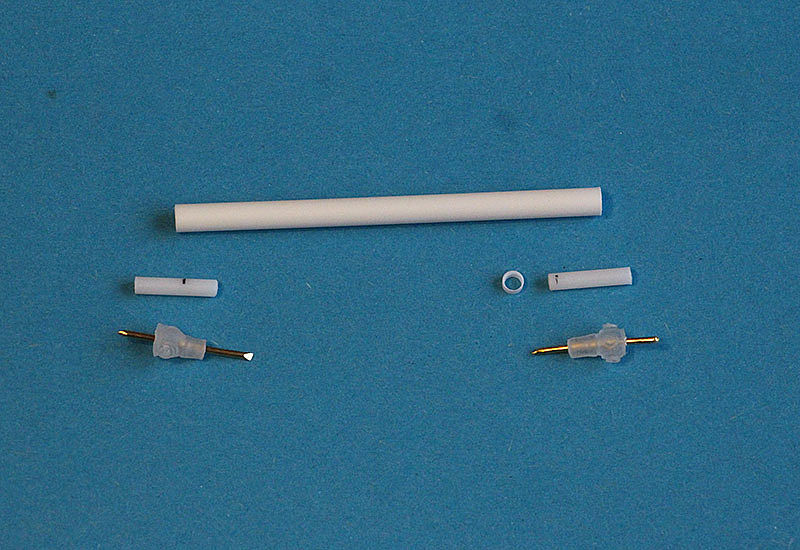  It was shortened a little in fitting process. Now I was ready to bend exhaust pipes, which should connect to*exhaust manifold* I glue the pickup manifold to its engine, try it on the chassis. The collector rested against the crossbar. Hm..... I looked at the reference photos and for sure: on passenger cars of those times, the exhaust outlet was at the back, at the last cylinder, and not in the middle, like mine. 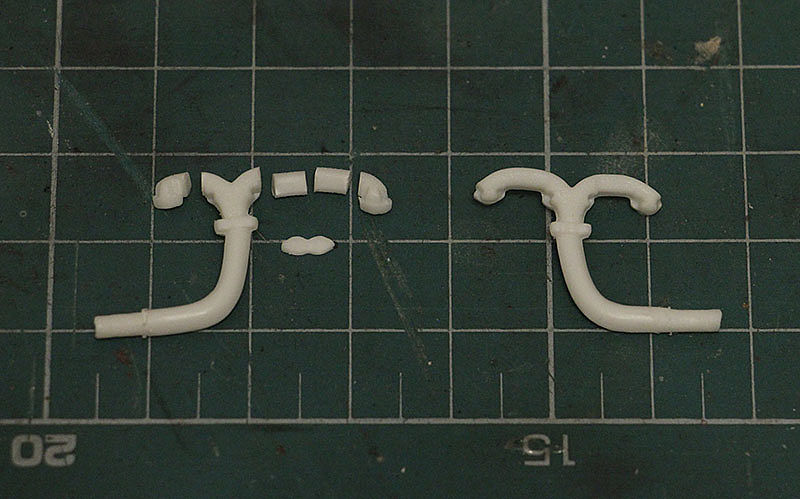 I decided to cut the exhaust manifold and swap the pieces Dismembered! Tried it on! Fiasco! Did not get into the middle exhaust outlets.* Calm down! Now we will bend this collector from a rod and glue it together! Glued! Here is this masterpiece! 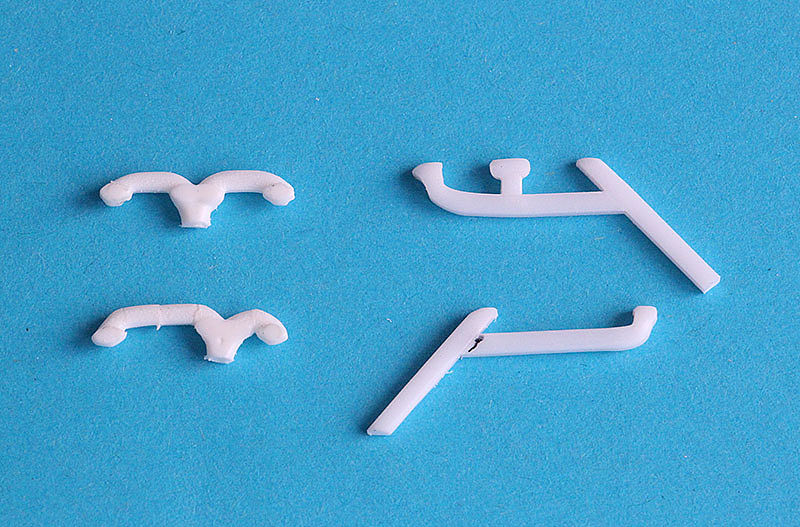 I look at it and my eye twitches. After all, it seems like a simple thing, but there it is. An idea! Why not to take a collector from extensive kit collection? There must be something suitable. And exactly! And also in a Chevrolet pickup truck, but - of '73. 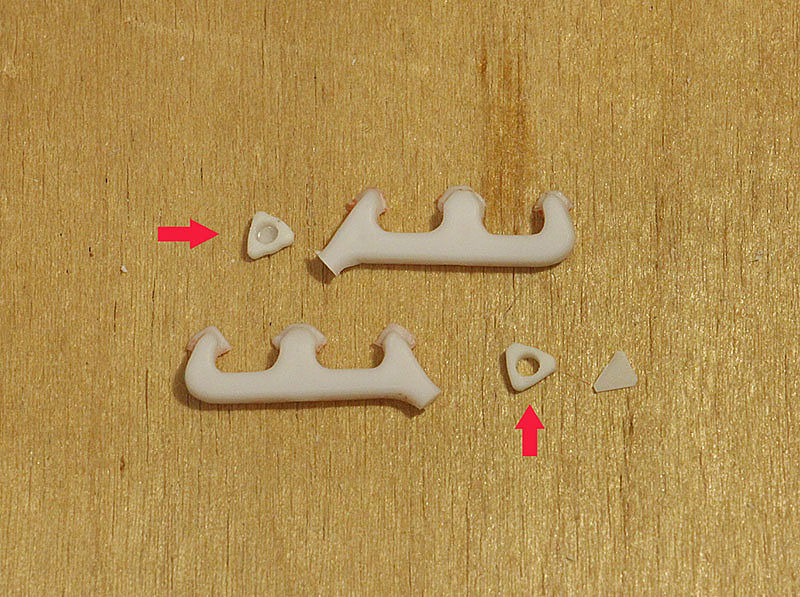 Well, from lousy pants*collectors - at least a shred of flanges. 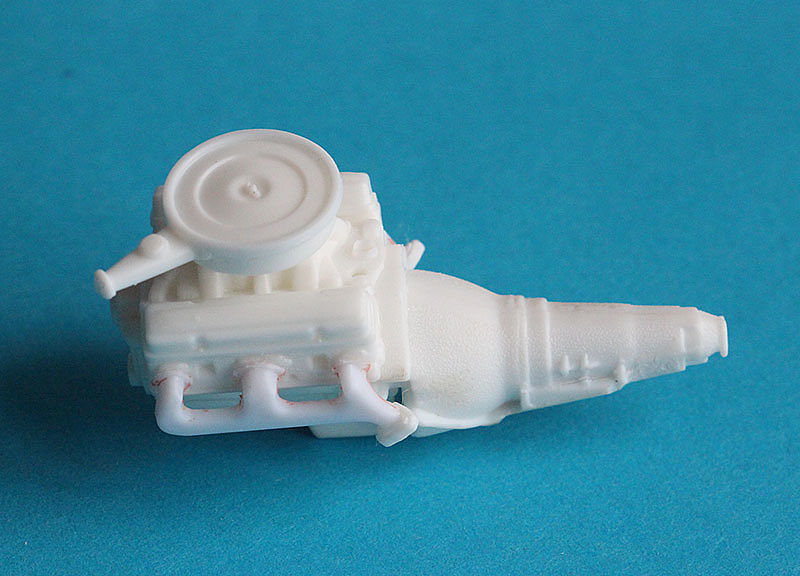 And they suit to engine though they of different scales 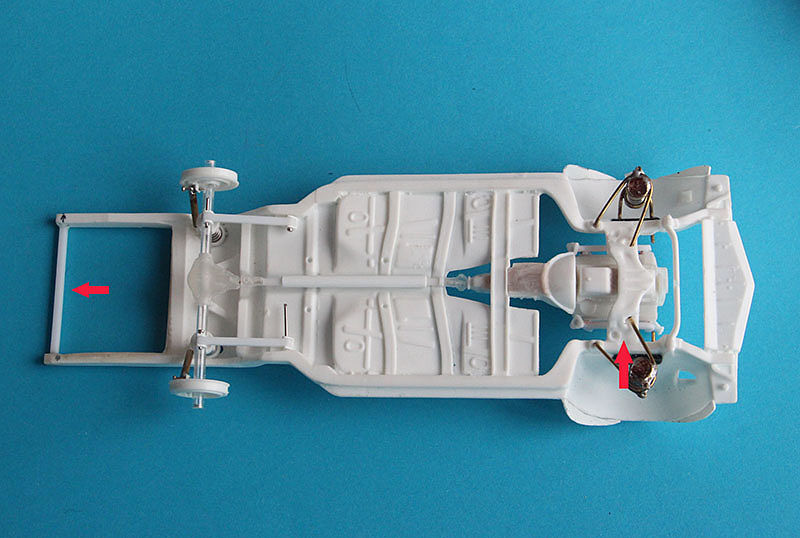 Here is this insidious crossbar! Yes, I also added a crossbar behind the tank. I've seen it on references. Now everything is ready for laying the exhaust pipes and you can enjoy the process. The sponsor of pleasure is 2mm solder.  It's the right one! It's beautiful, isn't it? And characteristically, it bends easily! 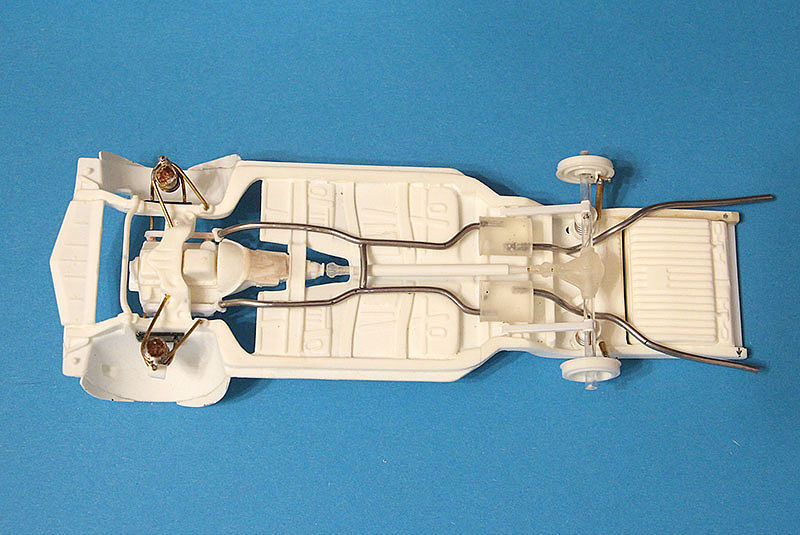 While I was chatting with you here and the second one bent! The eye rejoices! Well, I'm a handsome man! However, it's too early to celebrate! We continue to eliminate the shortage of parts. That suddenly I was seized with the desire to weld the radiator and all its surroundings  The rest is in the next episode!
__________________
"Precious and fragile things Needs special handling.."
|
|
|
|
|
|
04-19-2023, 04:32 AM
|
#8 | |
|
AF Regular
Thread starter
Join Date: Feb 2009
Location: Moscow, Russia
Posts: 294
Thanks: 5
Thanked 14 Times in 14 Posts
|
Re: 1973 Chevrolet El Camino
Where did I stop long ago? Oh, yes! On the radiator! Now I'll show my efforts in this field, but first a little more under-the-hood stuff. A little!
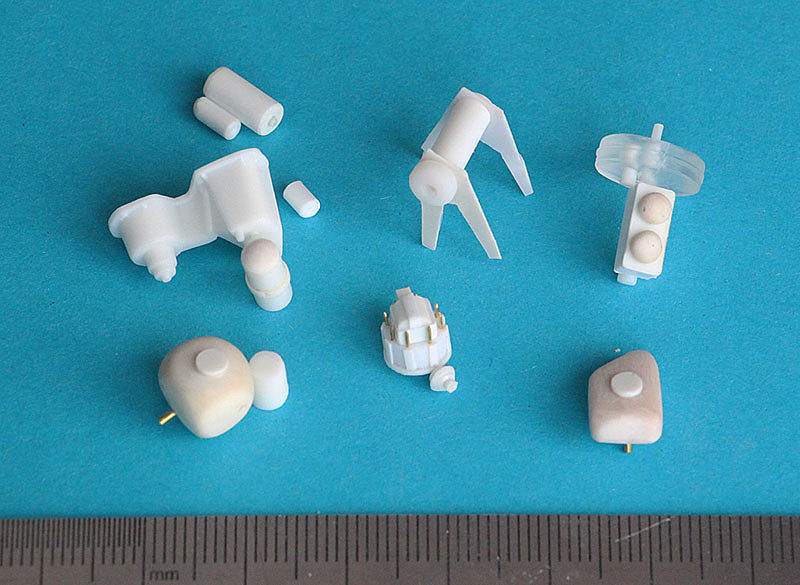 And then someone will ask a question (although they won't ask): "Tell me, dear heart, and what are these gray lumps in the foreground with little lumps?" And I will still answer (although no one asked) - these are tanks, expansion tank and washing tank! However, a distributer tired me more than others. Here he is - a bastard. Below we see one and a half distributers. And yes, because the first attempt was torture. I missed the size. Well, it happens. A piece of tube on on contact is playing a role of*tip 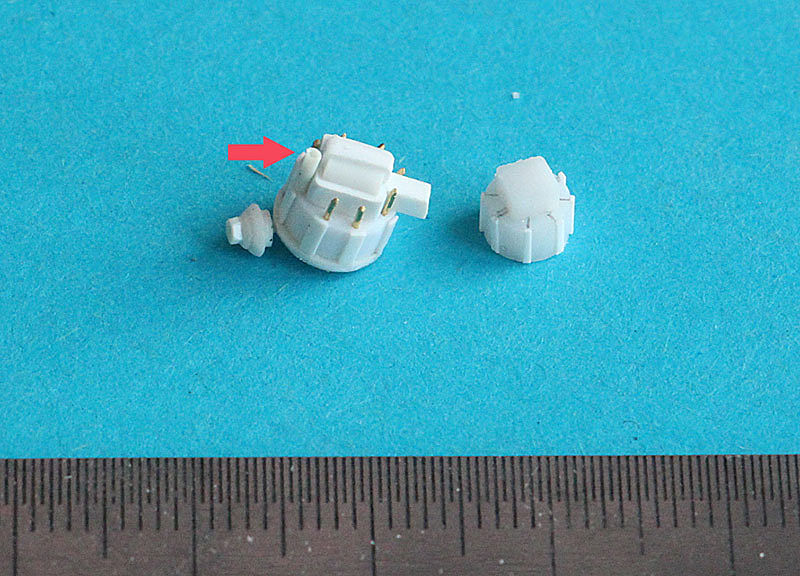 Here is the radiator + some more parts: alternator,*battery 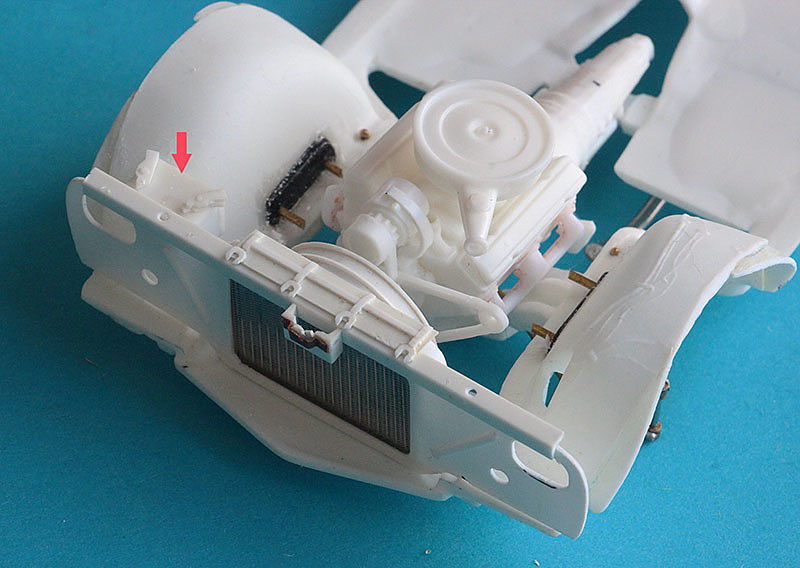  Yes, I couldn't help but dig into the radiator lining Here it is in its original form  We see (who can't see, there are arrows) that some holes are clogged with road debris (beetles, mosquitoes, etc.). "But it's a mess!"* We take a drill and cut off all the excess  More on this photo you can see 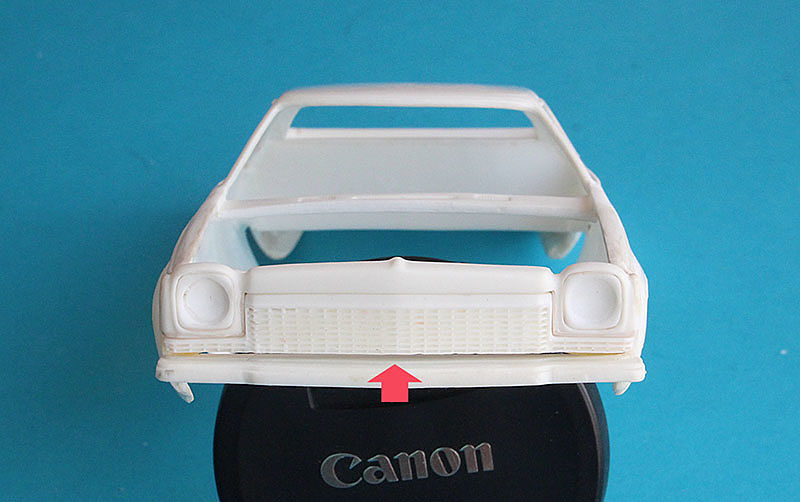 An inquisitive look will naturally notice the gap between ..... uh, the bumper and the lining, and he will be right, because there is an arrow there for this. We inflated the wings from above, raised the grill. It is logical that there will be a gap. But don't get excited! When the grill finally sticks to the body, a sheet of polystyrene will close this case. In the meantime, the wings need another layer of putty, so that by increasing the volume they coincide with the contour of the front panel adjacent to the wings.* 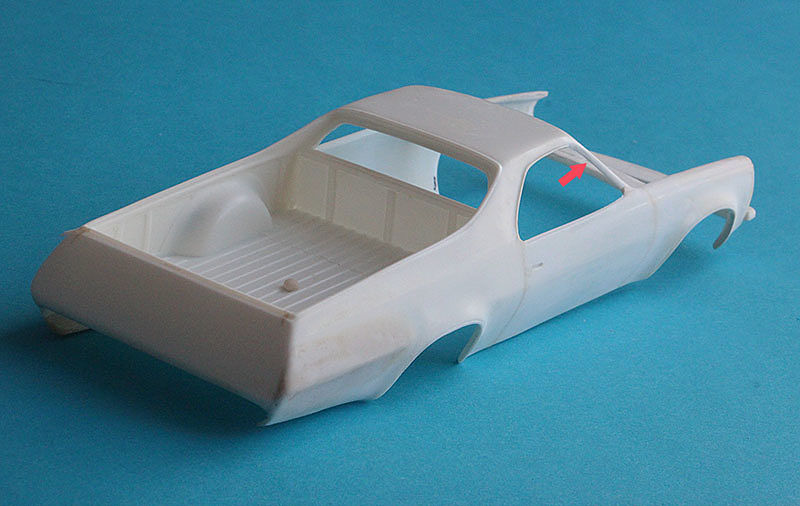 Pay attention to the more elegant windshield pillars. I'll attach the edging to them later 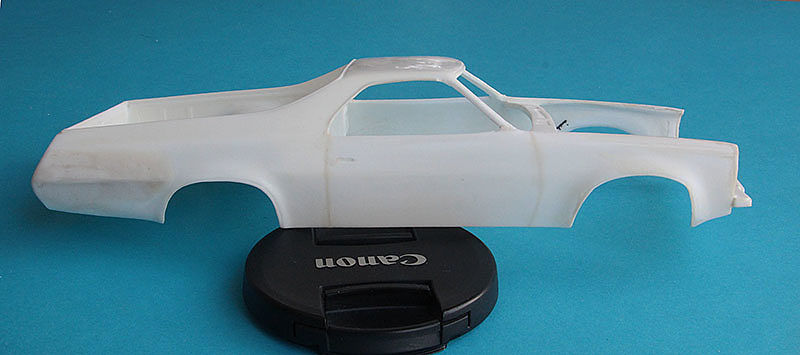 And here you can not focus attention. I've already glued a strip to the trunk. So I raise the line of stamping on the body. 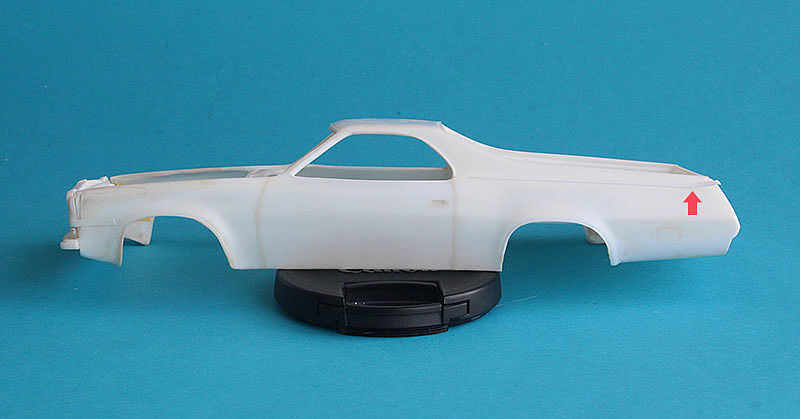 Thank you for watching!
__________________
"Precious and fragile things Needs special handling.."
|
|
|
|
|
|
04-19-2023, 04:45 AM
|
#9 | |
|
AF Regular
Thread starter
Join Date: Feb 2009
Location: Moscow, Russia
Posts: 294
Thanks: 5
Thanked 14 Times in 14 Posts
|
Re: 1973 Chevrolet El Camino
Let's continue our handiwork! Finally recut panel lines.
 I composed a template from 0,1mm styrene because without a template, the back of the doors was not very successful.  Returned "chrome" trimming on the windshield pillars. 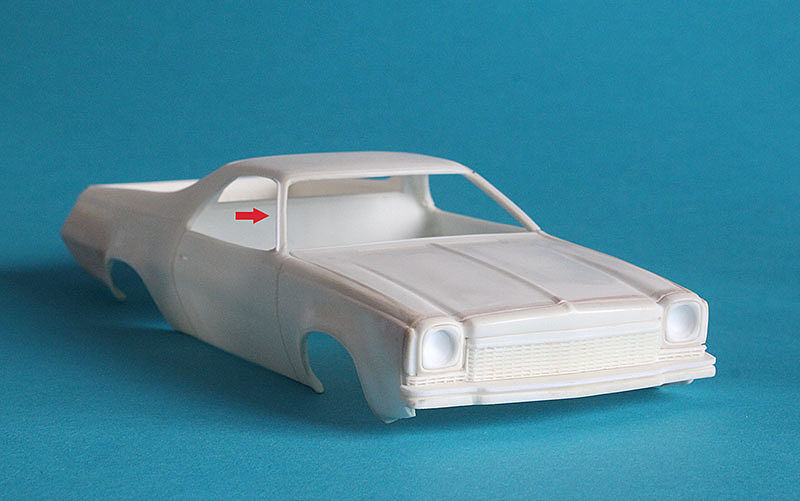 However, there are points for improvement. Yes, I closed the gap under the grill with millimeter styrene. 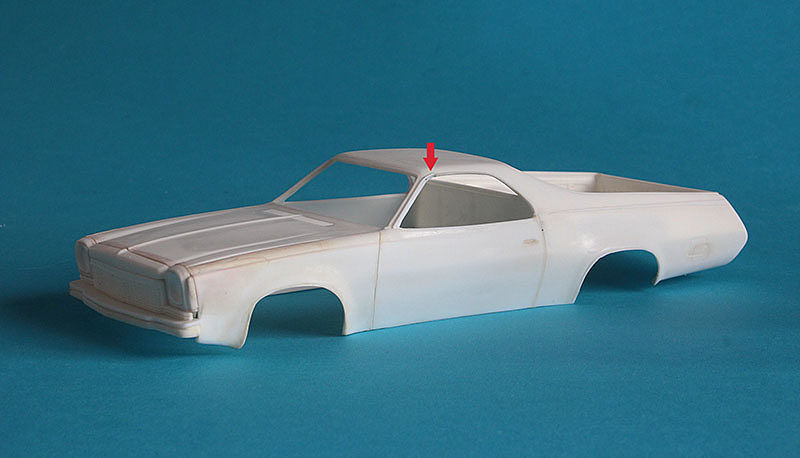 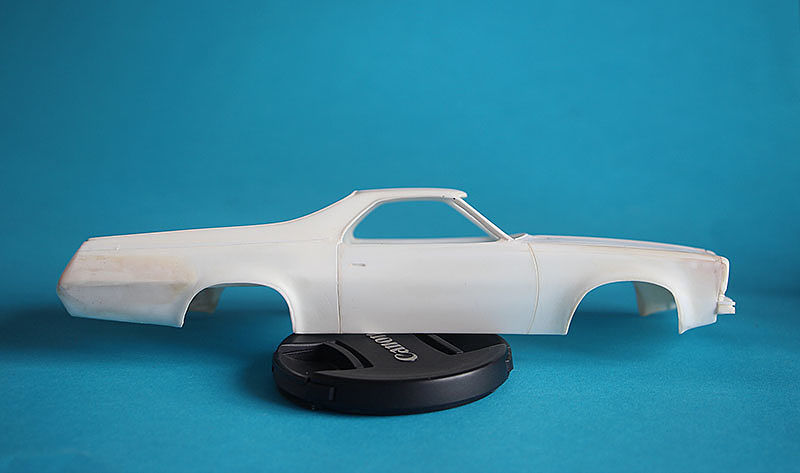 By gluing the muzzle with a negative slope, I increased the gap between the hood and the muzzle. I built up the hood in front with epoxy. 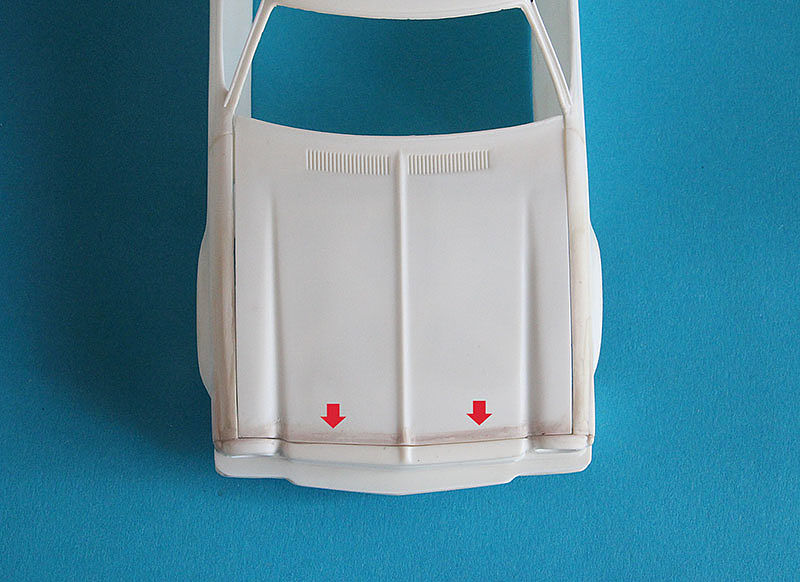 Do not forget about the firewall. I sawed down this heater structure. However it hidden by other components. 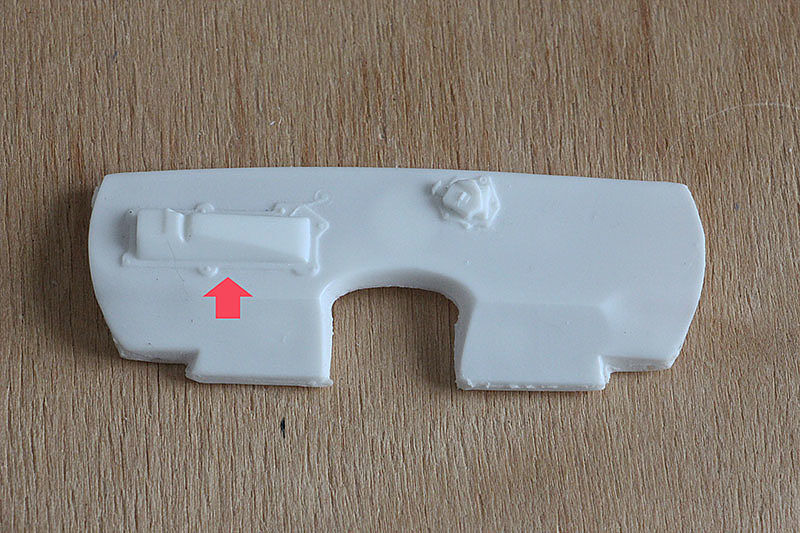 I tried to prime it yesterday, and as the Dozer from the Matrix said: "We still have to work on it and work on it."  Put filler on the perimeter of the lens of the right headlight, lift the rear of the hood... Yes, 1-2 vertical ribs on the grill are poorly casted. In thought: is it worth bothering?  In general, there is something to work on. Here are scratches of the sanding paper  There is not evenly glued strip of styrene 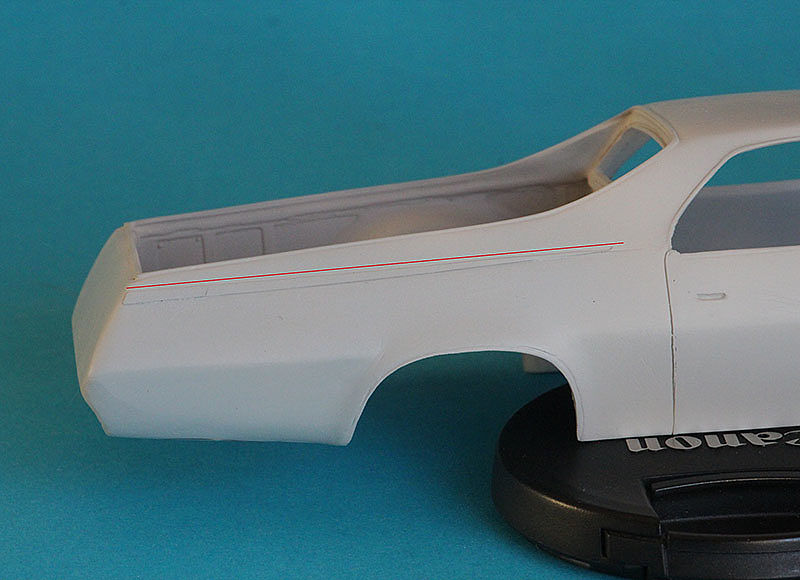 But I like almost everything about the interrior  Well, except for these moments 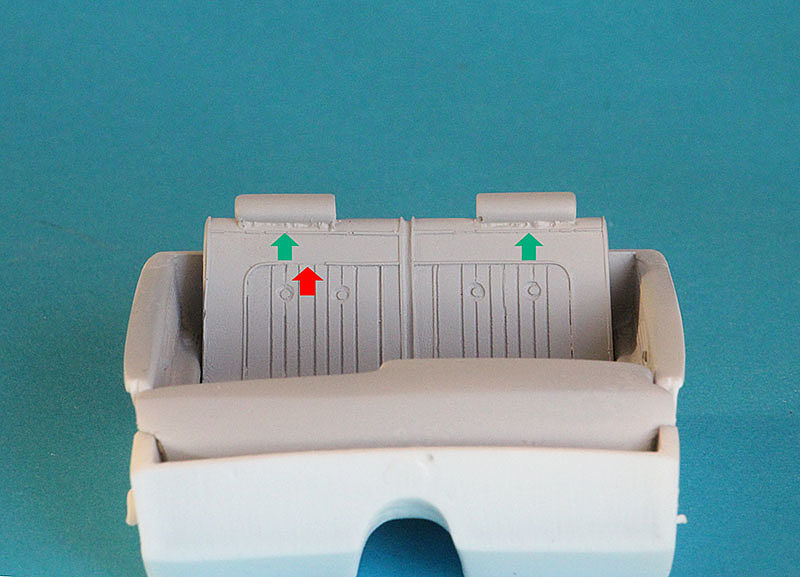 Silicon moulds were worn out. And then a nuance came out: the interior tub turned out to be too long and the firewall, which should be UNDER the bar, simply does not fit there. I'll cut the front wall of the tub and sand down the thickness of the firewall 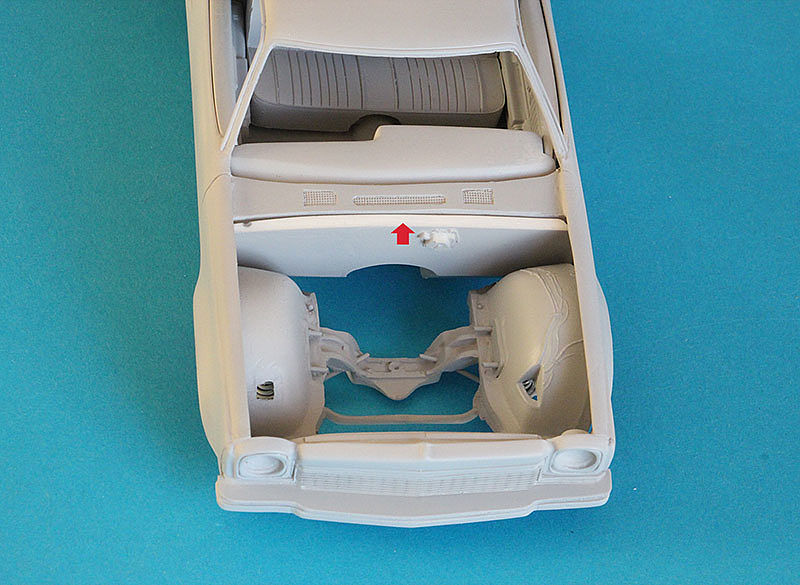 These are the grooves that are the most difficult to sand down. 
__________________
"Precious and fragile things Needs special handling.."
|
|
|
|
|
|
04-19-2023, 04:54 AM
|
#10 | |
|
AF Regular
Thread starter
Join Date: Feb 2009
Location: Moscow, Russia
Posts: 294
Thanks: 5
Thanked 14 Times in 14 Posts
|
Re: 1973 Chevrolet El Camino
I welcome my colleagues and all sympathizers!
Mockery of the body look in the next series, but for now the soul asks to show off. On the fourth El Camino, the spare tire was hiding tight: 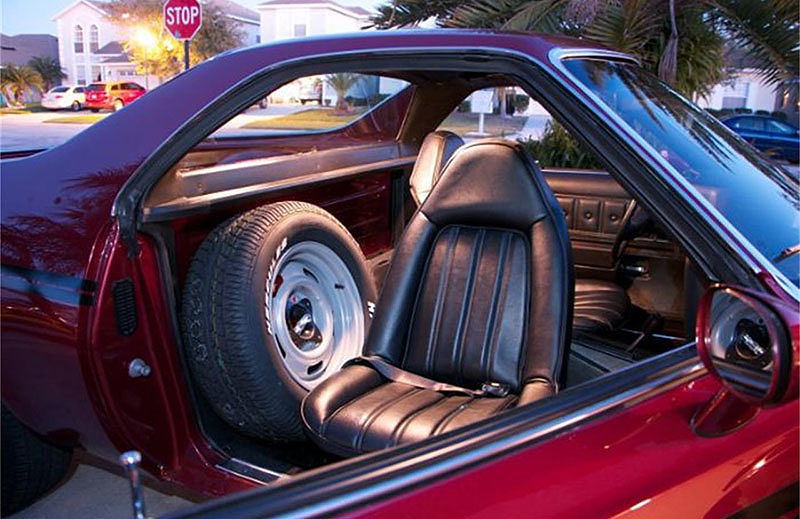 Of course, I does not have a similar 5th wheel in my spares. So we will make a spare wheel in a case. To begin with, brew a strip of styrene inside 32mm tube 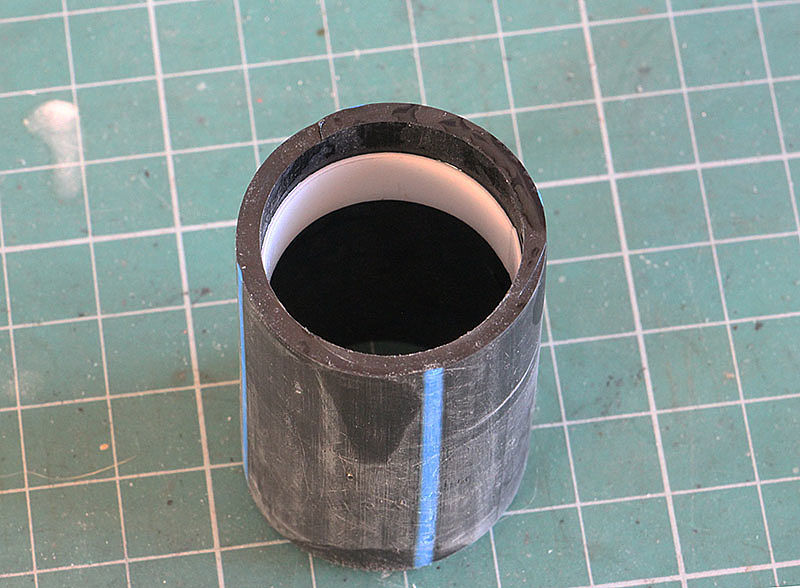 Pull out, cool, glue. We get the radial part. And a Chinese cutter cut the round. 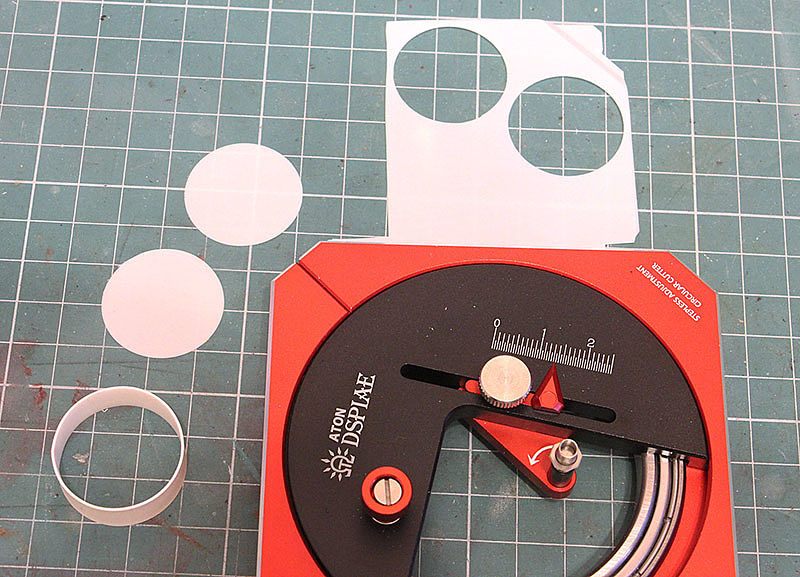 Then I glue square rod inside to sand down angles of case 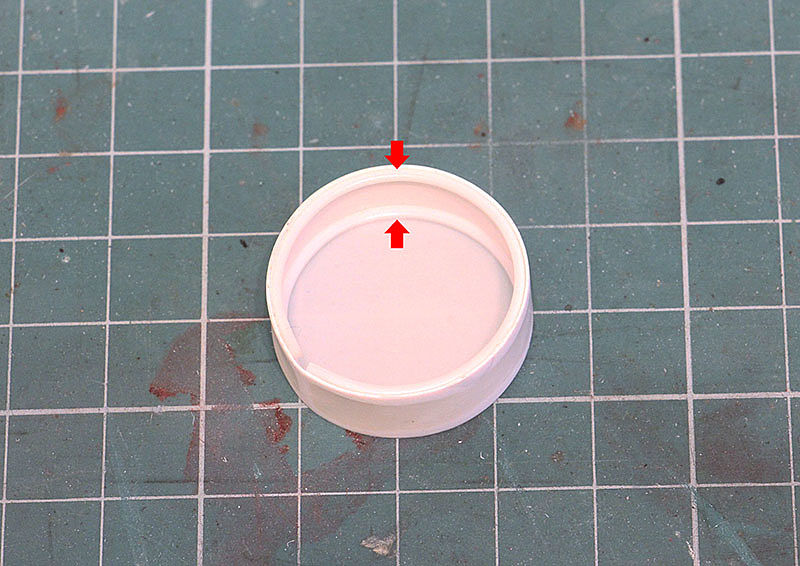 The dummy wheel is ready 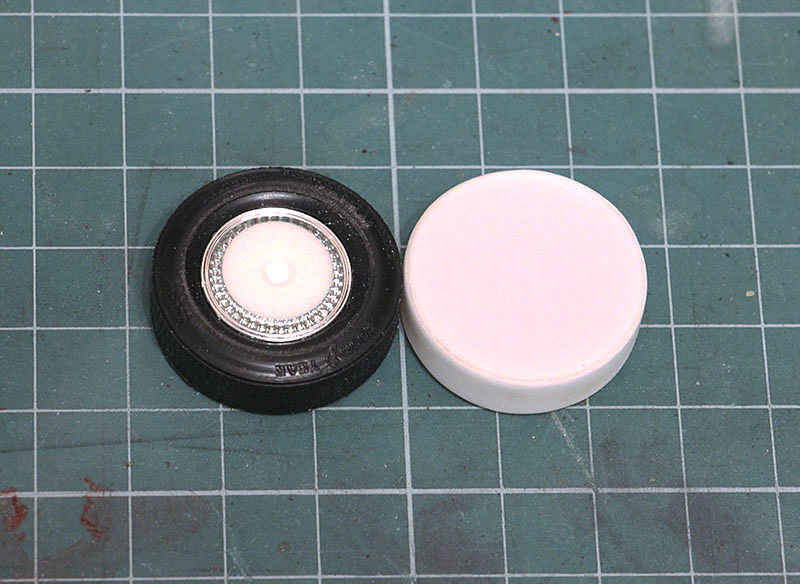 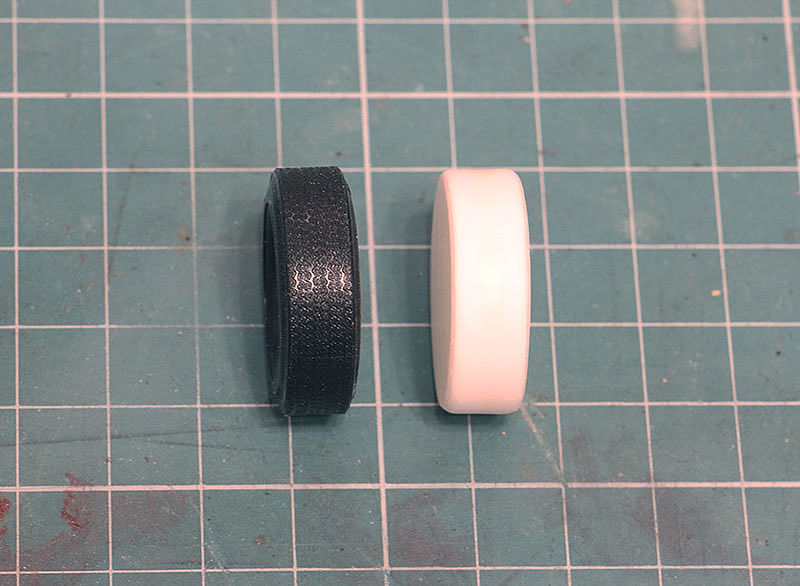 If you think that's all - you wrong.* We still need to break up interior tub! Who forgot the tub looked like this: Now looks - that 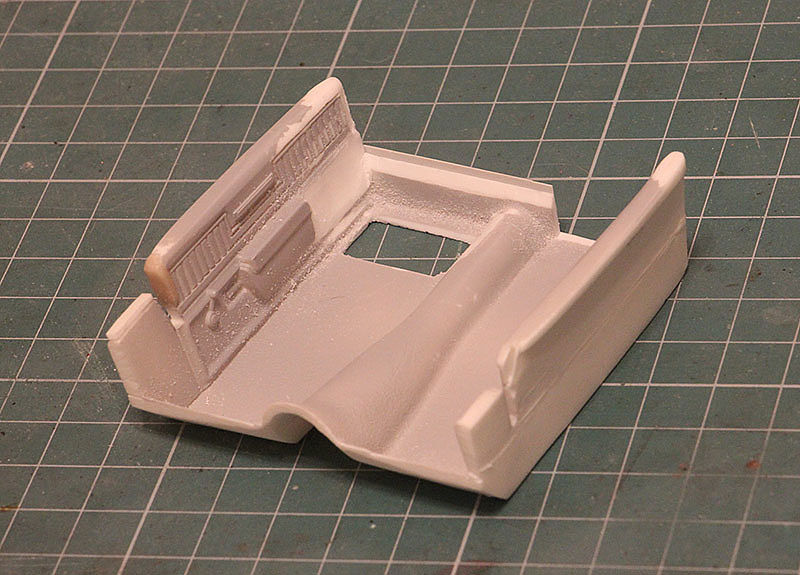 And in the chassis was scraped too. Well, the "wheel" did not fit otherwise. 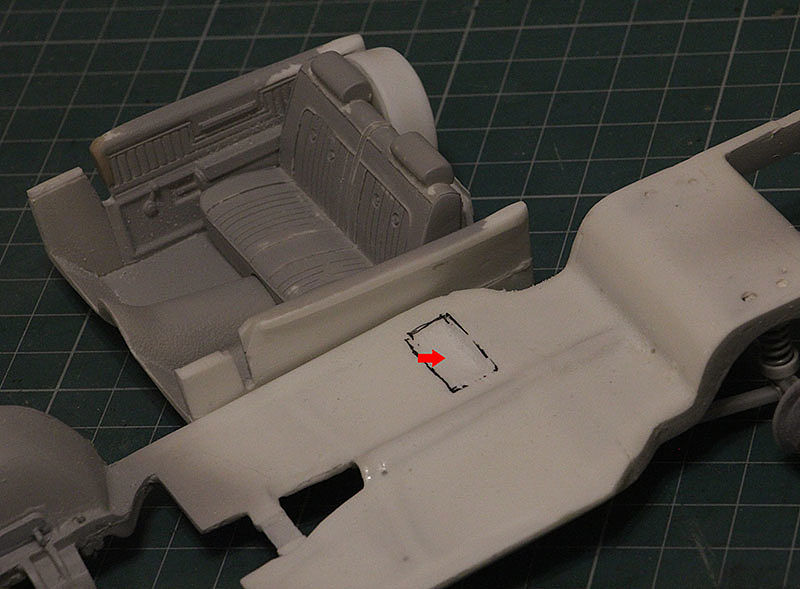 Now the wheel stands almost as in the original 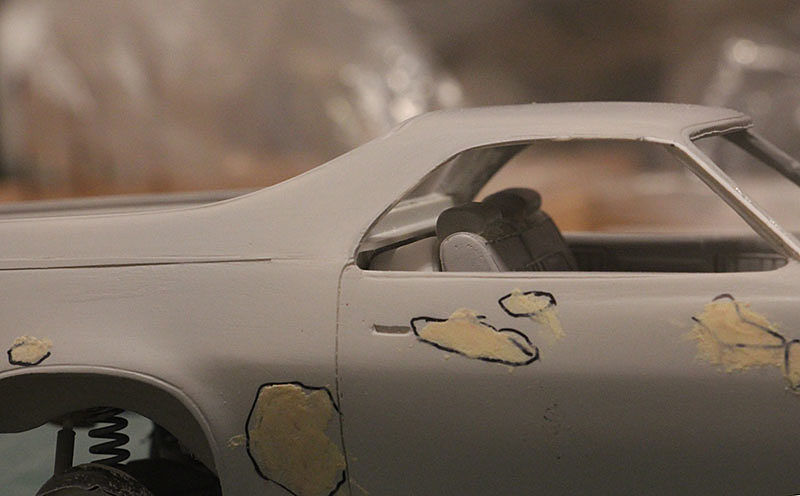 I realised that I have not mirrors for this project. Like these   I tried to make my own 3D models 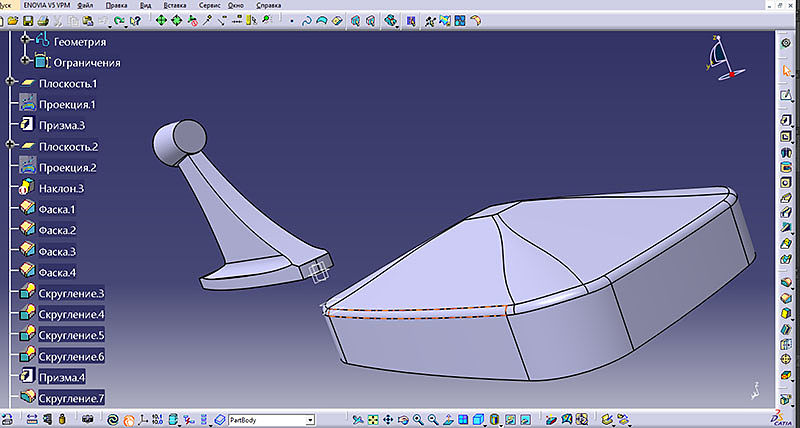 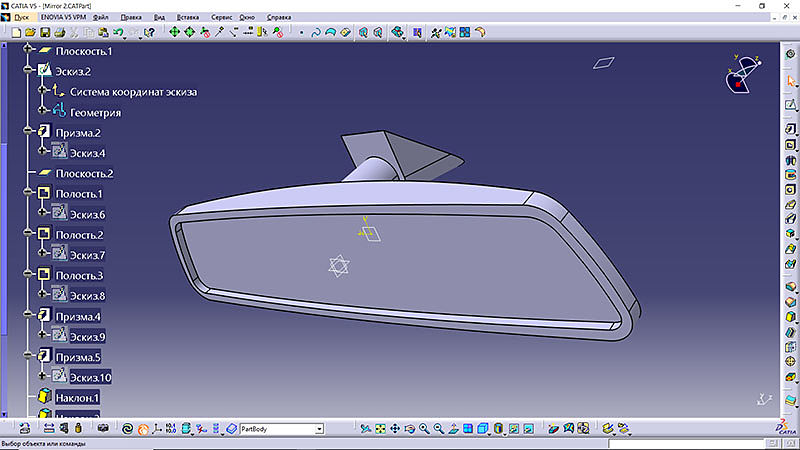 Stay turned!
__________________
"Precious and fragile things Needs special handling.."
|
|
|
|
|
|
06-13-2023, 01:35 PM
|
#11 | |
|
AF Newbie
Join Date: Jun 2011
Location: Budapest
Posts: 2
Thanks: 1
Thanked 0 Times in 0 Posts
|
Re: 1973 Chevrolet El Camino
Awesome work! Do you have any idea for the colors?
|
|
|
|
|
|
06-20-2023, 02:20 PM
|
#12 | |
|
Sweet, sweet tiny Hondas.
 Join Date: Jul 2003
Location: Austin, Texas
Posts: 5,720
Thanks: 48
Thanked 89 Times in 65 Posts
|
Re: 1973 Chevrolet El Camino
This escalated! Glad to see the work you are putting in. This will be very fine when you are done.
__________________
It ain't cool 'till your wife hates it. Imagine a world without Alabama Recent builds: Rocket Bunny FR-S and stock BRZ Toyota bB Bro-style Civic K20 powered SiR converted EK WIP I build slowly and poorly. 
|
|
|
|
|
|
11-04-2023, 02:21 PM
|
#13 | |
|
AF Regular
Thread starter
Join Date: Feb 2009
Location: Moscow, Russia
Posts: 294
Thanks: 5
Thanked 14 Times in 14 Posts
|
Re: 1973 Chevrolet El Camino
Hello again! Thank you Willimo and Rod666! I will try two tone color scheme. Perhaps white & blue.
Was busy some months/ Let's continue! I took up the steering column for a change. After and*Before 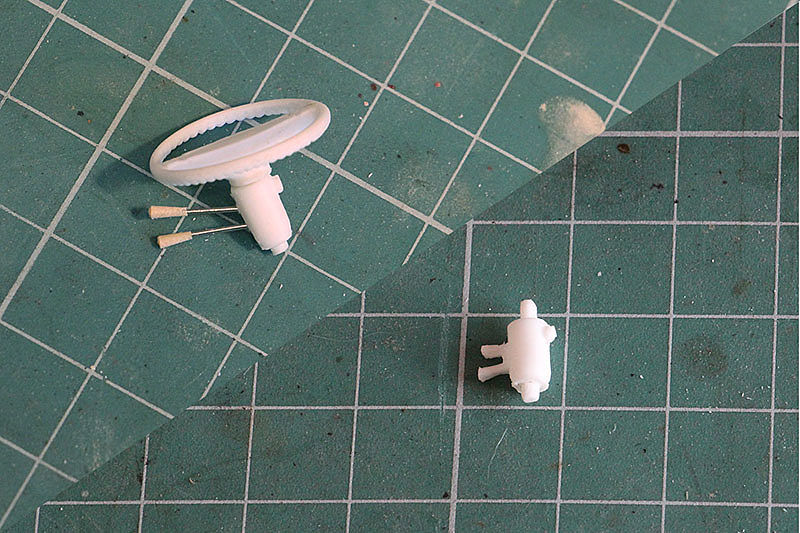 The steering wheel switches are made of a pin and a toothpick 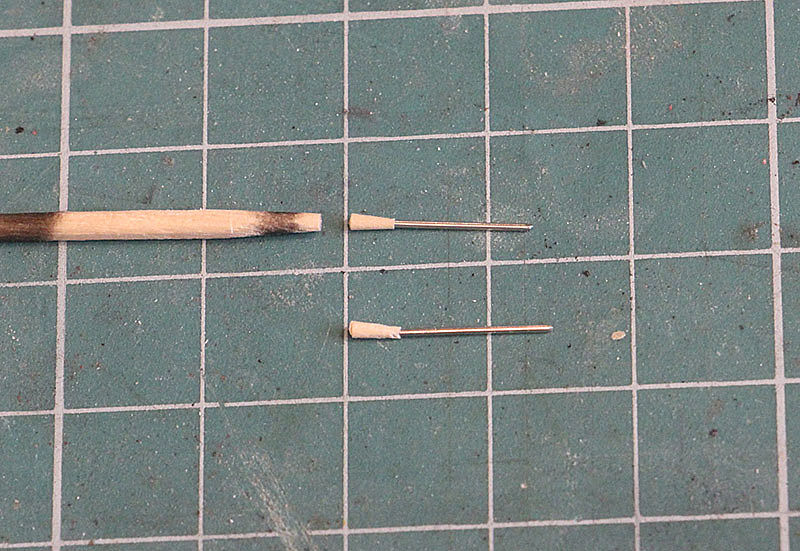 The tail door was too thick, so I manage to cut it out and take off excess fat 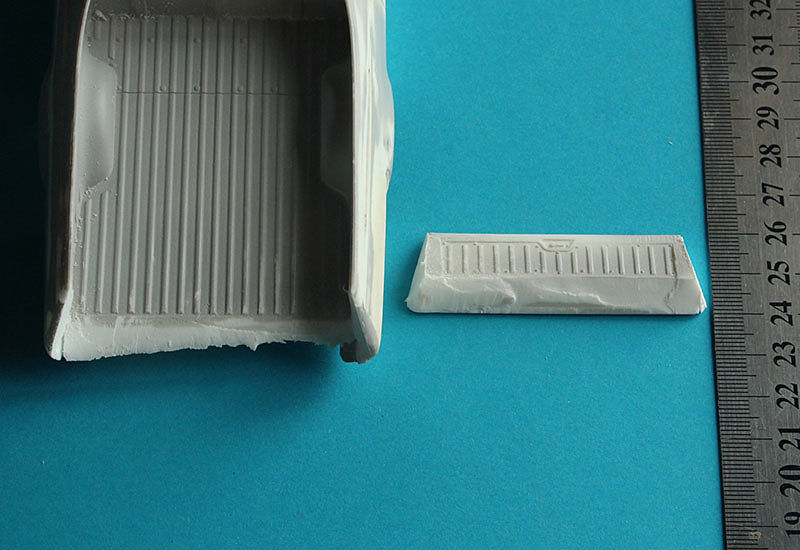 Please note: the bottom of the rear side is almost a centimeter thick. It is clear that this is done to facilitate the removal of the model from the mold, but I would make the tailboard separate.... Well - I did so.  For speed, I removed the thickness from the inside with a circular saw, and she jumped to the front side. Fail! Filled with glue. So, I removed the thickness and now I need to close the hole 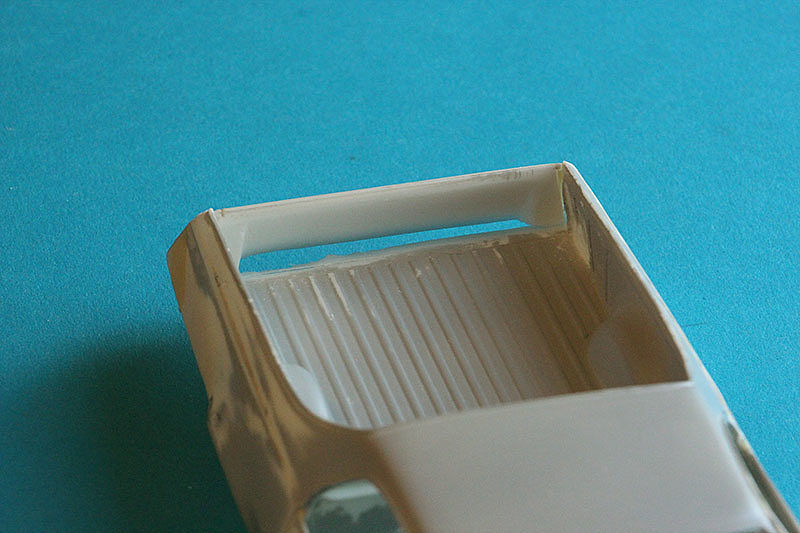 I used 1.5mm plastic for the insert. He's tough. That's what we need. 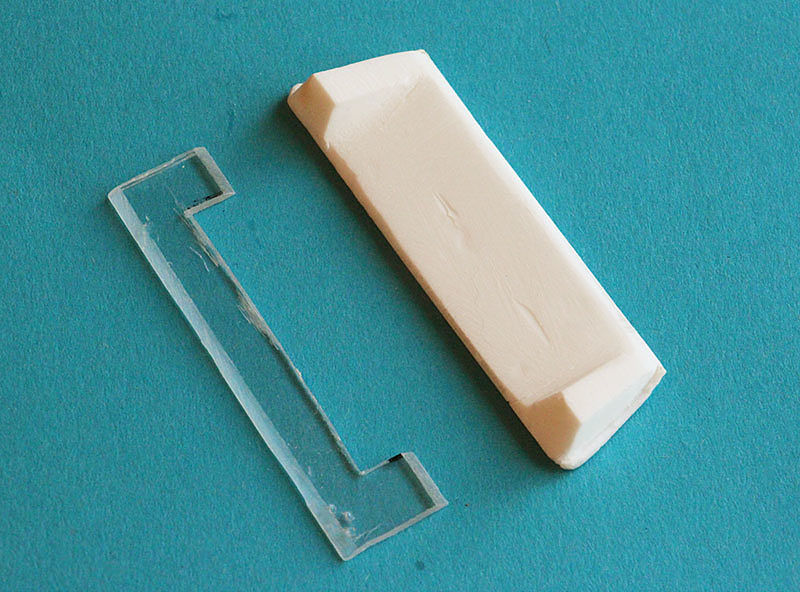 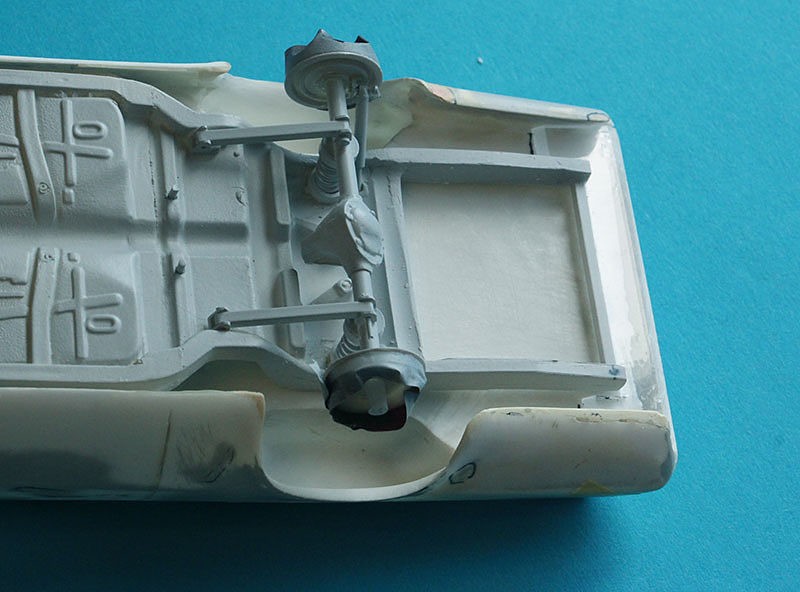 Now you need to make a semblance of this (specifically, for now - side stops for the door): 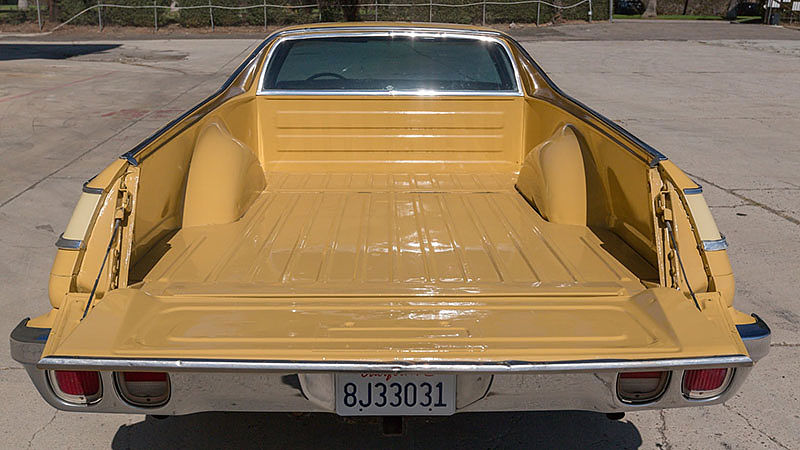 Epoxy for this purpose is a spot on! 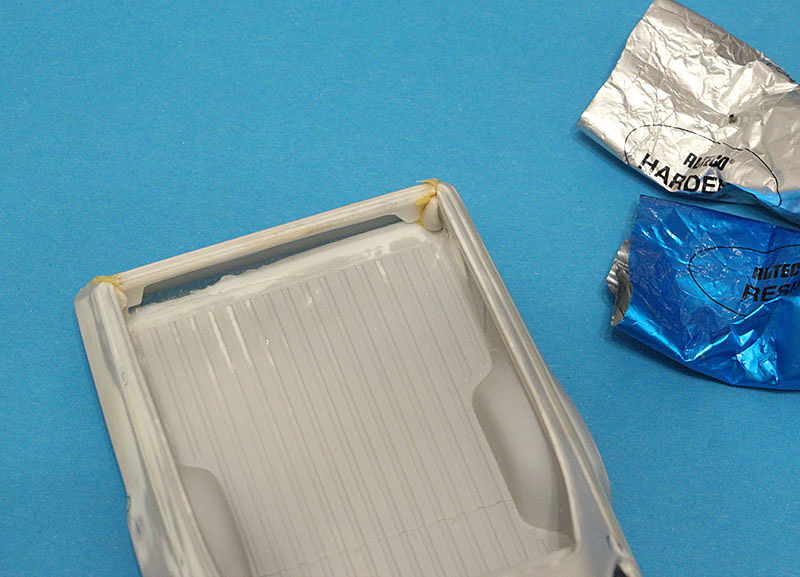 I made a bunch of angles to make it clearer 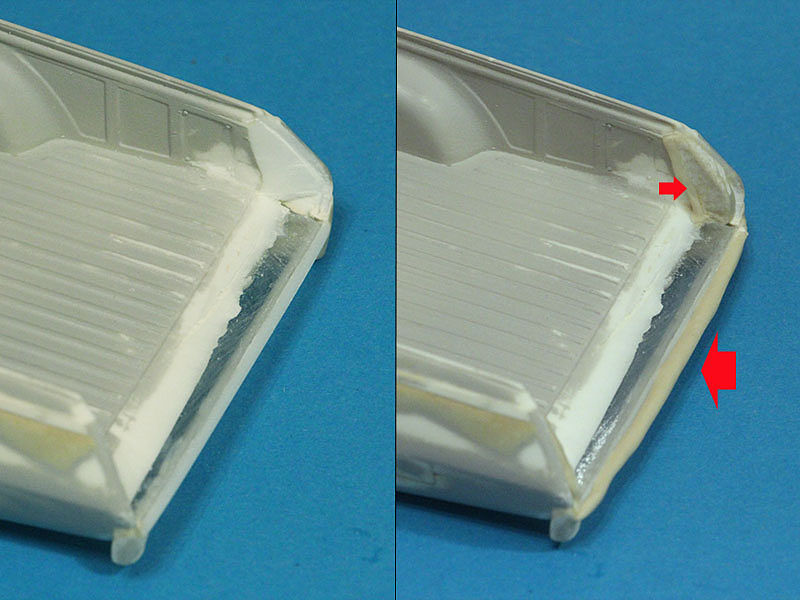 Yes. I also made a support plate, on which the rear bumper should lie 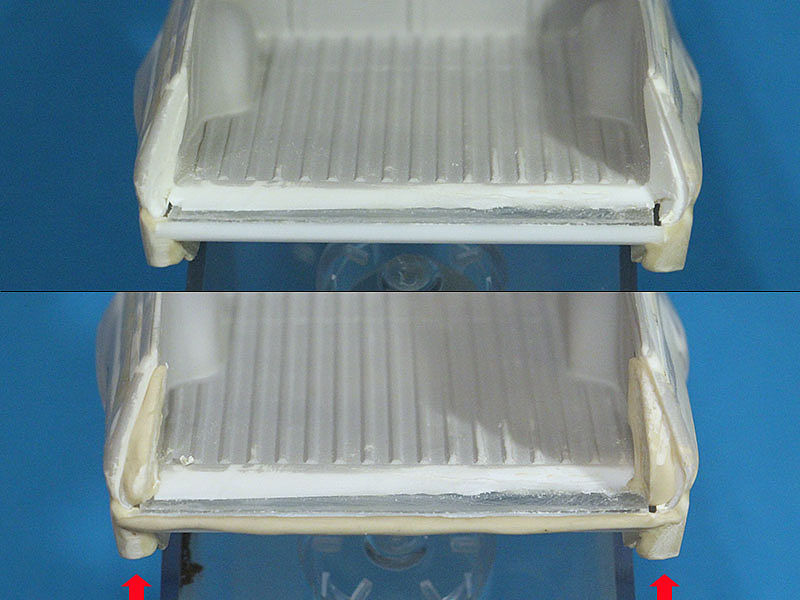 ... and "fangs in the corners - also under the bumper. 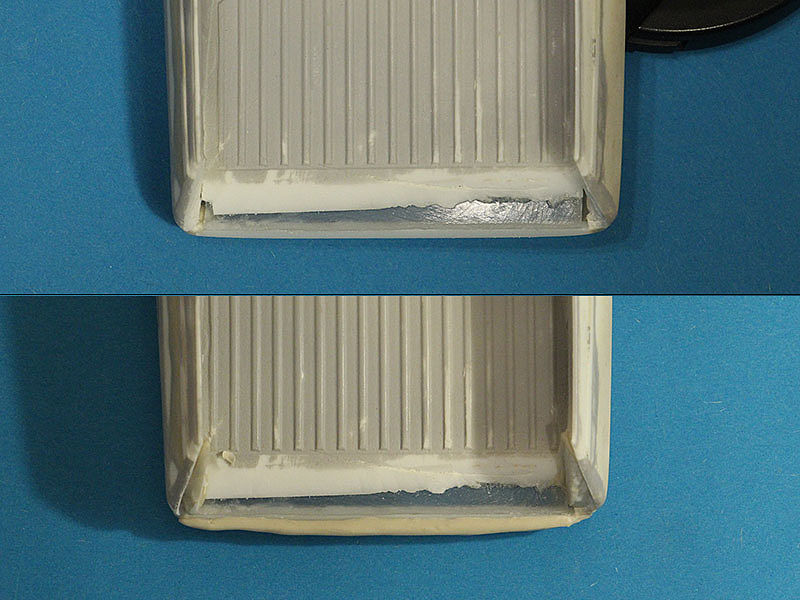 I tried to make the edges of the bumpers thinner and to shave excess resin - at the same time.  We cut the notch for the handle! 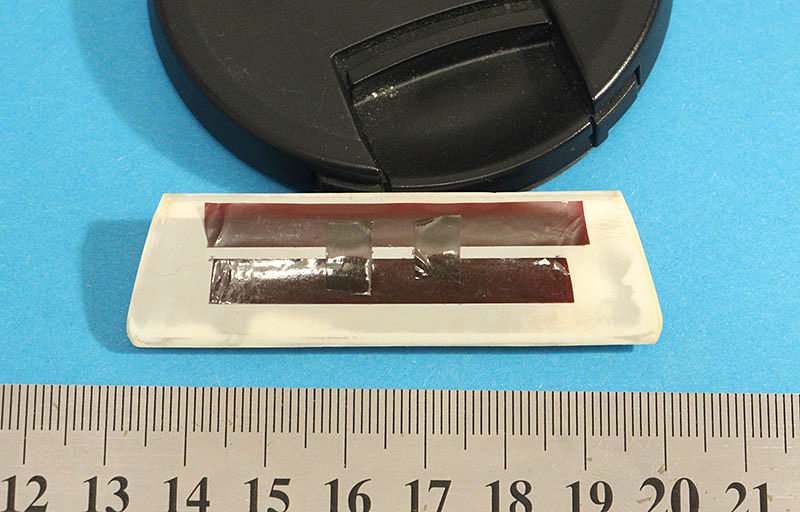 But now someone will ask: "What about the loops?" And I will answer: "There will be loops, comrades!" Historical background: as many have already noticed - there are "horns" sticking out at the bottom of the rear side. These are the body hinges. 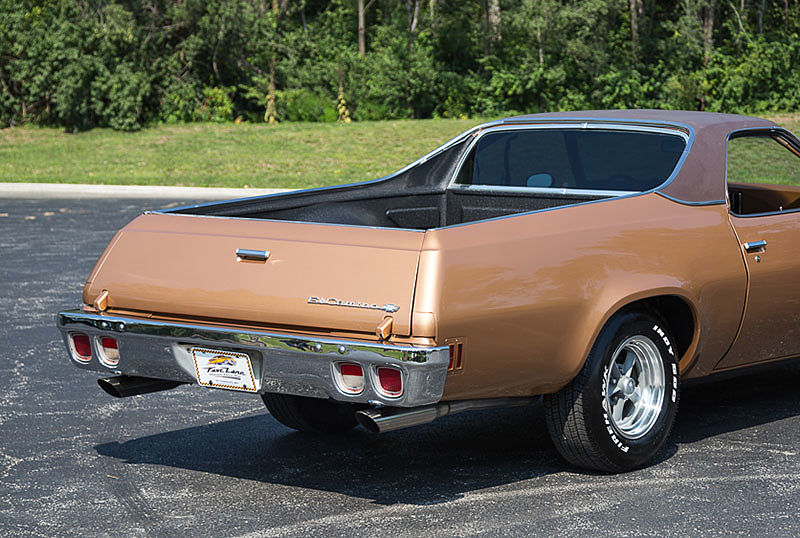 I did not fully understand: where is the door hinge and the axis of mutual rotation. Perhaps the axis of rotation is just on the outside of the door or just behind the face wall of the tailboard. At first I thought to make plastic loops.... well, in general, I did. Then I made it out of aluminum tin. 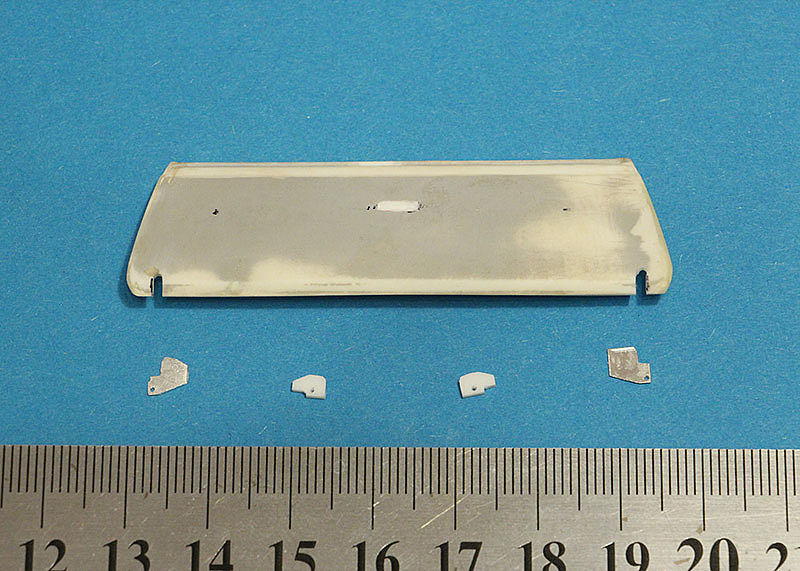 I will use both sets: I will glue the tin to the door, with the axis of rotation as close as possible to the outer skin, and I will glue the plastic into the body for imitation - at the end. In the middle of these operations I will bend right angle of wire 0.5 mm. and stick one end into the door, the other end will glue in the floor. That's the plan. Then we'll see what kind of "goat's face" (the Russian version of failure) will come out of this.   Thanks for your attention! Who honors my lamentations!*
__________________
"Precious and fragile things Needs special handling.."
|
|
|
|
|
| The Following User Says Thank You to Serioga For This Useful Post: |
fafnir (11-04-2023)
|
|
11-11-2023, 08:36 AM
|
#14 | |
|
AF Regular
Thread starter
Join Date: Feb 2009
Location: Moscow, Russia
Posts: 294
Thanks: 5
Thanked 14 Times in 14 Posts
|
Re: 1973 Chevrolet El Camino
I categorically welcome everyone!
Summary of previous episodes: As you remember, there was a ragged edge left: ... after that vandalism But we will cover this mess with aluminum tin  Yes, in the foreground are blanks for new stamplines 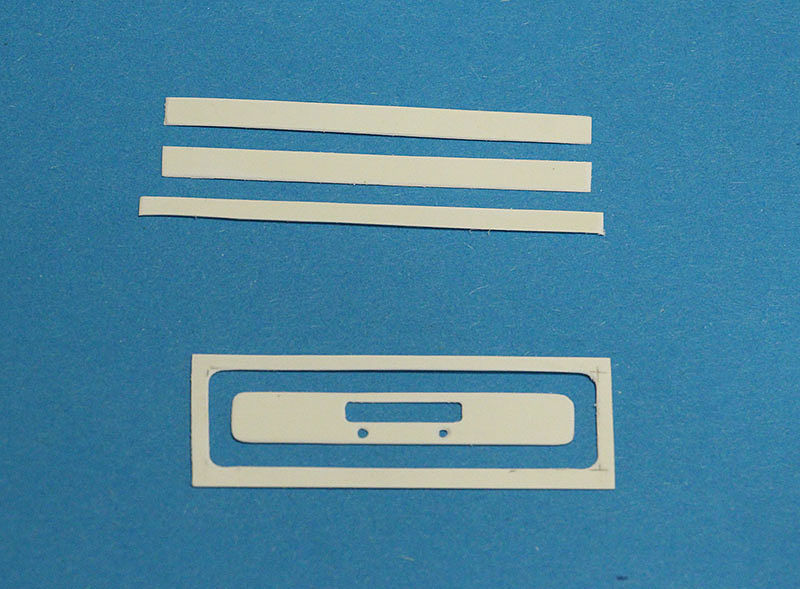 I didn't like the front body shield. It stands as if he is an important detail, and not some kind of S.*  But it should look like: In short, I cut it out. And the right shield took its place. Well, there's a better trim lines on the door now. 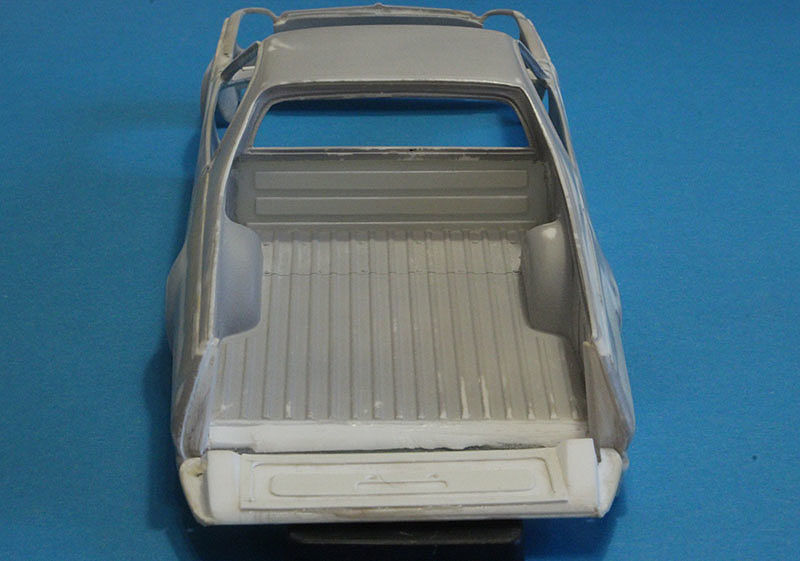 Loops.... I threw out the old ones. I cut new ones out of copper, because I bent/unbent aluminum once - they broke. Copper forgives this for the time being.  On the left - cutting, on the right - bent loops. From above, door's loop, from below - bodie's loop. So how does it work:  And now - on Camino: 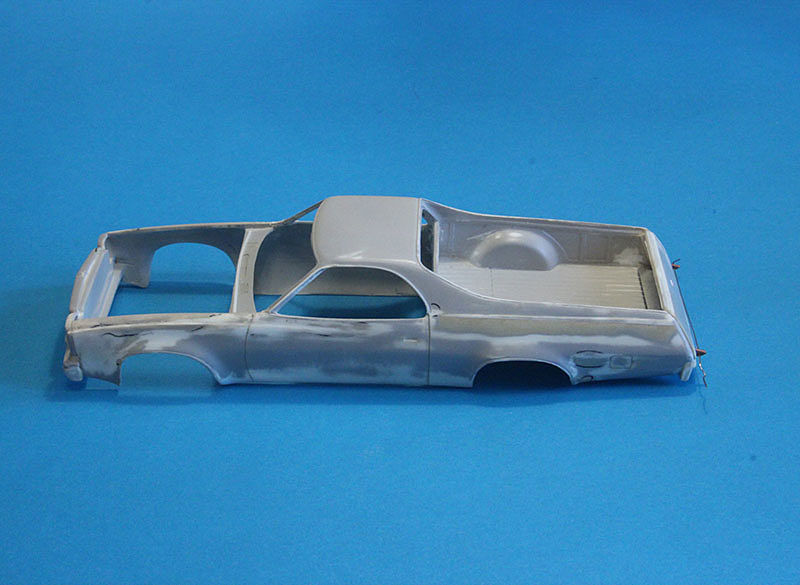 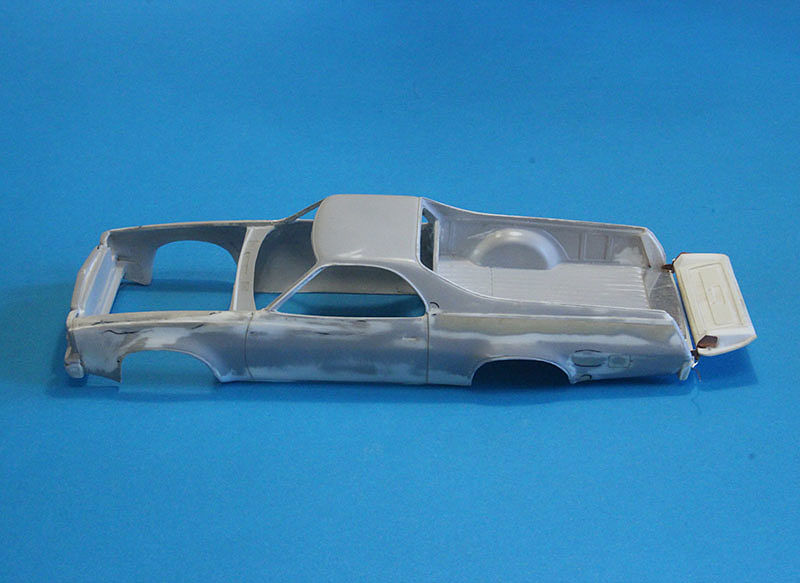 The joy of the eyes Yes, I almost forgot: I have joy! Friend of mine has grown mirrors! For which he has a big ARIGATO! 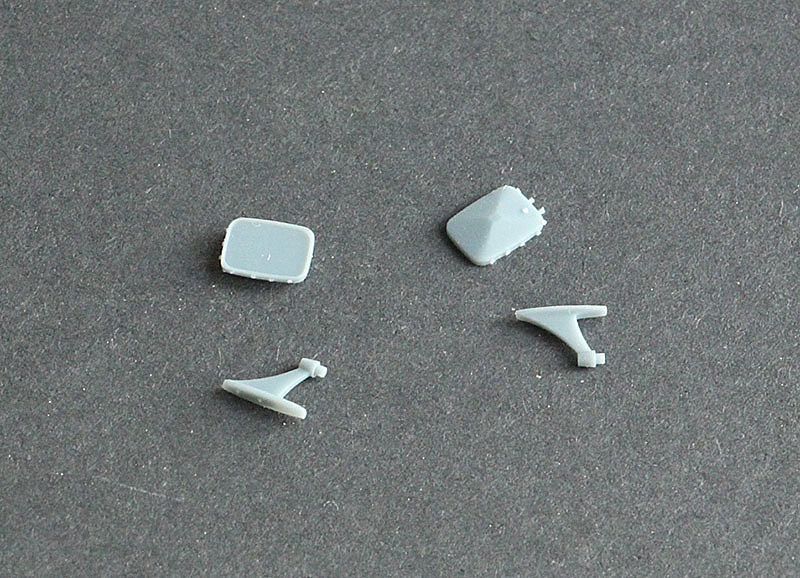
__________________
"Precious and fragile things Needs special handling.."
|
|
|
|
|
| The Following User Says Thank You to Serioga For This Useful Post: |
fafnir (11-11-2023)
|
|
11-13-2023, 01:04 PM
|
#15 | |
|
Sweet, sweet tiny Hondas.
Join Date: Jul 2003
Location: Austin, Texas
Posts: 5,720
Thanks: 48
Thanked 89 Times in 65 Posts
|
Re: 1973 Chevrolet El Camino
I thought the mirrors were cool - but I love the hinges! Amazing work making this kit work! I love being able to watch your process.
__________________
It ain't cool 'till your wife hates it. Imagine a world without Alabama Recent builds: Rocket Bunny FR-S and stock BRZ Toyota bB Bro-style Civic K20 powered SiR converted EK WIP I build slowly and poorly.
|
|
|
|
|
|
|
POST REPLY TO THIS THREAD |
 |
|
|

