|
|
| Search | Car Forums | Gallery | Articles | Helper | Air Dried Fresh Beef Dog Food | IgorSushko.com | Corporate |
|
#121
 02-12-2010, 05:17 PM
|
||||
|
||||
|
Re: Jordan 191
Jaykay, I'm a fan! This has got to be one of the most enjoyable threads I've read in a long time. Don't be a stranger with the updates. You won't bore me, I promise!
__________________


|
|
#122
02-15-2010, 09:22 AM
|
||||
|
||||
|
Re: Jordan 191
My level of astonishment rises with every post.
It is just incredible how much detail can be crammed into one build. I too enjoy following all your steps and pick up some useful hints and tips along the way. Pure modelling art !
|
|
#123
02-17-2010, 11:19 AM
|
|||
|
|||
|
Re: Jordan 191
I really like the technique to create the haze of epoxy impregnated cf. Clever idea.
By the way, I am still working on your 962 pdk transmission reference dilemna. It appears there is still one functioning 962 with a pdk transmission in it. It is a un-touched 962 last raced in a Japanese series (complete with dirt and damage) and was appearantly featured in "Excellence" some time back. I do understand what you mean though, pictures and details are very rare and scarce. This is all third party information from a colleague of mine whom has been racing Porsches for 20 or so years now. I will pass on anything else I can find out about it. The Porsche training manuals for current pdk cars have been very helpful, and actually have an animation of the 962 pdk functioning with fluid passageways and location of most of the lines. However, since it is current product information, it cannot be reproduced. Even with permission. They are very tight with these things..
|
|
#124
02-17-2010, 03:01 PM
|
||||
|
||||
|
Re: Jordan 191
Quote:
|
|
#126
02-20-2010, 12:29 PM
|
|||
|
|||
|
Re: Jordan 191
@Raikkobin: Thanks for the effort! There's no hurry yet ...:-)
Here we go with some more bits and pieces. As I said in my last update I was fed up with sanding and polishing so I continued by working on the cockpit area. Some of the parts have been in the works or done for a while and others were now made during assembly. The main two pieces for the footwell and seat area were CFd and painted along with the bodywork. I scratch built the pedals even though they will hardly be visible in the end but you can see them when looking through the service hole in front of the front damper. 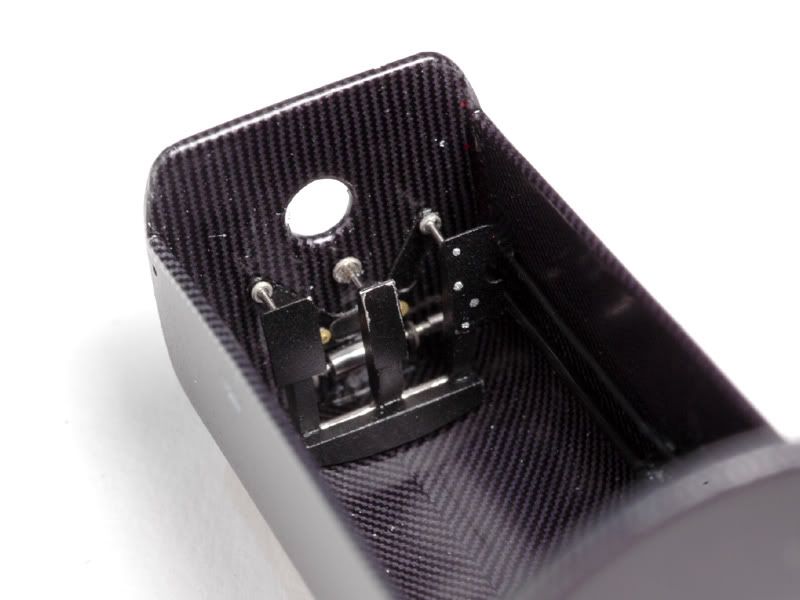 Theres one useful picture in the Perfect Manual taken from the drivers seat so I tried to build what I could see and made up the rest :-) I made them from some etched and plastic bits.  The next step was to do the main cockpit display. To replace the moulded in detail from the kit parts I made individual pieces from plastic for easier painting and decaling and an etched frame for the display itself. In the picture you also see a switch box made from an etched front face and a bit of renshape that will go to the lower left of the dashboard and two etched panels that will go on the cockpit walls besides the drivers shoulders. 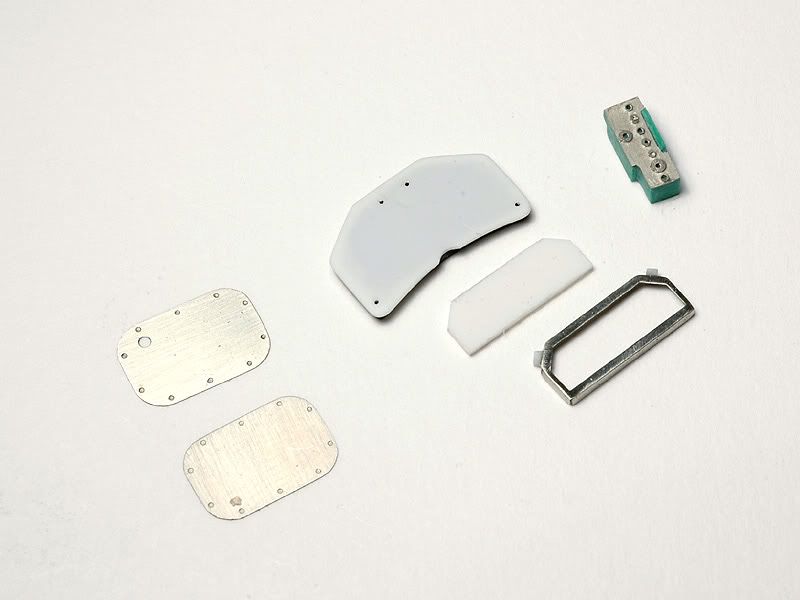 The parts were again painted and CFd. For the display itself I designed the graphics ( that are printed/stickered on the real display as well ) along with the etching graphics and printed them on transparent overhead film with an ALPS printer. I then sprayed the film from the back side with a mix of moss green and silver. After cutting this out I could place the display face inside the etched frame. 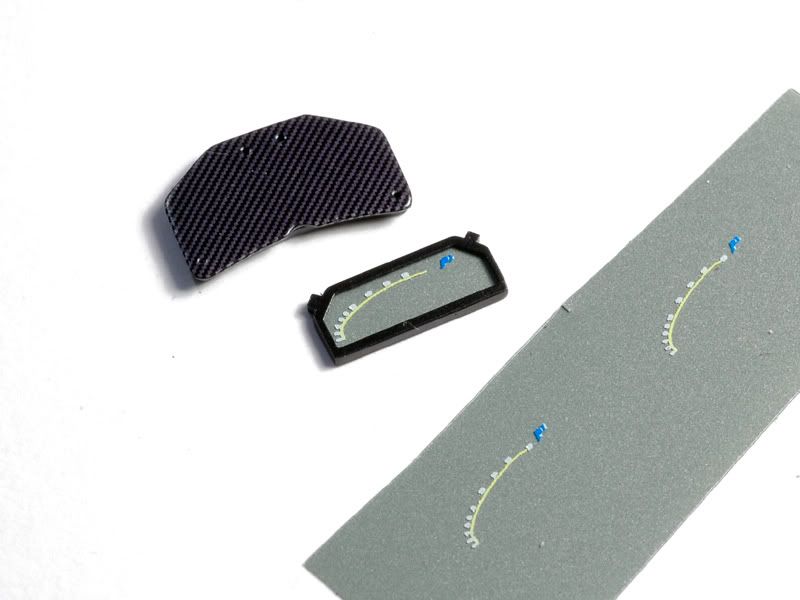 I then glued these parts on the dashboard and dressed them up with some small details. I also added the steering column that I made from brass tubes. The steering wheel that Ill show later will be removable. 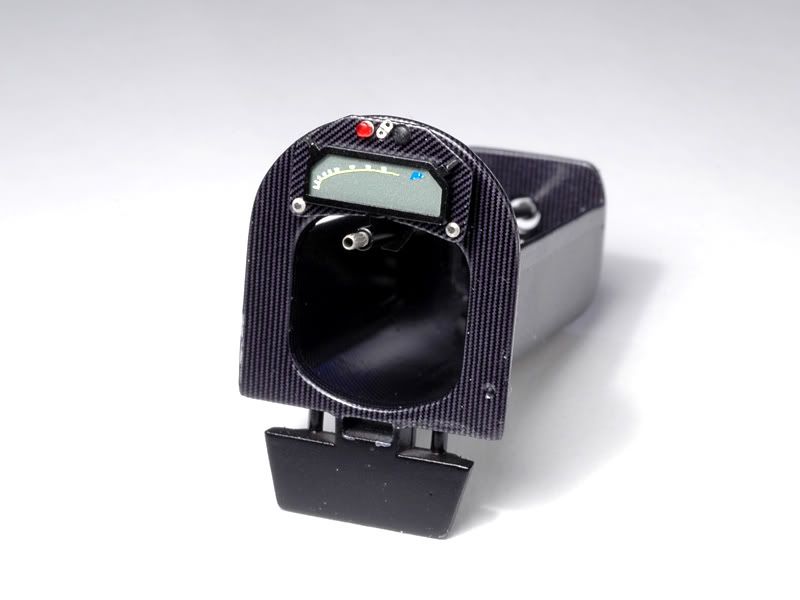 I carried on with the little box that goes to the left. It was also painted and CFd. I then added the emergency button that I turned from aluminium and painted transparent red for the anodized look. The little switches were made from 0,3mm nickel silver wire. I tried to give them a bit of that typical conical shape but at that size its rather tricky. Anyway Im happy how it turned out :-) Finally I added some knee pads on the bulkhead, some wires and that little round thing between display and switch box that seems to be a later season addition. I have no clue what its for though :-) 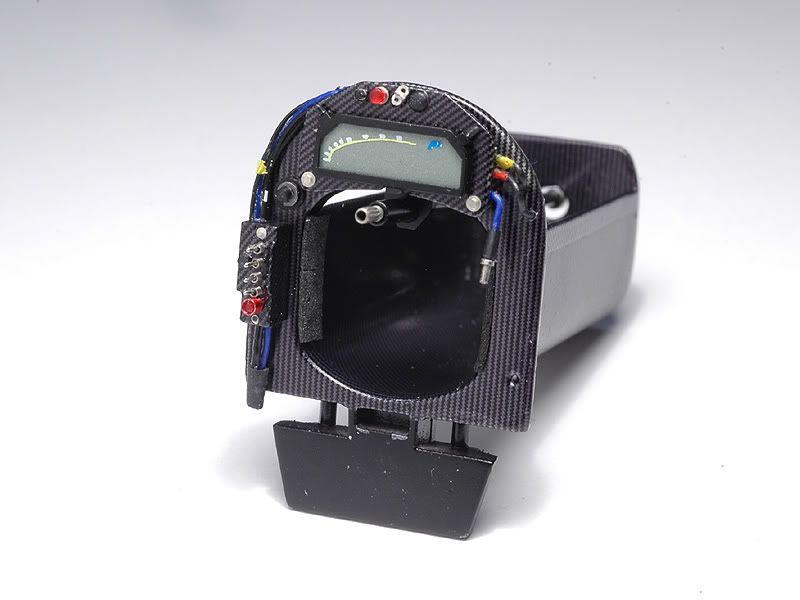 This is it for the first part of the cockpit. Theres more to come from the silly little bits department in the next update. Thats the part I really enjoy during a build. Much more than painting and sanding :-)
|
|
#129
02-21-2010, 12:11 AM
|
||||
|
||||
|
Re: Jordan 191
The display panel looks phenomenal
 (as does the rest of the update) (as does the rest of the update)Quote:

__________________
Guideline for happy modeling: Practice on scrap. Always try something new. Less is more. "I have a plan so cunning, you could put a tail on it and call it a weasel" - Edmund Blackadder
|
|
#130
02-22-2010, 12:52 AM
|
||||
|
||||
|
Re: Jordan 191
Quote:
I have the kit, but looking at yours, mine will probably never built ;-)))
__________________
Micha       
|
|
#131
02-23-2010, 12:36 AM
|
||||
|
||||
|
Re: Jordan 191
Quote:
__________________
  
|
|
#132
02-23-2010, 02:45 AM
|
||||
|
||||
|
Re: Jordan 191
Superb. You was one of the very preferred modelers of mine Jay, but you're becoming one unreachable hiro! Congrats.
The look of the front wing carbon undersurfaces is..... real. Fantastic.
__________________
gio
|
|
#134
02-23-2010, 12:55 PM
|
||||
|
||||
|
Re: Jordan 191
The pedals and switches look awesome, Jaykay.
__________________
-Mike AF Director of Media / Photographer  [email protected] | AutomotiveForums.com | Flickr Gallery
|
|
#135
02-23-2010, 05:37 PM
|
||||
|
||||
|
Re: Jordan 191
I didnt think this was a 1:1 forum, Im pretty sure this is a model forum, surely that is not possible on a 1:20 F1 car.... Or did you borrow some fancy shrinking ray thingy?
Incredible build!!!
__________________
 It's Not wheather you Win or Lose, its how you look while you play the Game
|
|
 |
POST REPLY TO THIS THREAD |
 |
|
|


