|
|
| Search | Car Forums | Gallery | Articles | Helper | Air Dried Beef Dog Food | IgorSushko.com | Corporate |
|
|||||||
| WIP - Motorsports Post topics for any "Work In Process" motorsports vehicles in this sub-forum. |
 |
 Show Printable Version | Show Printable Version |  Subscribe to this Thread
|
|
|
Thread Tools |
|
#121
 02-10-2009, 12:40 PM
|
||||
|
||||
|
Re: WIP...Peugeot 405T16GR
Bring it on! Show us some body work
 ! !
__________________
Recently finished Projects:
Porsche 911 Carrera RS 3.0 Current Projects: Ferrari 250 GTO LM 1962 (chassis #3387)   
|
|
#122
02-12-2009, 12:00 AM
|
||||
|
||||
|
Re: WIP...Peugeot 405T16GR
I finally did some work on the body!
First, I removed the 4 air inlet covers molded in the roof. There should be only 2, and I will add them as separate pieces. I drilled 4 pairs of tiny holes in the roof. For the longest stages of the rally, the teams placed a tubing rack with an extra spare wheel in the roof. When this rack was not used, you could only see the screws in the holes. I will paint them separately and add them later: 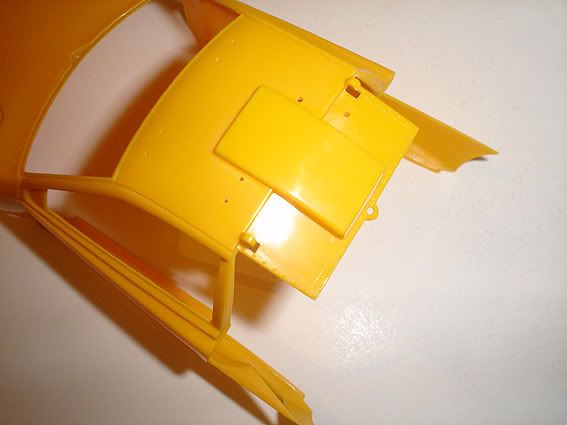 Here´s the completed front section of the body. I had to remove a lot of molding lines: 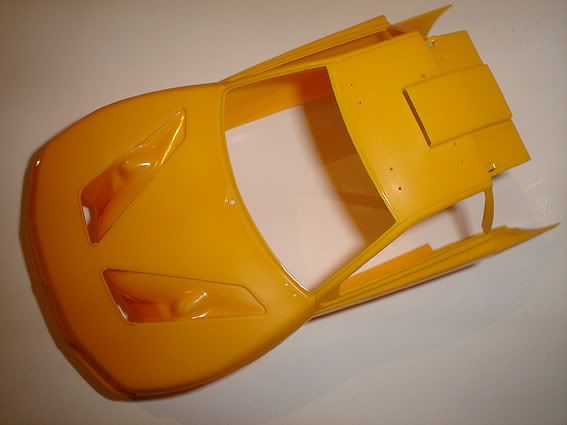 In the front of the body, I drilled holes for the light pods (a little hole was drilled just above of each headlight for the electric wires of the pods): 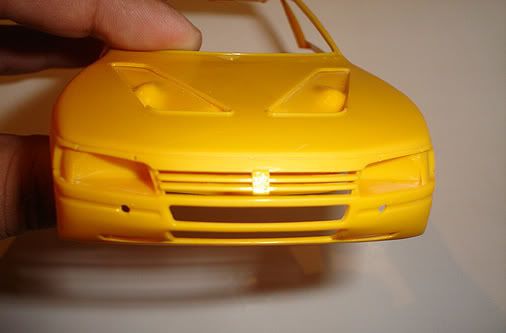 In the engine cover, I removed the center piece of the hinges. I will scratchbuild them with needles: 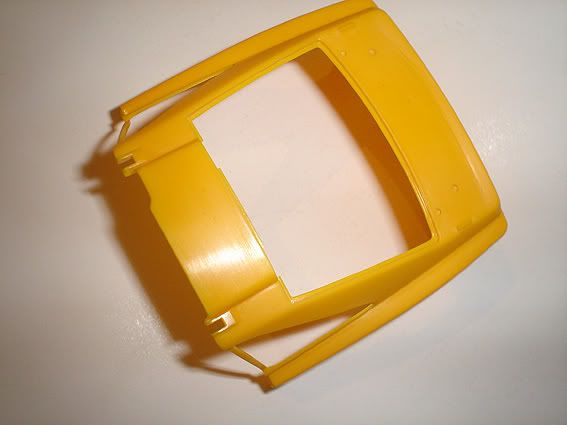 In the rear wing, I drilled holes for metal screws: 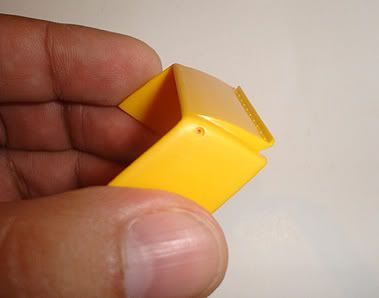 And here´s a photo of almost all the pieces that will be painted Yellow. Not pictured are the roof screws and air inlets mesh. You can see I scratchbuilt the front wheel inner arches:  Here´s the body after a coat of primer and some sanding. Next, I will spray a final primer coat and Tamiya´s Chrome Yellow: 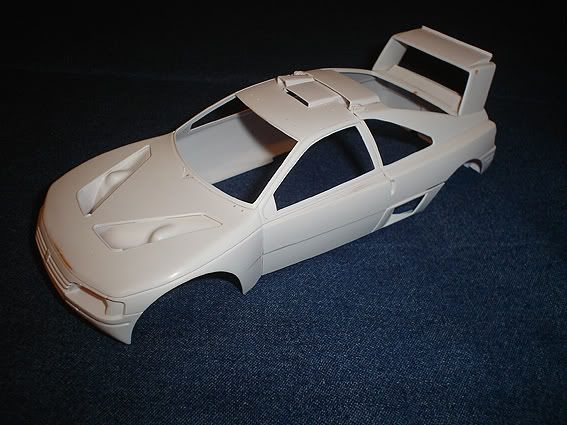 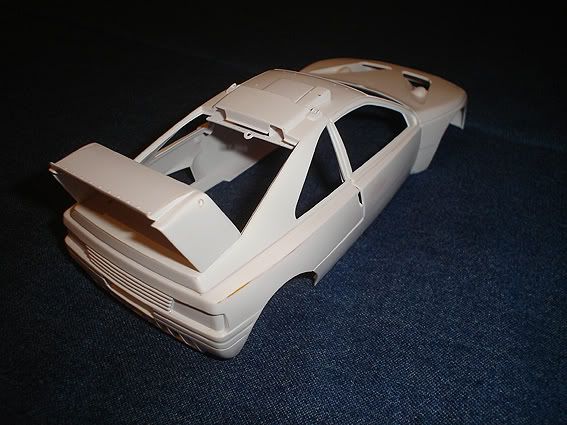 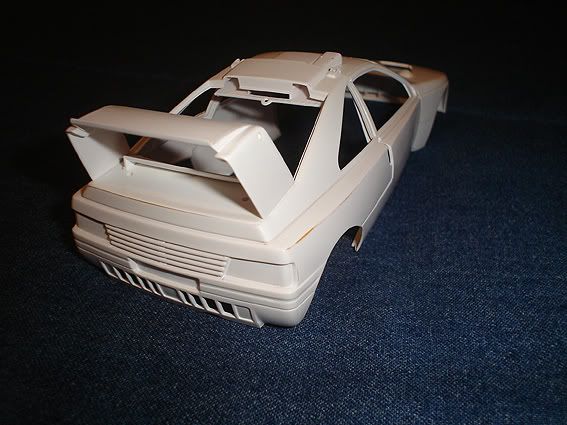 I´ll show you the painted body in a couple days! Stay tuned!!! 
|
|
#123
02-12-2009, 03:04 AM
|
||||
|
||||
|
Re: WIP...Peugeot 405T16GR
Looks great! Nice work and forward thinking ion the mods you want to make
 (PS letter sent this morning. scan coming soon  ) )
__________________
Guideline for happy modeling: Practice on scrap. Always try something new. Less is more. "I have a plan so cunning, you could put a tail on it and call it a weasel" - Edmund Blackadder
|
|
#124
02-12-2009, 07:53 AM
|
||||
|
||||
|
Re: WIP...Peugeot 405T16GR
Always some great work here !!
__________________
Phil  
|
|
#125
03-22-2009, 10:59 PM
|
||||
|
||||
|
Re: WIP...Peugeot 405T16GR
Finally! I have an update for you!
I had to paint the body 2 times. The first time I forgot to wash it after sanding the primer coat, and I obtained a cute sandpaper texture when I applied the paint. This showed me that it is very important to remember the basics!  Well, after a dive in acetone lake, here´s the body painted and decaled: 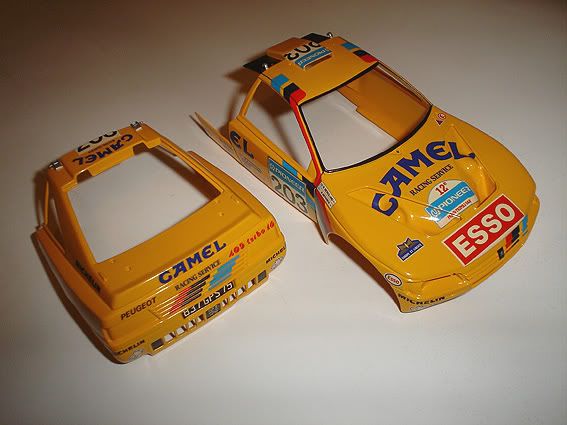 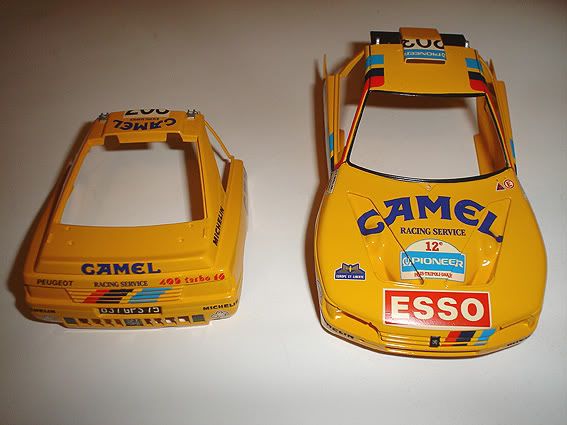 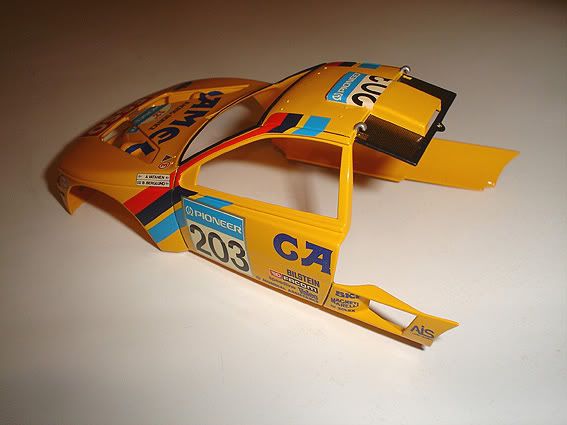 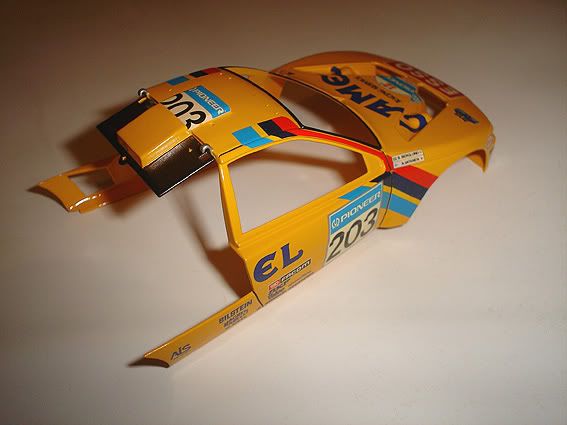 For the nose and rear colored stripes, I cut the decals in 7 separated strips: 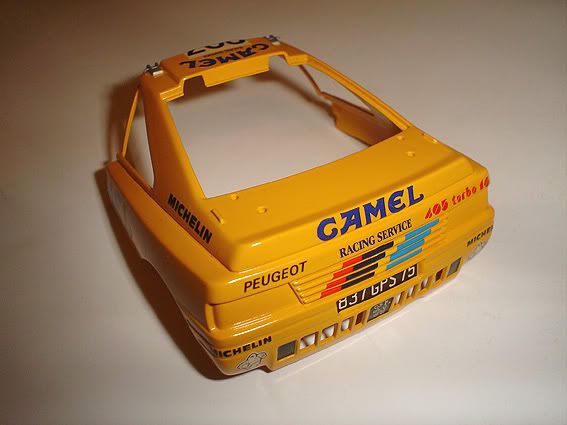 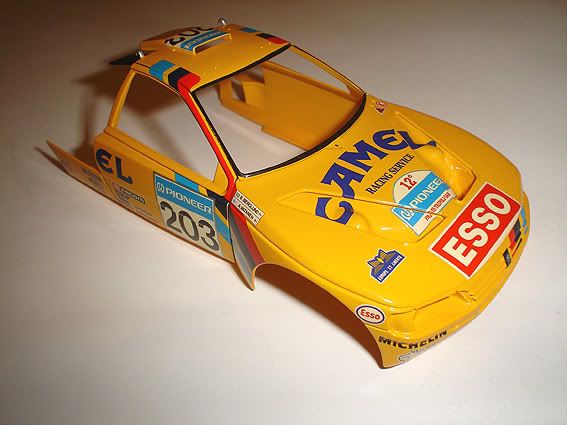 By the way, be very careful with the use of decal softeners on this sheet. The decals are old and thin, and it is very easy to ruin them if you apply too much softener. I found this the hard way  I had to use my backup sheet. I had to use my backup sheet.I painted the black parts in the rear wing and applied the decals: 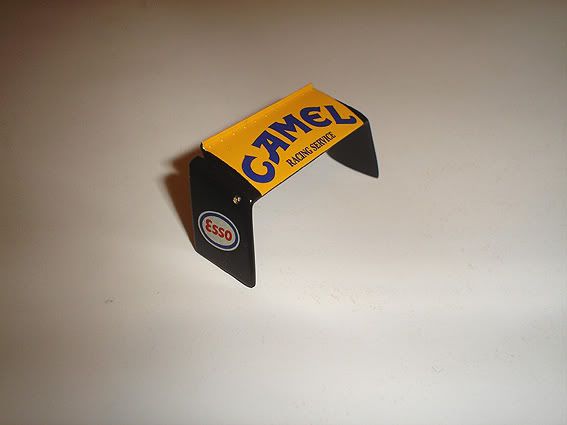 I painted the door panel lines with a mixture of yellow,orange and black: 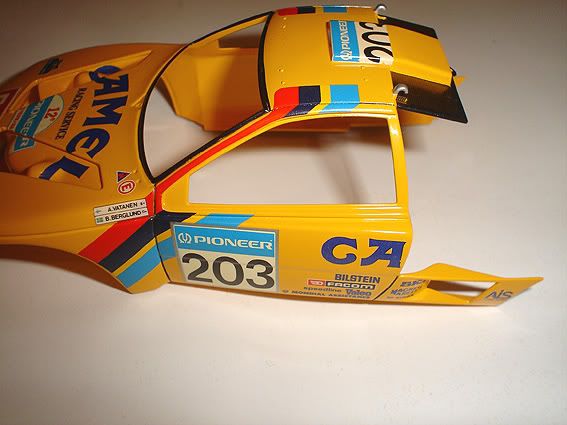 Hinges were painted in aluminum, and carbon fiber decals were applied in the roof panel: 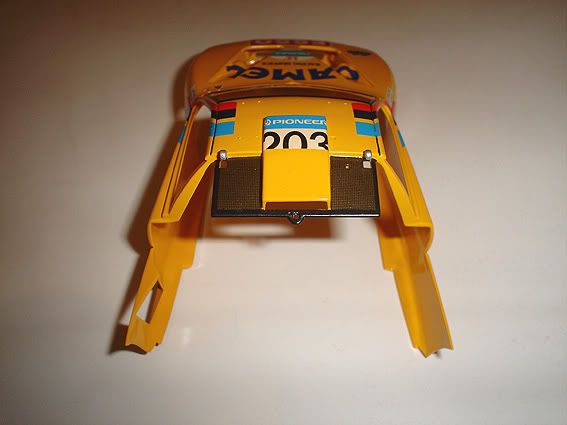 I also added pins and handles to the roof hinges: 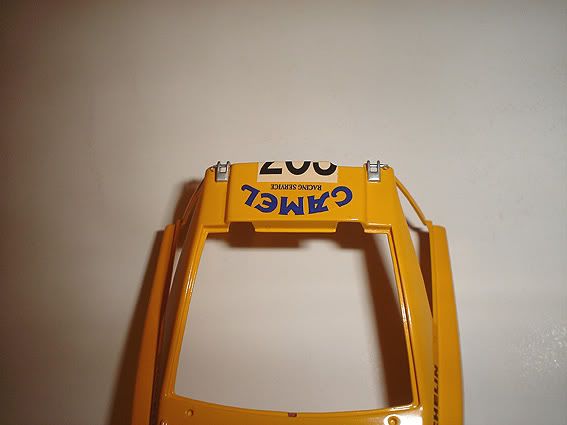 In this photo, you can see the roof screws (in the spare wheel rack holes): 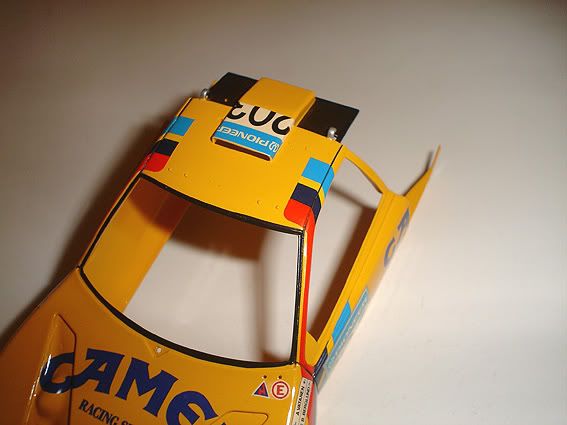 That´s it for the moment! Time to detail the windows and add final detailing to the body! Stay tuned!
|
|
#126
03-23-2009, 03:49 AM
|
||||
|
||||
|
Re: WIP...Peugeot 405T16GR
Looking great, Sam
I really like the pins in the hinges - awesome touch.
__________________
Guideline for happy modeling: Practice on scrap. Always try something new. Less is more. "I have a plan so cunning, you could put a tail on it and call it a weasel" - Edmund Blackadder
|
|
#127
04-12-2009, 10:26 PM
|
||||
|
||||
|
Re: WIP...Peugeot 405T16GR
It has been a looooong time since my last update, so I hope someone is still interested
The body is in the chassis now!! 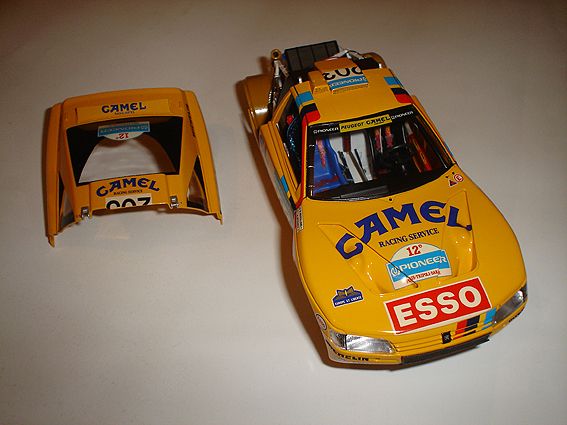 I scratchbuilt the front grilles (each of them must have a frame): 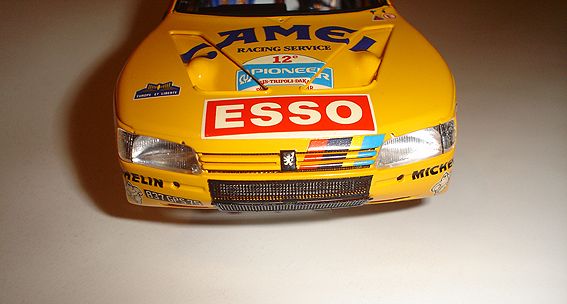 I also added grilles to the roof air intakes... 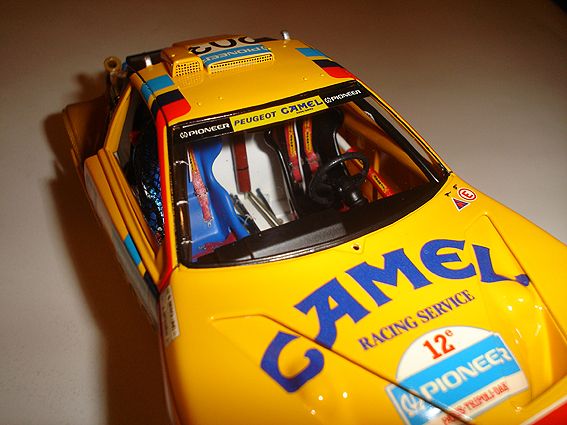 ...and the left side air intake (this one must have a frame): 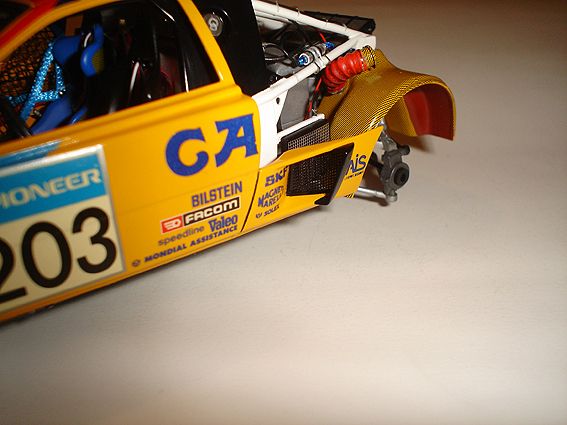 I added emergency switches in the base of the windshield: 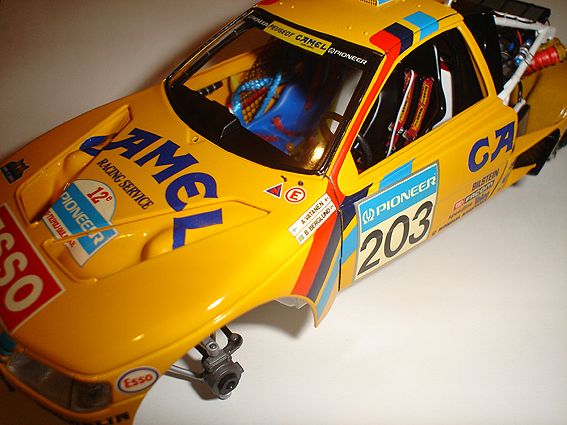 Time to glue the headlights. I used bare metal foil in the buckets: 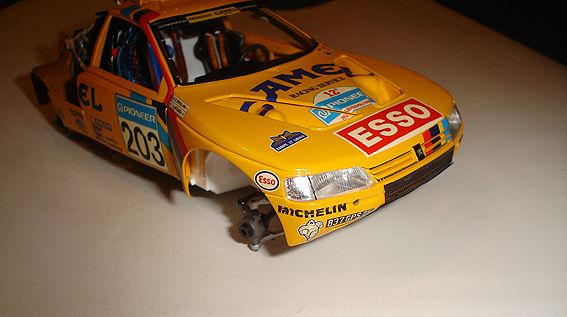 In the rear of the body, I glued the windows and painted the brake lights: 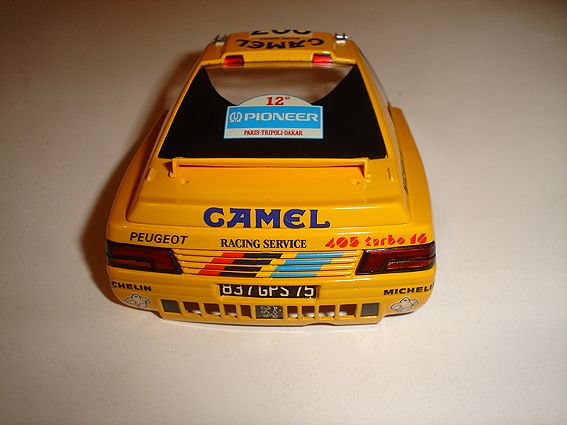  The rear lights were painted with clear red and clear orange: 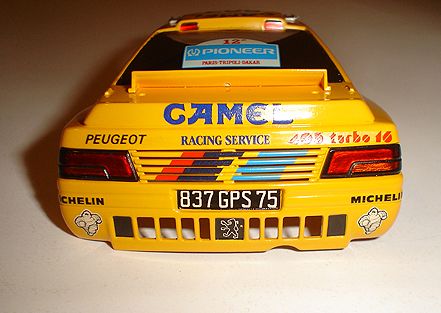 I am working in some details, like the side windows (the center section should have a smoke tint): 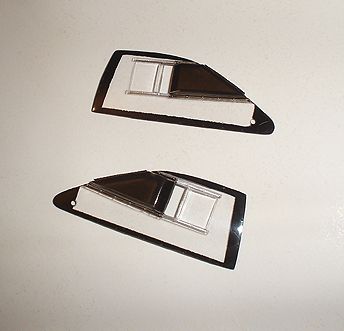 The windshield wiper included in the kit is too small, so I scratchbuilt a new one (I added proper wiring):  I painted and detailed the light pods with bare metal foil. I added connection wires: 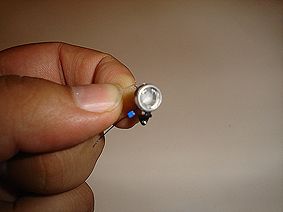 The 4 sand ramps should have the same size, so I scratchbuilt them with styrene...I will add belts and the proper hardware: 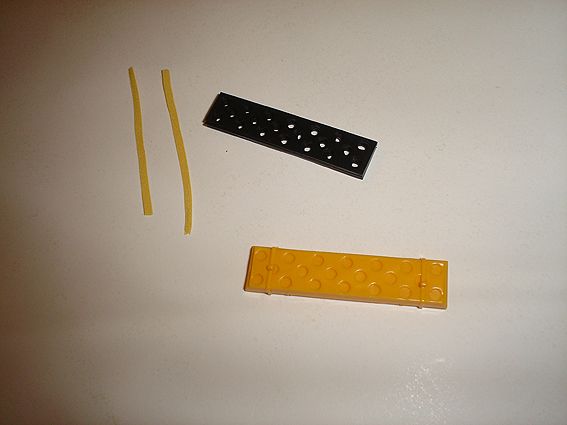 This baby should be done in a week!!! I hope you are still watching!
|
|
#128
04-14-2009, 09:40 AM
|
||||
|
||||
|
Re: WIP...Peugeot 405T16GR
Still watching. Lovely work on the body, great finish, grills look good.
|
|
#129
04-14-2009, 12:06 PM
|
||||
|
||||
|
Re: WIP...Peugeot 405T16GR
all i can say is wow the time and effort attn to detail is outstanding..you should enter it in a contest or something great works of art like that should be shown to all
|
|
#130
04-14-2009, 02:39 PM
|
||||
|
||||
|
Re: WIP...Peugeot 405T16GR
Still watching and still loving !!
and moreover still learning...! I hope to do mine as good as this incredible model. Sounds like the best 405 GR I've ever seen...
__________________
Phil
|
|
#132
04-19-2009, 02:01 AM
|
||||
|
||||
|
Re: WIP...Peugeot 405T16GR
Almost there!
 Tamiya provides a clear chassis shield, but I decided to paint it. Here´s the finished piece in the chassis (The screws will be covered with blue plates made from thin aluminum): 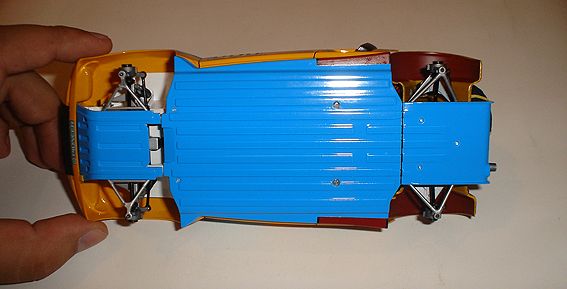 There should be a tow hook in the front of the car. I scratchbuilt it from a photoetched ring and styrene: 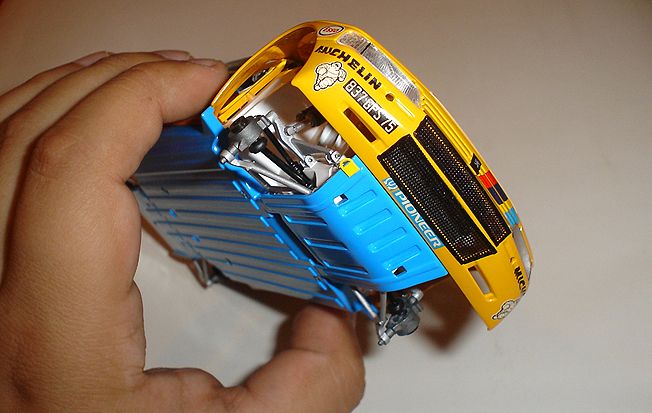 Here´s the spare wheel in place: 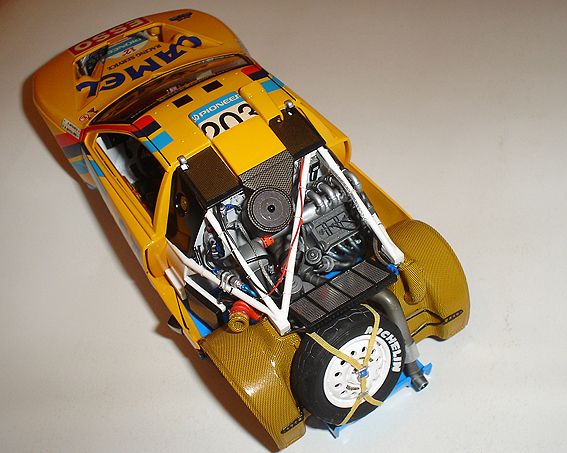 The air filter should have a solid aluminum top. I did a couple aluminum circles and glued them in top of the original piece (sorry for the flash glare) 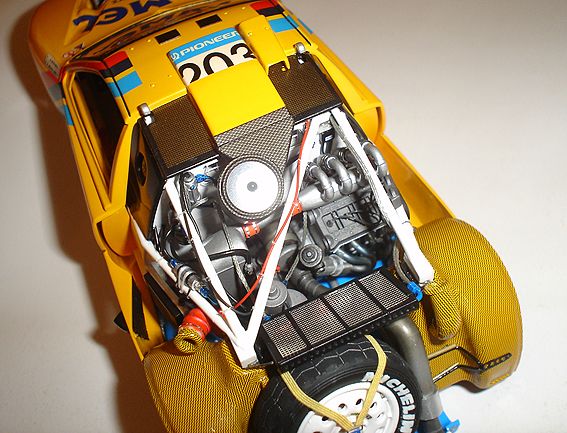 Next, I glued the sand ramps in place (detailed with belts and hardware): 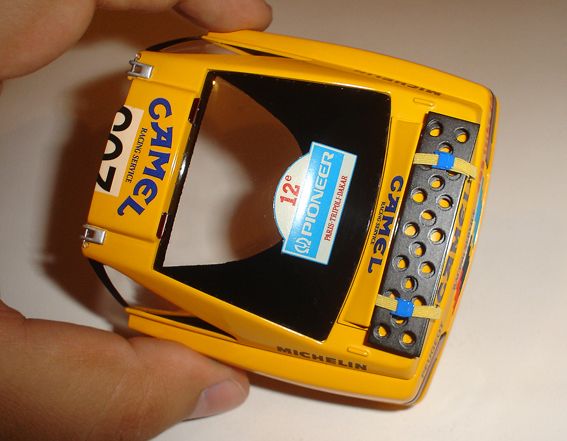 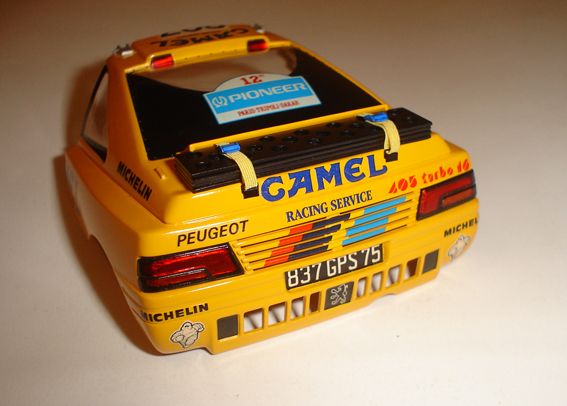 Time to add the light pods and front tubing: 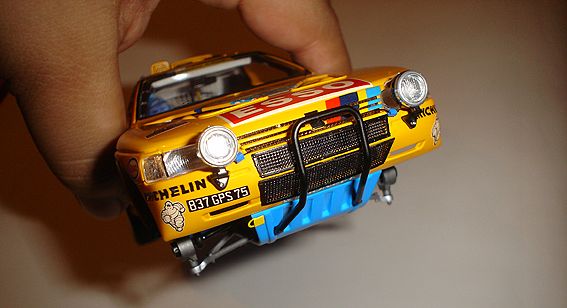 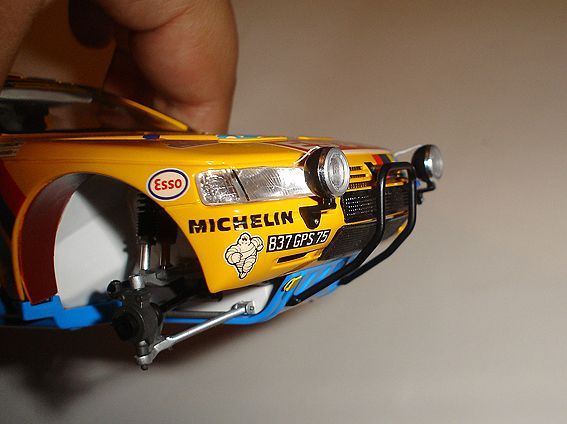 The front wheel inner arches were glued at this time: 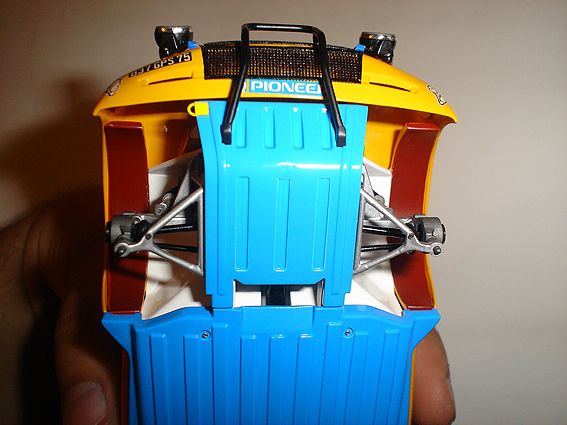 I only need to scratchbuild the mud flaps, glue the rear wing and put the wheels in place!!!! I hope to show you the finished model in my next post!!!
|
|
#134
04-22-2009, 05:44 AM
|
||||
|
||||
|
Re: WIP...Peugeot 405T16GR
What great work, if the PM is a madness is this then
others, well I tried to draw inspiration from your pictures but I was very far  Adolfo
|
|
#135
04-22-2009, 05:54 AM
|
||||
|
||||
|
Re: WIP...Peugeot 405T16GR
Quote:
|
|
|
POST REPLY TO THIS THREAD |
 |
|
|


