|
|
| Search | Car Forums | Gallery | Articles | Helper | Air Dried Fresh Beef Dog Food | IgorSushko.com | Corporate |
|
|||||||
| WIP - Street Post topics for any "Works In Progress" street vehicles projects in this sub-forum. |
 |
 Show Printable Version | Show Printable Version |  Subscribe to this Thread
|
|
|
Thread Tools |
|
#77
 02-16-2006, 05:12 AM
|
|||
|
|||
|
Re: WIP: Fujimi 1/24 Ferrari 550 Maranello
Very impressive work!!! Keep this way!! Wonderfull Work!!
__________________
 http://www.minituner.com.br WIP: Project NoMother (Nomad '55)**UPDATED (09/02/2005) My Mustang Boss 429 (Completed) My Mercedes Benz CLK DTM 2000 Street (Completed) 
|
|
#78
02-19-2006, 02:13 PM
|
||||
|
||||
|
Re: WIP: Fujimi 1/24 Ferrari 550 Maranello
While working on the troublesome interior, I also did a bit of work on the body. I masked the windshield with Tamiya masking tape, starting from a narrow one to cover the raised lines and filled the rest with wider tape, then I also completely masked the outside and sprayed Tamiya flat black.
Since I have one of each 575 and 550 kit to build in the future, I'm saving the masking tape, so I can cut out another set of masking tape by using the old ones as templates.  After I glued the window, a part of the glue leaked out! I don't remember when was the last time I made a blunder like this, but what has happened can't be reversed, can I? Repair work was simple. I used a chisel to get rid of nearly (but not completely) hardened excess glue, then I used a series of sand papers from 600 to 2000 grit, as well as polishing abrasives up to 12000, as I normally do on clear-coated bodies. After that, I used Tamiya's polishing compound coarse, medium and fine to completely eliminate scratches the sand papers and abrasives. I also had to touch up a part of the black window trim.  Now, back to the interior. I cut out pieces of styrene and glued them together. In order to create a crease, I first glued a pattern on the back side (top right), then I rubbed the front side (bottom left). 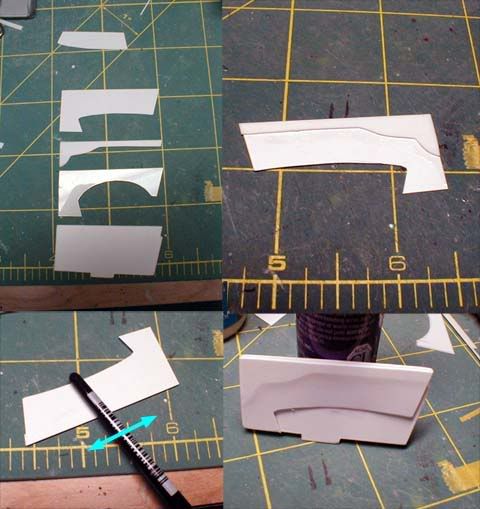 The arm rest was made the same way (laminating patterned styrene), so was the handle. Here, the surface is a bit rough because primer was hand-brushed only to fill scratches and to check the surface imperfections, but it's good enough to see how it's coming along. 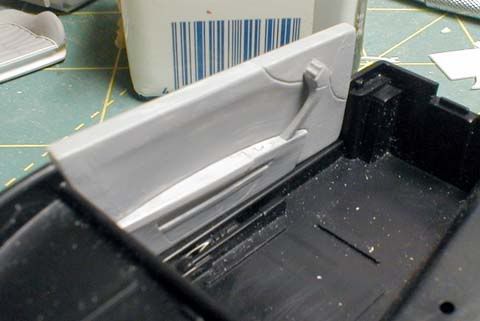
|
|
#79
02-19-2006, 02:24 PM
|
||||
|
||||
|
Re: WIP: Fujimi 1/24 Ferrari 550 Maranello
you are really good at scratch building. nice
__________________
RIP 88 Bronco II    
|
|
#81
02-19-2006, 03:23 PM
|
|||
|
|||
|
Re: WIP: Fujimi 1/24 Ferrari 550 Maranello
I really enjoy watching your builds! trully inspiring stuff.. well done

|
|
#82
02-20-2006, 04:03 AM
|
||||
|
||||
|
Re: WIP: Fujimi 1/24 Ferrari 550 Maranello
Hiroaki, you are definately one of my AF kings!
When I "grow up", I want to be able to do what you can 
__________________
Guideline for happy modeling: Practice on scrap. Always try something new. Less is more. "I have a plan so cunning, you could put a tail on it and call it a weasel" - Edmund Blackadder
|
|
#84
02-20-2006, 10:25 AM
|
||||
|
||||
|
Re: WIP: Fujimi 1/24 Ferrari 550 Maranello
this looks amazing. this is one of the ferrari's i love most(its really hard to pick your favourite ferrari!).
__________________
 bas is the name, feel free to use it please. bas is the name, feel free to use it please.
|
|
#85
02-27-2006, 03:34 AM
|
||||
|
||||
|
Re: WIP: Fujimi 1/24 Ferrari 550 Maranello
Here's another picture of the interior. The floor was coated with flocking material.
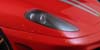
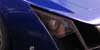
 What am I doing here? Well, determining the layout of the mold. This takes some thinking as I have to minimise the risk of air being trapped. 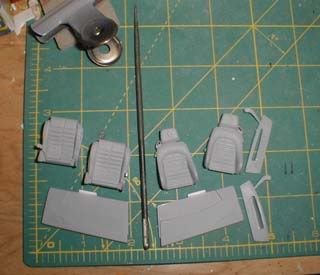 I started from the bottom left corner (a), and placed the rest of the parts (b). After that, I slowly poured silicone into and details (c). Then I poured some more into the top right corner (d) until all parts are covered. I waited for a few minutes to let air bubbles surface, then I poured a little more until the mold had a sufficient thickness. 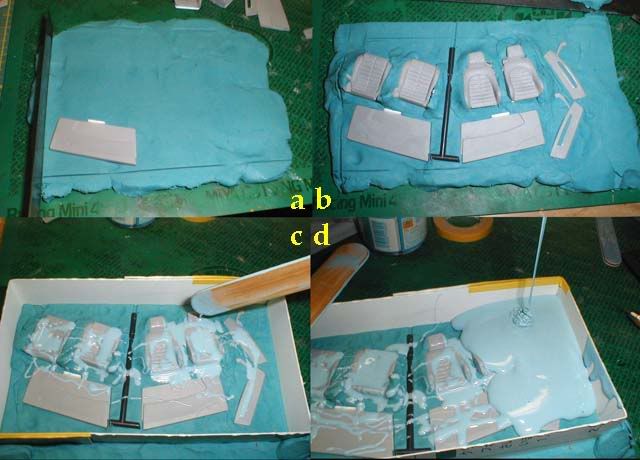 You don't necessarily have to use the entire amount of the mixed silicone in the cup. You can let it set at the bottom, and when it's cured, you can dice it up and use them as filler cubes. After one side was done, I repeated the same process and made the other half. Don't forget the mold releasing wax, or you won't be able to separate two halves. 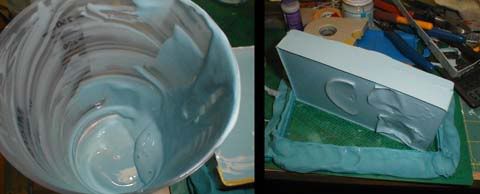 I de-chromed some parts by soaking them in Mr. Thinner overnight. The kit comes with a strip of chrome tape, and it's big enough to make all three mirrors faces, but the door mirrors aren't pre-cut, so I simply used the extra area. I also thinned the tip of the exhaust pipes. Although it's hard to see, the top two are the modified ones. 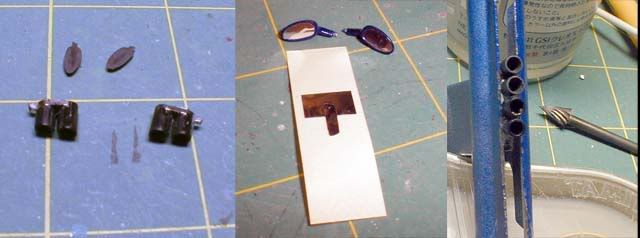 The brakelights were painted with GSI's Mr. Aqueous Hobby colors. The center circles were masked with baremetal, and clear red was shot through an airbrush (a). I made four circles out of baremetal, and placed them on the back face behind the brakelights (b). When light reaches the baremetal, the brakelights glow (c), but otherwise they look like they are off (d).  I chose black and cream two tone scheme for the interior, and for cream, I used a mix of dark yellow and pure white. Here I'm using Modeler's white. This white is by far the most opaque white I've used. Although I did use gray primer, it's always nice to use Modeler's, so that I don't have to use too much paint, which might make the surface details look dull. To demonstrate the effect of this paint, I painted a part of a red car body from inside. With just one brush application, the paint almost completely hid the color of the plastic. 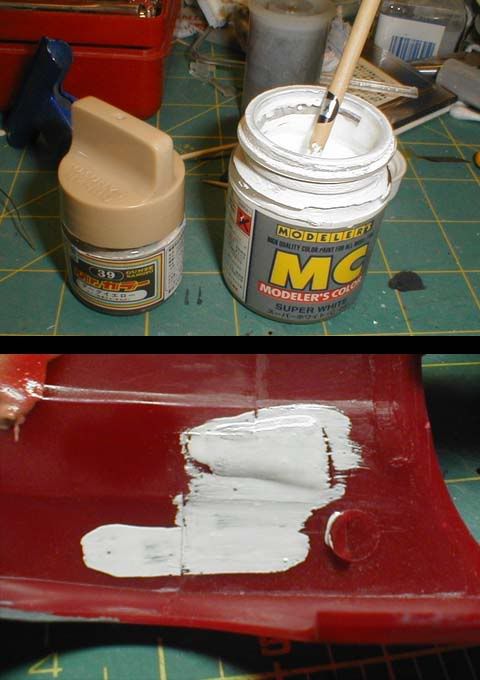 I rarely use light color for interior, so after some interior parts were painted, I checked the matching with the body color. Since I chose this color combination based on an actual 550, it doesn't seem odd. 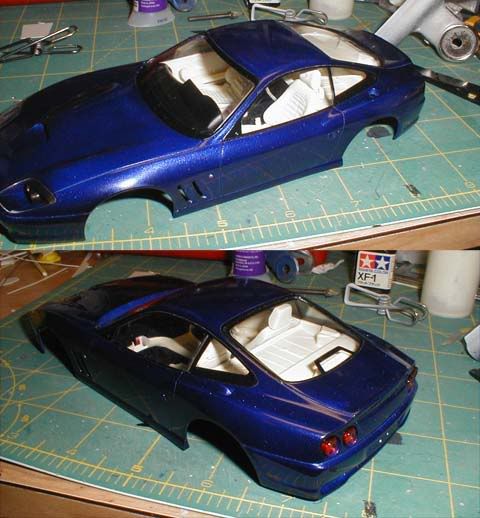 I hope the next will be the last update.
|
|
#86
02-27-2006, 04:07 AM
|
||||
|
||||
|
Re: WIP: Fujimi 1/24 Ferrari 550 Maranello
I've said it all before

__________________
Guideline for happy modeling: Practice on scrap. Always try something new. Less is more. "I have a plan so cunning, you could put a tail on it and call it a weasel" - Edmund Blackadder
|
|
#89
03-02-2006, 11:20 PM
|
||||
|
||||
|
Re: WIP: Fujimi 1/24 Ferrari 550 Maranello
I painted the radio face with semi-gloss black and the a/c control panel with flat black to accentuate the details. It's not so noticeable (especially after the body is glued), but I just wanted to do it.
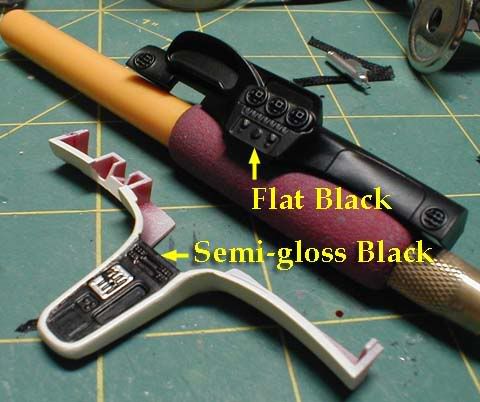 This is the finished interior. The chrome rings were painted with Model Master Chrome using the smallest brush I have. 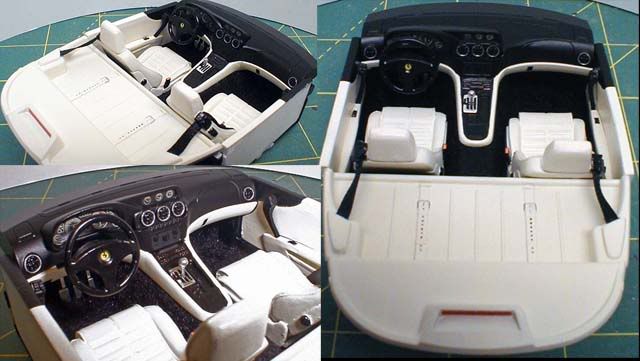 I added diamond mesh to the side and left rear openings. I also did the same on the hood (not pictured), but later I discovered that the pattern had to be hexagonal (oops). 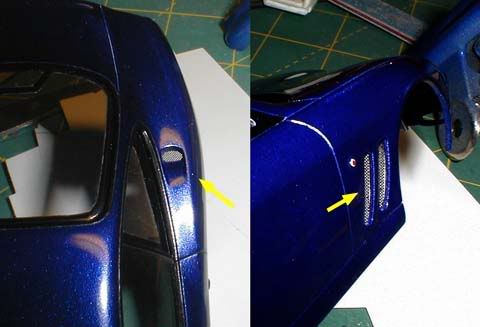 Here's another example of Fujimi quality , and I noticed the problem after I glued the part (a).The mirror part is common between the 550 and 575M kits, and the face is upside down for the 550 (correct for the 575M) (b). I cut and scratchbuilt the arm with a piece of styrene The arm shouldn't point straight up, but it's actually bent so the mirror sits a little forward (c). I also made the sun visor and the interior light housing with styrene sheet (d).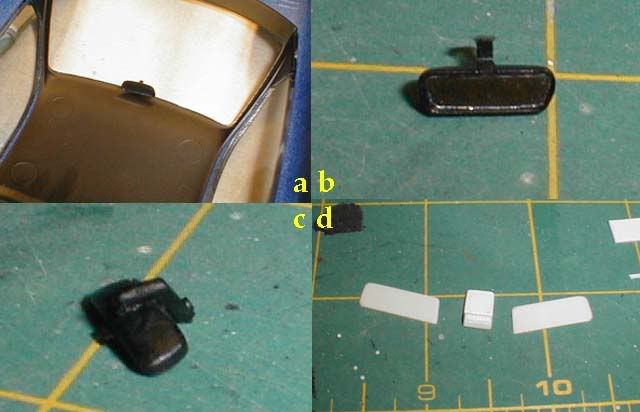 Okay, this is the last correction on this kit. Those who haven't finished this kit, you're lucky. Those who have built it straight out of the box, check the direction of the wiper arms. It's right hand steering! (damn Fujimi, it's so basic!  ) Anyway, I was going to use Modeler's photo-etch wiper set, so the problem didn't bother me much, but if you do the same, make sure you put them in the right direction. (Fujimi might correct this in their later production, but I don't know for sure.) ) Anyway, I was going to use Modeler's photo-etch wiper set, so the problem didn't bother me much, but if you do the same, make sure you put them in the right direction. (Fujimi might correct this in their later production, but I don't know for sure.)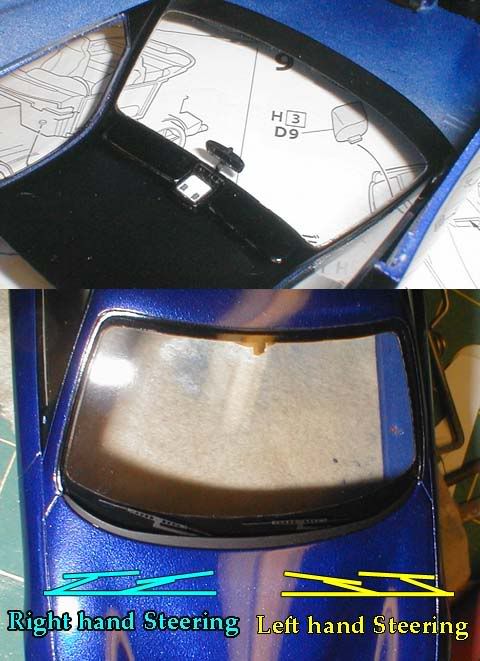 I had a minor problem gluing the interior tub on the chassis. Apparently, the bottom of the luggage part was interfering with the supports from the rear tire housings (arrow), preventing the bottom of the interior tub to touch the chassis. I modified the chassis a bit so that the interior tub sits correctly and don't interfere with the window on the body, but I should have test fit all three parts (chassis, interior tub and the luggage space) more carefully. 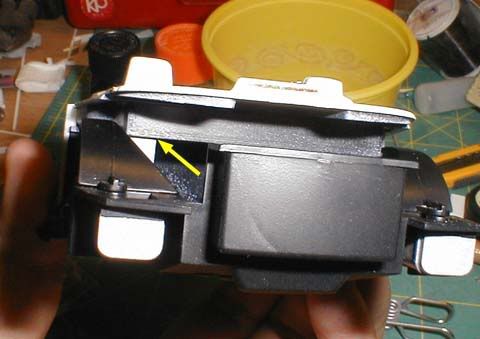 The rest are nothing special. I added photoetched Ferrari script and horses made by Replicas and Miniatures Co of Maryland, and added decals. Finally, I polished and waxed the body and it was done. (almost!) *NOTE, I'm painting the wheels with alclad II along with other wheels, so the decals for the hub caps have to wait. Anyway I finally finished my January (supposedly!) project exactly a month later. sigh... From high angles 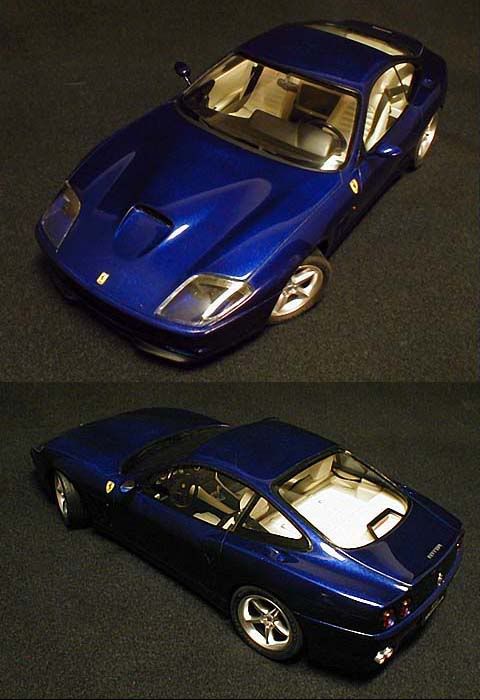 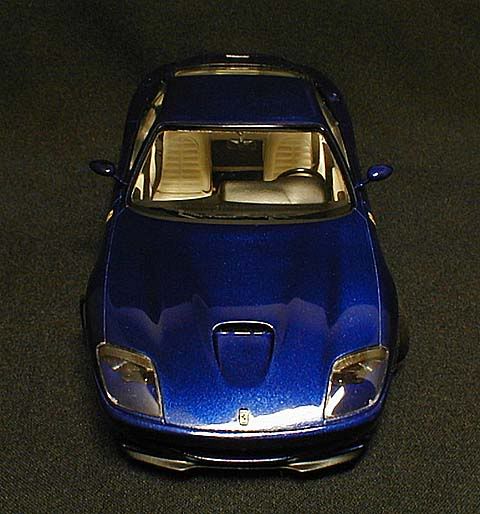 Interior pics 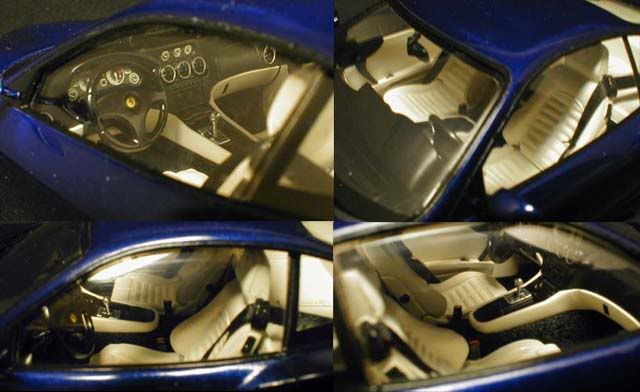 Some close-up photos 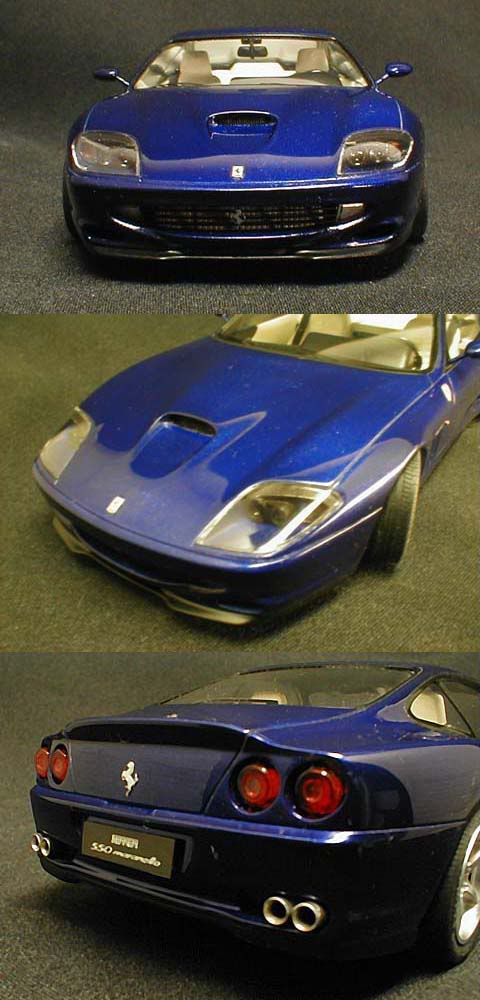 Is it just me, or the horse seems to have been glued too low? (I should correct that.) Rear view 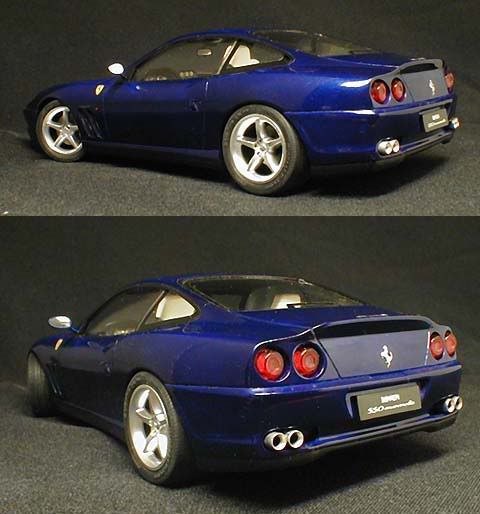 Well, this concludes the step-by-step building of my Fujimi's 550 Maranello model. Knowing really bad Fujimi kits, I think this kit is very good. I'll check this thread from time to time, so if you have any question, feel free to post it here. Thanks.
|
|
#90
03-02-2006, 11:25 PM
|
|||
|
|||
|
Re: WIP: Fujimi 1/24 Ferrari 550 Maranello
Wonderfull work!! Looks like a real car!!
__________________
http://www.minituner.com.br WIP: Project NoMother (Nomad '55)**UPDATED (09/02/2005) My Mustang Boss 429 (Completed) My Mercedes Benz CLK DTM 2000 Street (Completed)
|
|
|
POST REPLY TO THIS THREAD |
 |
|
|