|
|
| Search | Car Forums | Gallery | Articles | Helper | Air Dried Fresh Beef Dog Food | IgorSushko.com | Corporate |
|
#61
 09-06-2006, 01:28 AM
|
||||
|
||||
|
Re: Progress: 1/24 Ferrari F430 Challenge
Fantastic Robi, step by step progress with tools on pictures.....that's what I like.

|
|
#62
09-06-2006, 04:46 AM
|
||||
|
||||
|
Re: Progress: 1/24 Ferrari F430 Challenge
Hi again and many thanks for the comments !!
I cleaned the slot on the rear end and, before sanding away the lower grille underneath the license plate, I reinforced the locator pins with two small styrene rods dia. 2 mm / .080 inch The tool shown in the second photos is a cement dipping stick that I found so simple but incredibly useful (from Crazy Modeler, I bought it at http://hiroboy.com/catalog/product_i...roducts_id=482 ). Bye: Robi 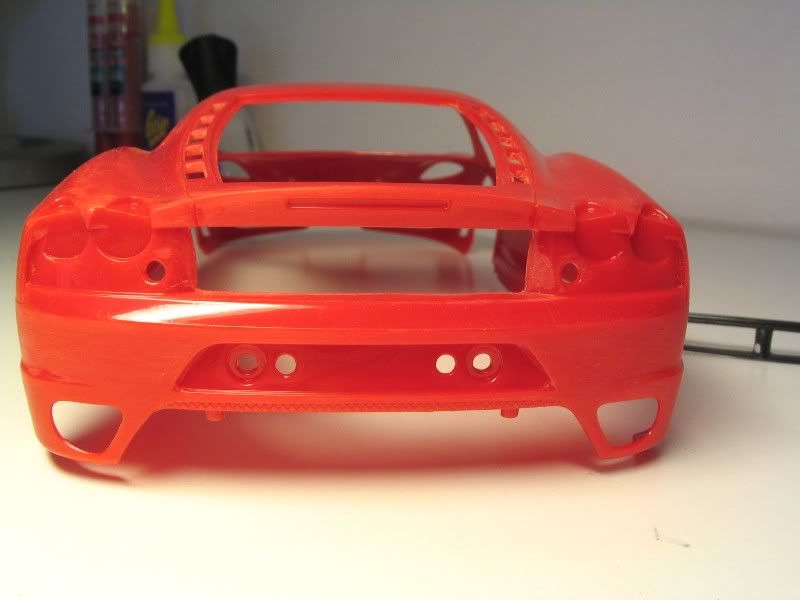 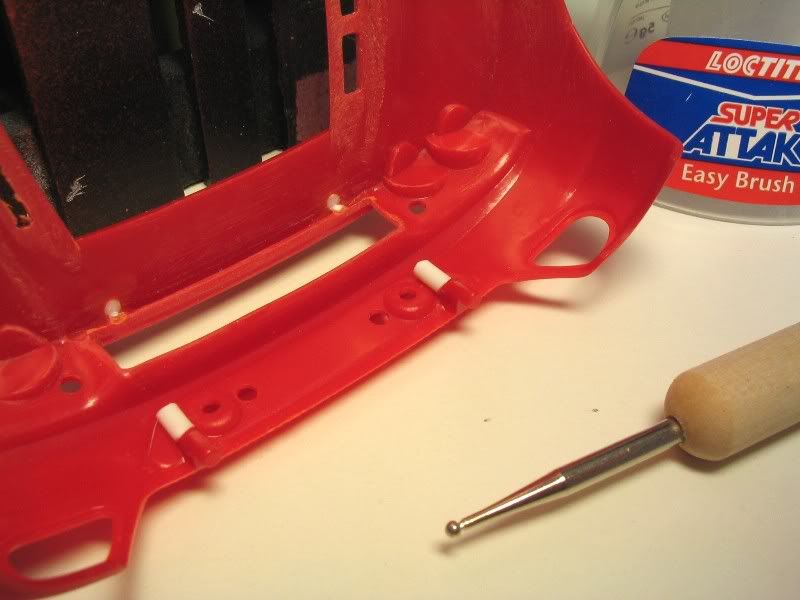
|
|
#63
09-06-2006, 10:17 AM
|
|||
|
|||
|
Re: Progress: 1/24 Ferrari F430 Challenge
Absolutely stunning progress! This is my tutorial thread for the upcoming Challenge model.
__________________
In Progress: FXX - test mule in CF 49' Mercury
|
|
#64
09-10-2006, 08:51 AM
|
||||
|
||||
|
Re: Progress: 1/24 Ferrari F430 Challenge
Hi again and thank you for the comments. Checking to my ref photos I realized that the outer ring of the wheels are rather thick, Fujimi did not replicated it correctly.
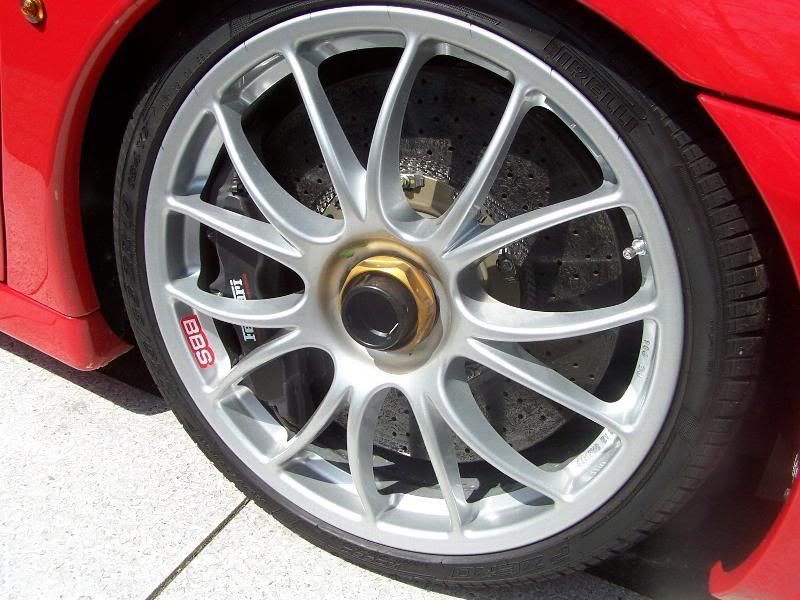 So, just for a check I add a strip of styrene over the kit rims. Here a comparison with and without the strips.  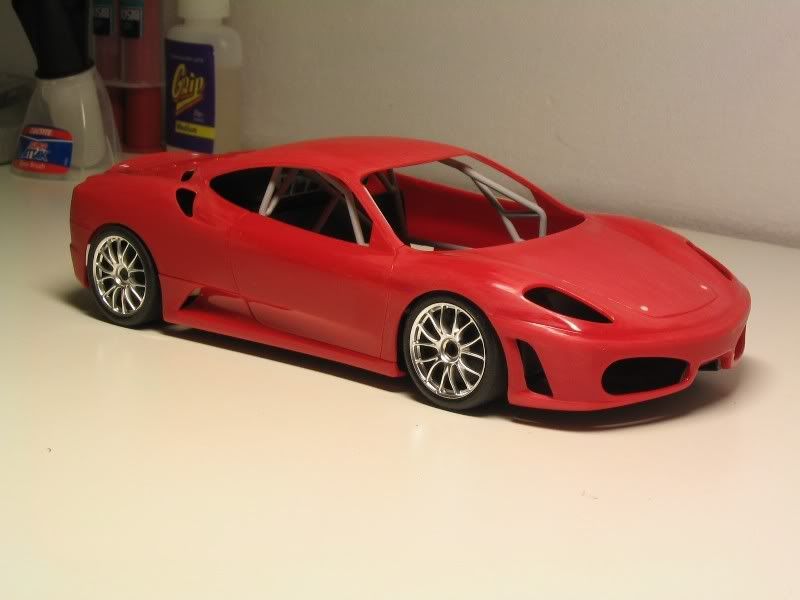 Thanks for looking: Robi 
|
|
#66
10-01-2006, 05:20 PM
|
||||
|
||||
|
Re: Progress: 1/24 Ferrari F430 Challenge
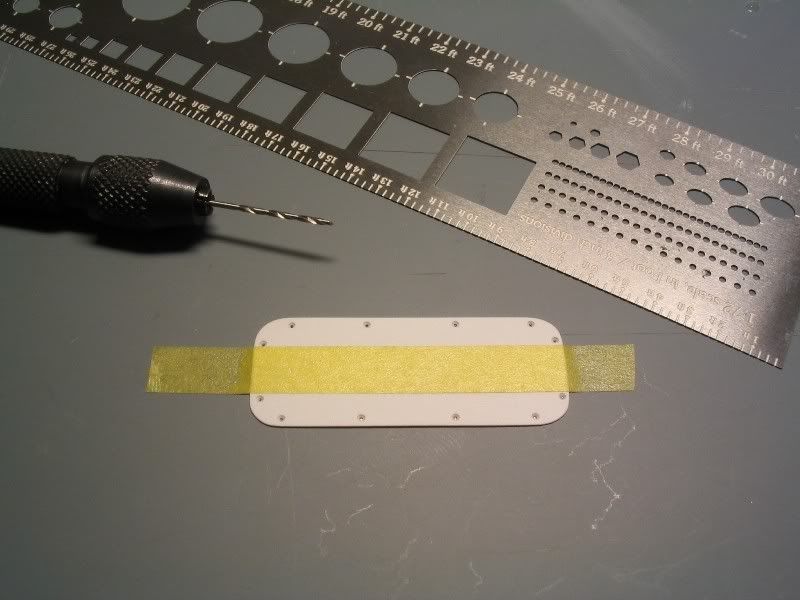
Hi Guys, do you remember the sketch on page 4 ? So, this evening I took care about those bulkhead elements to be scratchbuilt. I started cutting out with a pair of scissors the first plate from .010/0.25 mm styrene, then with the help of a steel template I drilled some holes to simulate the plate fixing
 Next was the rectangular ring, made of .020/0.5 mm styrene. First, I traced its shape 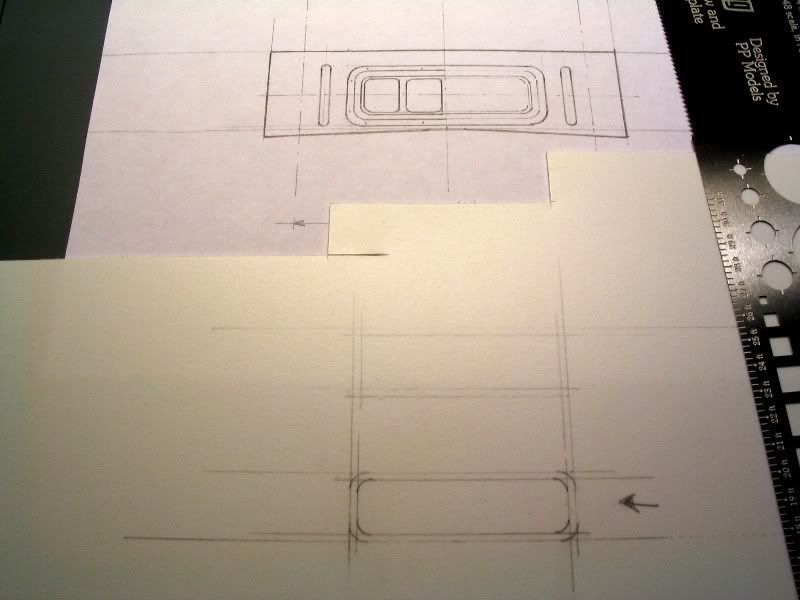 and then I roughly cut the inner portion using the SRC etched blade 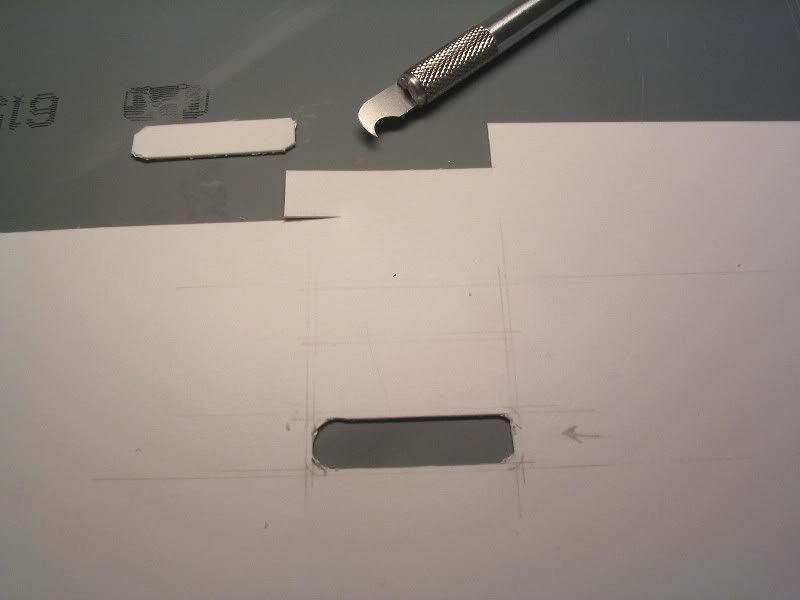 refining the cut with files and #1000 grit 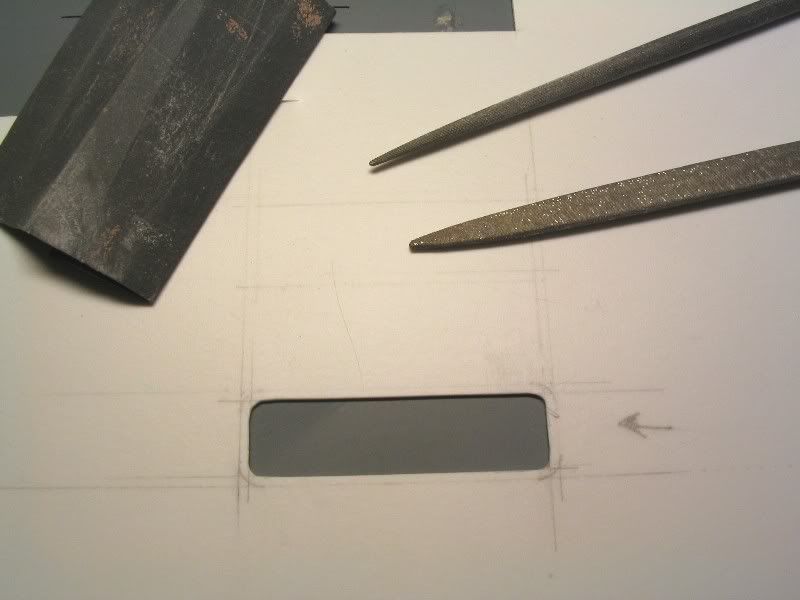 To avoid distortions, I cut the perimeter with the etched blade as well and refined it with #1000 grit 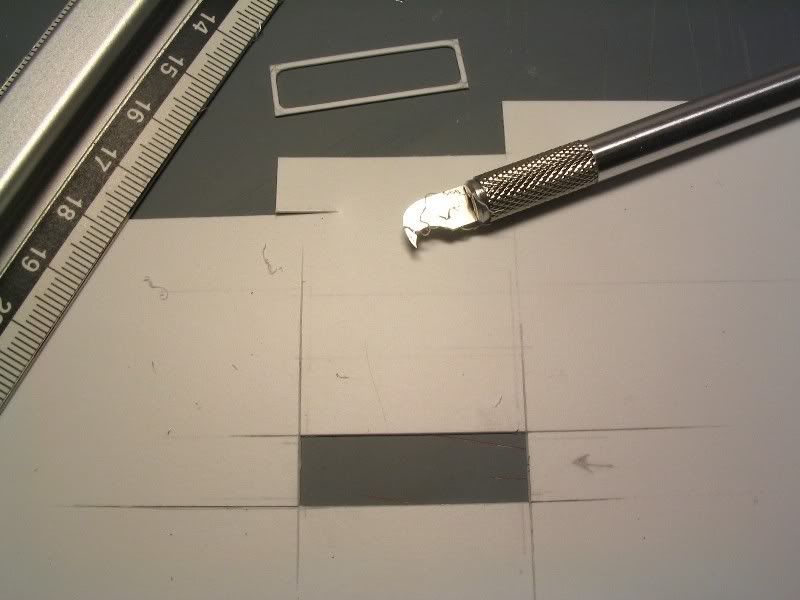 From strip styrene, I made the two lateral reinforcements, while the four square plates have been cut from .020/0.5 mm styrene 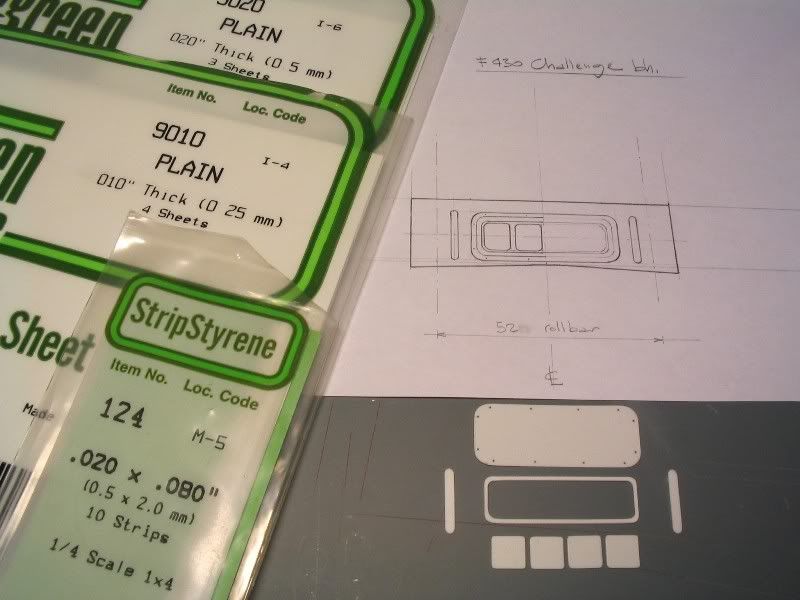 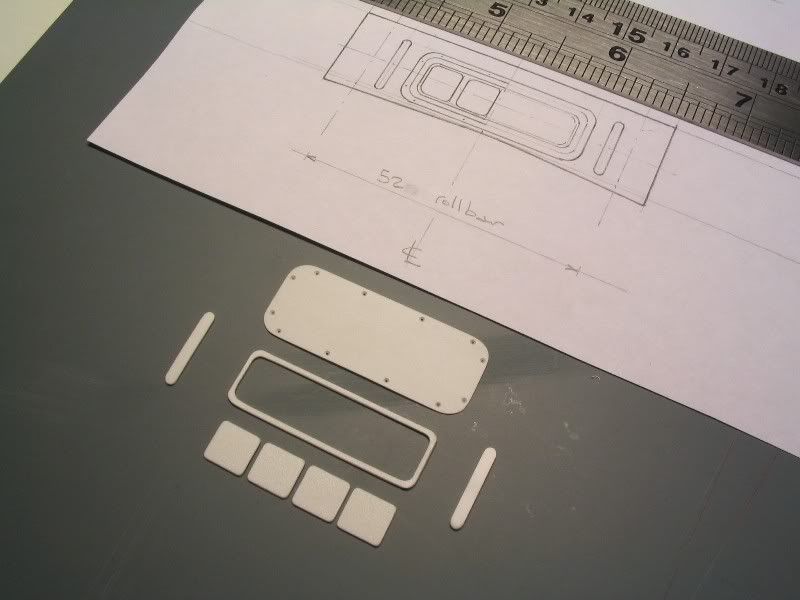 Finally, I just placed the pieces on the bulkhead for a quick visual check 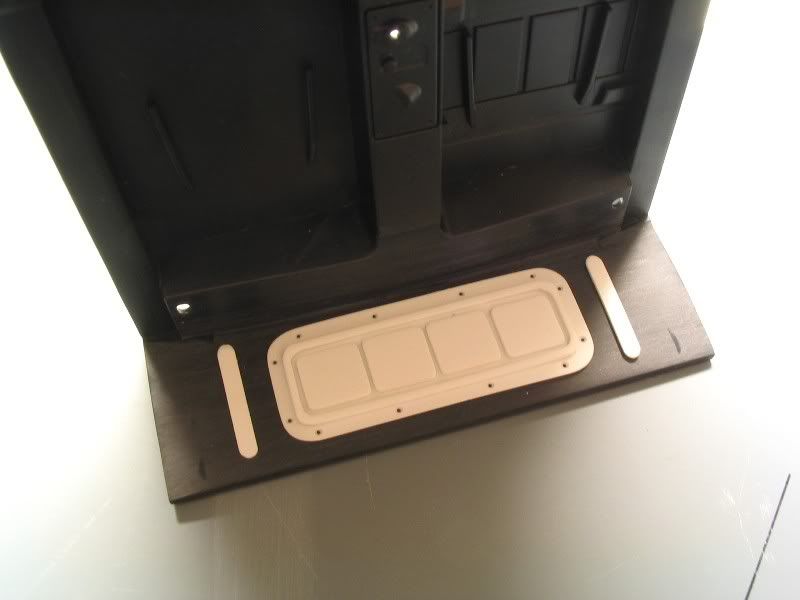 Thanks for looking and comments: Robi
|
|
#67
10-01-2006, 05:24 PM
|
||||
|
||||
|
Re: Progress: 1/24 Ferrari F430 Challenge
Wow Robi your scratch building skills are excellent. You sure make it look easy.
Mike. EDIT: Where did you get that metal rule/template in the first pic?
__________________
   
|
|
#68
10-01-2006, 06:24 PM
|
||||
|
||||
|
Re: Progress: 1/24 Ferrari F430 Challenge
Quote:
No further infos, sorry. Robi
|
|
#70
10-02-2006, 04:20 AM
|
||||
|
||||
|
Re: Progress: 1/24 Ferrari F430 Challenge
Hey Rob! ... been awhile... your skills are just great! Cant wait for the finish product... looks so good already with all the details

__________________

|
|
#72
10-02-2006, 10:34 AM
|
||||
|
||||
|
Re: Progress: 1/24 Ferrari F430 Challenge

__________________
Guideline for happy modeling: Practice on scrap. Always try something new. Less is more. "I have a plan so cunning, you could put a tail on it and call it a weasel" - Edmund Blackadder
|
|
#73
10-02-2006, 01:13 PM
|
|||
|
|||
|
Re: Progress: 1/24 Ferrari F430 Challenge
Wow, your friggin sick!! sweet work.
|
|
#74
10-03-2006, 11:04 AM
|
||||
|
||||
|
Re: Progress: 1/24 Ferrari F430 Challenge
Thank you guys for the comments.
While waiting for the specific Crazy Modeler upgrade set, I started taking care about some items which will be improved with the etched parts. In detail, I removed the callipers from their discs, both front and rear, using my faithfull blade and refined the parts with #1000 grit 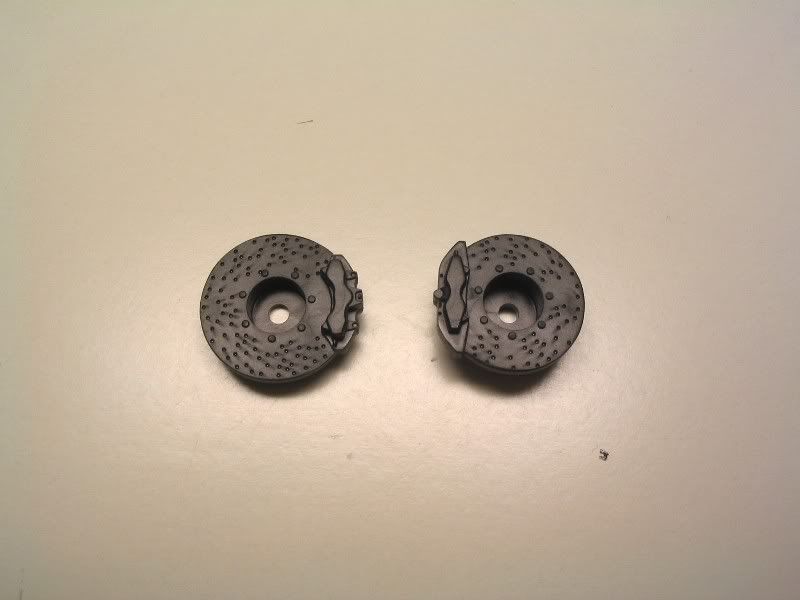 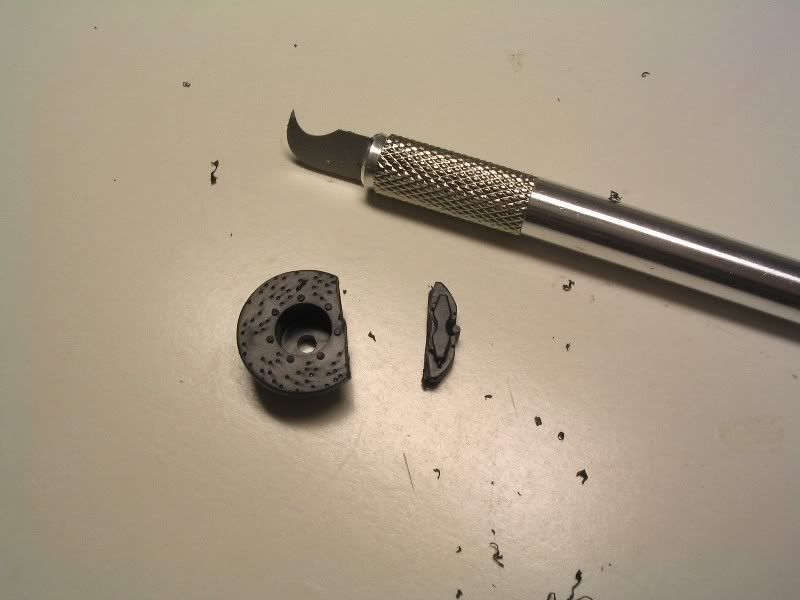 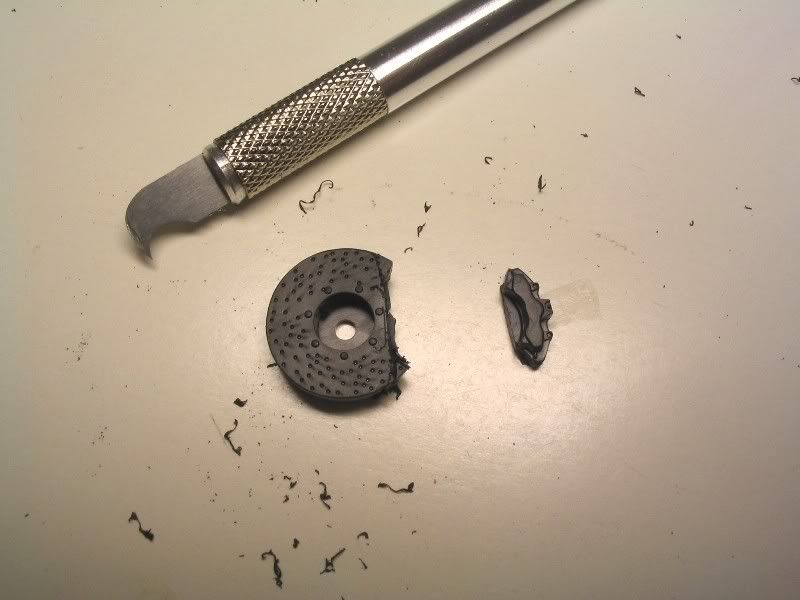 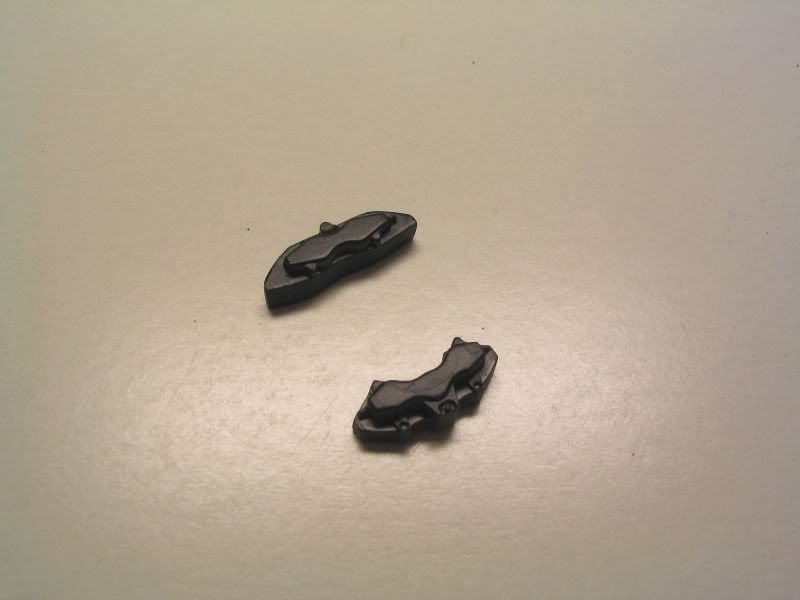 Then I had to open the yet nice grilles on the bumpers air intakes 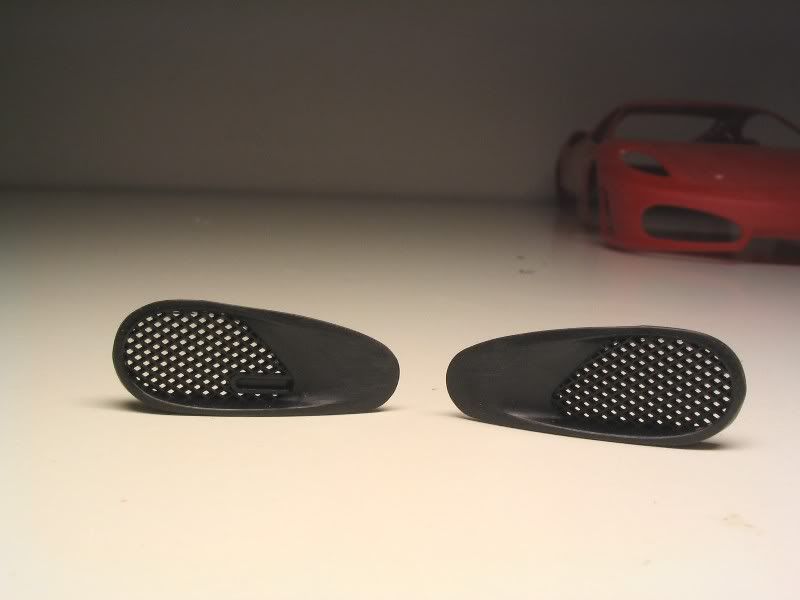 With a motortool I roughly milled away the central portion and then, with round and flat files and sandpaper - #600, #1000 I cured the obtained openings 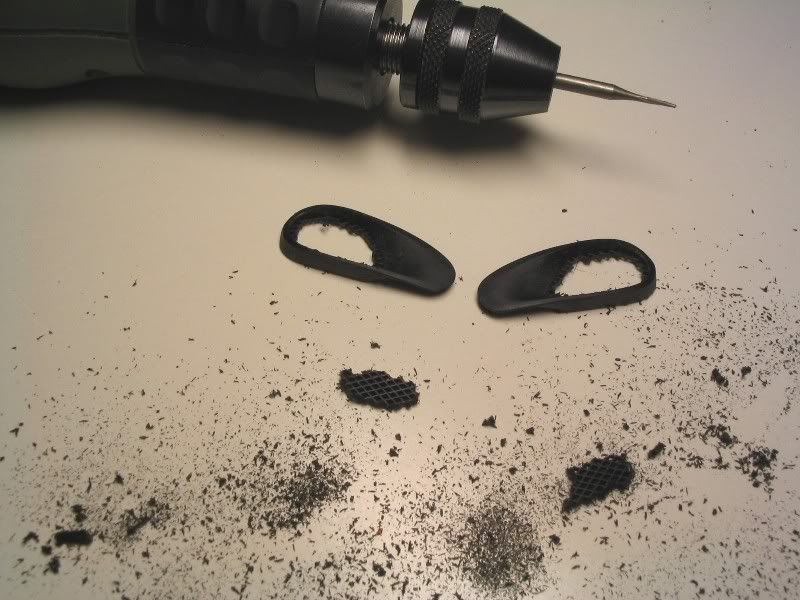 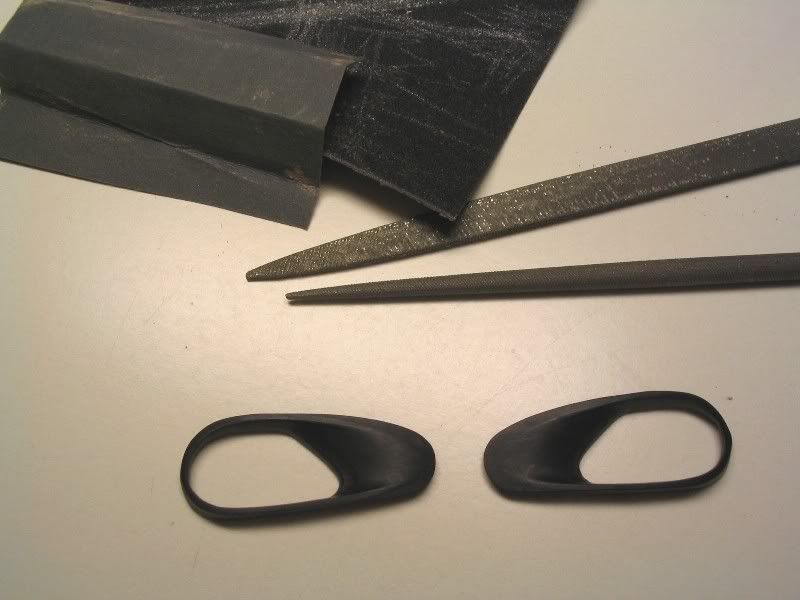 The intakes fit perfectly the bumper 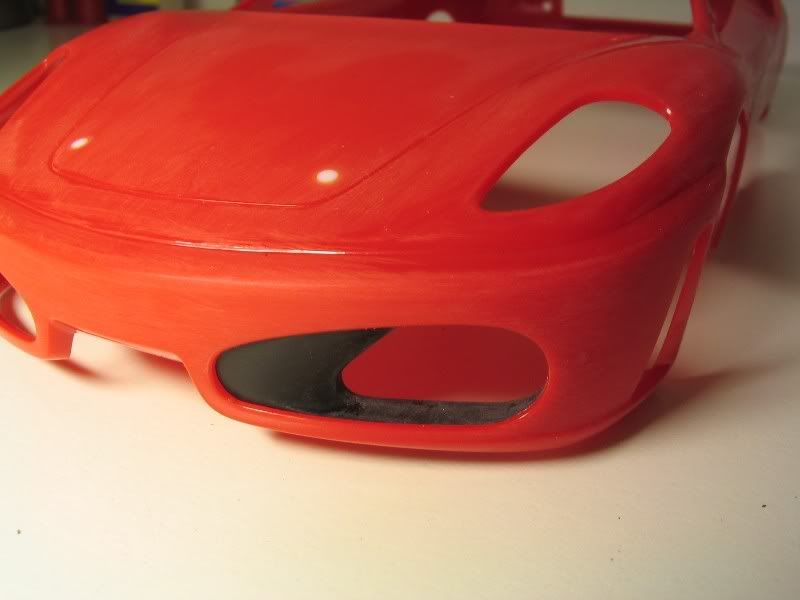 Bye: Robi
|
|
#75
10-05-2006, 06:34 PM
|
||||
|
||||
|
Re: Progress: 1/24 Ferrari F430 Challenge
Hi to all,
working here and there I discovered that these two crossed protrusions interfere with the rollcage and are not necessary for the glasses fixing 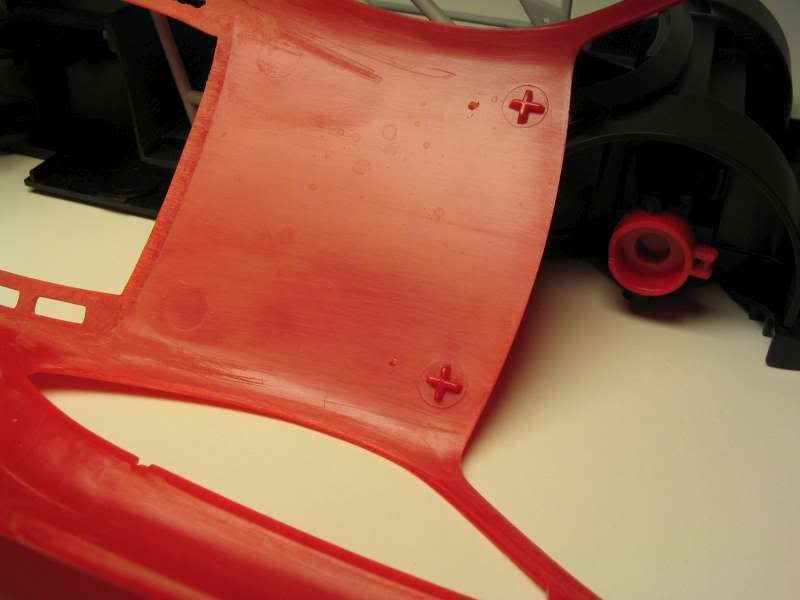  So, with a spherical mill I removed both 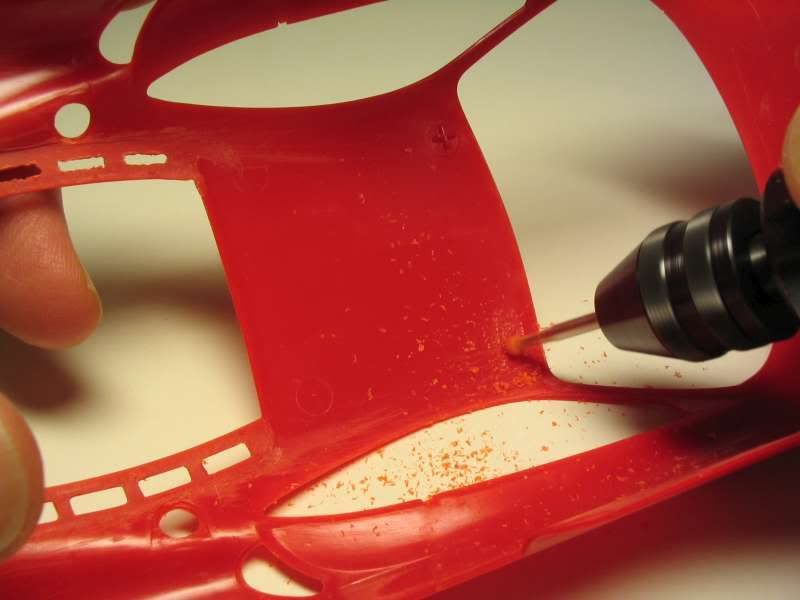 and the windshield fit is, anyway, perfect. I have now to check any possible interference with the rollcage 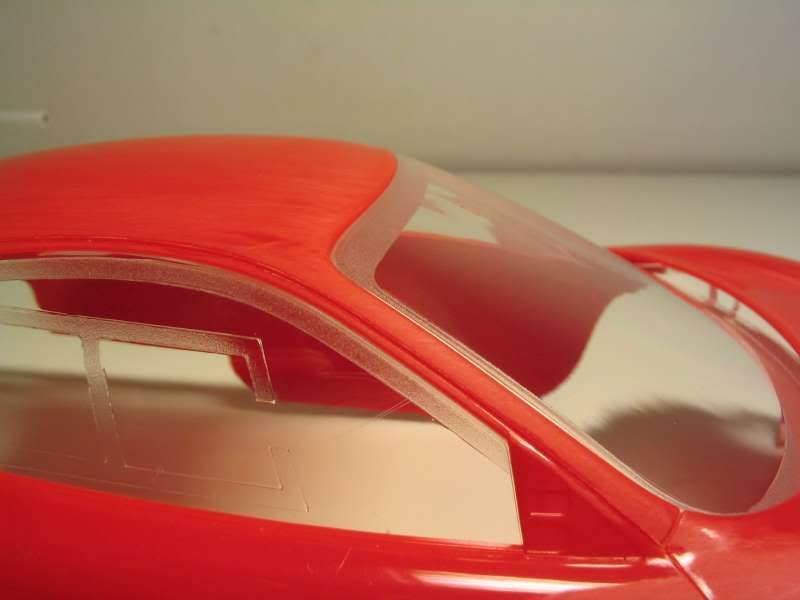 Pages ago, I mentioned about to increase the rims diameter. I tried to care about this topic tonight without success. First of all I choosed a thinner styrene (.010/0.25 mm), here a comparison, on the left the (not yet) modified one 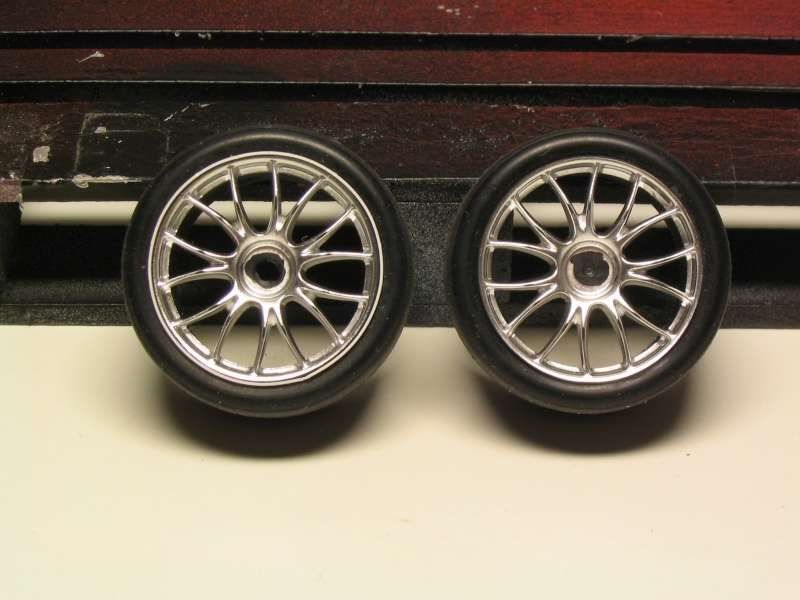 Then, to avoid glueing the strip in one step only, I superglued only a very small area with the intention to proceed with the rest once dried 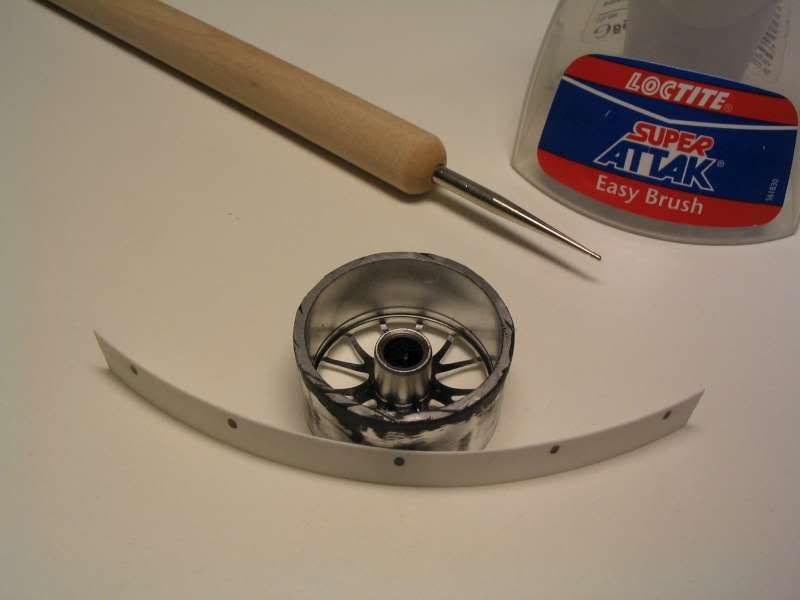 but I did not recognized a slight conicity of the rims and this is the result. The strip will not match the circumference of the rims. So I have to remove it and start again living a bigger gap (on the outer face of the rim) between the strip and the rim, and sand down. Hmm less easy than expected 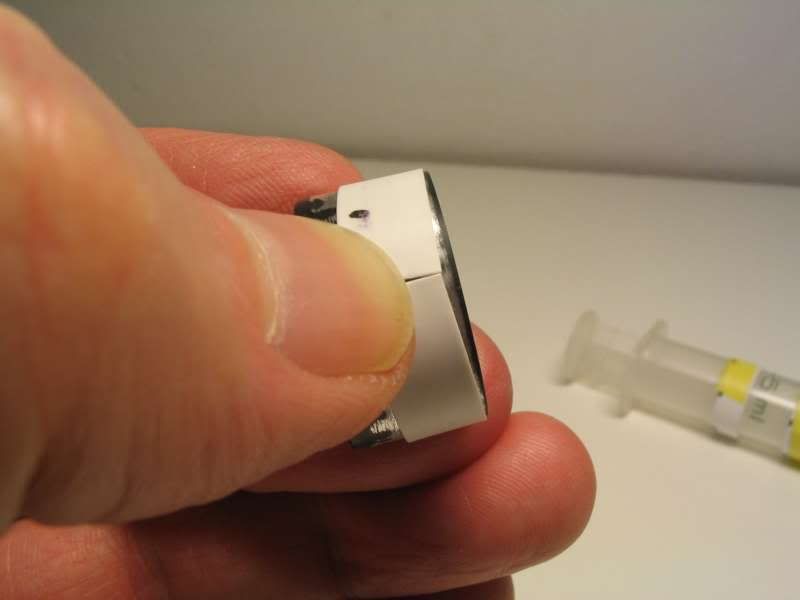 I set aside the wheels and superglued on the body the sideskirts 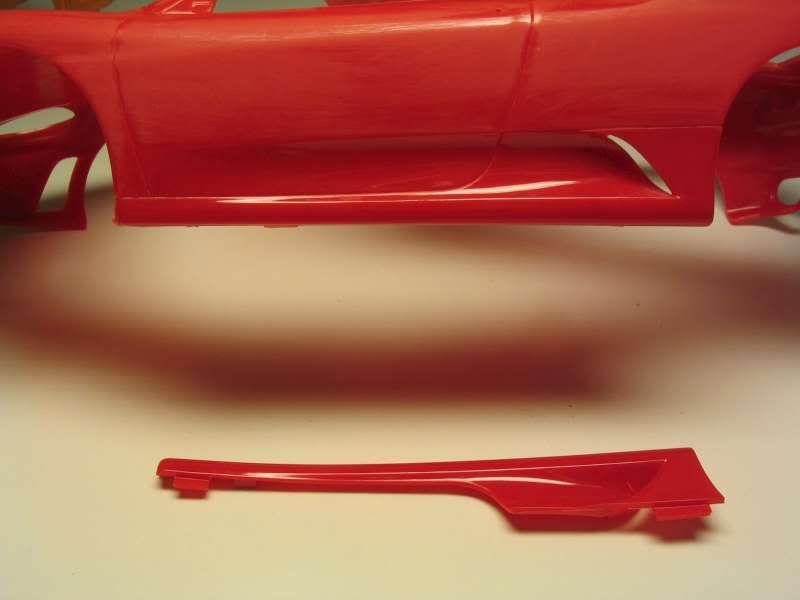 and the inner portions of the air outlets on the front bumper 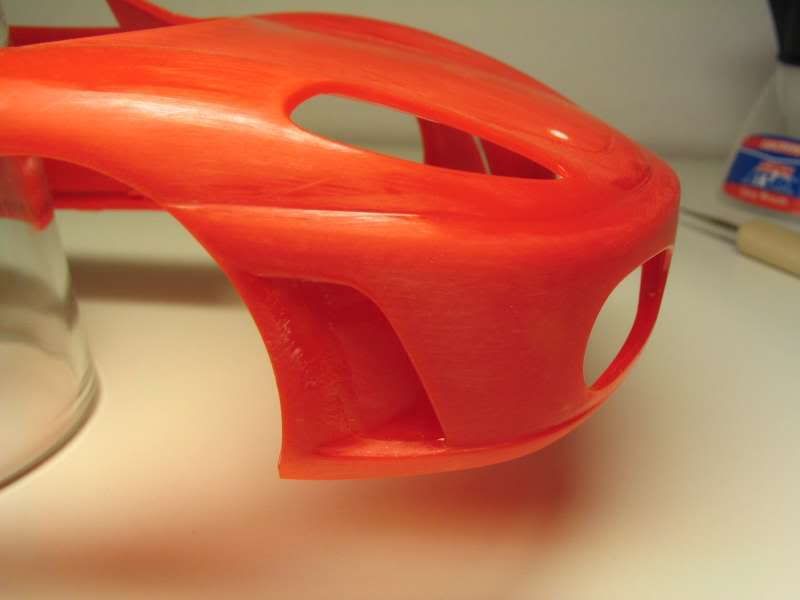 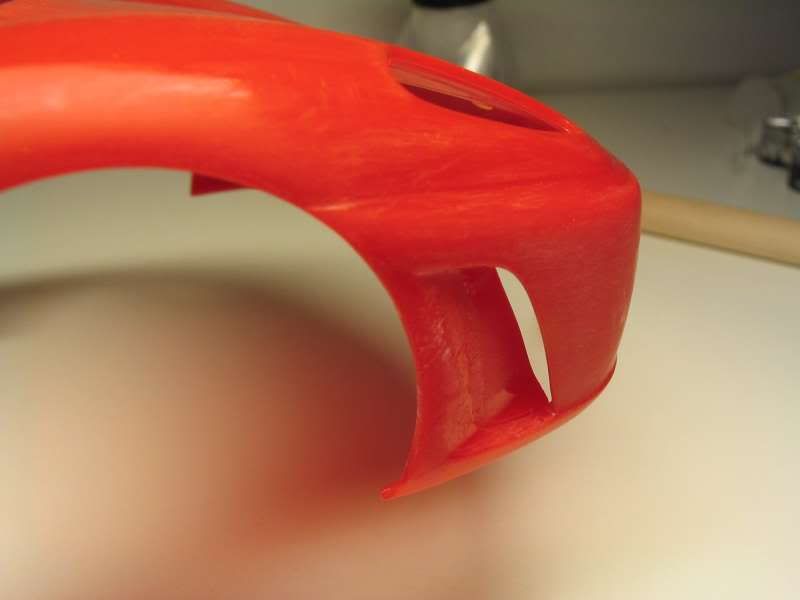 Thats all for the moment. Thanks for looking and see you next week. Bye: Robi
|
|
 |
POST REPLY TO THIS THREAD |
 |
|
|


