|
|
|

|
|
| Search | Car Forums | Gallery | Articles | Helper | Quality Dog Food | IgorSushko.com | Corporate |
|
| Latest | 0 Rplys |
|
|||||||
| WIP - Street Post topics for any "Works In Progress" street vehicles projects in this sub-forum. |
 |
 Show Printable Version | Show Printable Version |  Email this Page | Email this Page |  Subscribe to this Thread
|
|
|
Thread Tools |
 02-25-2003, 10:57 PM
|
#31 | |
|
AF Enthusiast
Thread starter

Join Date: Apr 2002
Posts: 729
Thanks: 0
Thanked 1 Time in 1 Post
|
not sure about the interior just yet.. i was planning on creating a more accurate RSI after i finish this model. i will flare the fenders on the next incarnation. this model is a bit of an experiment. plus, your next model is usually your best model.
|
|

|

|
|
02-25-2003, 11:16 PM
|
#32 | |
|
AF Enthusiast
Join Date: Feb 2003
Posts: 317
Thanks: 0
Thanked 0 Times in 0 Posts

|
looks awsome ...good work witht the styrene...u have any tips on how u mold the styrene and make the form stay as it is ...im new to this so any help would be great
 again wow good looking project |
|
|
|
|
|
02-26-2003, 02:32 PM
|
#34 | ||
|
AF Enthusiast
Thread starter
Join Date: Apr 2002
Posts: 729
Thanks: 0
Thanked 1 Time in 1 Post
|
hope this is helpful.
Quote:
__________________
|
||
|
|
|
|
02-26-2003, 07:11 PM
|
#35 | |
|
AF Enthusiast
Join Date: Feb 2003
Posts: 317
Thanks: 0
Thanked 0 Times in 0 Posts
|
thx that helped alot
and one other thing! u do the rest of the bodykit by putting putty on the styrene after it takes the formand sanding and forming them into shape? and looking forward to see some more progress pics |
|
|
|
|
|
02-26-2003, 09:19 PM
|
#36 | |
|
AF Enthusiast
Thread starter
Join Date: Apr 2002
Posts: 729
Thanks: 0
Thanked 1 Time in 1 Post
|
most of what you see on the surface is styrene... the putty fills it in underneath.
|
|
|
|
|
|
03-02-2003, 09:46 AM
|
#37 | |
|
AF Enthusiast
Thread starter
Join Date: Apr 2002
Posts: 729
Thanks: 0
Thanked 1 Time in 1 Post
|
Hi all,
here are some more progress pics of the beetle. i'm working on the wing. its a bit more complicated than i originally thought. i couldnt think of how to bend a piece of plastic into the shape of it so i decided to do it the hard way. what complicates it is the curvature of the wing when you look at it from the top. its not like a simple straight piece that can be bent easily. it must be bent with a curve. I stacked cuved pieces of styrene like i did in the diagrams below and glued them together. i then went at it with my dremel to smooth out the "steps". finally i went at it with some low grit sand paper, puttied it and sanded some more. Its held in place with some double stick tape right now. let me know what you think 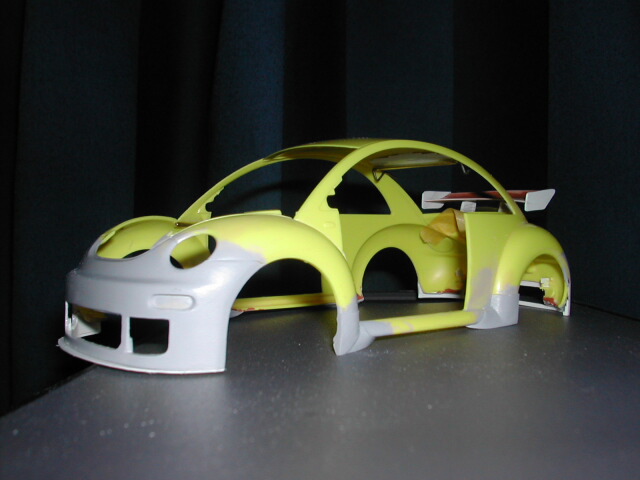 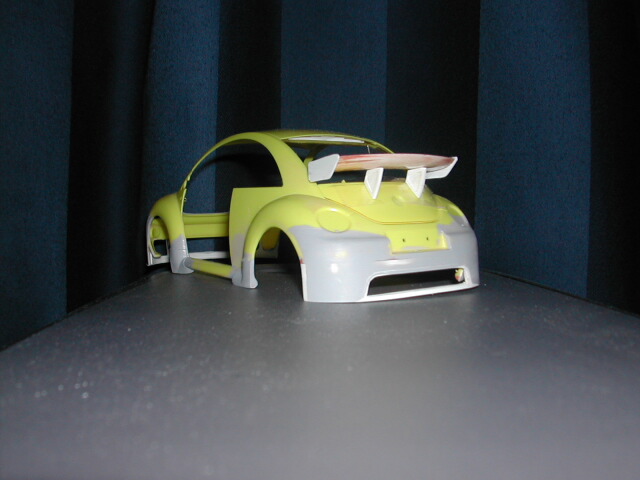 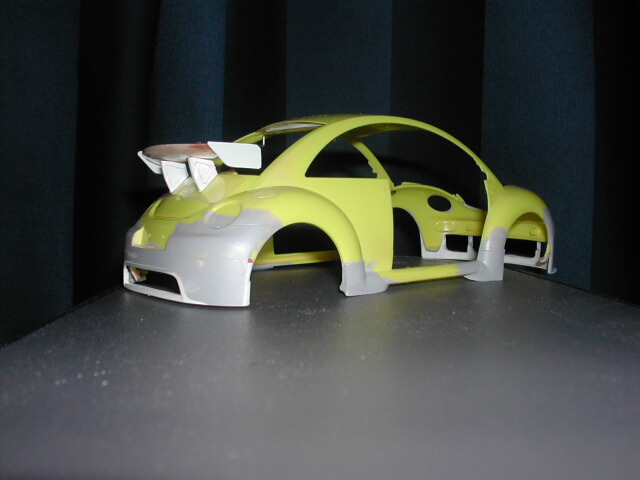 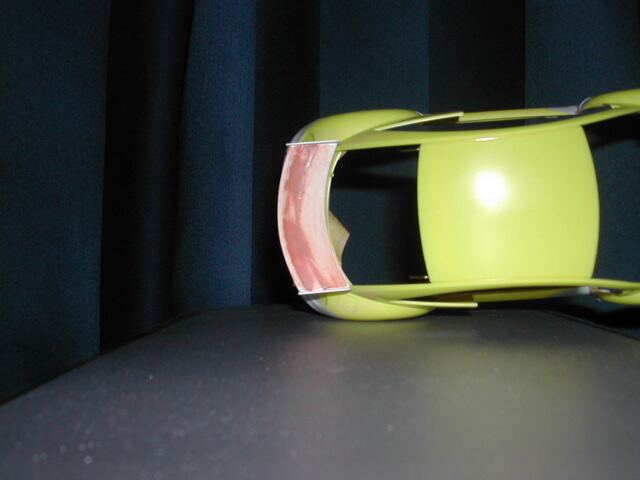 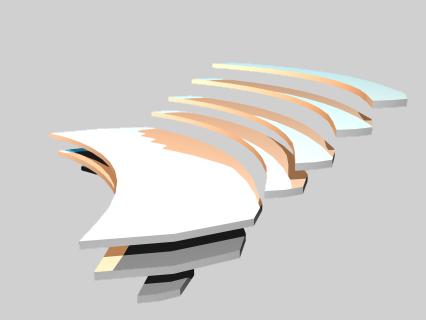 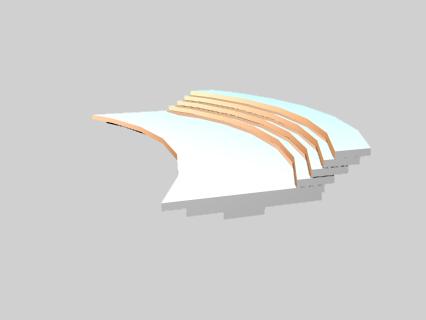
__________________
|
|
|
|
|
|
03-02-2003, 09:51 AM
|
#38 | |
|
AF Enthusiast
 
Join Date: Jan 2003
Location: Singapore
Posts: 583
Thanks: 0
Thanked 0 Times in 0 Posts
|
 THIS IS A PIECE OF ART !!!! THIS IS A PIECE OF ART !!!! |
|
|
|
|
|
03-02-2003, 11:32 AM
|
#39 | |
|
AF Enthusiast

Join Date: Nov 2002
Location: Brussels/Milano
Posts: 2,909
Thanks: 10
Thanked 3 Times in 3 Posts
|
It's freaking fabulous!!Awesome work! That bodywork is so clean! Olivier |
|
|
|
|
|
03-02-2003, 12:36 PM
|
#40 | |
|
AF Enthusiast

Join Date: Jun 2002
Location: St. Cloud, Minnesota
Posts: 1,081
Thanks: 0
Thanked 1 Time in 1 Post

|
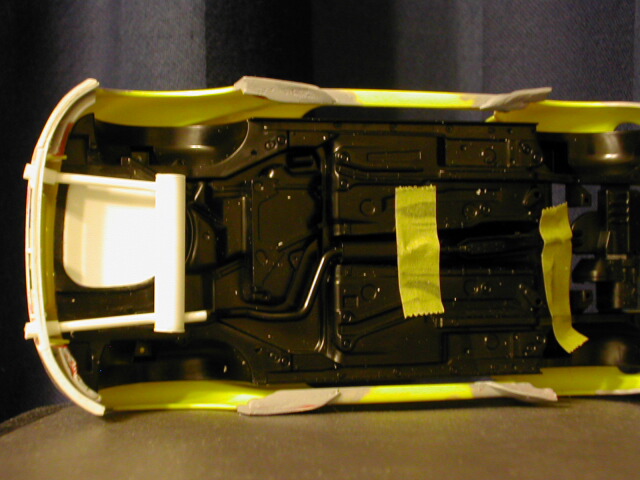
Great Job on the wing, and nice explanation pics.. Looks like the kit is coming together very well. Have you started modding the underside yet?
__________________
Just a good model of mine: 2 Fast 2 Furious SkylineSTOLEN!!! Another go at it: 2 Fast 2 Furious Skyline.. Pt. 2 |
|
|
|
|
|
03-02-2003, 12:39 PM
|
#41 | |
|
AF Enthusiast

Join Date: Dec 2002
Location: Los Angeles, California
Posts: 1,765
Thanks: 13
Thanked 8 Times in 8 Posts
|
Awesome work!!!
I still don't like beetles though.
__________________
I want to build models again :' ( |
|
|
|
|
|
03-02-2003, 01:07 PM
|
#42 | |
|
AF Enthusiast
Join Date: Feb 2003
Posts: 317
Thanks: 0
Thanked 0 Times in 0 Posts
|
damn man u seem to be good at everything huh first the kit then the bodykit then the step by step help and now even cad!....my god ur a monster
keep it up  |
|
|
|
|
|
03-17-2003, 08:37 PM
|
#43 | |
|
AF Enthusiast
Thread starter
Join Date: Apr 2002
Posts: 729
Thanks: 0
Thanked 1 Time in 1 Post
|
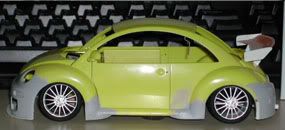
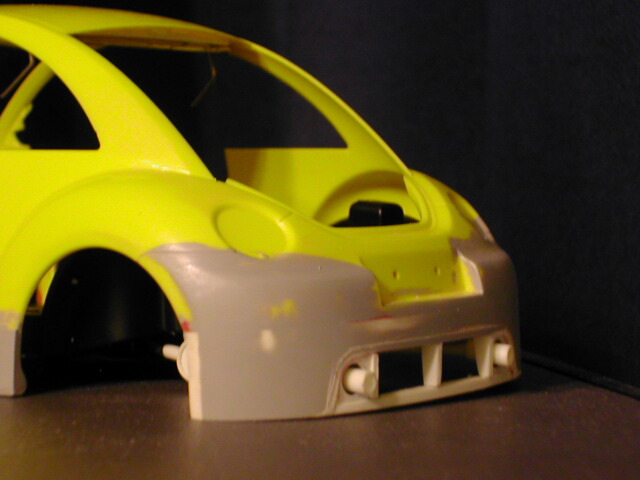
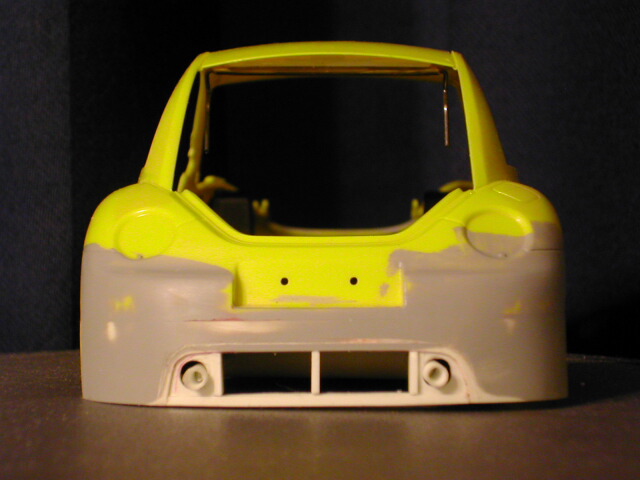
here are some long overdue progress pics of the beetle. i've been quite busy with work and school. or should i say school and school since im working and studying as a teacher. anyways, i've taken some time to put the rear bumper together along with the exhaust. bear with me on the pictures, i know that things may seem a bit out of alignment, but nothing is permanently attached yet. it took a good three hours to do what you see in the pictures below but i think it came out pretty good. i took out the spare tire and placed a piece of styrene. i cut off the original muffler, extended the pipe a bit and attached a new muffler with dual tips to fit in the rear bumper. im not sure how accurate it is or if it is possible at all to have a muffler like the one shown. i scowered the internet for pictures of an RSI exhaust and came up with nada. so i based the muffler on the drawing kindly provided by mstngcobrasvt98. let me know what you think. soon i will be at the priming stage! oh wait, i have to work on moding the interior for the open doors... doh!
__________________
|
|
|
|
|
|
03-17-2003, 08:47 PM
|
#44 | |
|
AF Enthusiast

Join Date: Mar 2003
Location: Singapore
Posts: 475
Thanks: 0
Thanked 0 Times in 0 Posts
|
Power!
Great graphic illustrations and work details on this project.
__________________
To each his own! Read the FAQ you faqer  Evo Meet....coming to a forum near you!  Completed!-Click on Pic:  Projects done and posted: Subaru WRC2001 RGB-My first project in AF Click HereIn stocks: Ferrari F1 2001 Tyrrell P34 CLK Warsteiner Ford Performance Blue Ferrari Enzo Opel Team Holzer Williams FW24 |
|
|
|
|
|
03-18-2003, 01:50 AM
|
#45 | |
|
Car Mod guy
 
Join Date: Feb 2002
Location: Manchester
Posts: 5,180
Thanks: 6
Thanked 11 Times in 9 Posts

|
Your getting very good at this
 Great work on the wing, that's not the hard way, that's the easy way!!! That's exactly how its done and the best way to create curves and contours. Great work on the wing, that's not the hard way, that's the easy way!!! That's exactly how its done and the best way to create curves and contours.
__________________
CHRIS... Catch me on FACEBOOK http://www.c1-models.com http://www.facebook.com/C1Models |
|
|
|
|
| ||||||||||||||||||||||||||||||||||||||
|
POST REPLY TO THIS THREAD |
 |
|
|


