|
| Search | Car Forums | Gallery | Articles | Helper | Air Dried Fresh Beef Dog Food | IgorSushko.com | Corporate |
|
|||||||
| WIP - Street Post topics for any "Works In Progress" street vehicles projects in this sub-forum. |
 |
 Show Printable Version | Show Printable Version |  Subscribe to this Thread
|
|
|
Thread Tools |
|
#16
 04-05-2010, 11:17 PM
|
|||
|
|||
|
Re: Aston Martin DB4-1/25 Revell Monogram...a detailed story!
Before the new update, I have to give credit to my good friend Dave Morton who pointed me a misplace of the rear brake lines to the correct master cylinder. After had spent so much time looking the underside upside, I forgot what goes up and what goes down
 Here's the correct placement, thanks Dave! 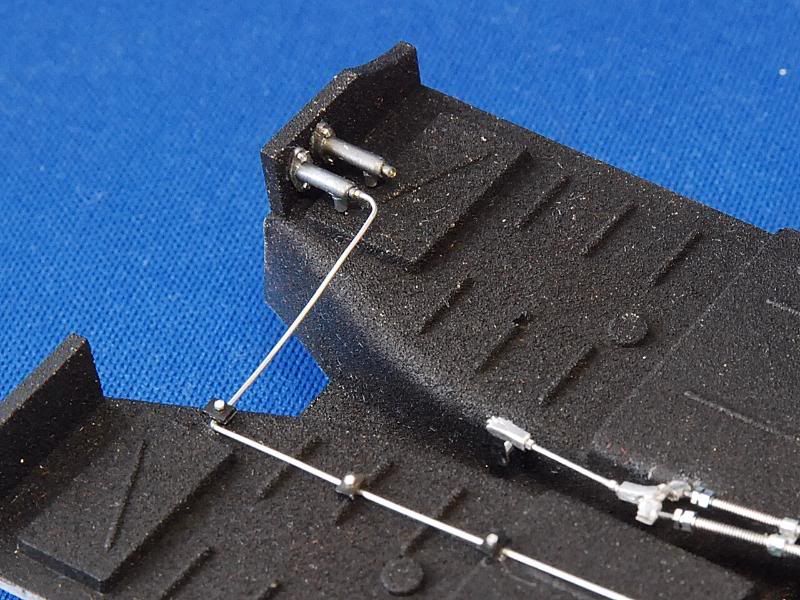 Ok, here I will go from the downside to the cockpit of the car. Like I said at the beginning, I won't follow the instructions order due to a modification I did to the body. I started painting the two basic shades for the carpet and leather upholstery. Light blue for carpet, dark for the leather. 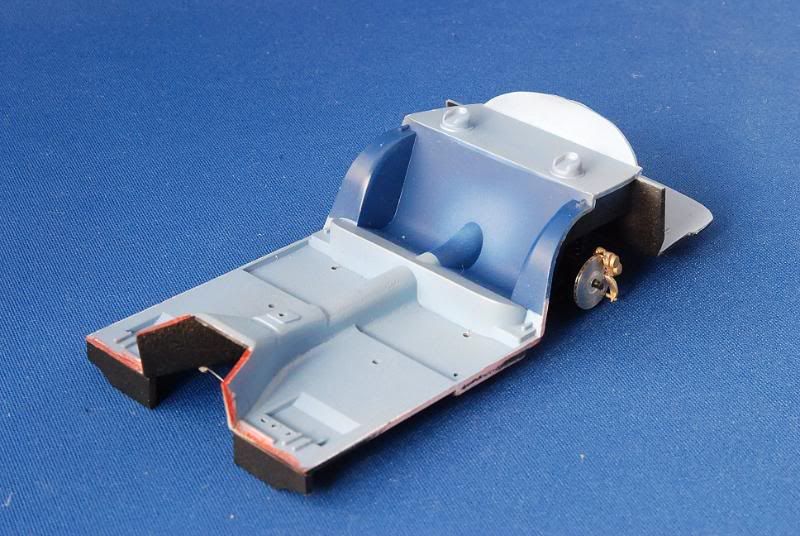 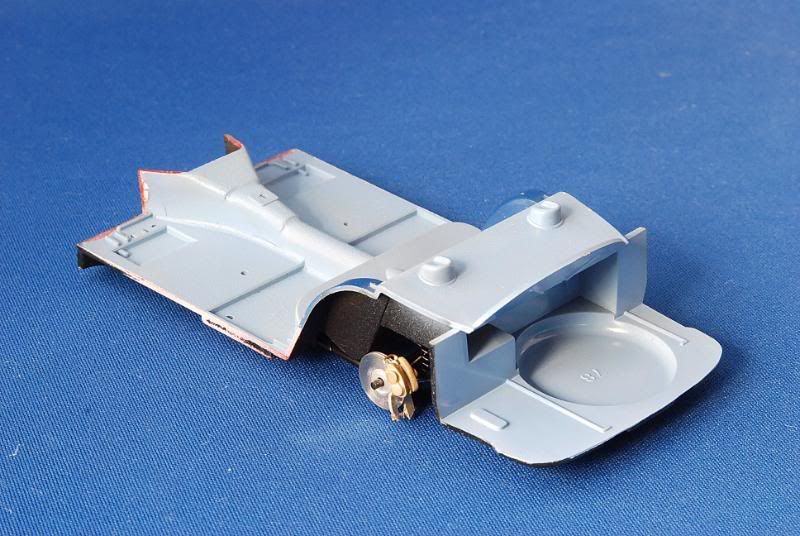 I did two simple floor carpets from sandpaper and wire to replicate the molding. Everything was treated with white primer in order to give a light shade of color for the base of the light blue that will be used as a base for the flocking. 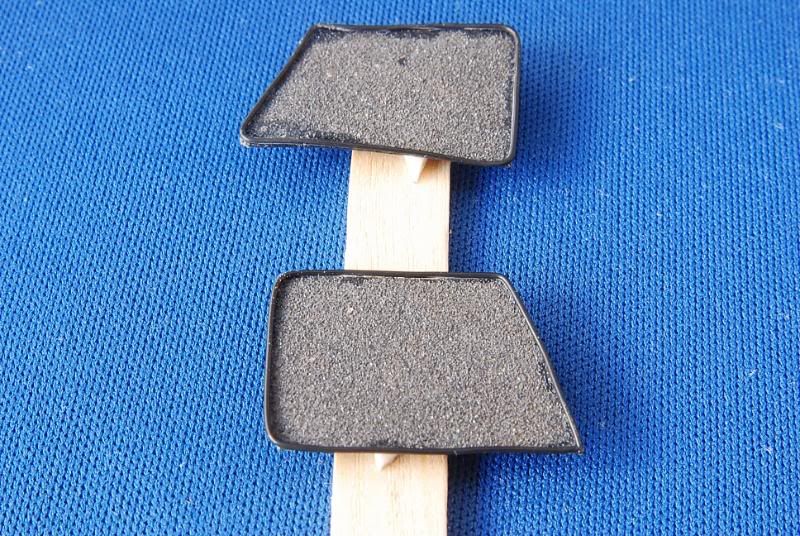 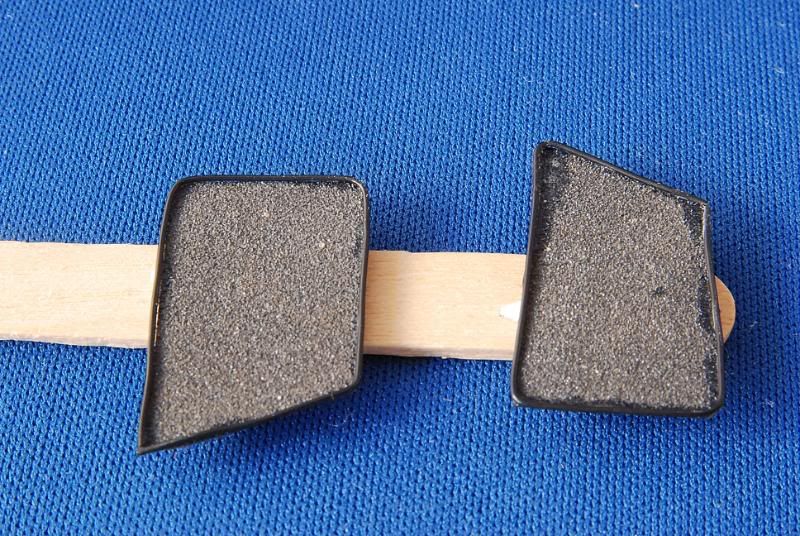 The protective carpet guard was made out of plastic sheet. I lightly scribed them in order to replicate the lined pattern on them 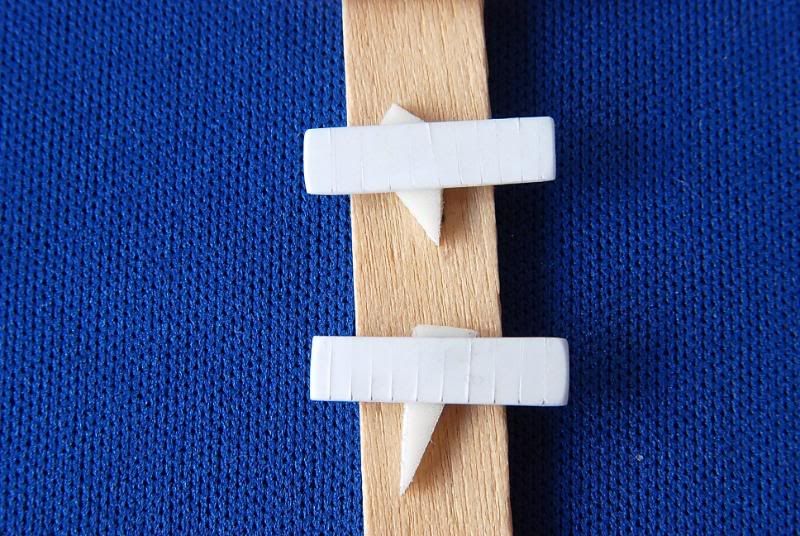 Same treatment for the carpet guards. 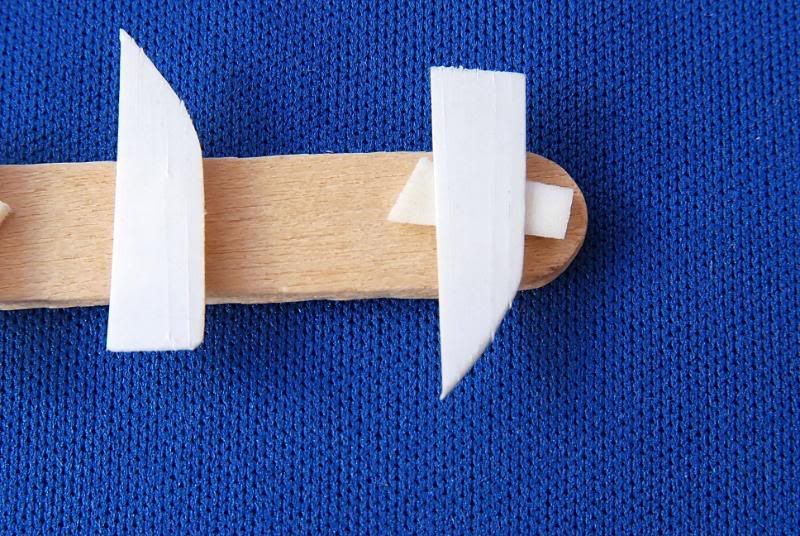 Masking tape was used to do the shift stick boot and the emergency brake level boots. The shift stick is a Sakatsu one that I altered its shape with my Dremel and the Emergency level with metal tubing. 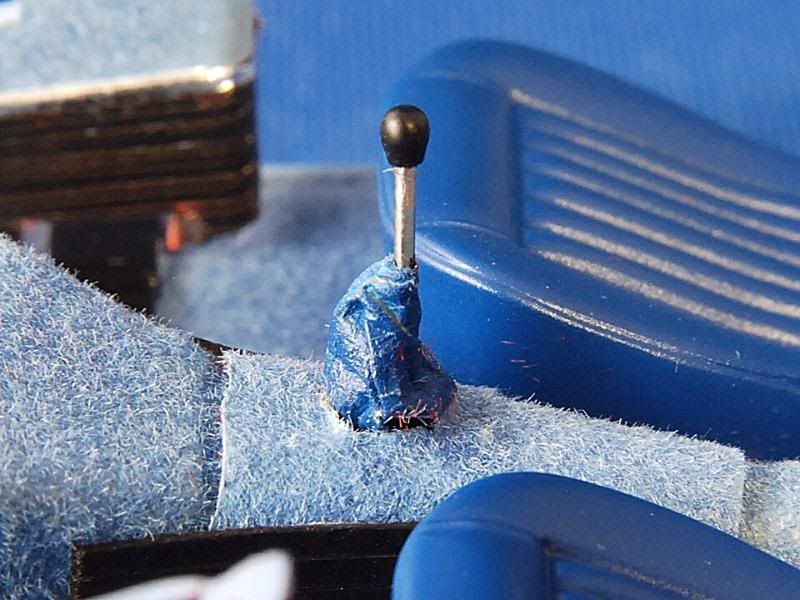 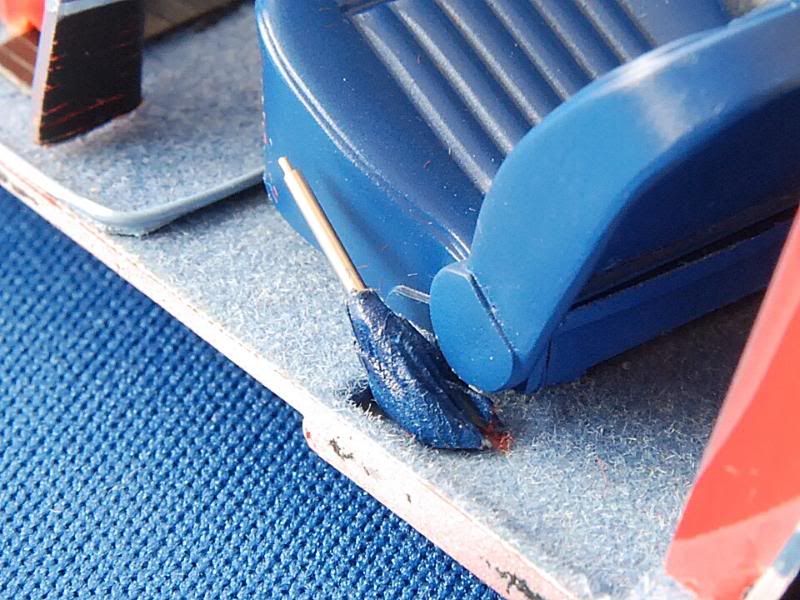 The side floor panels also were treated with flocking and also were scribed in order to get the lined pattern. Vents controls were made out of thin wire and the knobs are white glue with semi gloss black paint. 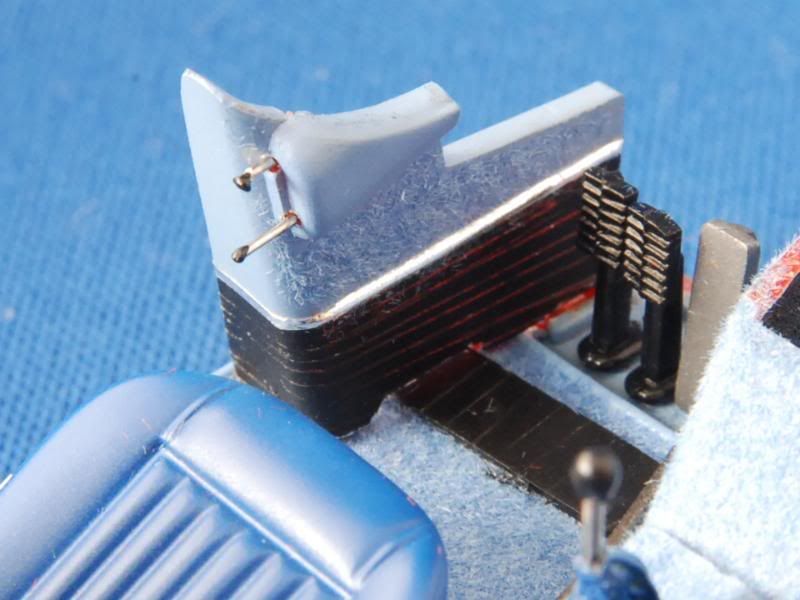 General overview of the seats area. 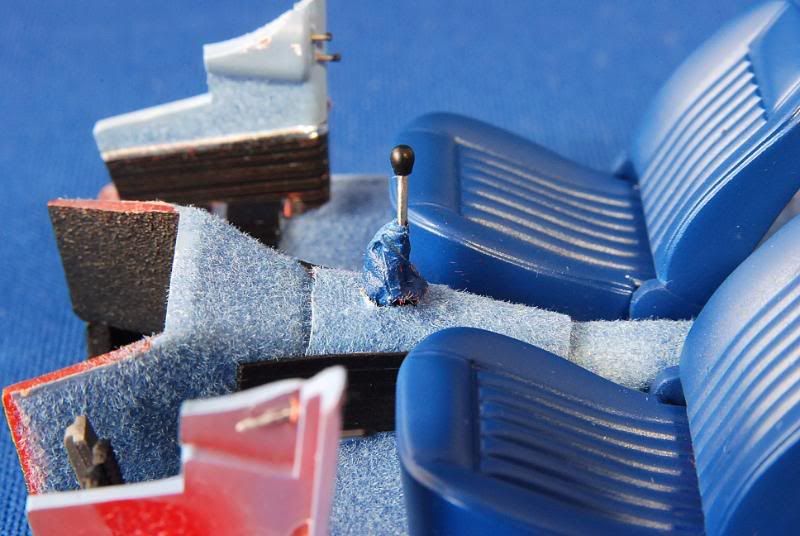 A last time view to the out of the box dash look. 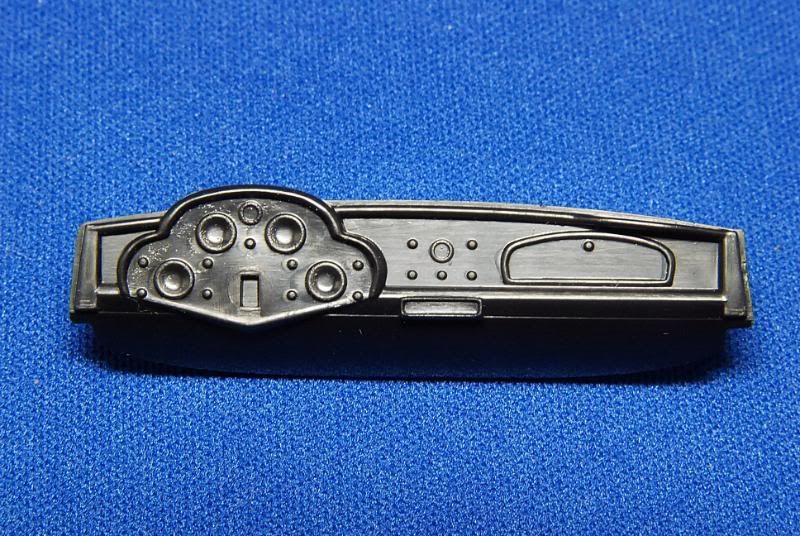 The Dremel and this tiny polishing swabs help me to open the enclosing for the gauges and toggle switches. 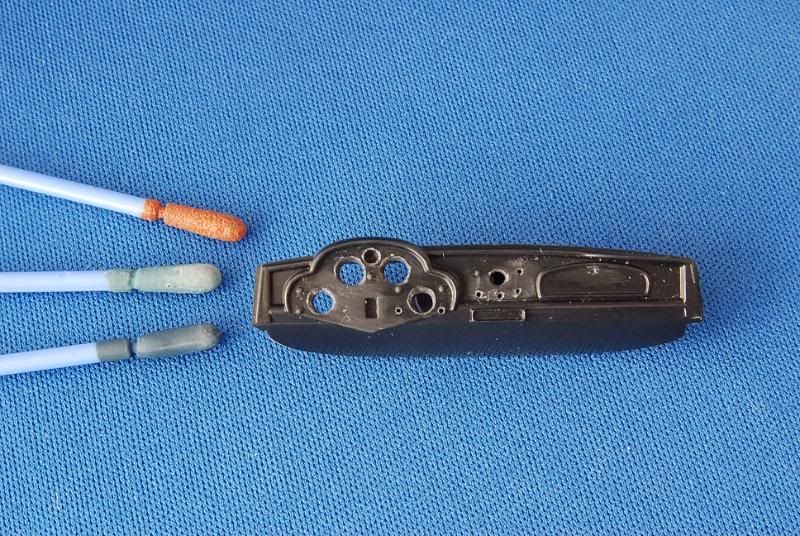 I chucked in my Dremel a Sakatsu toggle switch and re-shape it in order to make the glove box lock. 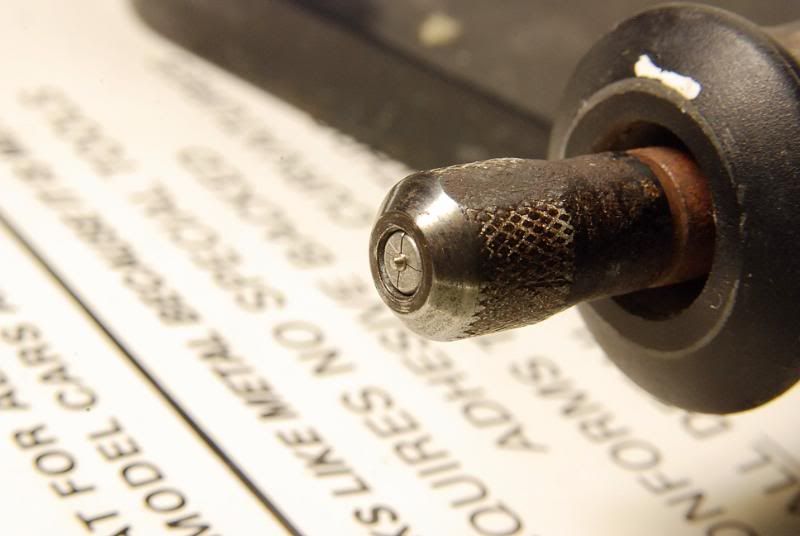 Some bare metal foil to the molding and this is how it looks now. 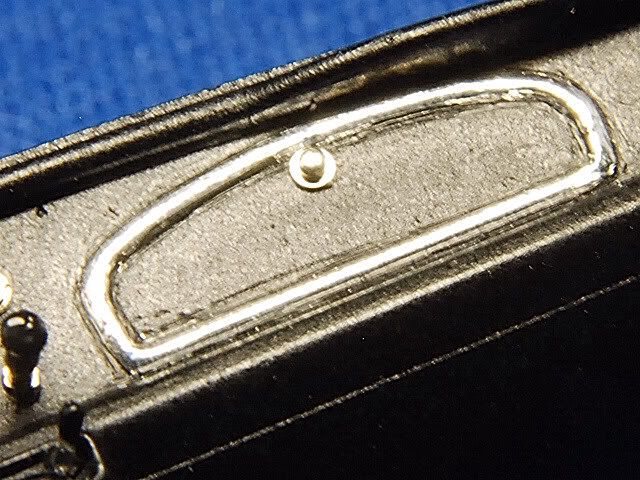 Model Car Garage black gauges faces and its bezels made the perfect combo for what I had in mind. In order to get the deep look of the bezels, I stocked them one over the other and have what I wanted. 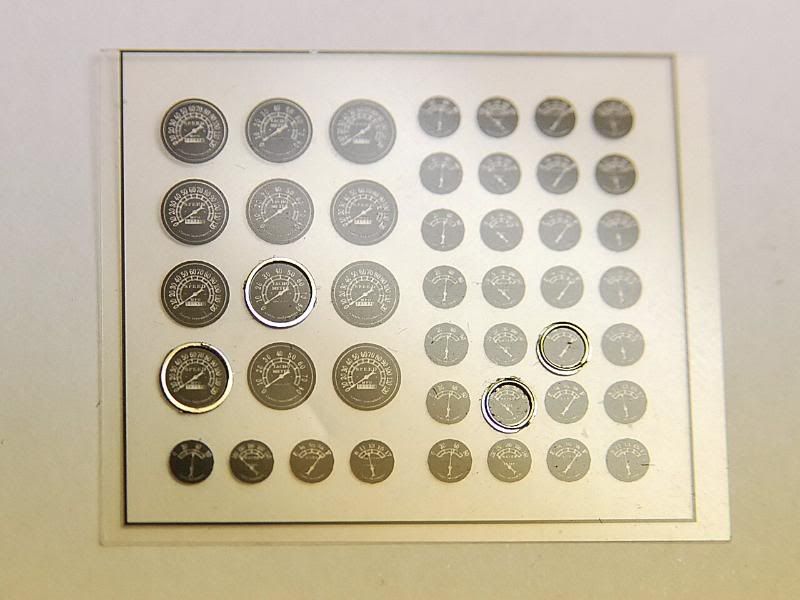 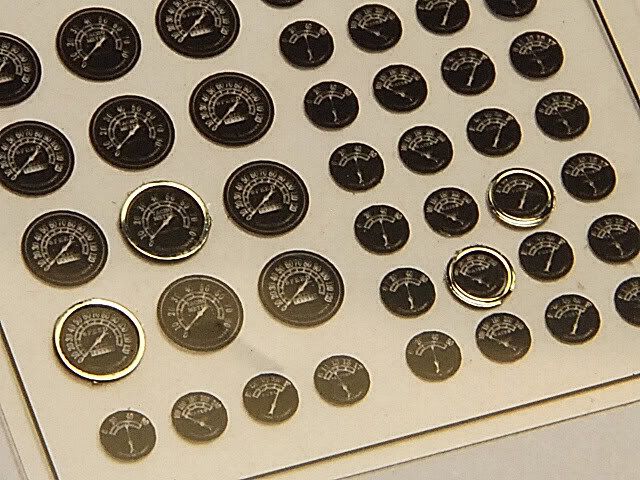 Toggle switches from Sakatsu, their knobs made out of metal tubing and photo etch washers and photo etch bolt heads made everything look real different. Here's how the final dash looks. 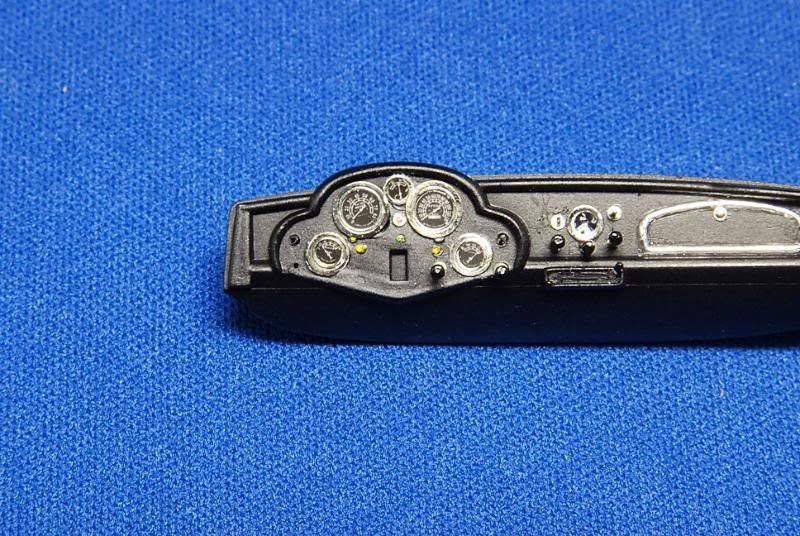  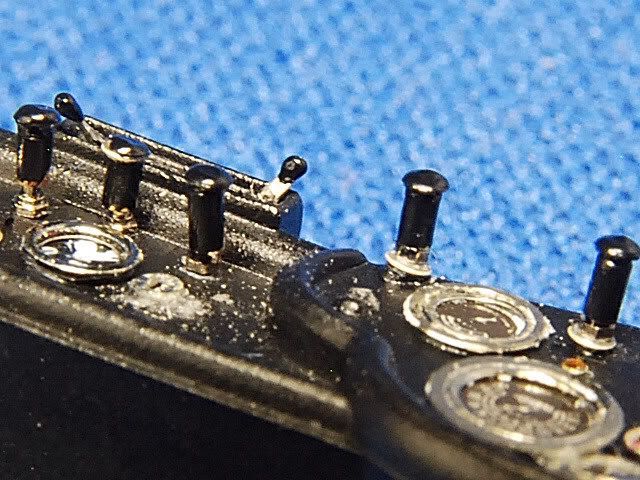 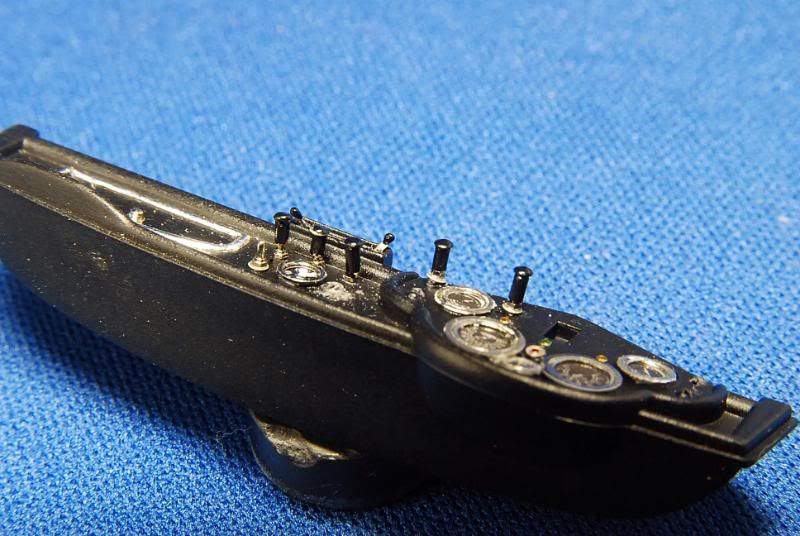 One of the main attractions of the cockpit is this correct great Derrington Steering wheel kit from Replica & Miniatures of Maryland. I thought to use a Renaissance Nardi one, but, it would be completely incorrect. It comes with the two real wood halves, the photo etch rim, and metal line to make the rivets. 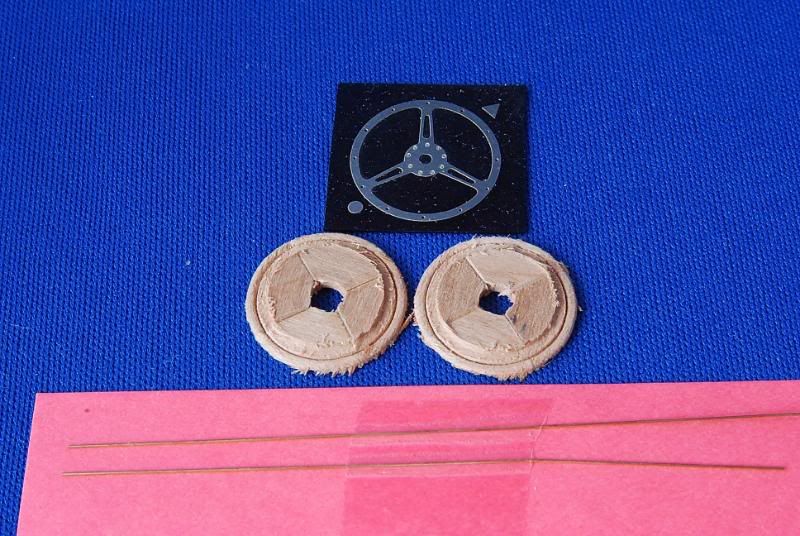 I started sanding it until I could see the light through the inner part of the wood halves. 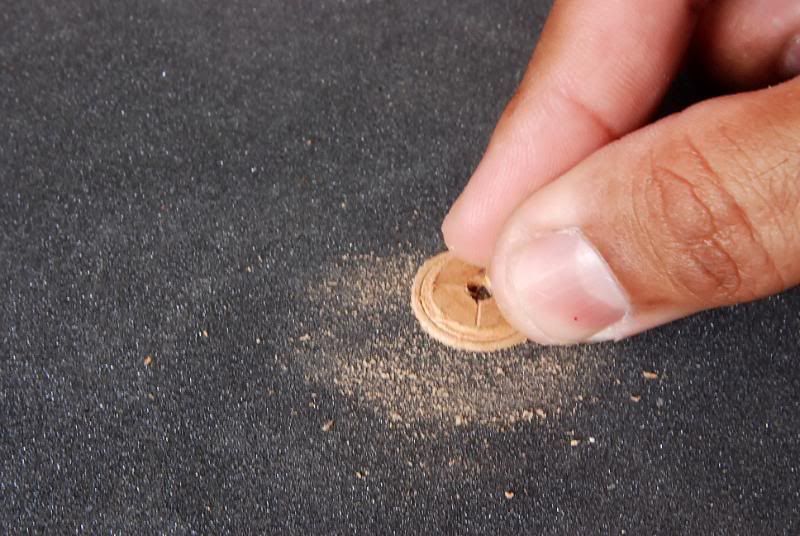 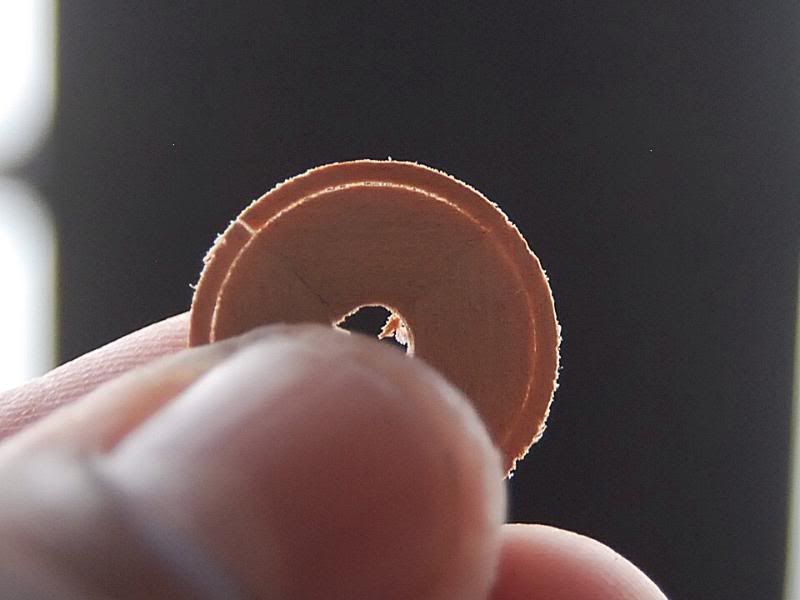 Finally, the wooden parts for the steering wheel are off. 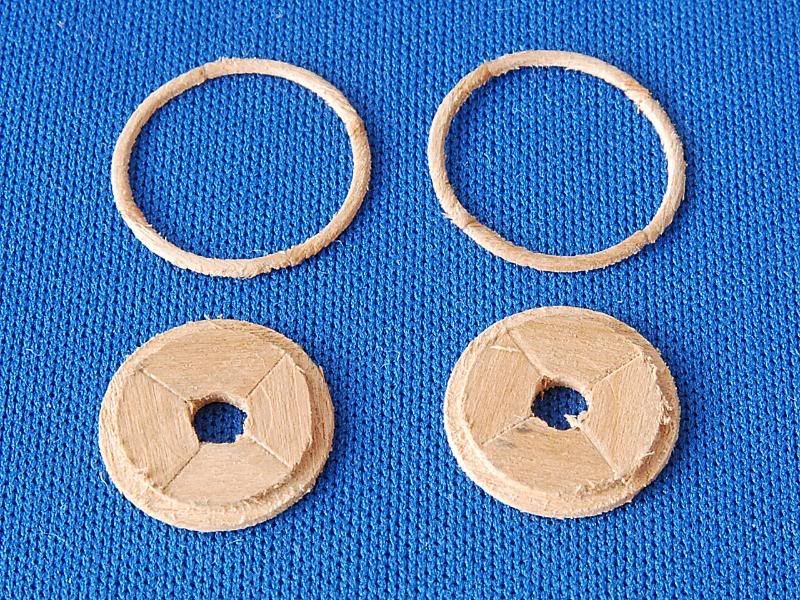 The rim was perfectly polished, but, I had to hold the temptation to leave as it is, because the correct factory stock look is covered by satin black paint. 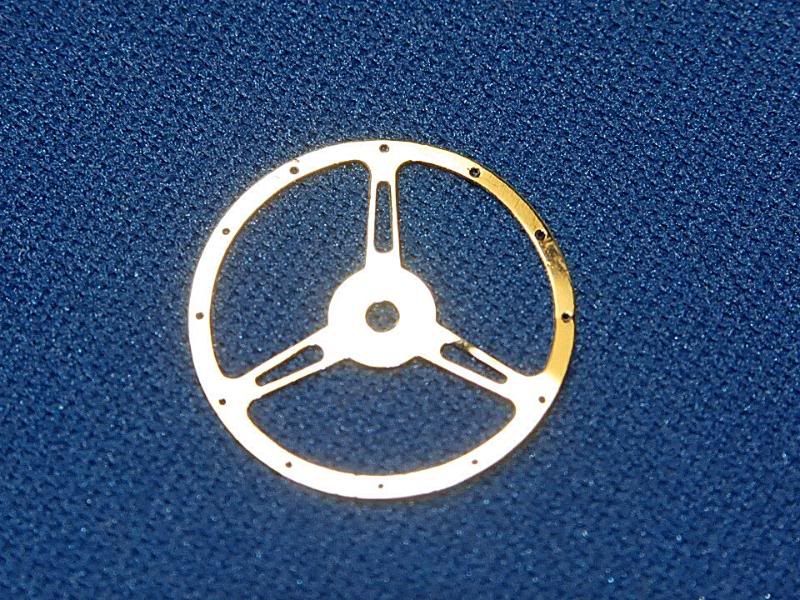 After glue the halves, the metal lines are placed trough the rim and the wood. After that a nail cutter is used to give it a flush cut. 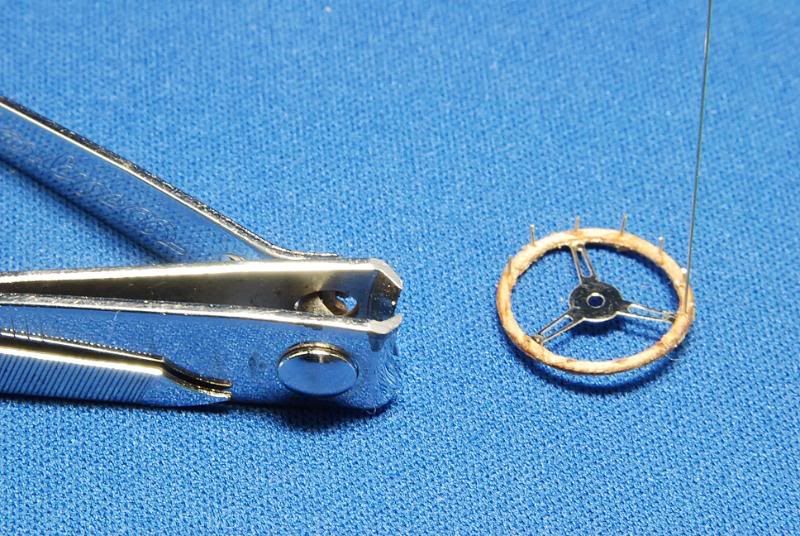 Uffff, after 4hours!!!...I finished the part. Next, masking and paint the center.  I take out some old cans of real wood paints and make some tries to see which color I would use. The upper right corner was the winner, after I painted it, I should use the upper center minwax one, but, it was already painted!  Final look: 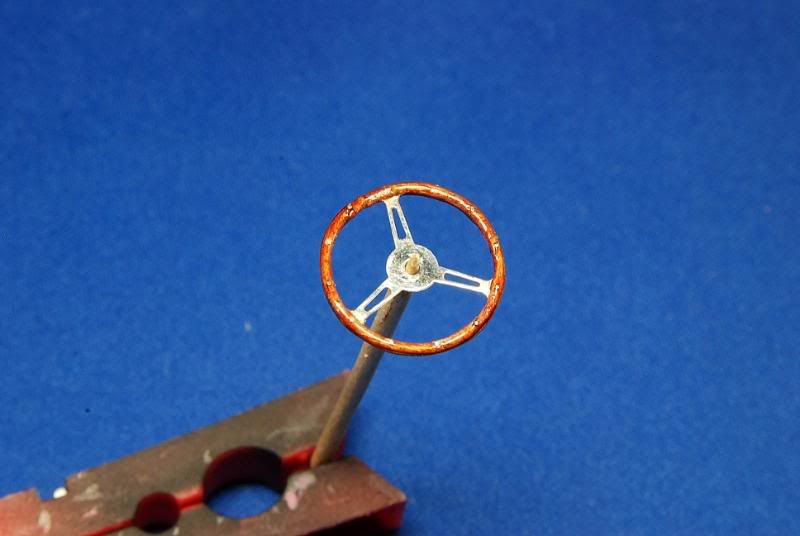 For a last alteration of the out of the box components, I cutted the turn signal switch and place instead a metal pin length. Again, with glue and satin black paint made the knob. 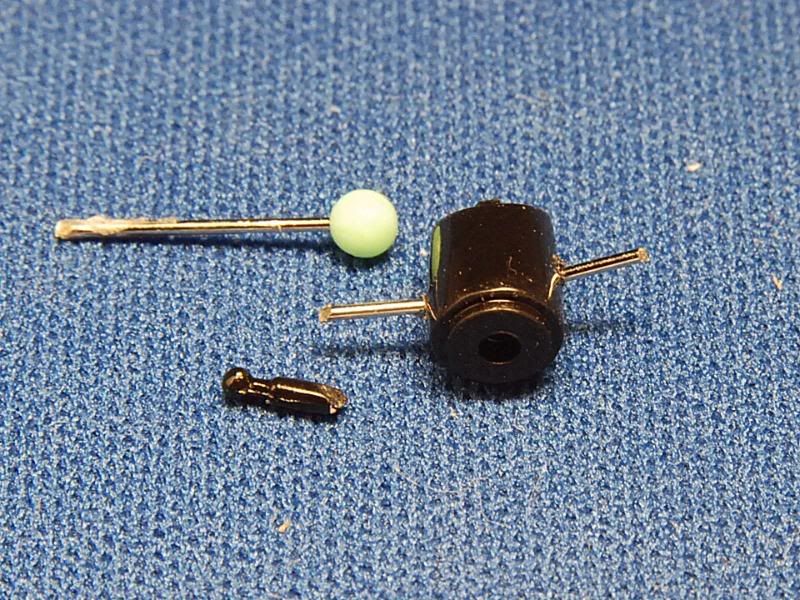 Finally, everything is together in place... 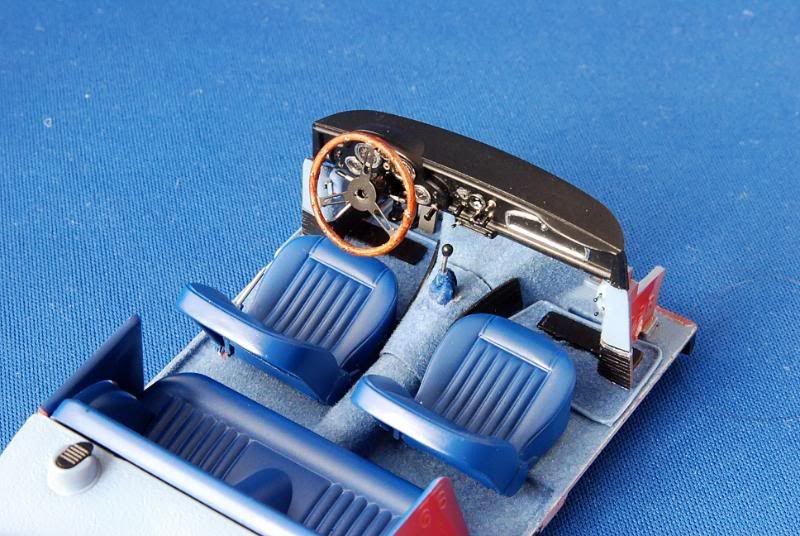 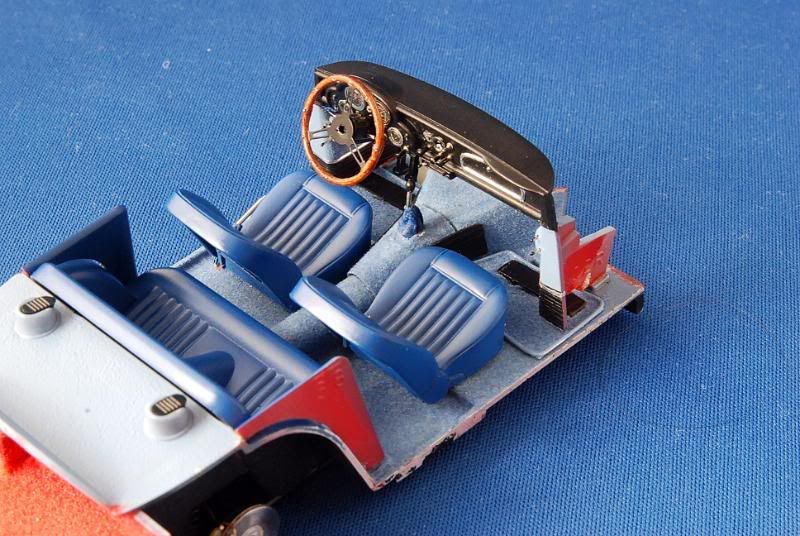 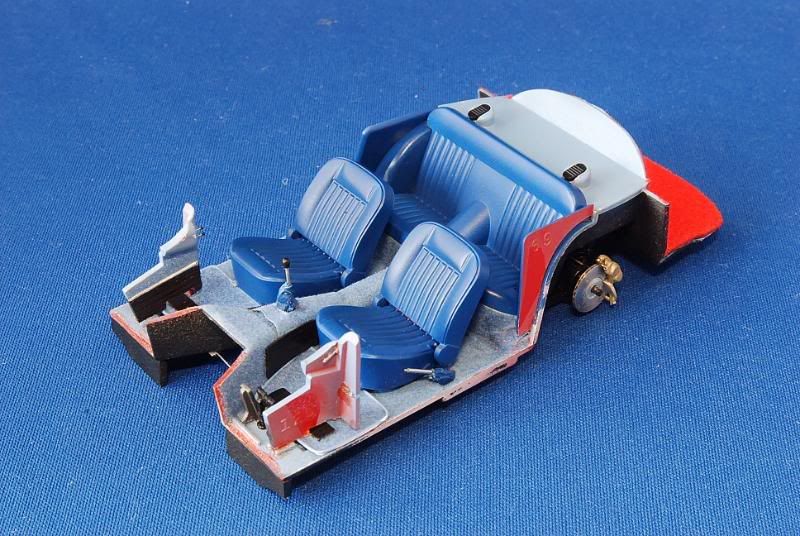 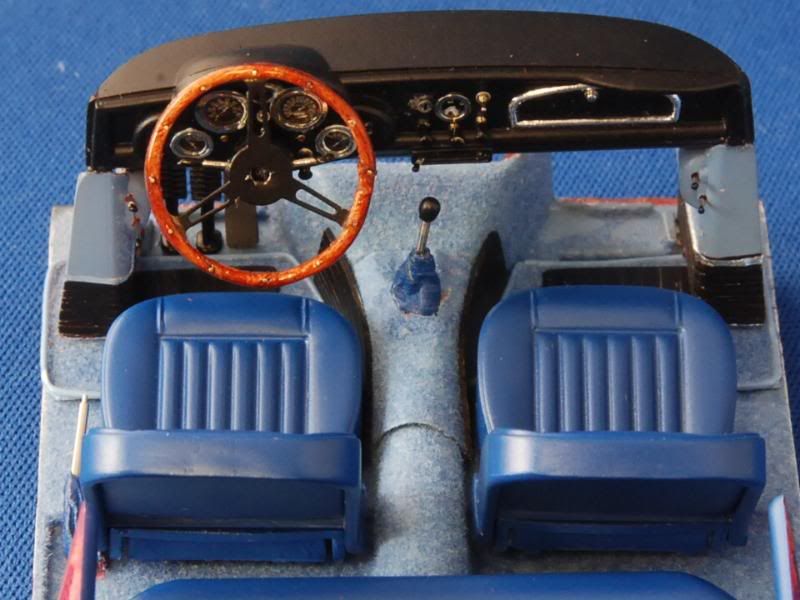 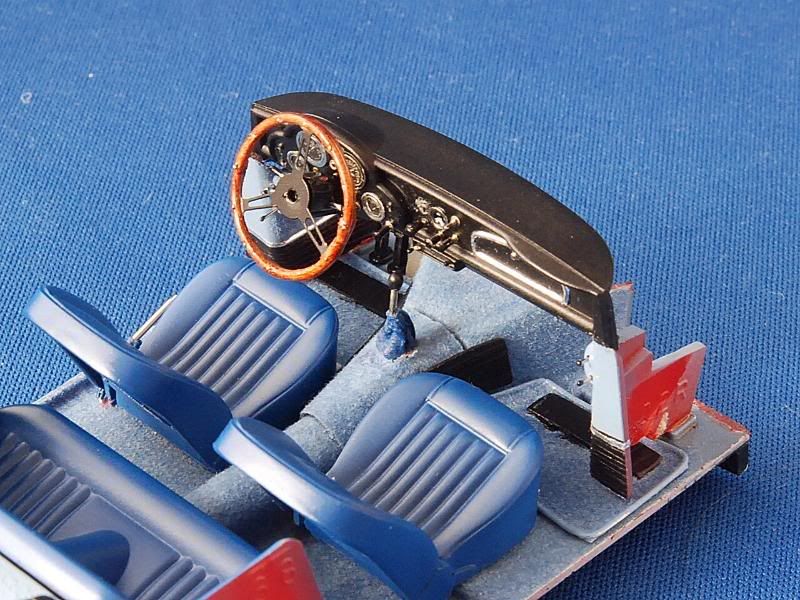 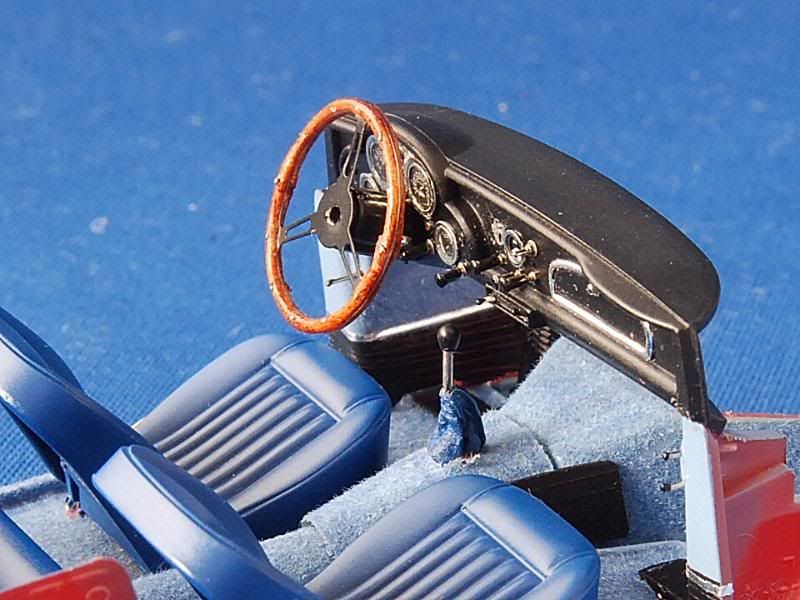

|
|
#17
04-05-2010, 11:50 PM
|
||||
|
||||
|
Re: Aston Martin DB4-1/25 Revell Monogram...a detailed story!
That's a great tip for using sandpaper as carpet
__________________
or 2010 QMHE Intermediate Silver - Mini Cooper S 2010 QMHE Intermediate Bronze - 37' Delivery 2011 QMHE Intermediate Silver - Panzer Tank 2011 QMHE Imtermediate Bronze - McLaren M8B
|
|
#18
04-23-2010, 01:28 AM
|
||||
|
||||
|
Re: Aston Martin DB4-1/25 Revell Monogram...a detailed story!
Excellent work!
|
|
#19
04-23-2010, 07:22 AM
|
||||
|
||||
|
Re: Aston Martin DB4-1/25 Revell Monogram...a detailed story!
Stunning work! You have a wonderful sense of details and your scratchbuilding skills are just awesome.
At some point on the pictures of under the car, it's hard to say which one is 1:1 and which is scale model  Looking forward to see it complete.
__________________
|
|
#20
07-29-2010, 05:34 AM
|
|||
|
|||
|
Re: Aston Martin DB4-1/25 Revell Monogram...a detailed story!
Again…after sometime without any posting, but, working with it, this is it…something more…a loooooong update!
Last time I forgot to add some details that will give the interior some more realism. As you guys can see in this picture, the steering wheel has a blue horn button, the model’s one doesn’t come with it…so let’s scratch build it! 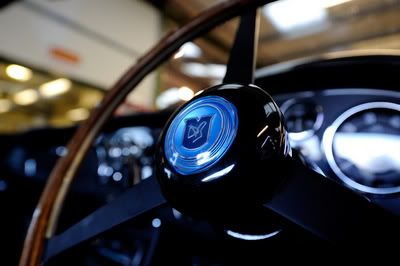 I started with a rounded plastic piece that I got after punch out a scrap of plastic sheet. Then, I made the dome of the button with some epoxy and after it I painted it gloss black. When it dried out, I masked the center with a 1/72 planes scribing template, then, painted white for the base, then clear blue for the tint.  Something else that I forgot last time was the upholstery lining. I did it using some fine solder.  With all the “new” parts are in place, the colored circles shows where are them.  I decided to use this Scale Equipment LTD luggage set: 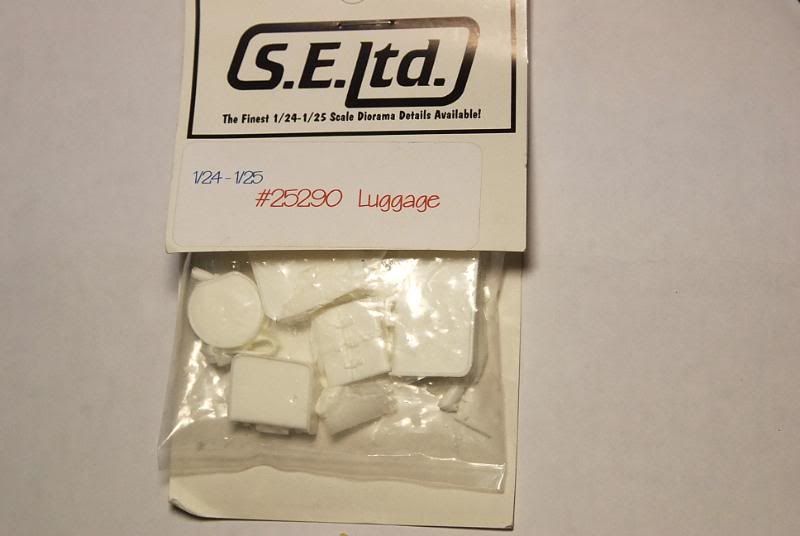 The resin kit needs some cleaning, but, after sometime, you get a nice luggage set:  Already paint detailed luggage set: 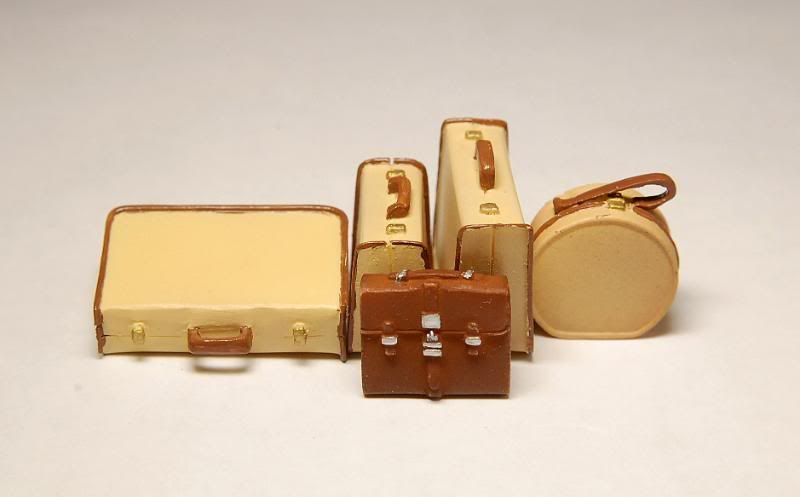 Already in place at trunk’s space: 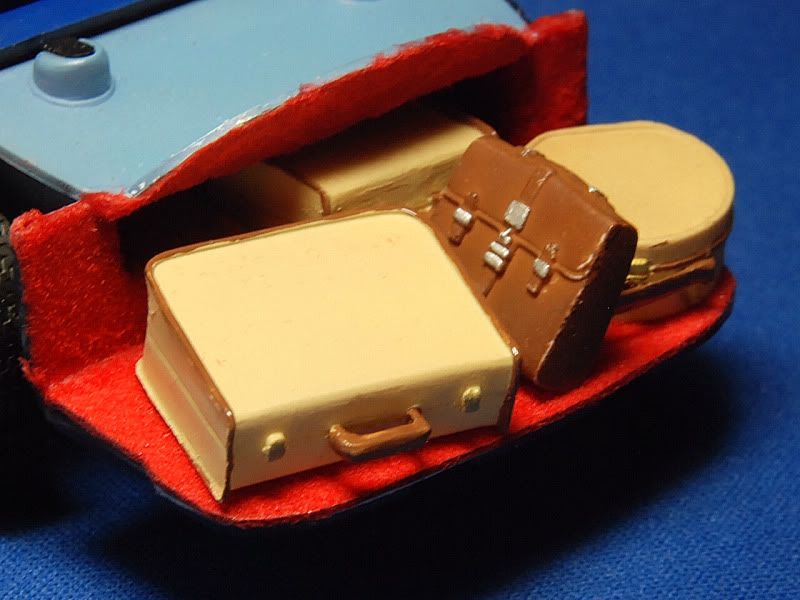 After I finished with the interior, I moved on to the body. In these pictures can be seen the basic body and all the parts that will complete it: 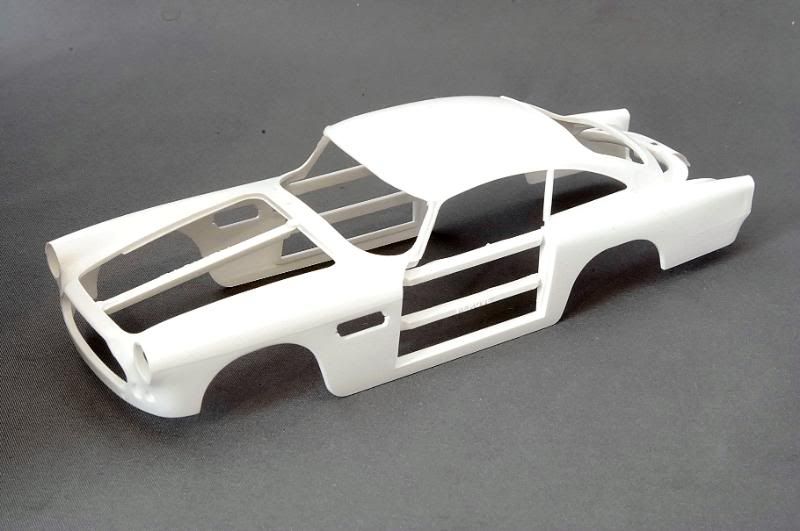 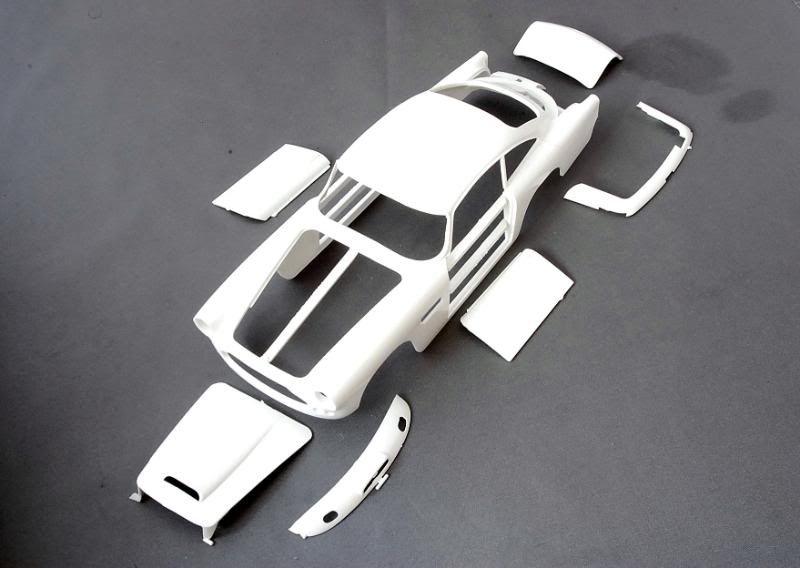 An idea of what we will see: 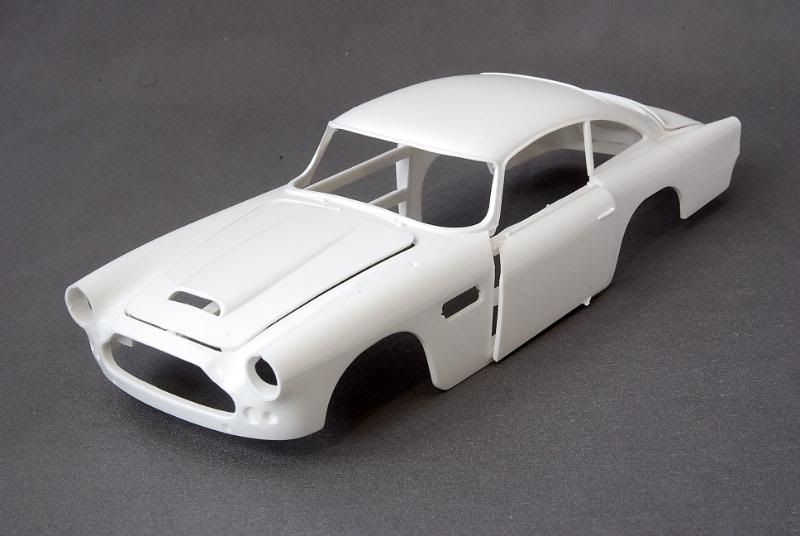 As in today model cars, lines all over: 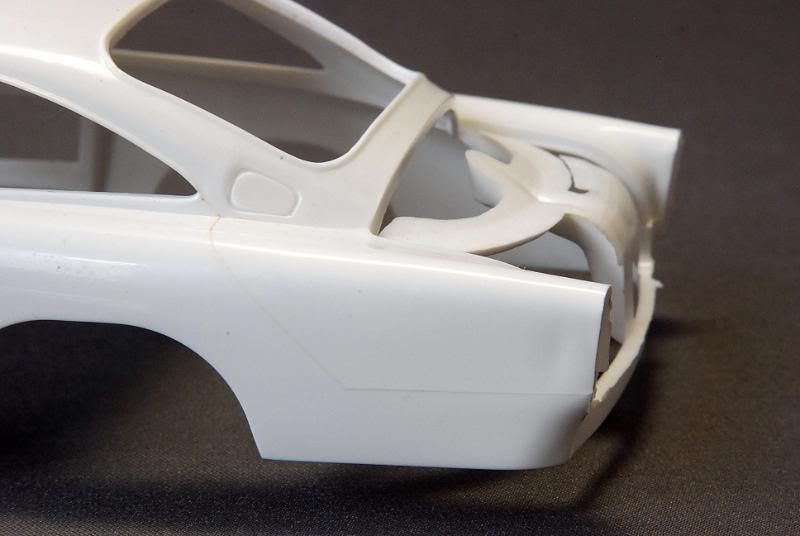 The door, nicely molded, but, handle lacks of some detail…it will go.. 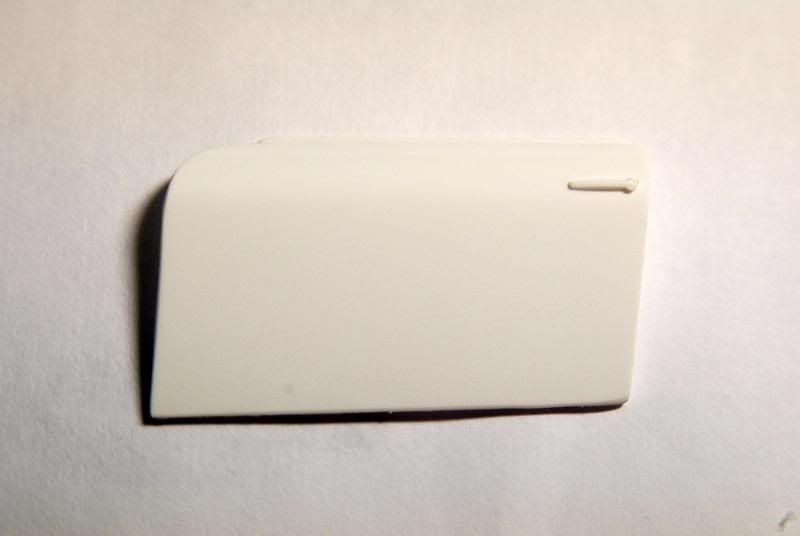 The same thing with the molded in wipers: 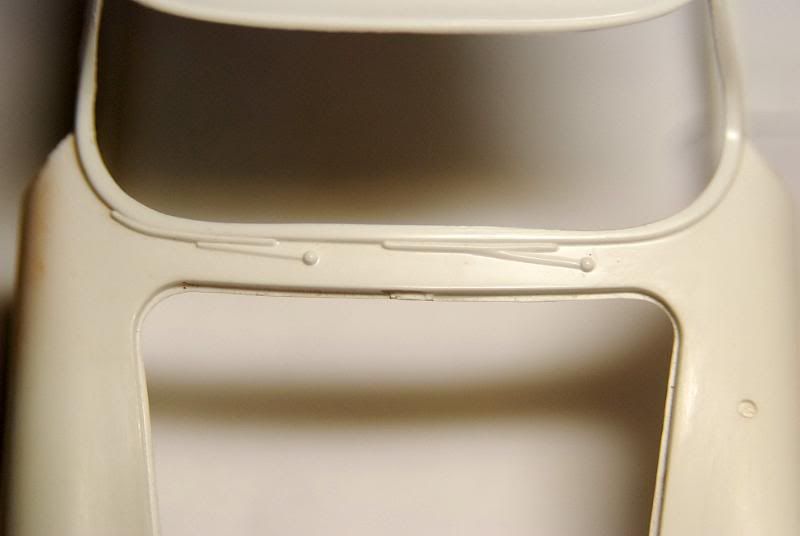 As it happened back in the 60’s with model cars, you guys had to build even the body. This model car has a front and a rear section that should be added once you paint the model, but, as a result, an ugly seam line will be seen. What I did to resolve it? As I said at the beginning, I won’t follow the steps of the instruction sheet in order to get some more real results and this step will be a clear example. I started putting together those parts with super glue, then, instead use any putty, I mixed super glue with micro balloons in order to get a plastic past that in the long run will give me an smoother surface: 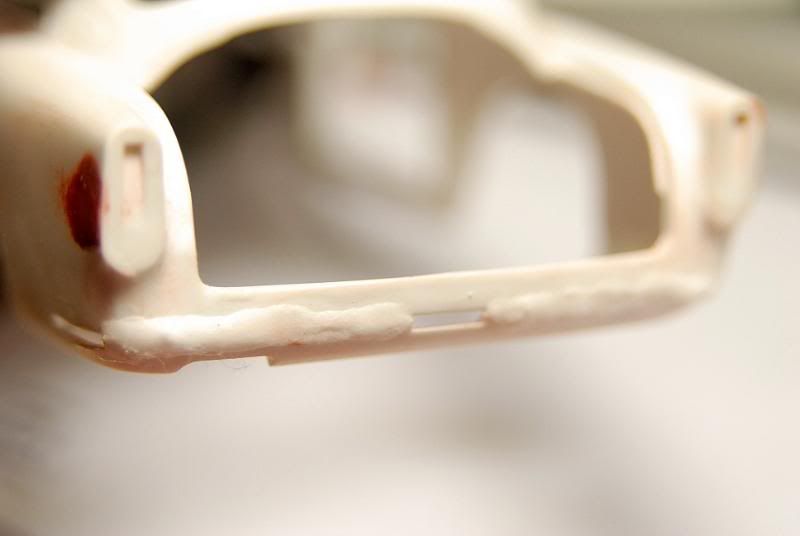 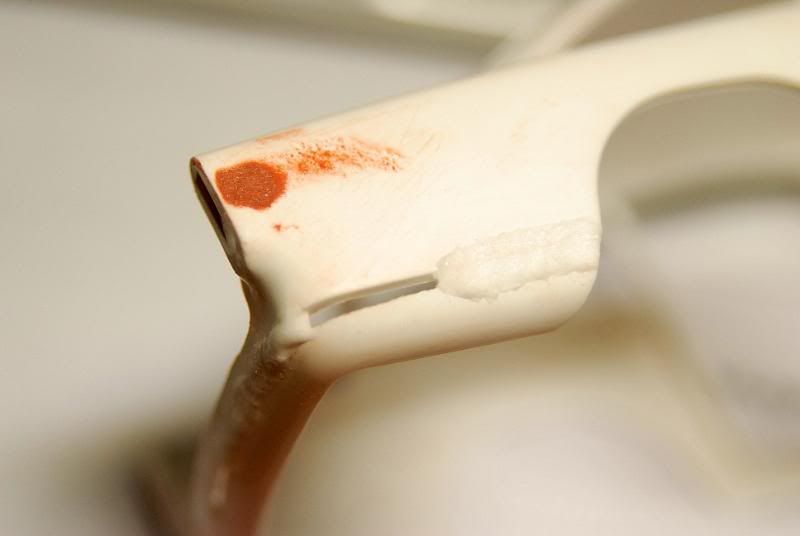 Here, the results, a nice and even surface without any use of putty or primer: 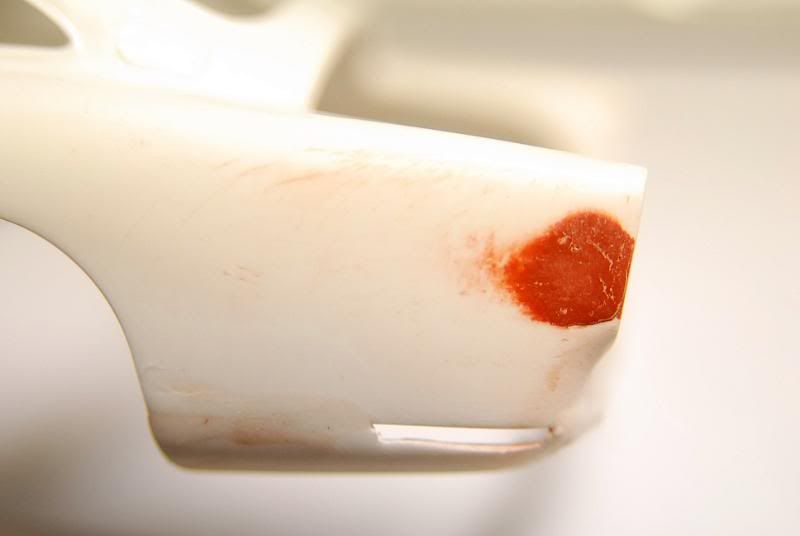 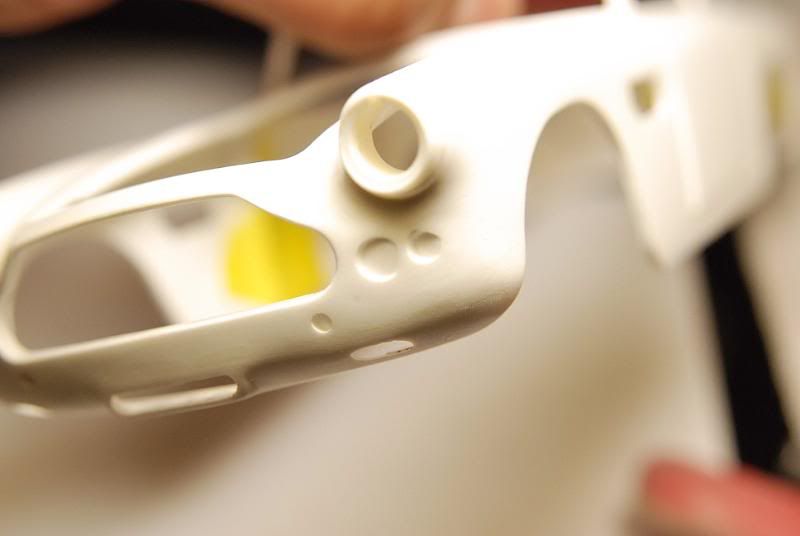 At the front, there’s some incorrect detail. The headlight buckets are too square shaped as you guys can see in the red circle. After some light sanding, now it show a better rounded look, as it shows the blue circle: 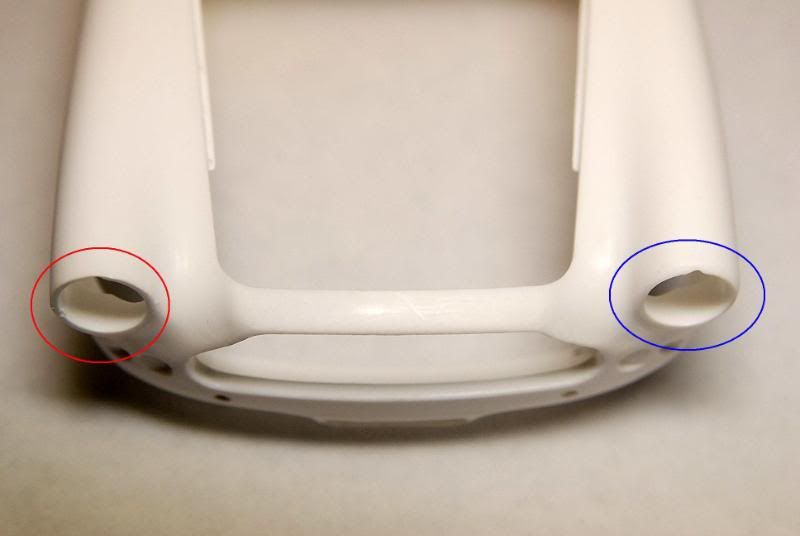 Here with the bezels in place, you can have an idea of how out of shape look it will have at the end: 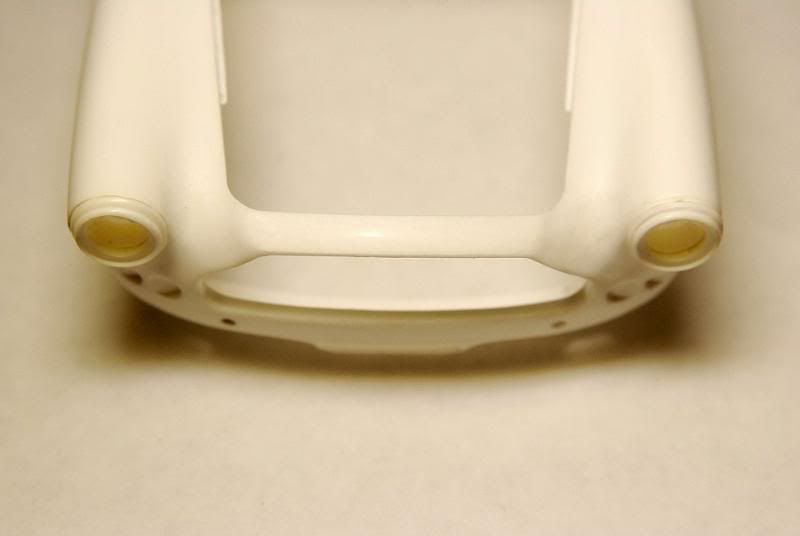 Here, both sides now have the same shape: 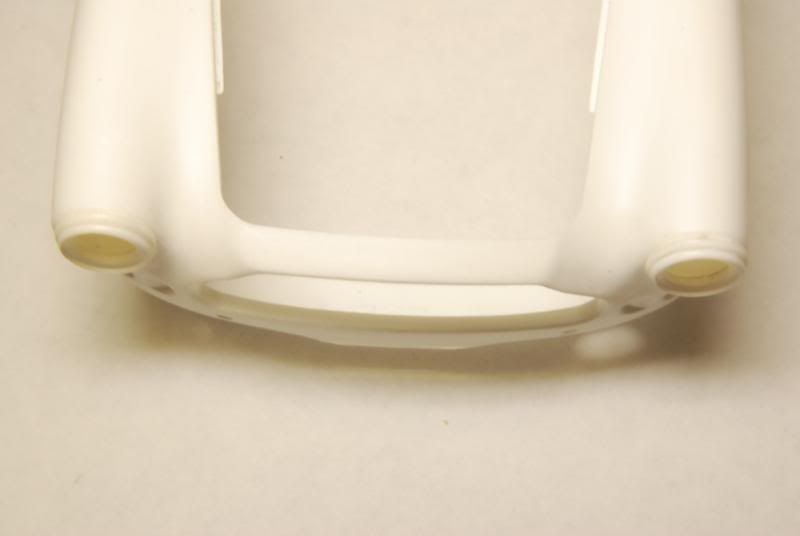 The rear bumper was drilled out in order to make some room for the rear reflector lights: 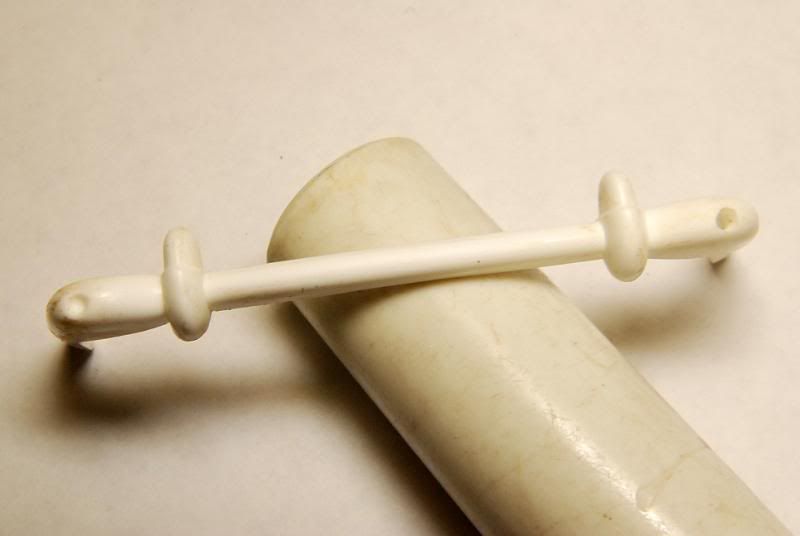 The front grill needs some make up to wear a better look. I drilled out the plastic part starting with some wholes abroad, and then I substituted it with some Detail Master Rectangle grill: 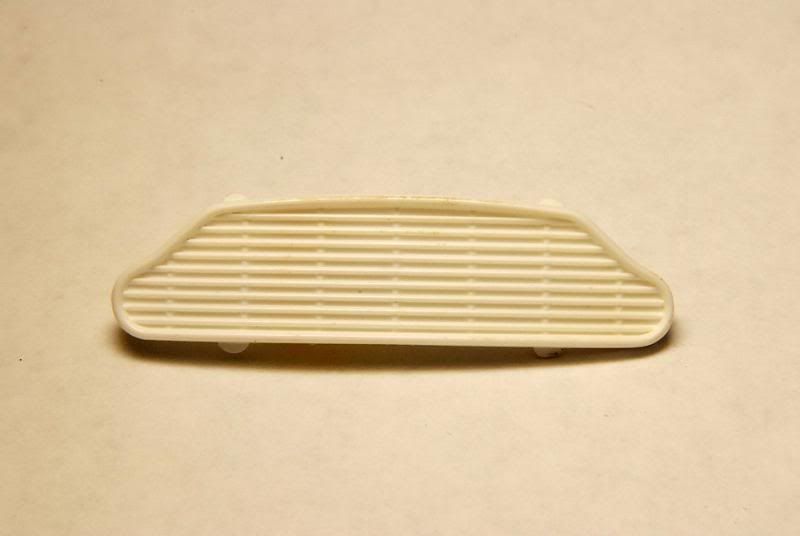 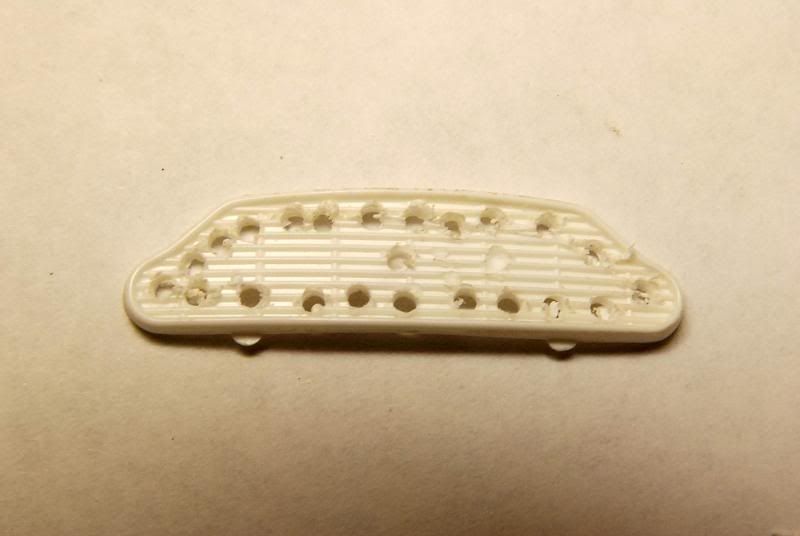 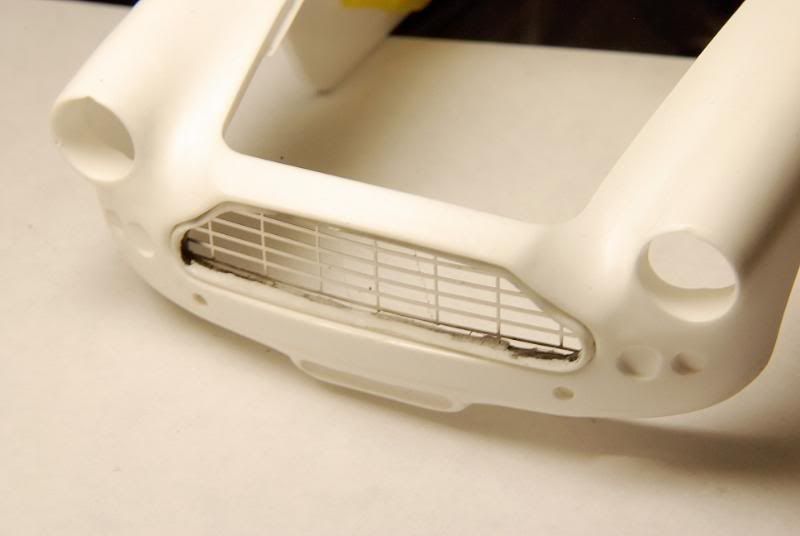 Now, everything starts to look more or less in shape. I added the hood to complete the body: 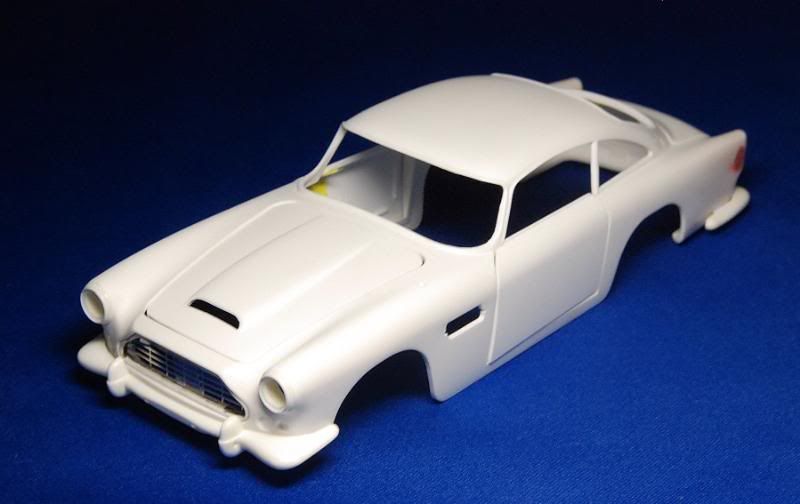 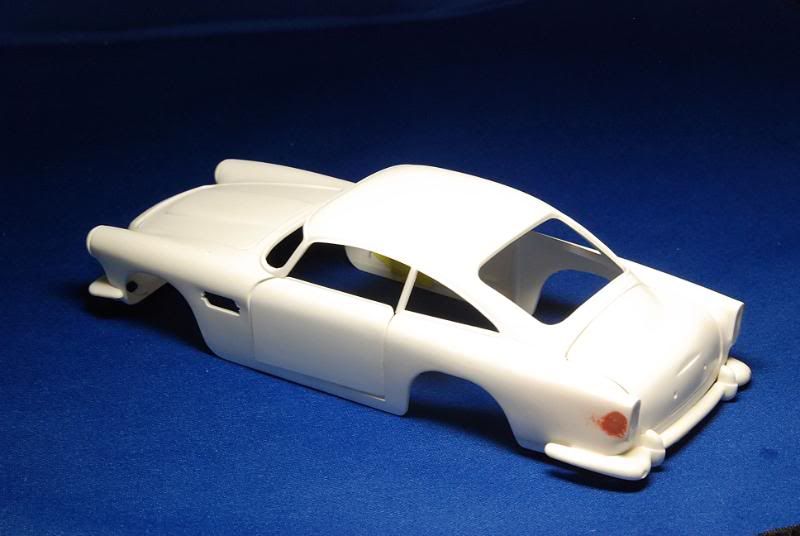 Speaking of the hood, in order to get the correct Series 5 look, the scoop in this model also has to go. It has the prior series higher and wider shape as can be seen in these to comparison pictures: Incorrect (for series 5):  Correct: 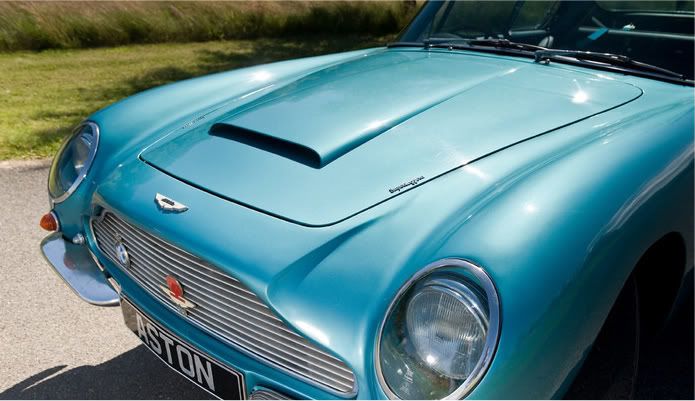 Now it comes a part of this build up that gave a rear headache…the making of this correct scoop... As it can be seen in the next pictures, it has the incorrect look for what I want: 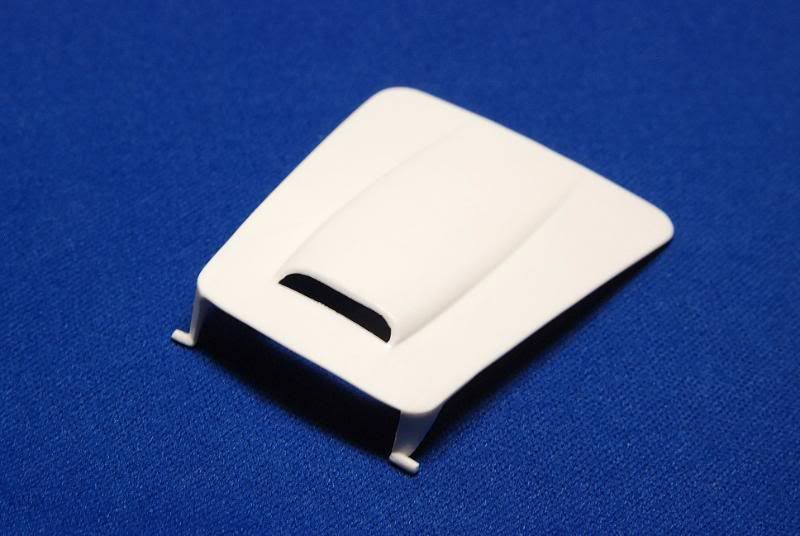 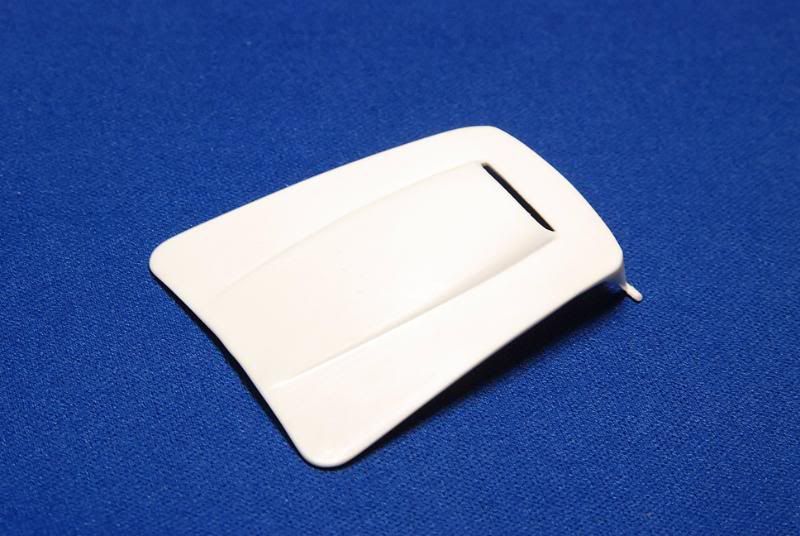 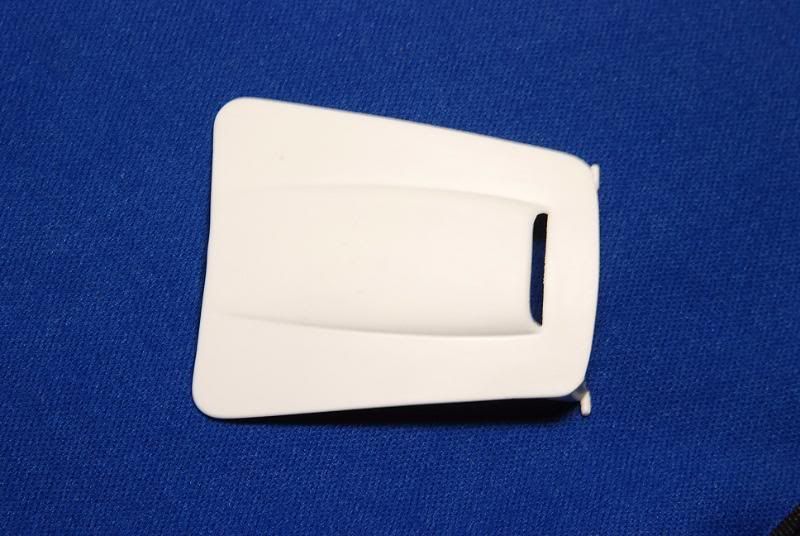 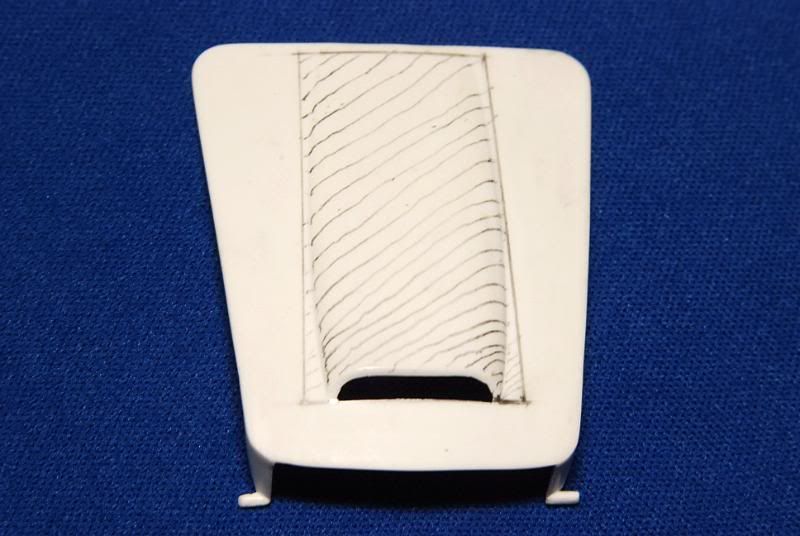 I started scoring the section to be removed, then, I cutted the section, added a piece of plastic sheet, glued everything up with the super glue/ micro balloons mix, then sanded it smooth: 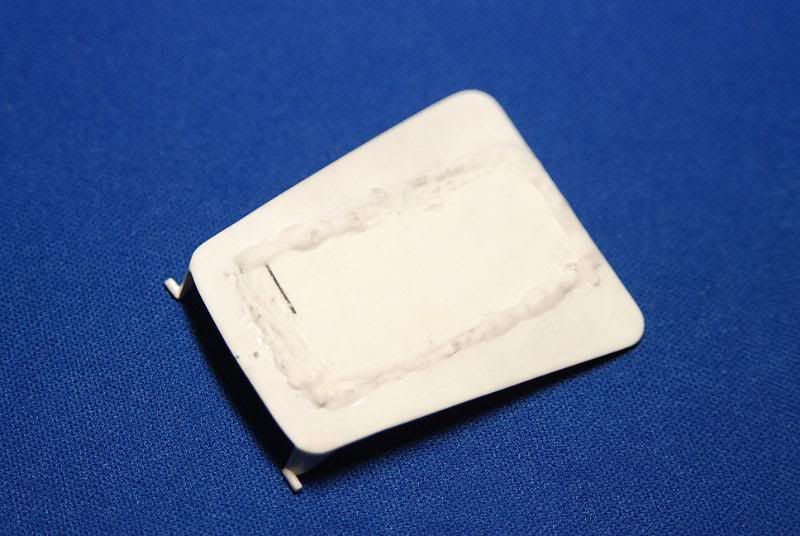 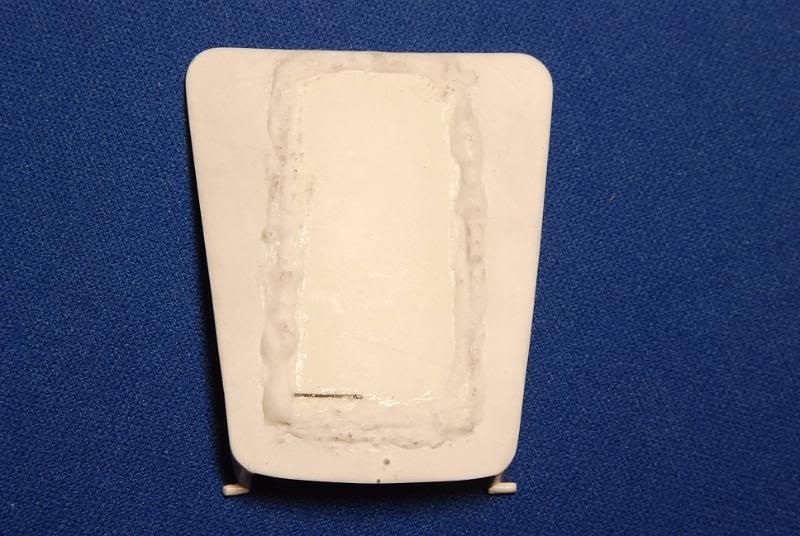 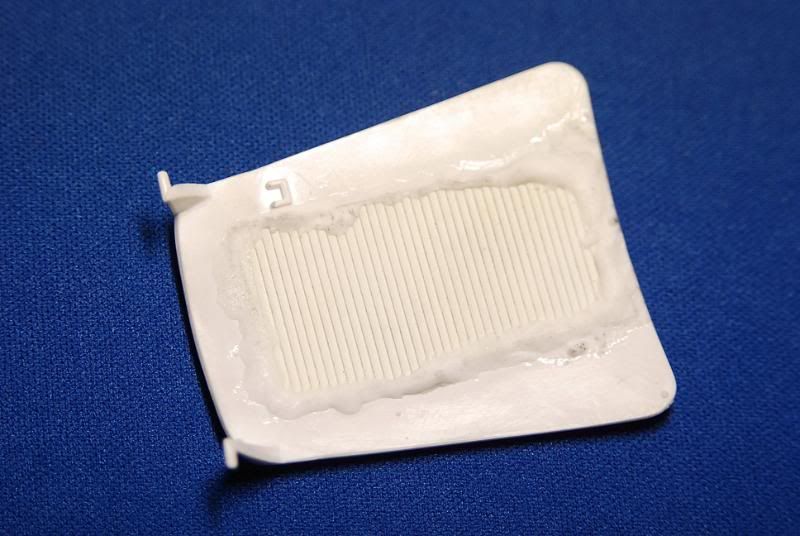 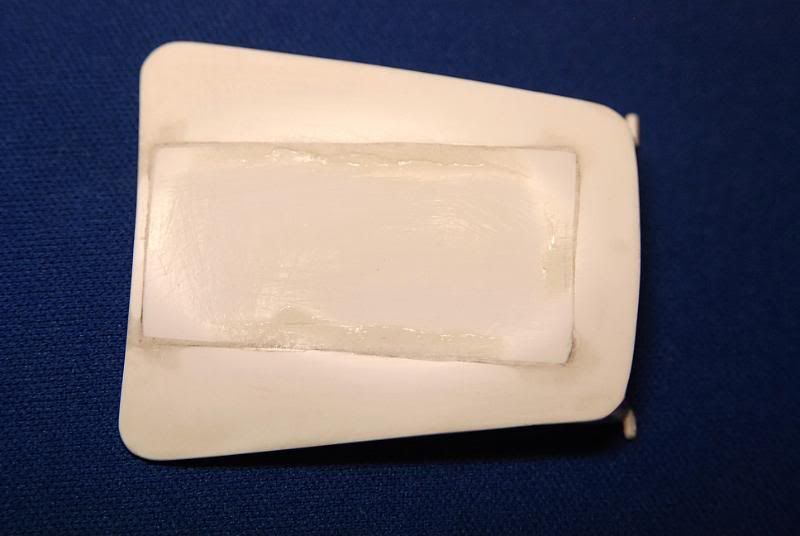 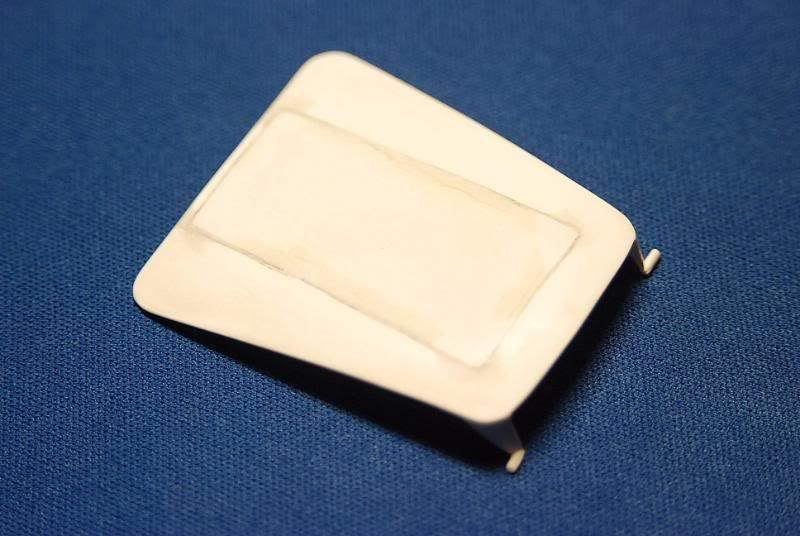 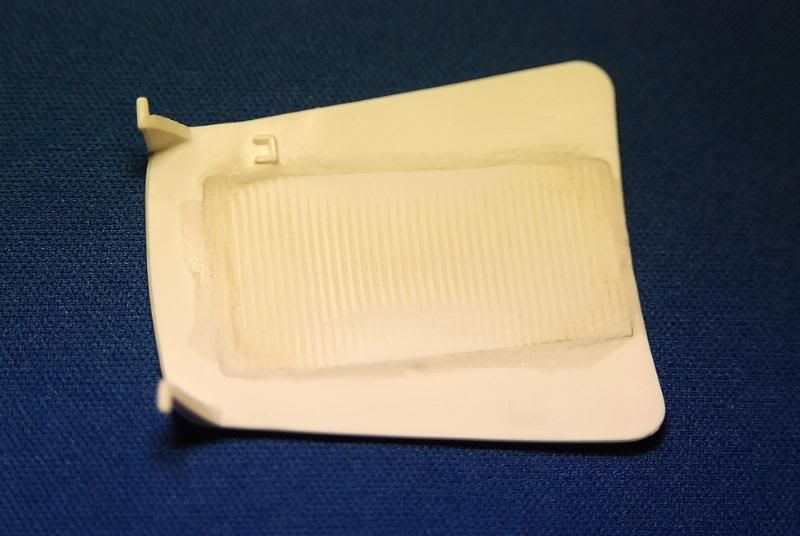 A piece of aluminum sheet was used for the new scoop...oh God!...lots of time and trials trying to get the correct shape:  After I got the correct shape for I wanted, I cutted again the new hood in order to adapt the aluminum part: 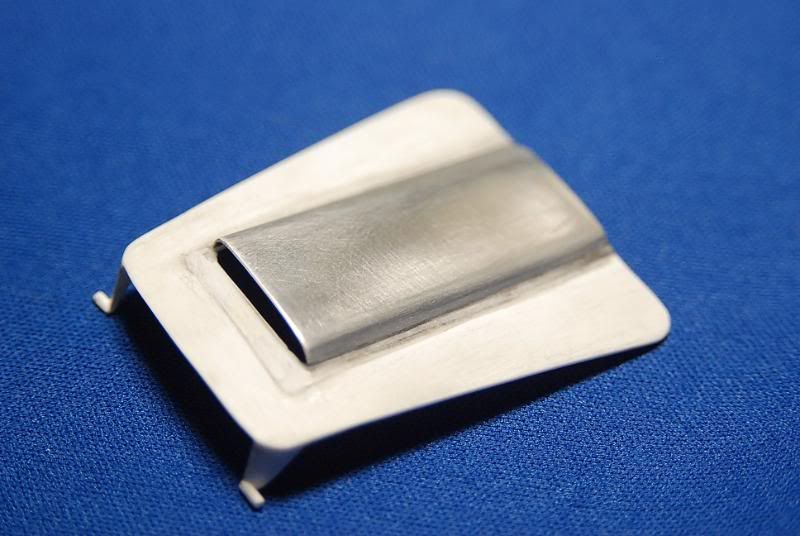 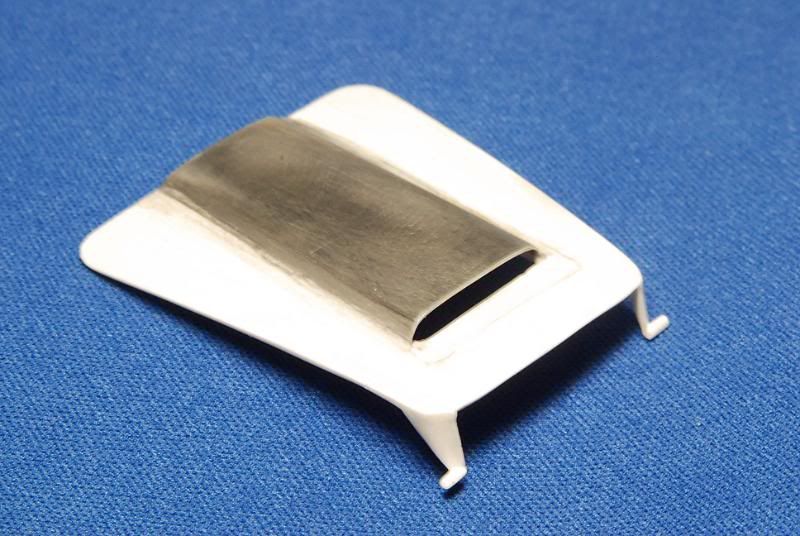 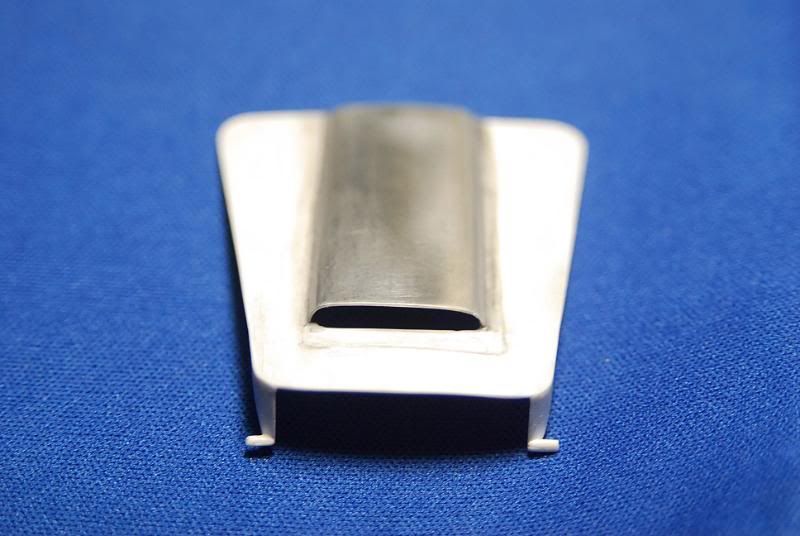 Trying to sand smooth these new parts I was aware off, the super glue/ micro balloons mix wasn’t strong enough to hold sanding and I didn’t want to have any surprises as some cracking at paint/clear sanding and polishing stage, so…I asked for some backup. After used the super glue/ micro balloons mix, I covered everything up with Evercoat Polyester putty to give the new part some strength: 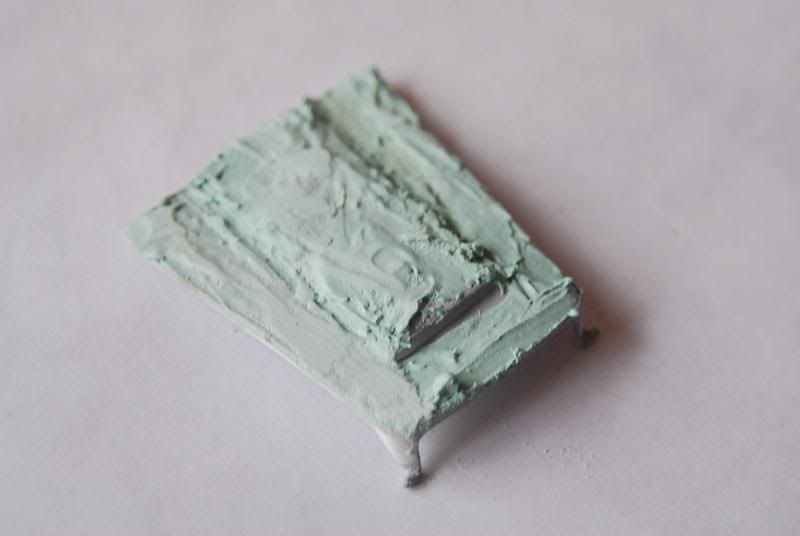 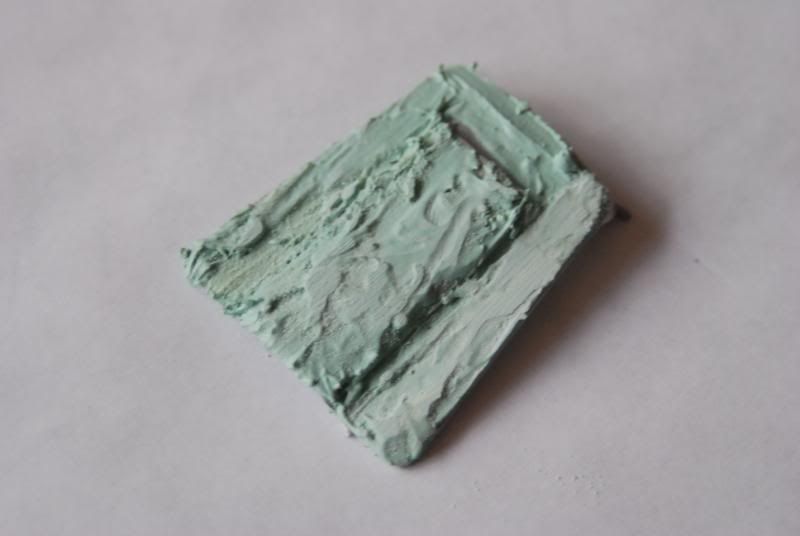 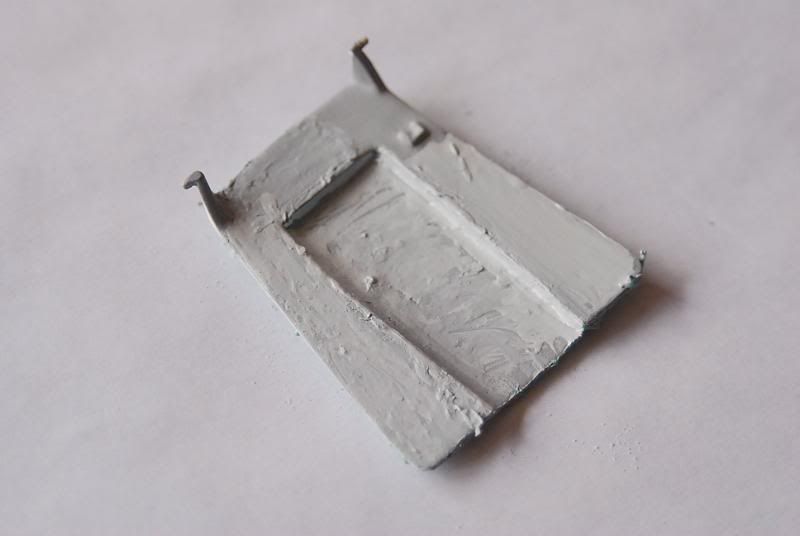 Everything sanded nice and smooth, but, some micro holes that appeared on the surface off the new hood. Lots of primer and sanding resolved it! 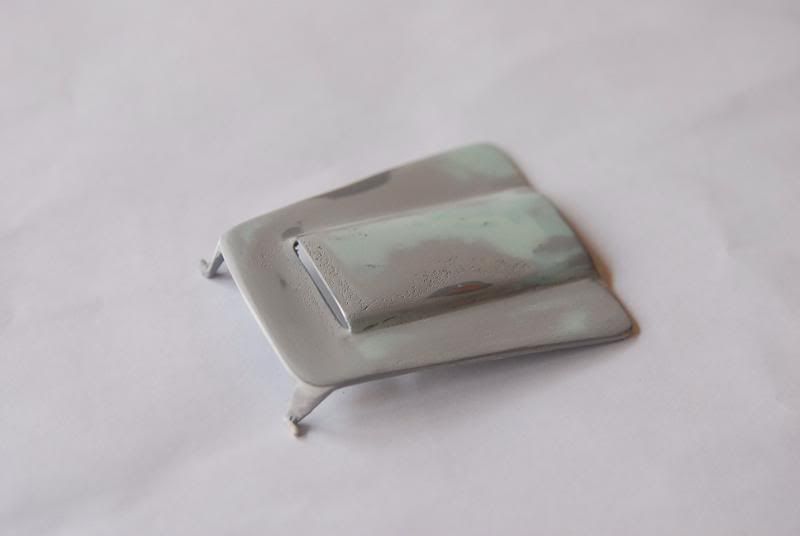 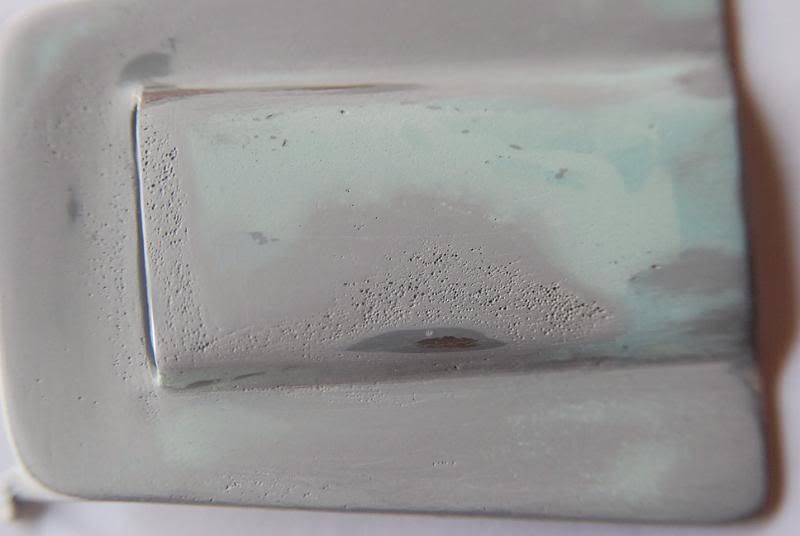 But still, there’s some funny things showing from beneath of the surface... 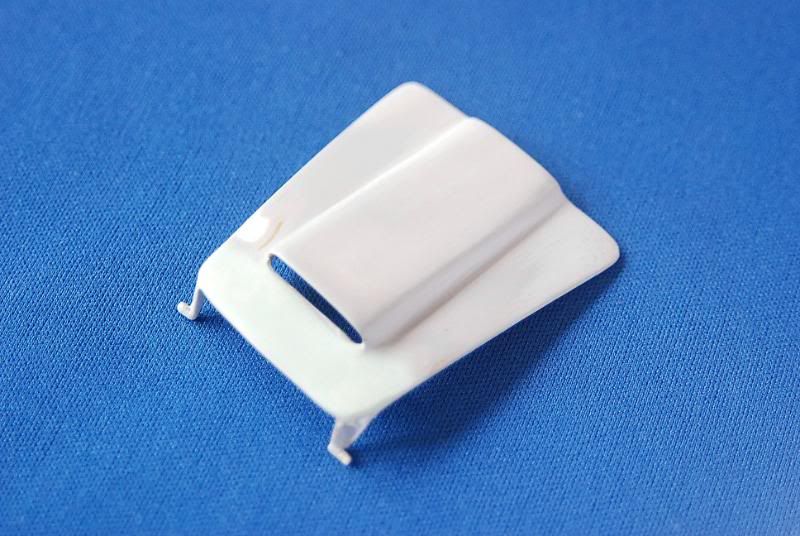 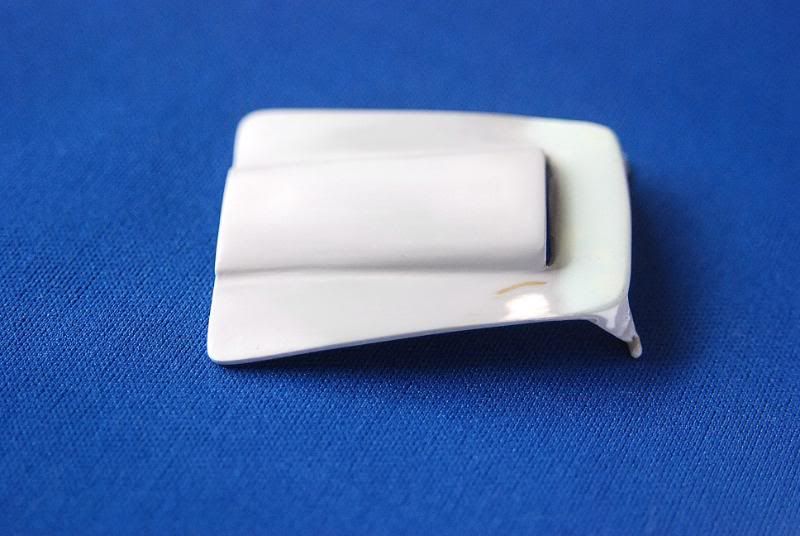 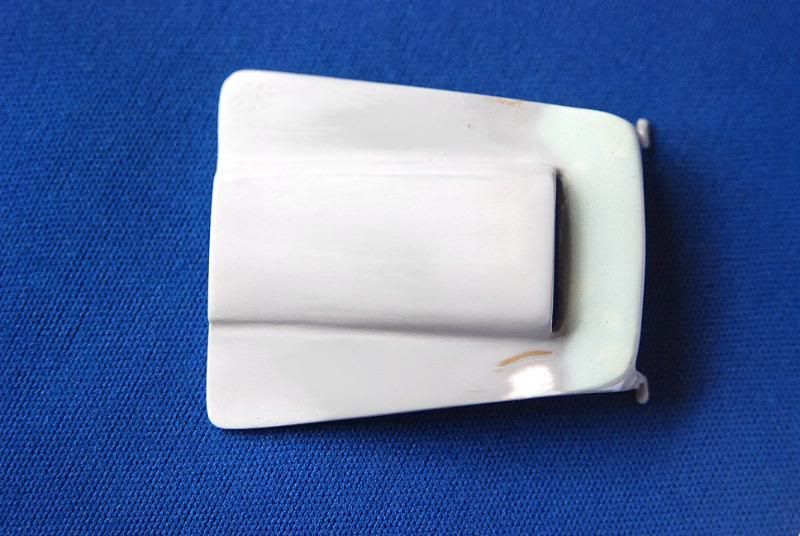 Due to that, I had to start all over again, using this time a wider plastic piece: 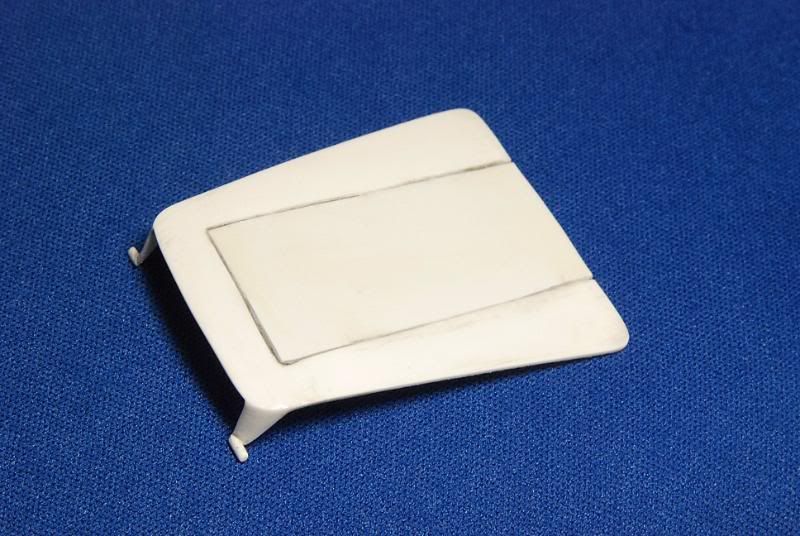 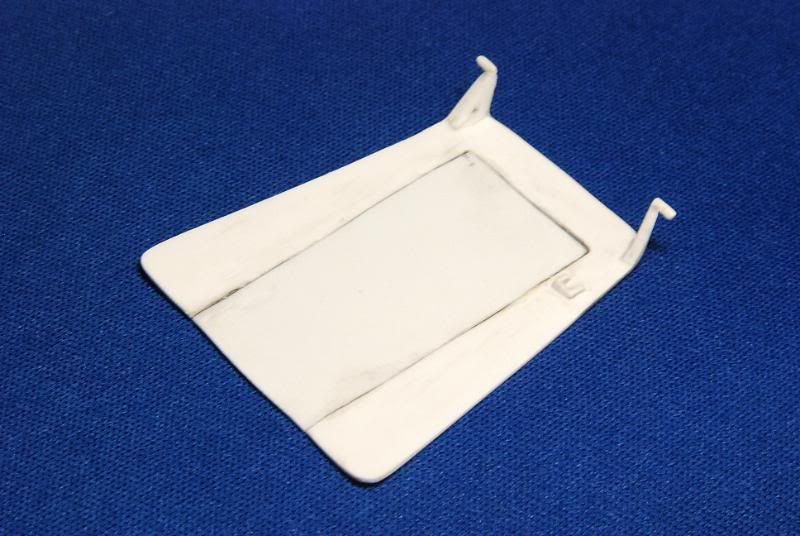 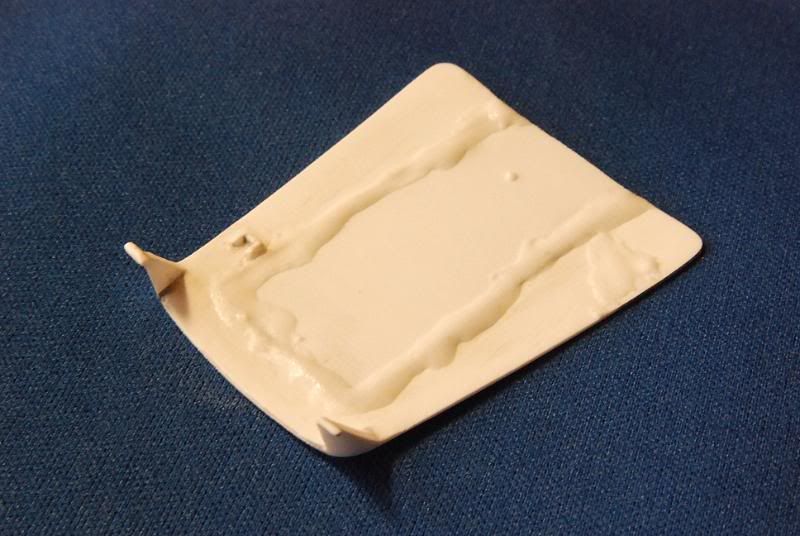 This time, I didn’t use the Evercoat Polyester putty, I just airbrushed some Gunze Sangyo’s Surfacer 500 and 1000: 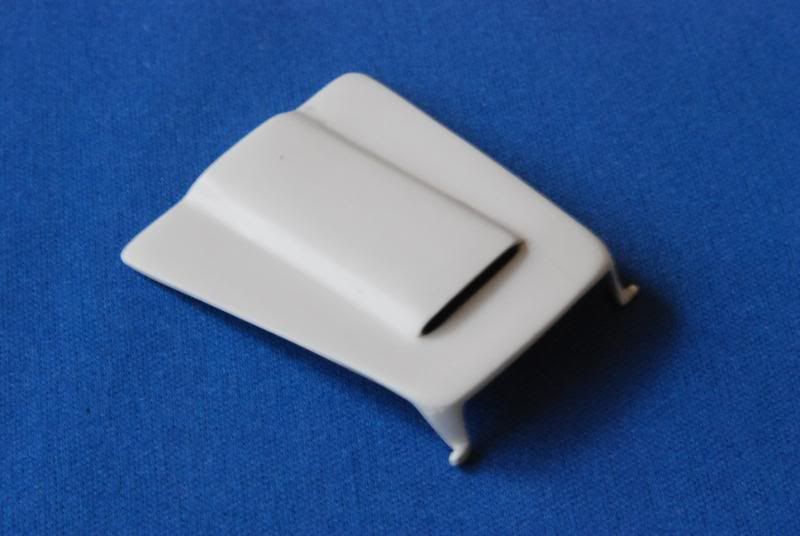 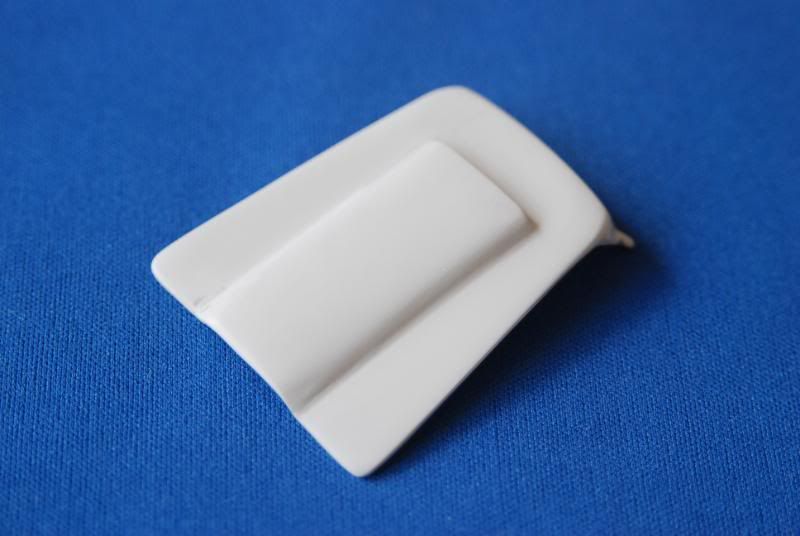 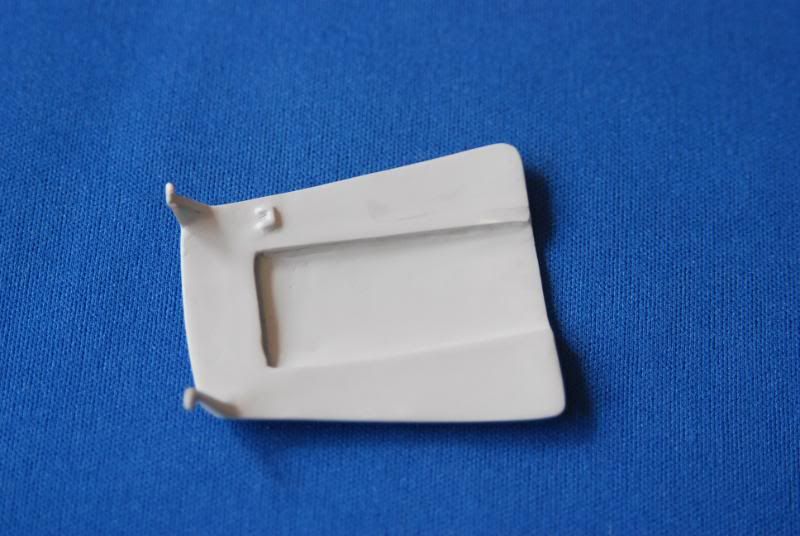 Some Gunze Mr. White Surafacer 1000 to give the final white base for the color I had in mind: 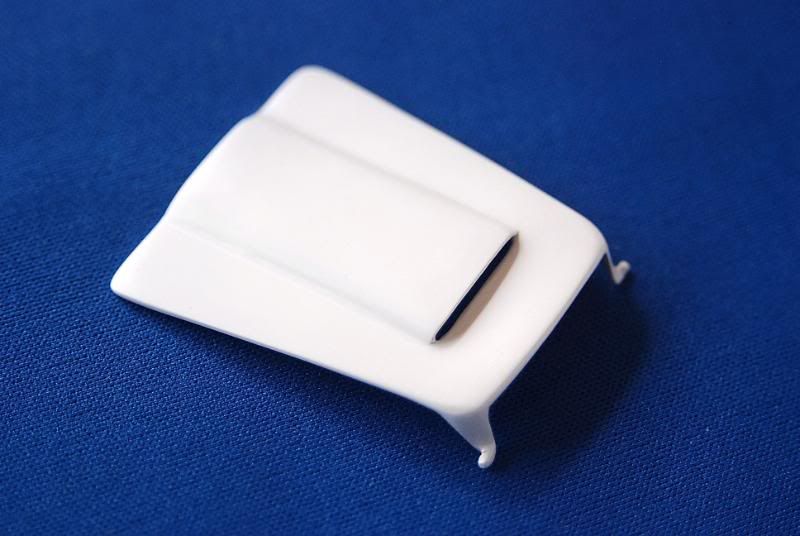 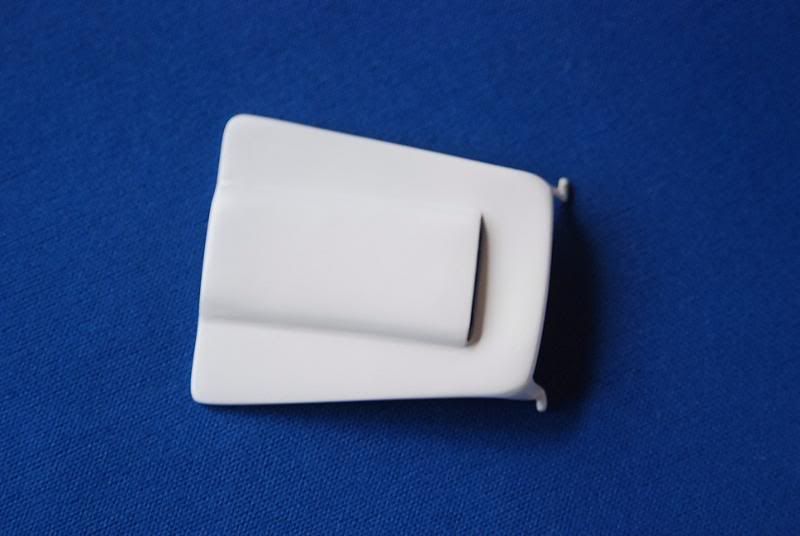 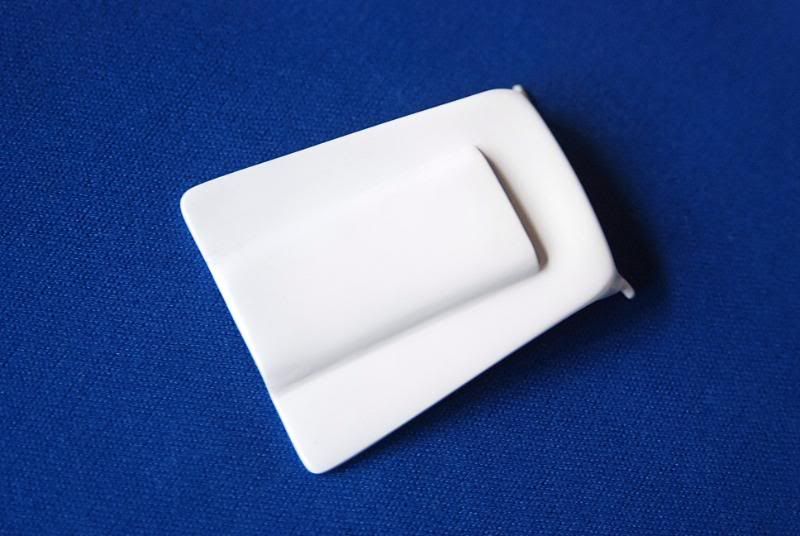 Looking to some pictures of the real car, I noticed that this model has some incorrect panels in the body as for example in the wheel wells panels. Would you guys imagine a car body panel with 1” thick, certainly it could hold some bullets! Here is what I meant: 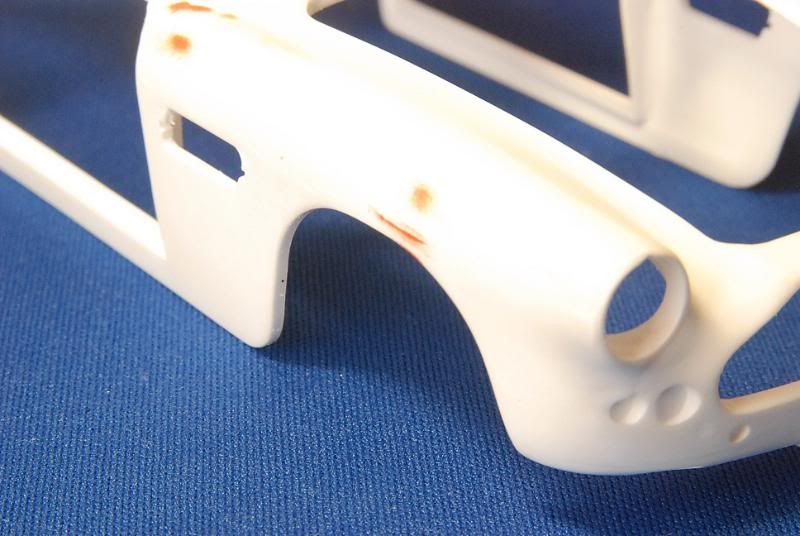 Corrected at the front: 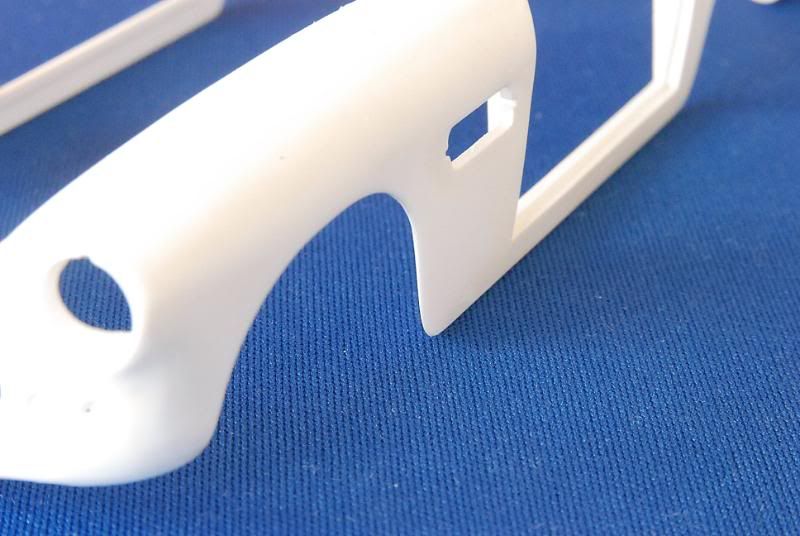 The circles shows the comparison better: 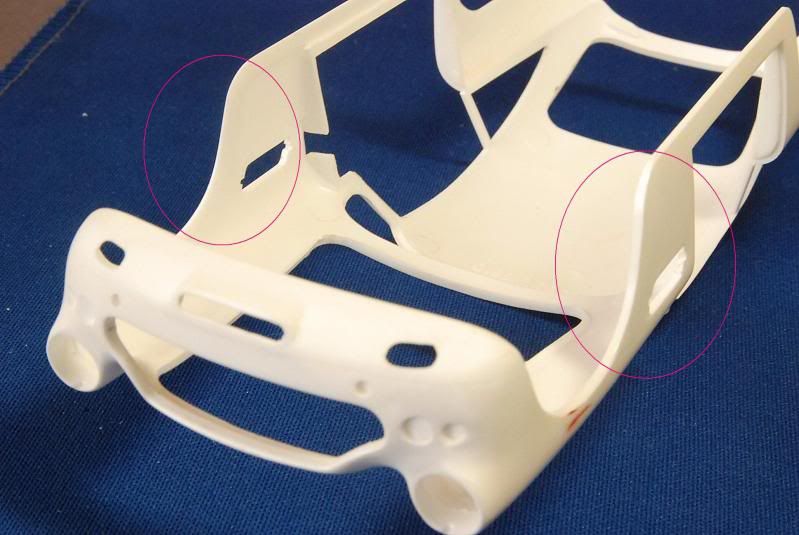 Now I finished with the corrections at the front, let’s move to the rear… 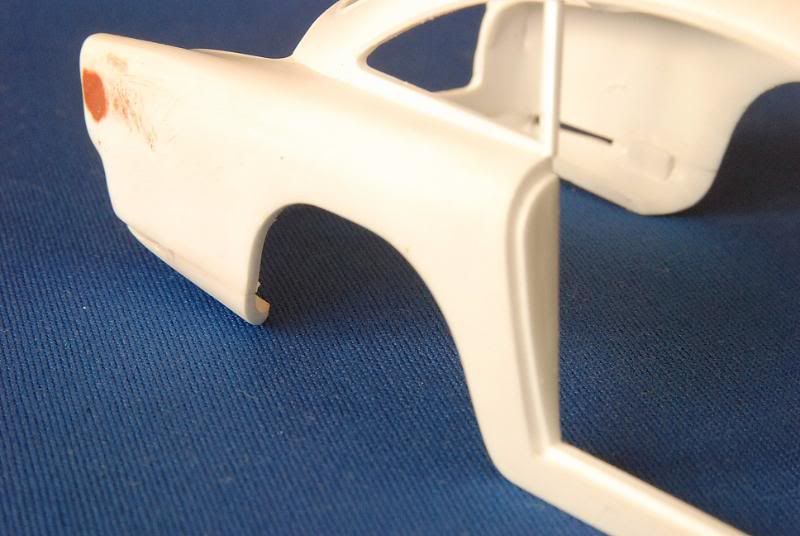 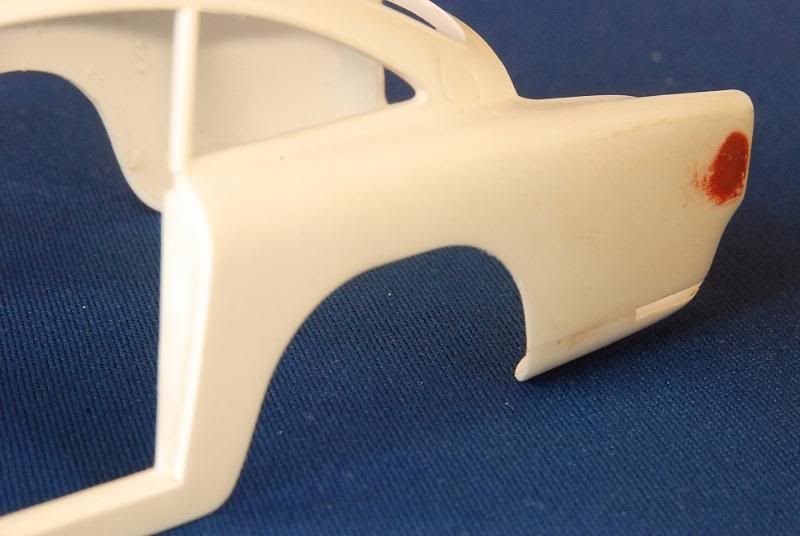 At the rear there’s a detail in the body where the rear lights cluster has to be placed. I started drilling the bucket hole. First of all, if you look to rear car, it has a more detailed shape at the bottom part of the bucket for the lights: 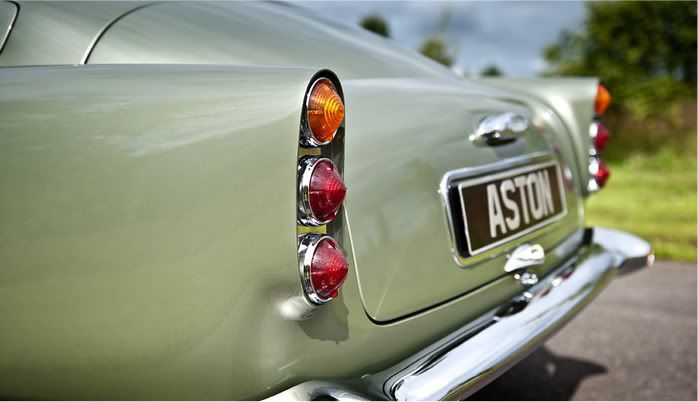 In my model, I carved and sanded it smooth giving it the correct shape: 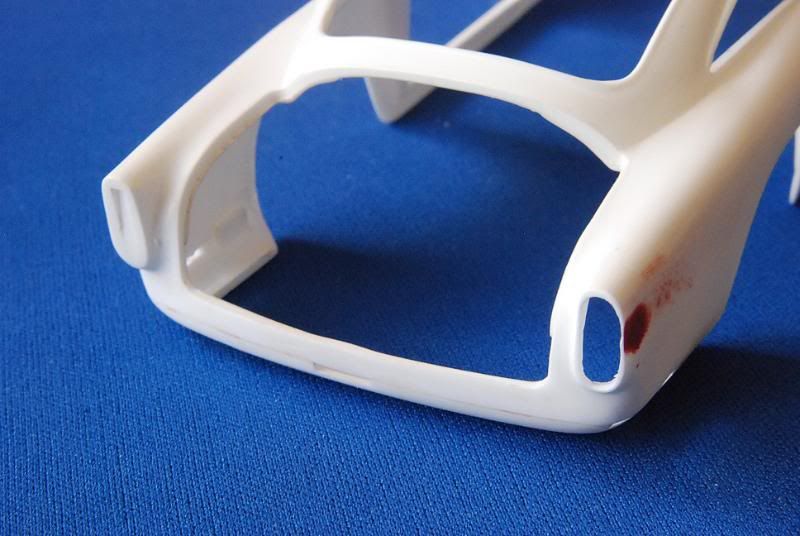 You guys can see here the two versions, before(red arrow) and after(black arrow): 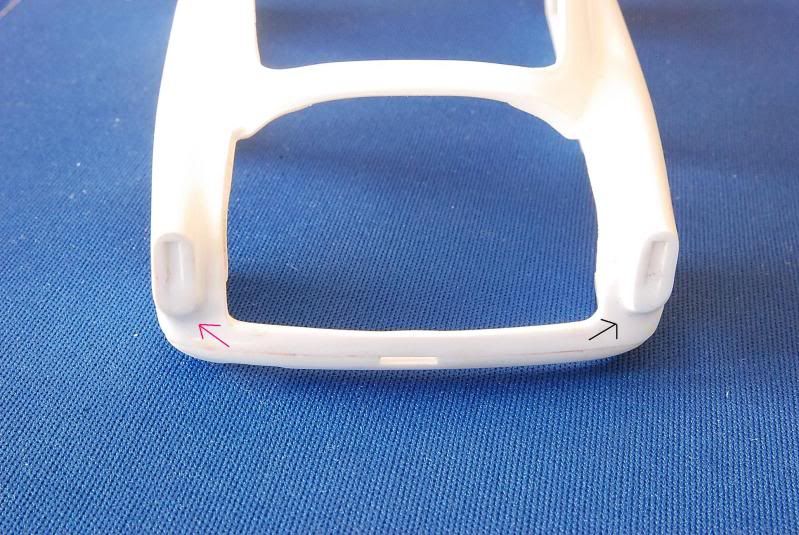 The transformation in detail: 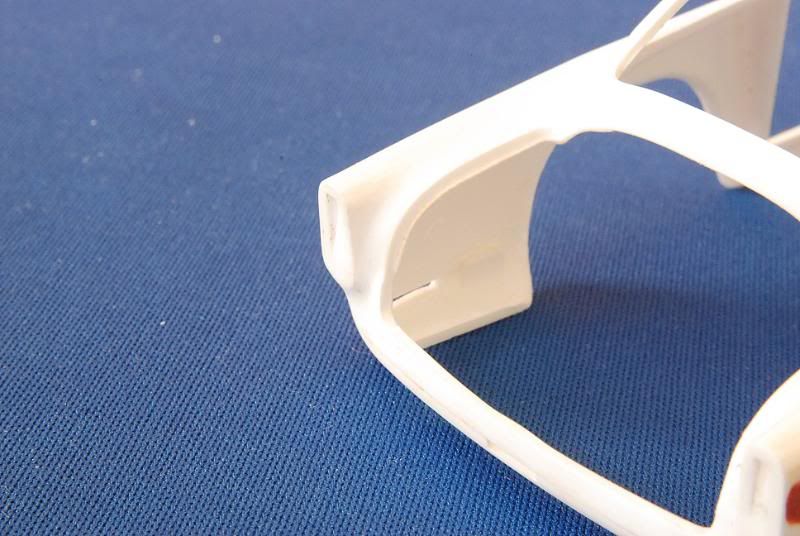 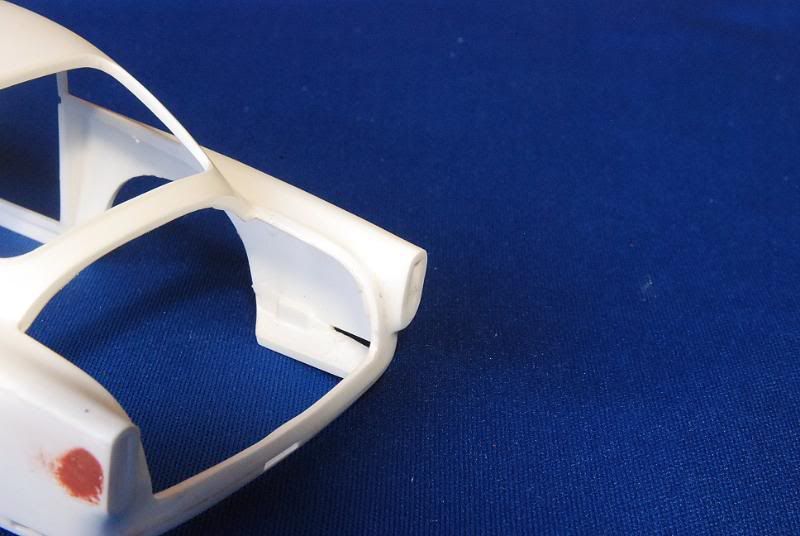 Besides that correction, the model was designed to wear the lights cluster with the part over the bucket and as you guys saw in the picture, they come from behind. Both are already cleaned: 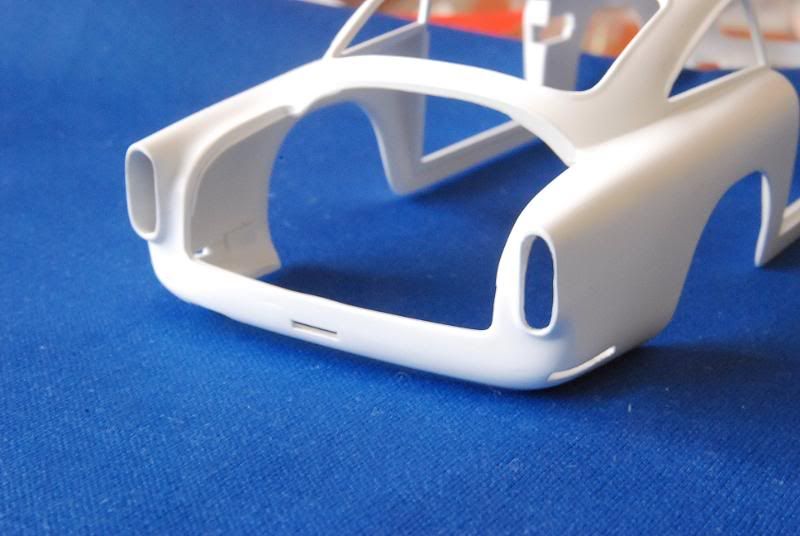 After some time, the body was primered with the white Gunze white primer as the final primer coat, now, we have a body with the true legendary Aston Martin lines… Sorry for this blurred picture: 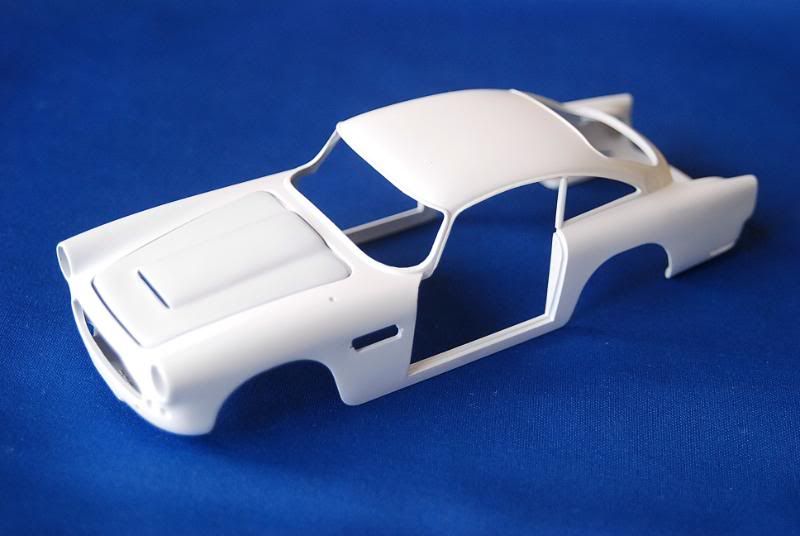 All the parts ready for paint: 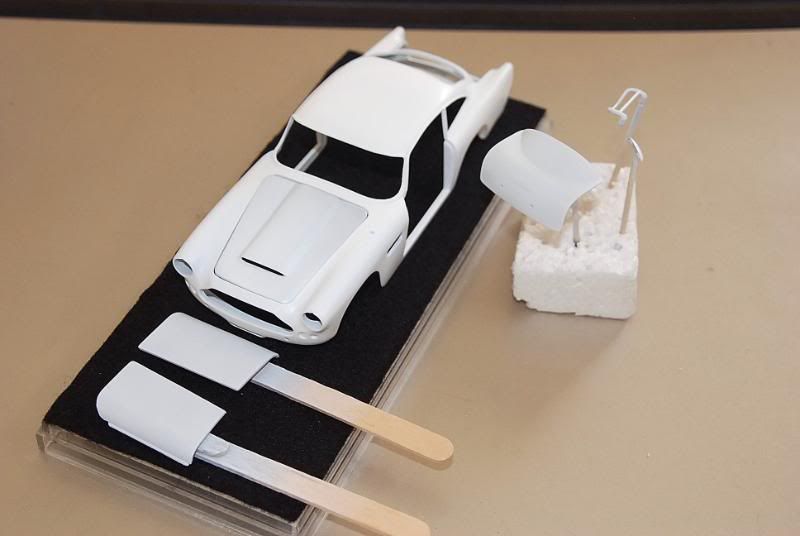 After this bodywork procedure, I had to deal with maybe the most tedious stage of this built…chose the body color!...It cost me lost of money and I even contacted Aston Martin Auk for this(thanks Dave Morton for the tip to get their help)in order to get the color codes, I mixed different kinds of paints, different ratios, etc,etc,etc,etc…. After spend some time on the internet looking for colors, there was a color that gained my attention, this light blue, named in some sites as Caribbean Pearl Blue Metallic: This is the color: (Here, the sun makes it look like a metallic blue) Another variation: Finally, this one gave me the idea of what I wanted: 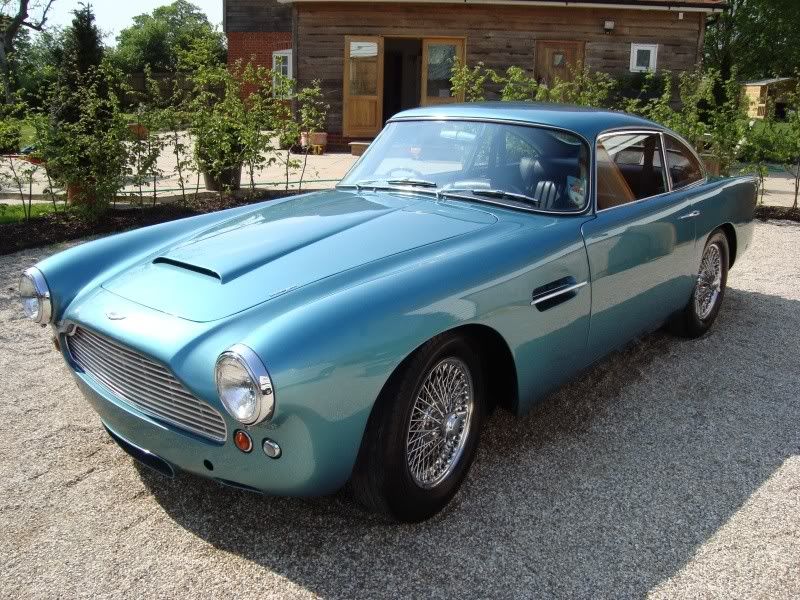 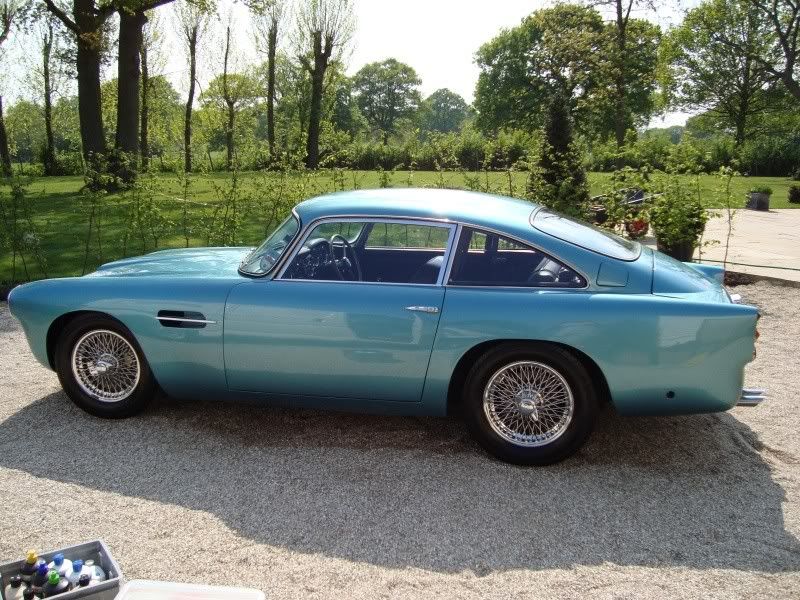 This army of colors would help me to get the desired final shade, among them I had some tamiya Lacquers, Duplicolor spray, nail polish, powders, PPG, R&M and Dupont paints: 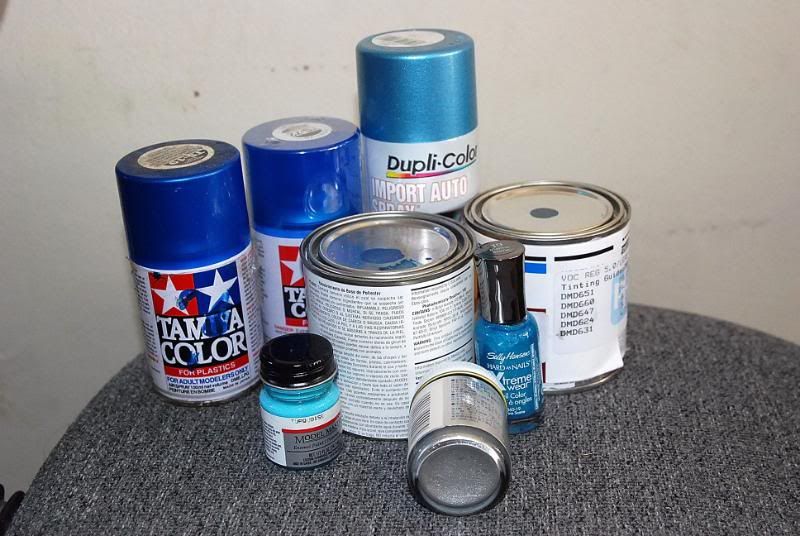 I used this spoon with three different bases to see if I can get what I was looking for. On it, I shooted silver, light gray and white primers: 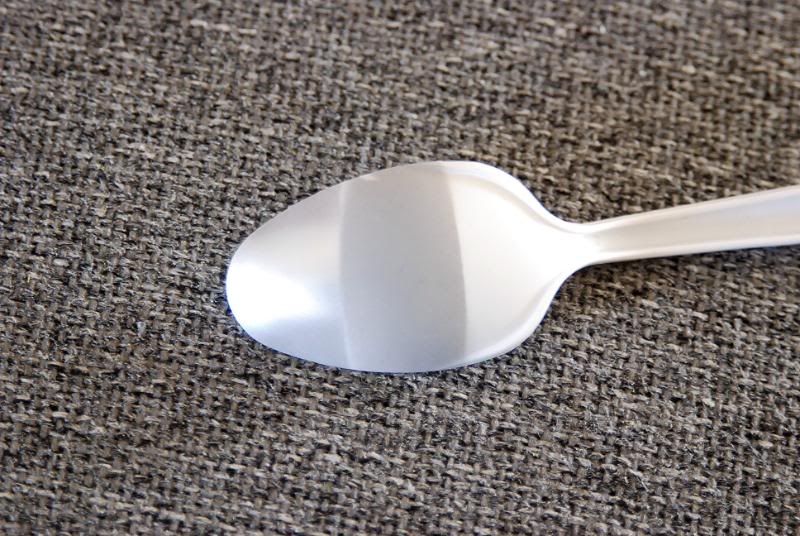 After so much color experimentation, finally I got some paint on the model. I chose the Duplicolor Metallic Light Blue(for some reason I couldn’t get the same shade decanting it and shooting it through the airbrush) and give it an Aqua pearl blue with a nail polish. I started on the spots where the paint could been sanded away at polishing stage in order to compensate the amount the flatter panels will receive later: 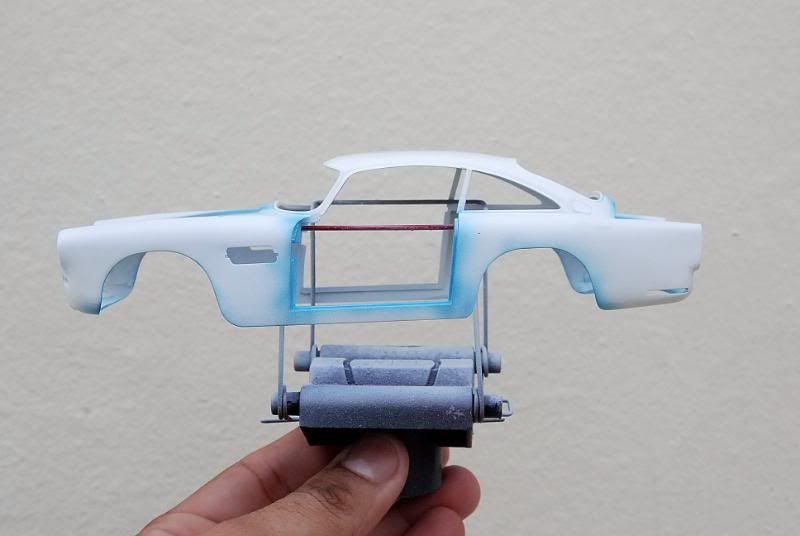 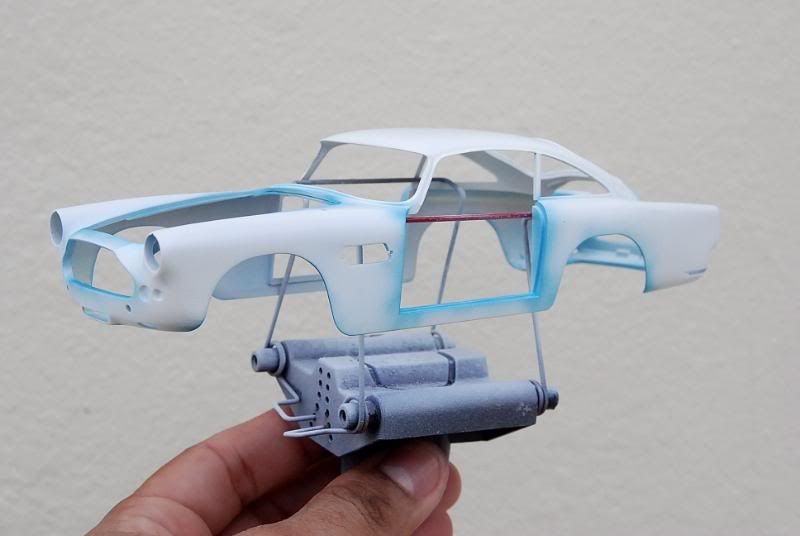 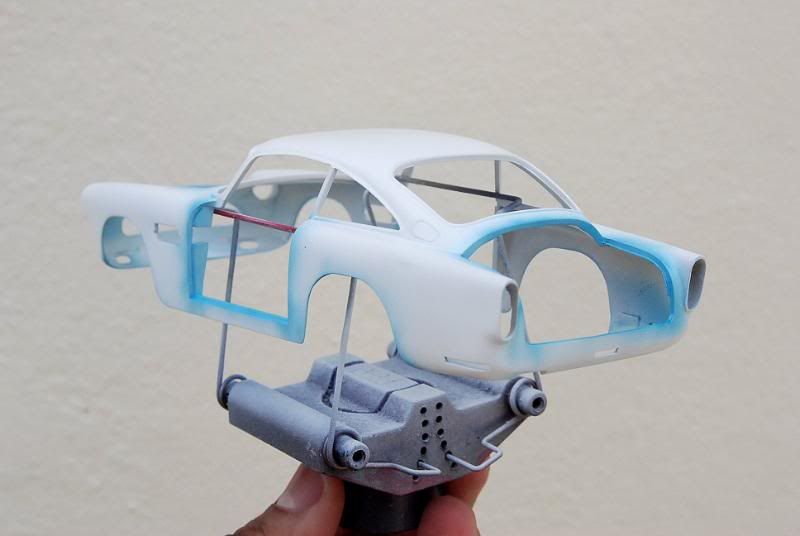 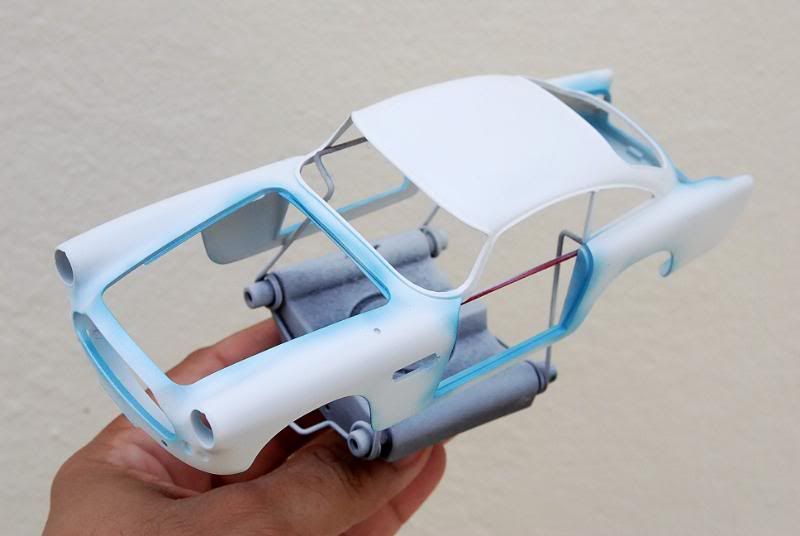 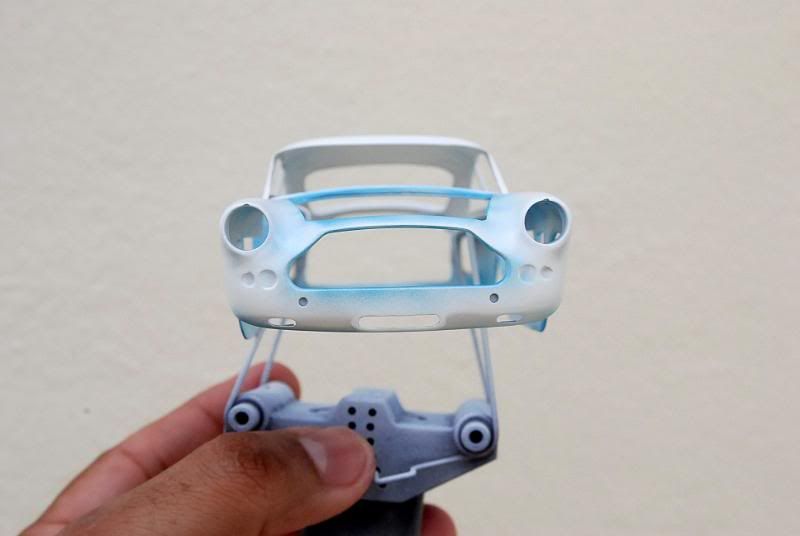 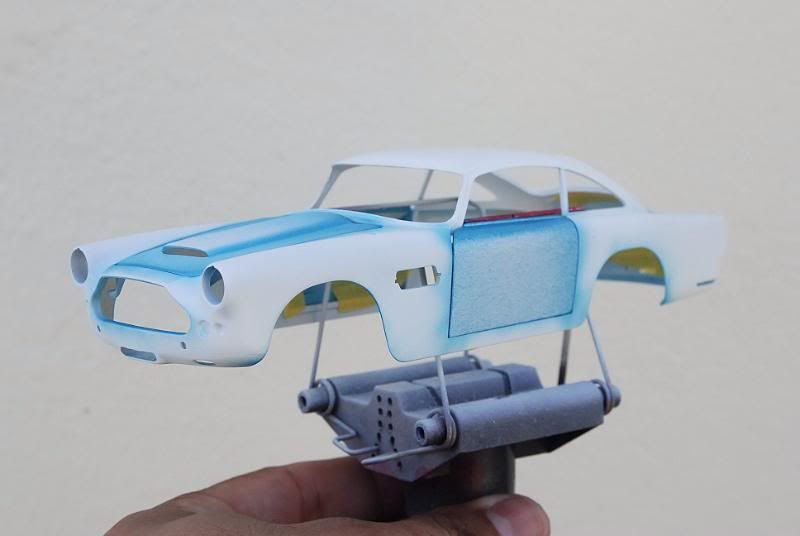 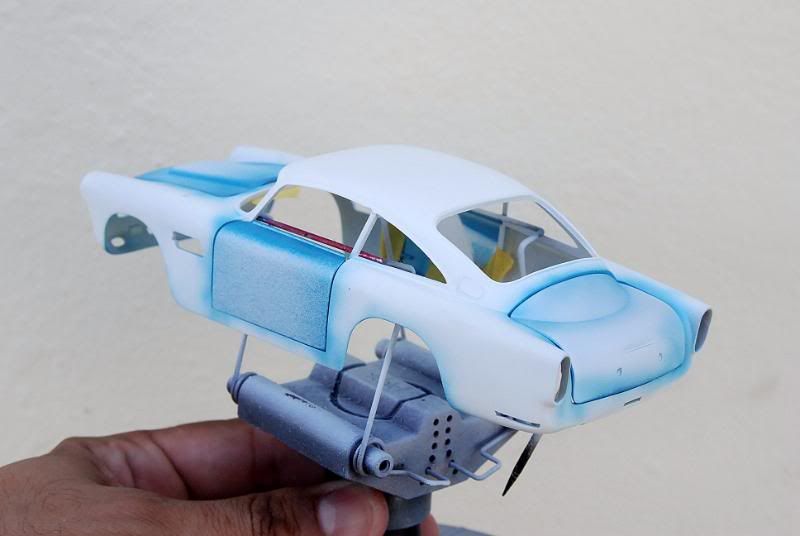 As you guys can see in this workshop picture, is the same shade I started to get: 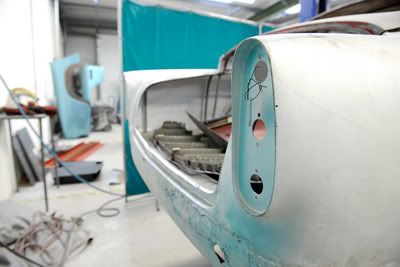 Doors, hood, and trunk received its misty coats: I was lucky enough to get dustless, flawless Duplicolor Light blue coat: 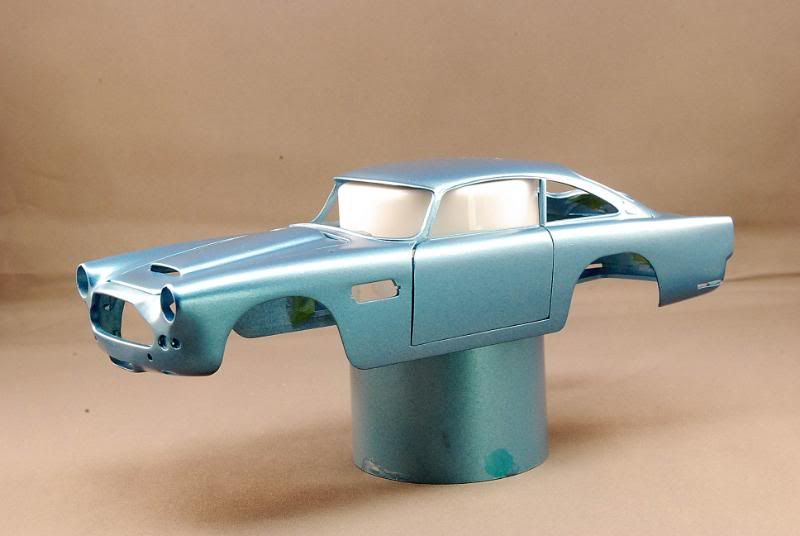 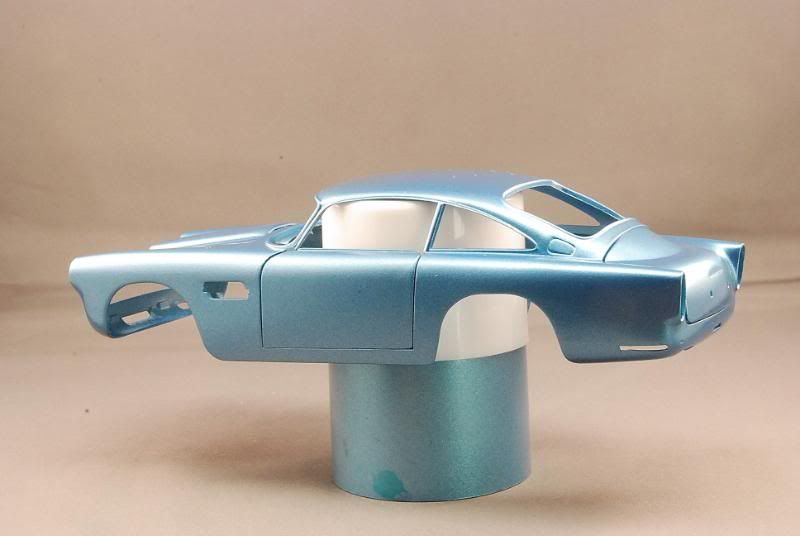 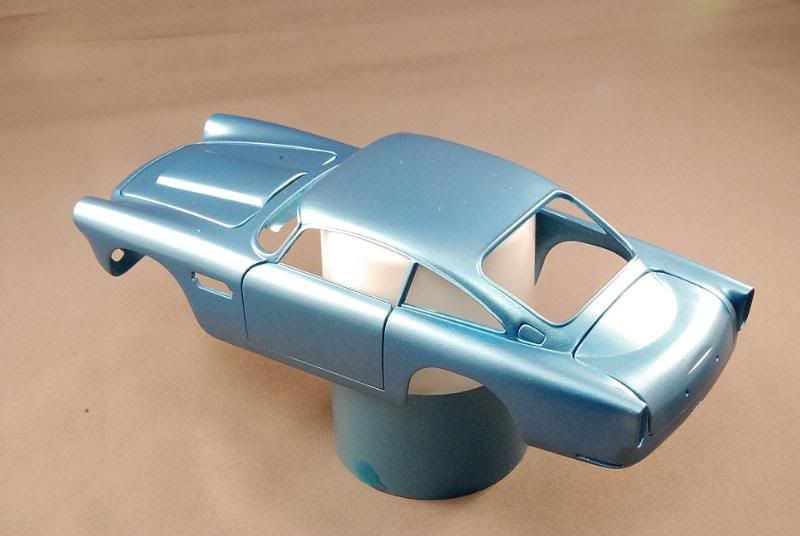 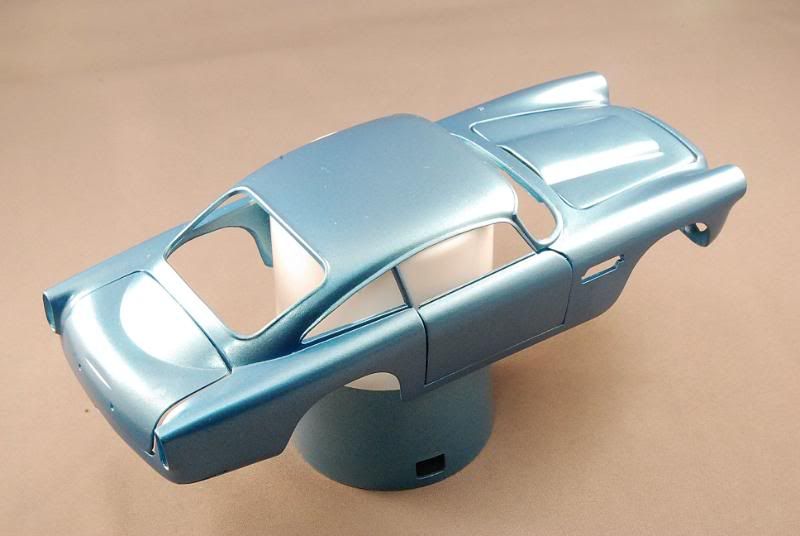 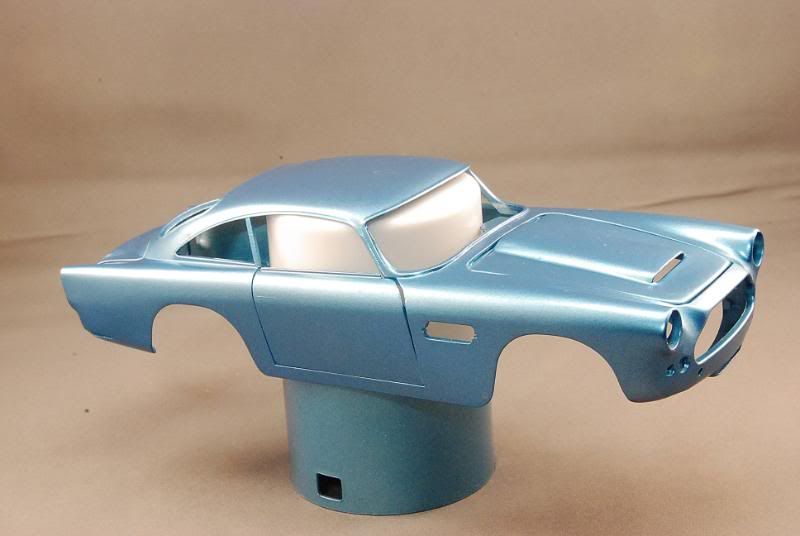 The Aqua Pearl Blue enters in action: 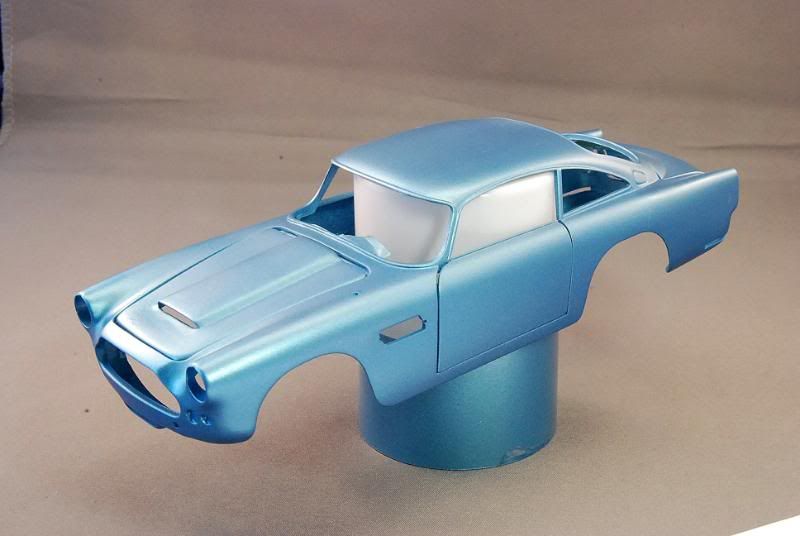 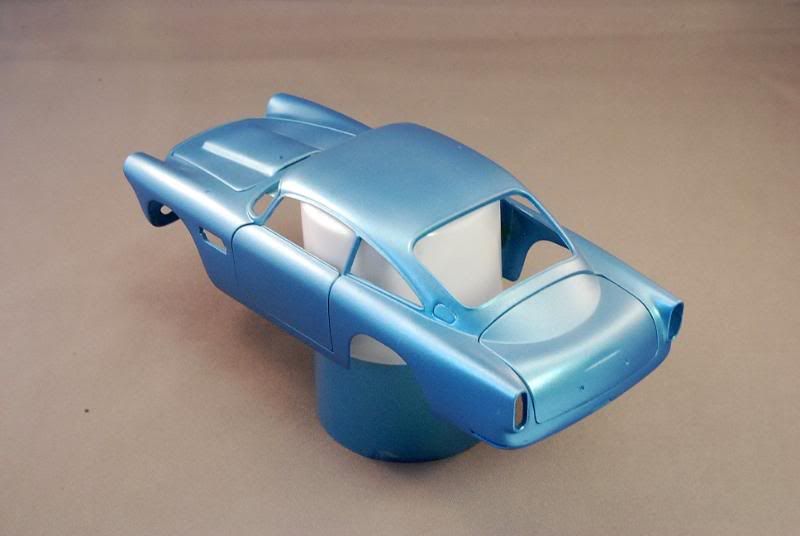 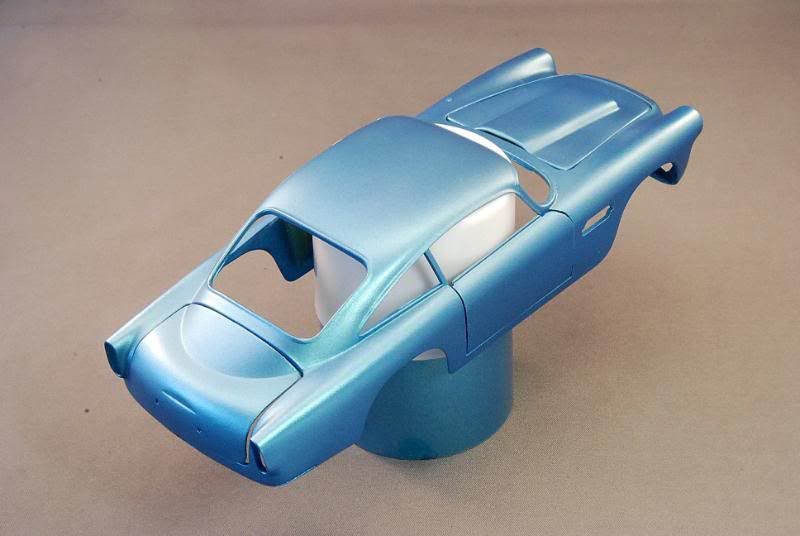 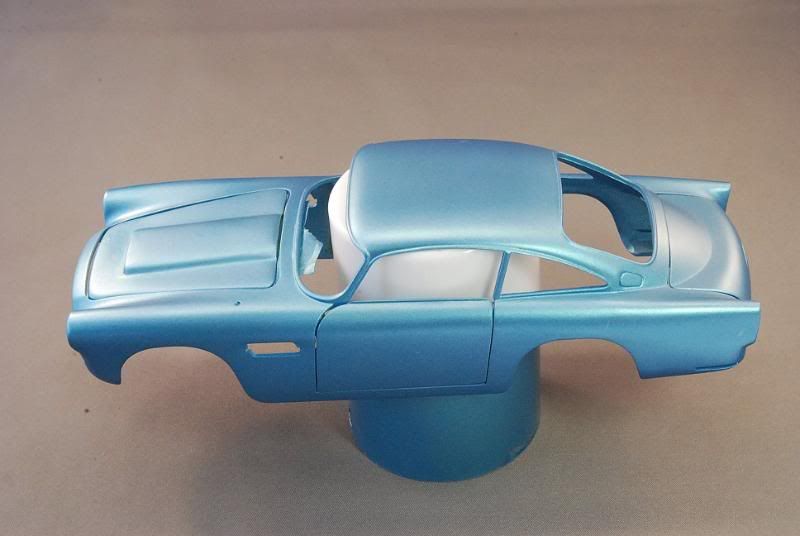 Then I topped everything with Finisher’s GP-1 Urethane Clear and easily could polish it with the same Finisher’s three steps compound system: 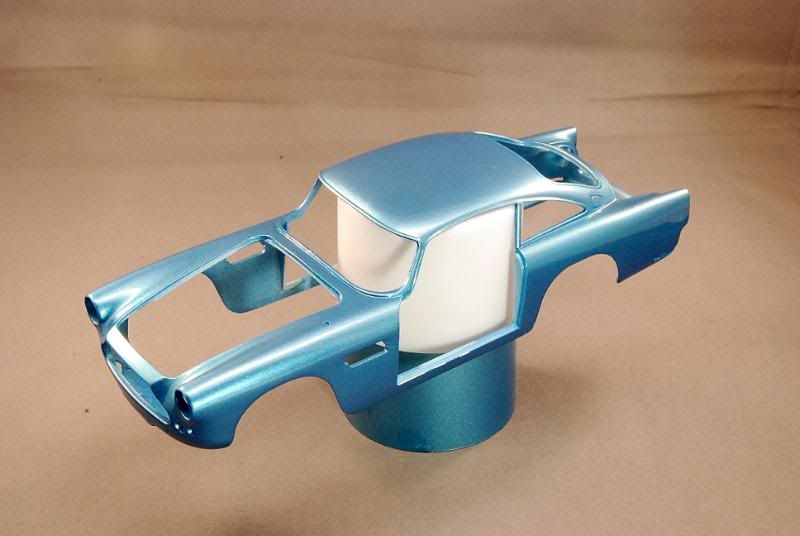 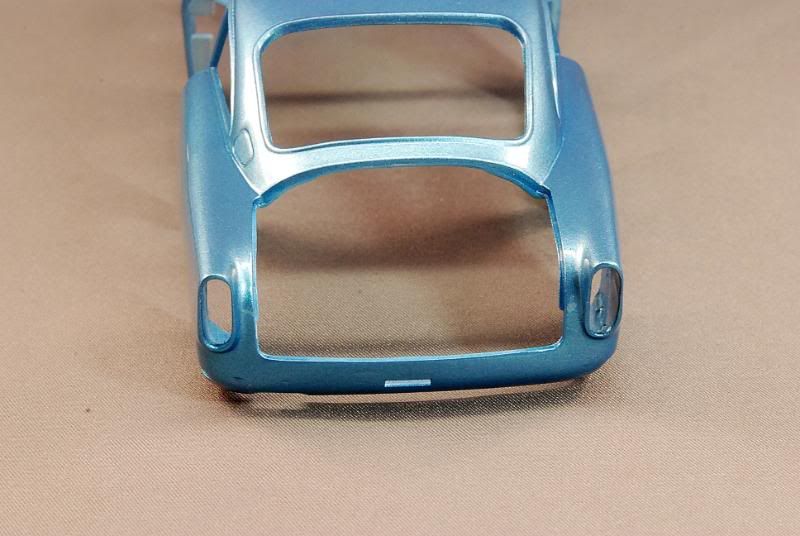 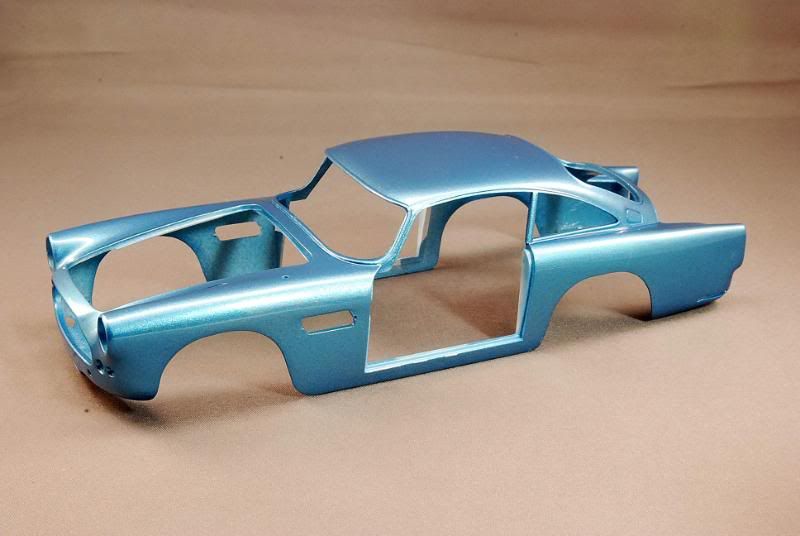 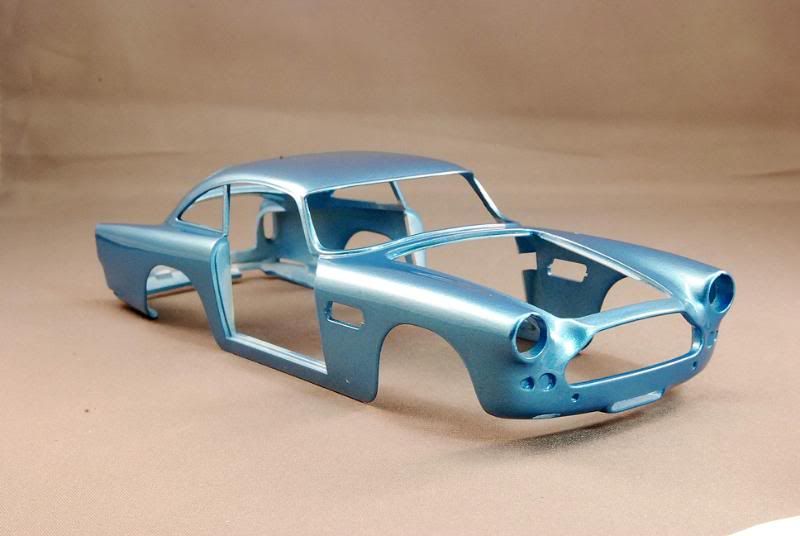 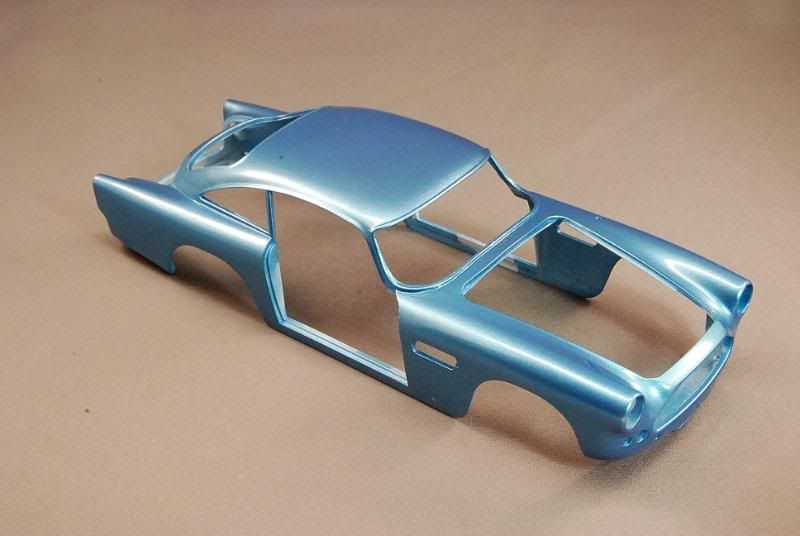 A close up of I got without too much effort: 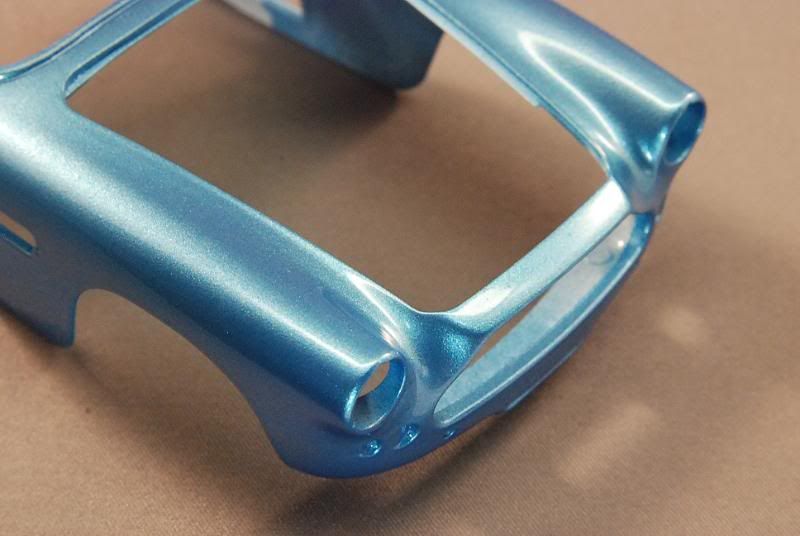 Light reflection test: 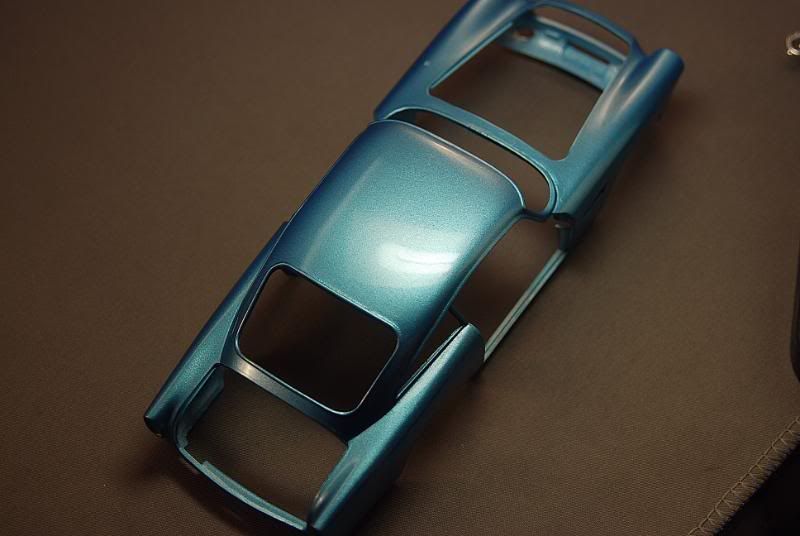 After the painting section, I started the add-ons to the body. First thing was the light bezels. At very early stage of this build I decided to used the one that comes with the kit, but, I had to scrap some plastic from the bucket in order to get a flusher headlight, because, if not, I would ending with a gold fish like look! 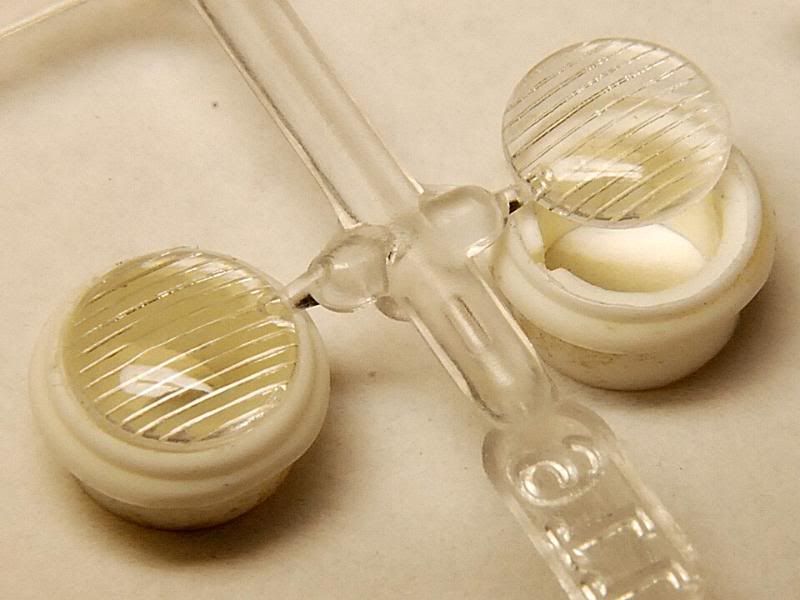 Then I send them along with bumpers to Chrome Tech USA for chroming and by the time I received them everything was OK, until looking around on the internet for some more details I discovered a part from Sakatsu that blew off my head. I got this Sakatsu turned aluminum headlights that even come with a part that doubles as the light bulb.  In order to complete this part, when I place the order to Hapico, Motoi told me that the Modeler’s Lens kit will the right one to complete the Sakatsu part. Then I discovered something even more real. As you guys can see in this picture of the real car, the front headlight beam has a Y shape engraving on the glass: 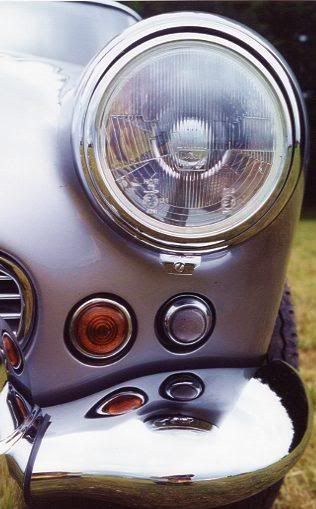 For my surprise, the modeler’s lens kit comes with one that has the same engraving on and for my luck, it’s the same size that the Aston model wears: The kit’s clear parts tree and the Modeler’s lens kit: 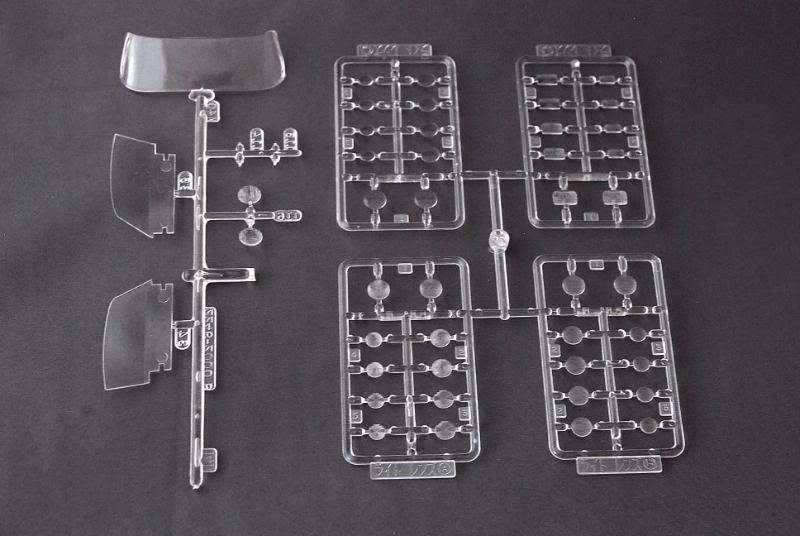 At the left, the Moldeler’s lens, at the right, the kit’s lens:  Even with the new chroming on the altered part, there’s no chance for the plastic part over the turned aluminum one: 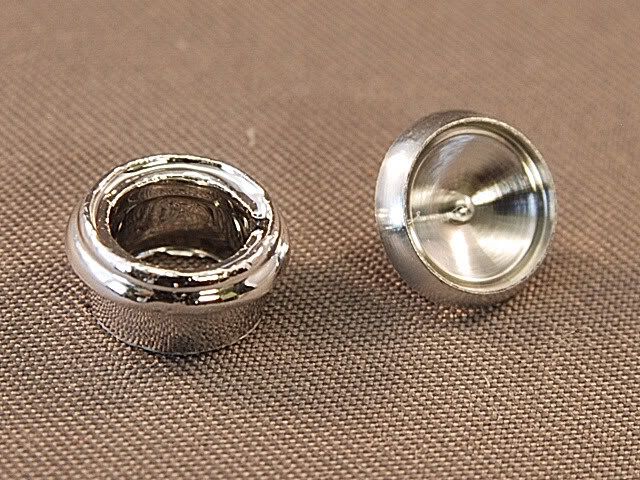 I accented it even more giving it a polishing session with Blue Magic metal polishing cream and my Dremel. At the left the already polished part, to the right, the unpolished part:  Here, pictures of the finished part: 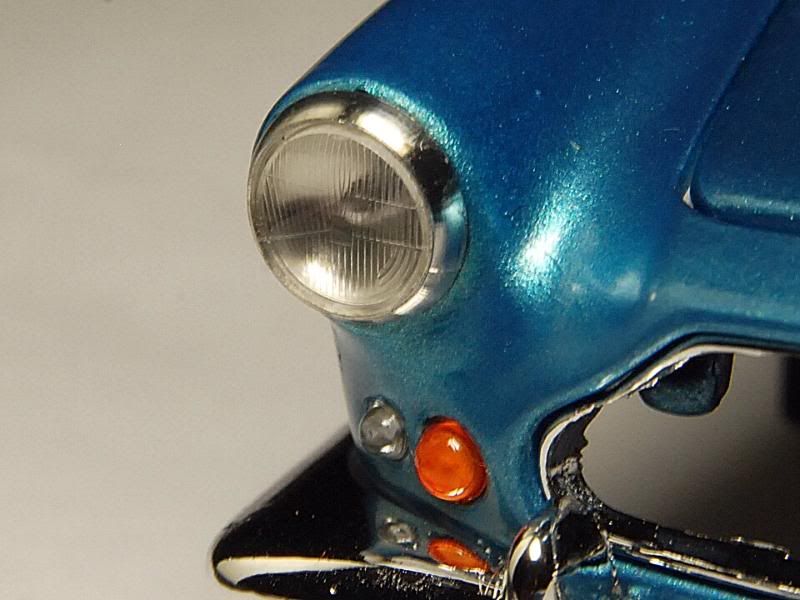 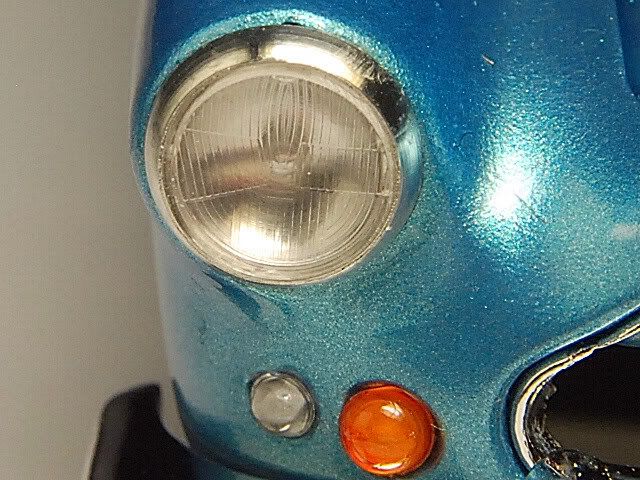 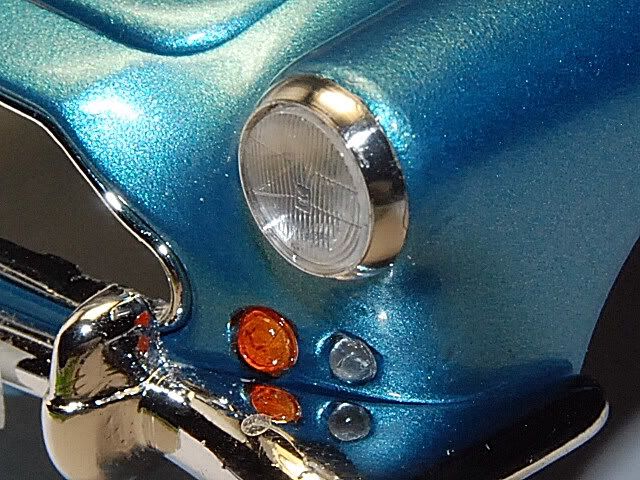 To be continued……..
|
|
#21
07-29-2010, 07:21 AM
|
||||
|
||||
|
Re: Aston Martin DB4-1/25 Revell Monogram...a detailed story!
outstanding dude
|
|
#22
07-29-2010, 01:04 PM
|
|||
|
|||
|
Re: Aston Martin DB4-1/25 Revell Monogram...a detailed story!
Just awesome! Is that an original factory Aston colour, then? It just looks rather brighter and SoCal or "Riviera" than I'd have expected from an early-sixties Brit classic...
Don't get me wrong - I think it looks great, and the pictures clearly show that there ARE cars that colour, I'm just wondering whether they ever emerged from the factory that colour... Keep up the great work, Simon, it's inspiring me for my Maserati (as are Skip's references!) best regards, M.
|
|
#23
07-29-2010, 02:16 PM
|
|||
|
|||
|
Re: Aston Martin DB4-1/25 Revell Monogram...a detailed story!
Hi Matt, about the color, you're right, I don't know what happened that in these pictures it turned out a little bit more metallic than the classic colors, but, in person it looks real close to the color I had seen on the internet. The same thing happened to me, your great DB5 build and the goodies you sent me for the decaling, alsi, inspired me to work with this one. Actually, I have an out of production real old MPC DB6 kit on line to work with aswell.
Best Regards Simón \ Quote:
|
|
#24
07-29-2010, 02:32 PM
|
||||
|
||||
|
Re: Aston Martin DB4-1/25 Revell Monogram...a detailed story!
I can only say a coupke of things, Awsome awsome asome awsome awsome and AWSOME!
__________________
Check out my Youtube Channel for Video's of my builds and some tips and tricks http://www.youtube.com/user/xrcflash https://www.facebook.com/thescalemodelingchannel My online webshop www.thescalemodeler.com
|
|
#25
07-30-2010, 01:17 PM
|
|||
|
|||
|
Re: Aston Martin DB4-1/25 Revell Monogram...a detailed story!
Incredible!!!!
Amazing!!! I was wondered with you passion with your build!!! Thanks for share us!!! Cesar Bossolani
__________________
http://s122.photobucket.com/albums/o278/bossolani http://www.youtube.com/user/cbossolani 
|
|
#26
07-30-2010, 08:51 PM
|
||||
|
||||
|
Re: Aston Martin DB4-1/25 Revell Monogram...a detailed story!
You said it was a while for the update - It was definately worth the what, INCREDIBLE!
__________________
or 2010 QMHE Intermediate Silver - Mini Cooper S 2010 QMHE Intermediate Bronze - 37' Delivery 2011 QMHE Intermediate Silver - Panzer Tank 2011 QMHE Imtermediate Bronze - McLaren M8B
|
|
#27
09-16-2011, 08:43 AM
|
||||
|
||||
|
Re: Aston Martin DB4-1/25 Revell Monogram...a detailed story!
wowowowowowowowow.
__________________
Jackson, blowing the competition away.  Check out the progress of my RS Skyline Super Silhouette
|
|
#30
09-17-2011, 07:06 PM
|
|||
|
|||
|
Re: Aston Martin DB4-1/25 Revell Monogram...a detailed story!
Thanks my friends...I have to tell you guys that I actually finished this project, took it to the GSL, but, never had the chance to make an update and post the finished pictures...let's see!
|
|
|
POST REPLY TO THIS THREAD |
 |
|
|