

|
| Search | Car Forums | Gallery | Articles | Helper | Air Dried Fresh Beef Dog Food | IgorSushko.com | Corporate |
|
|||||||
| WIP - Street Post topics for any "Works In Progress" street vehicles projects in this sub-forum. |
 |
 Show Printable Version | Show Printable Version |  Subscribe to this Thread
|
|
|
Thread Tools |
|
#16
 12-12-2009, 02:15 AM
|
||||
|
||||
|
Re: Anti-Pesto Van - quickie :)
I like your progress. The shading really helps on Wallace's clothing. I'm curious why you left Gromit's shoulder joint not filled in. This kit looks so much fun and in my eyes, worth buying even if just for the figures
 . I'm very interested to see if I can replicate your fantastic Alclad results myself as your lights came out looking perfect. Looking forward to more. . I'm very interested to see if I can replicate your fantastic Alclad results myself as your lights came out looking perfect. Looking forward to more.
__________________


|
|
#17
12-12-2009, 04:27 AM
|
||||
|
||||
|
Re: Anti-Pesto Van - quickie :)
Thanks guys
 Yes, I airbrushed the figures with Vallejo Air acrylics exclusively. Thinned with Vallejo thinner and a drop of Mr. Muscle  Quote:
To be honest the fit of the Gromit figure is pretty bad and by that time I was dog tired with it. It takes a lot of play to get the arms in the right position which I didn't  I should have pinned them IMO I should have pinned them IMO All in all, Gromit drove me barking mad! (all dog related puns intended )Small update. Large scale offers some interesting possibilities as well as challenges  While I was attaching the chrome parts, I put some BMF in the headlights for reflective purposes but when I test fitted the clear part, I couldn’t help feeling that the van looked like Grasshopper’s master form Kung Fu (remember that? LOL). 2 great, glaring empty spaces. I thought some light bulbs behind the glass might help. I simply cut off the stalks form 2 LEDs and flued them in place with 5-min epoxy 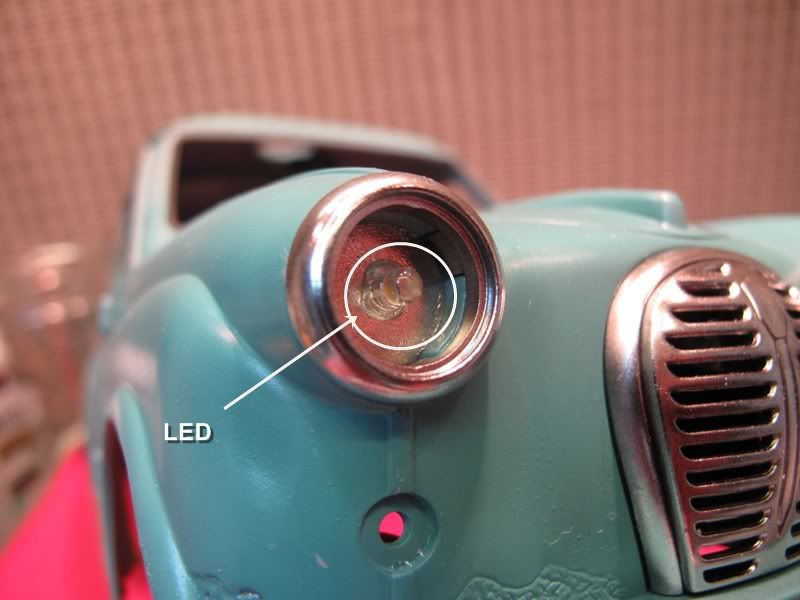 With the clear part in place, I think the effect looks quite cool 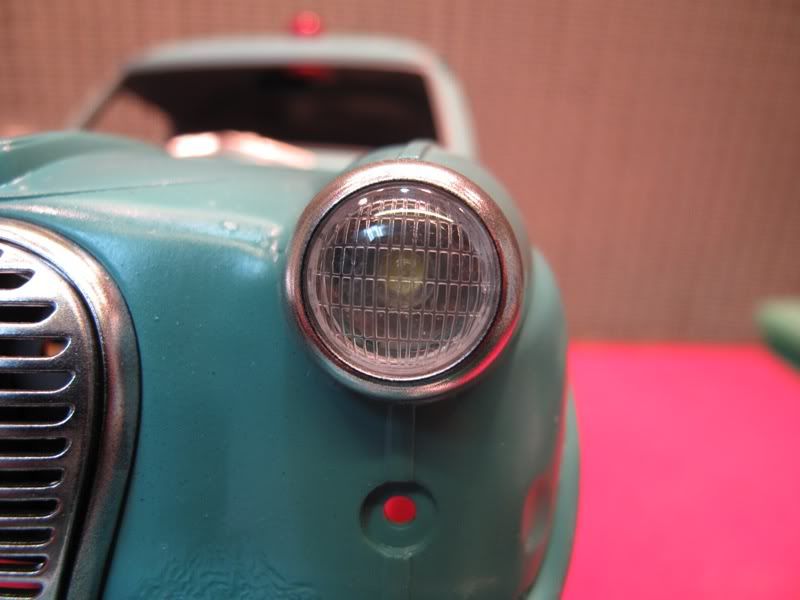 Same story with the roof light. The part is hollow and has no backing. You can see right through the light into the cabin!! I cut a circle of styrene, covered it with BMF and threaded an LED through it. 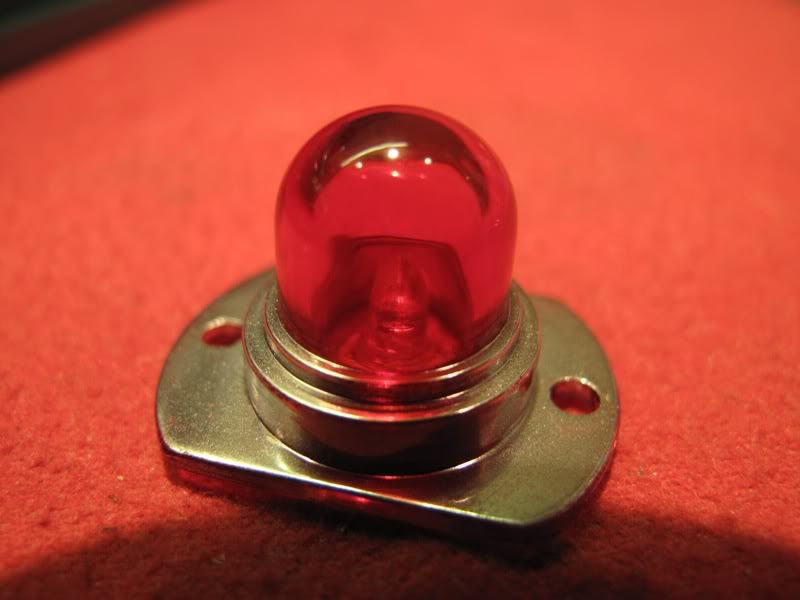 Also looks pretty cool in situ IMHO  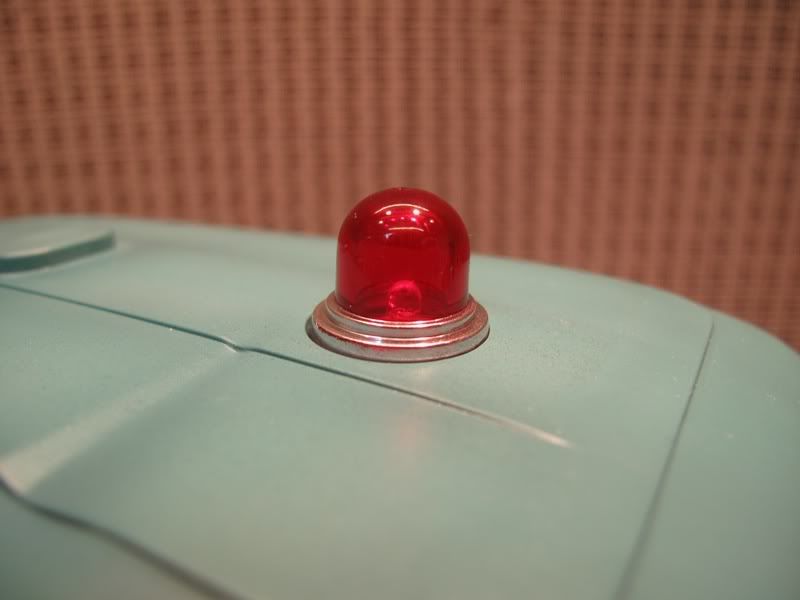 Status so far…. 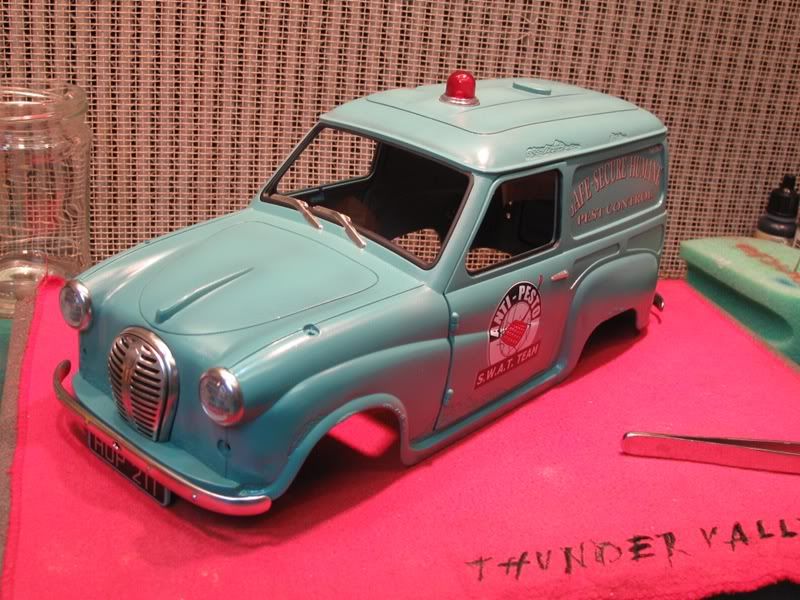 From the outset, there was on part missing from the Airfix kit that really pi$$ed me off – the Austin logo shown on the hood of the box art. Down to copyright I imagine. (BTW the box art is of the original car – not the Airfix kit  ) )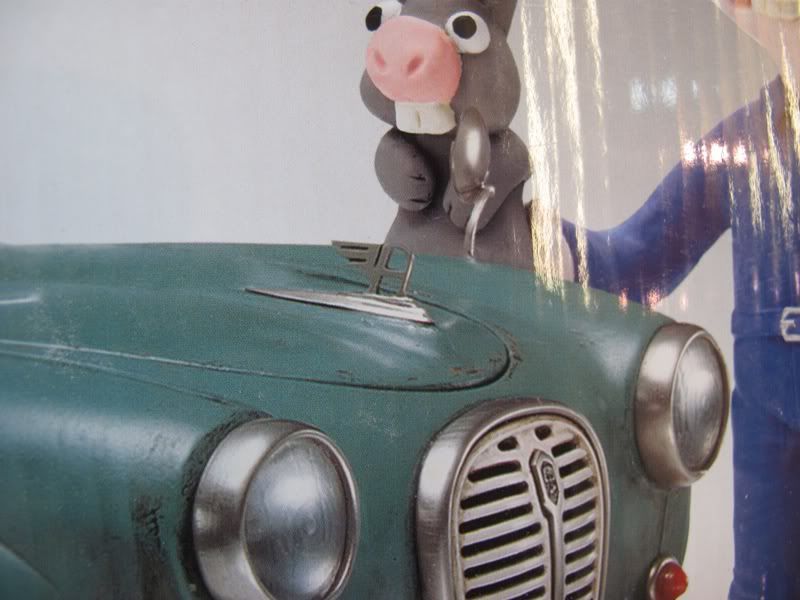 I wasn’t going to do anything about this because I thought that p/e was the only credible solution. However, this morning I decide to have some more fun. I drew the logo freehand onto a piece of styrene, cut it out and then painted it with Alclad. 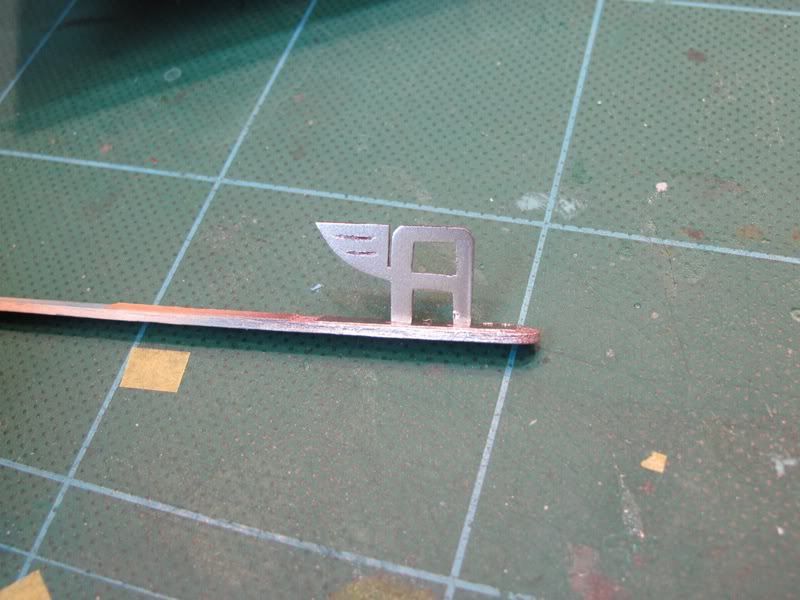 Blue tack-ed in place. It is vaaaaaaaaaaaaaastly out of scale but I don’t think I want to play with this forever trying to cut a smaller one by hand - anyway, this is a cartoon car and exaggeration is just fine in my book hehe! 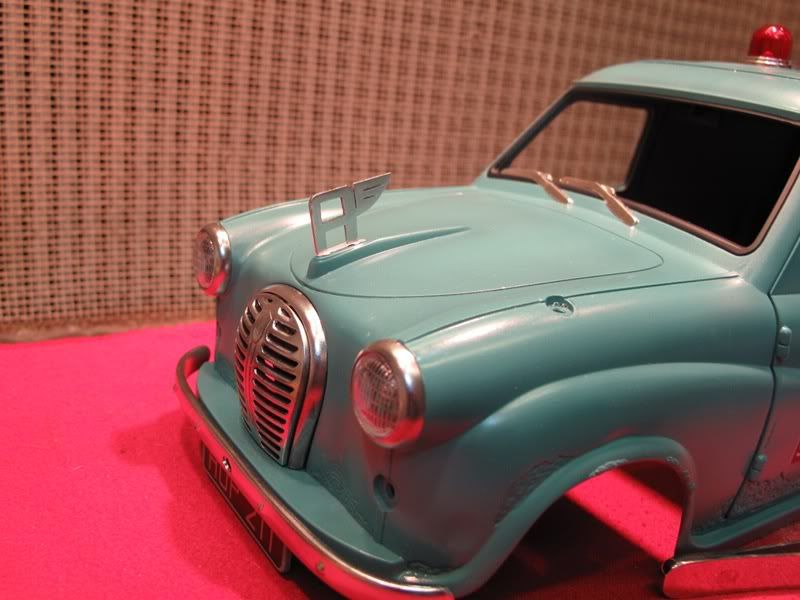 See ya !
__________________
Guideline for happy modeling: Practice on scrap. Always try something new. Less is more. "I have a plan so cunning, you could put a tail on it and call it a weasel" - Edmund Blackadder
|
|
#18
12-12-2009, 06:37 AM
|
||||
|
||||
|
Re: Anti-Pesto Van - quickie :)
A buddy bugged me about me leaving the "Flying A" like that - and he was right.
I made a new one more in scale 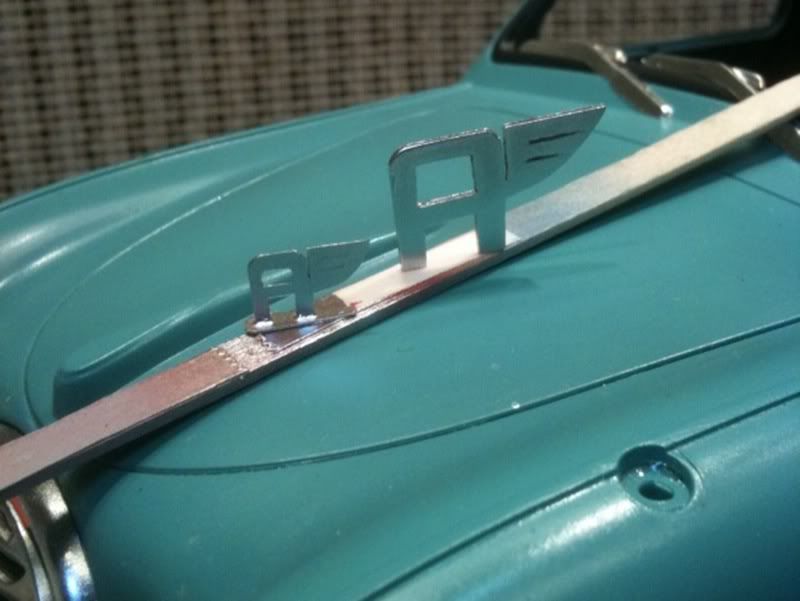
__________________
Guideline for happy modeling: Practice on scrap. Always try something new. Less is more. "I have a plan so cunning, you could put a tail on it and call it a weasel" - Edmund Blackadder
|
|
#22
12-14-2009, 10:59 AM
|
||||
|
||||
|
Re: Anti-Pesto Van - quickie :)
When i read "Anti-Pesto-Van" it was obvious to me, it would be a wip of yours, Steven.
 Nice progress so far. I agree, the smaller "A" is much better.
__________________
Julian
|
|
#23
12-15-2009, 03:02 PM
|
||||
|
||||
|
Re: Anti-Pesto Van - quickie :)
Thanks guys
Quote:
I just realised that I ended up last year with a couple of fun builds as well. It's a good way to end the year by letting off some steam Nearly done now. Not too happy with the weathering Airfix have really gone overboard with the moulded in rust patches and it all looks a bit OTT to my eye. Still having a ball though and I am not treating this one too seriously 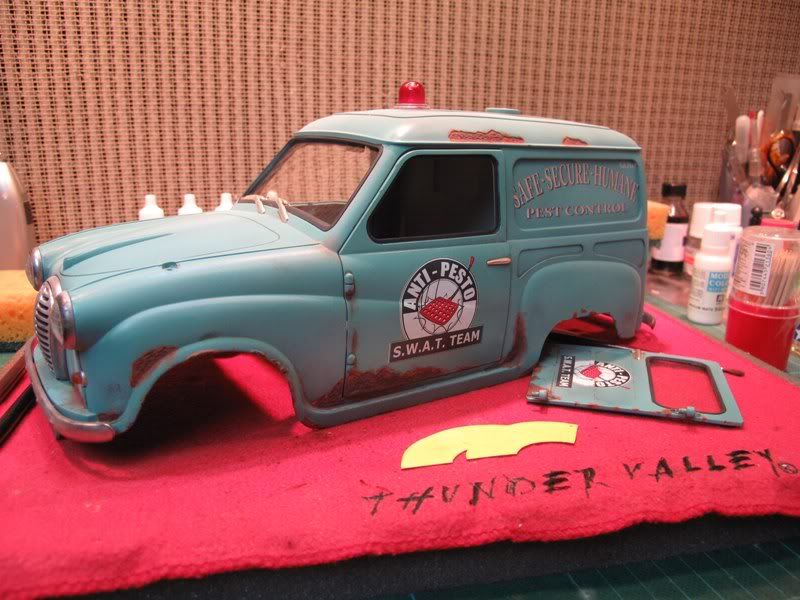 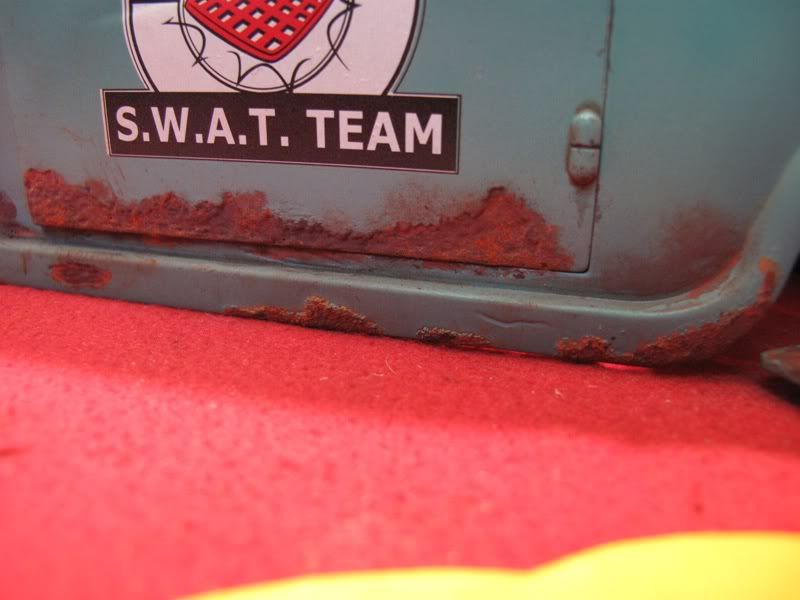 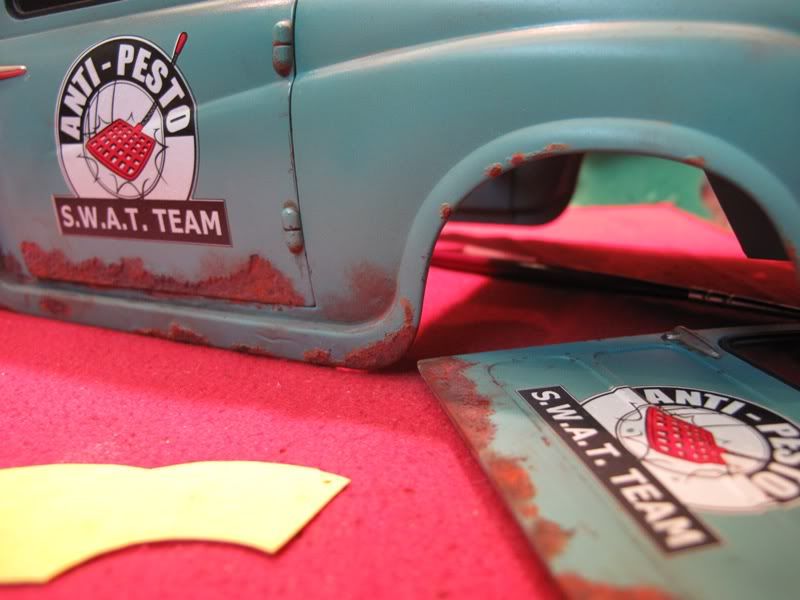 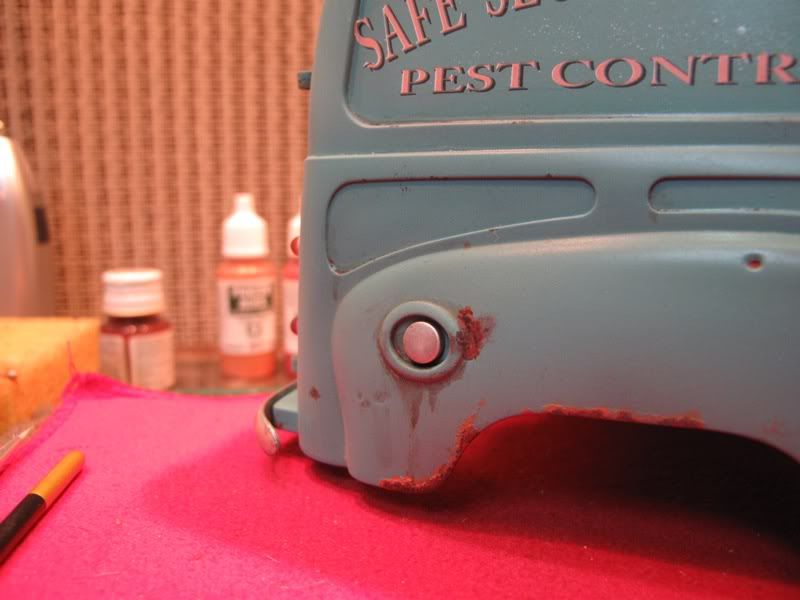 To try and distract from the overdone weathering, I thought I'd try making a simple setting to take the focus of the eye off the car and give some context to the figures. First job was to cut out a piece of styrodure and attach some balsa strips around the edges. 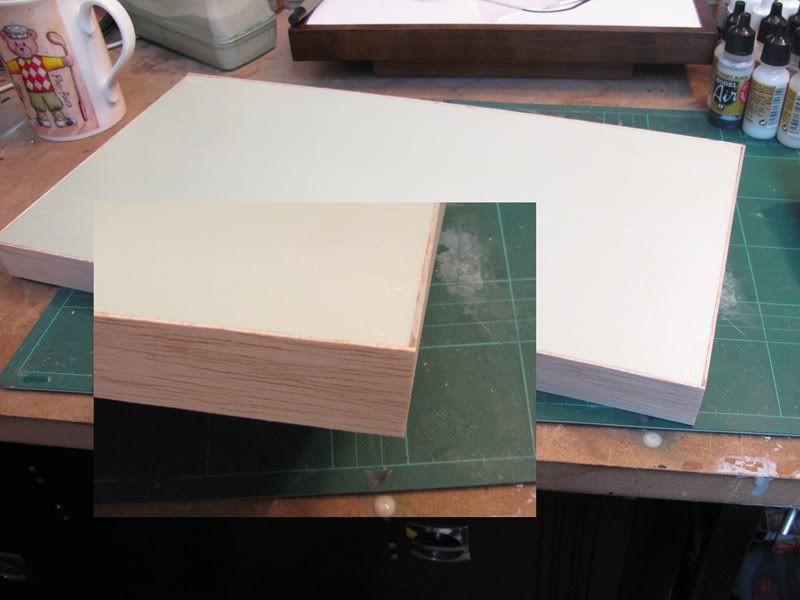 The balsa was dyed, varnished and sealed behind masking tape and then I planned out the basic layout 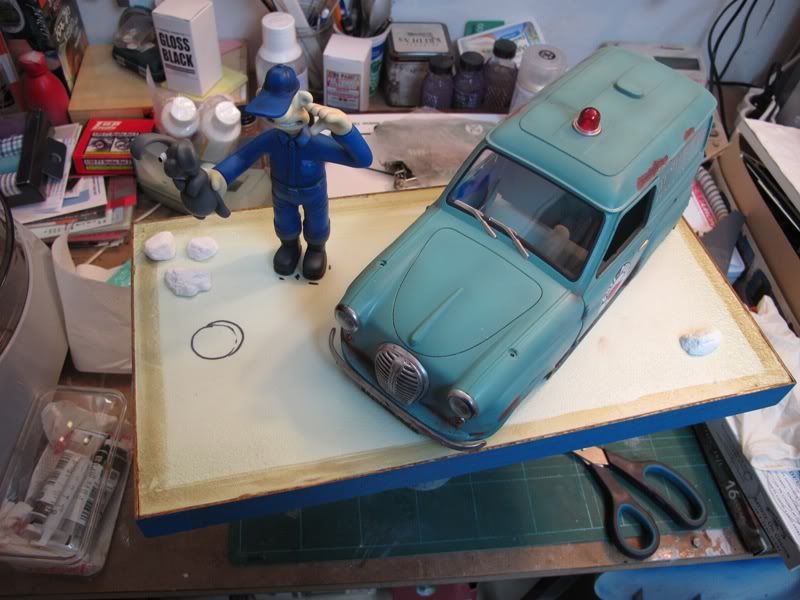 The base was then primered and mottled with various "earthy" colors (browns and greens )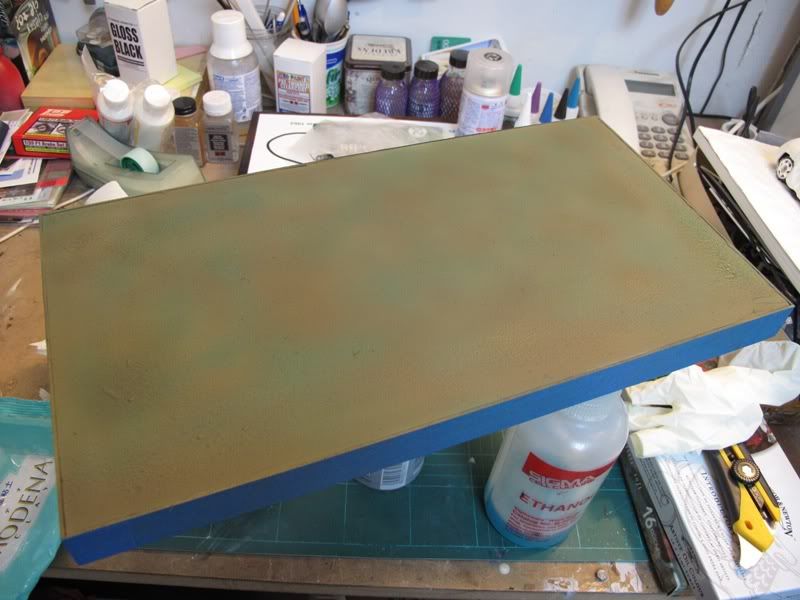 Made a detail with some modelling clay. This is great stuff BTW - very light, dries well in 12 hours and keeps forever when sealed in food cling film 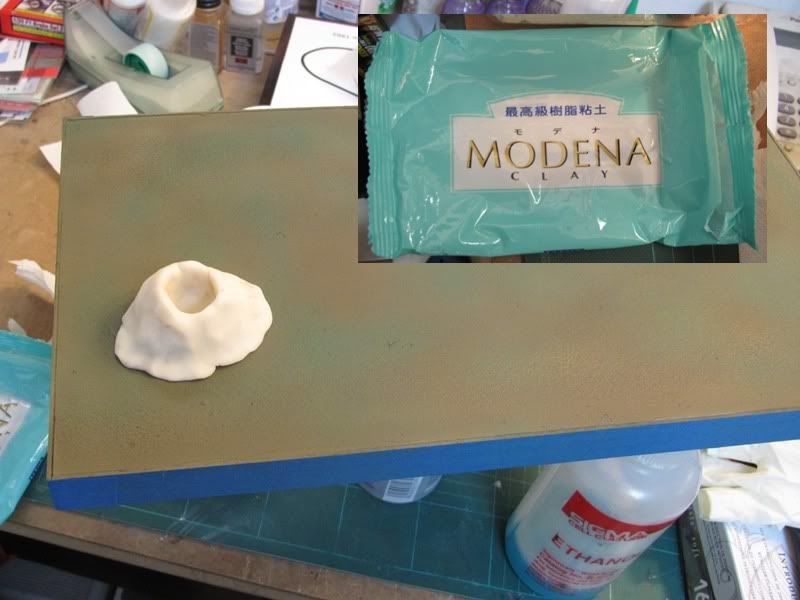 Plaster rocks were painted and the base covered with static grass 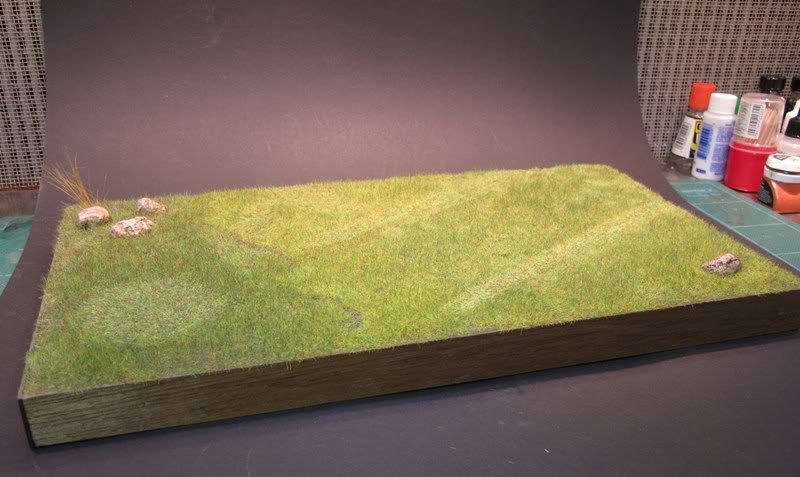 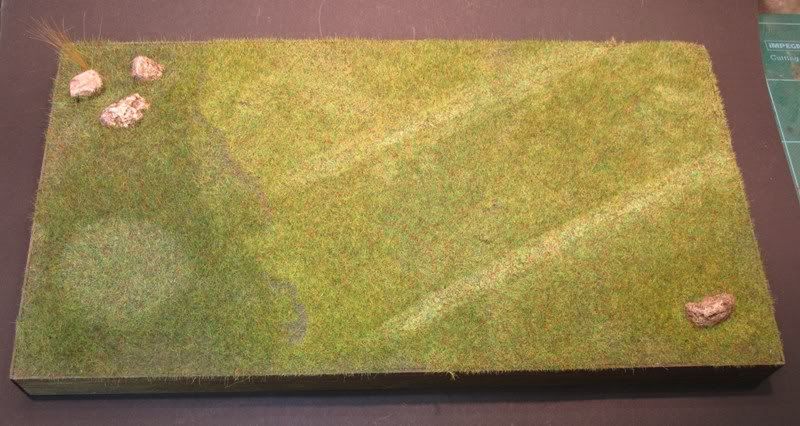 Rabbit hole was painted. Wallace is supposed to have just caught this were-rabbit hehe 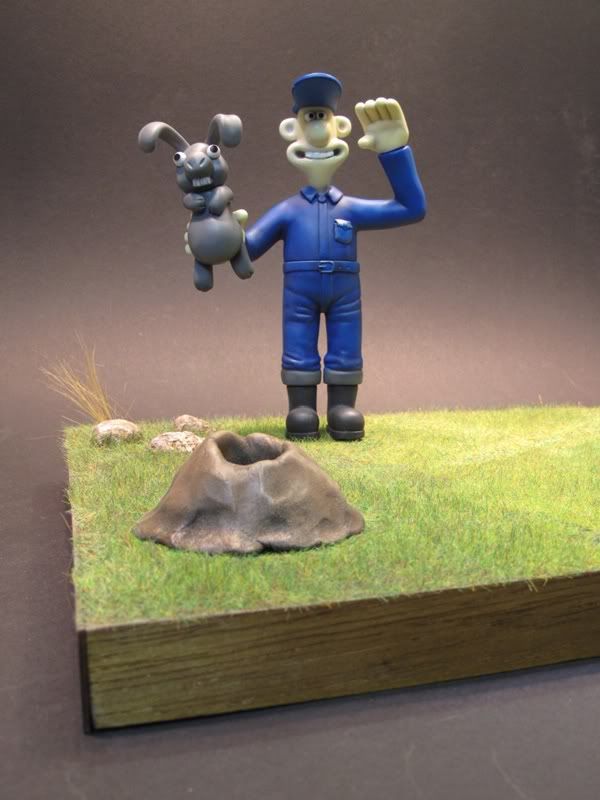 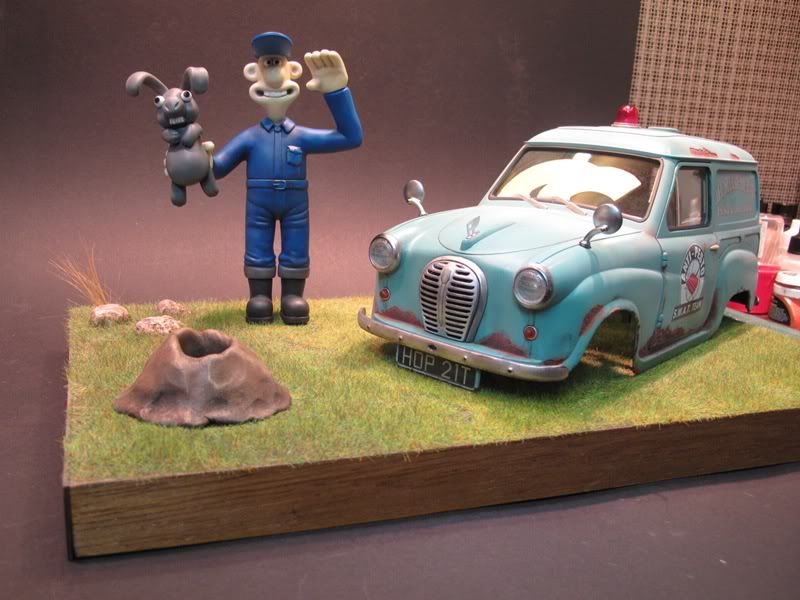 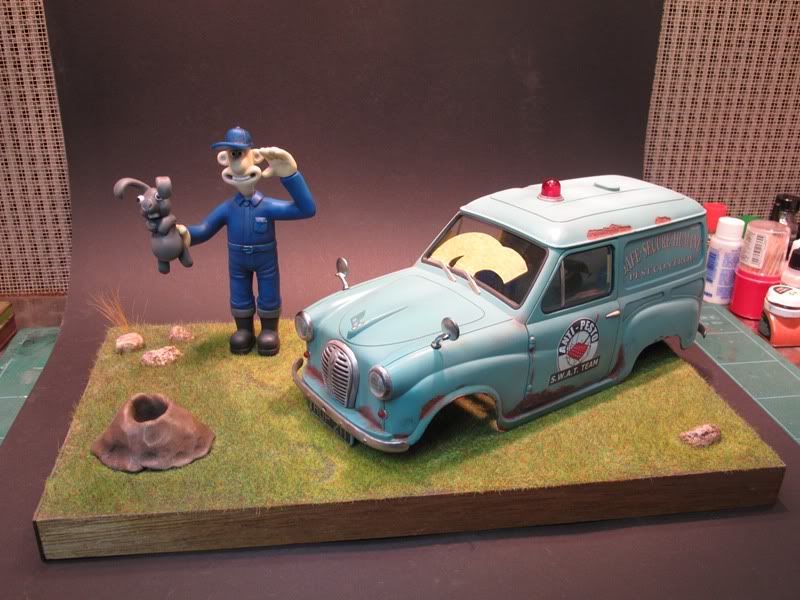 Here's a shot for you scale nutters - lot's of 1/1 clutter for size reference 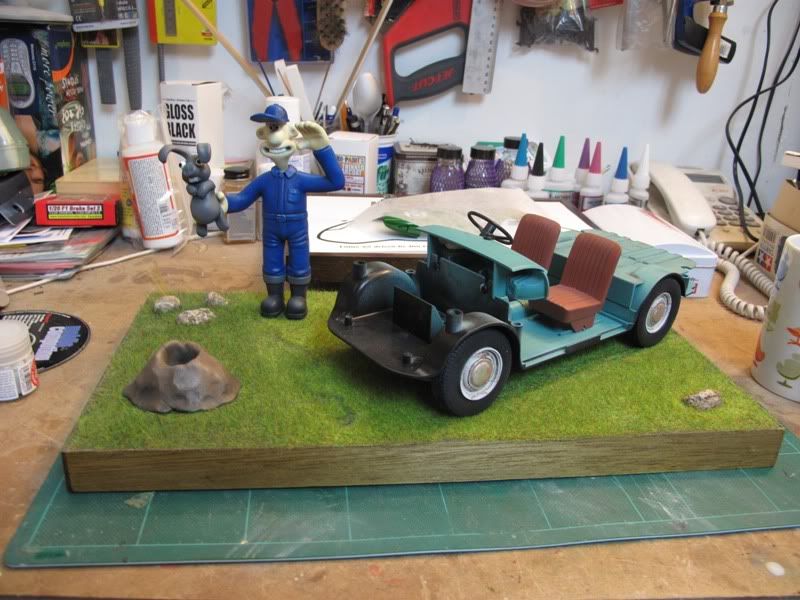 Just need to do some final weathering and dusting touches and it will be finished I think. Thanks for looking in
__________________
Guideline for happy modeling: Practice on scrap. Always try something new. Less is more. "I have a plan so cunning, you could put a tail on it and call it a weasel" - Edmund Blackadder
|
|
#24
12-15-2009, 03:24 PM
|
||||
|
||||
|
Re: Anti-Pesto Van - quickie :)
Haha that's so cool! I'm wondering how you achieved the tyre marks and apparent depth to the grass despite starting off on a flat surface. With such a large base I would have loved to see the light on the roof actually flashing with an LED. Also I like how in the first photo, it's sitting on a cloth with "Thunder Valley" on it
. Rust looks fine to me.
__________________
|
|
#25
12-15-2009, 03:52 PM
|
||||
|
||||
|
Re: Anti-Pesto Van - quickie :)
Quote:
 (and then stippled it down with a 50/50 white glue solution and a stiff bristle brush ) (and then stippled it down with a 50/50 white glue solution and a stiff bristle brush )The static grass looks deep because it IS deep LOL It is a custom mix of 3,4 and 6mm static grass applied with one of these home-made static electricity applicators which makes it stand up straight and tall. Working LED is out I am afraid. I don't understand electronics at all and could never get it to work
__________________
Guideline for happy modeling: Practice on scrap. Always try something new. Less is more. "I have a plan so cunning, you could put a tail on it and call it a weasel" - Edmund Blackadder
|
|
#27
12-16-2009, 01:10 AM
|
||||
|
||||
|
Re: Anti-Pesto Van - quickie :)
Quote:
Nice job so far, weathering look great
__________________
Micha       
|
|
#28
12-16-2009, 01:42 AM
|
||||
|
||||
|
Re: Anti-Pesto Van - quickie :)
Quote:
Robert
__________________
Recently finished Projects:
Porsche 911 Carrera RS 3.0 Current Projects: Ferrari 250 GTO LM 1962 (chassis #3387)  
|
|
#30
12-17-2009, 03:34 AM
|
||||
|
||||
|
Re: Anti-Pesto Van - quickie :)
Thanks guys.
Quote:
Quote:
__________________
Guideline for happy modeling: Practice on scrap. Always try something new. Less is more. "I have a plan so cunning, you could put a tail on it and call it a weasel" - Edmund Blackadder
|
|
|
POST REPLY TO THIS THREAD |
 |
|
|


