|
|
| Search | Car Forums | Gallery | Articles | Helper | Air Dried Fresh Beef Dog Food | IgorSushko.com | Corporate |
|
|||||||
| WIP - Street Post topics for any "Works In Progress" street vehicles projects in this sub-forum. |
 |
 Show Printable Version | Show Printable Version |  Subscribe to this Thread
|
|
|
Thread Tools |
|
#16
 09-09-2008, 03:36 AM
|
||||
|
||||
|
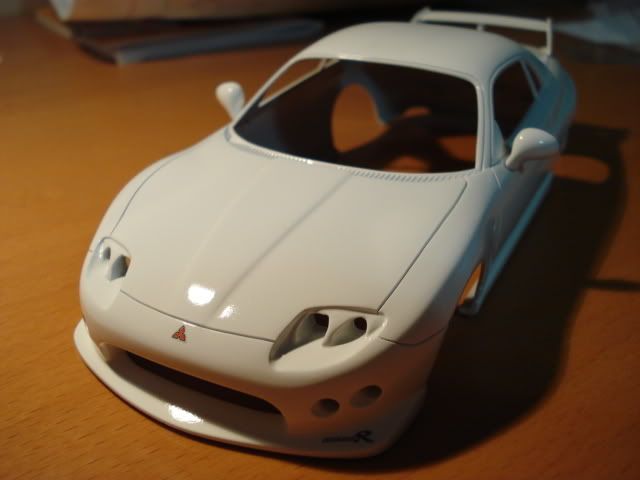
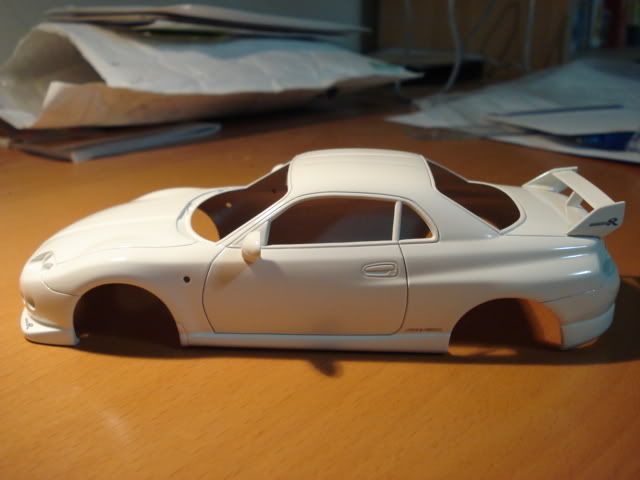
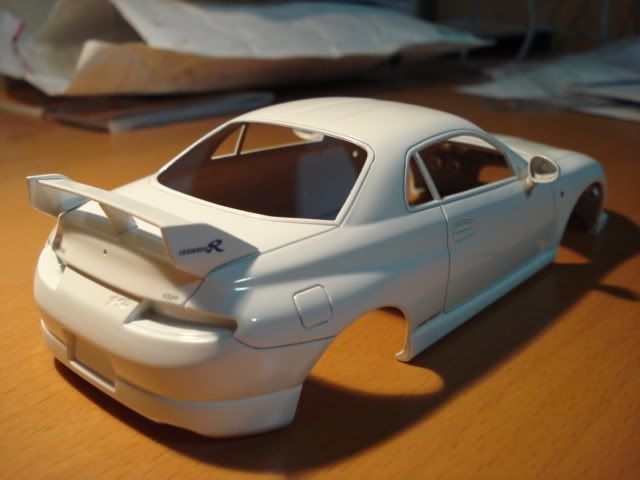
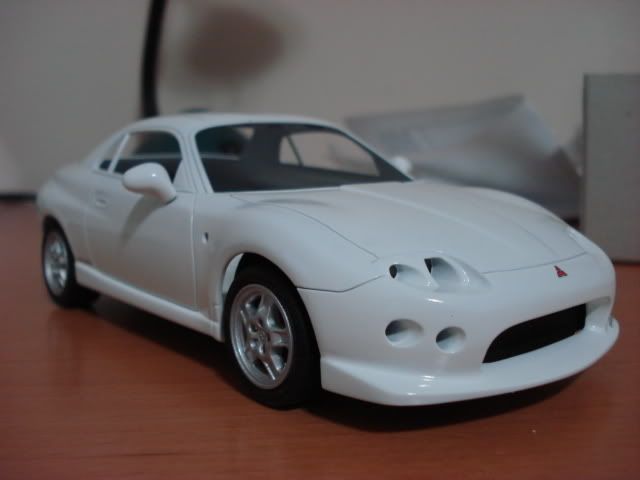
Re: Mitsubishi FTO
The FTO is now in white!
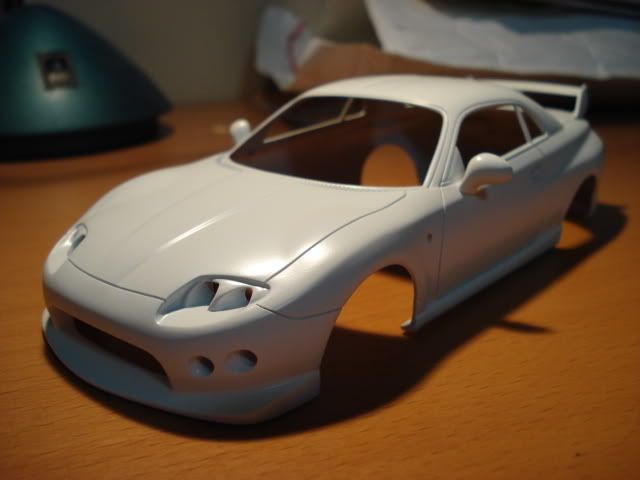 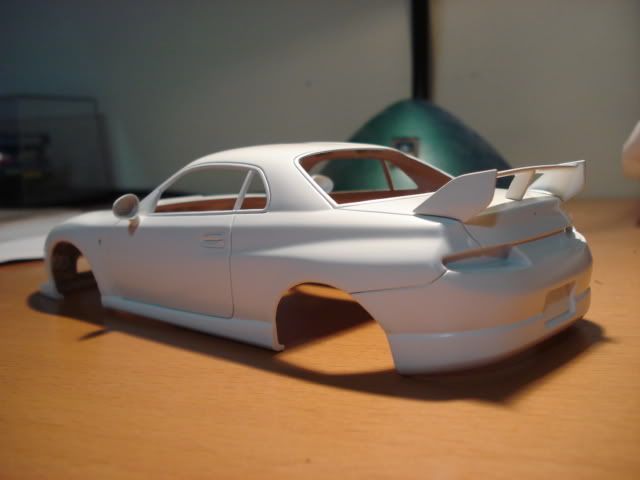 Also completed printing of the VERSION-R decals. 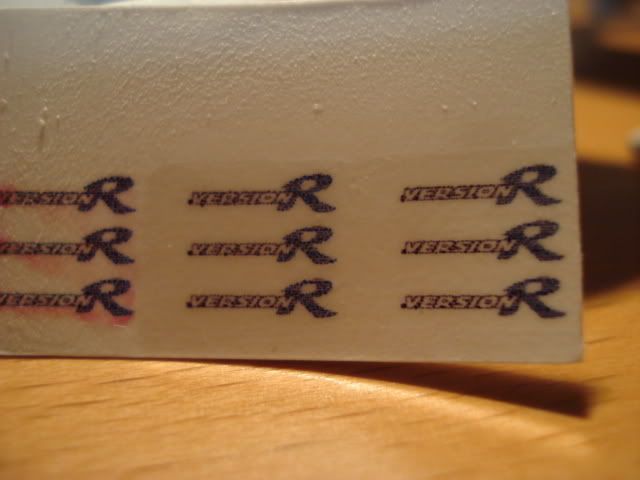 The quality is nothing compared to what's inside the original box but about shouldn't look too shabby once put on and clear over. Body will get cleared once all decals get applied. 
|
|
#17
09-09-2008, 05:41 PM
|
|||
|
|||
|
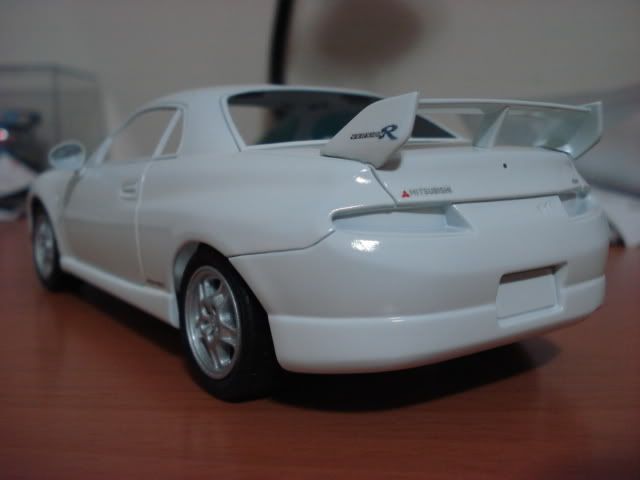
Re: Mitsubishi FTO
look at that front end! Very nice.
Always a joy to see you work on a kit. beautiful work!
__________________

|
|
#18
09-09-2008, 08:47 PM
|
||||
|
||||
|
Re: Mitsubishi FTO
Just wanted to say you've done a fantastic job on the front bumper. I really wish I could work with putty like you do. It now looks a lot better. Also, do you mean that the rear wing was scratch built? Fits the car very well! Can't wait to see more and what wheels you might choose.
__________________

|
|
#19
09-10-2008, 05:04 PM
|
||||
|
||||
|
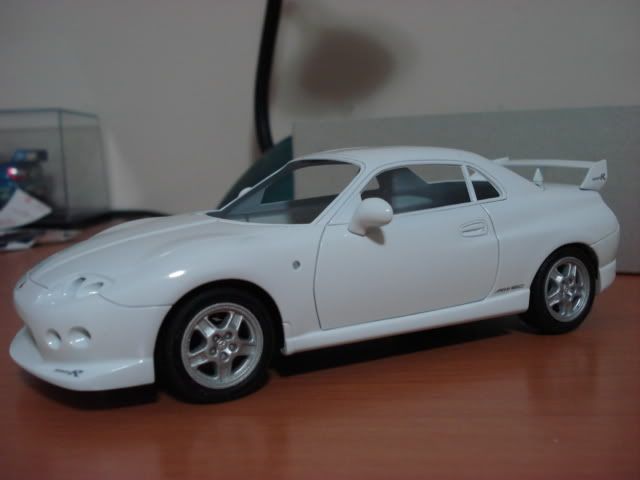
Re: Mitsubishi FTO
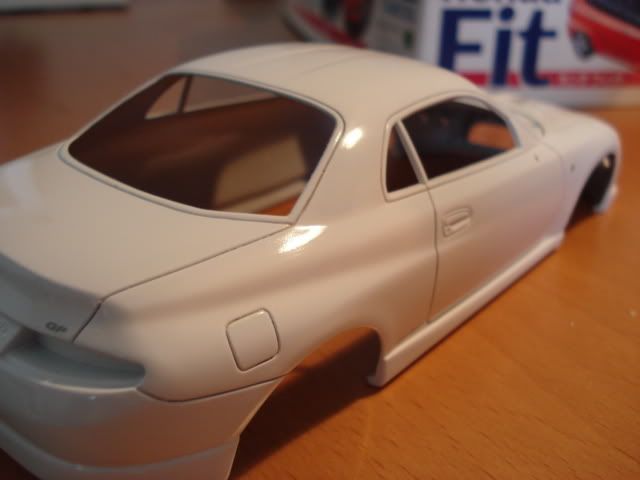
Clear coated.
   Good thing I printed 3 times as much of the decals I needed because upon some experimentations 3 of them were destroyed while 2 were put onto a testing body. The process of printing diy decals were not very complicated. Use photoshop or similar to draw out the graphic, or google an image to use as a base. After resizing the image, use decal paper (I used Testors)to print out the work with the printer's best settings. The resulting paper needs a protective clear and flexible coating applied on top of the ink(Microscale makes a clear decal film). On my previous projects I found that brushing on the film has a high chance of eating away the printer ink and it makes the resulting decal very thick and has a tendency to peel. (the film at one side of decal shrinks over time making the entire decal curl outward) I was told long time ago that applying the clear decal film using an airbrush will "kill" the airbrush itself. This time I tried applying the decal film using an airbrush and the results were much better. Full protection of the decals while remaining a reasonable thickness. Althought they still tend to curl a little bit it is easily remedied by clearcoating the decals right after putting onto the body. There was no harm done to the airbrush as the liquid decal film can be washed off using paint thinner.   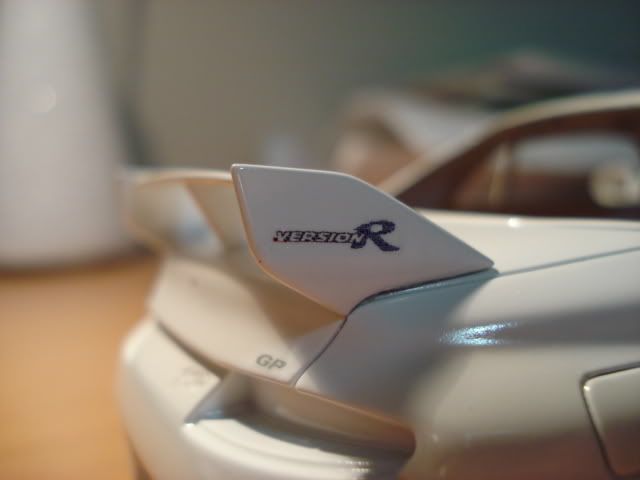
|
|
#20
09-10-2008, 05:18 PM
|
||||
|
||||
|
Re: Mitsubishi FTO
Quote:
Over the past month or so I did some extensive reading (I mean pictures, at least) about this car through this site: http://www.mitsubishi-fto.org/ and lots more pictures in tradecarview.com. This car didn't seem to get a lot of attention since there are not much more info outside of these sites.
|
|
#22
09-13-2008, 05:07 AM
|
||||
|
||||
|
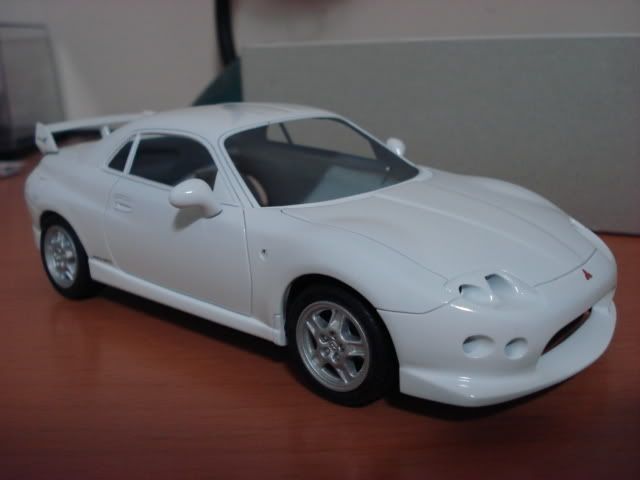
Re: Mitsubishi FTO
Stance adjusted. Stock ride height all corners with front steering rack shortened slightly to give some toe out. If I have another chance I would have not touch all the stock pieces except the steering rack. I tried tucking the wheels within the wheel well but accidently broke off one rear strut. Oh well, the struts won't be seen anyways
|
|
#23
09-13-2008, 07:49 AM
|
||||
|
||||
|
Re: Mitsubishi FTO
Just looks wrong to me if you're going to go with those rims, and also if you're not going to lower it. Seems a sort of waste of your bodywork modifications. Also, is it just me, or do those wing mirrors look really big? Only just noticed, but they just look 'swollen' in a Shrek sort of way

__________________
|
|
#24
09-14-2008, 09:03 PM
|
|||
|
|||
|
Re: Mitsubishi FTO
I think Kaho strives for realistic stock looking models. As such, this FTO fits nicely within those design parameters.
Amazing work, my friend. Certainly another gem in the making.
__________________
|
|
#25
09-14-2008, 10:05 PM
|
||||
|
||||
|
Re: Mitsubishi FTO
Quote:
 Great job Kaho! Looks like you nailed it. Great job Kaho! Looks like you nailed it.
|
|
#26
09-20-2008, 06:05 PM
|
||||
|
||||
|
Re: Mitsubishi FTO
Interior work:
Seats were airbrushed with tamiya XF8 + XF1. "FTO" letters hand brushed. It's a little bit sketchy... 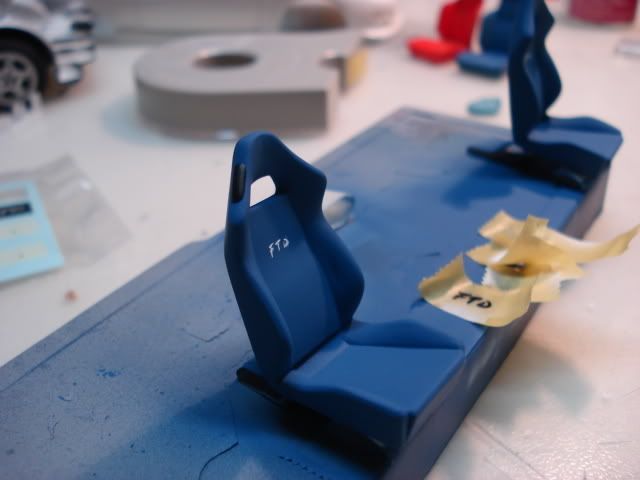 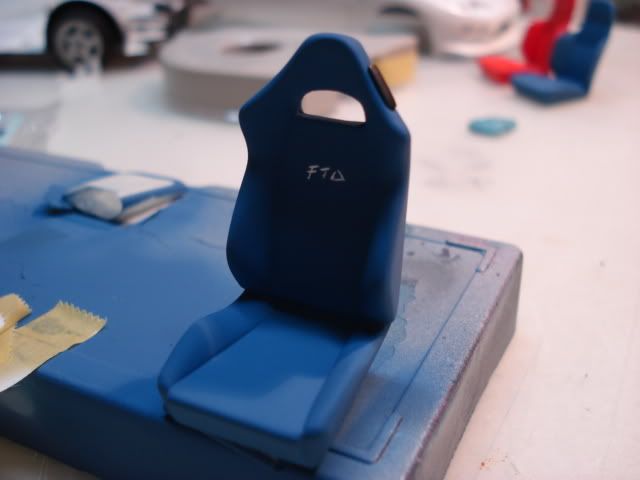 Interior tub, I put on the floor carpet. The original shift knob was so poorly made I machined a new piece with aluminum. "MOMO" steering wheel off the fujimi evo kit. I have an endless source of these wheels since I bought quite a few fujimi evo series and each one comes with 3 wheels to choose from. 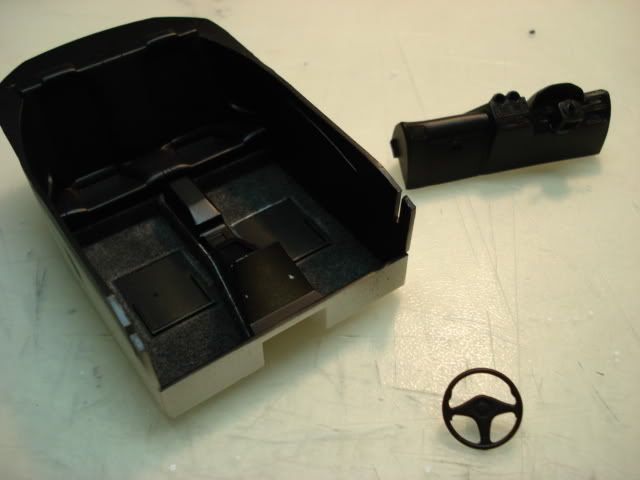 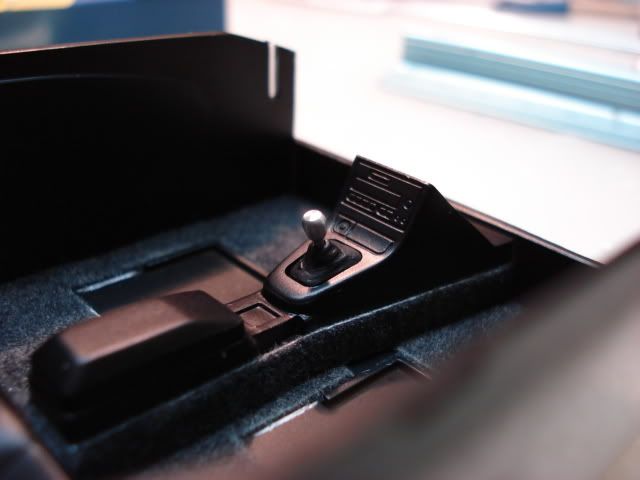 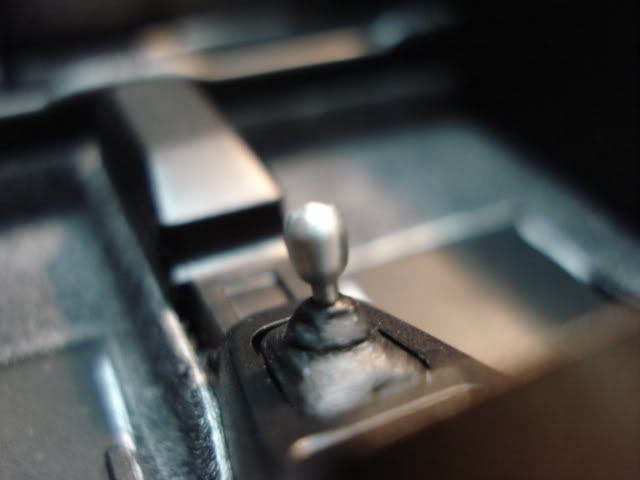  Fujimi totally left the radiator missing, I think they could have at least put a section of it where it will be visible from outside the bumper. I cut a hole to put in a piece of a radiator. 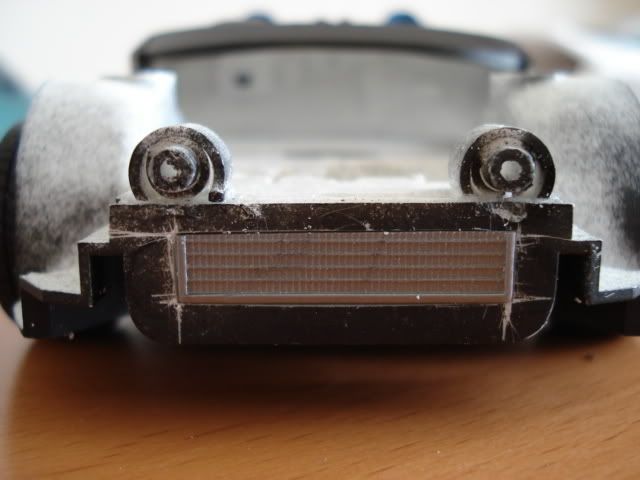 Completed interior/underbody: 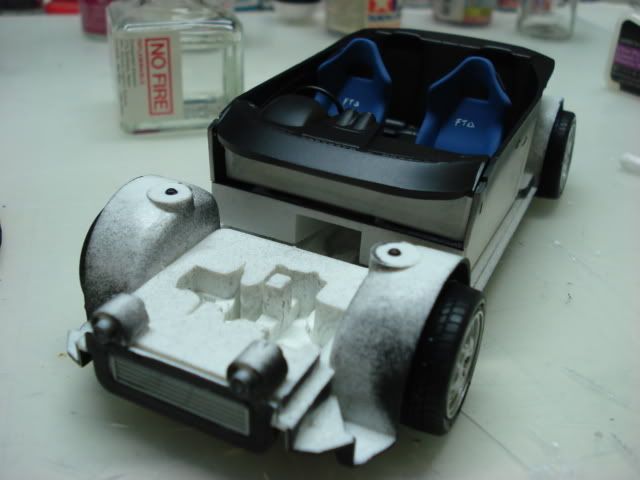 Exterior: With the front bumper completely modified, new blinkers and fog lights were needed. I thought some regular sized clear frame rods from the leftovers were good enough as a starting material for the lenses, but turned out the holes in my bumper were too big for them to fit!! Luckily, I had some leftover clear parts tree off a Italeri truck model, and the Italian frames are "fatter" than the japanese. They fit into the light sockets just right. Lenses machined to shape, polished, painted, then coated with future. The small orange ones are for the side markers. 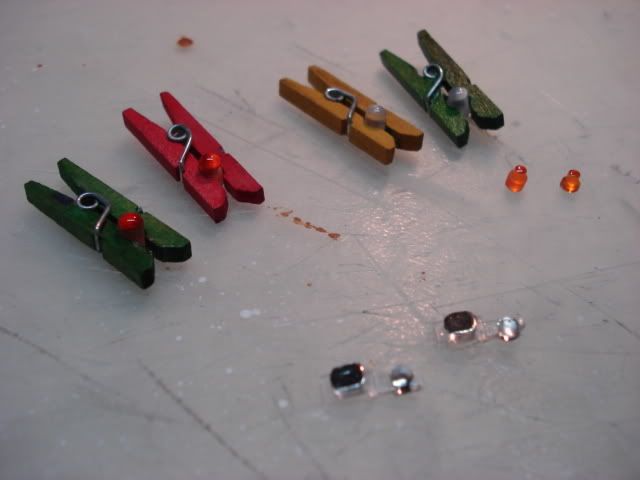 Test fit.... 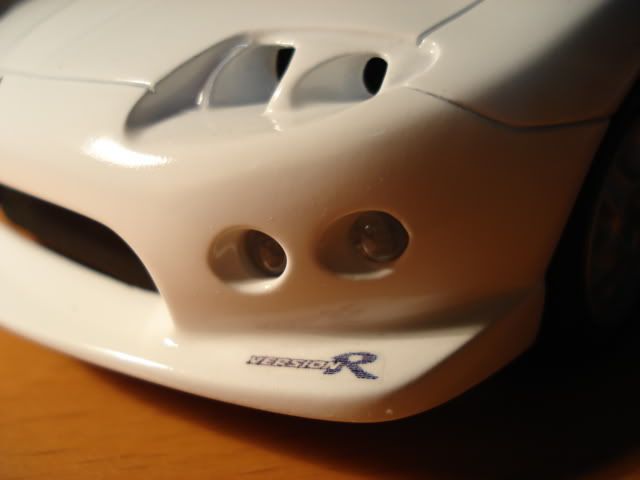 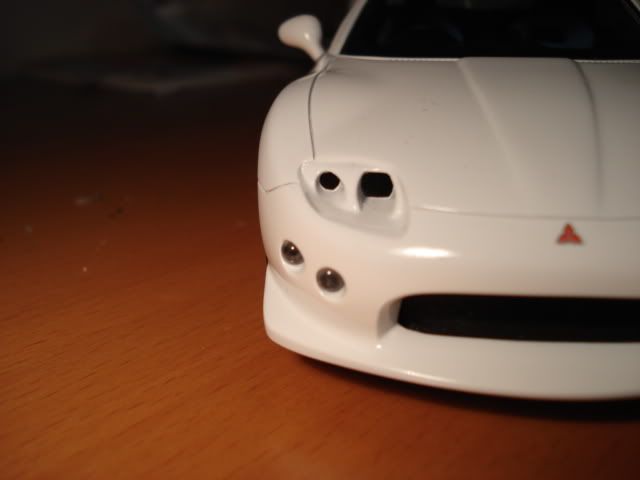 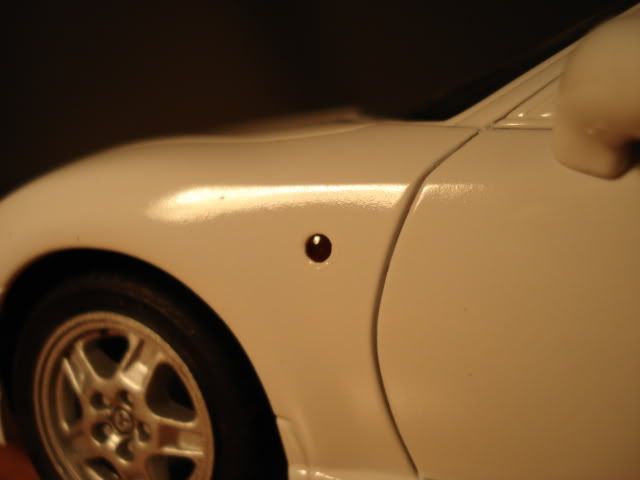
|
|
#27
09-21-2008, 03:50 AM
|
|||
|
|||
|
Re: Mitsubishi FTO
I must admit that I am not a fan of this particular vehicle, but I'm glad I clicked on the thread - your craftmanship on the body is amazing! Very well done! I agree with KevHw that it would gain from sitting a tad lower...
Keep it up. I always like it when somebody builds a kit that is not commonplace.
|
|
#29
09-21-2008, 10:41 AM
|
||||
|
||||
|
Re: Mitsubishi FTO
Quote:

__________________
http://public.fotki.com/tonioseven/
|
|
#30
09-21-2008, 12:35 PM
|
||||
|
||||
|
Re: Project FTO has officially failed
This is a sad day for me....
 I did not take photos of the actual mishap, but what happened was I polished through the white paint at the rear right quarter to reveal the bottom layer of grey primer. This is at the more complicated creases where I was trying to polish the recesses. During the whole process I was contemplating using cotton swabs instead of using a 6" x 10" cloth folded into a smaller but thick "cloth ball". Unfortunely I was too much in a rush (or lazy) to walk to the bathroom and get the cotton swabs. I tried spraying new white paint on top of the burn, but for some reason the exact same bottle of paint I used before gave me a different shade of white this time, so different that I can see it from a meter away after feathering the edges. This is my first time feathering paint by the way. Then comes the polishing part again. All the feathered edges got polished away, leaving a perfect outline of the white color differece telling everybody that this car had it's body been repaired poorly by someone who put paint on with a broom. 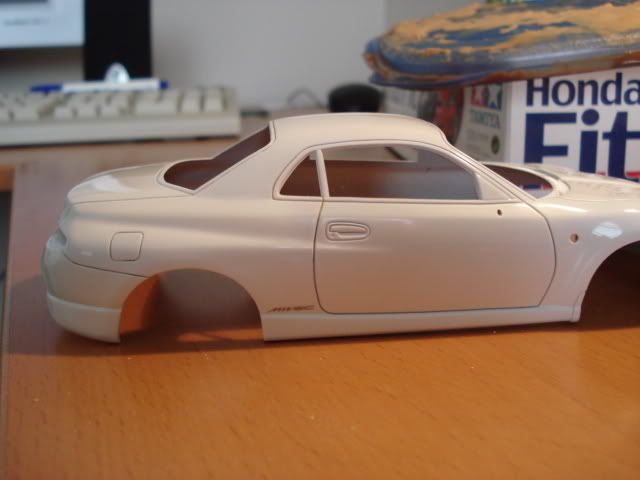 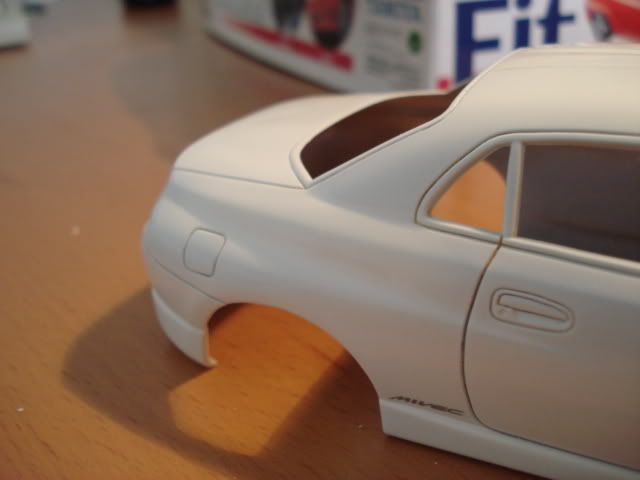 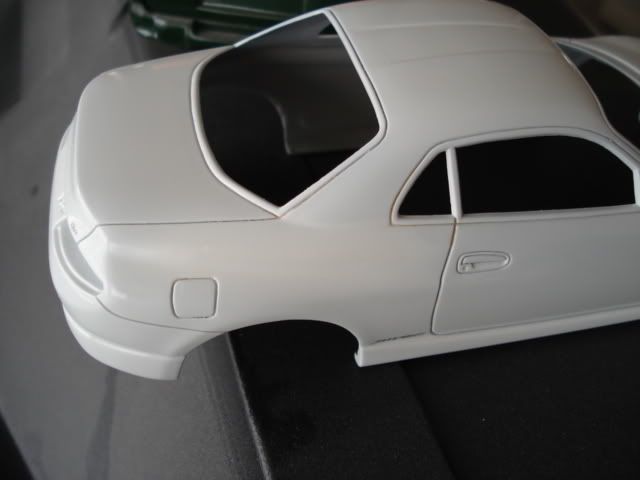 I had these kind of paint burn throughs all the time but there had usually been some way to fix it relatively easily. (ie, rear overfender on a 05 STi, rear bumper pass it off as a recent rear end collision) This time the mistake just happened at the worst place possible. If this was a real car, you would think it had severely been T-boned and should have gone to a junkyard a long time ago. I might finish this off in a near future but with it's current condition and school work catching up on me, I might have to give it a break. I must admit that I was doing this in a rush and lost my senses for finding the best way to do things.  (note: pictures did not give justice to the paint problem)
|
|
|
POST REPLY TO THIS THREAD |
 |
|
|


 American Muscle.... Nothing else...