|
|
| Search | Car Forums | Gallery | Articles | Helper | Air Dried Fresh Beef Dog Food | IgorSushko.com | Corporate |
|
|||||||
| Car Modeling Share your passion for car modeling here! Includes sub-forum for "in progress" and "completed" vehicles. |
 |
 Show Printable Version | Show Printable Version |  Subscribe to this Thread
|
|
|
Thread Tools |
|
#16
 01-27-2003, 02:28 AM
|
||||
|
||||
|
Ok i finaly got this thing to work like i want it to. Here is a full focus pictures of my interior and custom made roll cage and tach...
__________________
Recently completed models: JGTC Mobil 1 NSX   Porsche 911 gt2   1985 Toyota Corolla AE86  

|
|
#17
01-27-2003, 09:29 AM
|
||||
|
||||
|
Are we up for a little tutorial that i promised?
 Ok here is the first part of it. How to make a custom Tachometer Part 1 Step 1 Basicaly what we need, is X-acto knife, sand paper, and main parts frame which looks like this (not sure about tamiya kits, but fujimi has what we need)  And what exactly we need, is this part in the middle, which will be our main subject for a tach.  Step 2 Now we grab an X-acto knife, and simply cut this thing out, leaving one long side (will be needed later on) and other sides could be short or long, you will cut them away anyway later on.  Now we need a tool to chop those things off by using this chopper tool (not sure what its called :smoker2: ) Then basicly smooth out the surface of the rear end using X-Acto knife.  Ok thats all for today, i will post more later on, since i have no time right now.
__________________
Recently completed models: JGTC Mobil 1 NSX Porsche 911 gt2 1985 Toyota Corolla AE86
|
|
#19
01-27-2003, 09:51 AM
|
||||
|
||||
|
Quote:
You basicaly get what happend at the end right? You round the rear, and then round the base, make it smaller in diameter and sand it a bit of everything. :frog:
__________________
Recently completed models: JGTC Mobil 1 NSX Porsche 911 gt2 1985 Toyota Corolla AE86
|
|
#20
01-27-2003, 03:06 PM
|
||||
|
||||
|
wow.. didn't know it would be that easy... damn i should've saved all the branches...
__________________
-TomazWS TomazWS.net UF3000.com   <-- my proud lil mofo <-- my proud lil mofo   Why don't they make ToyTaco models?!?!?! Specially the S-Runner.. ohohohh so nice :ylsuper
|
|
#22
01-27-2003, 11:47 PM
|
||||
|
||||
|
Ok are we up for part two? This is getting harder
How to make a custom Tachometer Part 2 Step 3 Now we grab an X-Acto knife, and cut the shape similar to the one in the picture. Be careful tho, dont cut too much at the begining. Make it round by sanding out at the end. Should look like that.   Step 4 Ok now its time to spray 2 light coats of primer. (no pics for this one, hope you know how to do that! :alien2: ) Then You can use brush or spray can to paint it in silver. For the smaller part of the tach, where the orange button has to be, you can use smaller peace from the parts frame. Step 5 Now is the decal time. Thanks to Murco for posting these great textures. Simply measure the diameter of the guage, and then measure it off in any photo editing program and print. 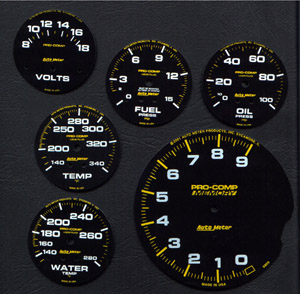 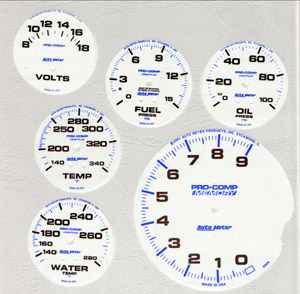 Ok thats about it, it was pretty simple tutorial, anyone could do that. Enjoy
__________________
Recently completed models: JGTC Mobil 1 NSX Porsche 911 gt2 1985 Toyota Corolla AE86
|
|
#23
01-29-2003, 10:02 PM
|
||||
|
||||
|
ok here is the first coat of the paint. The camera made it look very brigh and dark in some spots. Maybe because of the light or flash. Anyway in real life is very even and nice shiny blue metalic
__________________
Recently completed models: JGTC Mobil 1 NSX Porsche 911 gt2 1985 Toyota Corolla AE86
|
|
#24
01-29-2003, 11:30 PM
|
||||
|
||||
|
WOW ...
 both the tachometer and the car looks very very nice both the tachometer and the car looks very very nicecant wait to see it when its done
__________________
AF OG Dori crew (member #5)  Altezzas: It only looks good if you have the FULL car, not just the LIGHTS!! grinyes:
|
|
#25
01-30-2003, 12:31 AM
|
||||
|
||||
|
Ok i sprayed 3 thin coats on the body. It came out not bad for my second try i guess. But i dont get a clear reflection on the body, its kinda with riples. Like the water or something. Is it because of primer?
 
__________________
Recently completed models: JGTC Mobil 1 NSX Porsche 911 gt2 1985 Toyota Corolla AE86
|
|
#26
01-30-2003, 12:37 AM
|
||||
|
||||
|
that is the dreaded orange peal effect. there should be something about it in the faq. what i would do is wait for the paint to totally dry. several days at least and if you can bear it, a week is better. sand it smooth, then polish. be very careful not to sand so much that you go to the primer. if you accidentally do sand too much like i have a knack for, you will have to add some more paint to cover those areas. just be careful and even cover the higher points on the body with masking tape cut to size. but before you do anything... see the faq for the real low down on orange peel
__________________
|
|
#27
01-30-2003, 12:40 AM
|
||||
|
||||
|
__________________
Recently completed models: JGTC Mobil 1 NSX Porsche 911 gt2 1985 Toyota Corolla AE86
Last edited by primera man; 01-30-2003 at 04:26 AM.
|
|
#28
01-30-2003, 12:45 AM
|
||||
|
||||
|
wax WON'T do the trick. wax is designed to hide the small scratches that happen during a polish. the only way to smooth out an orange peel is to gently sand the roughness away. to avoid the orange peel, your going to have to read the faq cuz i dont feel it is necessary or appropriate for me to rewrite what already has been written. click here ==>FAQ
|
|
#29
01-30-2003, 02:52 PM
|
||||
|
||||
|
Took some outside shots. I am not sure if this peal makes the car look bad. Ur opinions?
 
__________________
Recently completed models: JGTC Mobil 1 NSX Porsche 911 gt2 1985 Toyota Corolla AE86
|
|
#30
01-30-2003, 03:40 PM
|
||||
|
||||
|
I just had the orange peel problem on my 300ZX shown below...i do'nt know if yours is worse than mine was, but this is what i did....
1. sanded down with 1700 GRit sandpaper 2. washed with water 3. dried 4. Painted again~ hope this helps!
__________________

|
|
|
POST REPLY TO THIS THREAD |
 |
|
|


