|
|
| Search | Car Forums | Gallery | Articles | Helper | Air Dried Beef Dog Food | IgorSushko.com | Corporate |
|
|||||||
| WIP - Street Post topics for any "Works In Progress" street vehicles projects in this sub-forum. |
 |
 Show Printable Version | Show Printable Version |  Subscribe to this Thread
|
|
|
Thread Tools |
|
#16
 07-16-2007, 03:42 PM
|
||||
|
||||
|
Re: Concept Sidwinder Engine build!
color looks nice and bright,but is hood an opening one? Id hate to never to see the engine again. Other than that looks like you're doing a very good build!

|
|
#18
07-19-2007, 01:35 AM
|
||||
|
||||
|
Re: Concept Sidwinder Engine build!
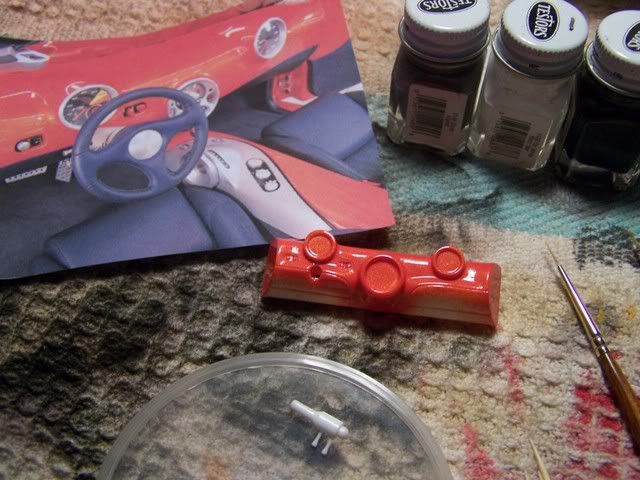
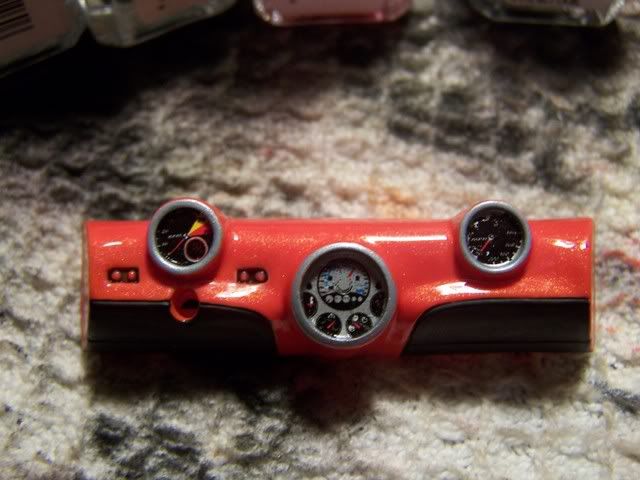
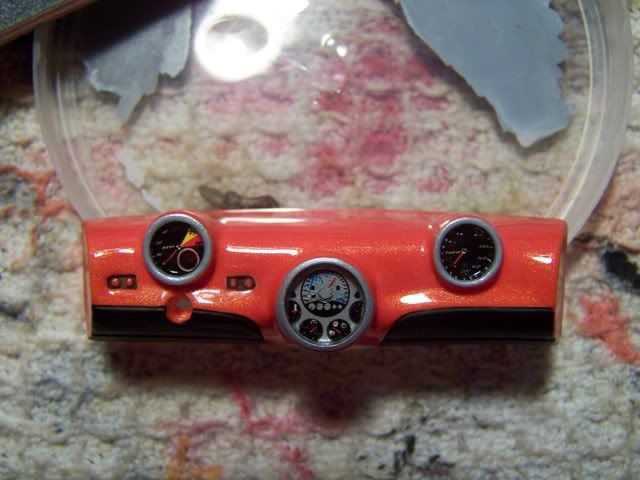
Ok here's some of tha Interior work. After I painted the gauge bezels I had to use decal softening solution to make the decals sit better one of the decal came out bad the one on the far right, then I fixed it with fl-black & fl-white, then I coverd them with TAMIYA Clear Gloss. I don't have steady hand to paint with in thine lines so I used Rustall mixed with FolkArt to make the lines darker (that way I have a guide to start from) and I have just started the flocking hope you like. This is what's in the images.
 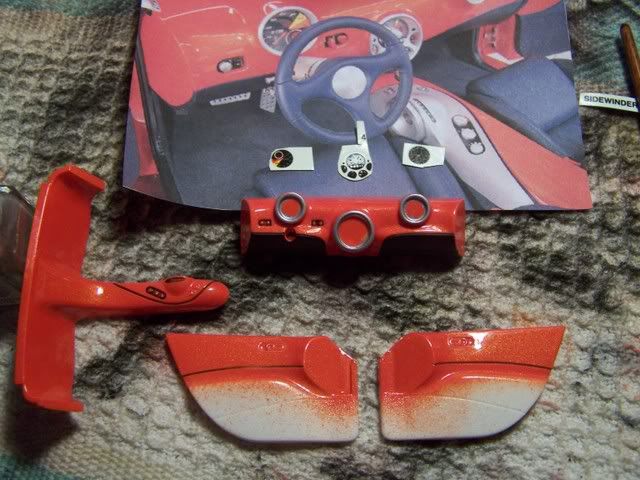    this is just before I flocked it I'm showing what I have so far. 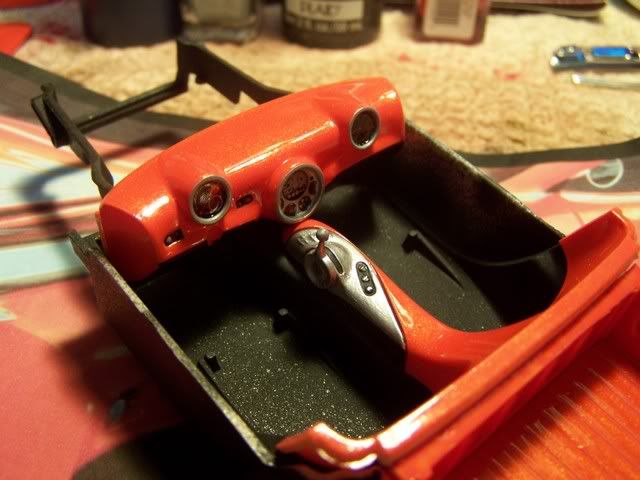 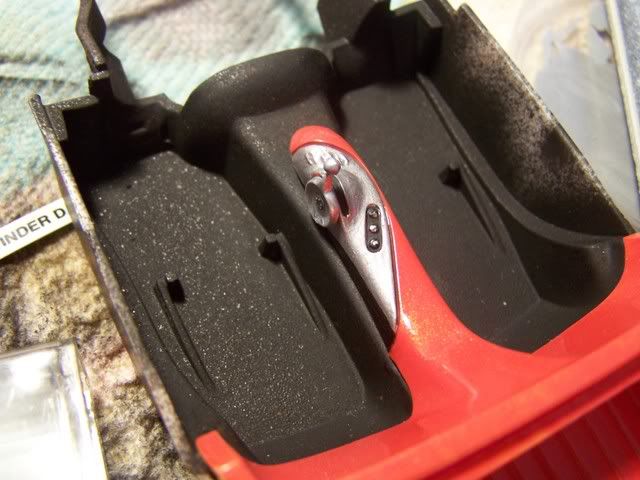 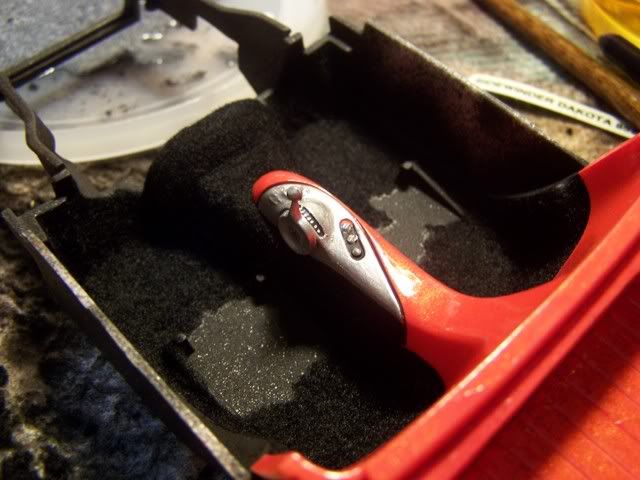 I have to make a 6 pack of soda for a friend so I'll be working on that later to day with the door panels and seats.
__________________
Oops I didn't see you down there sorry for running you over!  http://s162.photobucket.com/albums/t248/White_r34/
|
|
#20
07-19-2007, 05:20 AM
|
|||
|
|||
|
Re: Concept Sidwinder Engine build!
ahh... i am waiting for the making of the pack soda!! LOL... this is getting interesting...
will you be giving a step by step guide on that? hehehe
|
|
#21
07-20-2007, 05:53 AM
|
||||
|
||||
|
Re: Concept Sidwinder Engine build!
Nice Work!
As I see, You try to build it as real as possible, but the interior trim seems like dark blue, not black, doesn't it? I like the color and the shine!  Keep it up!
__________________
Current project: 1:35 Humvee Workmachine Style Tamiya is for girls, hard boyz build AMT! 
|
|
#22
07-20-2007, 05:29 PM
|
||||
|
||||
|
Re: Concept Sidwinder Engine build!
Yes just like the hole thing(Sidewinder Project) the soda will get the same thing.
Now on to the Interior build. First you need to get some Hobby Mask it works well. 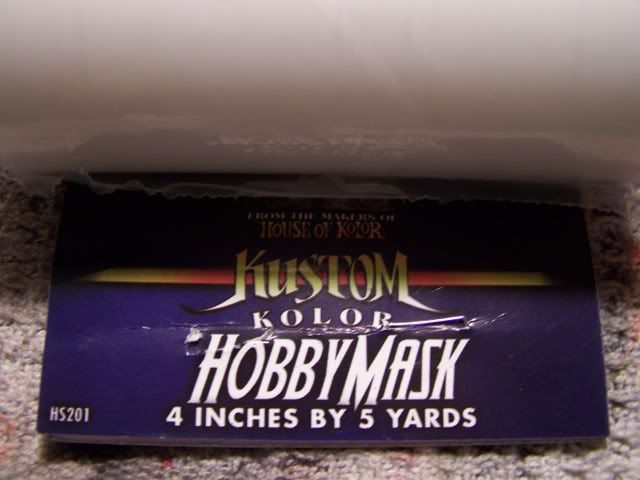 Mask of the part that eill be painted Fl-Black, and paint all the interior parts to. 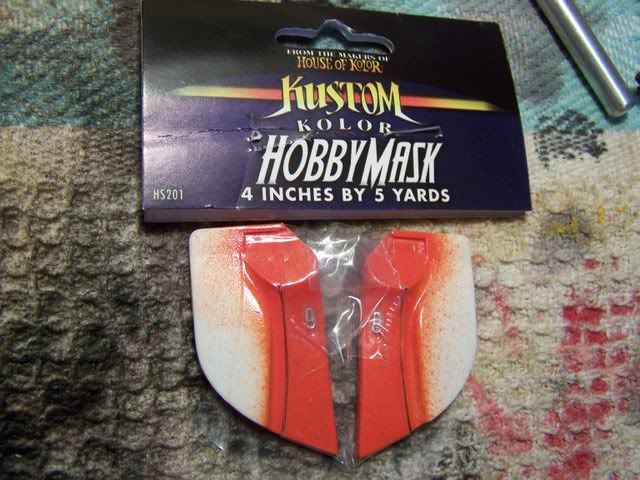 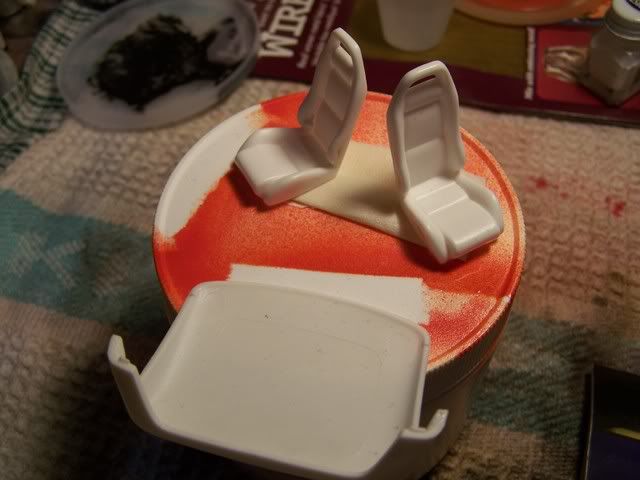 take the mask off when dry and get ready to (Flock) your inreior parts.   Flock only here on the textured part, these are the things your going to need to do the flocking job. One brush is for painting the glue on and one is for sweeping particals off. 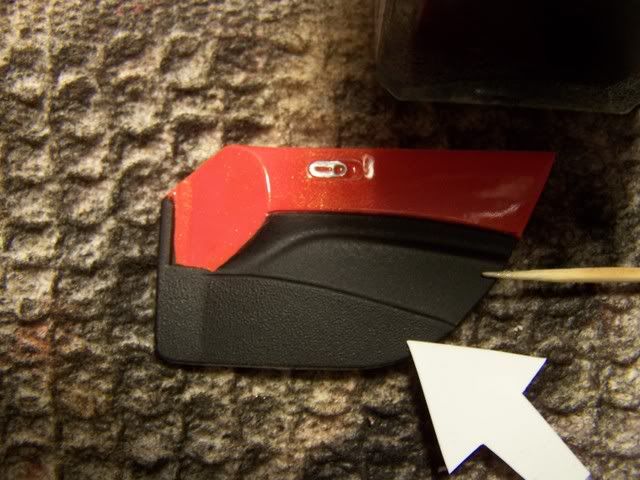 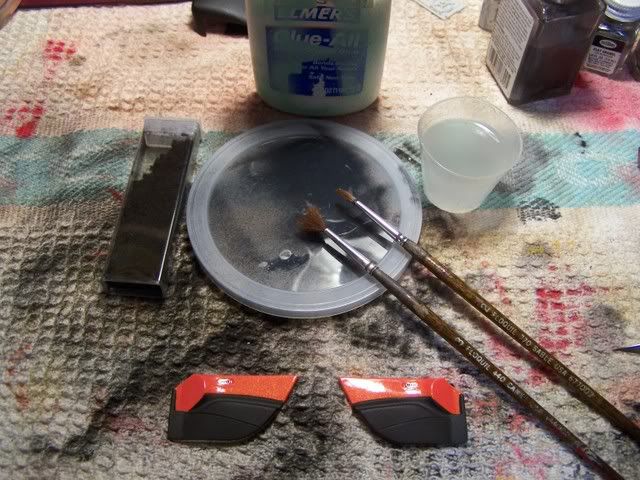 I use Elmers white glue it's up to you what you use on your projects, and mix the flocking in your glue so when it drys you will not see the glue under the thin flocking. 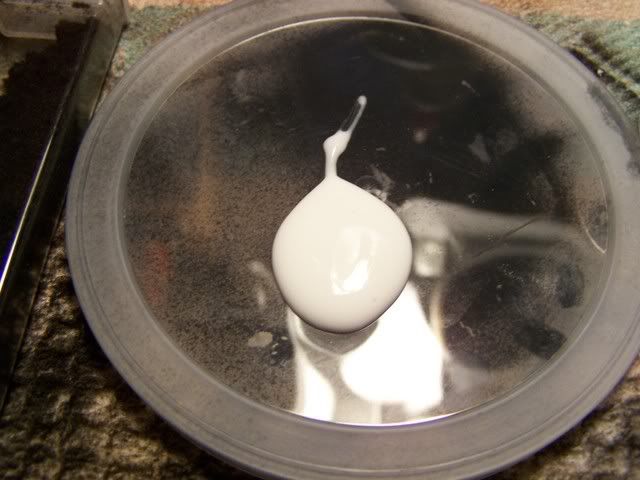 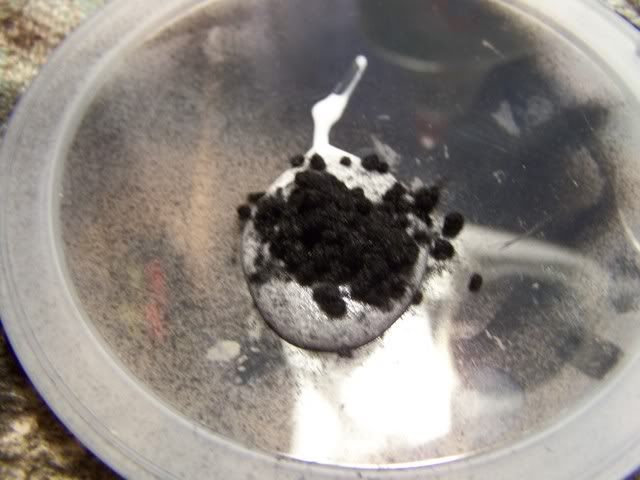  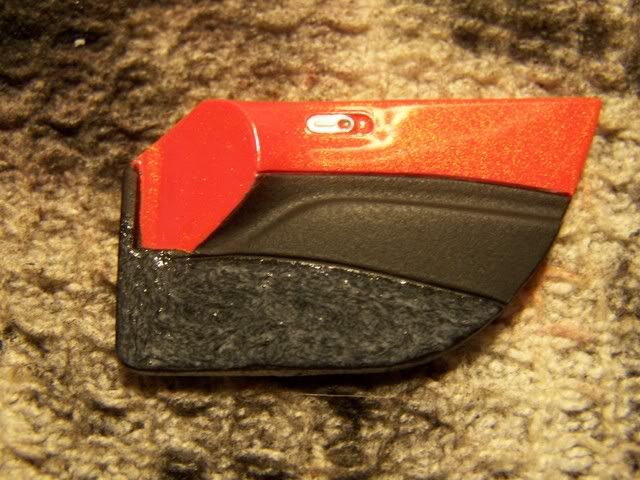 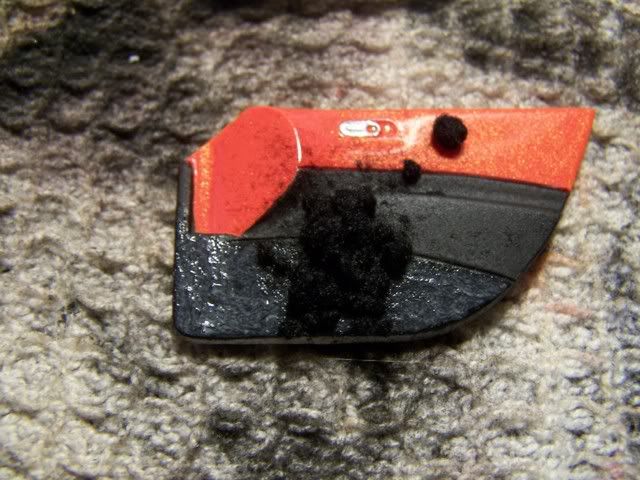 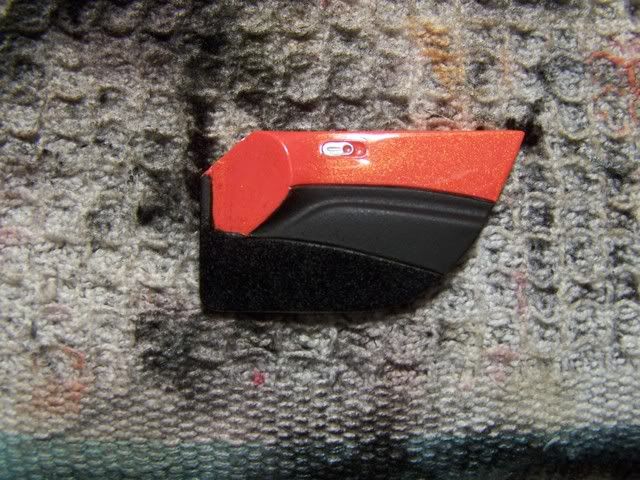 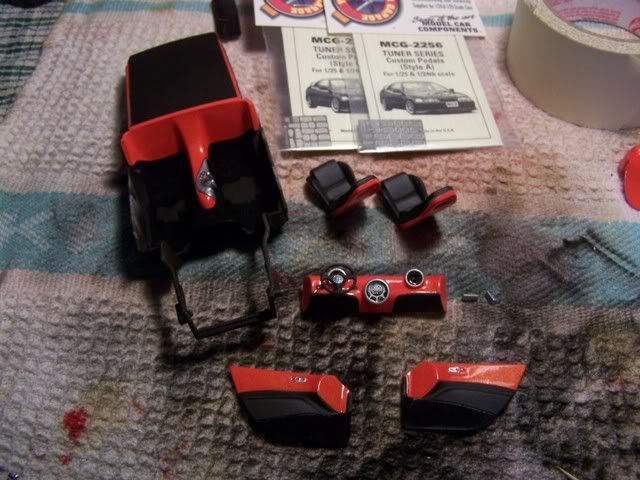 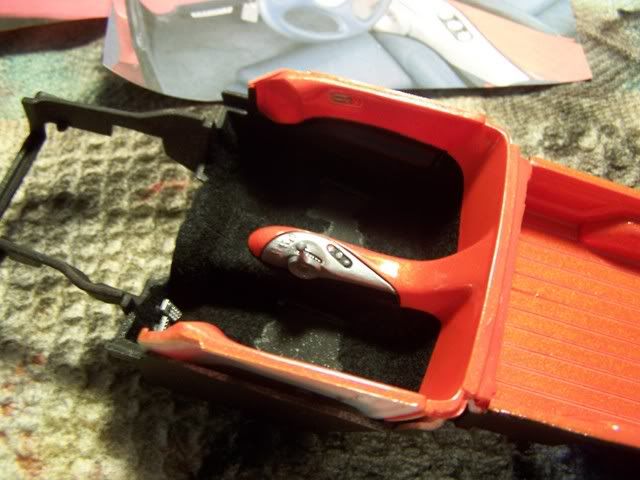 The seat backs are begger than the fronts so you will need to touchup thim up. 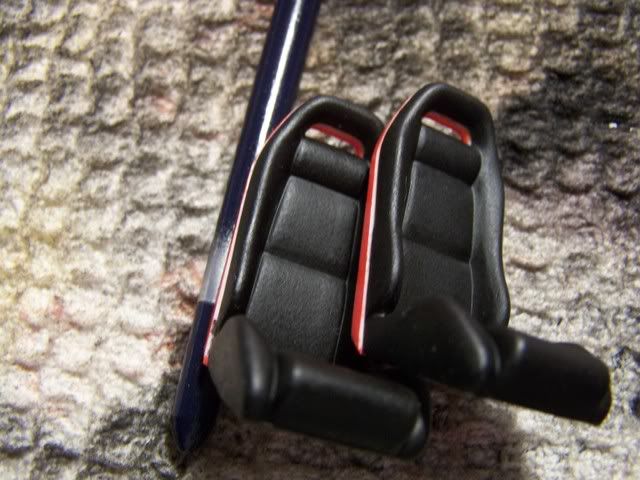 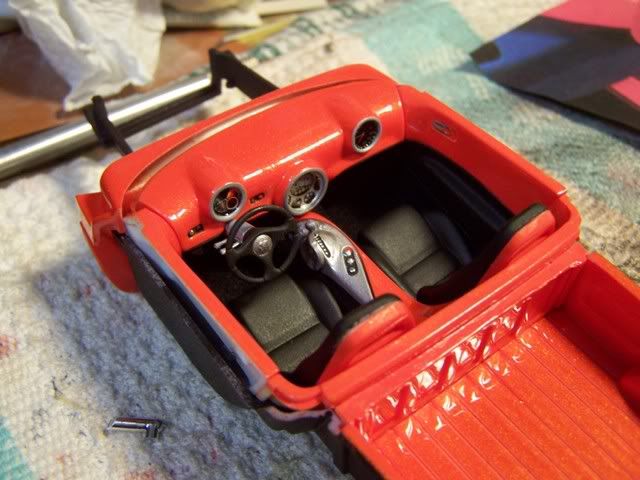 Im going to need to move the Gass pedal over. Ididn't use the MCG pedals they did no give me the look I was looking for. Next the Soda can pack for the interior. (Kyuuketsuki) Yes the Color seams to be Dark Blue. I E mailed some one that has see the real truck and she said that the interior real is black (as she tells me if the light hits you Black lether just right it will look gray some times blue depends on the light source and type of light (natural light or artificial light) the lather in my Honda Accord looks Dark Gray but its black. I like some of my model to look as real as it can.
__________________
Oops I didn't see you down there sorry for running you over! http://s162.photobucket.com/albums/t248/White_r34/
|
|
#23
07-20-2007, 05:53 PM
|
||||
|
||||
|
Re: Concept Sidwinder Engine build!
very very clean build! I like it alot.
|
|
#24
07-21-2007, 05:02 AM
|
||||
|
||||
|
Re: Concept Sidwinder Engine build!
OK! Thank you for the color info!
The seats are very nice! I like the white masking tape stripe between the black and the orange  (I don't like flocking, not specially yours, truly I don't like any scale-flocking , it always reminds me to TeddyBears  but this is my own problem...) but this is my own problem...)
__________________
Current project: 1:35 Humvee Workmachine Style Tamiya is for girls, hard boyz build AMT!
|
|
#25
07-23-2007, 11:27 AM
|
||||
|
||||
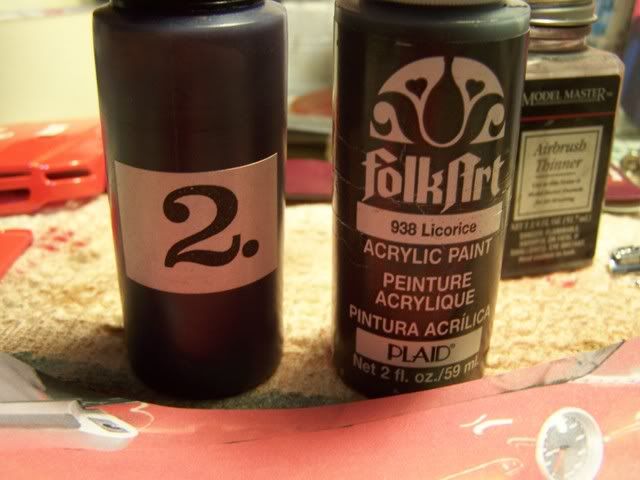
The white lines are not to be there I fixed thim.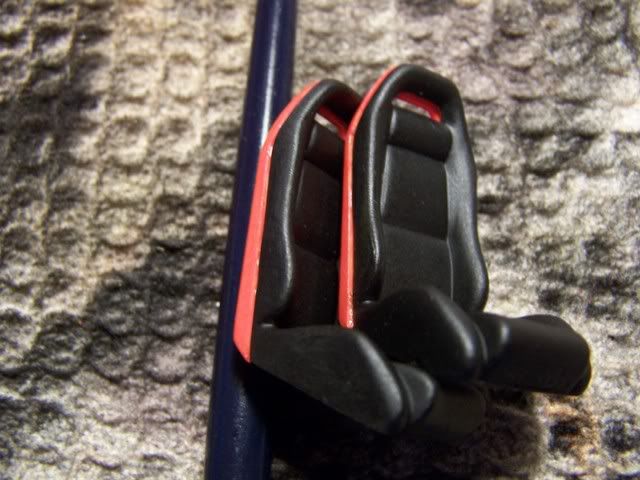 Heres somthing you all who don't open your doors, to make your door and trunk,hood line look more real fill them in in black by using Black wash. for all of you who have a Rustall kit use No. 2 black and some Fabric paint called FolkArt to make the wash darker this is just the same thing I used on the door panels. First without any filled in lines. Then with the lines filled in. 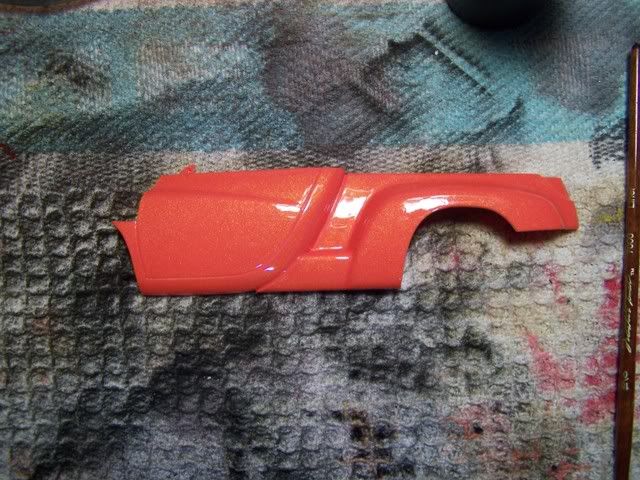 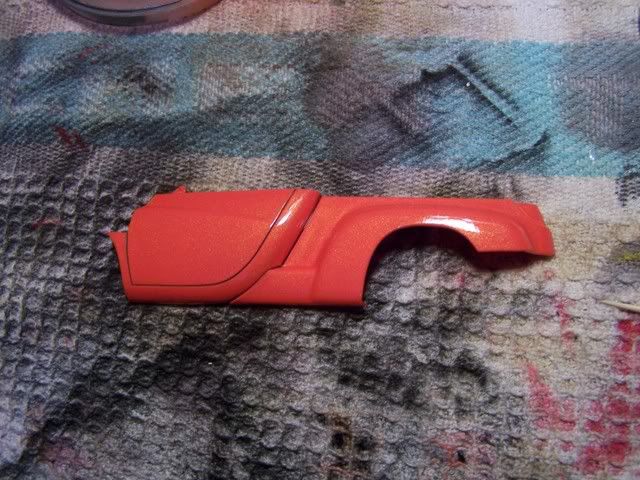 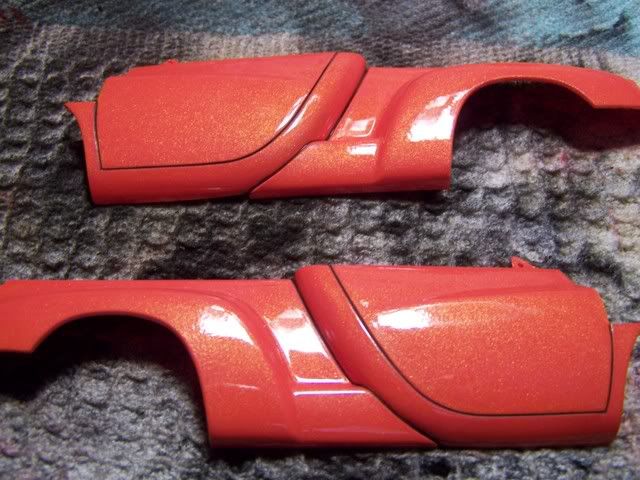 This will help you make your model stand out more and if you do it right on some types of models It makes your doors look like they will open up. About the (Soda cans) I did this on my bed so the back ground is Red sorry for that, it makes the aluminum look like brass it's not just aluminum. See I ran out of styrene tubbing and all I had in theat size was aluminum tubbing you still can use styrene it's better and the work go's by faster. first Tube type & size:  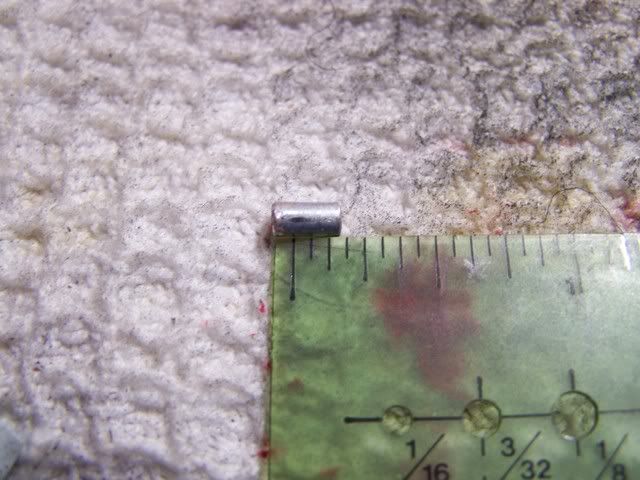 These are things your going to need to do this: 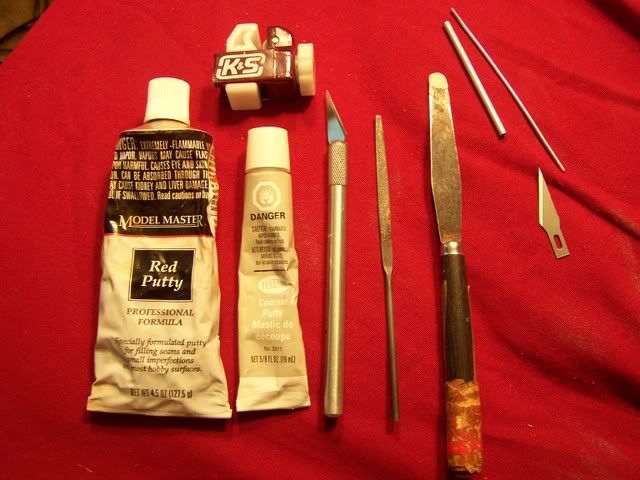 Now ones you have measured the size of tubbing, make a cut line use your pipe cutter(do this 6 times) for a full pack. 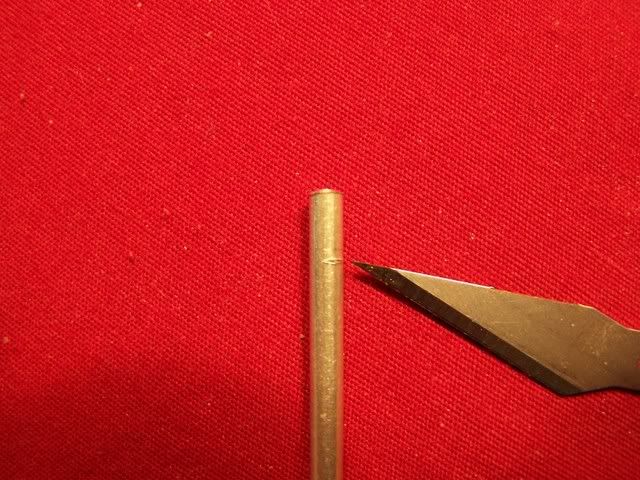 sand off the edges some times there sharp. 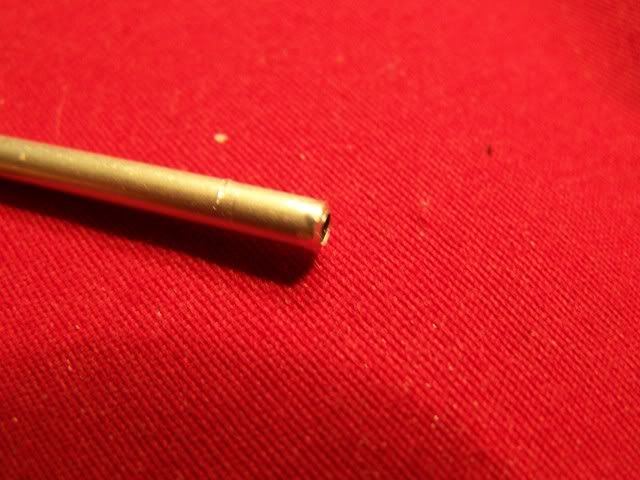 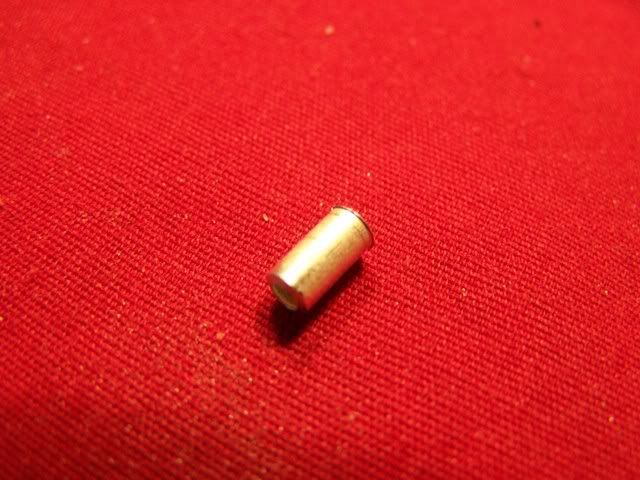 now that you have both sides sanded off and have a full 6 pack paint the can holder Fl-White (I made one more can to show you tow diffent styles of can Co.s: 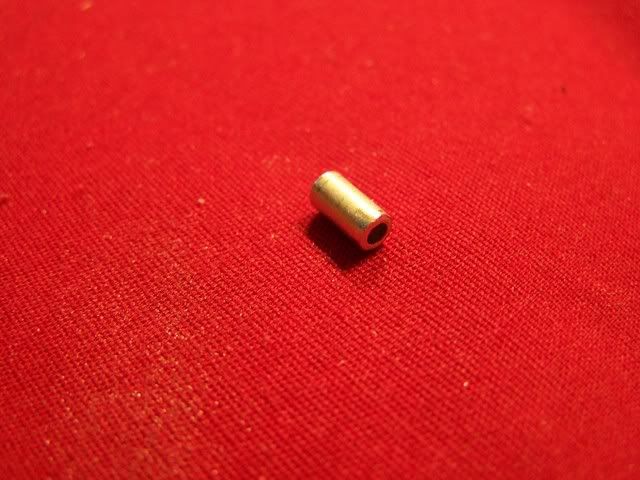 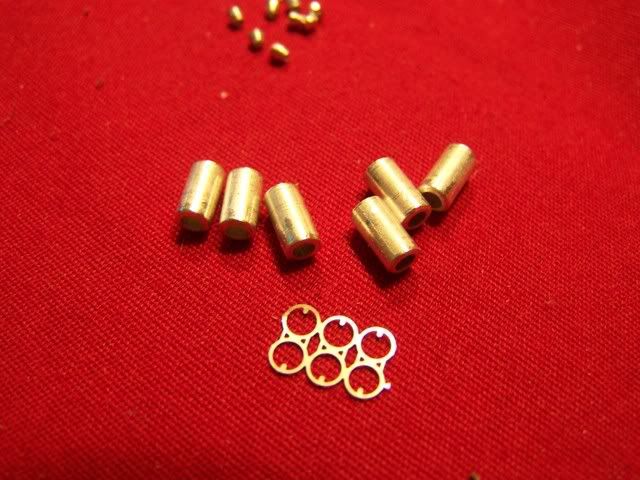 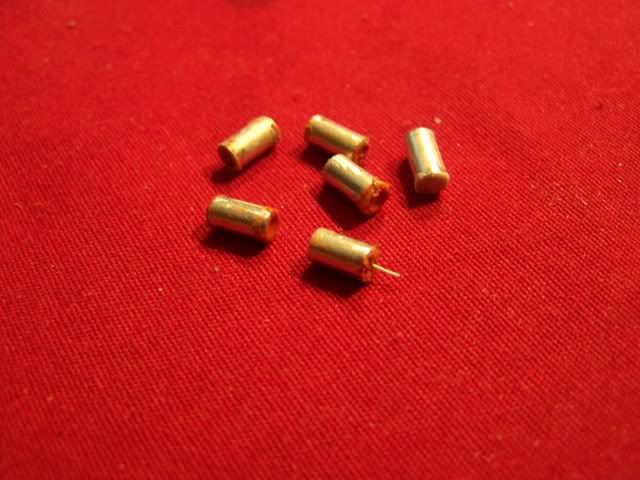 For the straw I used DM Ing. wire Now fill in the tubbing with what ever type of fill you want from Testors to Tamiya it's up to you. I'll be back to post the painted images on the can later to day. OK no one wants to post so I have to just add to this thread. About the Soda I used tamiya Red Clear Testors Fl-White,Silver for the Coca-Cola logo wile looking a an image of a coca can for placemint of the image. Remember paint the can holder Fl-White. Tell me what you think on this one, now I'll put up some cola can for some of you who mite want to make some for your selves. 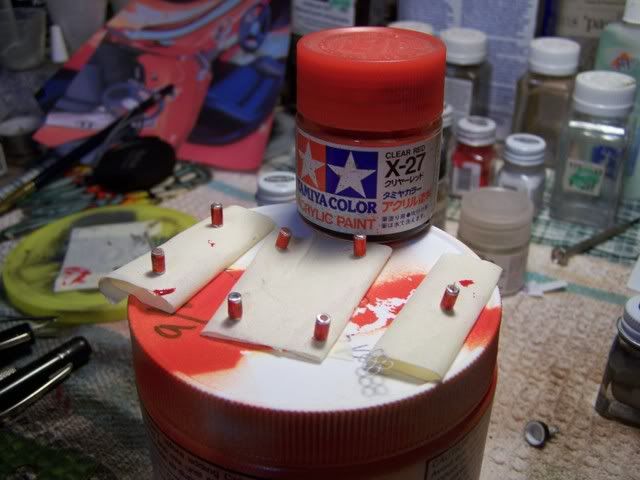 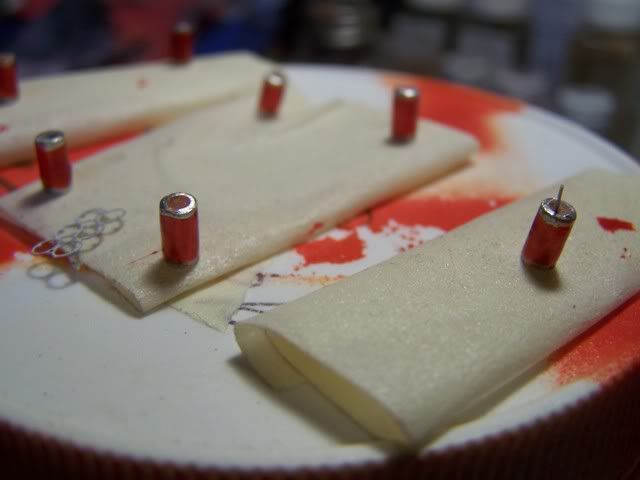 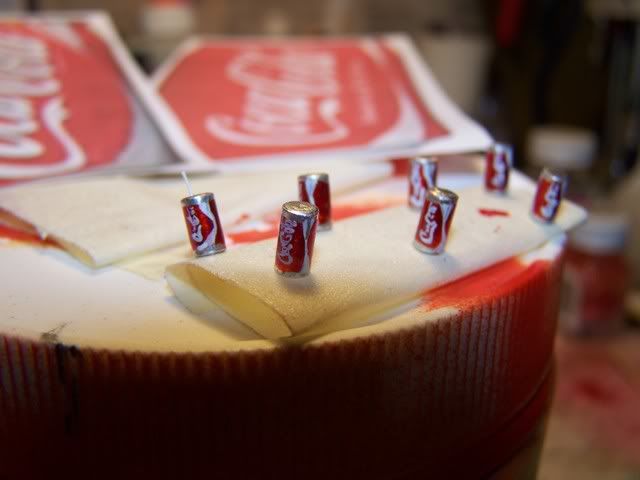 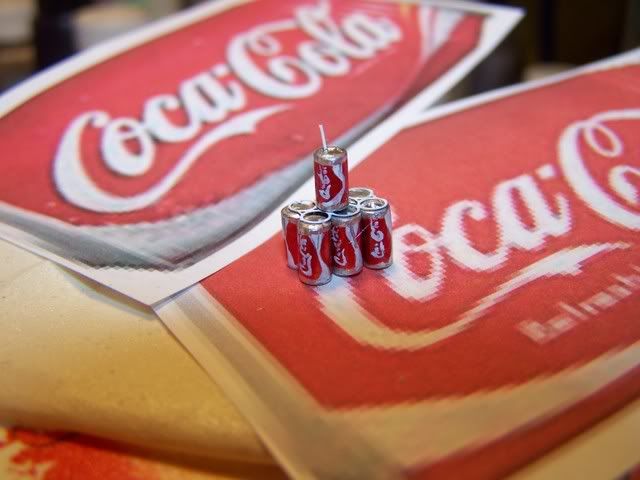 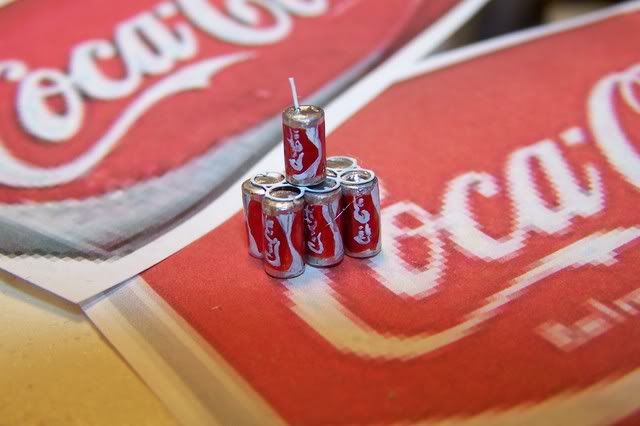 Cola Images for one and all.  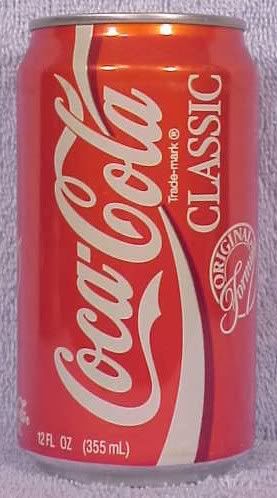 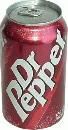 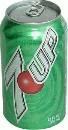 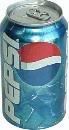 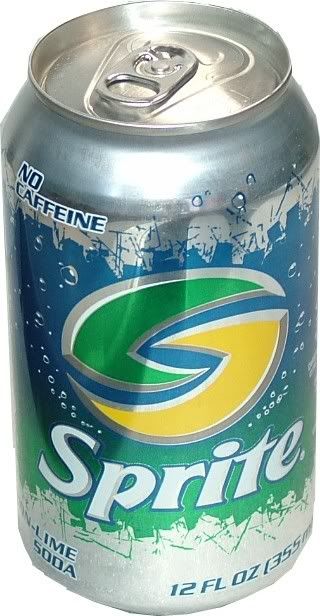 The next images are of the me making fake Carbon Decals for the drive shaft and making pullys and belts for the engine. I'm going to rap this thing up soon. First I found the images of Carbon Fiber I need for the decals and cut out all the images and tapped them together then, I Made a copy of all the tapped images on to Testors decal paper and then sprayed them with the bonder and let dry over night. Placed the new Decal on the Drive shaft and put Tamiya Clear and let Dry. To make the decal darker i used tamiya Smoke clear.   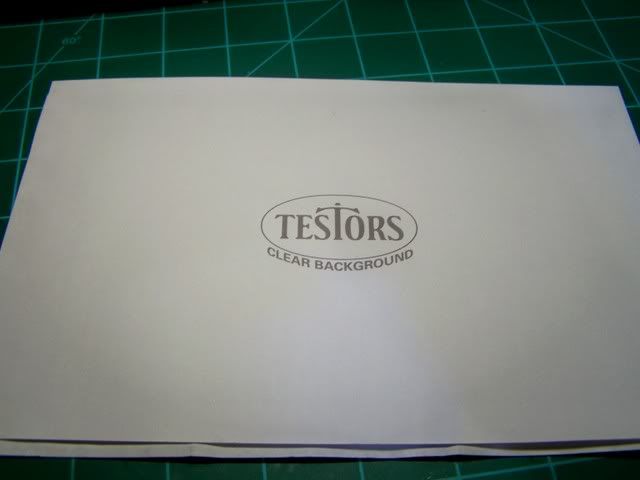 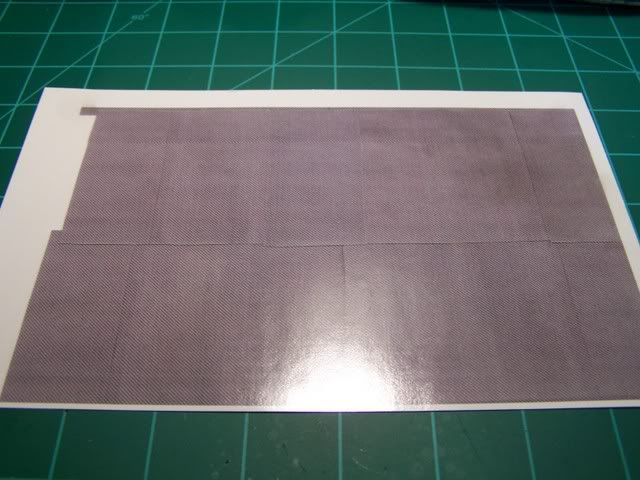 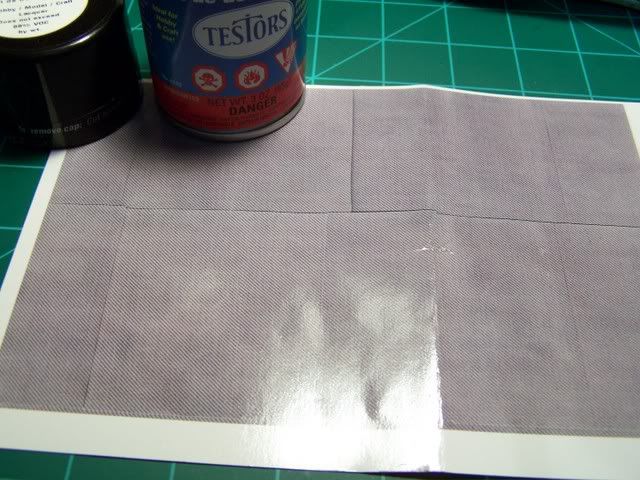 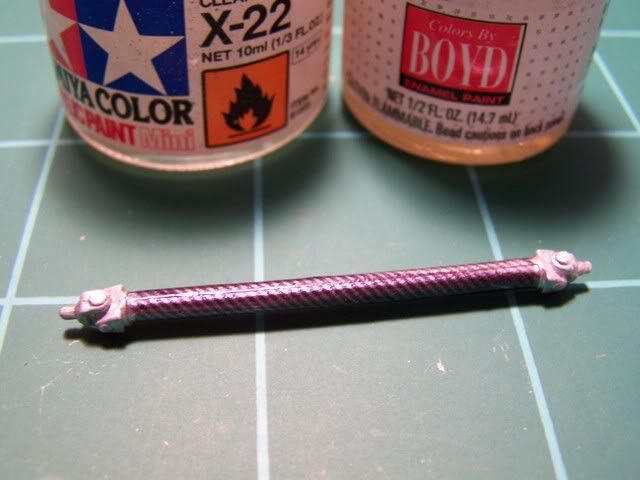 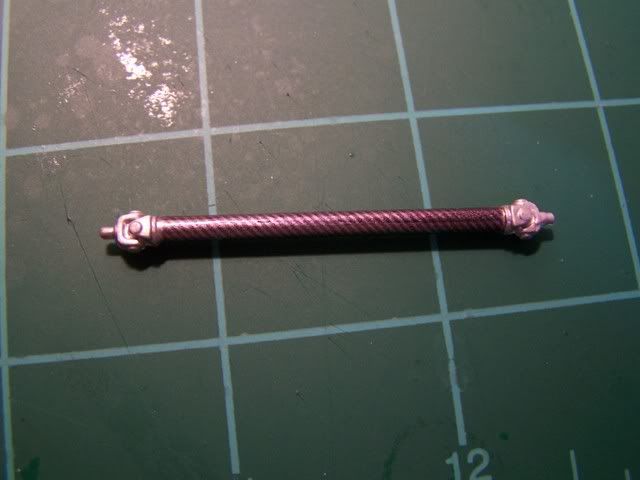 I know I know why didn't I use the ones from Scale Motor Sports well I wanted to but the Company has moved and is not up and running well yet so I need to go on with this project. Well now I know that the hole thing (the Decal stuff) Works so I can make other stuff with it. NOW for more Engine work. First I made some A/N Fittings for the Oil cool can and oil sump pump when I made the Soda can how to for Kyuuketsuki. Now I need to put pullys on the engine I lost the kit ones I'm glad I did (lost them) that is the one I made up from old parts work out well tell me what you think. 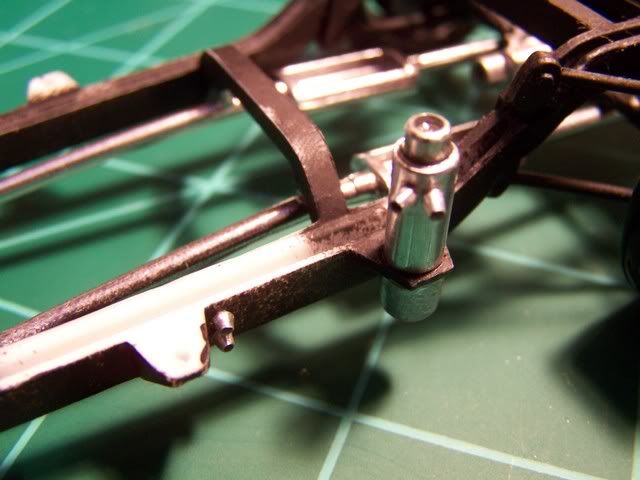 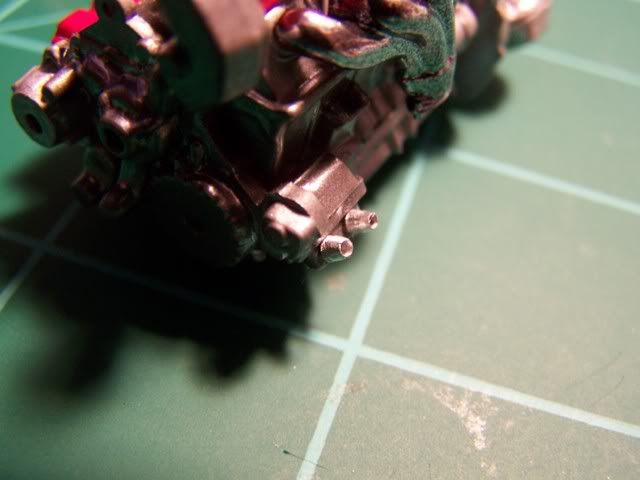 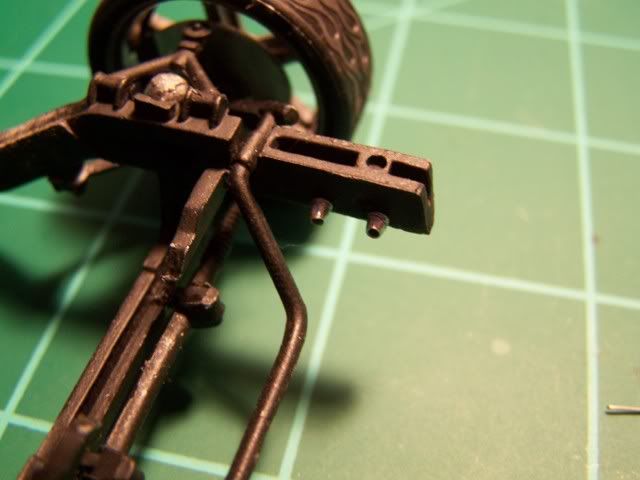 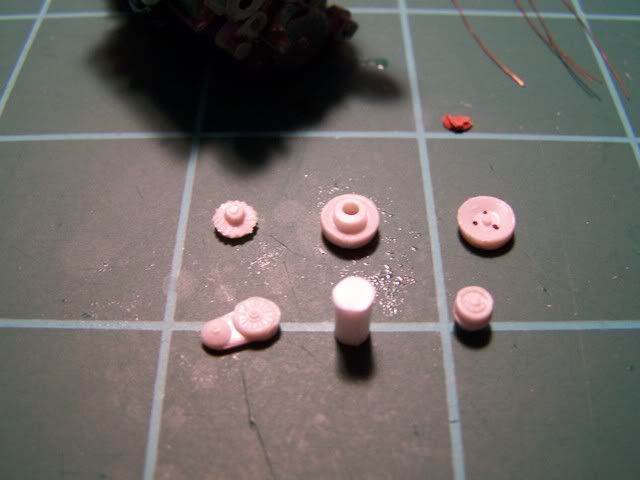 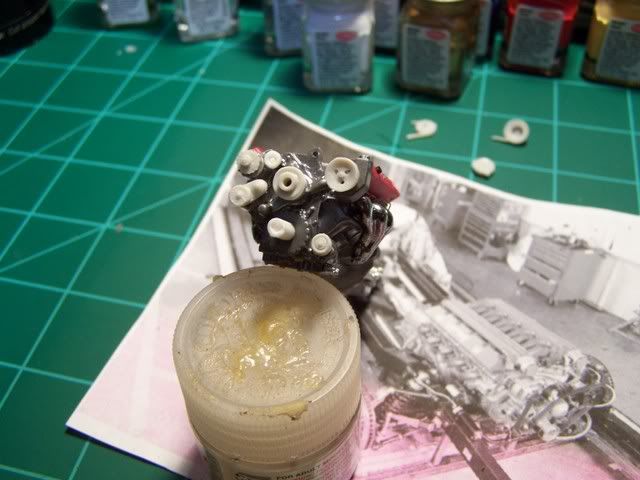 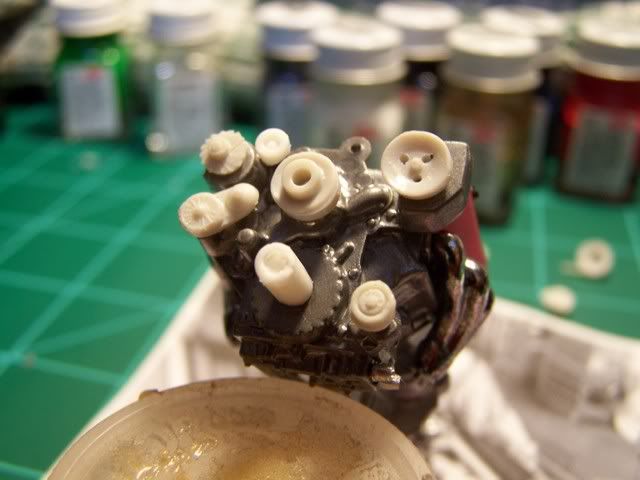  MAN!!!!!!!Kyuuketsuki STOP LEAVING CAN AROUND!!!!!! 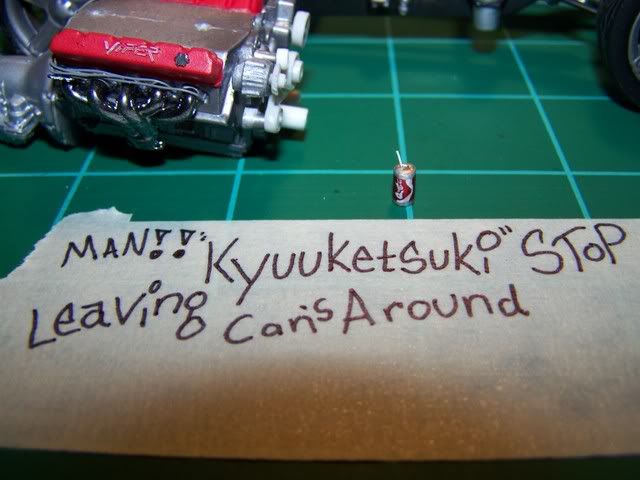 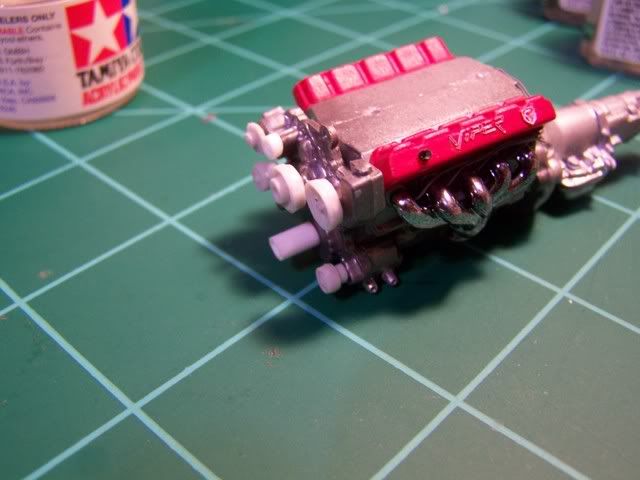 I made pully belts out of masking tape:  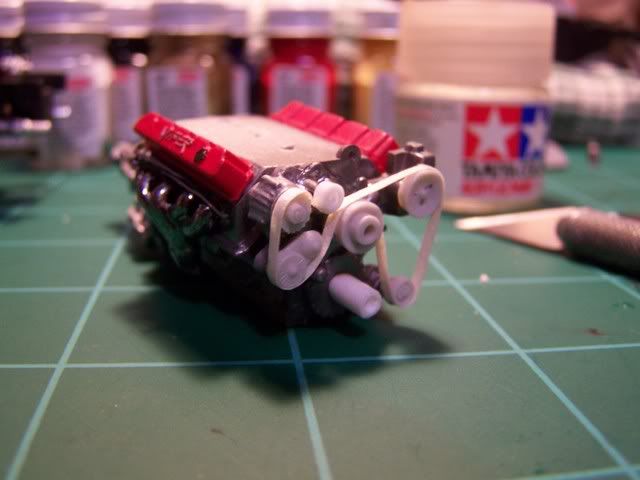  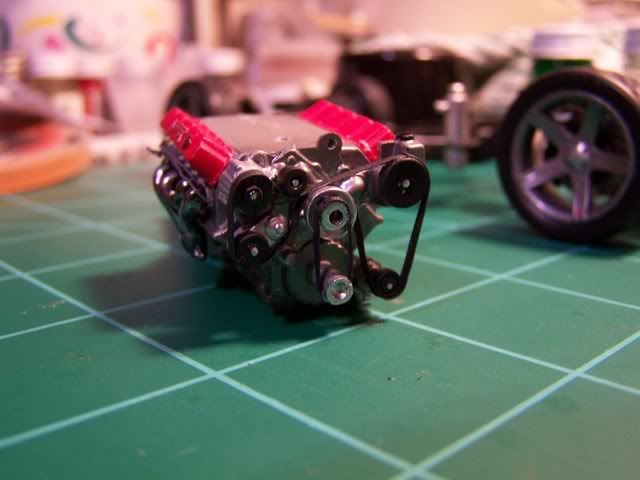 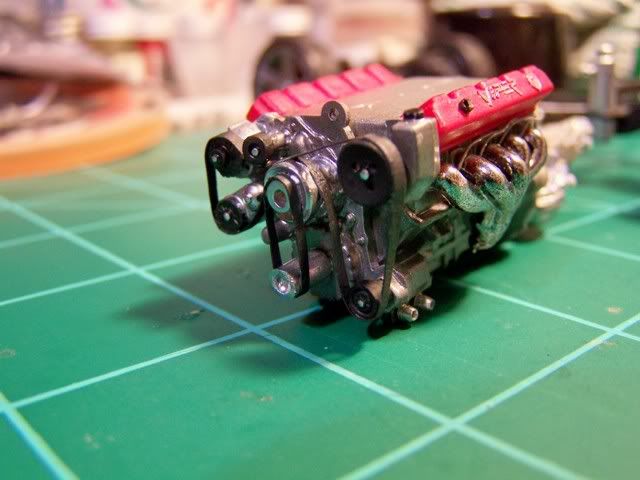 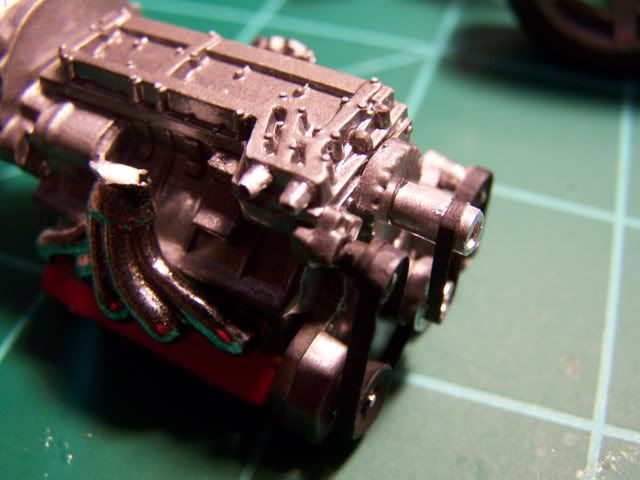  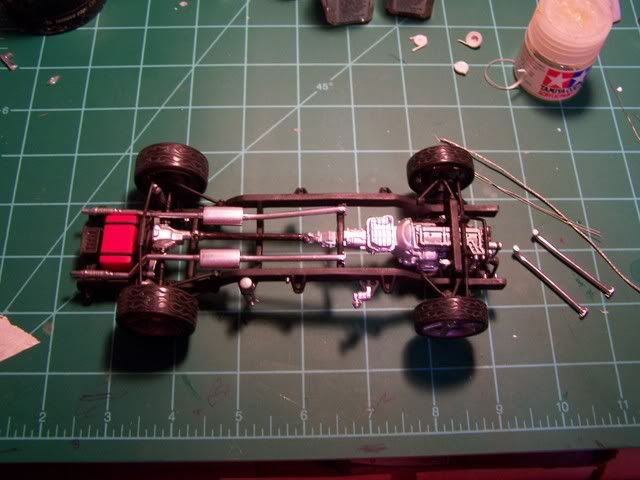  MAN what's with all the cans? 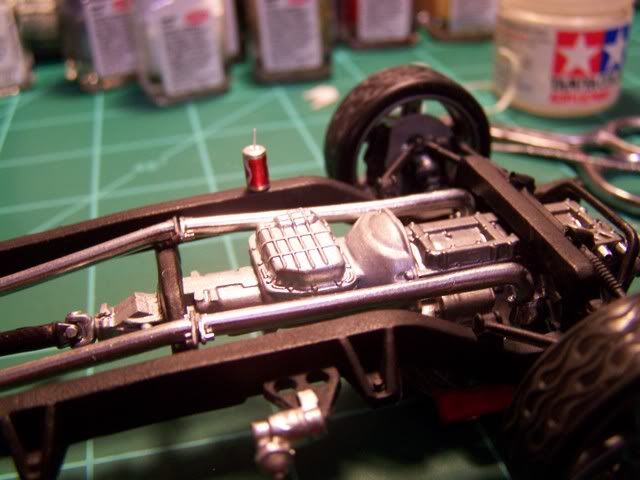 If you keep leaving half full cans laying around some things is going to go rong (It did) I went to lunch and came back and found this-  !!!!!!MAN!!!!!WHAT!!!!!THE!!!!!@#&&!!!!! Do you know how much that Engine cost now, I'm going to have to rip the block down and start all over MAN!!!!! 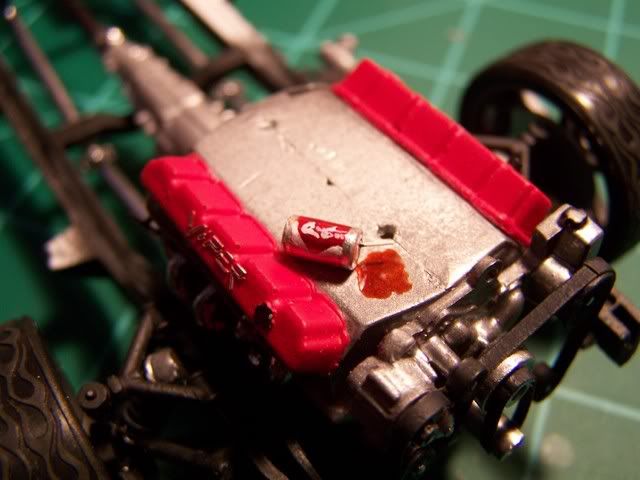 All of that was just for fun. To make the Coca spell I mixed Tamiya Clear Red & Smoky, a little more Smoke than Red ok. Next I going to have to make a Radiator yep I lost that one to. "LOL" Good thing that, I know how to make stuff. I'm going to use some fans' from ethere a Corvette or Camaro. I want that two fan look on the out side or the front of the radistor. I'll be using Brass Mesh, your going to like this one. (Let me know what you thing so far on my work). (Kyuuketsuki)-how did you make the 6 pack can holder? White_r34-(the can holder come from Detail Master you can order DM stuff from Hiroboy It's in a kit called Interior Junk #1 stock No. #2380. also, did you hand paint the individual cans? Yes it takes some time but I did it. painting the words was the hardest. You will need to use a No. #18/0 fine line detailing paint brush.
__________________
Oops I didn't see you down there sorry for running you over! http://s162.photobucket.com/albums/t248/White_r34/ Last edited by white_R34; 07-31-2007 at 02:00 PM.
|
|
#26
07-30-2007, 03:27 AM
|
|||
|
|||
|
Re: Concept Sidwinder Engine build!
gosh that coke can is amazing..lol
how did you make the 6 pack can holder? also, did you hand paint the individual cans? cant wait to do some of my own too...lol.. thanks for the instructions! Well done!
|
|
#27
08-02-2007, 10:28 PM
|
|||
|
|||
|
Re: Concept Sidwinder Engine build!
hey!! that coke can aint mine. i only take coke LIGHT...lol
|
|
#28
08-03-2007, 09:14 AM
|
||||
|
||||
|
Re: Concept Sidwinder Engine build!
Great progress, dunno why so little responses. Gotta say its coming along excellent, the paint came out top notch. Also the interior is very clean, one thing i noticed is when you put on the flocking it was in clumps. I don't know if you used a strainer, but it really spreads out the flocking and covers it well. The coke cans are a nice touch, but i just hate it when i spill some on my engine.
__________________
In Progress    
|
|
#30
08-09-2007, 06:36 PM
|
||||
|
||||
|
Re: Concept Sidwinder Engine build!
Hello all I'm back to finish up.
This time befor I build the radiator I needed to put in the braided lines on the engine oil pump, cool can; then the radiator build begins. for all of you who have not used braided lines befor you will need to use the hard lines that go in side the braided line. so when you shape the hose it will keep it's shape. 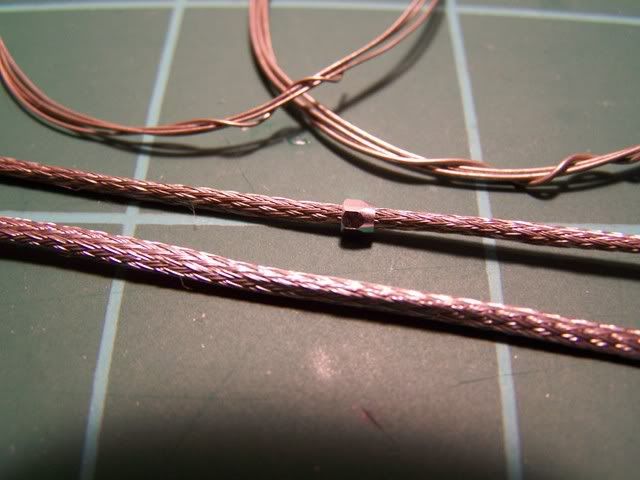 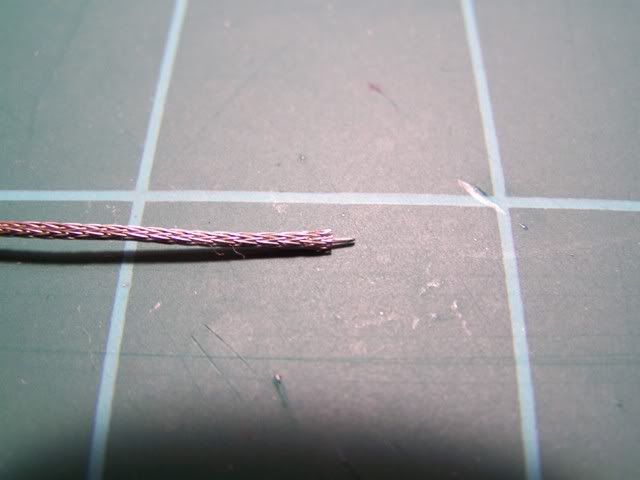 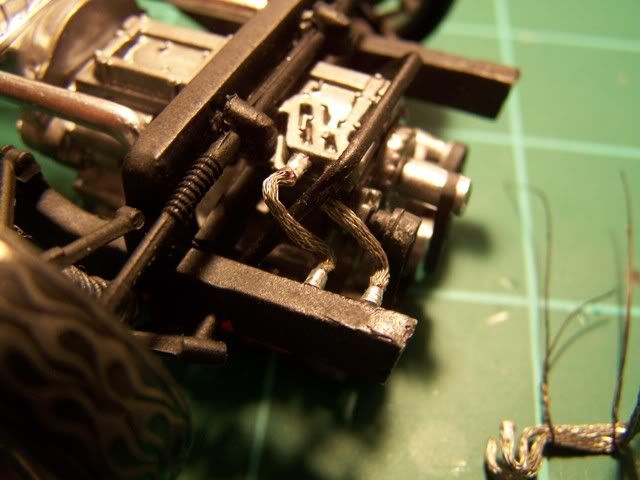 The first time I shaped the hoses fro the cool can they where hanging to low I test fitted the body panel and didn't like the look so I reshaped the hoses to look more realistic i used copper wire for the tyes' and super glued them in place. 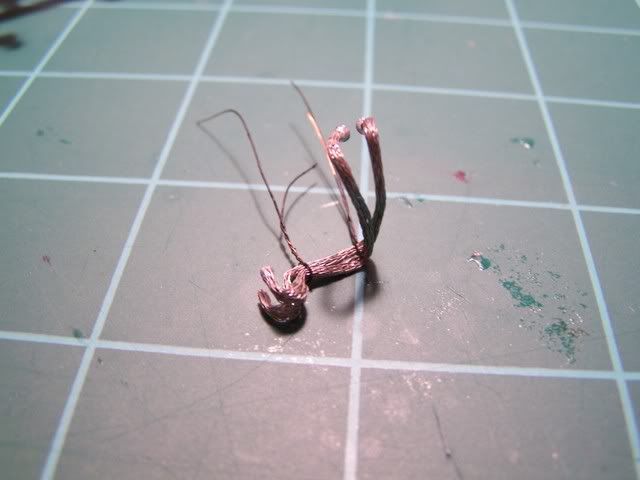 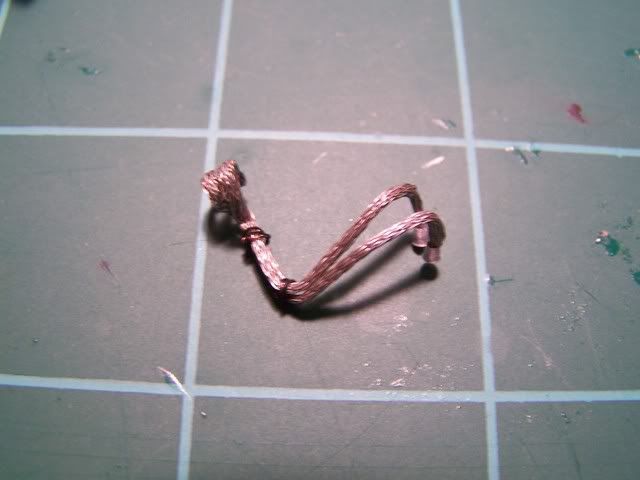 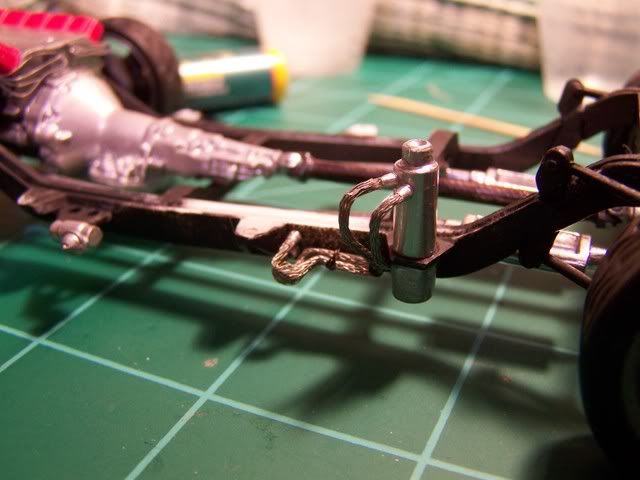 One quick note I used copper wire for the brake lines. Thin I pained them silver and put the master Cel. on the fire wall. 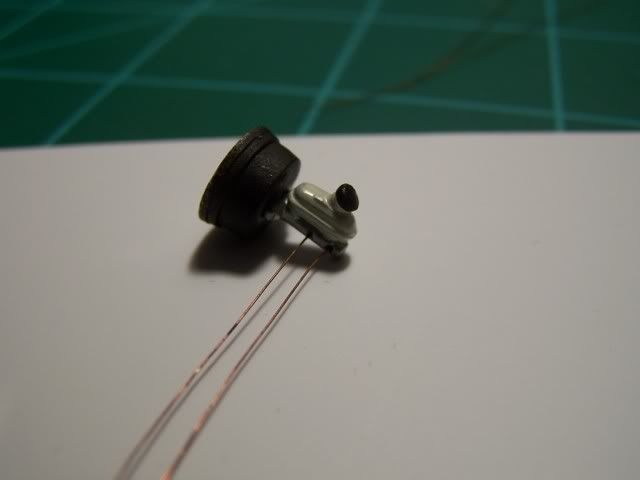 On the Radiator build I changed the way and where the fans will be located. I will use some of my resin fan on the inside facing the engine. then I test fit the fan and liked the look. First what I used to make the Radiator. 1.DM Coolint hose..........................(DM) DetailMaster 2.VRW Resin fans count 2 3. .015 thick Sheet Styrene 4.WireMesh type Brass 5. Testors Clear Cement for Plastc 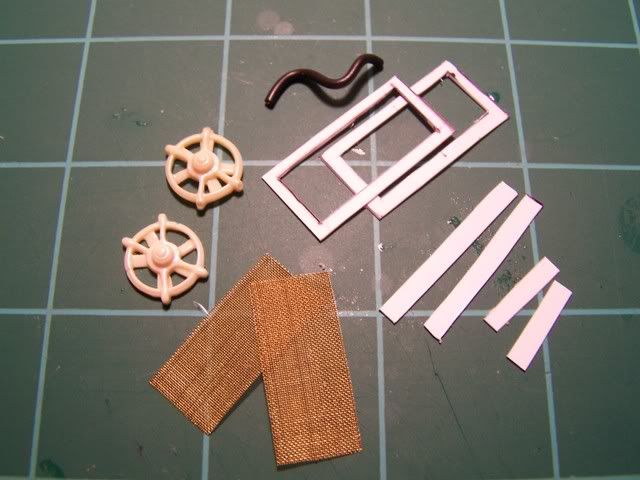 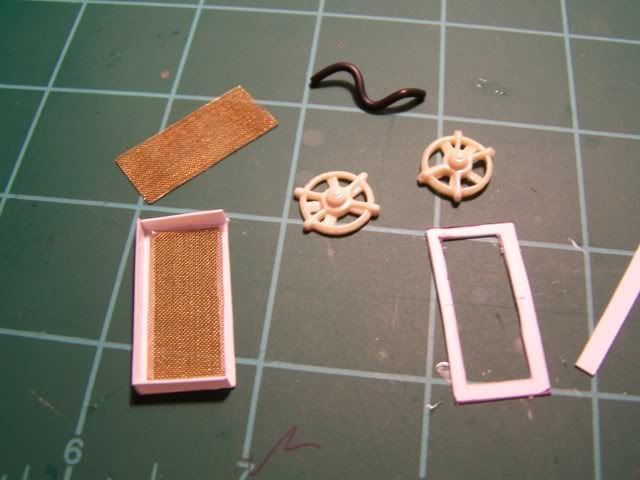 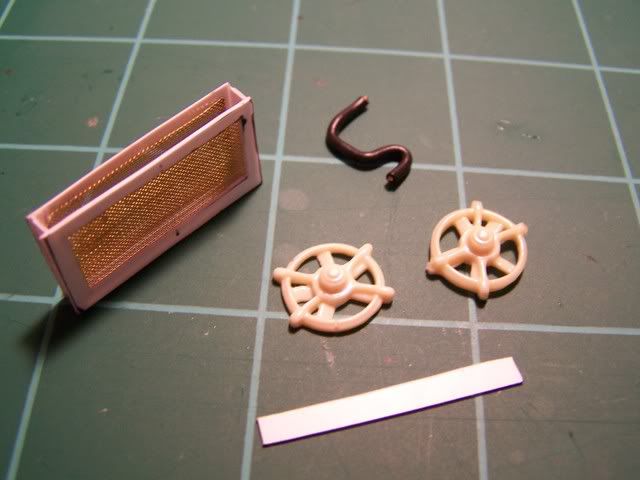 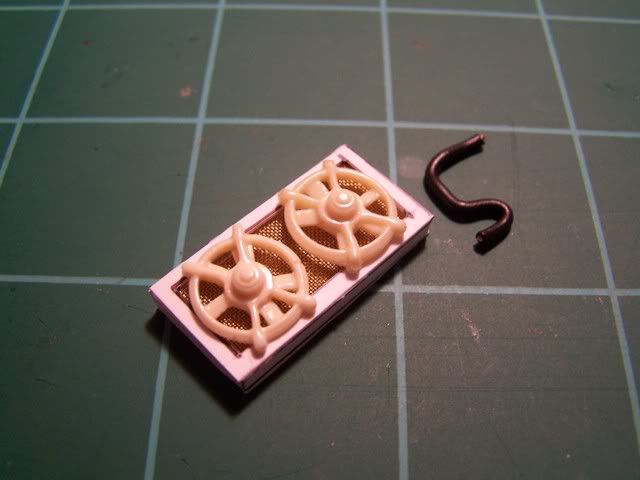 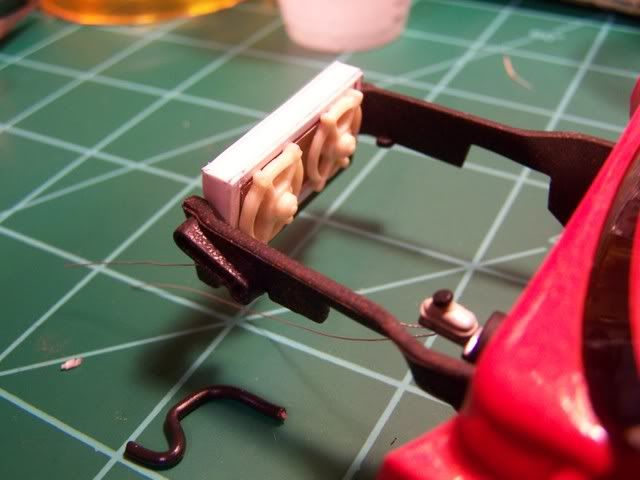 Do not use the image of my hose to make yours that shape comes from the shape on the Instruction sheet. You will have to reshape the hose to fit you configurations. Now on to the window your going to have to reshape the lower half of the window to fit properly. sand down the lowest part of the window. your goint to half to fit the lipe of the window under the tope of the fire wall, then flip it in there dun! 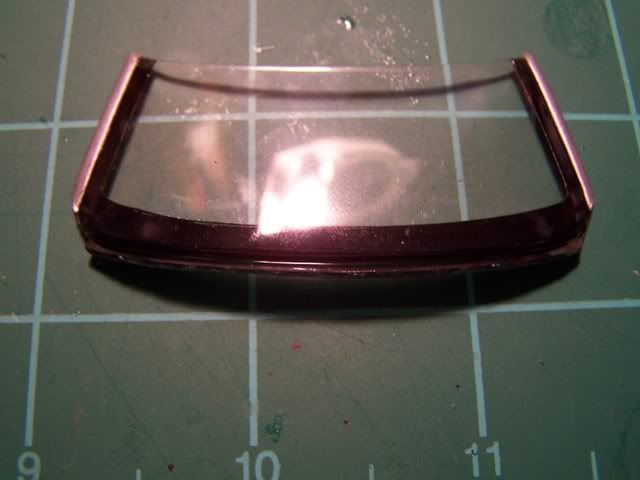  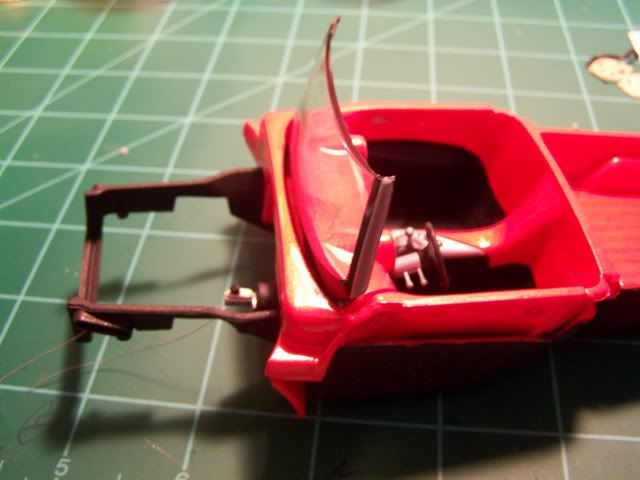 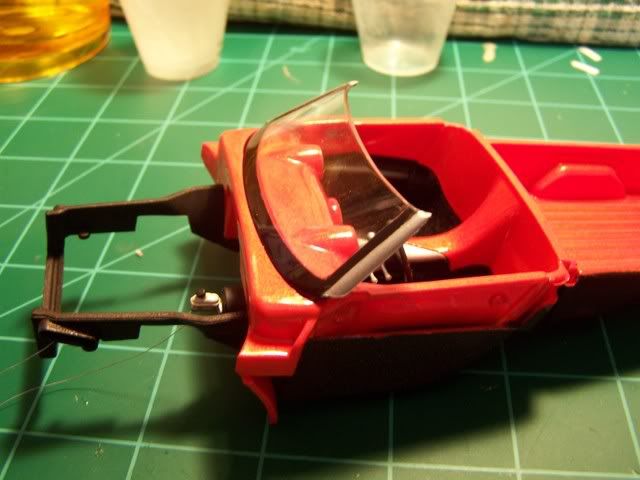 Just before i wint and put the uper assembly on I just remeberd that I didn't make the top of the Coilovers wooooooooooooo! thats not good. So I cut some small triangles for the mounts and used StripStyrene 3/64" Rod + .025" Rod.the 3/64" was for the bolt mount and the .025" was the bolts'. Then I painted the top to mach the Chassis. (Sorry I did it so fast that I didn't take pix) Now I painted the radiator and put it on and the intake plenum. 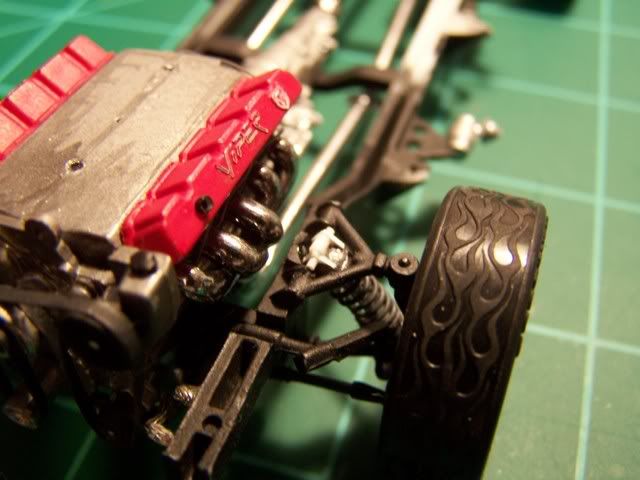 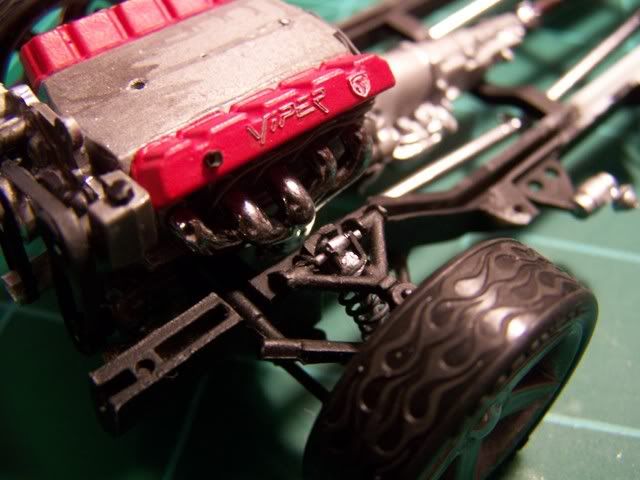  I had to cut a part of the front cowl to make room for the coolint hose.  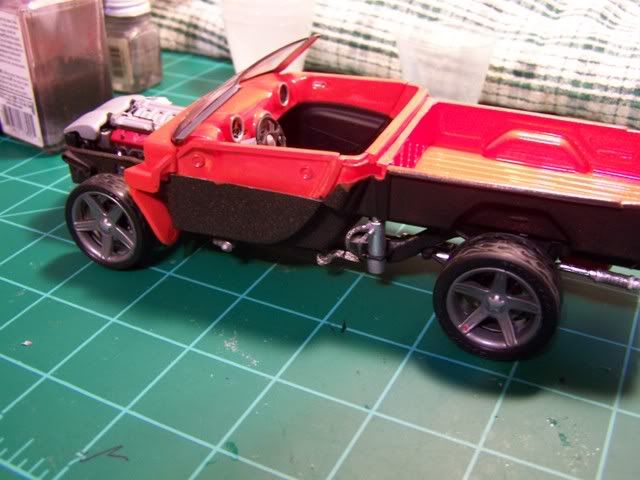 THE FRONT BUMPER Now thats a problem I put the bumper on the way the sheet tells you to but the sheet is rong!!!!!!!!!!!!!! You need to cut down the mounting part of the bumper and put it up on the front of the radiator. I know your asking what do you mean. just look at what I mean! first the BAD fit thin the Right fit.  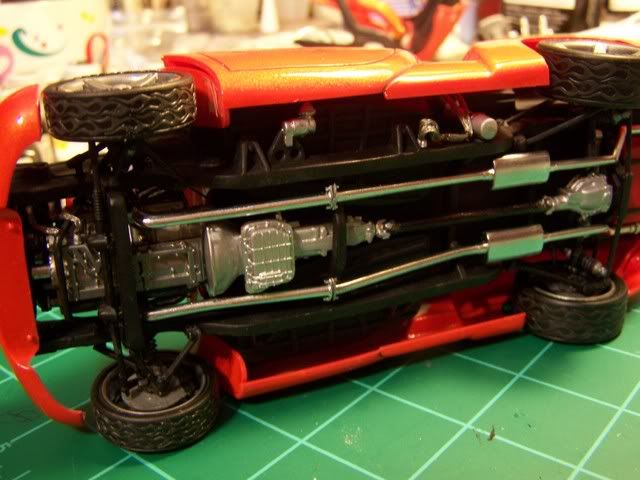 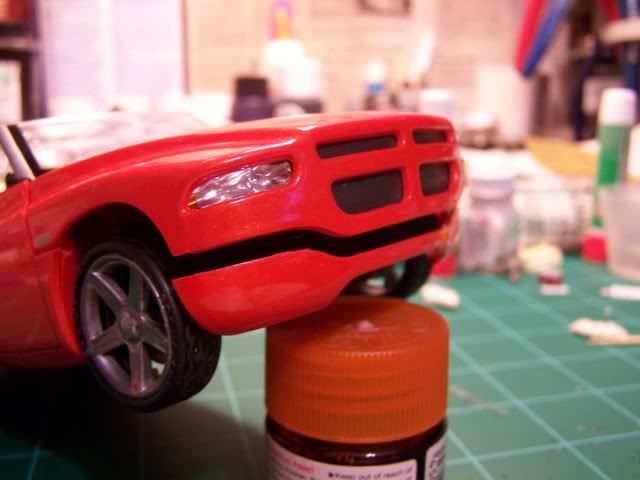 RONG LOOK thats not like the Real Truck MAN!- that go's out to the makers of the Models. First the Reshape and fit on GOOD.................. 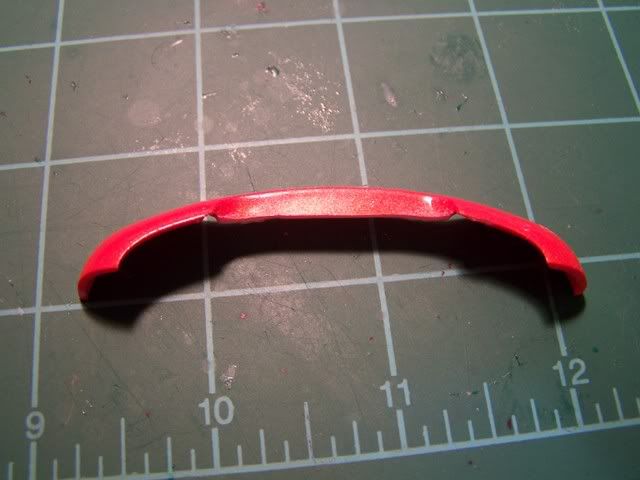 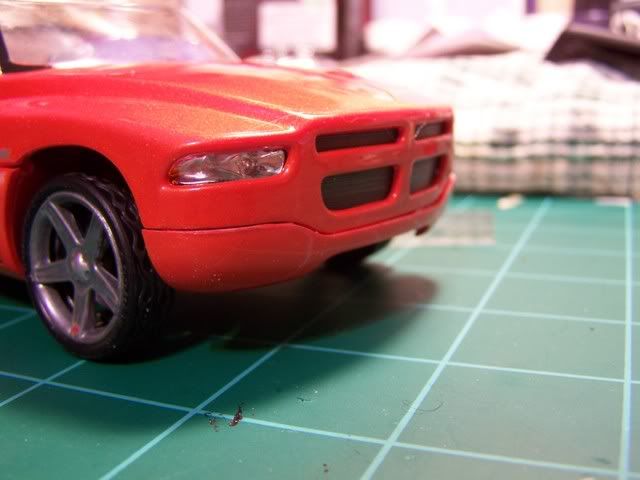 AND yes the hood will still open you know that you need to pull the hood to you then flip it up. 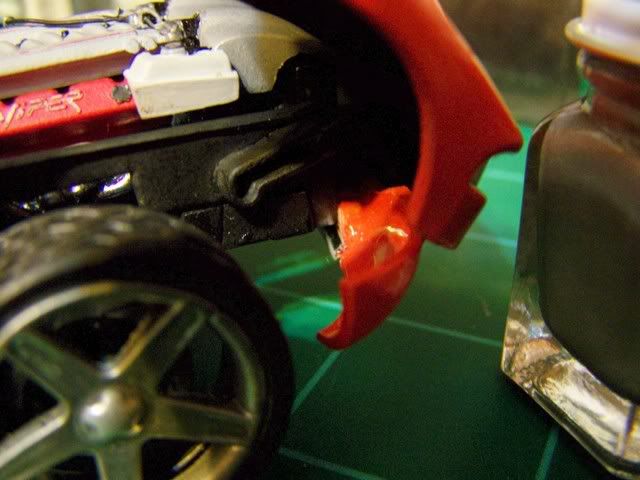 OH YES go back a Touch up all the things that need to be look after. Seams I'm dun NOT YET!!!!! ones I got the body panels on I wanted for the teal lights to look more realistic like real LAD light so I hand painted thim. First a all black back grown then silver as the basefor the tamiya clear red. At the end I painted the hole thing black around the light a put on the clear cover. 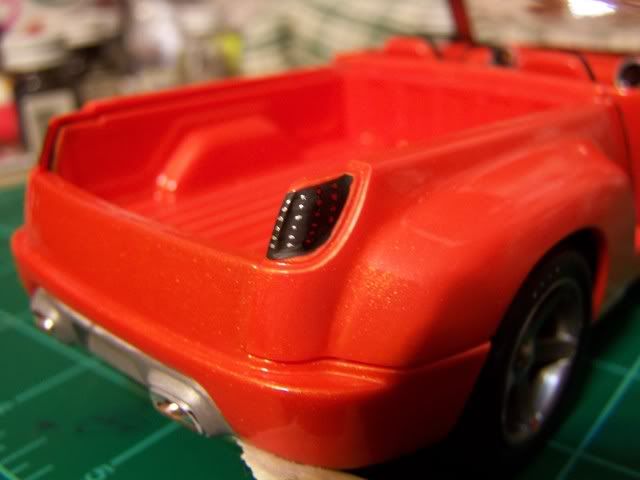 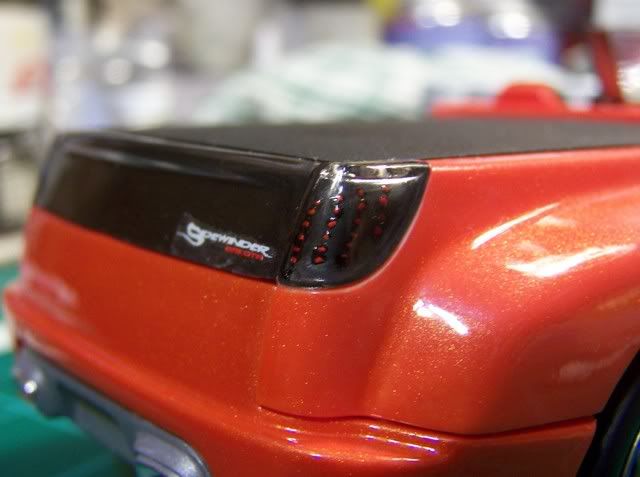  Look real or what? on the hood I used Clear Sheet Styrene for the front head light covers then put on the hood.  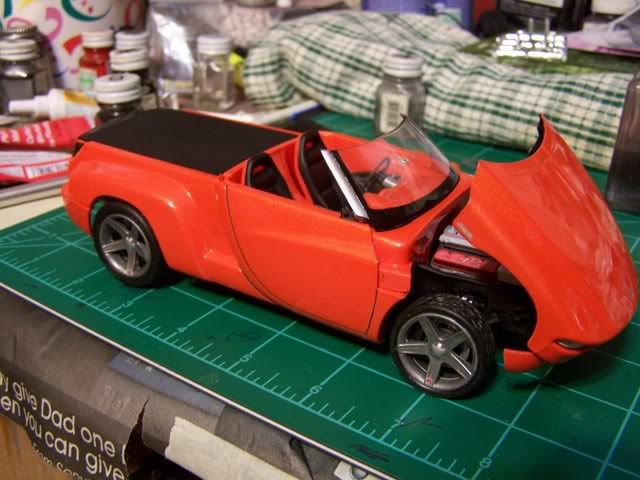 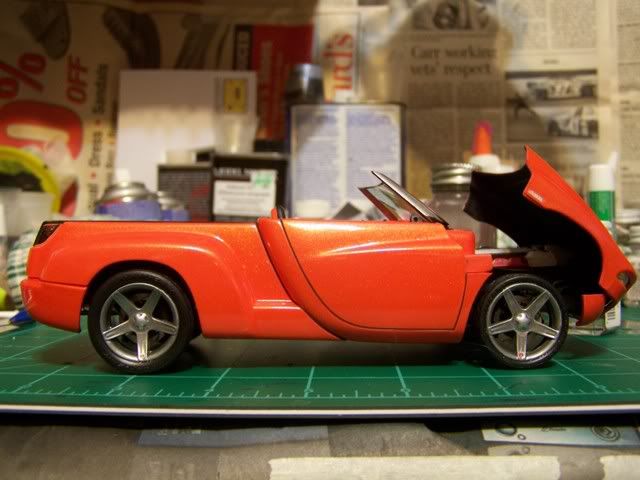 I think it looks good so far. Dubble meat, Dubble cheese, Dubble mmmmmmmmmmmmmmmmm.......... LOL Now for the Rear view mirrors. I didn't want to use the ones in the kit and I don't like the way they look, so I made my some that look more realistic. 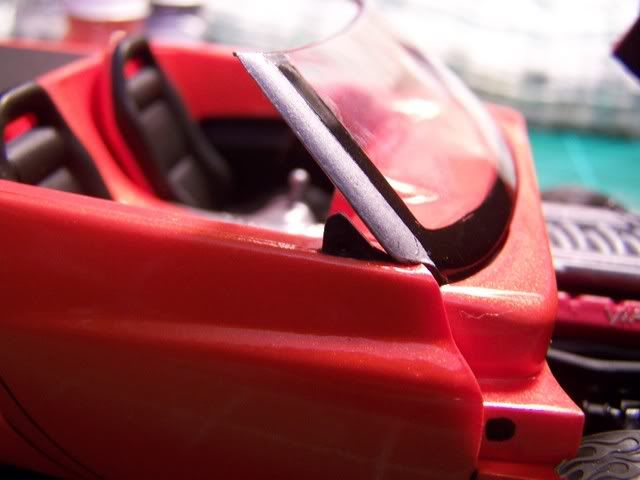  I made the Mirrors from drops of Resin then I drilled holes in back and used PSF battery cable wire for the arm's of the mirrors. The resin is wet in this pic. 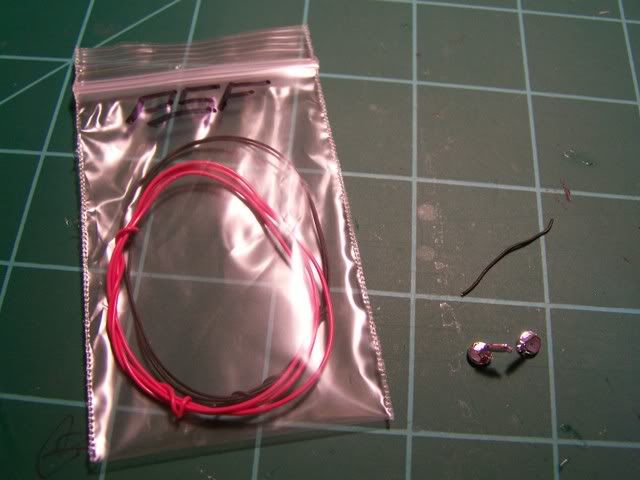 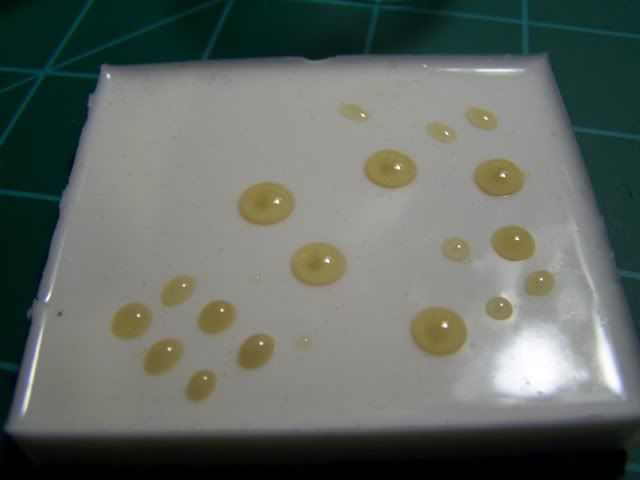 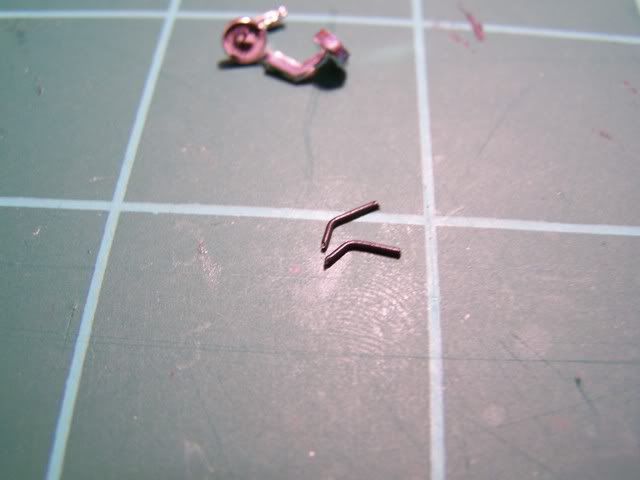 OH Yeah I compaired the mirror from the kit for the right size. 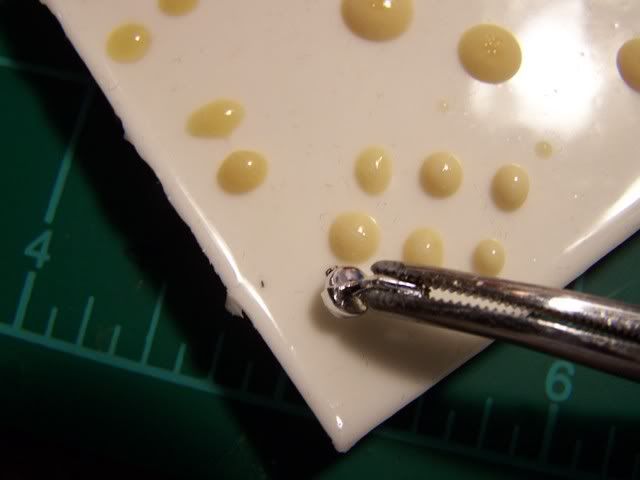 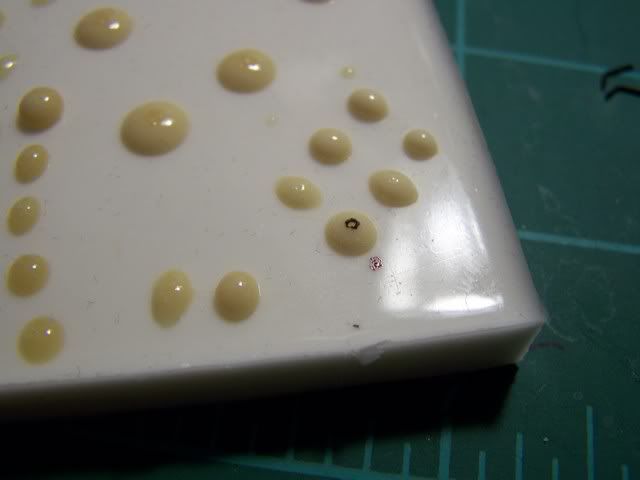 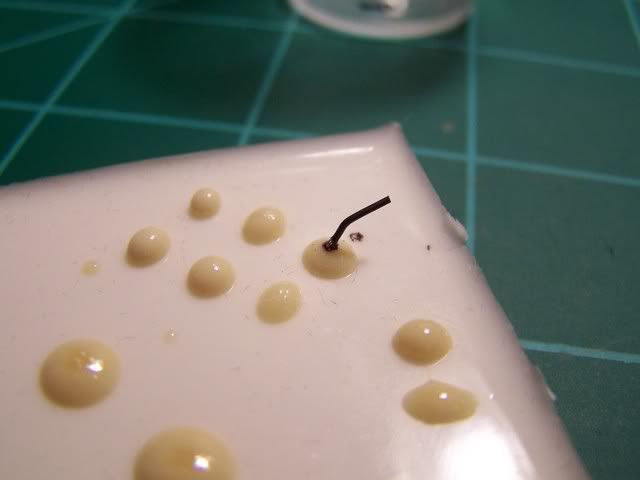 NOW wich one would you use? 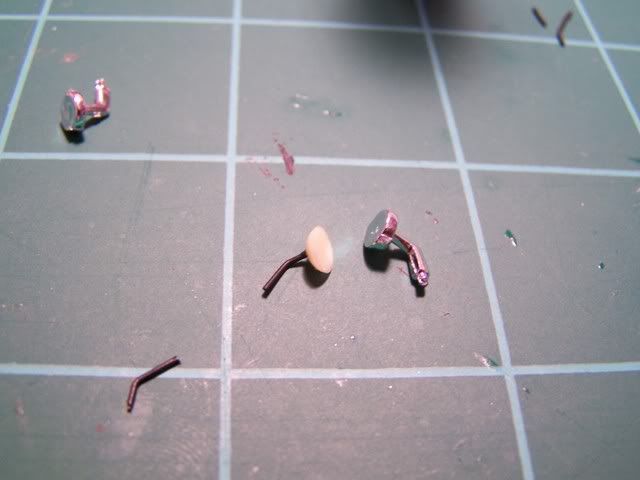 I super glued the arm on than glued them to the body with testors cement so I could move thim in to the positions I wanted and held them up with tooth pics till they dryed. I painted them silver on the out side and gloss black on the face so I could use Alclad II Chrome ALC 107..  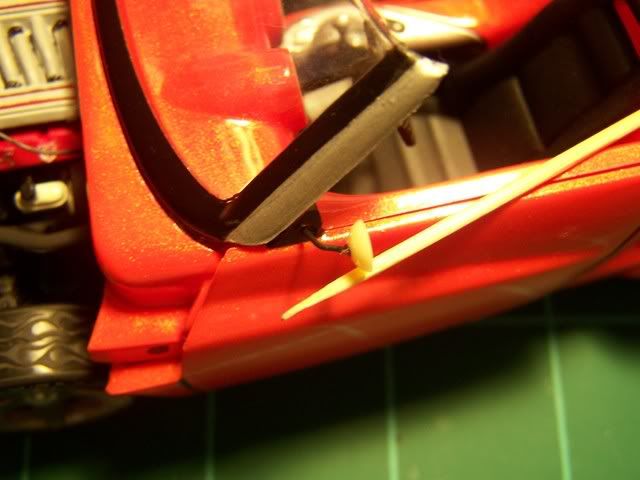  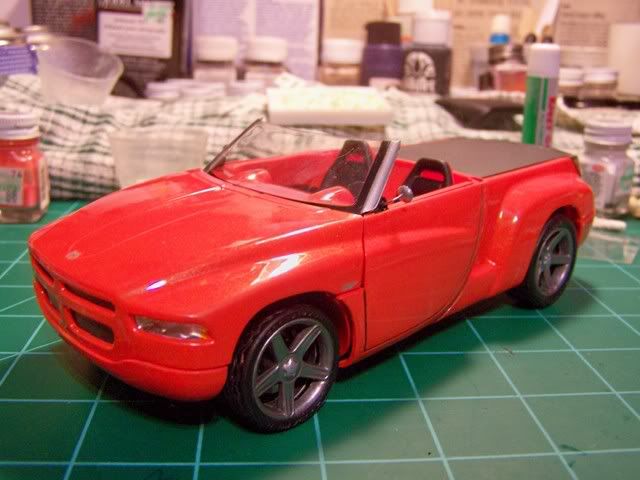  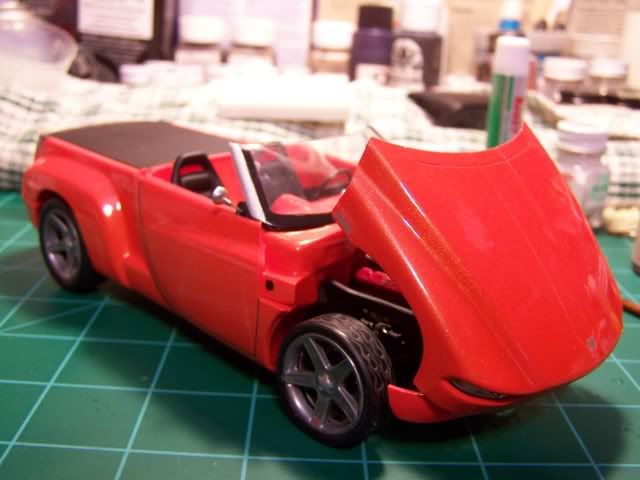 Looks good huh? OH and before I let you all go on the Clock in the dash on the 1:1 scale truck theres a nob on the clock so I made one from 3/64" Rod.  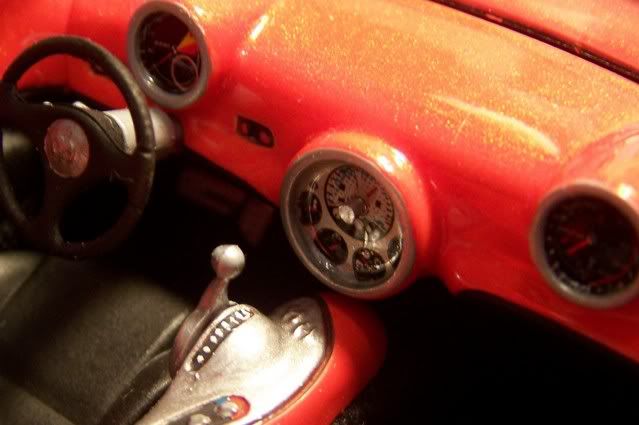 You know that if you where cruising in your truck you would need or want some thing to drink, HUH? and you have nothing to hold your soda;Well I got just the thing a can holder AH................. 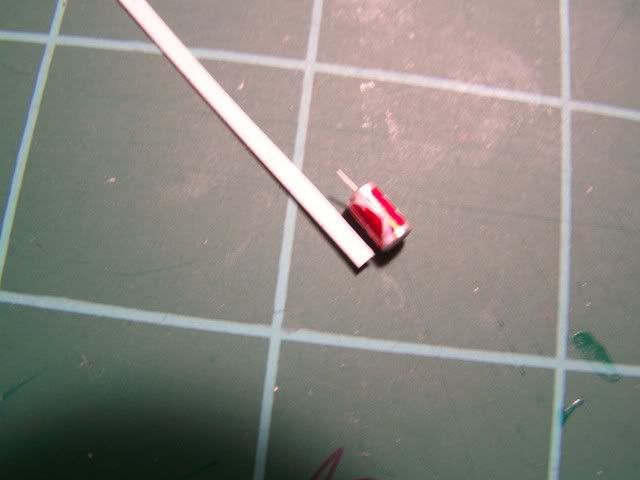   OK that is yall now for that Magic hr. Shot of the sun rise shot didn't work the way I wanted so I got some shot any way you tell me what you all think. On a bigger note I hope the ideas in this thread will help any one who needs them.  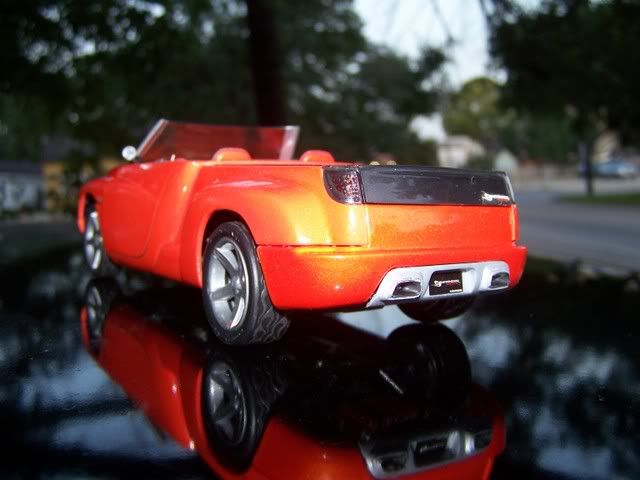 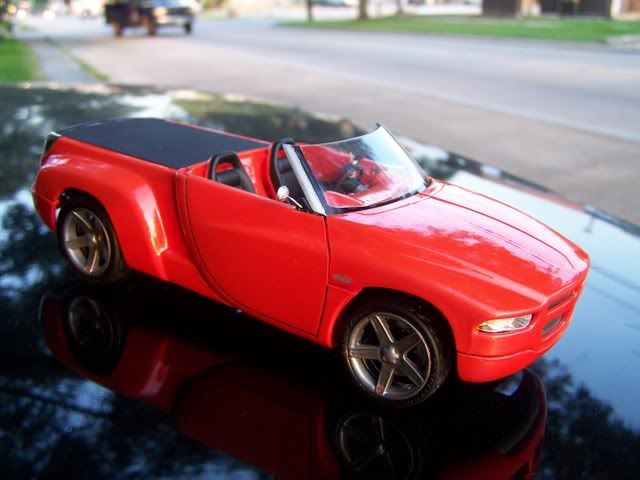 
__________________
Oops I didn't see you down there sorry for running you over! http://s162.photobucket.com/albums/t248/White_r34/ Last edited by white_R34; 08-09-2007 at 08:15 PM.
|
|
|
POST REPLY TO THIS THREAD |
 |
|
|


