|
|
| Search | Car Forums | Gallery | Articles | Helper | Air Dried Fresh Beef Dog Food | IgorSushko.com | Corporate |
|
|||||||
| WIP - Street Post topics for any "Works In Progress" street vehicles projects in this sub-forum. |
 |
 Show Printable Version | Show Printable Version |  Subscribe to this Thread
|
|
|
Thread Tools |
|
#17
 03-23-2007, 09:34 AM
|
||||
|
||||
|
Re: Orange 7 WIP
Well, to me the scale of the splotches is on the small side for Giraffe on this project. I was going for "animal print look", over replicating an actual hide. And Cow just didn't seem appropriate for this ride... And thank you!
Here are some more parts I used SMS Faux Fabrix on for texturing. "It's not just for seats anymore!" The rear bulkhead received several very wet coats, (let dry between coats), to replicate the rubberized spray coating/insulation. (Keeps, stone chips from damaging the C/F too.) The transmission took a light coating for a fine sand-cast look, and the front of the engine/head got a matching amount as was applied to the block.  Heres the finished rear bulkhead installed in the frame. The rivets are raised on the floor and rear panels. I lightly sanded them to allow the aluminum to show through the decal with some 1000 grit sandpaper. 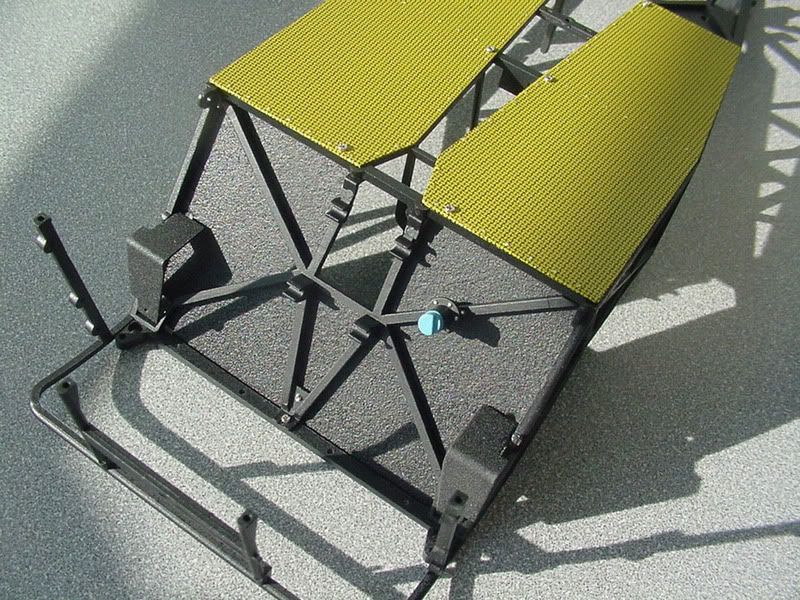 SMS 1/12 Hi Def C/F on the interior side.  Stay tuned... - Mark 
|
|
#18
03-26-2007, 10:54 AM
|
||||
|
||||
|
Re: Orange 7 WIP
The brake rotors were sprayed with Tamiya Natural Metal, then sprayed with an even medium coat of TS-71 Smoke, and then again sprayed with a couple light coats of TS-17 Gloss aluminum. Each coat of each color was allowed to dry before putting on the next layer.
The hubs were textured with, you guessed it, Faux Fabrix.  The rear differential was given a sand cast look with the same method  Next stop, engine work... - Mark
|
|
#19
03-26-2007, 07:12 PM
|
||||
|
||||
|
Re: Orange 7 WIP
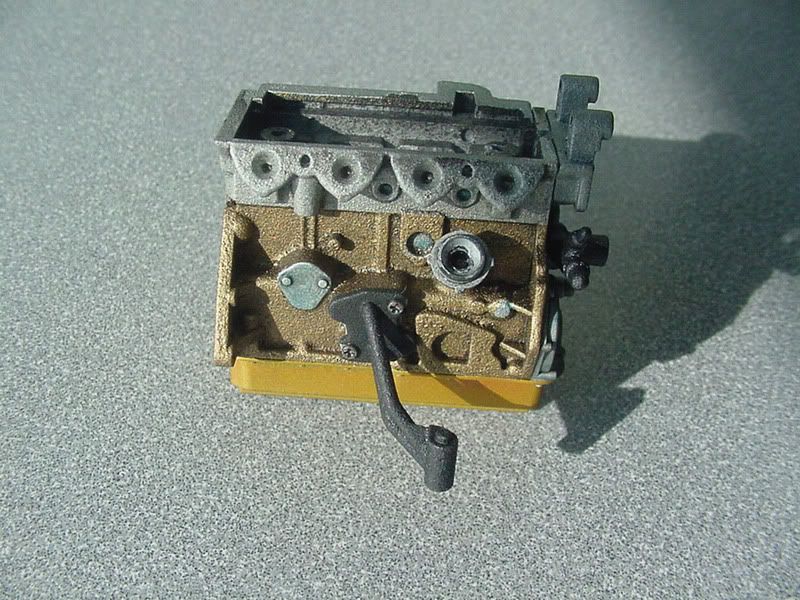
More work accomplished on the engine
|
|
#20
03-26-2007, 07:35 PM
|
||||
|
||||
|
Re: Orange 7 WIP
Looks great Mark. Just as nice as the blue one. I like those rotors, what is Tamiya Natural Metal?
Mike.
__________________
   
|
|
#22
03-27-2007, 08:28 AM
|
||||
|
||||
|
Re: Orange 7 WIP
The Natural Metal is from the Tamiya aircraft paint line. AS-12.
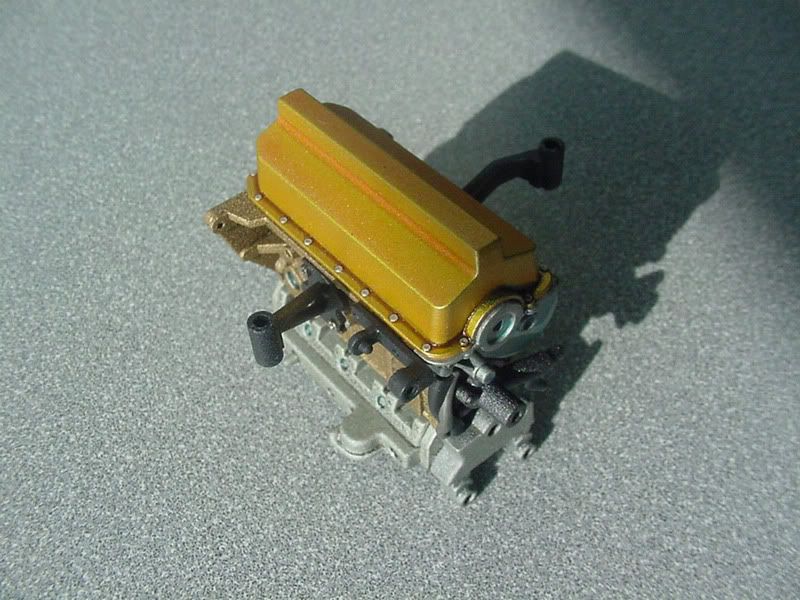
Thanks, but this is actually quite a bit simpler than the blue one. These are kit parts. (What a concept!) The blue one is made up of mostly scratchbuilt and/or super detailed and modified assemblies. The cam cover is the only thing on this one painted that color. Orange 7 will be orange and carbon fiber on the exterior... - Mark
|
|
#23
03-27-2007, 09:18 AM
|
||||
|
||||
|
Re: Orange 7 WIP
The aluminum body side panels were scratched and I wasn't able to polish them up to a level I was happy with. So I went back to an option I had originally considered for this build, carbon fiber. A base coat of semi gloss black was sprayed on to promote decal adhesion.
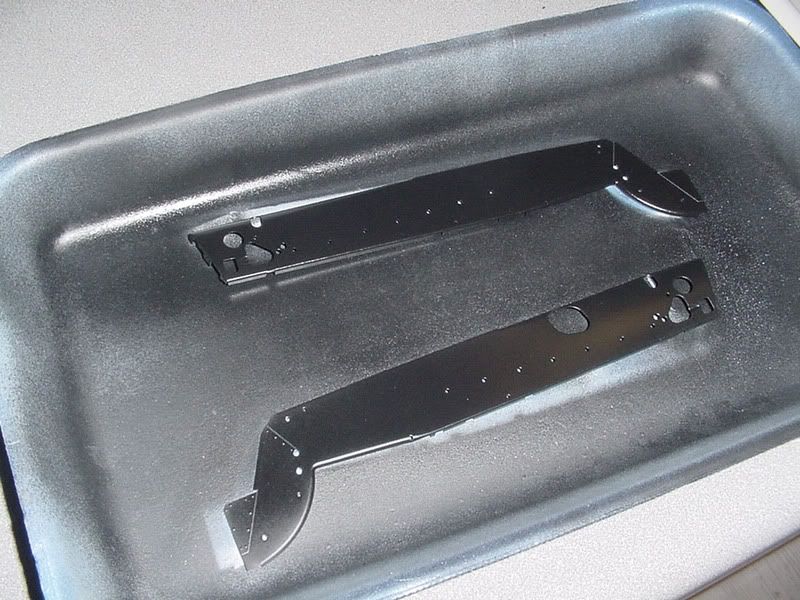 Scale Motor Sport 1/12 scale Hi Def C/F decal (#1512) was applied in two main parts on each panel. Once FULLY dry, a 50/50 mix of Testors Dullcote and Glosscote was sprayed in a medium light coat and allowed to dry. The same application was repeated about 30 minutes later. The seams of where the decals overlapped were sanded out with 1000 grit wet and another coat of the 50/50 mix was applied to make the sheen uniform. 
|
|
#25
03-27-2007, 06:45 PM
|
||||
|
||||
|
Re: Orange 7 WIP
Quote:
The carbon fiber sides look great. Mike.
__________________
|
|
#26
03-27-2007, 07:22 PM
|
||||
|
||||
|
Re: Orange 7 WIP
unbeliveable detail as usuall!!
|
|
#27
03-29-2007, 08:33 AM
|
||||
|
||||
|
Re: Orange 7 WIP
Here the sides are attached and the basics of the front suspension are in place. Care must be taken when putting the side panels on as to not chip the decals applied to either the sides or the floor panels. Only a little extra time and vigilance was needed to get both sides on event free... - Mark
 
|
|
#28
03-29-2007, 03:13 PM
|
||||
|
||||
|
Re: Orange 7 WIP
The rear panel, also made of the same soft aluminum as the sides, received the same SMS Hi Def C/F treatment as the sides. Here you can see the first largest single decal panel applied. The holes were cut out with a sharp knife after the decal had fully dried.
 I like to use semi gloss black as a base because it dries faster than high gloss and is glossy enough to not cause silvering problems. These decals are dense and opaque enough that any base color will work, but they work much better over a painted surface than raw metal, plastic or resin, like all decals. Here it is finished.  It took several decals to cover all the edges and contours. Not difficult, just time consuming. It is best to decal a part like this over several days, a little at a time, letting each application dry before proceeding. Once all the decals were dry it was clear coated with the same 50/50 mixture of Gloss and Dullcotes and treated to the same finishing techniques as the sides. As you can see it works well to hide the seams, if you get them lined up when you are decalling...
|
|
#30
03-29-2007, 07:10 PM
|
||||
|
||||
|
Re: Orange 7 WIP
Excellent work Mark. I've not tried the high-def decals yet (I do have some), anything I need to know?
Mike.
__________________
|
|
|
POST REPLY TO THIS THREAD |
 |
|
|


