|
|
| Search | Car Forums | Gallery | Articles | Helper | Air Dried Beef Dog Food | IgorSushko.com | Corporate |
|
|||||||
| WIP - Motorsports Post topics for any "Work In Process" motorsports vehicles in this sub-forum. |
 |
 Show Printable Version | Show Printable Version |  Subscribe to this Thread
|
|
|
Thread Tools |
|
#16
 05-15-2015, 12:38 AM
|
||||
|
||||
|
Re: Audi R18 LeMans 2014 1:24
Hi Joachim,
every time very impressive. Cheers Sascha
__________________
Take a look to my Facebook site https://www.facebook.com/profile.php?id=100006453230358 
|
|
#19
05-22-2015, 07:20 PM
|
|||
|
|||
|
Re: Audi R18 LeMans 2014 1:24
The next area to work on, were the bodywork connections of the fenders with the nose.
Here they are still in their original shape. 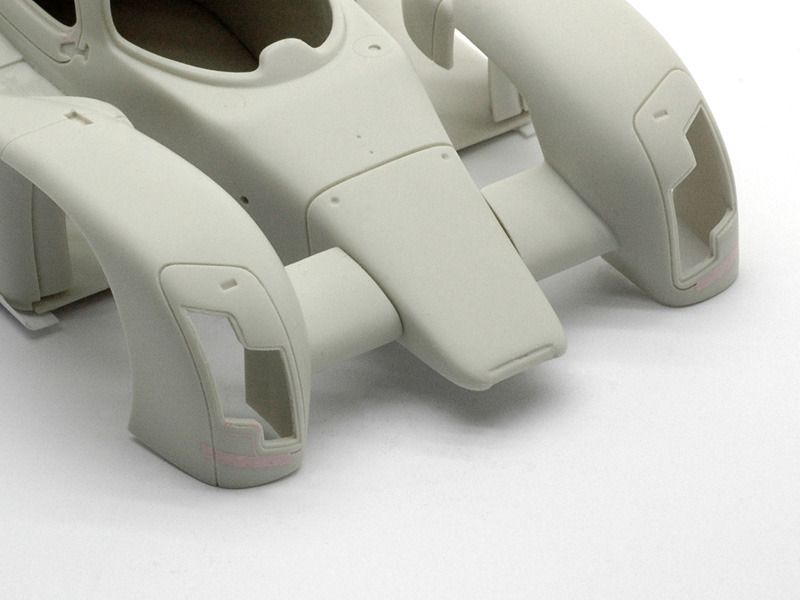 They are rather fat. You can see that when comparing them to a reference picture:  So I sanded them thinner from the top. Their top surfaces are still higher up ( relative to the nosecone ) than on the real car, but this was as far as I could go without exposing the connection of the parts and without reshaping the nose. 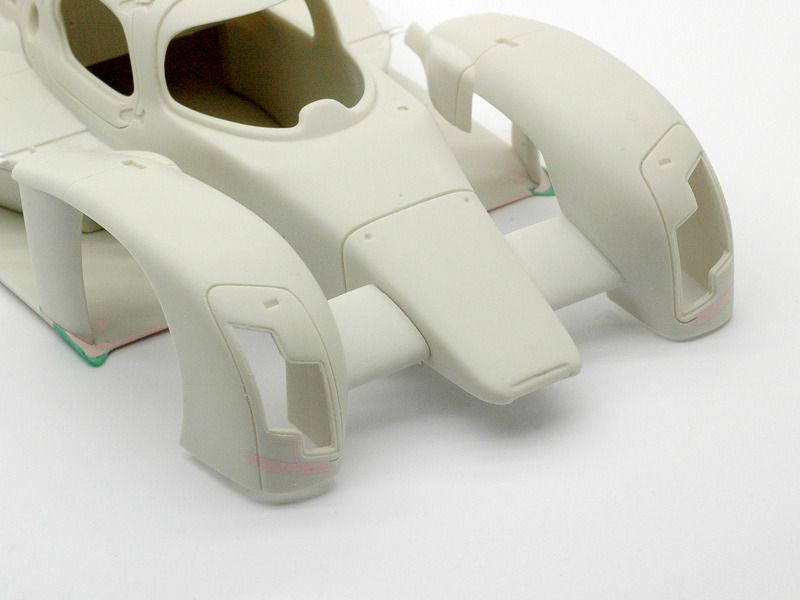 The next parts to attach were the body panels over the front suspension ( in between the fenders and nosecone ). The kit parts are made from white metal and already incorporate the front axles. Studio27 wants you to later glue the uprights ( and wheels ) to them. I didnt quite agree with that for several reasons. Just look at the locator pins of the parts in the next picture. They really only locate, so the parts would only be connected to the main body by glue ( and thats a load bearing connection ). Next it turned out, when using the marked holes on the nosecone, the parts were at different heights ( by about 1mm ). This means the wheels would end up at different heights. Not good at all... Finally they were too wide. So I decided to make resin copies again and modify those. One could use the kit parts, but I dont like to do such jobs on white metal bits. 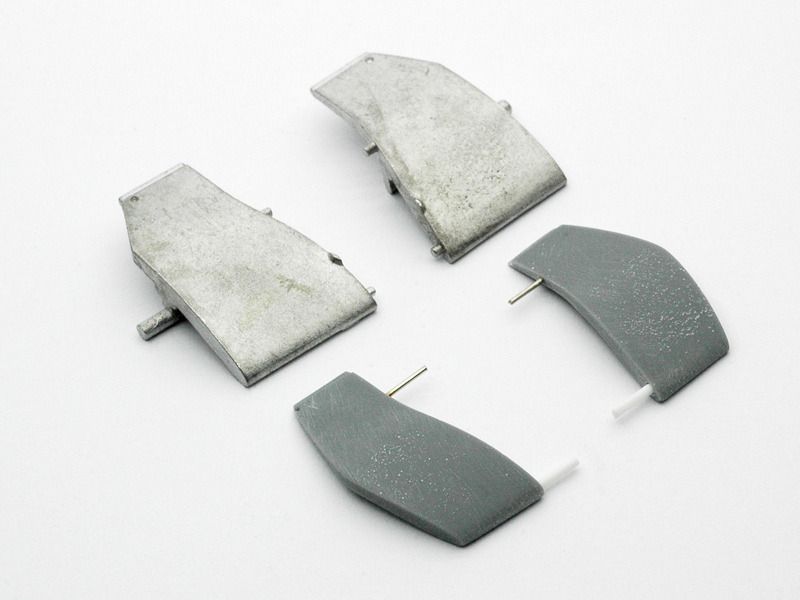 As you can see, when comparing the white metal parts with my resin ones, I incorporated much longer pins and cut off the stub axles. My parts are also narrower and dont have a straight outer edge... for a simple reason: the front wheels and uprights inner sides sit close to that edge. Now, occasionally during a race front wheels need to steer. If they are mounted next to a straight panel edge, theres not much steering going to happen. It seems that thought also crossed the mind of some engineer at Audi:  So, thanks Studio27 for another thought through kit detail! Here are my modified parts dry fitted to the nosecone. 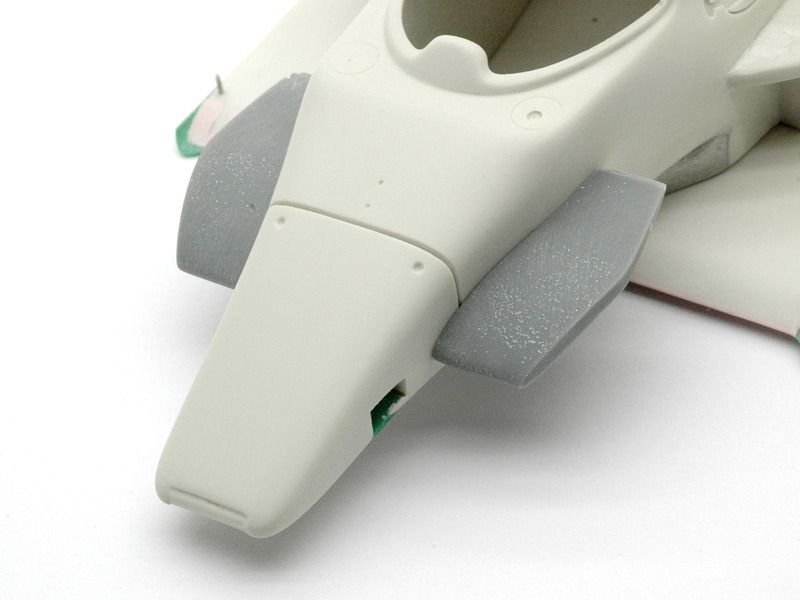 And in the next picture the fenders are also installed. 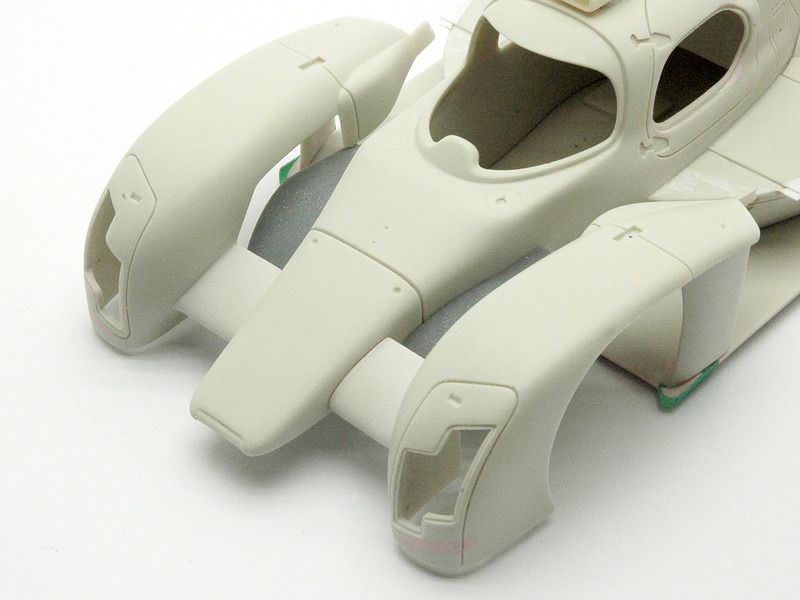
|
|
#20
05-23-2015, 03:52 AM
|
||||
|
||||
|
Re: Audi R18 LeMans 2014 1:24
suspect there is also a little issue in the connection part between the esternal part of the front nos wing and the cover for wheels..

__________________
Paolo - LoveGT40 Modelworks website www.alsoldatino.com my YT channel : https://www.youtube.com/channel/UCIp..._as=subscriber FB: https://www.facebook.com/alsoldatino
|
|
#21
05-25-2015, 05:01 PM
|
|||
|
|||
|
Re: Audi R18 LeMans 2014 1:24
hahahaha nice way to save the steering issue
 looking forward to more improvements.
__________________
olly olly oxen free
|
|
#22
05-26-2015, 07:08 AM
|
|||
|
|||
|
Re: Audi R18 LeMans 2014 1:24
Yes Paolo, well spotted :-)
That is something i still need to work on. The big problem is, that the front fenders are too wide over all. The angle of the surfaces in that area will not be correct in the end, but i'm not going to rebuild the fenders completely.
|
|
#23
05-26-2015, 08:42 PM
|
||||
|
||||
|
Re: Audi R18 LeMans 2014 1:24
Quote:
lol
__________________
 It's Not wheather you Win or Lose, its how you look while you play the Game
|
|
#24
06-06-2015, 08:48 AM
|
||||
|
||||
|
Re: Audi R18 LeMans 2014 1:24
Wow! A new Jaykay project! If this is anything as good as the Leyton House March, we're in for a treat!
Great progress this far and crazy attention to detail as usual! //Emil
__________________
Men love women...but even more than that! Men!...Love!...CARS!
|
|
#25
08-10-2015, 07:33 PM
|
|||
|
|||
|
Re: Audi R18 LeMans 2014 1:24
After a long break theres finally something new to show. Unfortunately I didnt get a chance to build during the last 3 months, so when I finally got some free time now, I went for it despite the hot weather.
After the last step shown, there needed to be a bodywork connection between the axle panels/front fenders and the sidepods. The kit provides a thin etched panel and a thick white metal one to close that gap. 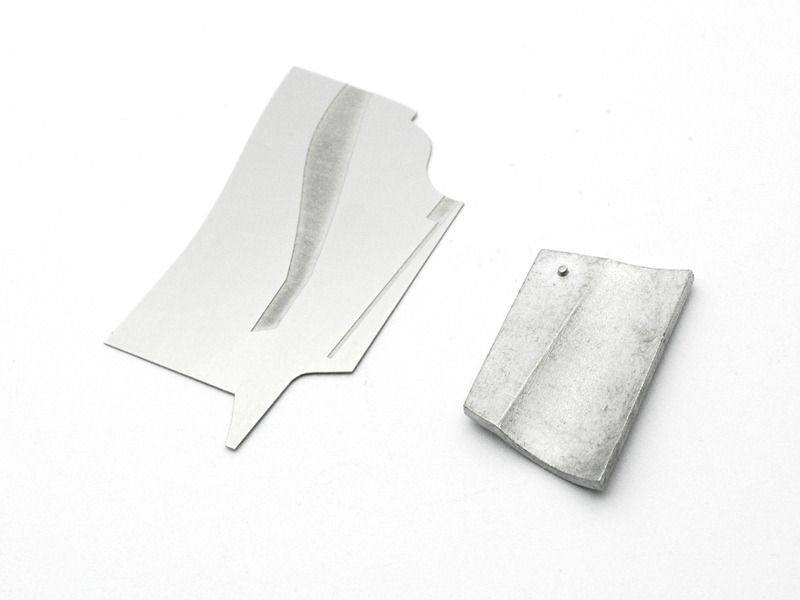 Heres a shot of the etched panel Scotch taped to the sidepod at an earlier moment during the build, when I tried to figure out how best to go about test fitting/building the whole front end. 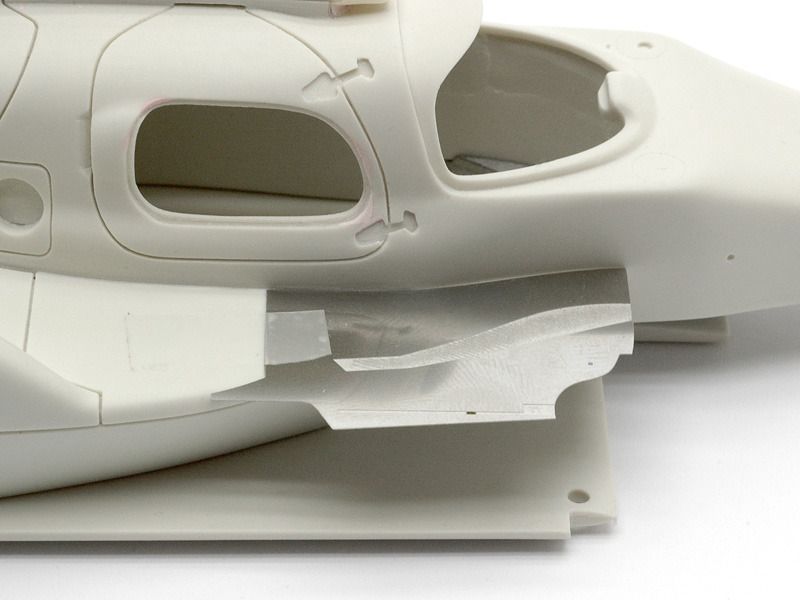 To give you an idea, why that area is difficult to build, take a look at the real car again. Rather busy stuff and not exactly what you get from Studio27. 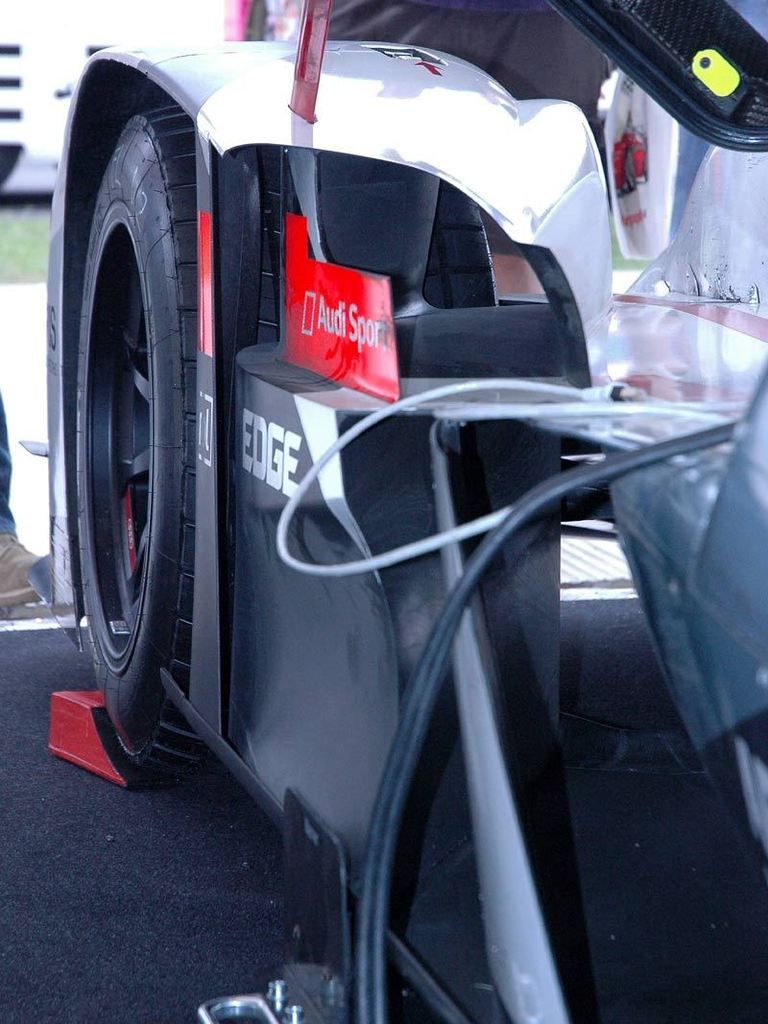 The shapes of those parts are quite complex it turned out when I built them. For the lower structure I started with a block of Renshape for each side and mounted them in their future positions again with locator pins. Then I carved away the unnecessary stuff and mated them to the floor shape with putty at the lower front.  Building one part like that is work, but doing a symmetric pair can be annoying. Thats the joy when building CAD-data... just hit the symmetry button :-) 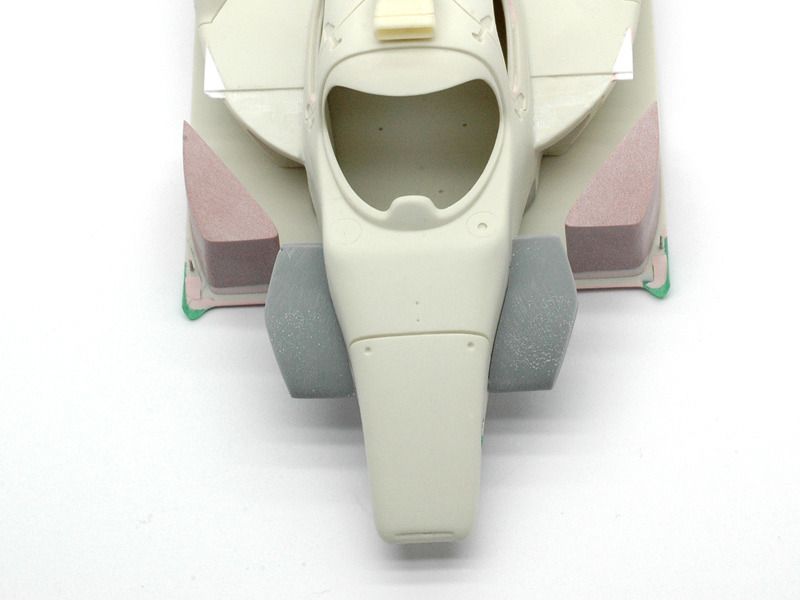 Next up I could then do the panel above. The etched part from the kit was no good, because it was way to stiff. On the real car that surface isnt just flat and I built the Renshape blocks accordingly. So I used 0,3mm styrene sheet instead, that will be bent and glued in place eventually. 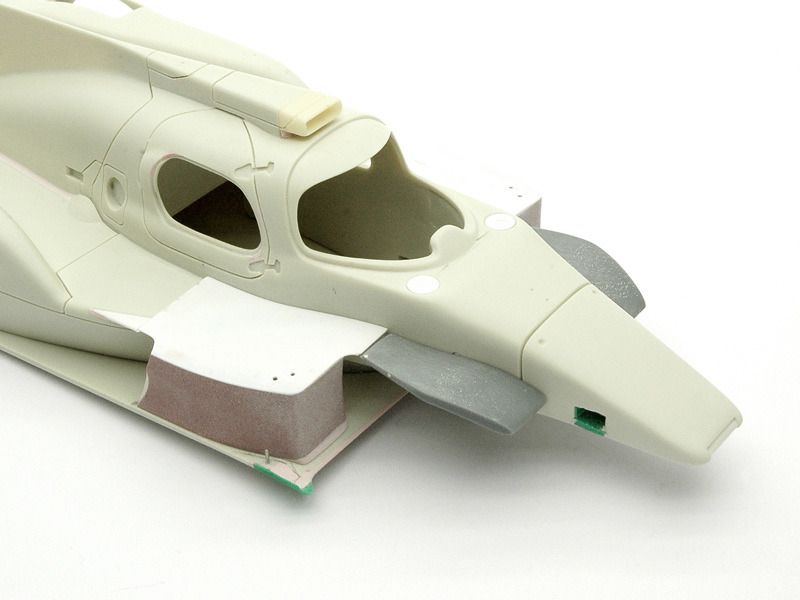 This was followed by another set of parts I had to scratch build, that were even more complicated in shape than the lower blocks. Once more I started with bits of Renshape, that I temporarily mounted with locator pins. The kit only provides etched parts again, that I replaced with the green portions of Renshape. Some putty and lots of sanding followed to turn the bits into one shape and mate them to the insides of the fenders at the top. In the next step theyll be glued and blended in with the lower portions. 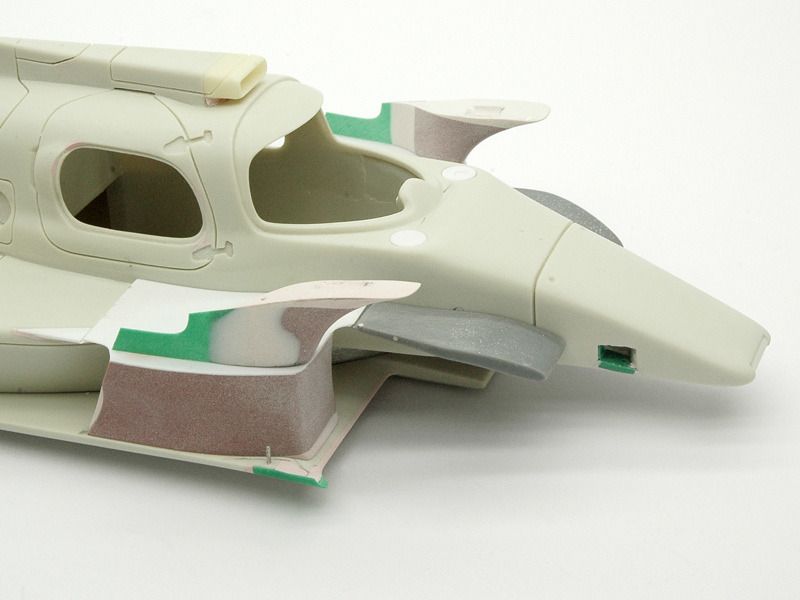
|
|
#26
08-10-2015, 09:04 PM
|
|||
|
|||
|
Re: Audi R18 LeMans 2014 1:24
Master work! Always love watching your builds. Thank you for putting the time into sharing, it's wonderful!
__________________
It ain't cool 'till your wife hates it. Imagine a world without Alabama Recent builds: Rocket Bunny FR-S and stock BRZ Toyota bB Bro-style Civic K20 powered SiR converted EK WIP I build slowly and poorly. 
|
|
#27
08-11-2015, 10:24 PM
|
||||
|
||||
|
Re: Audi R18 LeMans 2014 1:24
Absolutely inspiring!
|
|
#28
08-13-2015, 03:31 PM
|
|||
|
|||
|
Re: Audi R18 LeMans 2014 1:24
Since I had some more modeling time in recent days here’s another update already.
As mentioned in the last post, the next step was to glue the new parts and fill the gap with putty.  So it was time to get back to the fenders and also the headlight clusters. First here’s a shot of the headlight parts from the kit. 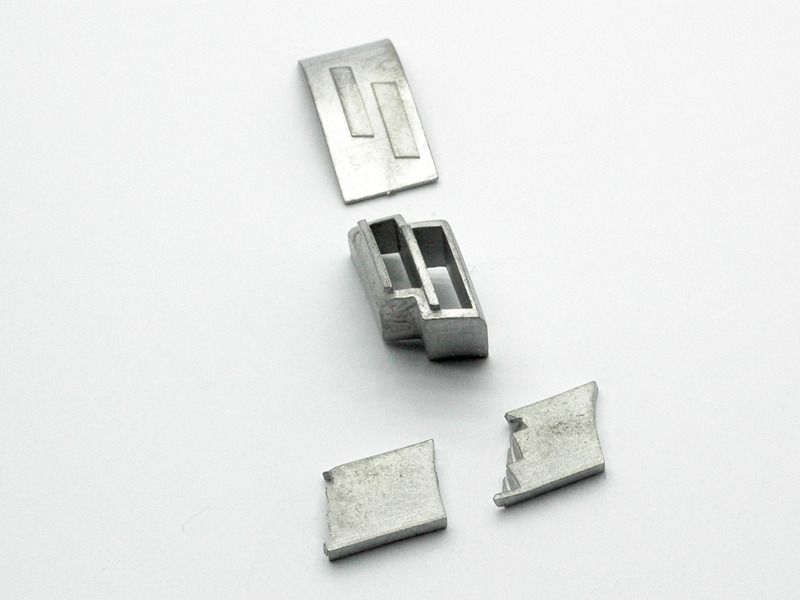 When the white metal parts are put together and placed in the fender it looks like this from the back. 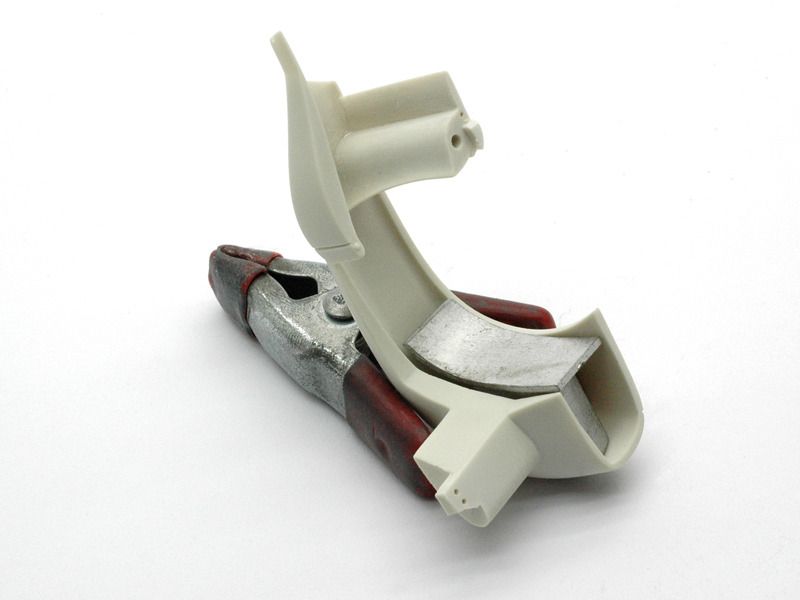 It’s a somewhat complicated solution that makes sense when you fiddle around with CAD. But on the kit and considering the painting and building sequence it’s not such a bright concept. To begin with there would always be a massive visible gap around that panel, that shouldn’t be there. So I decided to make some changes once more. Before working on the light clusters I had cut away the thick resin portion at the rear vertical panel. That’s sort of what Studio27 intended to represent the front end of the parts I just built from Renshape and putty. Actually, I had to cut that away prior to building these parts and you may have noticed that in previous pictures. 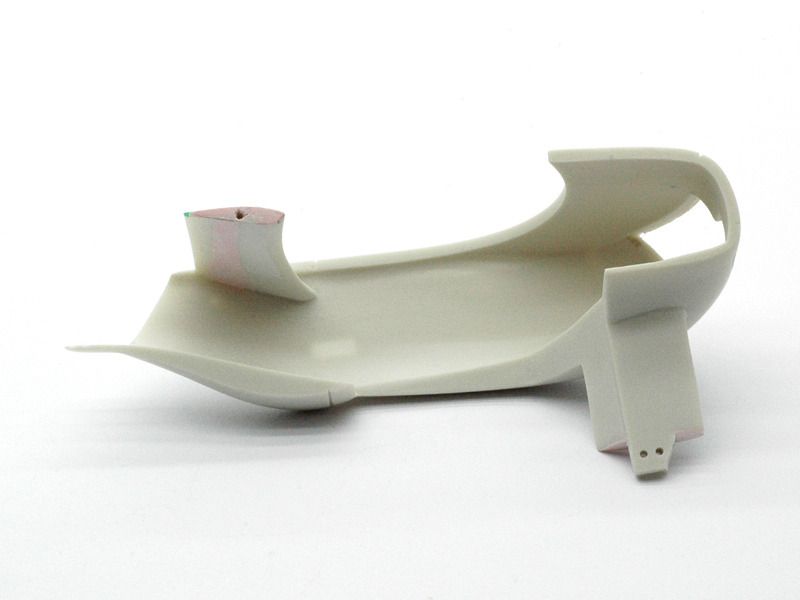 I then put in the additional inner panel, made from sheet styrene and blended it in with putty. 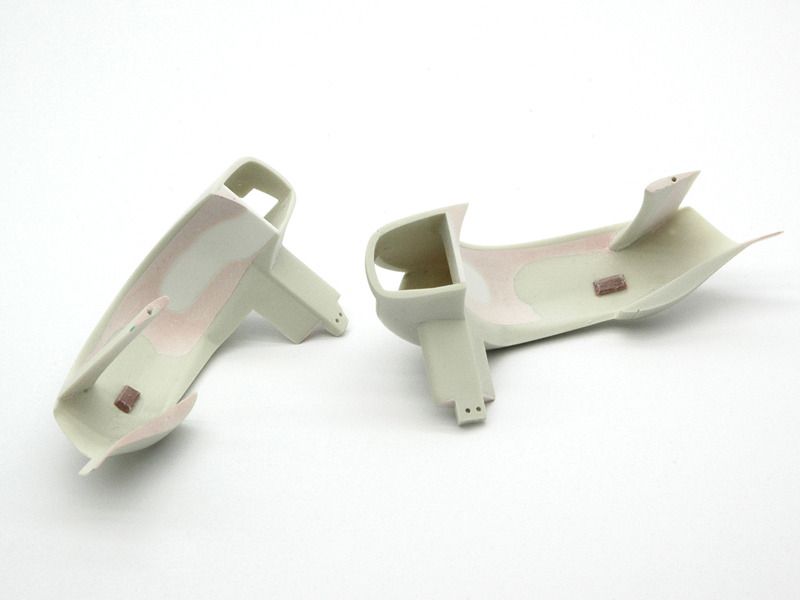 That’s more like it looks on the real car. Not quite as nicely done but it’ll be fine, because once the wheels are mounted it won’t be very visible, unlike the gap would have been. So this is how it looks when the fenders are installed over the new custom built parts. 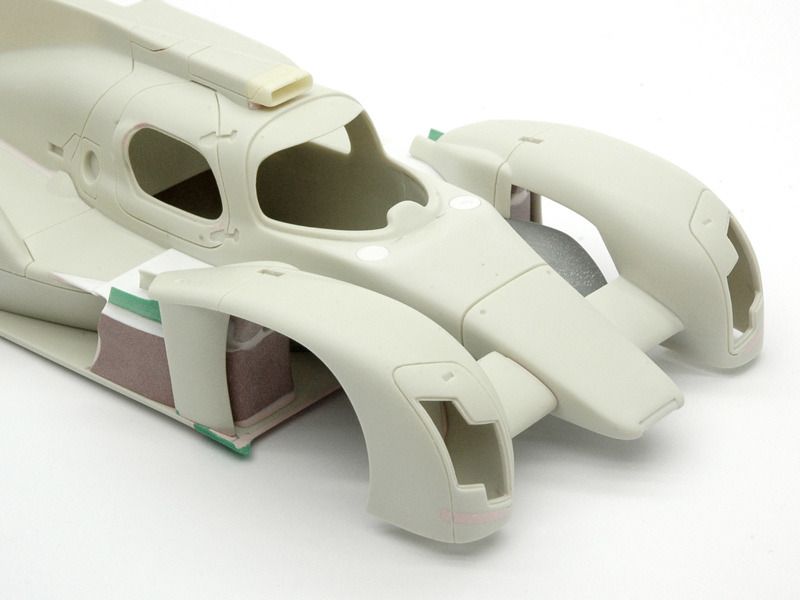 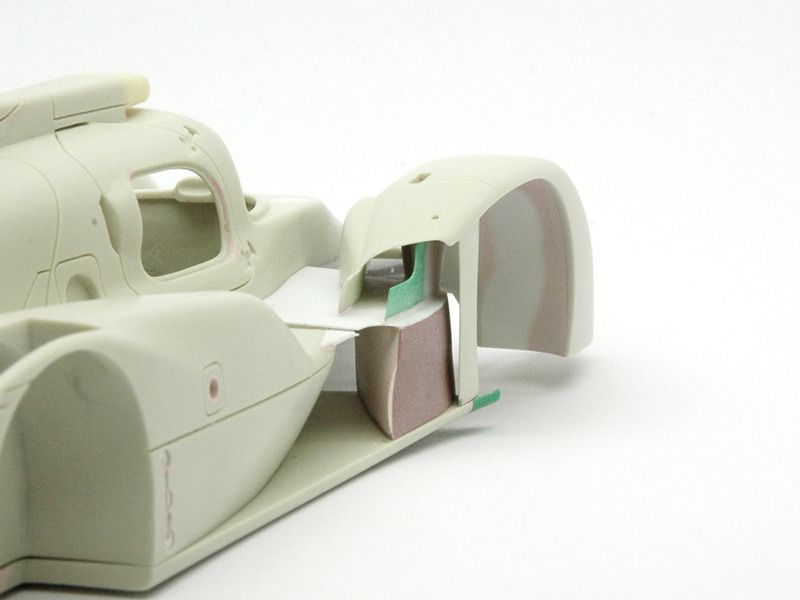 That’s it for now. The next update will take longer. I hope I can carry on with the build after some family holiday time.
|
| The Following 2 Users Say Thank You to jaykay640 For This Useful Post: | ||
fola (12-20-2015)
| ||
|
#29
08-15-2015, 05:20 AM
|
||||
|
||||
|
Re: Audi R18 LeMans 2014 1:24
Simply amazing !
I'm surprised studio 27 could even kit this complected car. Paul
|
|
#30
08-21-2015, 11:49 AM
|
|||
|
|||
|
Re: Audi R18 LeMans 2014 1:24
Beautiful work, and so much creative effort on display. Ridiculous amount of aero going on with these modern LMP cars (in a good way) - I don't think I'll be planning to make one from scratch any time soon! Looking forward to seeing more of this one.
|
|
|
POST REPLY TO THIS THREAD |
 |
|
|


