|
|
|

|
|
| Search | Car Forums | Gallery | Articles | Helper | Quality Dog Food | IgorSushko.com | Corporate |
|
| Latest | 0 Rplys |
|
|||||||
| WIP - Motorsports Post topics for any "Work In Process" motorsports vehicles in this sub-forum. |
 |
 Show Printable Version | Show Printable Version |  Email this Page | Email this Page |  Subscribe to this Thread
|
|
|
Thread Tools |
 07-26-2007, 03:27 AM
|
#241 | |
|
AF Enthusiast
Thread starter
Join Date: Aug 2005
Location: where "sky grey" is a colour
Posts: 822
Thanks: 3
Thanked 32 Times in 29 Posts
|
Re: Eighties Contest Entry: 1988 McLaren MP4/4 (and Introduction)
Pancho
Where are you...Europe or US? For Europe i would suggest material with a density between 650kg/m³ and 750kg/m³. As far as i can tell the equivalent material in the US is Renshape5460 or 460. The green material i used has 750kg/m³ density. The rule is simple...the higher the density the easier you achieve a nice surface and sharp edges....but it's abit harder to work with by hand. If you use machines definitely go for the higher density. I hope that helps! |
|

|

|
|
07-26-2007, 10:55 AM
|
#242 | |
|
AF Newbie
 Join Date: Mar 2005
Location: Tempe, Arizona
Posts: 14
Thanks: 0
Thanked 0 Times in 0 Posts
|
Re: Eighties Contest Entry: 1988 McLaren MP4/4 (and Introduction)
thanks, jaykay!
I'm in the US. I've been checking around and it's a bit pricey! I may have to figure out a local source and see if I can get some scraps!!
__________________
_____________________________________ ~Pancho |
|
|
|
|
|
08-05-2007, 11:46 AM
|
#243 | |
|
AF Enthusiast
Thread starter
Join Date: Aug 2005
Location: where "sky grey" is a colour
Posts: 822
Thanks: 3
Thanked 32 Times in 29 Posts
|
Re: Eighties Contest Entry: 1988 McLaren MP4/4 (and Introduction)
The weather was bad lately so i made some more progress……here’s the update.
After the front suspension arms I showed you last time I turned my attention to the rears. I used the big Tamiya parts and separated them into individual arms for the left and right sides. Then I replaced the end pieces with aluminium or Renshape parts to get them true to the original and stronger in the process. Then I dry mounted them to the scratch built lower mounting points on the engine/gearbox ( hardly visible…) and the upper subframes with miniature brass bolts ( and in some places wire that will be replaced with turned aluminium parts ). Outside followed the heavily modified uprights.  I then primed the parts and after that sprayed them black. Next up I will have to make the pushrods, after I mounted the arms. I didn’t do that yet because the assembly was to fragile without any glue to properly decide their length. At the front I got one step further already. I started mounting the suspension after spraying the parts black. First I had to mount the nosecone and the lower suspension arms with epoxy glue. It was quite tricky to get the arms glued in the tiny monocoque holes without messing it up with glue…. 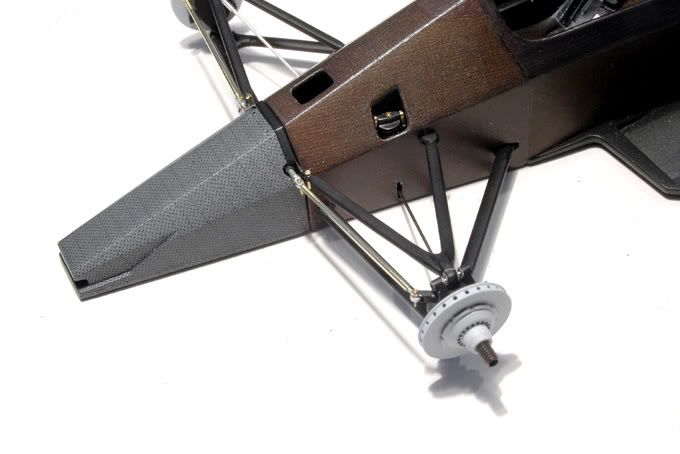 I then had to connect the upper A-arms with the uprights. That turned out to be a bit of a nightmare because of that silly upper mounting point ( what the hell were McLaren thinking…? ) I finally managed to get it together and make it work but the paintjob suffered in the process so I’ll have to touch the parts up now. As you can see I also mounted the front spring/damper units in their holes and next I made the pull rods, that connect them to the uprights on the real car. I used 0,5mm nickel silver rods and end pieces turned and milled from aluminium ( not really visible in these pictures ). After painting I’ll add hex bolts made from brass also for the steering arms. It’s a bit time consuming but with the combination of lathe and mill with dividing head I can now make my own tiny hex bolts to the sizes I want :-) Here’s a close up shot of the left steering arm: 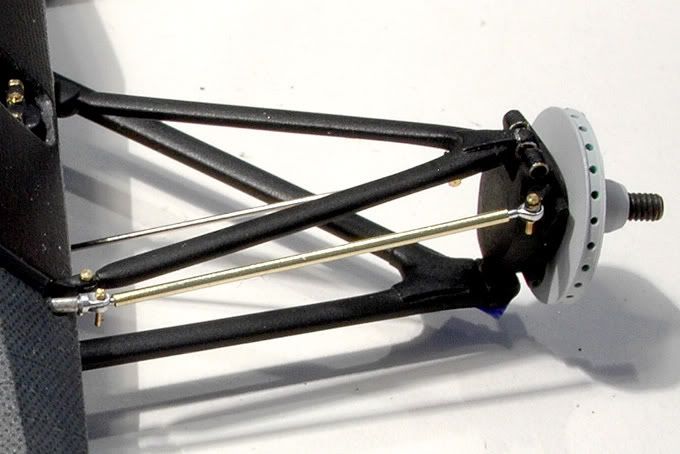 It’s a 0,8mm brass rod with my own machined end pieces. I had shown them in a previous update but these are new better ones I made after getting into the swing with the mill. They are now more precise than the original ones that were more “handwork”. In the end the steering will be working like on the original car ( o.k…..without the steering wheel turning of course :-). I have my doubts if the steering angle I managed to get is big enough but the wheels will move :-) I do still have one big issue with the front suspension though. Too much camber! The wheels are leaning out at the top and that looks wrong. In pictures it looks like there’s no real angle to the wheels at all on the real car so I will change that. 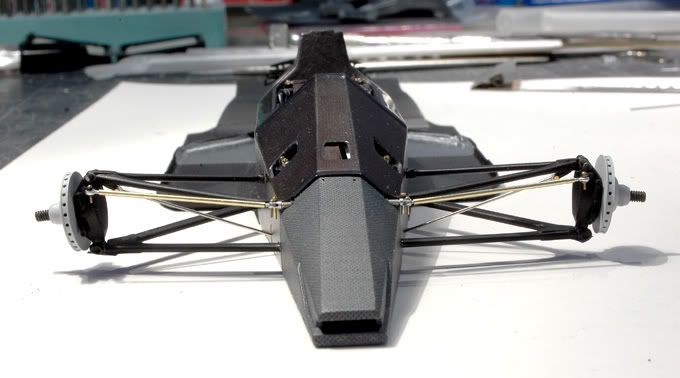 I’m a bit annoyed that despite all my test fitting and checking it came out like that but what can I do. I will redo the end pieces of the lower A-arms so I move the uprights out at the lower pick-up points. Some other time consuming pieces I was working on are the brake ducts. The ones on the late season cars are considerably smaller than the early season ones replicated in the kit pieces. I scratch built them from 0,3mm styrene sheet. 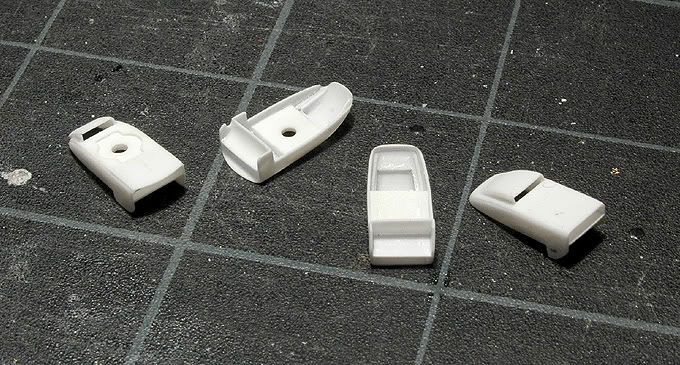 After priming, sanding, painting them black, putting CF-decals on and clear coating they look like this: 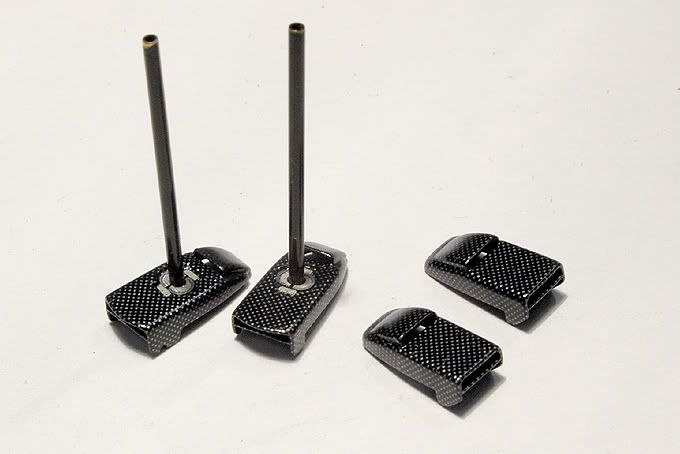 Around the drive shafts of the rear ducts I added some tiny PE bits and now they are ready for installation…..once the uprights and suspension arms are all properly mounted and painted. A word about paint….on the pieces shown in this update I used Hiroboy’s Zero Paints for the first time and I must say I’m quite happy with them. I used “ Jet Black” which covers well with a very thin paint layer and dries faster and better than the enamels I previously used. The brake ducts were covered with 2-Pack clear and that worked nicely too. I achieved the “not so glossy” finish I wanted without any sanding or polishing afterwards ( which would have been very difficult on these pieces ). I’m now curious how it will work when I need a really glossy finish :-) That’s it for now. Thanks again for your comments! Last edited by jaykay640; 09-08-2010 at 07:07 PM. |
|
|
|
|
|
08-05-2007, 12:11 PM
|
#244 | |
|
AF Enthusiast
 
Join Date: Mar 2005
Location: Barnsley
Posts: 3,199
Thanks: 8
Thanked 111 Times in 107 Posts
|
Re: Eighties Contest Entry: 1988 McLaren MP4/4 (and Introduction)
Very nice work in this update.The effort you are putting into the details on this build is mind boggling.I really admire the work you are doing,it looks more like a 1/12th scale model than a 1/20th.Very impressive stuff,it's going to be some model when it's finished.
__________________
Steve Noble |
|
|
|
|
|
08-05-2007, 03:09 PM
|
#245 | |
|
AF Regular

Join Date: Mar 2006
Location: swansea
Posts: 160
Thanks: 0
Thanked 6 Times in 6 Posts
|
Re: Eighties Contest Entry: 1988 McLaren MP4/4 (and Introduction)
Outstanding work. Just really,really outstanding work!! I just wish I had the patience (ok, and skill!!
 ) to do stuff like that! ) to do stuff like that!Waiting in anticipation for the next installment!! Keith PS thanks for the earlier answer about the renshape, I forget to say so at the time! |
|
|
|
|
|
08-06-2007, 11:53 AM
|
#246 | |
|
Banned
Join Date: Apr 2003
Location: Ma$$h0le
Posts: 306
Thanks: 27
Thanked 10 Times in 8 Posts
|
Re: Eighties Contest Entry: 1988 McLaren MP4/4 (and Introduction)
Be careful with the whole Castor/Camber thing....dunno off the top of my head about the MP4/4, but alot of F1 cars have noticable Castor built in.
|
|
|
|
|
|
08-06-2007, 10:14 PM
|
#247 | |
|
AF Enthusiast

Join Date: Feb 2004
Location: Brisbane
Posts: 751
Thanks: 0
Thanked 9 Times in 9 Posts
|
Re: Eighties Contest Entry: 1988 McLaren MP4/4 (and Introduction)
I can see everyone who was planning to enter the next TamiyaCon putting their models away... I think once this is done you'd be hard pressed to do worse than first place in any competition!
__________________
 
|
|
|
|
|
|
08-08-2007, 03:49 AM
|
#248 | |
|
AF Regular
Join Date: Feb 2005
Location: Newcastle
Posts: 209
Thanks: 0
Thanked 1 Time in 1 Post
|
Re: Eighties Contest Entry: 1988 McLaren MP4/4 (and Introduction)
Awesome progress as always. Don't keep us waiting to long for next update. I hope for our sake the weather over there stays bad.
|
|
|
|
|
|
08-08-2007, 02:37 PM
|
#249 | ||
|
AF Newbie
Join Date: Mar 2005
Location: Tempe, Arizona
Posts: 14
Thanks: 0
Thanked 0 Times in 0 Posts
|
Re: Eighties Contest Entry: 1988 McLaren MP4/4 (and Introduction)
Quote:
You mean camber?
__________________
_____________________________________ ~Pancho |
||
|
|
|
|
08-09-2007, 03:48 PM
|
#250 | |
|
AF Enthusiast

Join Date: Sep 2006
Location: USA, Florida
Posts: 590
Thanks: 3
Thanked 6 Times in 6 Posts
|
Re: Eighties Contest Entry: 1988 McLaren MP4/4 (and Introduction)
The suspention arm are awesome and great work on the brake ducks
__________________
Regards, Dave |
|
|
|
|
|
08-10-2007, 12:41 PM
|
#251 | ||
|
Banned
Join Date: Apr 2003
Location: Ma$$h0le
Posts: 306
Thanks: 27
Thanked 10 Times in 8 Posts
|
Re: Eighties Contest Entry: 1988 McLaren MP4/4 (and Introduction)
Quote:
Oops!  Yes, sorry about that, what I meant was Positve Camber. Thanks, Pancho, old buddy!  |
||
|
|
|
|
08-10-2007, 02:13 PM
|
#252 | |
|
AF Enthusiast

Join Date: Mar 2004
Location: Flo' Park, New York
Posts: 693
Thanks: 0
Thanked 0 Times in 0 Posts
|
Re: Eighties Contest Entry: 1988 McLaren MP4/4 (and Introduction)
OMG Stunning work. Btw, where did you find those refrence pics?
__________________

|
|
|
|
|
|
08-10-2007, 03:14 PM
|
#253 | ||
|
AF Enthusiast

Join Date: Jul 2005
Location: London
Posts: 899
Thanks: 3
Thanked 11 Times in 10 Posts
|
Re: Eighties Contest Entry: 1988 McLaren MP4/4 (and Introduction)
Quote:
 |
||
|
|
|
|
09-17-2007, 01:01 AM
|
#254 | |
|
AF Newbie
Join Date: Aug 2007
Location: Orange
Posts: 45
Thanks: 0
Thanked 0 Times in 0 Posts
|
Re: Eighties Contest Entry: 1988 McLaren MP4/4 (and Introduction)
I have not seen any updates for a while?
|
|
|
|
|
|
09-17-2007, 09:04 PM
|
#255 | |
|
AF Newbie
Join Date: Aug 2007
Location: Orange
Posts: 45
Thanks: 0
Thanked 0 Times in 0 Posts
|
Re: Eighties Contest Entry: 1988 McLaren MP4/4 (and Introduction)
OPPS
Forgot to say : A GREAT MODEL!!  |
|
|
|
|
|
|
POST REPLY TO THIS THREAD |
 |
|
|


