

|
| Search | Car Forums | Gallery | Articles | Helper | Air Dried Fresh Beef Dog Food | IgorSushko.com | Corporate |
|
|||||||
| WIP - Motorsports Post topics for any "Work In Process" motorsports vehicles in this sub-forum. |
 |
 Show Printable Version | Show Printable Version |  Subscribe to this Thread
|
|
|
Thread Tools |
|
#151
 09-30-2010, 03:36 PM
|
||||
|
||||
|
Re: 36 cylinders
The time has come to bring this old build thread back from the dead. I really hope that by doing this I will motivate my fellow builders Steven and Gio to get off their butts and start cranking on this project (hey, it has been few years already, come on!) :-)
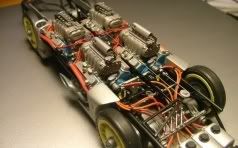
I decided to make removable wheels on this model, so I could show suspension detail after model is assembled. Since I have already used similar technique on my 250 GTO build, it was relatively simple procedure- first I drilled hubs with suitable diameter bit all the way though. 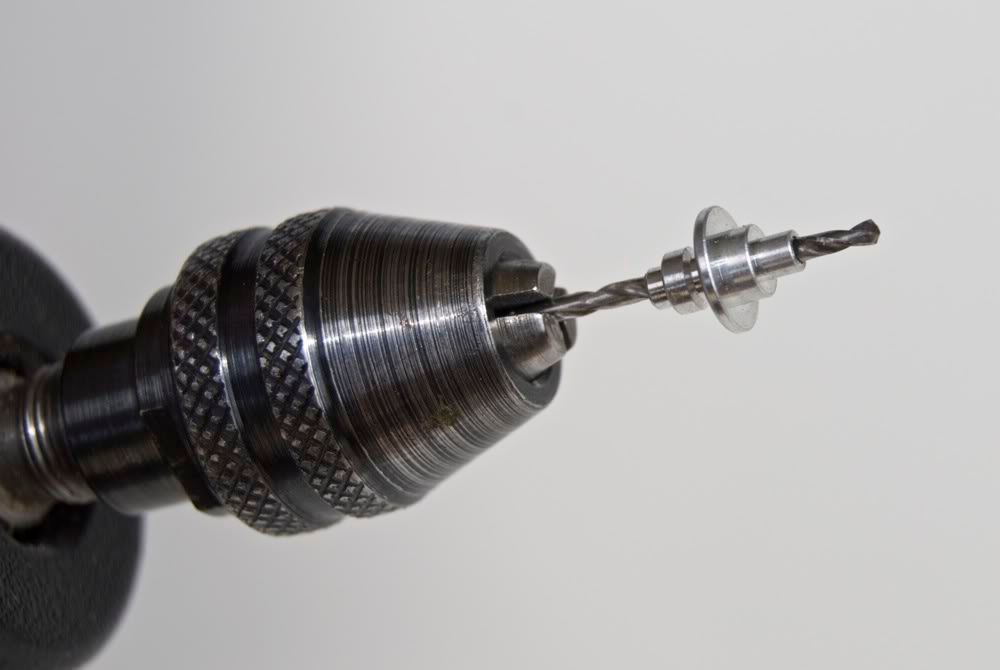 Few years ago I picked up several sets of tiny screws and nuts at one of my local hobby stores, not even knowing what I will be using them for. These came really handy for mounting wheels! I’m not quite sure if this manufacturer is still in business, but you could probably pick similar stuff from Scale Hardware. 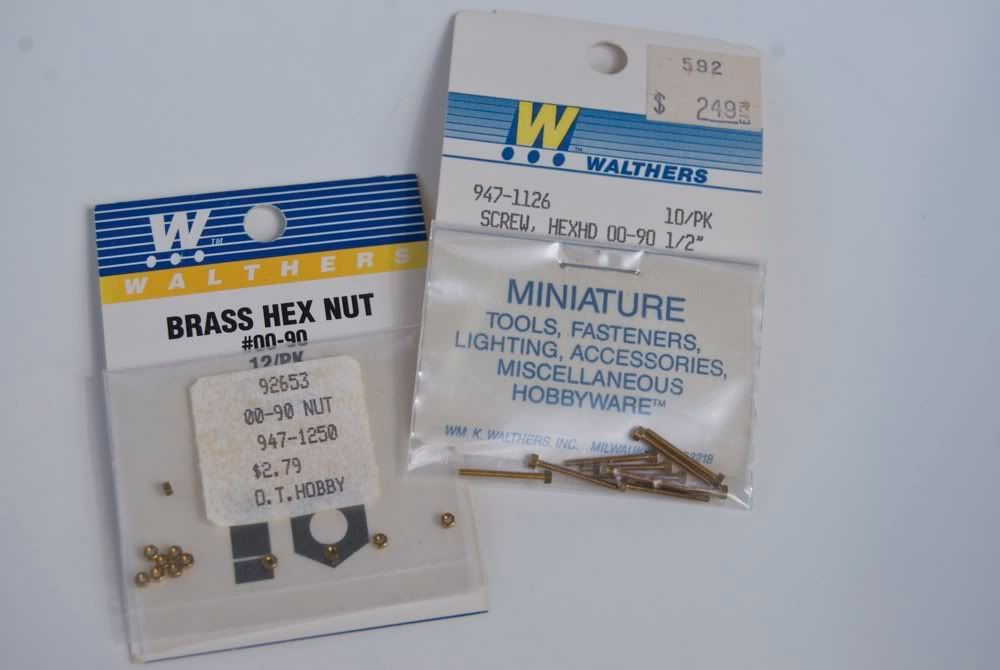 Once the hubs were drilled, I also drilled out Tecnomodel knock offs (they are slightly bigger and better shape than MFH, they are also polished and don’t look like pitted blobs of crap) and implanted tiny nuts in there. 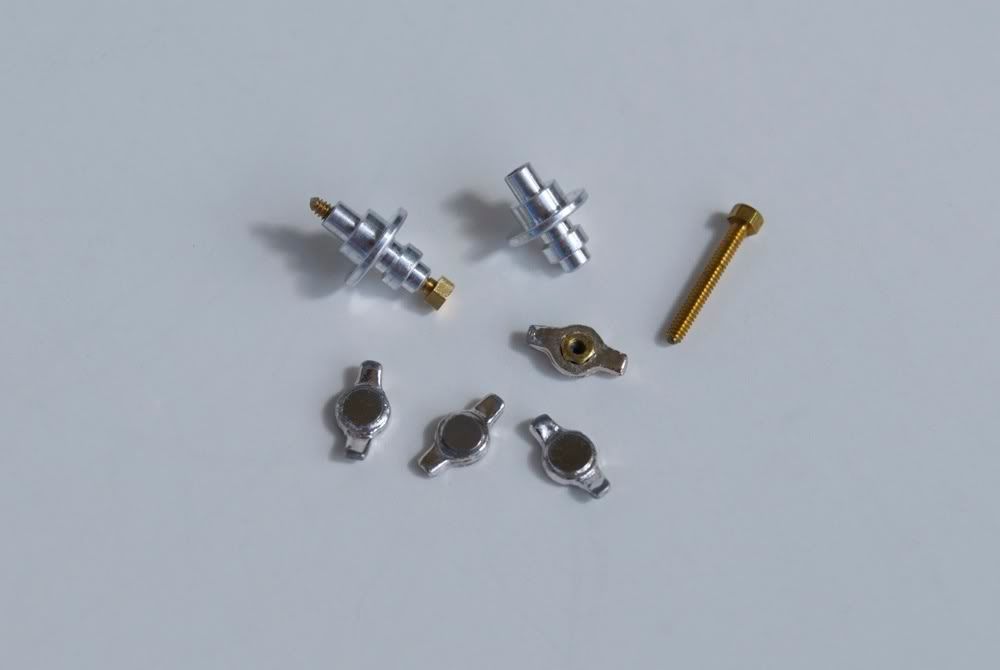 Then did the same for 3 more wheels, and I had hubs ready to be put in the wheels and a system in place to take them on ad off using knock-off nut, just like on the real thing. 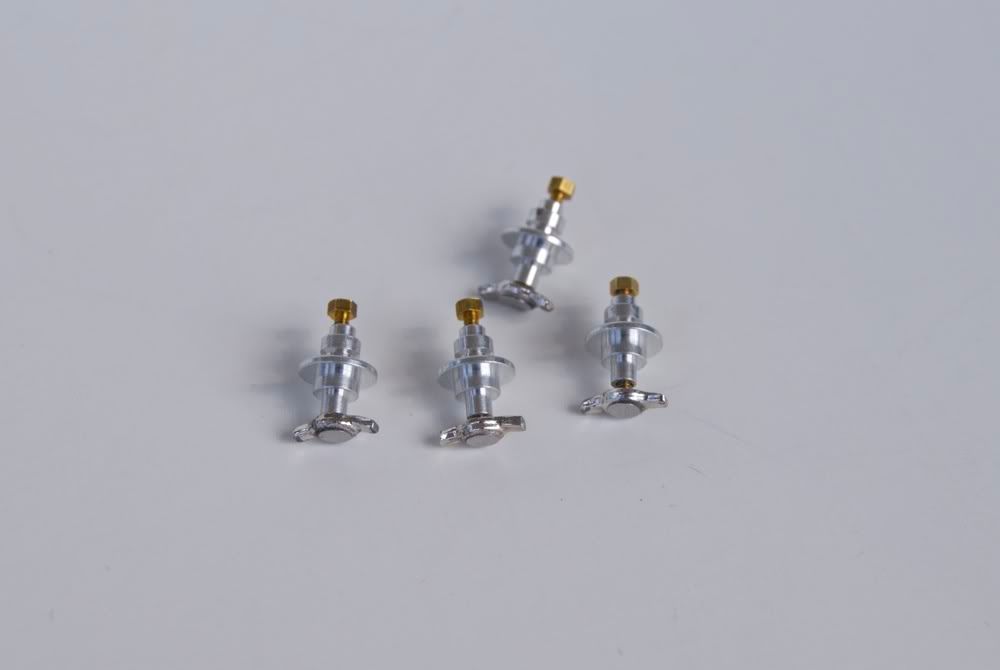 Wheels were put together, I also added some scratchbuilt air-valves, weights (didn’t balance though :-) ) and release handle for the spare wheel. 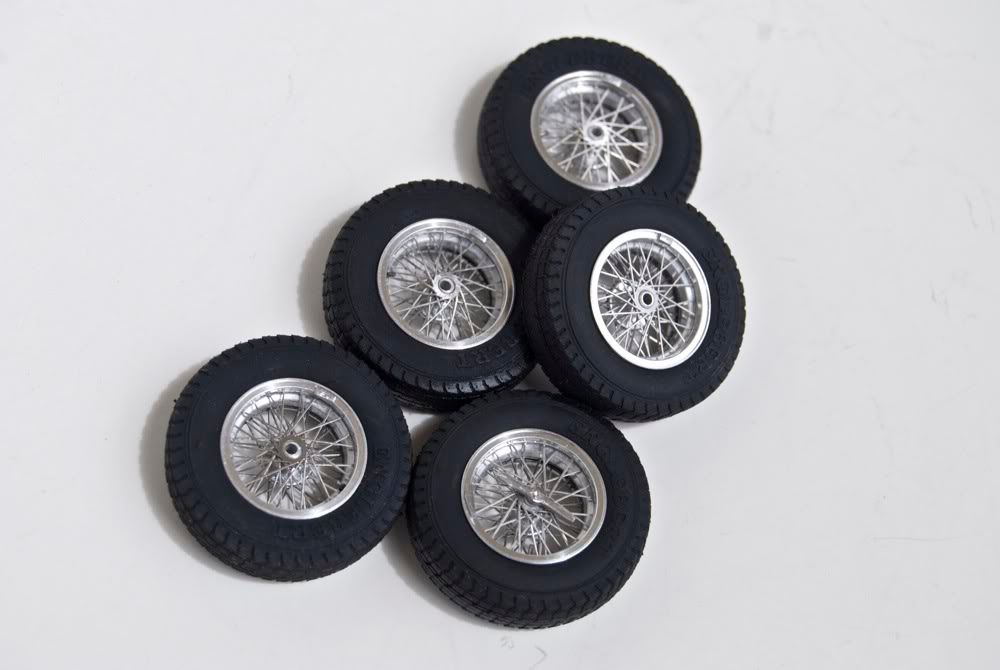 Tires were molded slightly off (outside of the tire was not perfectly aligned with the inside of the tire), and that made scuffing the tires a bit problematic, but I did it anyway and it turned out ok, though not perfect. 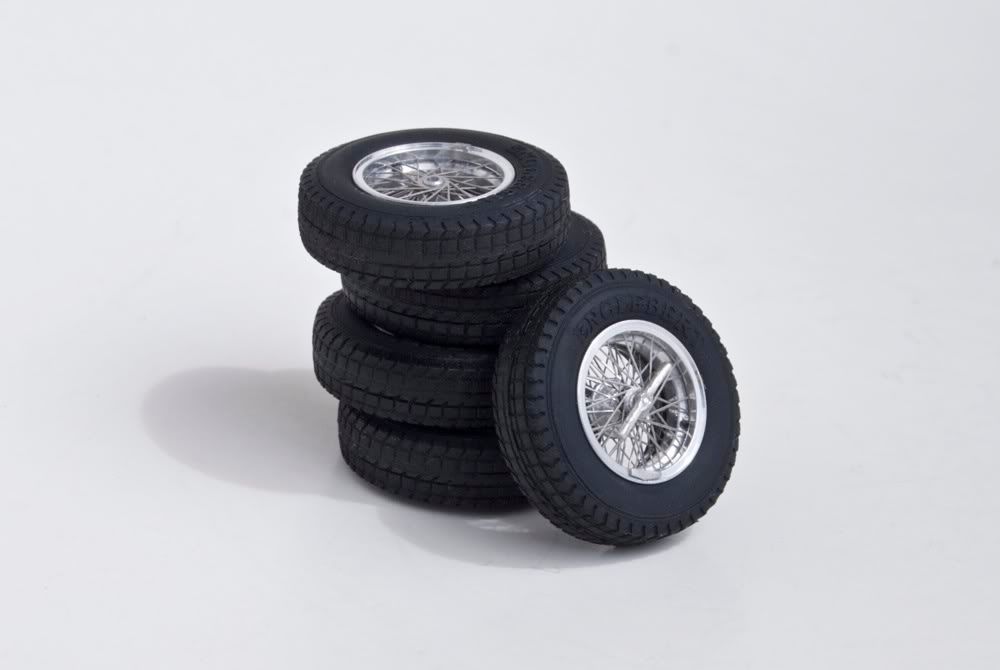 Gas tank was one of these parts that you look at and go – what the hell were they thinking! It is made out of two heavy, pitted, rough pieces of metal that don’t even fit together well! It needed work! I sanded the pieces, glued them together, cleaned the surface, and then re-drilled entire tank for the rivets. Rivets were replicated by inserting a piece of hollow core solder into the holes, then cutting it and sanding it almost flush. Since the solder was hollow core, it created a nice dot on top of the rivet, making it look like the real thing. Of course this detail will be lost under primer and paint, but neat nonetheless. 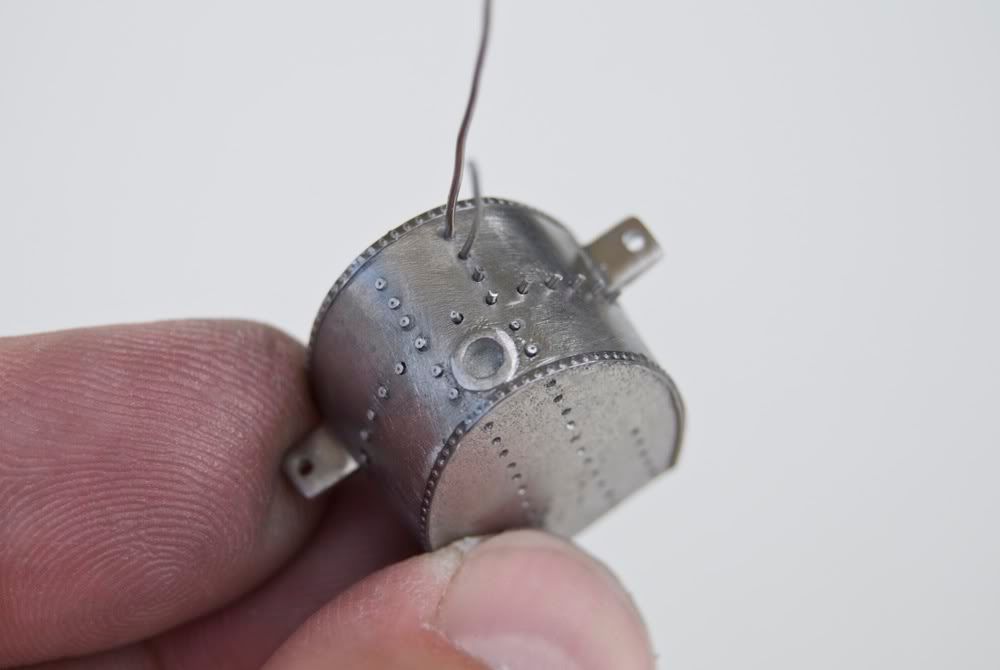 Rear axle was another one of those parts. I did the same thing to it as well – sanded all the detail off, cleaned it, and then re-did the nuts and re-scribed all the ribs, etc. 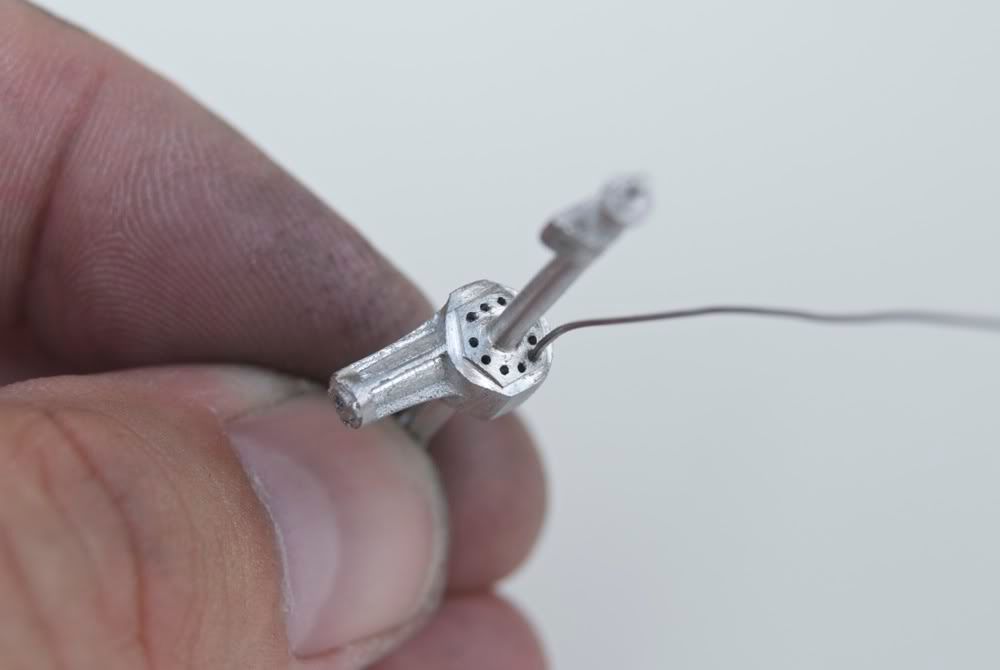 Frame was a nightmare. I’m sure Steven and Gio agree with me. It took me literally 2 days to make it more of less acceptable for primer and paint. I have used two 12-packs of flexi-files and hours with needle files to clean this thing! 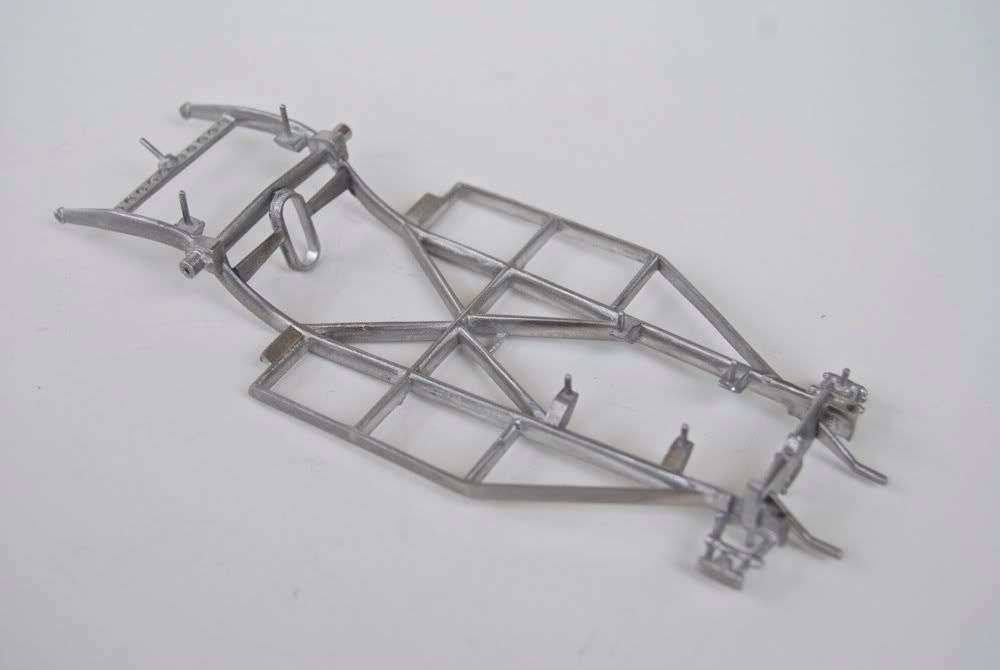 Engine block, head, cam covers, sump, gearbox, and bell housing were cleaned, put together, and painted with MM steel buffing metalizer, then lightly buffed to bring out shine and scrape some of the paint off the edges. Once black-washed, this should bring out some contrast and detail to the engine. 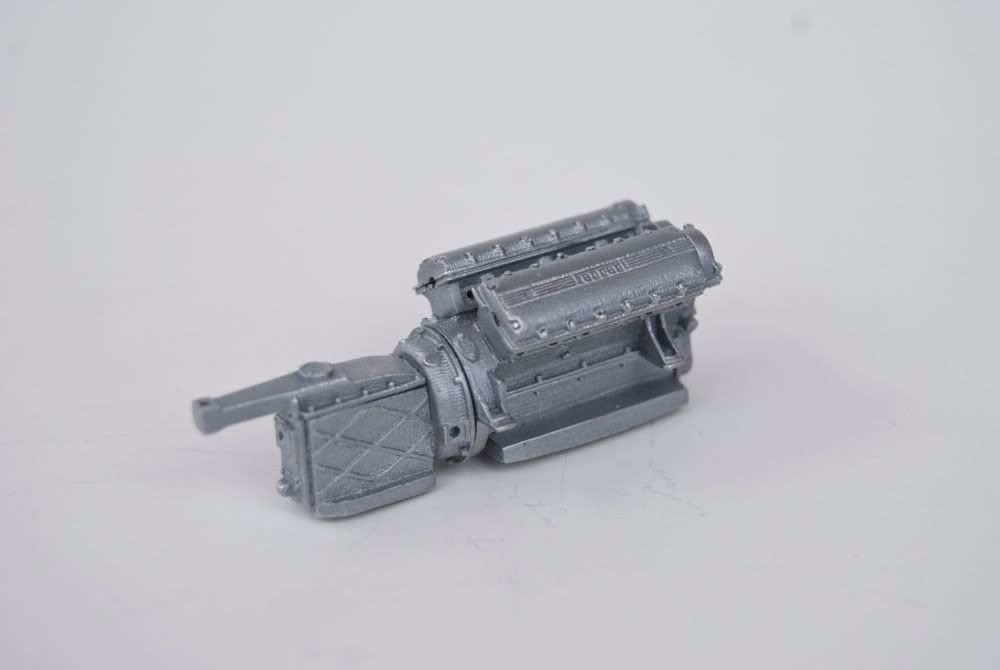 Then I installed my threaded bolts in the front and rear axles. I just drilled holes in the front hubs and glued the bolts in. Rear axle was too thin to do this, so I just cut off the head of the bolt, and glued it in that way. Good thing they were long enough. 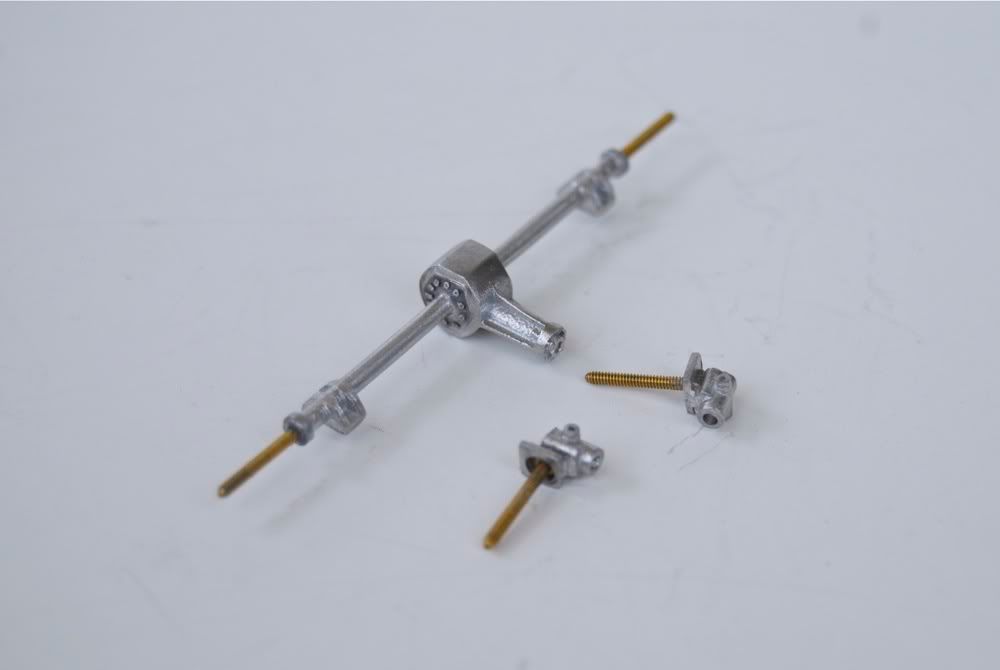 Once this was all done, I test fit everything on the frame, making sure that the length of the axles was correct and engine was aligning properly with the frame. Had to bend a few things here and there. 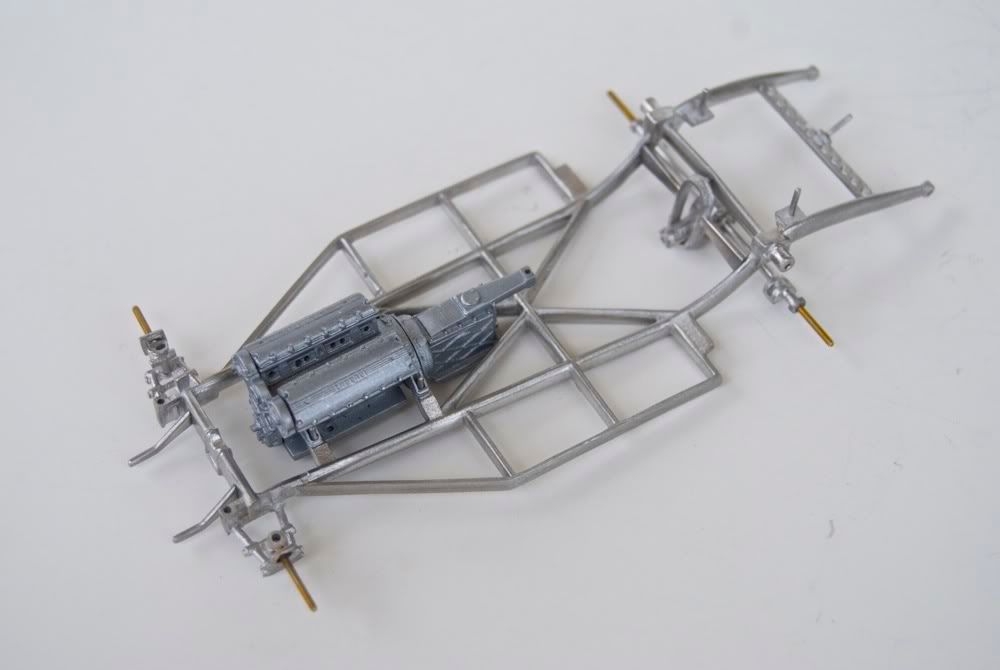 Leaf springs were put together (neat construction I must add). 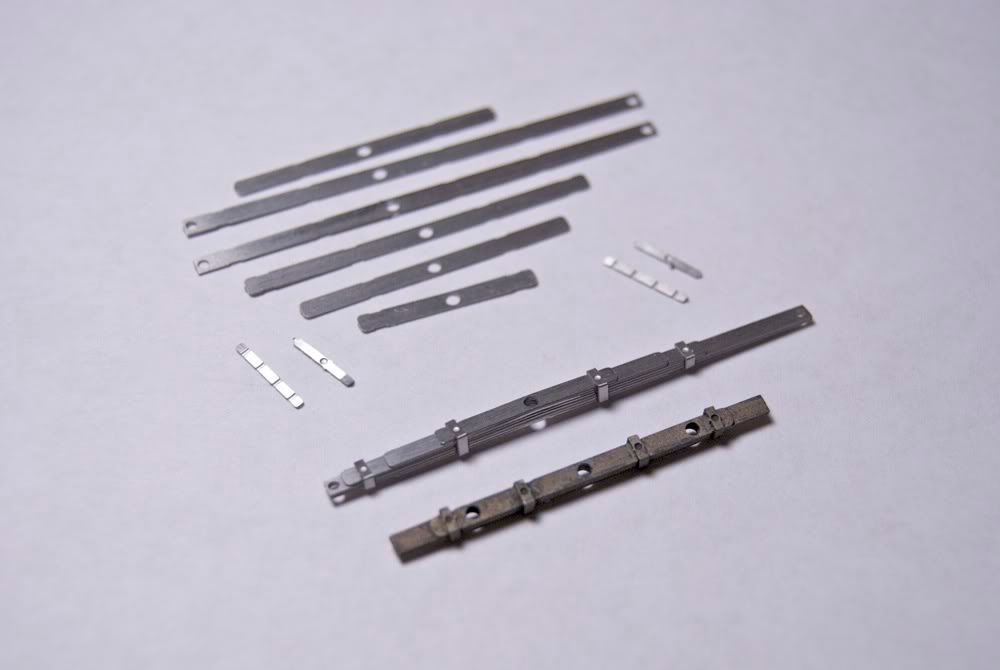 Then leaf springs and exhaust manifolds were painted with mix of burnt iron, and steel metalizers. 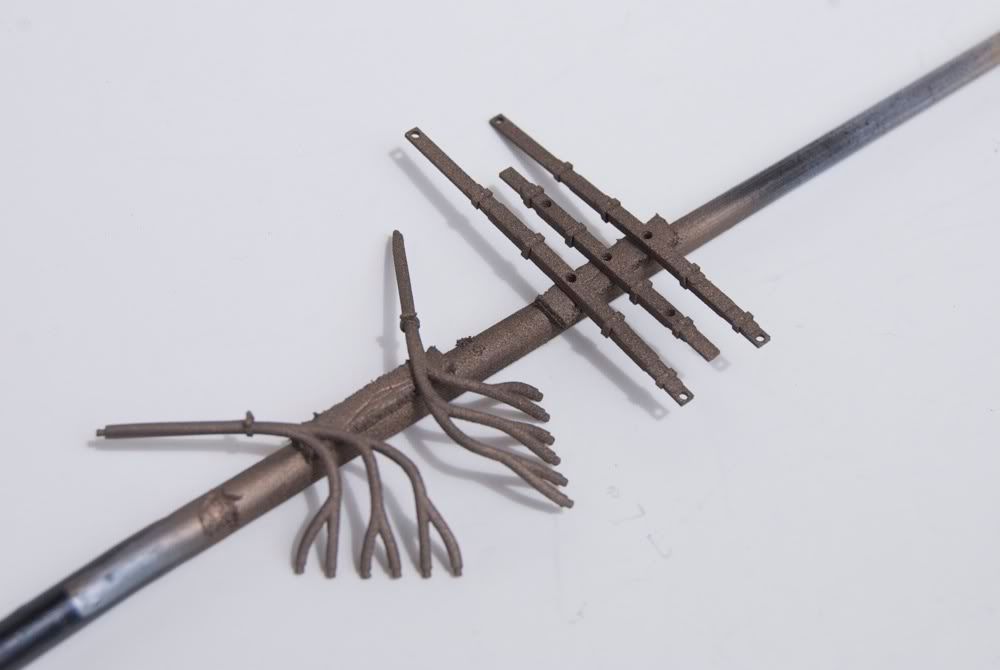 To change the subject a bit, I decided to put together front grille. It turned out to be much harder than I thought! Pieces kept falling apart until I decided to mount this entire assembly on a piece of playdoh while putting it together. Worked great, but still need to clean some of that playdoh from the slats! 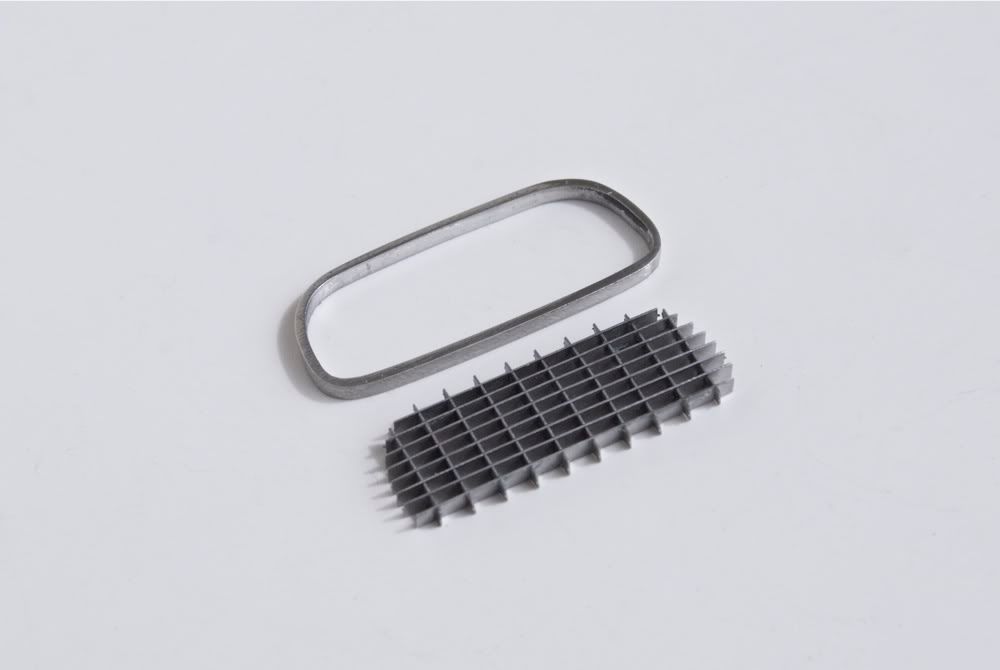 Brake drums were also cleaned, put together and painted. I also painted gas tank and then everything was lightly buffed (and then black-washed, but not on this pic). 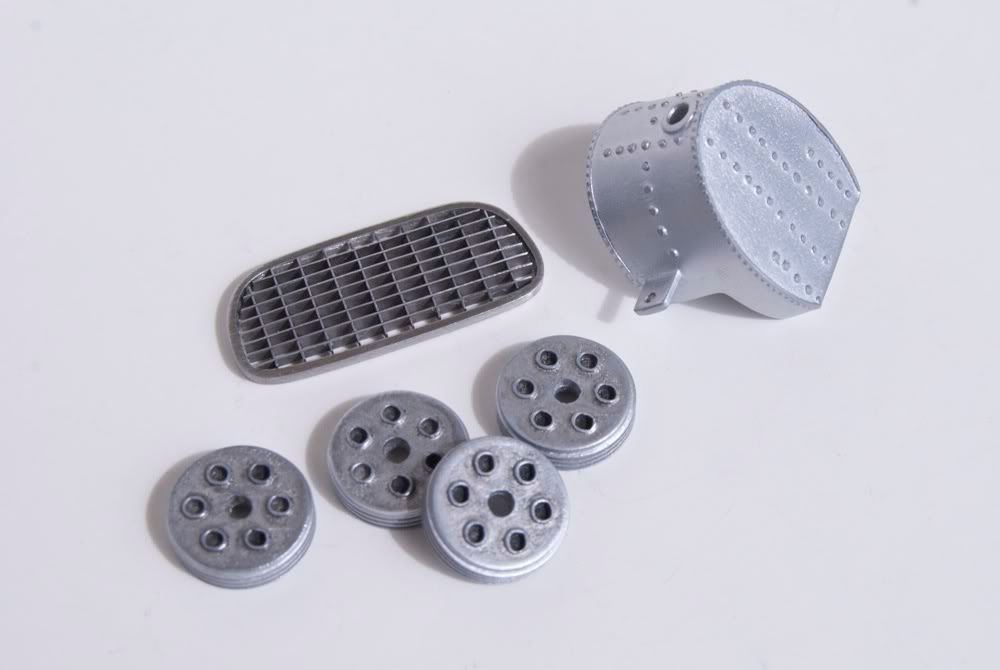 Radiator and oil cooler were put together and pre-drilled for hoses. The rads, frame and suspension components were painted with various shades of black. 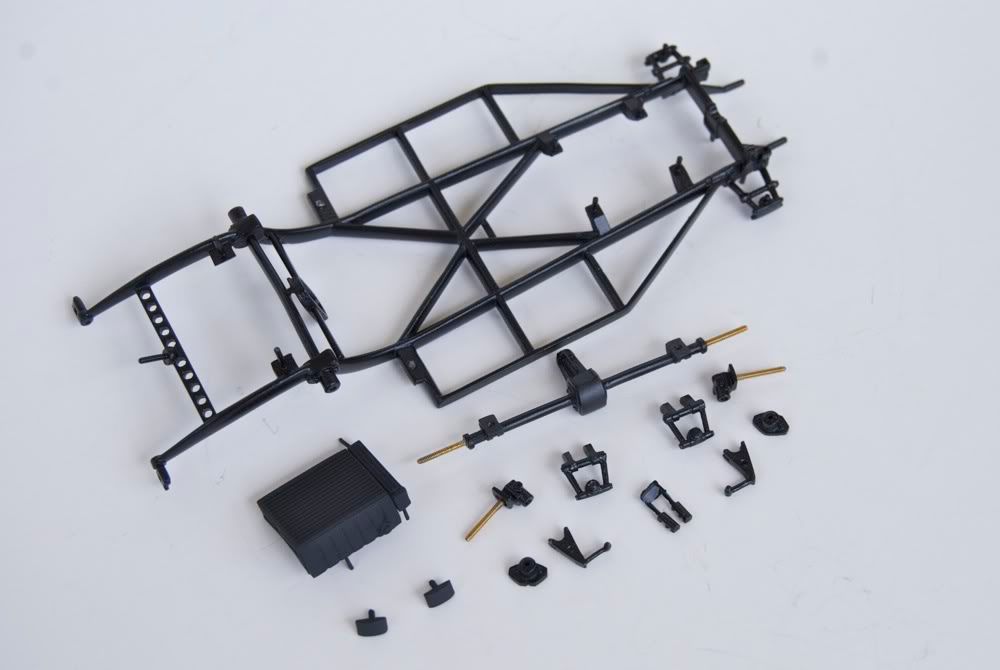 I’m not going to go into detail, but almost all small engine components were awful quality castings. Some were not even worth cleaning IMO! I decided that since most of them will be hidden from view, to clean them the best I can and just live with it. One thing I couldn’t live with though were spark plug wires holsters, as they were too small to drill and put six wires into each. I decided to discard them and build my own instead. I used suitable diameter aluminum tubing, flared one end a little bit, and tapered the other end by sanding it with a file. 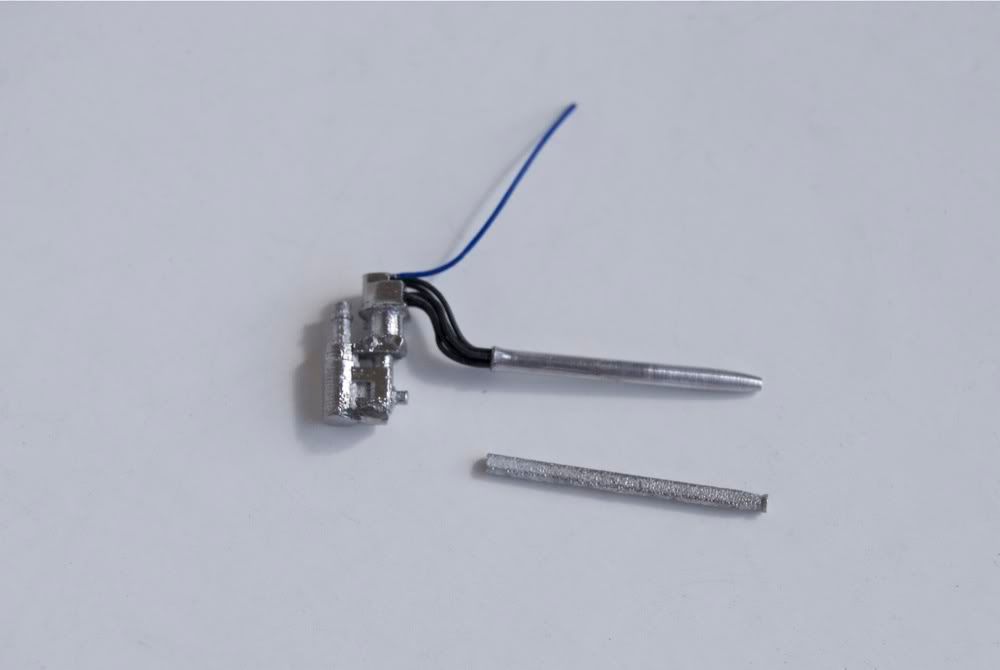 Then the tubes were flattened with a hammer, wired, and sanded smooth. Then I cleaned carbs, lightly painted them with Alclad pale gold, then followed with black wash. Then installed fuel lines and plumbed fuel hoses. Since air scoop was rather small, I decided against drilling it out, and just cleaned and sanded it smooth. 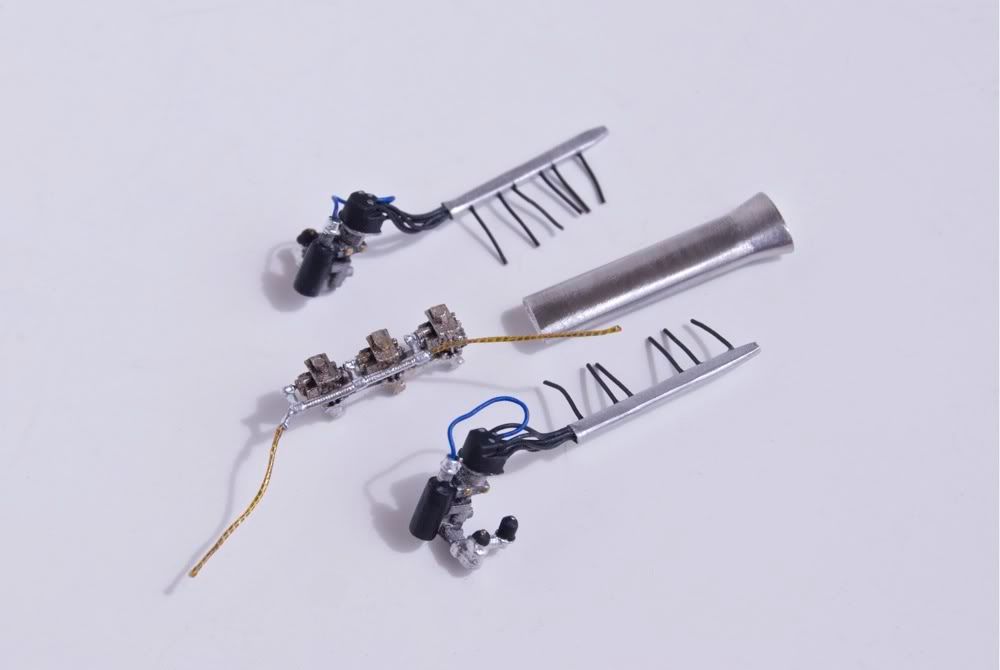 Then all this long list of parts was put together! Plugs wires were glued into the head, carbs installed, front suspension assembled, radiators installed and plumbed, oil lines connected, fuel lines connected, then I also added clamps, brake lines etc, and finally engine bay started to take shape. 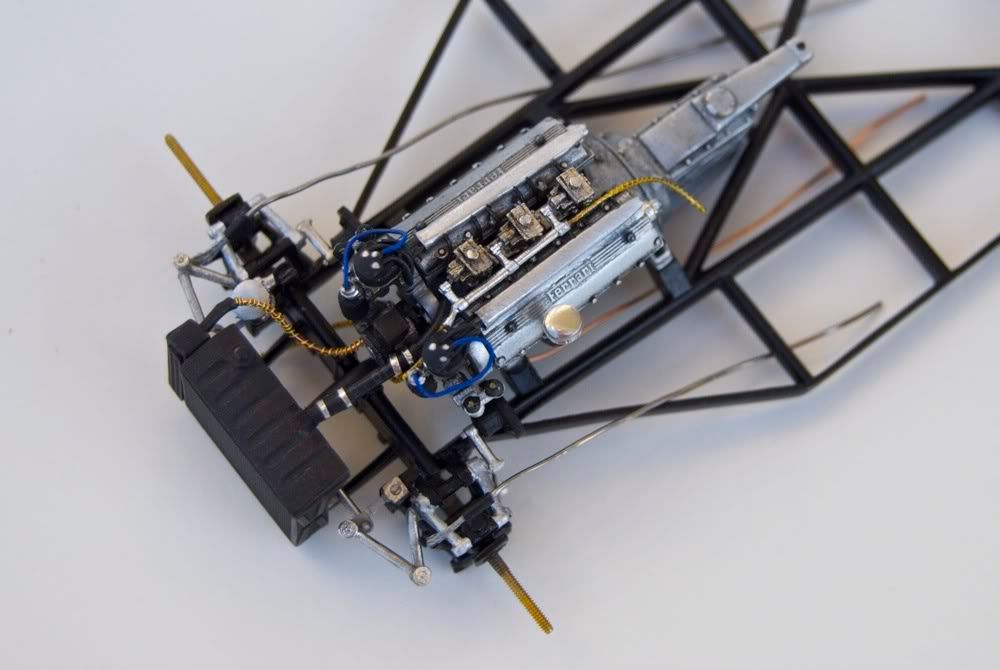 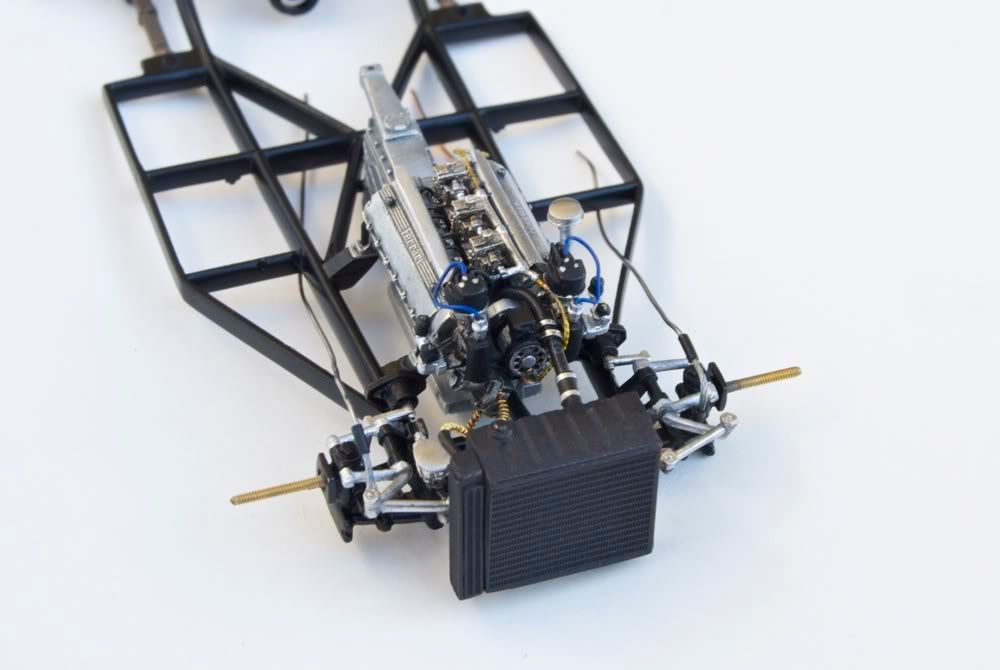 Rear suspension was also put together, leaf springs installed, and axles aligned. 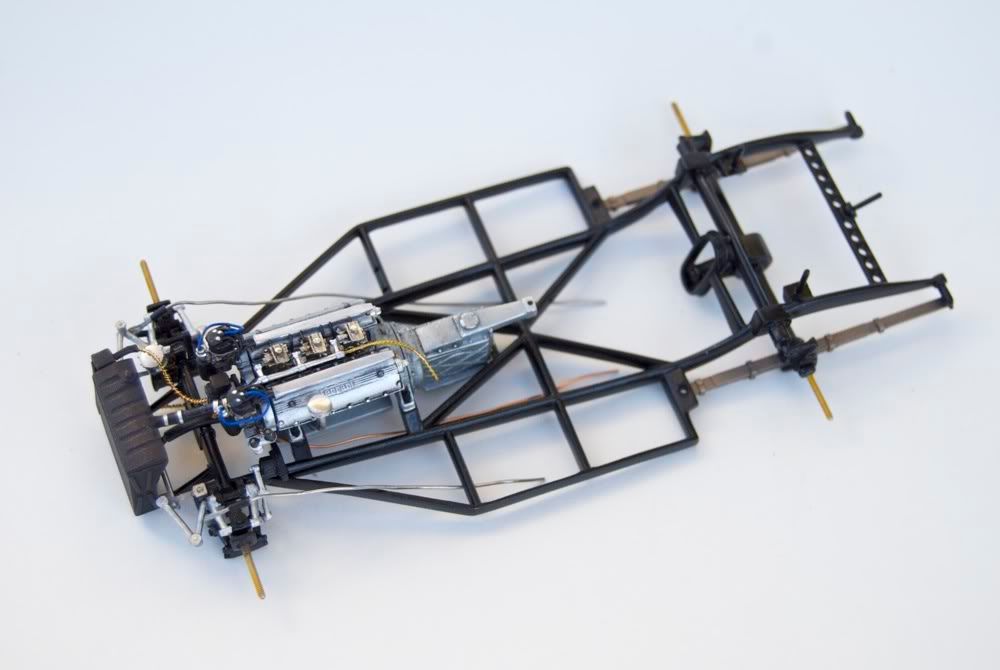 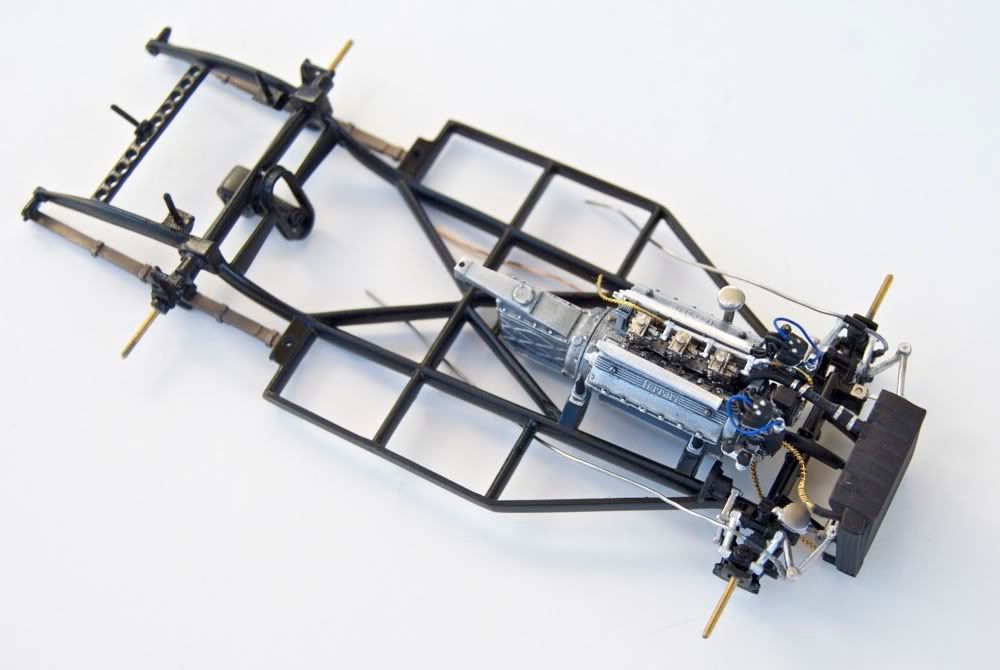 Then I started to add more detail to the chassis. I installed and plumbed fuel tank, brakes and wheels, spare wheel and driveshaft. 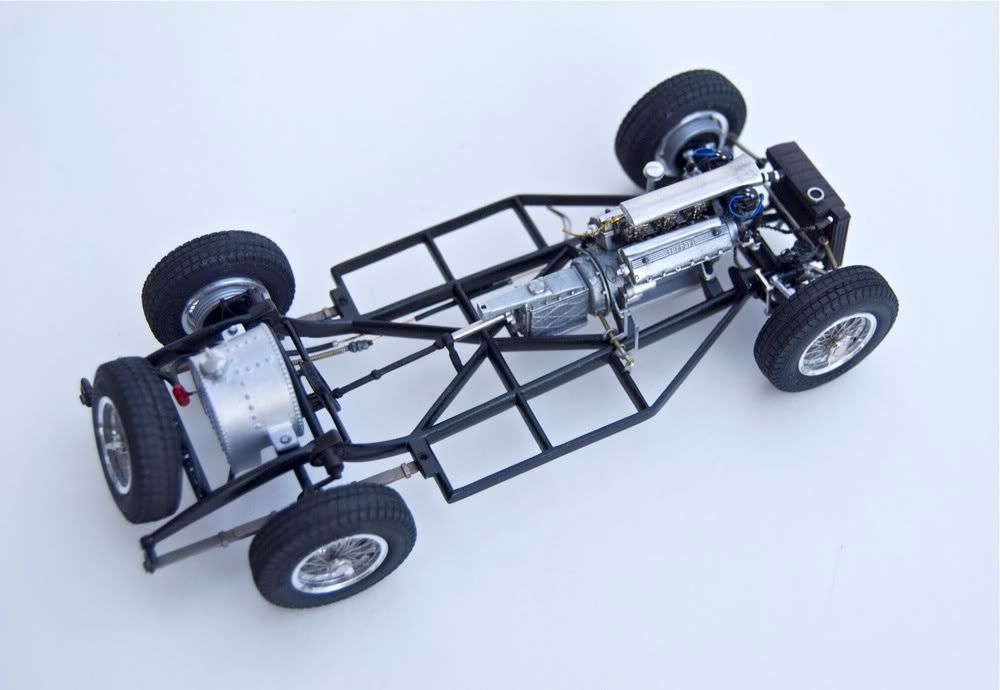 Pedal block was assembled and installed on the chassis. 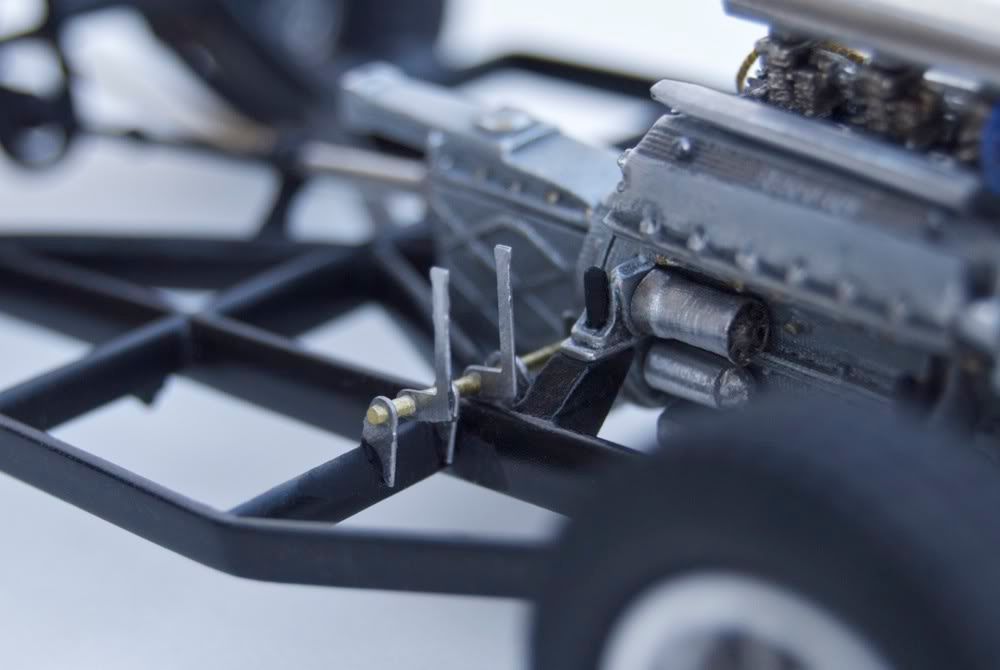 Spare wheel mounted on the chassis. 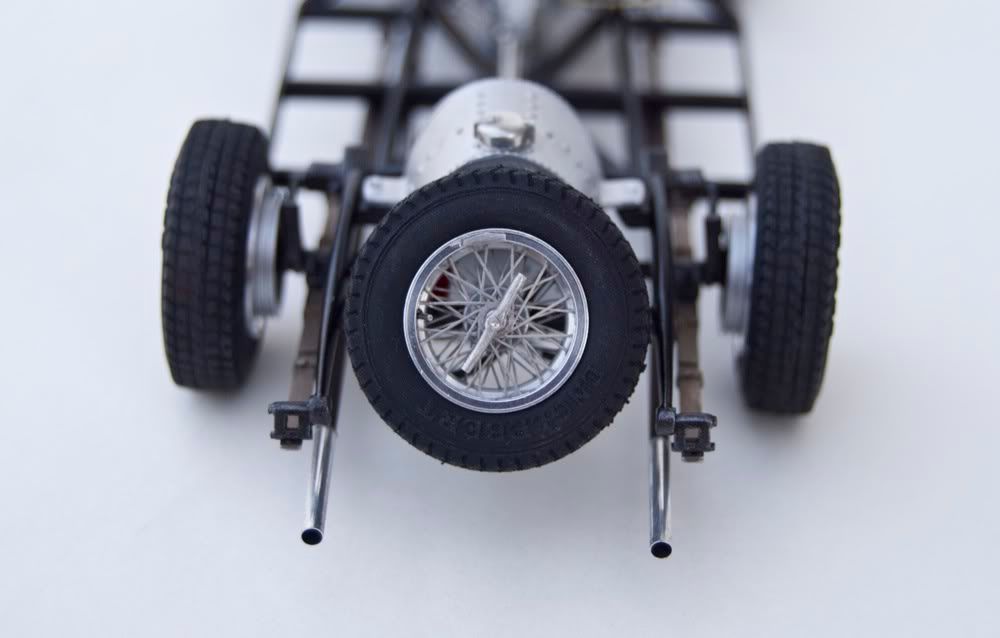 Fuel tank was completely plumbed, with fuel lines going from the tank main puck-up point back to the engine (through coarse fuel filter) and to the carbs (fine fuel filter on the line) and back to the tank. Connectors were made from solder, lines from various wires; I also used Sakatsu fittings and bolts from Scale Hardware. 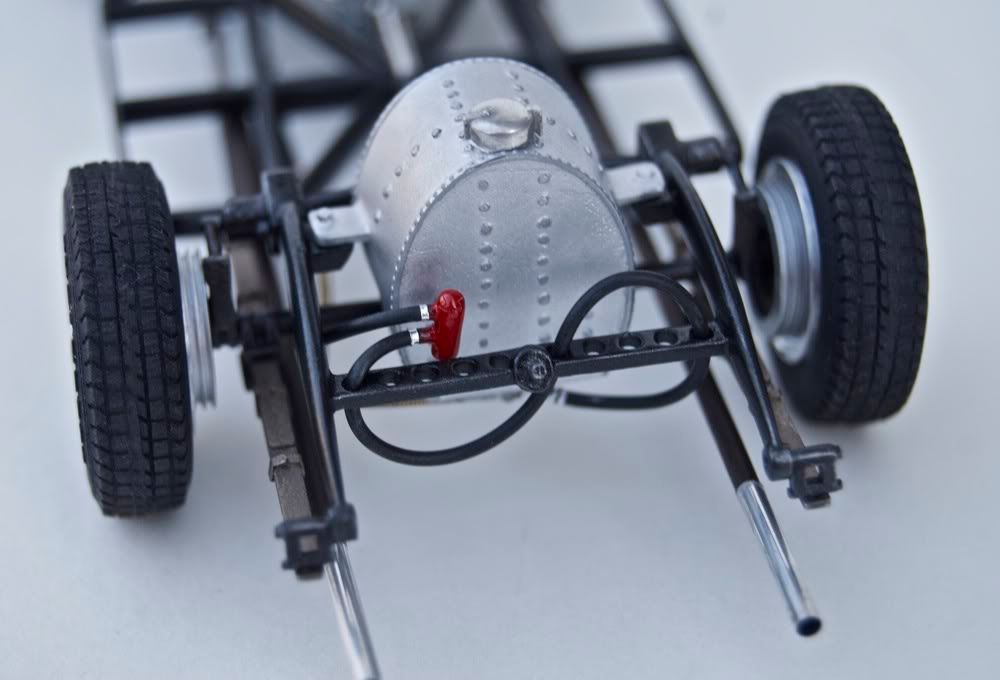 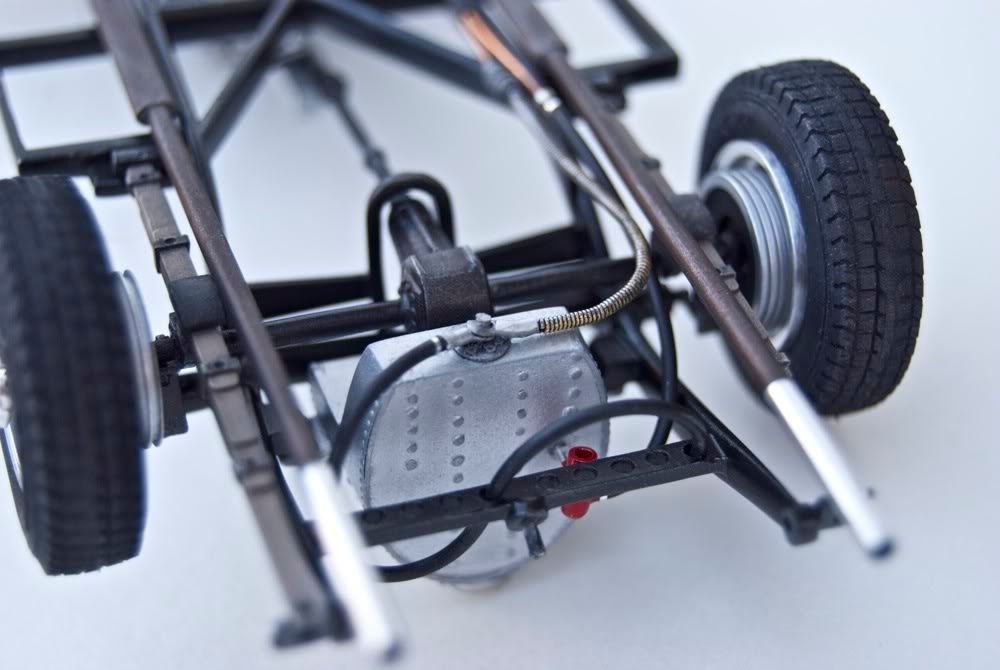 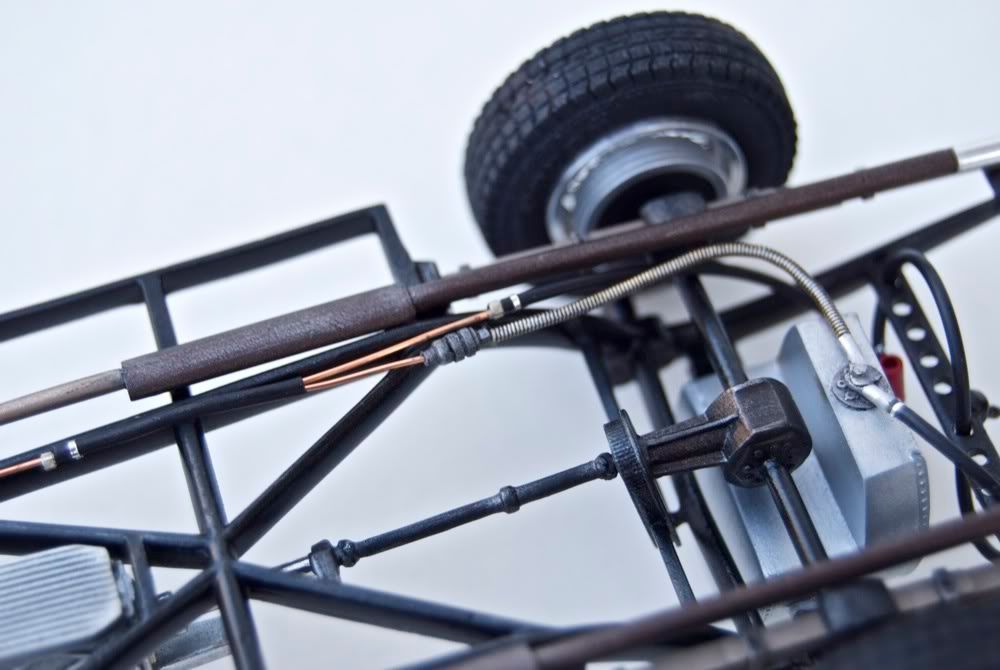 Up front, all lines were connected to their respective units, and routed on the chassis. I also attached exhausts, weathered chassis components here and there with various washes and dry-brushed them with metalizers. LeMans winning car should be dirty, even though it is not my usual building style! 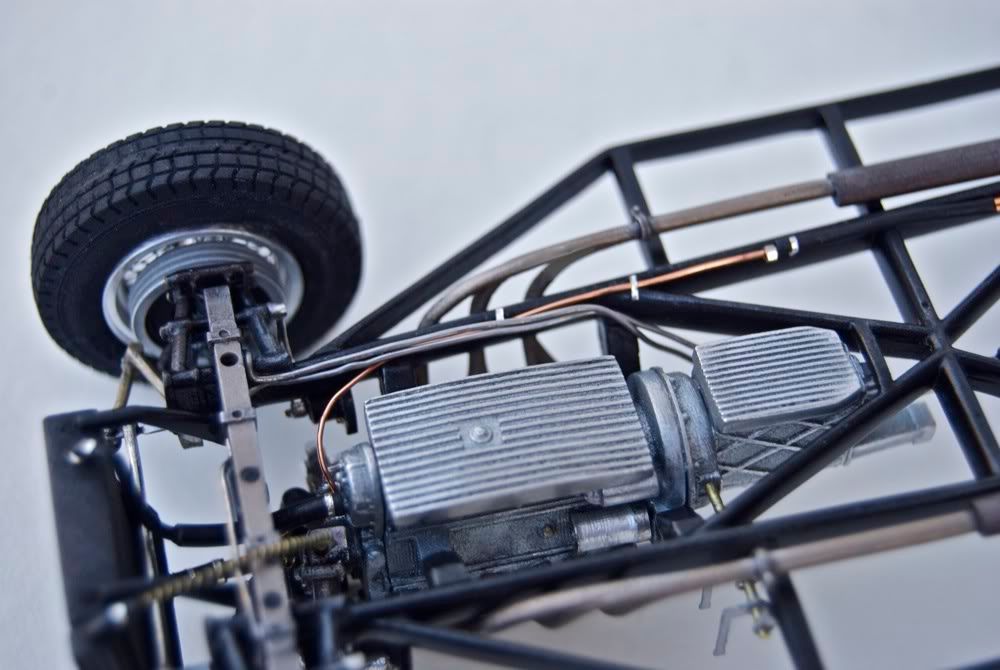 Finally, chassis was test fitted to the body to determine clearances and location and placement of the exhausts. 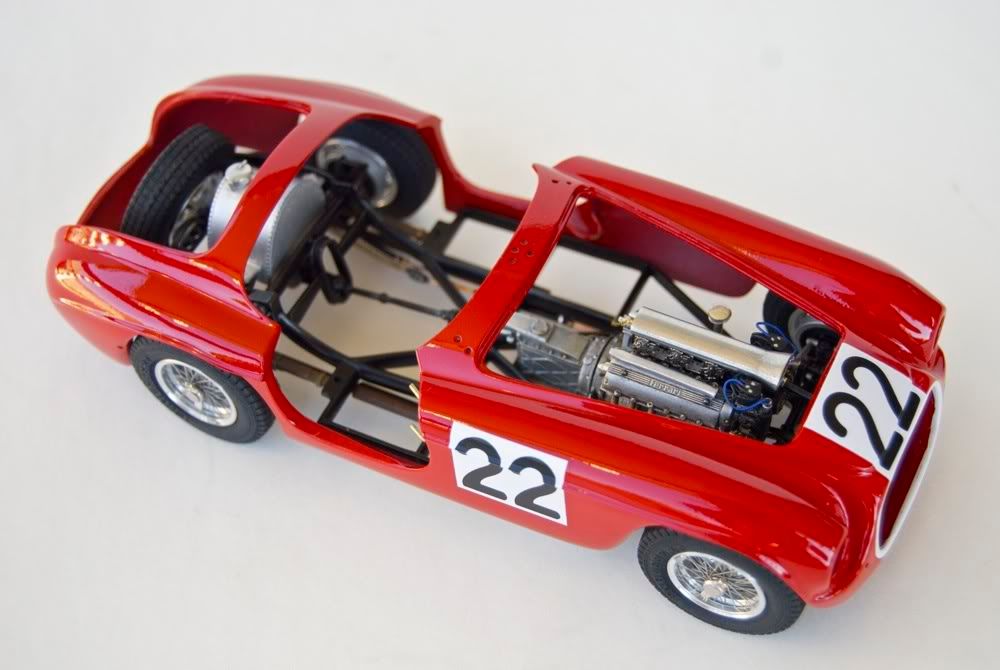 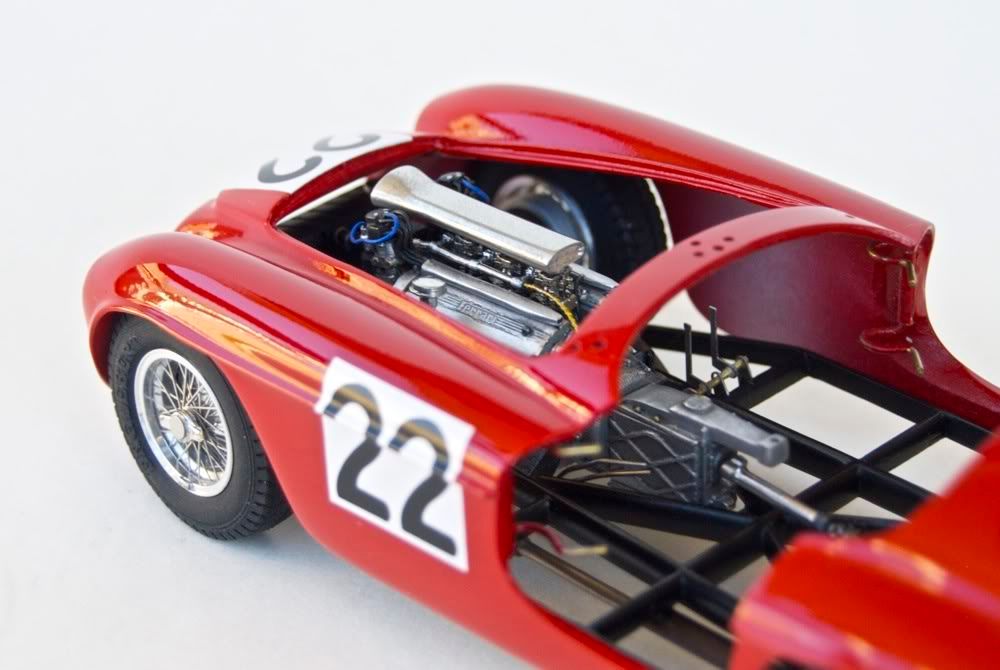 Being able to take the wheel off will be nice after the model is completed. 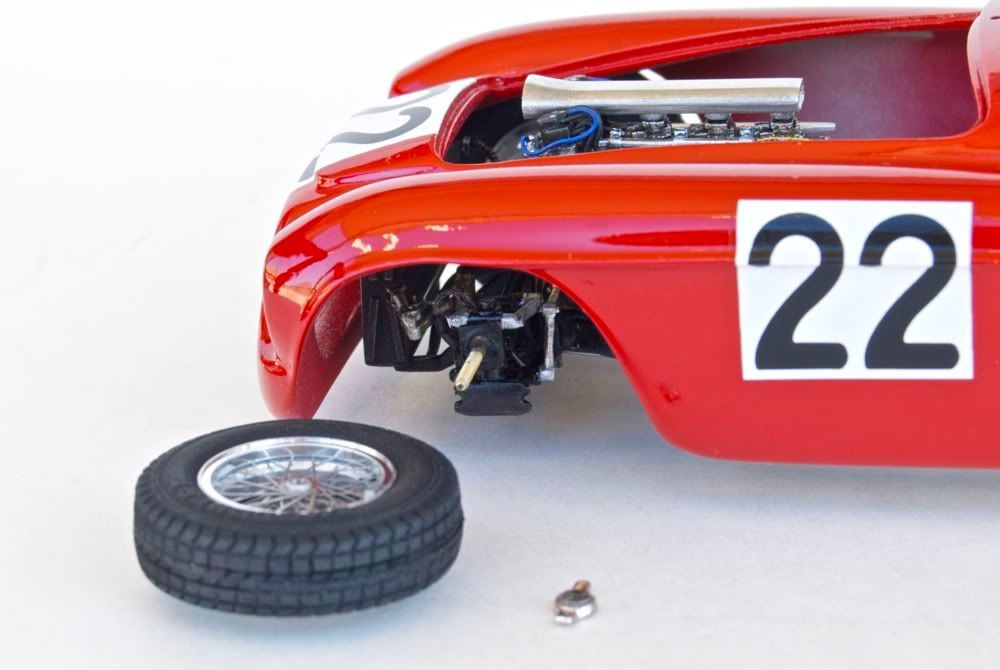 Finally, the chassis was completed, so I took few pics of it before it will be obscured by interior and other components. 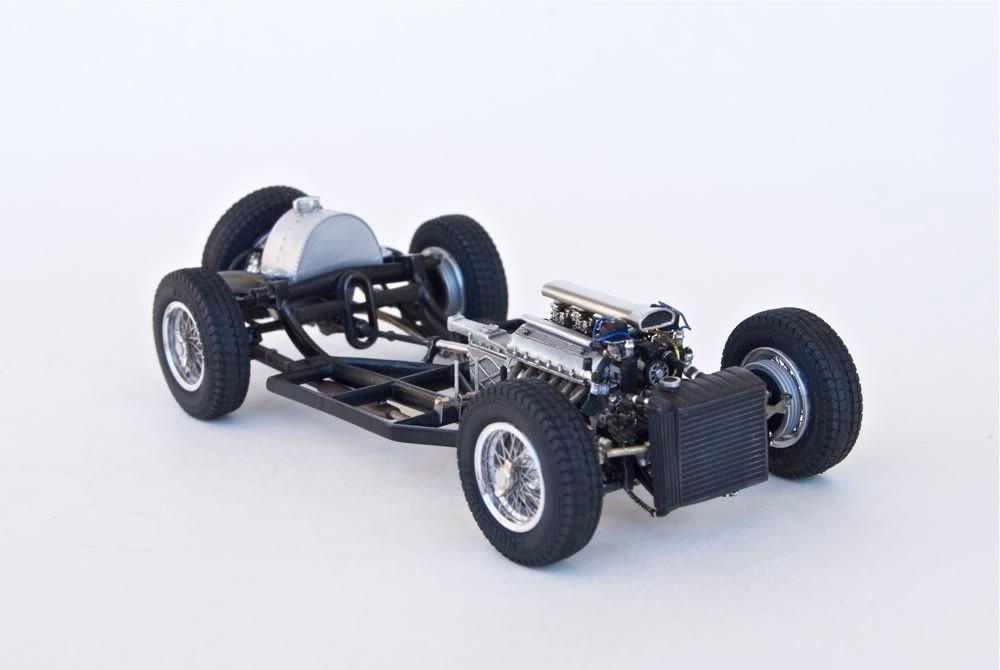 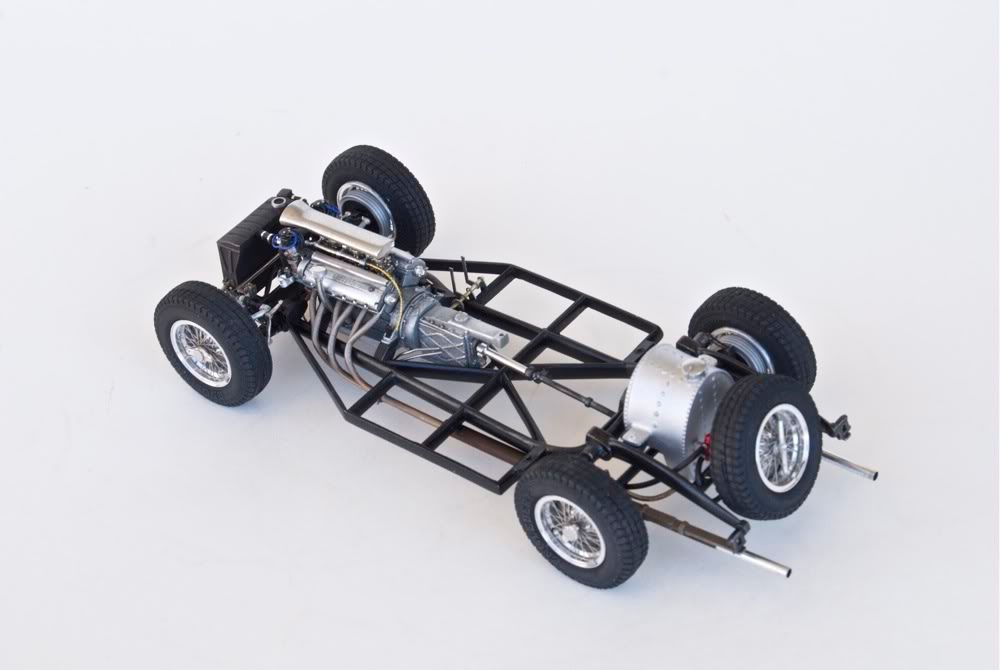 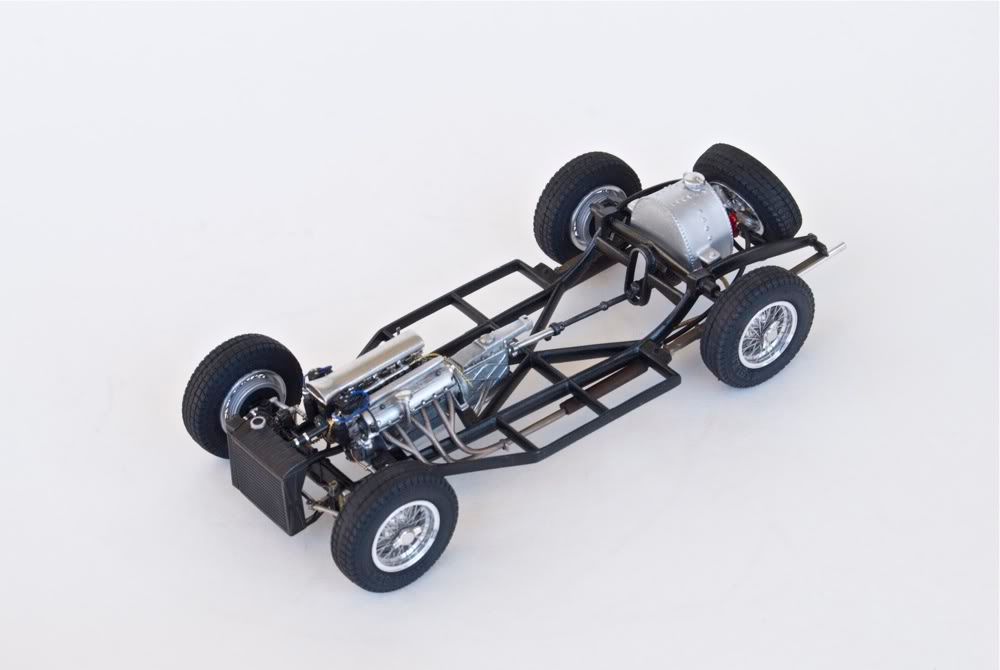 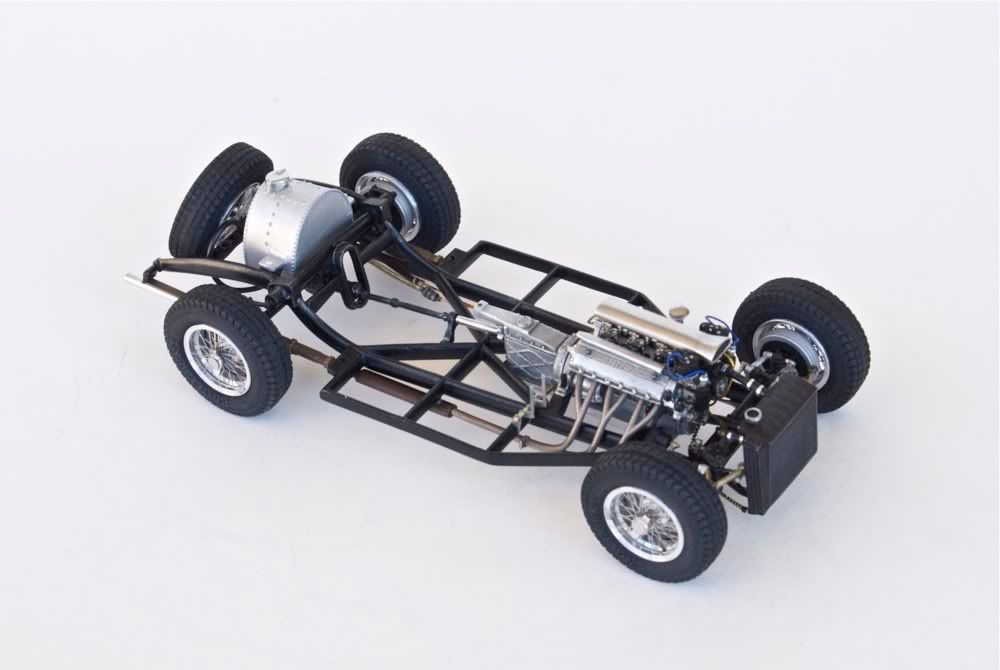 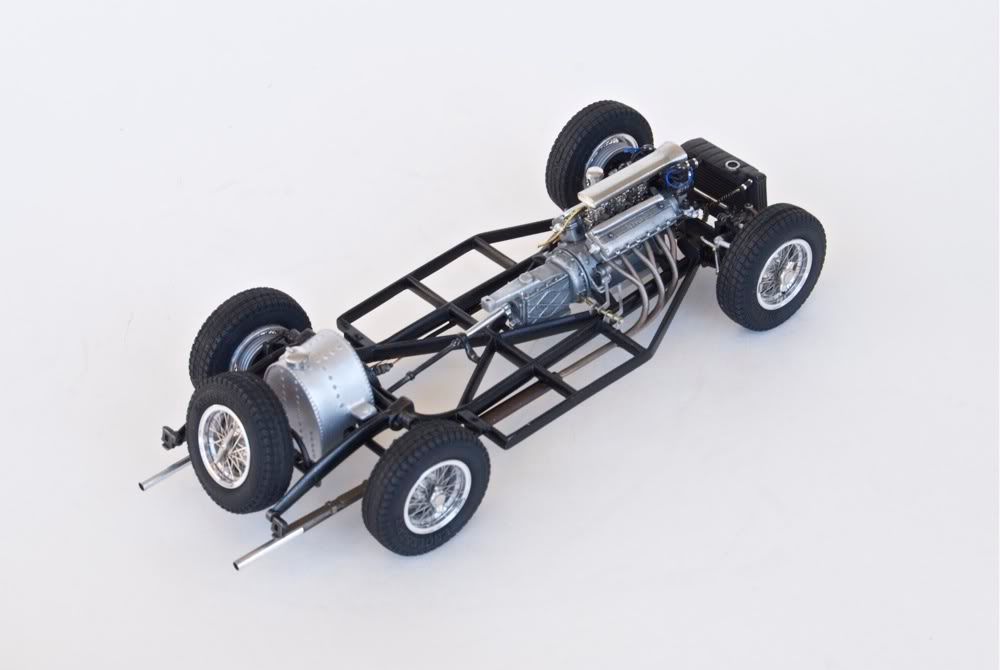 Couple more picks of completed chassis underside. 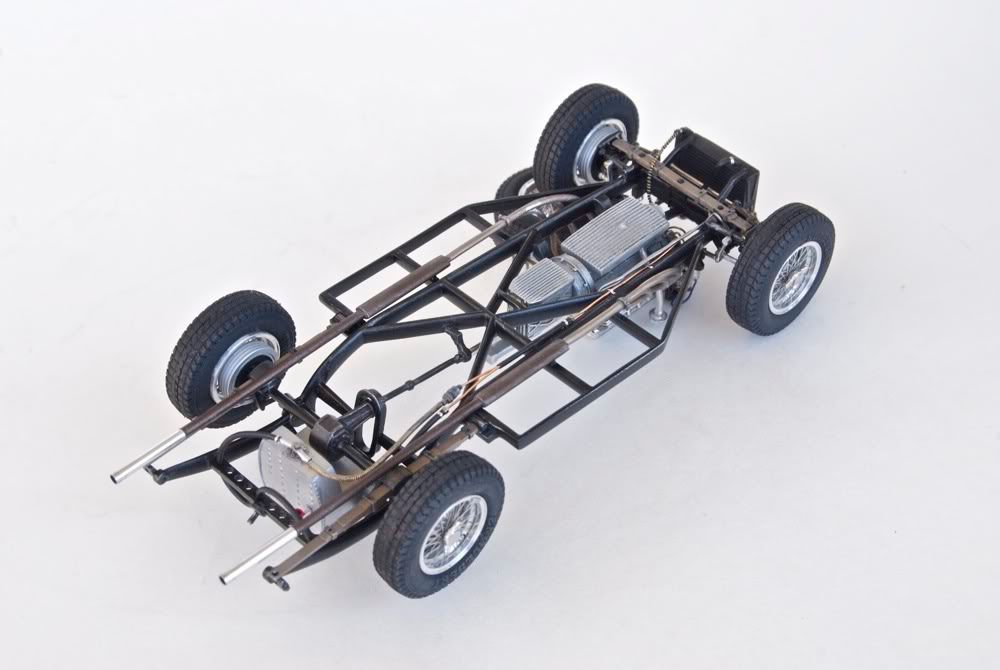 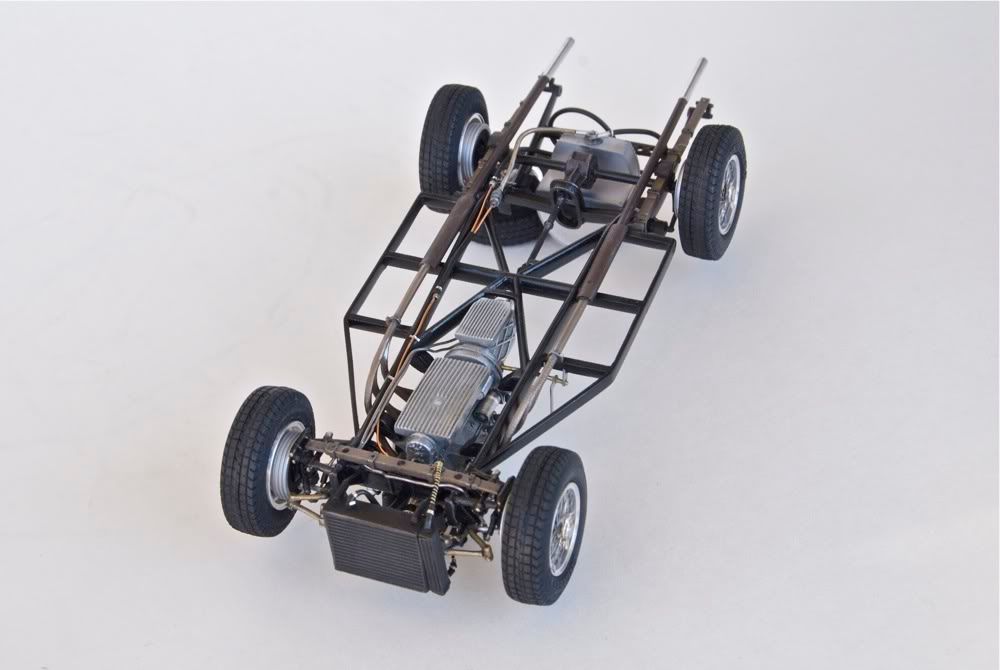 So, this is where I am currently, but hopefully this will be enough to motivate Stevenski and Gio to pick up their pace. More soon! 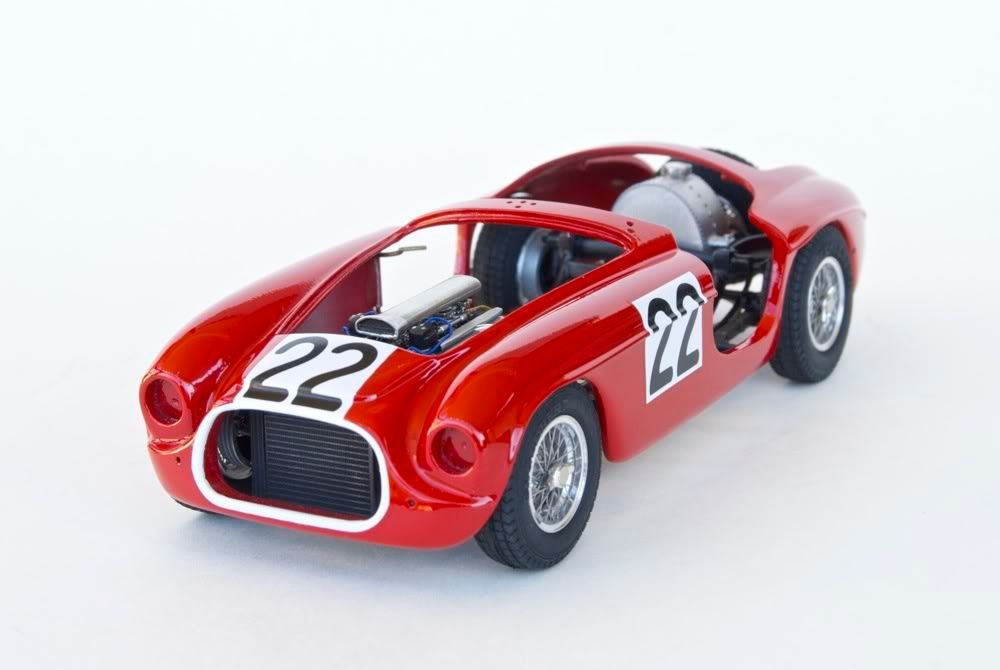 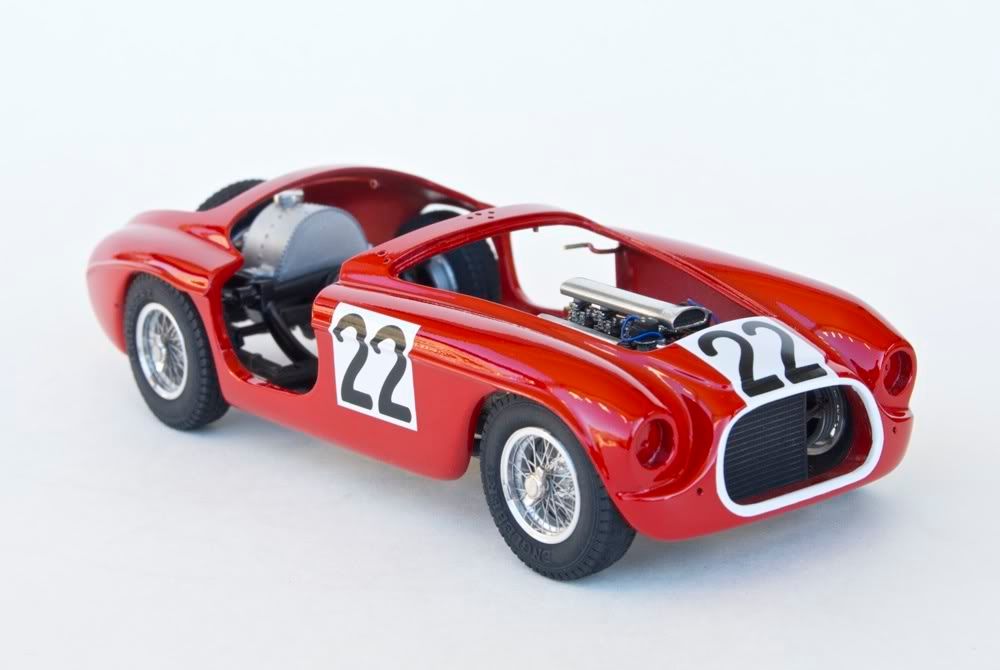 PS: I’m back :-)
__________________
The client is not always right. - Enzo Ferrari ItalianHorses.net    

|
|
#155
09-30-2010, 08:07 PM
|
||||
|
||||
|
Re: 36 cylinders
What an amazing update, I completely enjoyed myself looking at your workmanship. That beautiful chassis and engine doesnt even need a body on it and still its a masterpiece. I really like the very realistic leaf springs.
__________________
|
|
#157
09-30-2010, 10:14 PM
|
||||
|
||||
|
Re: 36 cylinders
Hey, Alex is back in the studio! I love that rolling chassis. This post might just get a lot of people off their be-hinds (me).
|
|
#159
10-01-2010, 02:21 AM
|
||||
|
||||
|
Re: 36 cylinders
I know when we said we'd try and finish this year, I didn't think you were serious!!
 Loving all the details you've added. Looks super! Now it's Gio's turn to update 
__________________
Guideline for happy modeling: Practice on scrap. Always try something new. Less is more. "I have a plan so cunning, you could put a tail on it and call it a weasel" - Edmund Blackadder
|
|
#161
10-01-2010, 09:51 AM
|
||||
|
||||
|
Re: 36 cylinders
Thanks everyone!
Quote:
Quote:
Quote:

__________________
The client is not always right. - Enzo Ferrari ItalianHorses.net
|
|
#162
10-01-2010, 11:39 AM
|
||||
|
||||
|
Re: 36 cylinders
It really is breathtaking just how amazing it looks
__________________
https://www.instagram.com/ecemodelling/
|
|
#163
10-01-2010, 11:42 AM
|
||||
|
||||
|
Re: 36 cylinders
Wow, i can't believe this thread is three years old, seems like this it was just last week. Either way, the detail is amazing. Proper entrance back from a slump!!
__________________
In Progress    
|
|
#164
10-08-2010, 11:22 AM
|
||||
|
||||
|
Re: 36 cylinders
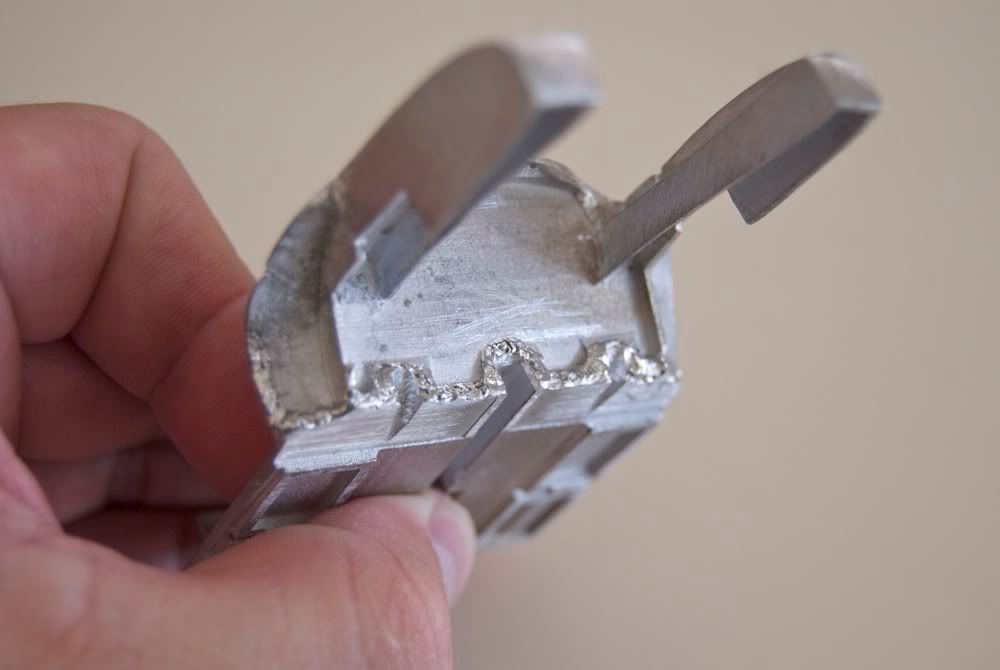
After completing the chassis, I decided to move on to the interior. Interior parts were the worst out of all the parts in the kit, simply because they were really rough, and needed lots of cleanup. Rear bulkhead was really awkward to work with – I glued it to the floor to test fit and adjust parts to the body, but even with extra strength super-glue, it was constantly breaking off. So….I soldered it to the floor. Problem solved.
 After EXTENSIVE cleanup of all the parts, they were primed, and painted. You can imagine how much work went into making parts from the first photo to look like these: 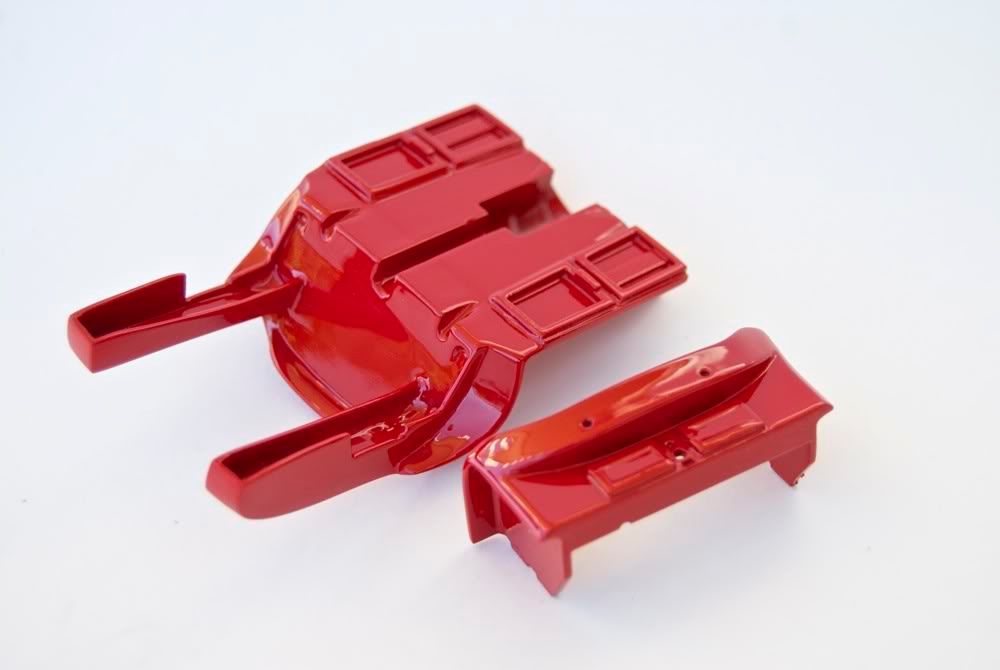 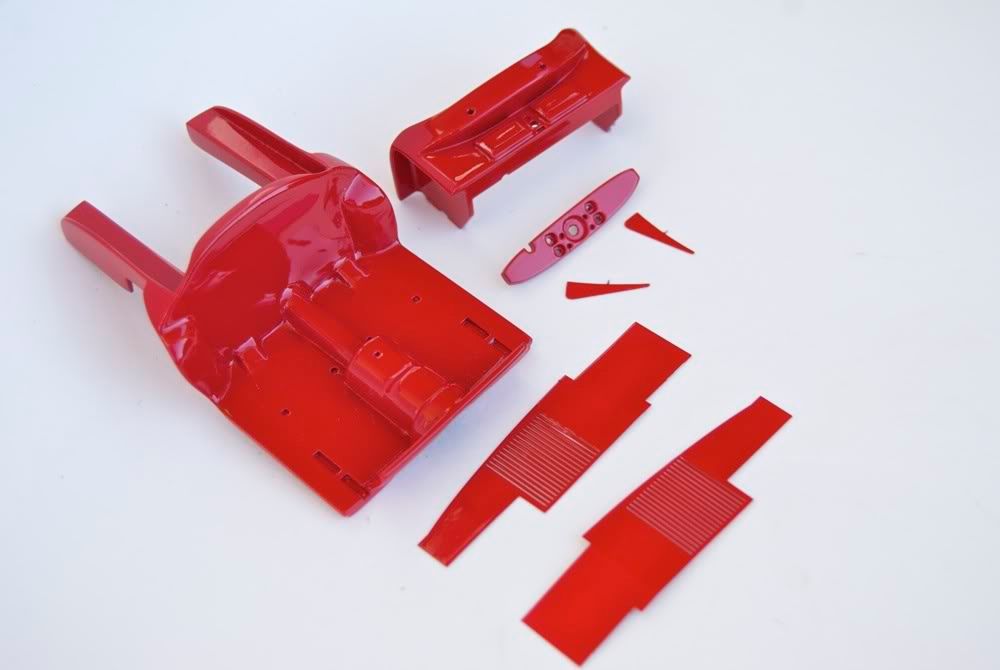 Second biggest problem of the kit was the seats. They were totally wrong. New seats were made out of Milliput putty, and once putty cured, sculpted with knives and carving tools into shape. Then I added some piping (thin wire), painted them (I decided to replicate the seats as they were on a restored car, since this is the only reference I could find. Original seats were corduroy, but there are no pics of them), and added lap belts. 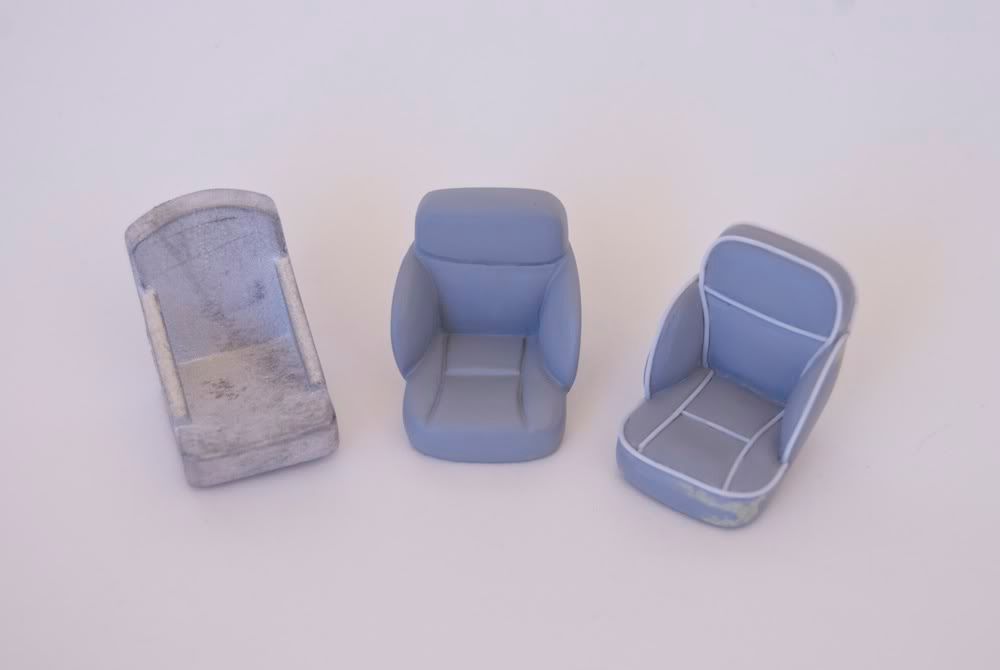 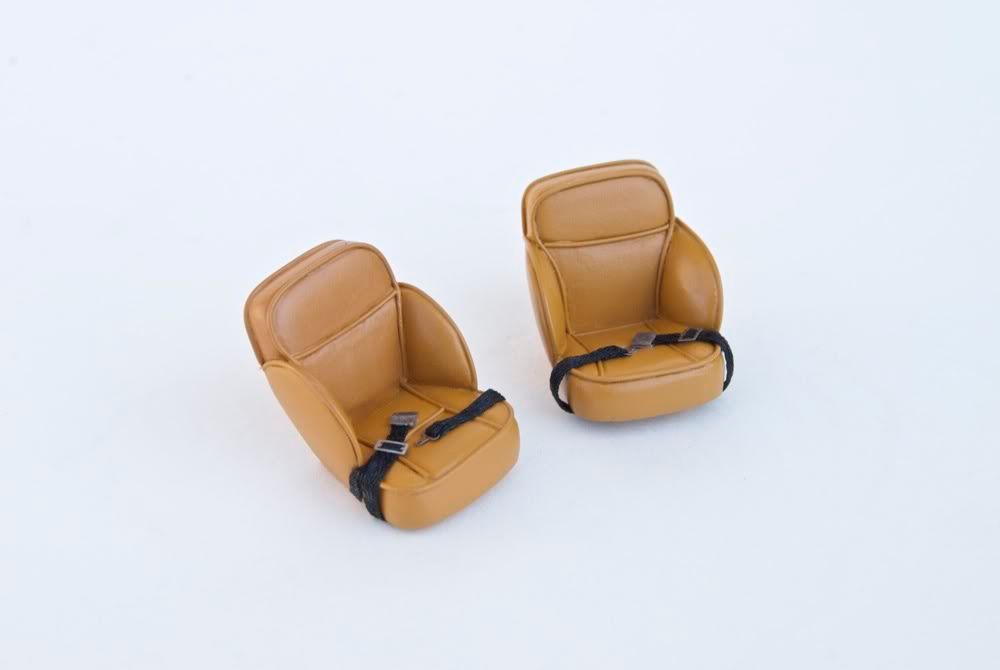 Dashboard was assembled, and few scratchbuilt things like switches and pulls were added. I also made shifter from scratch, as the one provided in the kit was wrong. Boot was made from real leather (note the tie down at the top), and knob from sheet styrene. Shifter rod is glued to the top of the boot, then bent at an angle, but not glued to the base, which allows it to move freely to simulate working shifting. Steering wheel was assembled and detail-painted, and topped with self-adhesive Cavallino. 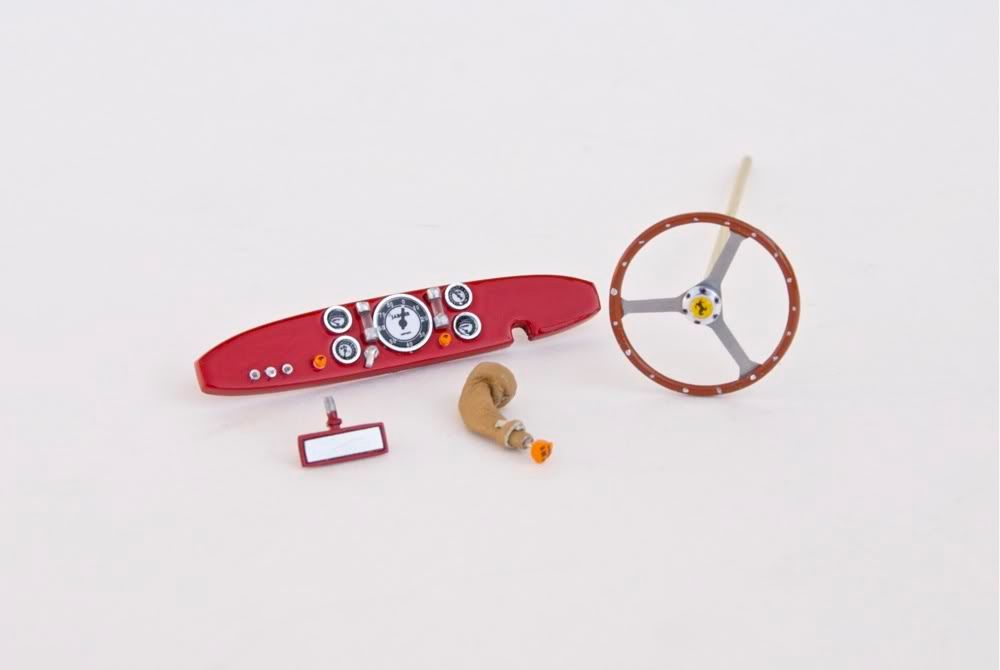 Engine bay was put together, and I added few details and wires here and there. 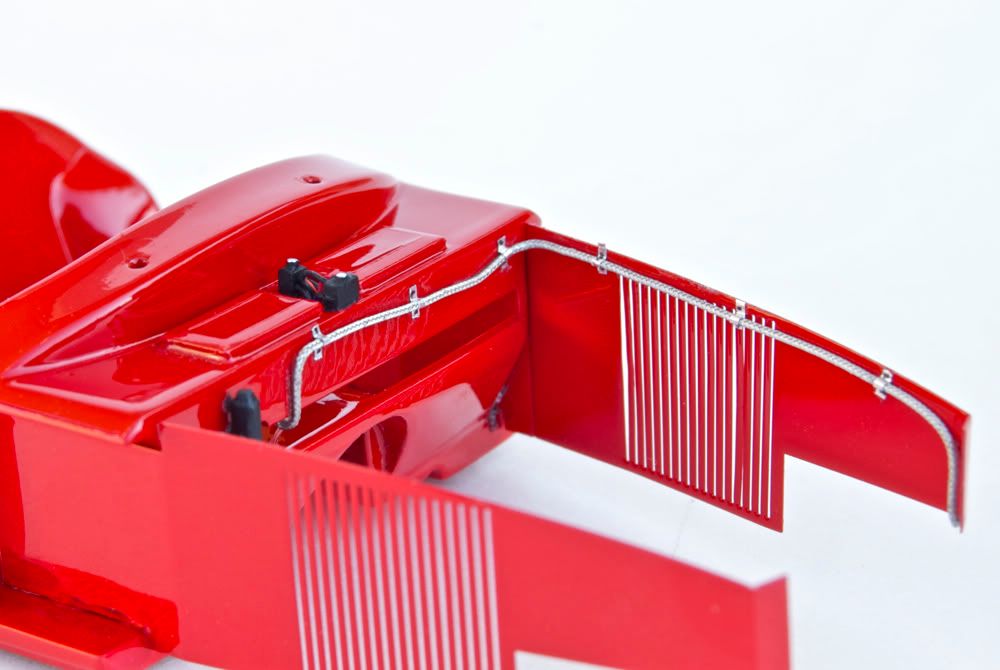 The chassis was put together, and carefully test-fitted to the body – this is where few adjustments were needed. First of all (as I measured) right side of the body is shorter than the left! (maybe just my copy). That resulted in front wheel well misaligned related to the chassis, and right front wheel rubbing on the fender. Obviously, that looked totally wrong! Had to bend front suspension here and there, adjust the chassis, and doo all that fun stuff that you so hard try to avoid to do on a completed chassis. Fun fun fun. 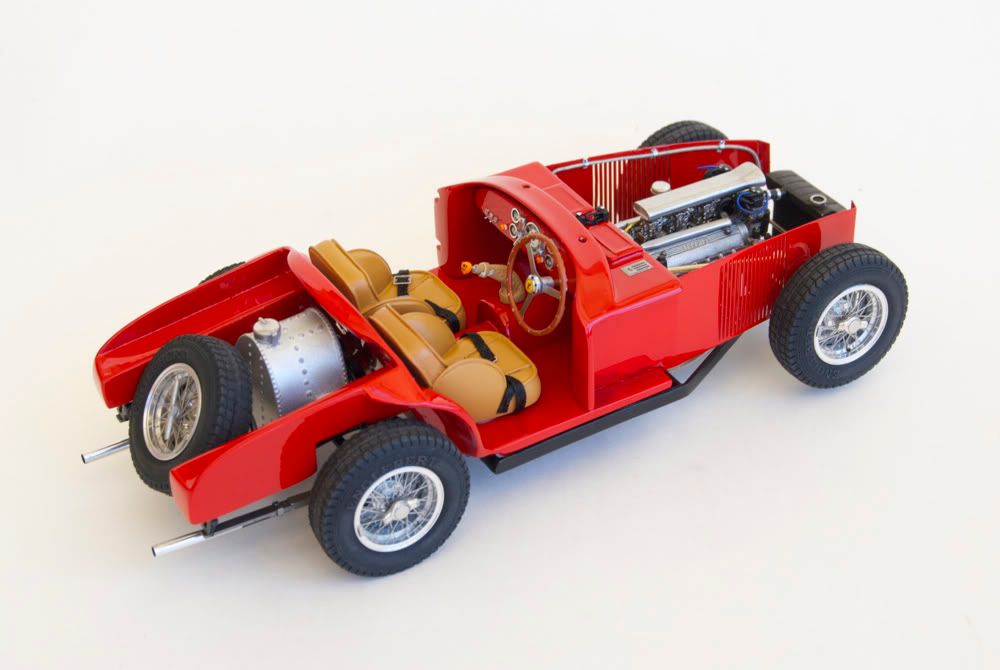 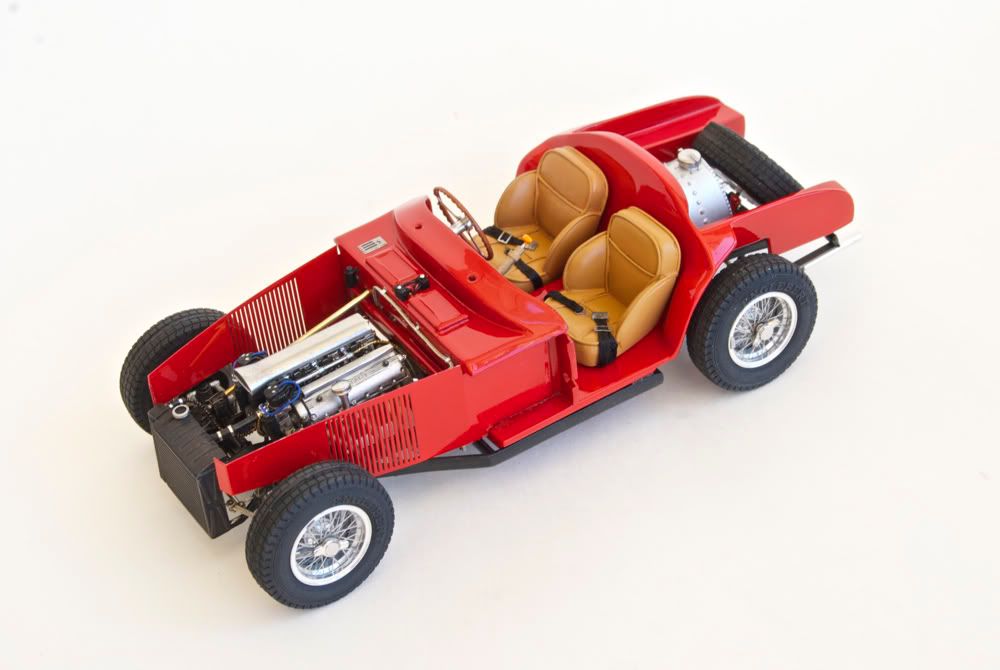 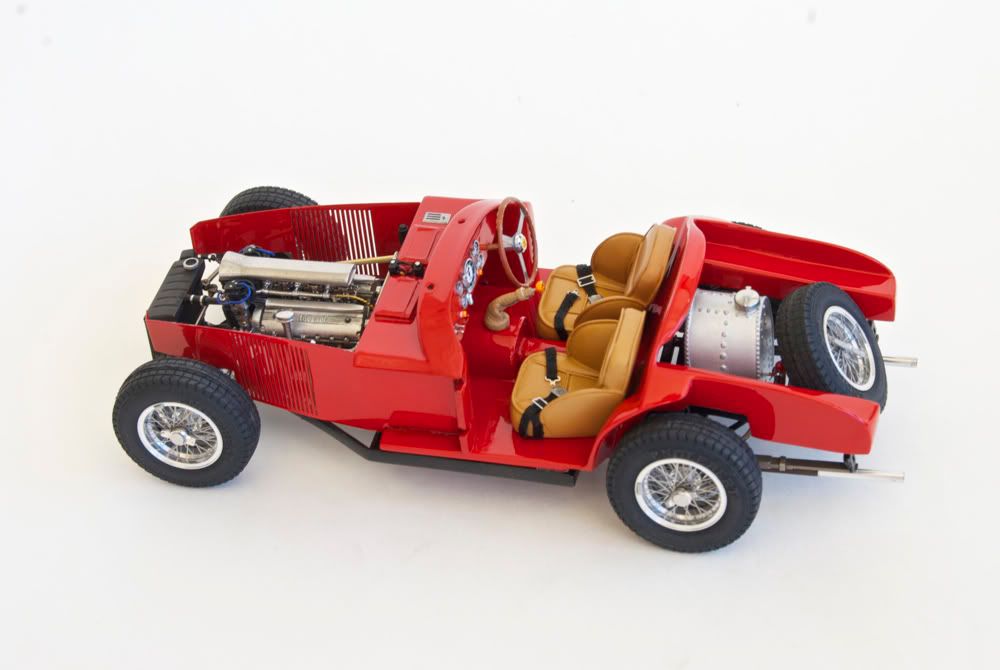 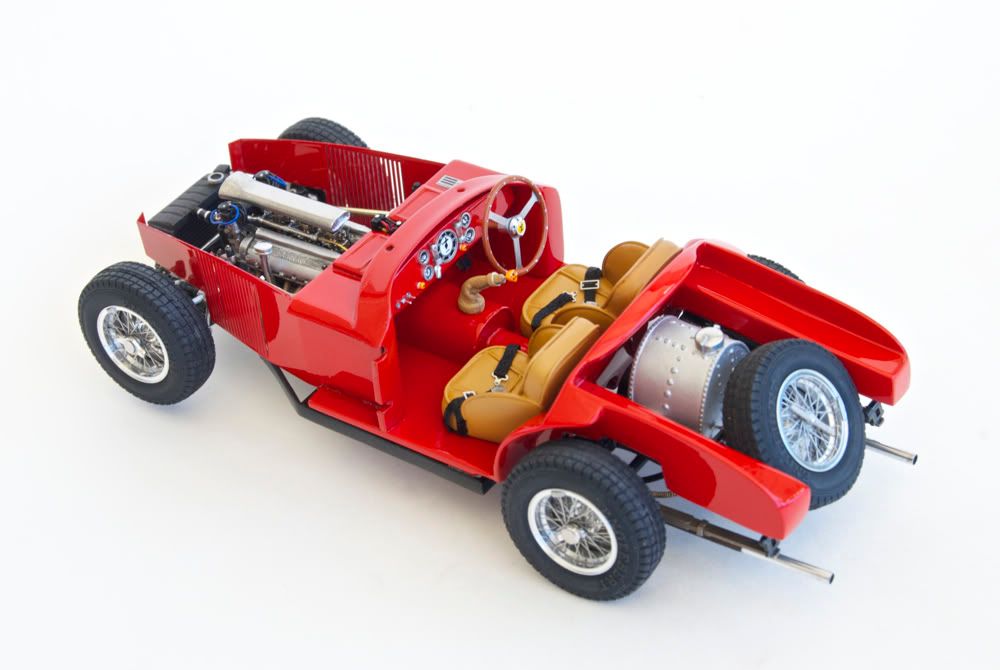 Finally, few bits and pieces were put together, windshields, headlights and taillights, trunk lid, door straps were made out of leather, etc. 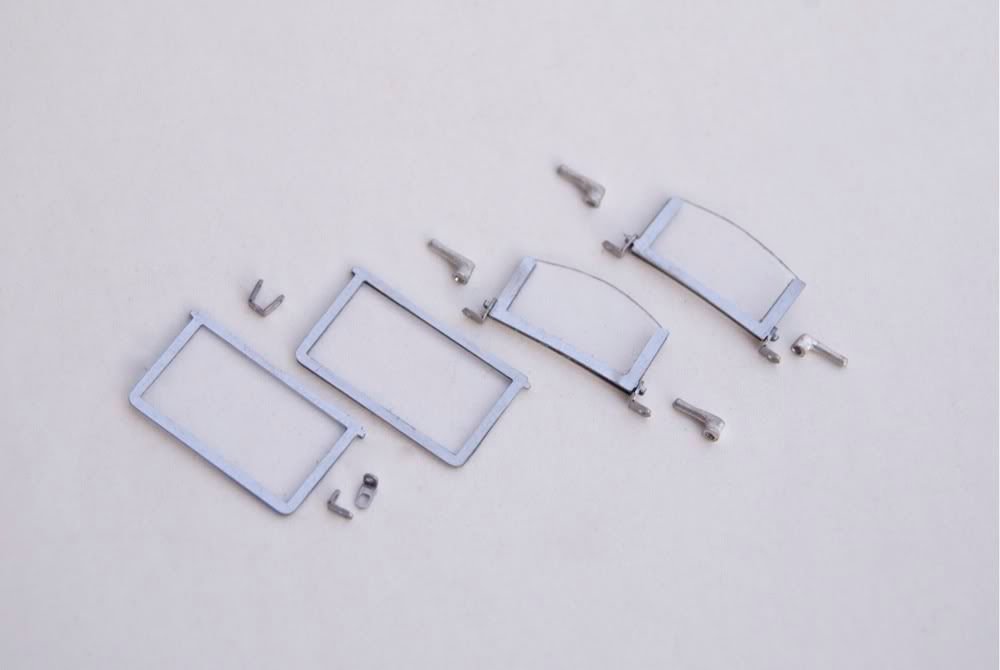 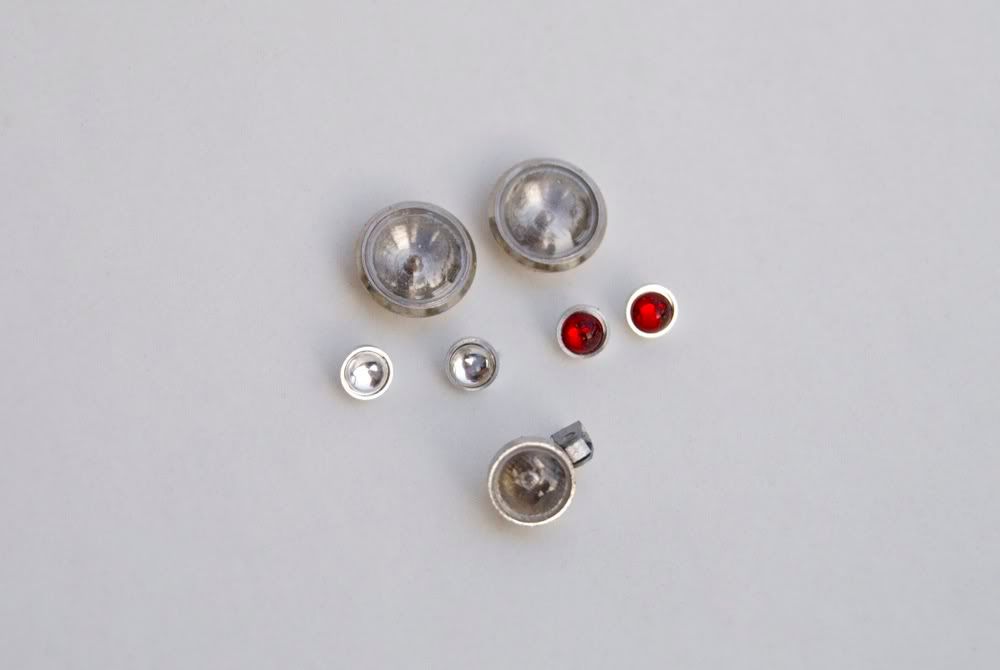 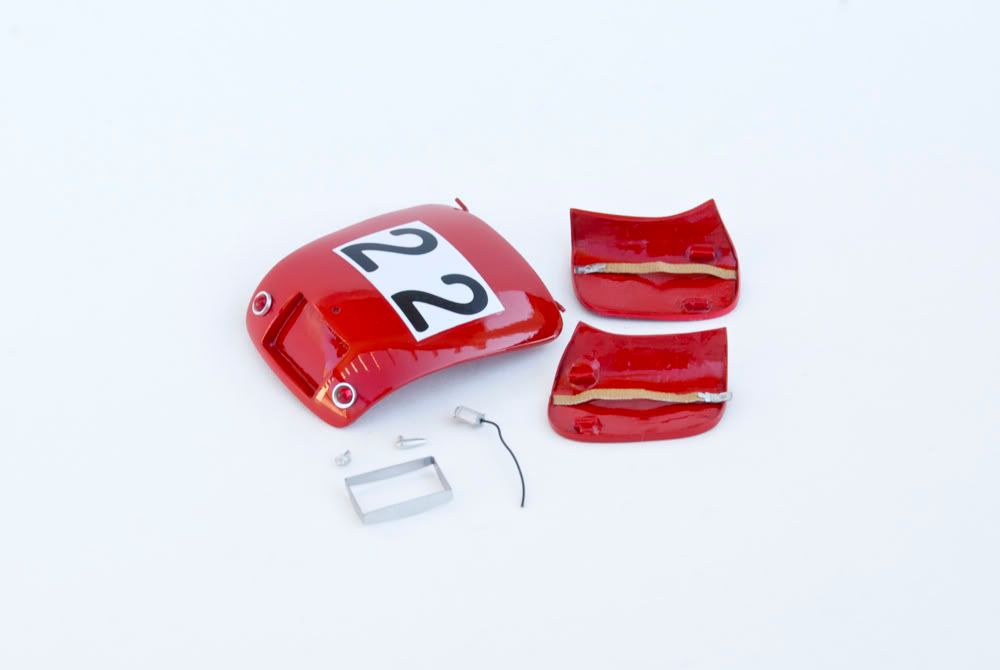 And then everything was put together. Luckily, there were no problems with the final assembly. While not totally correct, I think the model turned out rather nice. More pix soon in the completed section! Gio, Steven, your turn now! 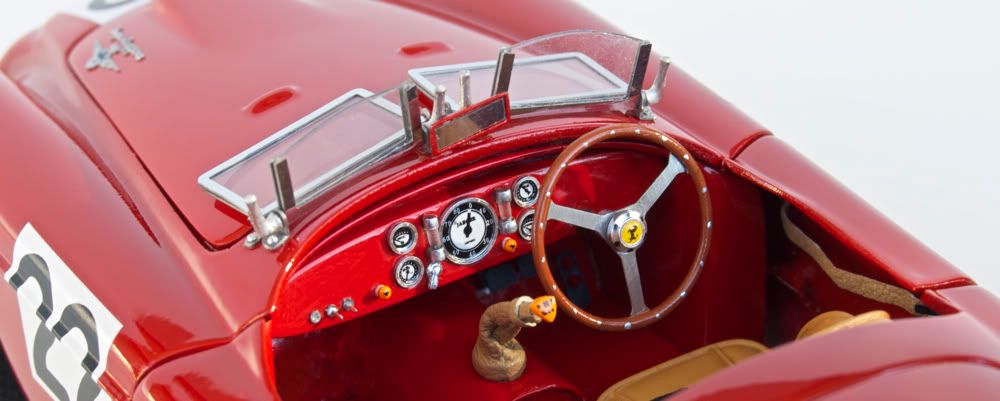 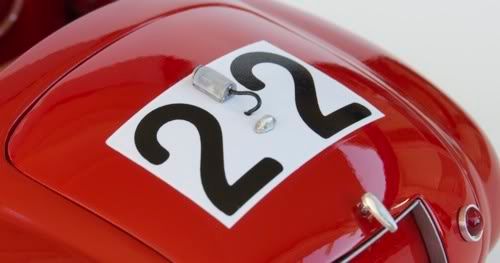 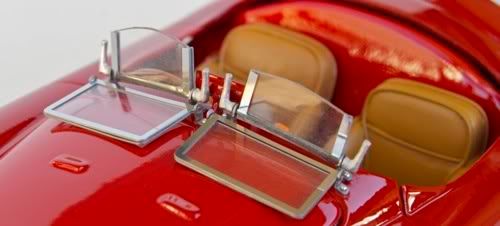 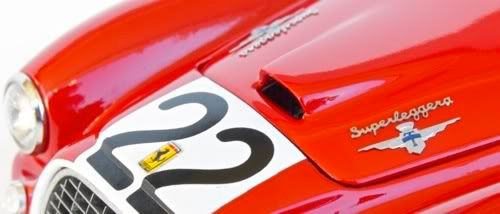 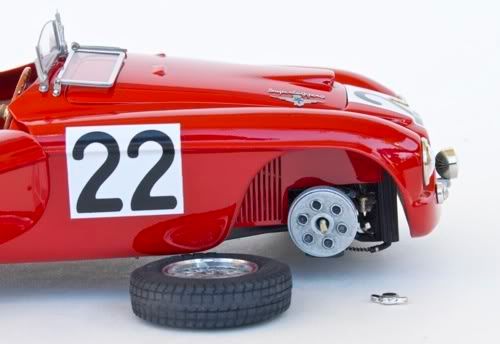 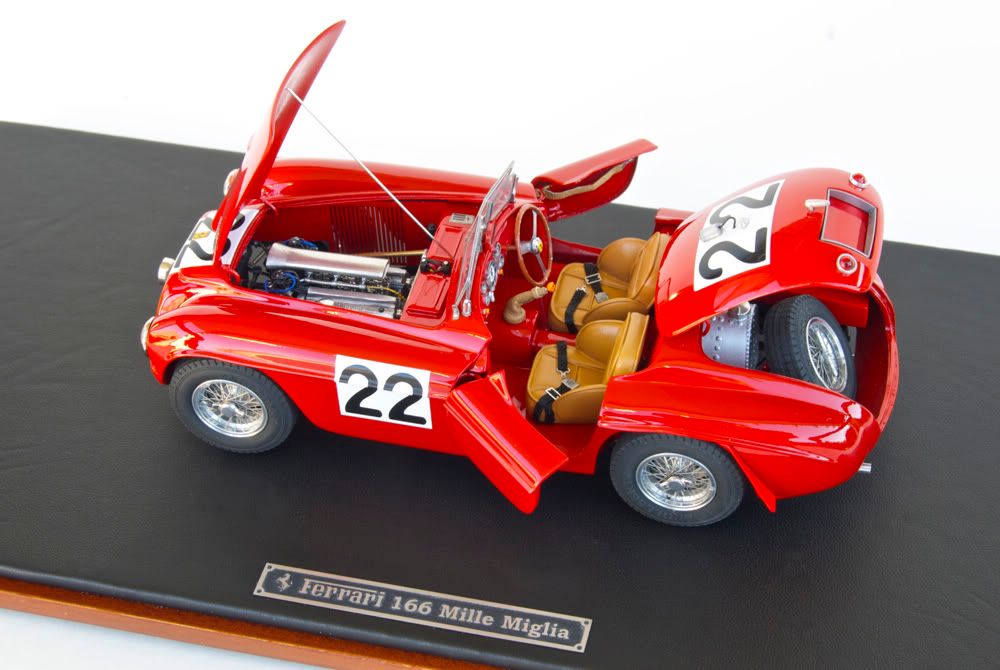 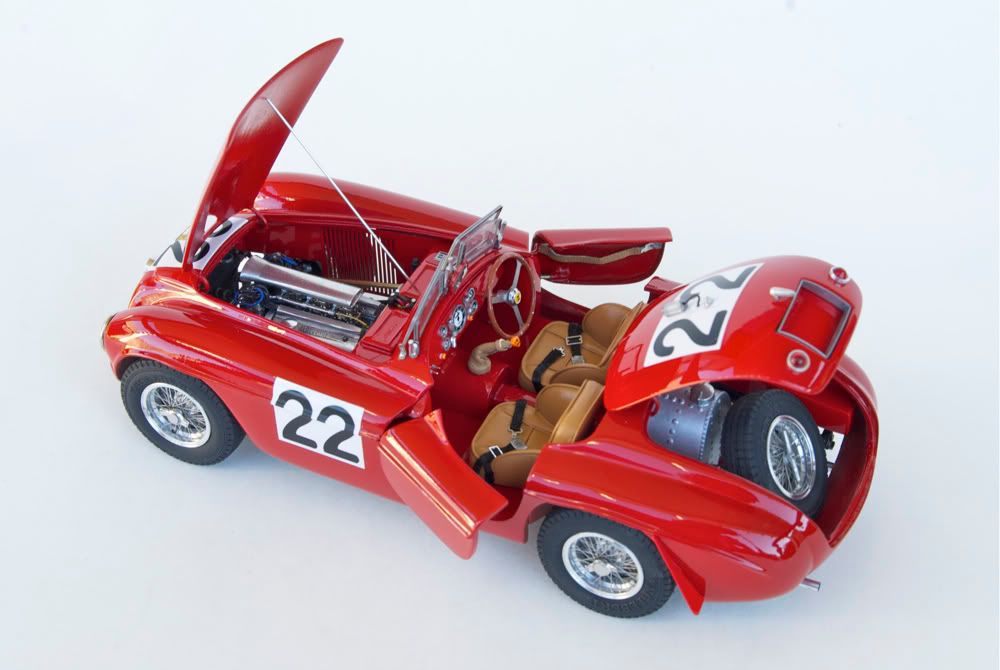 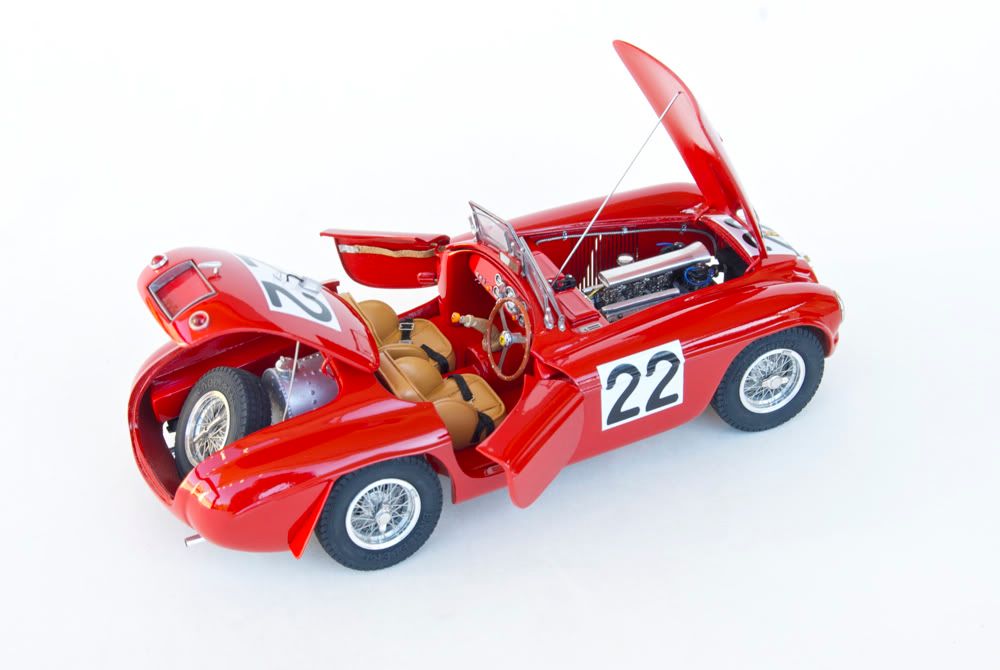 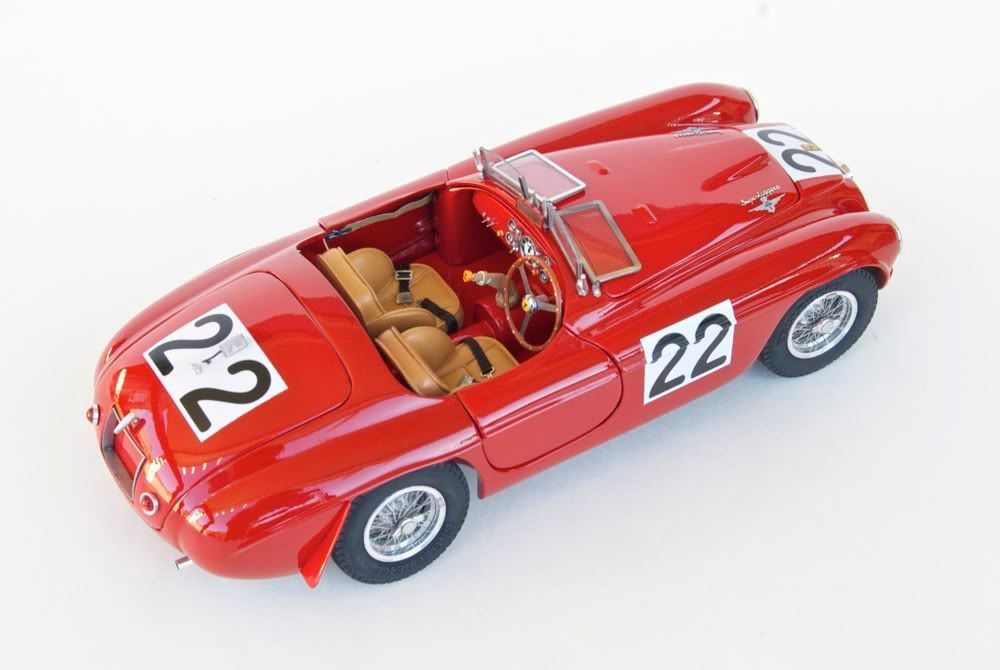
__________________
The client is not always right. - Enzo Ferrari ItalianHorses.net
Last edited by 360spider; 10-08-2010 at 12:13 PM.
|
|
#165
10-08-2010, 01:01 PM
|
||||
|
||||
|
Re: 36 cylinders
Its hard to believe those are the same parts. The finished product looks phenomenal
__________________
https://www.instagram.com/ecemodelling/
|
|
|
POST REPLY TO THIS THREAD |
 |
|
|





 gio
gio


