|
|
|

|
|
| Search | Car Forums | Gallery | Articles | Helper | Quality Dog Food | IgorSushko.com | Corporate |
|
| Latest | 0 Rplys |
|
|||||||
| WIP - Street Post topics for any "Works In Progress" street vehicles projects in this sub-forum. |
 |
 Show Printable Version | Show Printable Version |  Email this Page | Email this Page |  Subscribe to this Thread
|
|
|
Thread Tools |
 09-15-2010, 09:45 AM
|
#1 | |
|
AF Newbie

Join Date: May 2006
Location: North-Netherlands
Posts: 73
Thanks: 0
Thanked 0 Times in 0 Posts

|
Ferrari Enzo - Tamiya - 1/24, update 4 29-03
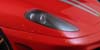
Back in 2006 I bought this Enzo kit for a bargain on my vacation in Luxembourg. I kept myself saying that I would start building this one, till I was ready for it. I kept stalling and kept saying to myself that I need to build first this kit and then that kit and it kept going on. But this last sunday I got some motivation and grew some cohoney's to start on it. What I want is to give myself in this kit, my full 100% without shortcuts. I always have stuff done on a build that is not to my satisfactory and I want to eliminate that element. So I will only work on this car when I want to, when I have the right motivation to build beyond my limits. And so I started today, Basically the only thing I could do was glueing the engineparts together and cleaned up the left-exhaust. cost me 3-4 hours on just those few parts. The bos:   Some of the extra parts I am going to use, I will use more aftermarket stuff, but that will appear later on.  The first parts of the engine doesnt need a whole lot of detailling other than adding the sand-texture.  I will sand off the detail on the backside and add a piece of wire.  Here I cut out a tube that was molded in, but didn't show up realistically, so I cut it out and will replace it with tubing.   The parts of the left-exhaust.  Because of some hard edges, I threw the parts in bleach and have the freedom to work with it.  In the upper connor was a bit of extra plastic molded-in, I cancelled that and filled it smooth.  The rear-axle will be replaced as well, this is the standard part....  ...Which is going to be replaced with a piece of tubing and a turned metal part.  
__________________
Nothing Beats a TurboCharger! 
Last edited by Erik O.; 03-29-2011 at 04:12 PM. |
|

|

|
|
09-15-2010, 11:32 AM
|
#2 | |
|
Authorized Kia Vendor
 
Join Date: Mar 2010
Location: Kaysville, Utah
Posts: 280
Thanks: 0
Thanked 2 Times in 2 Posts
|
Re: Ferrari Enzo - Tamiya - 1/24, update 1
Very detailed work dude. Where is the end product? hope you will post it here. I'd love to see the result.
__________________
Northern Utah Car Sales |
|
|
|
|
|
09-15-2010, 03:24 PM
|
#3 | |
|
AF Newbie
Thread starter
Join Date: May 2006
Location: North-Netherlands
Posts: 73
Thanks: 0
Thanked 0 Times in 0 Posts
|
Re: Ferrari Enzo - Tamiya - 1/24, update 1
Thanks for the reply; however, it will be many, many months from now until I can present a finished product. 24 hours is just too little for me ;-)
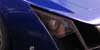
Since my HDD crashed yesterday and I've been working basically non-stop on it to see what I can rescue from it, I worked a little bit in photoshop to see what I could do for a paintjob. Everybody that knows me a little, does know that I just can't paint a normal paintjob. With this one, I tried to capture some old racing livery's from the 250-twelve cilinders,     
__________________
Nothing Beats a TurboCharger!
|
|
|
|
|
|
09-15-2010, 03:50 PM
|
#4 | |
|
AF Enthusiast

Join Date: Dec 2008
Location: Limerick, Ireland
Posts: 744
Thanks: 2
Thanked 6 Times in 6 Posts
|
Re: Ferrari Enzo - Tamiya - 1/24, update 1
Progress looks good so far. I like the blue paint job with the white stripe, reminds me a bit of the Maserati m 12
__________________
https://www.instagram.com/ecemodelling/ |
|
|
|
|
|
09-15-2010, 10:53 PM
|
#5 | |
|
AF Fanatic

Join Date: Feb 2004
Location: Hartford, Connecticut
Posts: 5,601
Thanks: 7
Thanked 108 Times in 103 Posts
|
Re: Ferrari Enzo - Tamiya - 1/24, update 1
That will be a wild enzo!! Go for it. I got the sms super detail kit and am eager to use it soon. Good luck with yours!
__________________
In Progress    
|
|
|
|
|
|
09-16-2010, 06:49 AM
|
#6 | |
|
AF Enthusiast

Join Date: Mar 2004
Location: Gold Coast, AUSSIE!!!!
Posts: 827
Thanks: 26
Thanked 32 Times in 32 Posts
|
Re: Ferrari Enzo - Tamiya - 1/24, update 1
well, after a minute or so of staring at the blue with the white stripe
it grew on me Blue and green: nah blue and white stripe and circle: nah Black and white front: too " in your face " same with the black and red front but i think the blue and white stripe blend together an bit better 
__________________
   
|
|
|
|
|
|
09-18-2010, 03:53 AM
|
#7 | |
|
AF Newbie
Thread starter
Join Date: May 2006
Location: North-Netherlands
Posts: 73
Thanks: 0
Thanked 0 Times in 0 Posts
|
Re: Ferrari Enzo - Tamiya - 1/24, update 1
Thansk guys; it hasn't been decided yet. It is awful difficult to get the right paintjob in my head, I am in doubt between 1 and 3. Heading towards 1, but I don't want to make the car look cheesy.
Dilemma, I was researching for the engine, I basically had it ready for primering, and wanted to know how bad the sandcast effect was. But I stumpled accross this picture: http://picasaweb.google.com/lh/photo...p7Bv-3oGr_vEhA When you then look at the Tamiya Enzo Engine, you just see it is not correct. Pay attention to the tubes that comes down from the airbox to the engine. In the Tamiya kit, they are 12 straight pipes with a seem halfway. When comparing it to the real deal, you see pipes that come down, they are wider and they bent at the engine half. 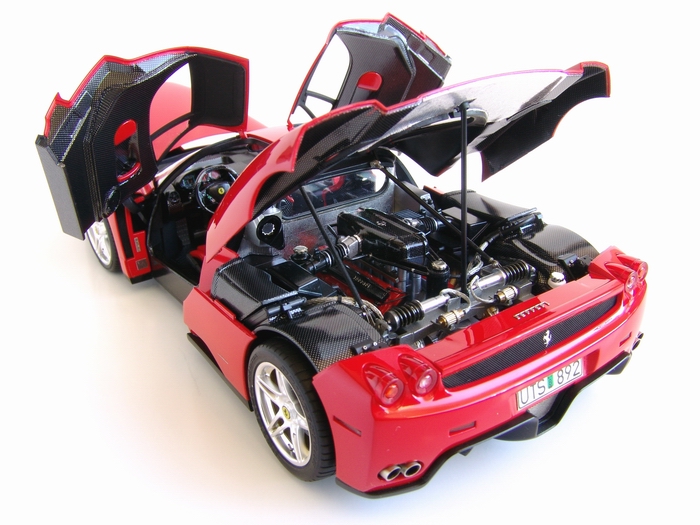 So I don't know what to do. The work that needs to be done is quite a handfull, but I can handle that, the biggest problem is that I am not good at consisted scratch-building and since I need to destruct the intake first, before I can make something nice out of it; I am affraid to ruin it. So, if I just continue, I know I will have a incorrect Enzo, but working on the problem and fix, might make things worse. However, When I was typing this, a 3rd and more appealing option came upon me, I can also fix the first and maybe second row of intake pipes, therefore not a whole lot of tearing down is needed, and the other rows are not visible anyway, Sounds more appealing.
__________________
Nothing Beats a TurboCharger!
|
|
|
|
|
|
09-19-2010, 12:26 PM
|
#8 | |
|
AF Enthusiast

Join Date: Aug 2001
Location: Austin, Texas
Posts: 2,828
Thanks: 17
Thanked 163 Times in 79 Posts
|
Re: Ferrari Enzo - Tamiya - 1/24, update 1
Either scratch-build a set of 12 tapered and curved pipes, or hide the kit part with additional details. I'd go with the latter option.
Injectors and fuel lines should hide the lower part of the intake pipes when viewed from either side. Also, there are 6 sensor(?) connectors (4 black, 2 blue), and that should hide the rear-most pipes. |
|
|
|
|
|
09-19-2010, 01:05 PM
|
#9 | |
|
AF Regular
Join Date: Jul 2009
Location: Honolulu, Hawaii
Posts: 412
Thanks: 2
Thanked 2 Times in 2 Posts
|
Re: Ferrari Enzo - Tamiya - 1/24, update 1
That seems like quite a bit of effort to fix those velocity stacks. I'd assume Tamiya did it because it was easier to make simplistic molds like that. The 1:1 velocity stack runners actually enter through the angled side of the cylinder heads, not directly over top.
I'd say do what Hiro suggested. The below reference pics shows a several sensors and such obstructing the view. You also have to figure that the pic you posted was a display engine and is missing some other components. http://pyghtle.com/Reference/Enzo%20engine.jpg |
|
|
|
|
|
09-19-2010, 02:17 PM
|
#10 | |
|
AF Newbie
Thread starter
Join Date: May 2006
Location: North-Netherlands
Posts: 73
Thanks: 0
Thanked 0 Times in 0 Posts
|
Re: Ferrari Enzo - Tamiya - 1/24, update 1
Thanks for the input; I already started with the way in the middle; the first row will be removed and improved, the other injectors can't be seen. There are a few connectors in front, but they will not hide the whole thing. I think this is the way to go. i hope it will turn out the way I want.
@Star21; I had to use the display engine photo to study the texture of the engine, I can't seem to see it when the engine is in the car. And so I did notice the inlet mistake. By the way; the photo you show is one of the front of the engine ;-)
__________________
Nothing Beats a TurboCharger!
|
|
|
|
|
|
09-19-2010, 04:59 PM
|
#11 | |
|
AF Newbie
Thread starter
Join Date: May 2006
Location: North-Netherlands
Posts: 73
Thanks: 0
Thanked 0 Times in 0 Posts
|
Re: Ferrari Enzo - Tamiya - 1/24, update 1
Finally; after a long time since my HDD crash I can give a update, be aware that it is a huge one!
The exuasts are glued together and been sanded, you can see a seem on the catalyst, but it should be there, so I left it and not overdo the sanding.  A bit of filler too smooth things out.   At the front of the engine, on the banana, I drilled a hole and will put a sensor in there after painting.   I am using PE brakes and use a metal rod for centering  The parts of one of the rear-brakes. One thing I really like is that the middle part is just thick PE, so I dont need to bent all the vents.  A dryfit to see if there are any mistakes, looking for overall fit and it helps me visualize a paintjob.    Basically all the body-parts, such a refreshment after all those body's in one piece.  All of the parts had some problems with irregularity, so a bit of sanding is needed.  A 4-way file is just so perfect for these jobs.   Even the small roof had those problems.  On the inside of the fender was a big diagonal seem, it is basically not visible when the engine is in the car, but I want to have it smooth anyway.  The door with the same problem  Not anymore ;-)  I also mounted the door-panels, I've seen a few Tamiya Enzo's that had the whole doorpanel in carbon, but this is incorrect, the lower part should be body-color  Filled a few pressureholes  I got rid of the molded-in mesh and will replace it with PE  BEfore and after.  The first round of primer  And the first parts in primer  Still working on the fenders, you can see the diagonal line and how it is filled and smoothened out.  The whole between the doorpanel and the door is filled, because the lower part is body-color; it needs to be smooth  These 2 towers will be replaced with PE  Then came the Proxxon and behold: result!   On the left you see a treatment with the 4-way file and on the right the rough product made with the proxxon.   Fill.....  Even de rear-hatch had measels...I mean holes   Looks like a red mushroom with white dots.  Filling the engine.  When you look closely, you see a box molded-in, this didnt look all that realistic and I removed it with the proxxon.  Both sides has such a box (computer)  And filling again  The before mentioned inlet-manifold, it just doesnt look right  With the multitool and a small drill, carefully got rid of the first 2 tubes and it's base.   En because it was difficult working on it, I got rid of the top part. Making things easier.  Filling the bottomside first  Then the top  Sanding smooth with my own designed tools, clever it it's simpelness and it works delightfull in tight places.  Finished the door for now  The top part is finished smooth too, a good base to start on.  It might be hard to see, but I used a stainless steel rod beneath the original tube, this time it is curved and heads for the sloped bank. This is just the first step, next step will be cutting in halve, so I can make a base on the banks.  
__________________
Nothing Beats a TurboCharger!
|
|
|
|
|
|
09-19-2010, 06:06 PM
|
#12 | |
|
AF Enthusiast

Join Date: Feb 2006
Location: Salonica
Posts: 1,336
Thanks: 138
Thanked 111 Times in 106 Posts
|
Re: Ferrari Enzo - Tamiya - 1/24, update 1
Nice Job, and very explaining!!!
Good luck until the end... |
|
|
|
|
|
09-19-2010, 08:46 PM
|
#13 | |
|
Razor Sharp Twit
 
Join Date: Mar 2004
Location: london
Posts: 5,865
Thanks: 0
Thanked 26 Times in 22 Posts
|
Re: Ferrari Enzo - Tamiya - 1/24, update 1
before you get to paying down some paint, you might want to think about correcting Tamiya's ill thought out and incorrect join on the front/side of the nose area where the Tamiys kit's nose joins onto the body.
__________________
AF's Guidelines Read them. __________________  Currently in the process of re-hosting my photos. If any go missing, drop me a PM. |
|
|
|
|
|
09-20-2010, 04:19 AM
|
#14 | |
|
AF Newbie
Thread starter
Join Date: May 2006
Location: North-Netherlands
Posts: 73
Thanks: 0
Thanked 0 Times in 0 Posts
|
Re: Ferrari Enzo - Tamiya - 1/24, update 1
|Thanks guys and thanks for the heads-up on the nose. I haven't looked closely to it, since I assumed Tamiya got it right, but it is not looking that good.
It has to be changed. I am now doubting on 2 options; cut the lower part of the fender and attach it to the front spoiler and keep it as 2 parts, what will help painting and detailling. Or glue the front to the fenders and fill the gap with filler, making painting the black part an ass. I am heading towards option 1, even it is more labour intensive, I think the end-result looks better.
__________________
Nothing Beats a TurboCharger!
|
|
|
|
|
|
03-23-2011, 08:25 PM
|
#15 | |
|
AF Newbie
Thread starter
Join Date: May 2006
Location: North-Netherlands
Posts: 73
Thanks: 0
Thanked 0 Times in 0 Posts
|
Re: Ferrari Enzo - Tamiya - 1/24, update 1
After a long time and some projects, I've found the right motivation to work on this project again. Since it is a high-demanding project, it is hard to keep the right motivation, then I put the kit aside and let it sit, so I won't force the build.
I did some testfitting of the bodypanels,  And dryfitted the engine, just to see how it would look and what was needed to be improved.  Work continued on the intake manifold, it was a delicate and long process to make it look close to the original. When the engine is back in the car, little will be seen, but at least I did it.       The subframe had many sinkholes, not really the best effort of Tamiya, some sinkholes are hardly reachable, a challenge on it's own  I had the simple SMS detailset, meaning that I had to provide my own calipers. I cut up the original discs and used those calipers. Especially the handbrake caliper was difficult to make it fit. It is a very fiddly part.  I installed the intake manifold, so I can make it flush with the engine, then it will be ready for primer.  Different angle  I drilled holes on the valve-covers, some wiring will be installed later on  And the subframe again, the longer I looked at it, the more wrong it looked in the middle. There is hardly any referencematerial to be found on this part, so I used my knowledge and filled up that gap. It doesnt make sense to have a gap there. 
__________________
Nothing Beats a TurboCharger!
|
|
|
|
|
|
|
POST REPLY TO THIS THREAD |
 |
|
|