|
|
|

|
|
| Search | Car Forums | Gallery | Articles | Helper | Air Dried Beef Dog Food | IgorSushko.com | Corporate |
|
| Latest | 0 Rplys |
|
|||||||
| Graphic Manipulation Post and discuss different automotive art works- photoshopped, 3d graphics, and hand-drawn. |
 |
 Show Printable Version | Show Printable Version |  Email this Page | Email this Page |  Subscribe to this Thread
|
|
|
Thread Tools |
 07-22-2003, 11:31 PM
|
#1 | |
|
AF Enthusiast

Join Date: Feb 2003
Posts: 219
Thanks: 0
Thanked 0 Times in 0 Posts
|
Quick Tutorial- Eyelids
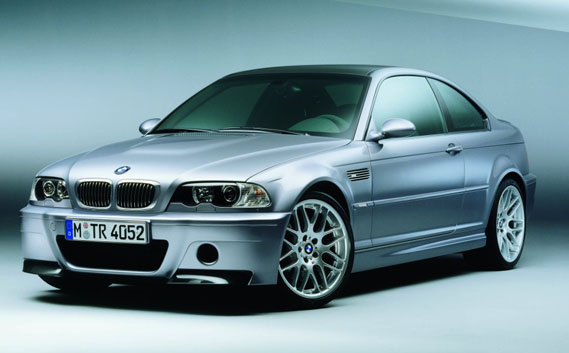
This is my method for creating eyelids. The tutorial shows how to make eyelids, using the airbrush tool in photoshop 6. It is by no means the only way or correct way, it is just the way I make them. I will start out by using a BMW M3 as pictured below.
 step 1: Create a new layer. Using a prefered lasso tool, select the area of the headlight where the eyelid will appear. 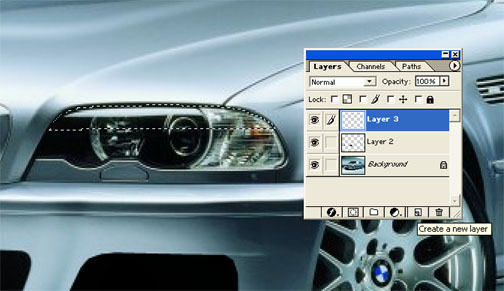 step 2: We will paint the eyelid in 3 different color- light, medium, and dark. Using the eyedropper tool, select the lightest color that touches the headlight. In this case it is white. Then using a soft brush, airbrush the color in the selected area. 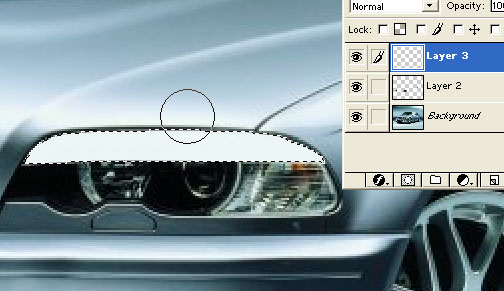 step 3: Now select the medium color and airbrush the areas where that color touches the headlight.  step 4: Select the darkest color, but not black, and again paint the selected area. 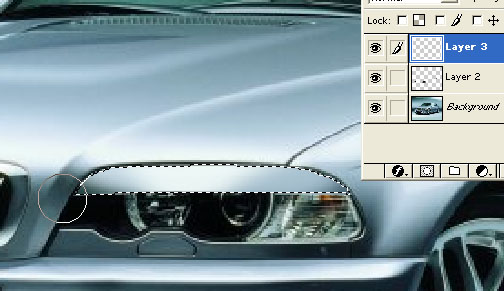 step 5: You eyelid is now complete. To add some realism, we are going to add a shadow over the headlamp, because now light will not reach this area. Deselect the eyelid. Using the lasso, select the rest of the headlight. 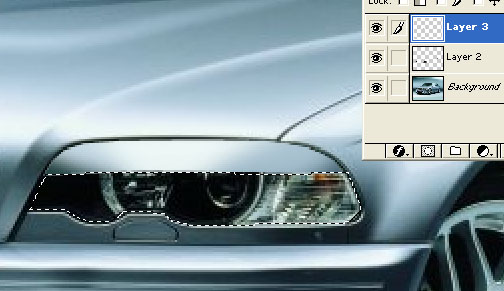 step 6: Take a slighty larger brush, but still soft, and select color code 000000, or balck. Paint the black under the eyelid, but avoid brushing heavily on the actual selection. This will create a smooth, light shadow. 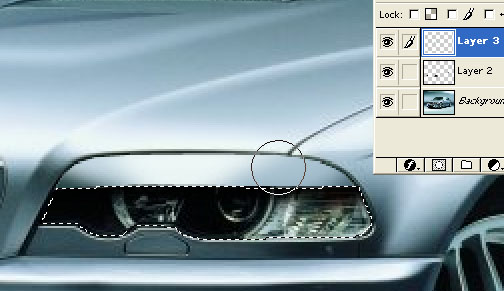 The eyelid and touch up is now all finished. The most important part of creating any body part is matching color. This is the basic bethod of airbrushing, so you can use this same method for creating sideskirts, fenderflares, sun visors. . . . If anybody has a tutorial request I will be more than happy to post one. 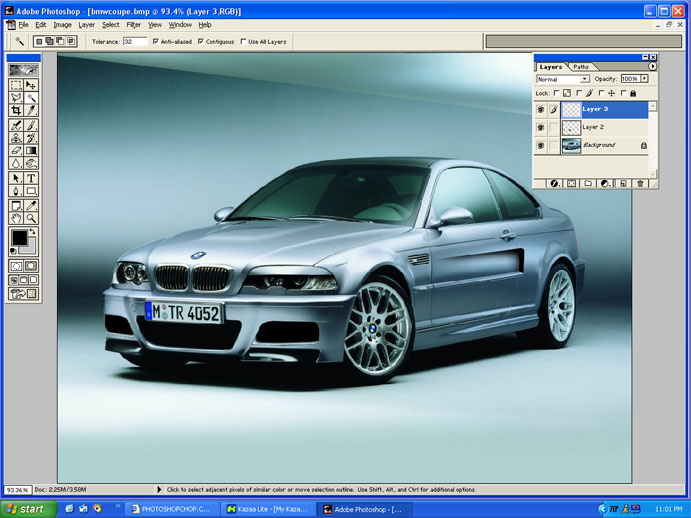
__________________
 'In the end, we will remember not the words of our enemies, but the silence of our friends.'-Martin Luther King Jr. |
|

|

|
|
07-22-2003, 11:54 PM
|
#2 | |
|
AF Enthusiast
 
Join Date: Jan 2002
Posts: 218
Thanks: 0
Thanked 0 Times in 0 Posts


|
Good tut. The finished version looks like its winkin at me though
  |
|
|
|
|
|
07-23-2003, 12:02 AM
|
#3 | |
|
Sikh Pride

Join Date: Jul 2002
Location: Oakville
Posts: 1,807
Thanks: 0
Thanked 0 Times in 0 Posts
|
another way to do it........is either using the clone stamp.......or using the smudge tool and just dragging it out..........
__________________
Formerly known as De$i Gank$ta  Current Status:100% New Project:Audi Chop Currently Working On:Nothing Current Mods: Everythings done Link:Click Here |
|
|
|
|
|
07-23-2003, 12:18 AM
|
#4 | |
|
AF Enthusiast
Join Date: Jun 2003
Posts: 461
Thanks: 0
Thanked 0 Times in 0 Posts
|
doing it his way is much more realistic however...I still have no clue on how to airbrush nor will i ever which is dissapointing cause my chops will never be able to look that clean
__________________
A man once told me you haven't lived till you've died.  Rest In Peace Luke. |
|
|
|
|
|
07-23-2003, 11:23 PM
|
#5 | |
|
AF Newbie

Join Date: Jun 2003
Posts: 65
Thanks: 0
Thanked 0 Times in 0 Posts
|
I noticed you used the beem' from my last chop
 ...hehe j/k you do much better with it than I ever would! ...hehe j/k you do much better with it than I ever would!the car looks like it is piss drunk...hehe
__________________
 |
|
|
|
|
|
07-24-2003, 12:01 AM
|
#6 | |
|
AF Enthusiast
Join Date: Jul 2002
Location: Exeter, Rhode Island
Posts: 2,839
Thanks: 0
Thanked 0 Times in 0 Posts

|
Great tutorial. Very useful.
__________________
 05' Civic Si - Tokico D-Specs/Progress Springs/Progress Rear Sway/CorSport Endlinks/Ingalls Torque Dampner/Energy Suspension Motor Mounts/Falken Ziex/HFP Spoiler/RSX Rims |
|
|
|
|
| ||||||||||||||||||||||||||||||||||||||
|
POST REPLY TO THIS THREAD |
 |
|
|


