|
|
|

|
|
| Search | Car Forums | Gallery | Articles | Helper | Quality Dog Food | IgorSushko.com | Corporate |
|
| Latest | 0 Rplys |
|
|||||||
| WIP - Street Post topics for any "Works In Progress" street vehicles projects in this sub-forum. |
 |
 Show Printable Version | Show Printable Version |  Email this Page | Email this Page |  Subscribe to this Thread
|
|
|
Thread Tools |
 03-25-2005, 05:32 AM
|
#31 | |
|
Guest
Posts: n/a
|
Hi guys, the weather has finally cleared so i was able to spray the car with Tamiya white primer, its not the most glamourous part of the build but the model's overall finish will depend on the preparation before laying down the paint. The first primer coat will always show imperfections,bumps or small scratches.
I wasnt surprised to see that the surface was still a far from perfect, i wanted to give the car a clean look so i puttied up the side strips that runs through the side of the car. After the primer was laid down it was ovious that i didnt do this properly in some areas.  After looking over the model i wasnt really happy the way the front end looked it just looked too long, i think this front end wasnt to scale it also looked plain. I decided to put the car under the knife again and cut out the retractable lights just to break it up a bit and was considering giving the car a "sleepy eyed" look.  Looking at the car for sometime i still wasnt quite happy so i decided to have a bit of a dig around my parts box and found some neat projector light housing, it was from an NSX by memory, i found some spare brake discs and calipers which should look nice and will complement the TE37 wheels that will be used on this car.  I also added some sheet styrene to break up the huge mouth on the front bar,never been a big fan of the huge gaping front mouth on the veilside kits,simple adition of this piece makes it look better, the radiator now looks right before this modification the radiator leaves a huge gap in between.  This build up wasnt really suppose to get this complex but early fit problems made it so, but im really enjoying it. Thanks again for the feedback and encouragement, will try to post as much info and pics every few days. Last edited by snk33y; 03-25-2005 at 07:07 AM. |
|

|
|
03-25-2005, 09:00 AM
|
#32 | |
|
AF Enthusiast
 
Join Date: Jan 2004
Location: London
Posts: 412
Thanks: 0
Thanked 0 Times in 0 Posts
|
Re: Fujimi Veilside MR2 SW20 In Progress
Hey man thats is awesome progress, i like what u did to the front bumper. Makes it look soooooooooo much better. i really think you should go with the rims that came with the kit, i dunno lol i just really like them. Oh btw can i buy the projector light housings somewhere? like sepratly?
__________________
    
|
|

|
|
|
03-25-2005, 10:56 AM
|
#33 | |
|
AF Enthusiast
Join Date: Nov 2004
Location: San Diego, California
Posts: 833
Thanks: 2
Thanked 6 Times in 6 Posts
|
Re: Fujimi Veilside MR2 SW20 In Progress
nice touch! i always thought the front looked longer than it should on mine. very creative with the lights and bumper. i really would like to see this completed.
|
|
|
|
|
|
03-25-2005, 11:01 AM
|
#34 | |
|
AF Fanatic

Join Date: Feb 2004
Location: Hartford, Connecticut
Posts: 5,601
Thanks: 7
Thanked 108 Times in 103 Posts
|
Re: Fujimi Veilside MR2 SW20 In Progress
yeh i know what you mean about the long nose, my 300zx is the same way, way to out of scale. I see some nice progress, nice thinkin on the lights to, will give it more depth.
__________________
In Progress    
|
|
|
|
|
|
03-25-2005, 12:21 PM
|
#35 | |
|
Sweet, sweet tiny Hondas.
 Join Date: Jul 2003
Location: Austin, Texas
Posts: 5,723
Thanks: 50
Thanked 89 Times in 65 Posts
|
Re: Fujimi Veilside MR2 SW20 In Progress
This is coming along great! Very impressed with all the little things you've done to make it come along so nicely. Fujimi kits require a little finagling, but it looks like you've got it under control. Keep it up, I am very looking forward to seeing this complete.
__________________
It ain't cool 'till your wife hates it. Imagine a world without Alabama Recent builds: Rocket Bunny FR-S and stock BRZ Toyota bB Bro-style Civic K20 powered SiR converted EK WIP I build slowly and poorly. 
|
|
|
|
|
|
03-25-2005, 06:38 PM
|
#36 | ||
|
Guest
Posts: n/a
|
Re: Re: Fujimi Veilside MR2 SW20 In Progress
Quote:
 The front bar on this kit looked wrong, it was too long and the mouth way too wide, so i just couldnt resist to alter it, it was a quick mod but it made a whole lot of difference to the way the front end looked. I was also looking into integrating some turn signal lenses mounted in the front bar but still tinkering on this idea. The front bar on this kit looked wrong, it was too long and the mouth way too wide, so i just couldnt resist to alter it, it was a quick mod but it made a whole lot of difference to the way the front end looked. I was also looking into integrating some turn signal lenses mounted in the front bar but still tinkering on this idea.I was thinking the same with the wheels, I would have only used them if i had some pegasus aluminium sleeves and dish them out, but as is i wasnt happy the way they looked so i had to stick with the TE37's,still early days yet once i have this thing painted i might change my mind. The projector light housing is from a Tamiya Mobil NSX kit,im sure you can order the sprue set direct from them. |
||
|
|
|
03-25-2005, 06:48 PM
|
#37 | |
|
AF Regular
 
Join Date: Jun 2003
Posts: 63
Thanks: 0
Thanked 0 Times in 0 Posts
|
Re: Fujimi Veilside MR2 SW20 In Progress
that looks beautiful
__________________

|
|
|
|
|
|
03-25-2005, 10:24 PM
|
#38 | |
|
AF Regular

Join Date: Nov 2003
Posts: 458
Thanks: 0
Thanked 0 Times in 0 Posts
|
Re: Fujimi Veilside MR2 SW20 In Progress
great progress so far, the front end look's much better with the styrene sheet in the middle
 |
|
|
|
|
|
03-27-2005, 08:35 PM
|
#39 | |
|
Guest
Posts: n/a
|
Just another quick update, unfortunately this is another non glamourous part of this build. Today im working on the suspension setup, Most of you guys out there who has built either a Fujimi or Hasegawa knows that its not uncommon for their kits to have a very high ride height, personally i dont like my cars riding like a bus especially if you drop in a set of 18' wheels. I just want to share my technique of lowering the suspension which will work with most Fujimi kits and can also be applied to suit other kits as well
The first pic below shows the MR2's interior and suspension in its test fit stage, the first thing that you notice is the front end's ride height compared to the rear end is just way too high so a little bit of surgery is required here.  This shot shows that suspension is so high that you can see the coils and struts,even my MR2 in real life dont ride this high, sometimes i wonder why Fujimi does this.  This is really a simple mod, first thing is i measure approx how much i want to drop the car, in this instance around 2.5-3mm will just tuck the wheels slightly under the guards. I cut the tops of the strut and inserted some brass tubing to replace the old stub which goes into chassis, make sure that you are precise here, use a digital or a decent vernier caliper to measure it up correctly otherwise the car wont sit flat when you re assemble the suspension.  Once you cut the tops of the struts you will also need to sleeve the bottom part of the hub carrier otherwise it will just float around, just cut a bit of brass and insert and glue in place,thats it the car has been lowered in place. While test fitting i also wanted to give the car a slight negative camber so i heated the bottom suspesion arm and bend it a fraction.  Now its time to mount the brake and caliper assembly, this was out a Tamiya kit where the polycaps are not mounted in the wheel, so i had to drill out the centres of tthe brotors out to accomodate the Fujimi wheels.  After all the mods this is how the car sits with the wheels and suspension looks,not too low but not too high, the tops of the rubber is nicely tucked under the guards.  Anyway still working through a few other things and making good progress, hope im not boring you guys with the details, i know that the suspension and tiny fidly stuff is mind numbing to read but i just want to make this project as detail as possible so that the new guys that im teaching produce decent results. More pics and updates soon, i usually do every 2 days,thanks again for the encouragement and feedback all is appreciated. Cheers and thanks for looking!! |
|
|
|
|
03-27-2005, 08:48 PM
|
#40 | |
|
AF Enthusiast
Join Date: Dec 2004
Location: Sydney
Posts: 135
Thanks: 0
Thanked 0 Times in 0 Posts
|
This is looking really good - great job on the tutorials they are really helpful and understanding. Did you decide on a final colour???
|
|
|
|
|
|
03-28-2005, 12:52 AM
|
#41 | |
|
AF Enthusiast
Join Date: Sep 2004
Location: Brookfield, Illinois
Posts: 357
Thanks: 0
Thanked 0 Times in 0 Posts

|
Wow thats all I can say about it man WOW, Yea did you decide a final color? What are the rims going to be?
__________________
Matt! \ 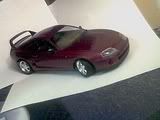 
|
|
|
|
|
|
03-28-2005, 01:01 AM
|
#42 | |
|
AF Enthusiast

Join Date: Jun 2003
Location: sactown, California
Posts: 248
Thanks: 0
Thanked 0 Times in 0 Posts
|
where do u get those brass tubing and what sizes did u use? btw very nice progress!
__________________
Current Project: Fujimi Veilside Combat Silvia S14...almost finished |
|
|
|
|
|
03-28-2005, 03:34 AM
|
#43 | ||
|
Guest
Posts: n/a
|
Re: Fujimi Veilside MR2 SW20 In Progress
Quote:
They were 2mm brass rods not sure what that converts to inches. The progress of this project has been surprisingly smooth even though the start was far from ideal. |
||
|
|
|
03-28-2005, 05:32 AM
|
#44 | |
|
AF Enthusiast
 
Join Date: Apr 2004
Location: Langeraar
Posts: 1,034
Thanks: 0
Thanked 0 Times in 0 Posts
|
Re: Fujimi Veilside MR2 SW20 In Progress
I think the detailed prescription is perfect and I really like to read it. Usually nobody tells any details like this. I think lots of guys can learn from this, myself included. Continue the way you post your progress! I think that more people should do it like this. I'll be following this thread closely!
__________________

|
|
|
|
|
|
03-28-2005, 06:31 AM
|
#45 | ||
|
AF Enthusiast
 Join Date: Jan 2002
Posts: 676
Thanks: 0
Thanked 0 Times in 0 Posts
|
Re: Re: Fujimi Veilside MR2 SW20 In Progress
Quote:
 Maybe you could make an extra thread about the lowering and put it to the "How To"s. |
||
|
|
|
|
|
POST REPLY TO THIS THREAD |
 |
| Thread Tools | |
|
|


