|
|
| Search | Car Forums | Gallery | Articles | Helper | Air Dried Beef Dog Food | IgorSushko.com | Corporate |
|
#47
 06-27-2009, 06:35 AM
|
|||
|
|||
|
Re: Jordan 191
@hakkfan....paint or even primer is still some time to go, but eventually it will be painted :-)
...and here we go with build progress of an area i havent shown yet. Obviously thats the engine :-) I first cut off the rear wing supports which will be replaced. This also gave me room to build a new gearbox/final gear cover. Because of the integrated wing supports that area is nowhere near the original on the kit parts because the injection tooling wouldnt work. The same goes for the top area of the gear box. After gluing the engine halves together and cleaning up the visible seams I rebuilt the final gear cover with styrene. Theres a nice picture of the gear box out off the car in the F1Modeling Schumacher Special that helped a lot. At the sides I filled up the holes for the suspension arms and some ugly locator pins for bodywork parts that I wont use. The suspension will be overhauled just like the front and I want to detail the connectors/brackets better. 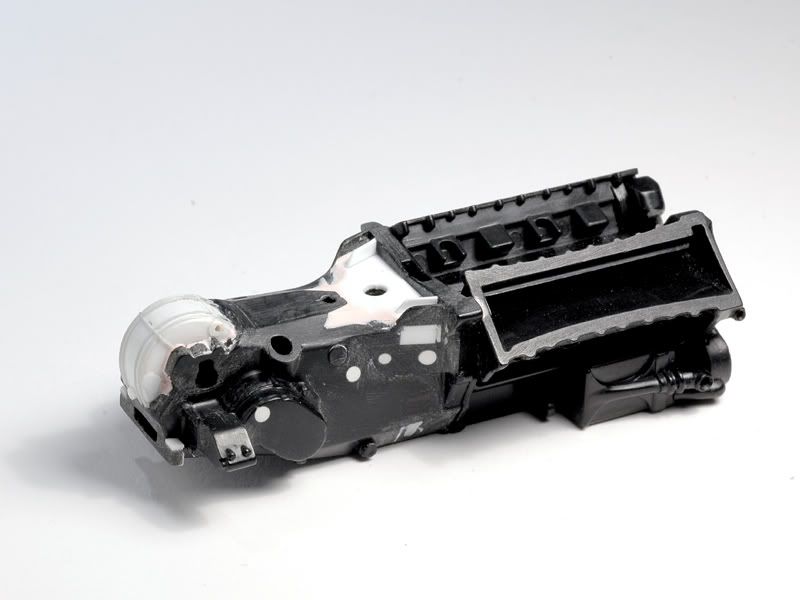 So on to the rear wing supports. The Tamiya ones are not that wrong, but they could be better detailed. The machined frame pattern on the kit parts is only on the outside but on the real ones its on both sides. So I etched a central plate and two frames for each side from 0,2mm nickel silver. The artwork for these parts was the most complicated to do of all the parts I made for the Jordan. Here you see the two sprues ( theyre identical at least :-) 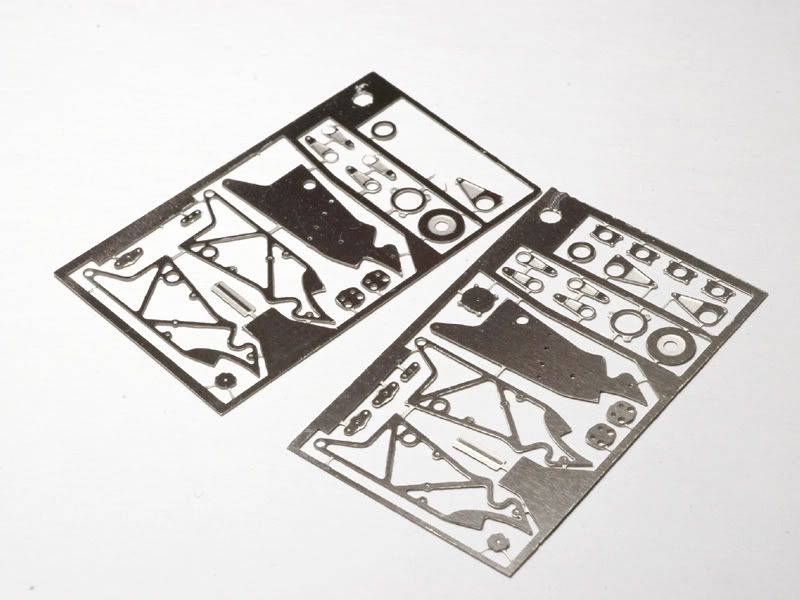 After cleaning the parts up I assembled them with super glue. 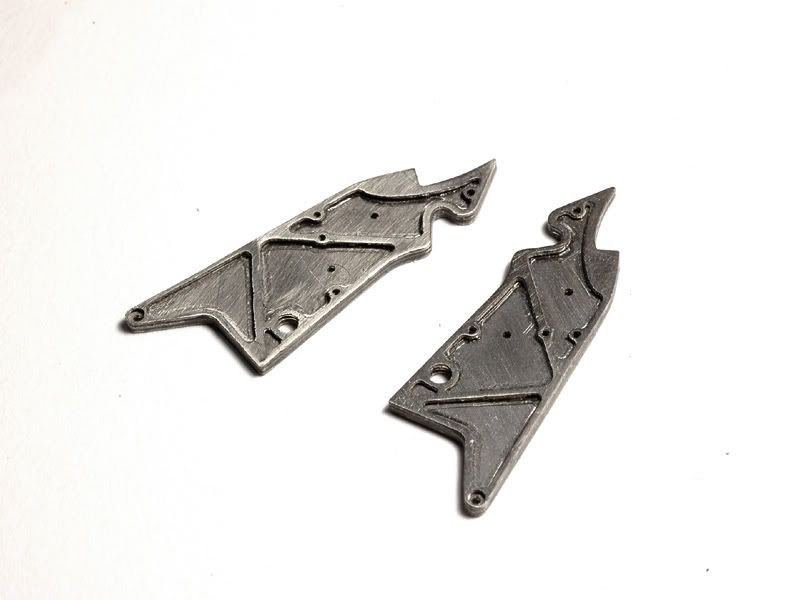 And next you see them together with more wing parts. 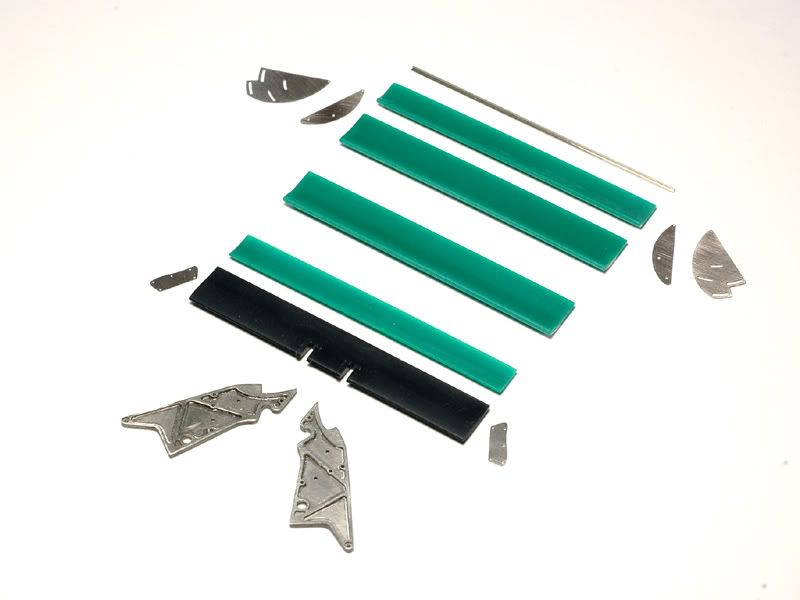 The wing elements from the kit are all sanded clean and I filled up the holes for locator pins on the undersides because I dont like those. In addition you see some more etched bits I will use to detail the rear wing better. The Tamyia wing endplates arent bad ( apart from that locator pin issue :-) but I decided to try something more detailed with them as well. Why easy if you can do it the complicated way!? :-) I etched two layers of 0,1mm nickel silver and then made the thick areas at the front from 0,4mm styrene sheet. 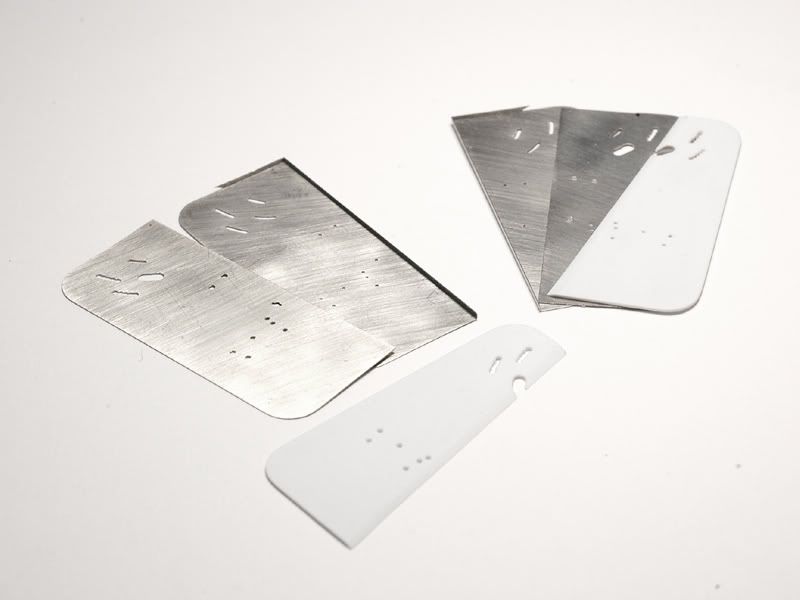 The tricky part will be to put them together and then paint and polish them without losing all the tiny crisp details I achieved so far! In the end I want to put the wing together with metal bolts just like the real one. I hope all this is gonna work out :-) So much for now! This was the last update for a while. This time next week Ill be at Goodwood, hunting reference pictures for even more projects Ill never get around to build and then Im on holidays, so dont expect anything new before mid August :-) Cheers! 
|
|
#49
06-27-2009, 12:36 PM
|
||||
|
||||
|
Re: Jordan 191
Someone pinch me please! I must be dreaming....
 DEFINITELY my favourite serial on AF at the moment 
__________________
Guideline for happy modeling: Practice on scrap. Always try something new. Less is more. "I have a plan so cunning, you could put a tail on it and call it a weasel" - Edmund Blackadder
|
|
#51
06-28-2009, 02:47 PM
|
||||
|
||||
|
Re: Jordan 191
Stunning work! You are the photoetch master, those wing uprights are beautiful! Using photoetch was a brilliant idea instead of machining those indentations out of renshape or aluminum.
Quote:
__________________
-Mike AF Director of Media / Photographer  [email protected] | AutomotiveForums.com | Flickr Gallery
|
|
#52
09-15-2009, 06:57 PM
|
|||
|
|||
|
Re: Jordan 191
Hi everyone
After what turned out to be an extended summer break im back working on the Jordan and finally i have some stuff together that makes sense to show. The first job was to thin out the lower bodywork parts left and right of the engine from the backside, add a bit of wall on the inside of the sidepod intakes and then add 0,1mm metal strips at the upper edges. I had to smooth them in with putty and they will ( hopefully) hold the cowling instead of those ugly locator pins :-) 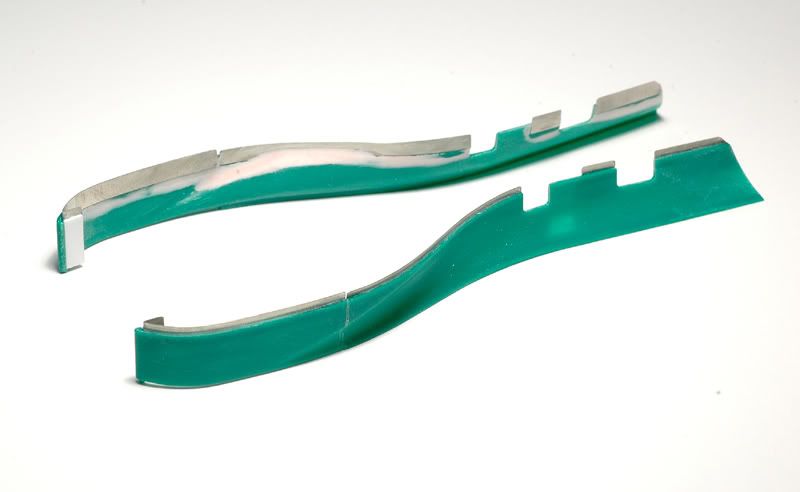 Now the next step is of course the cowling. I started by also thinning it out from the inside but thats where i still am. I need to properly match it up with the aforementioned lower bodywork parts and the cockpit tub and thats rather tricky. Without the Tamiya pins it doesnt just sit flush on the other parts ( especially around the cockpit ). Theres some tweaking and bending necessary and thats scary stuff. Im in fact working on my second cowling because the bending ( which involves a hot air gun ) went wrong when i was almost finished the first time ..dont ask styrene melts suddenly and sometimes where you dont need it! :-) So to cheer myself up I decided to do some fun parts and got going on the lathe and mill to do bits for the suspension. In a previous update i have already shown the new front push-rods i made. Well i found out soon after, that the ( green ) rod ends were in fact wrong. There should be adjustable parts. So i remade them from aluminium and brass ( for the hex nuts ) and also added slightly smaller samples at the tops. 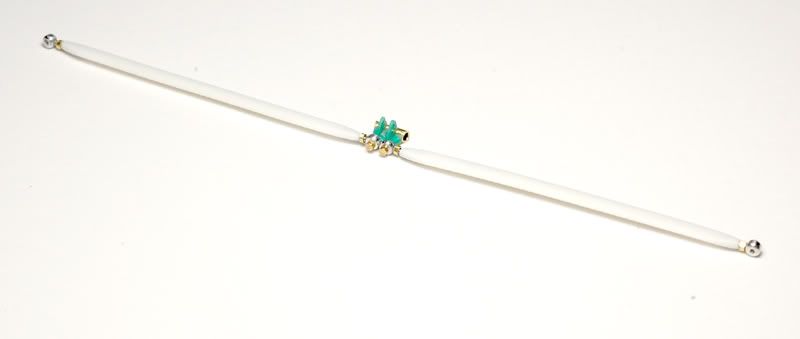 They are then fixed to a bracket which connects them to the front mono-shock in the nose. I dont have a picture of the original part so i had to make something up that looks kinda credible :-) Then came the damper and the same problem of insufficient reference material. There are good pictures of the rear dampers in the Perfect Manual but the front damper is not exactly the same so i designed it along the lines of the rear ones and of what i could see of it. As you can see in the next picture it consists of quite a few parts made from aluminium, plexiglass, renshape and 0,6mm wire. The whole assembly has a diameter of 4mm. There are in fact some more parts still to come :-) 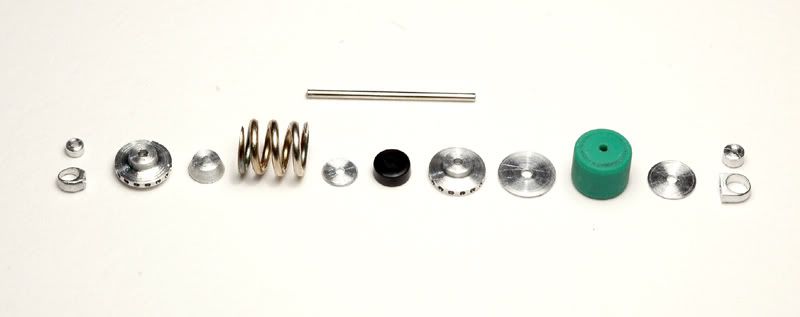 The next parts to be made were for the steering mechanism which will be movable after assembly ( at least thats the plan :-). I used various diameter brass tubes and added turned aluminium parts. Those tiny cone shaped parts are quite fragile and they really made me wonder, how sturdy the originals must have been. They dont look like something i would trust while going through Eau Rouge :-) 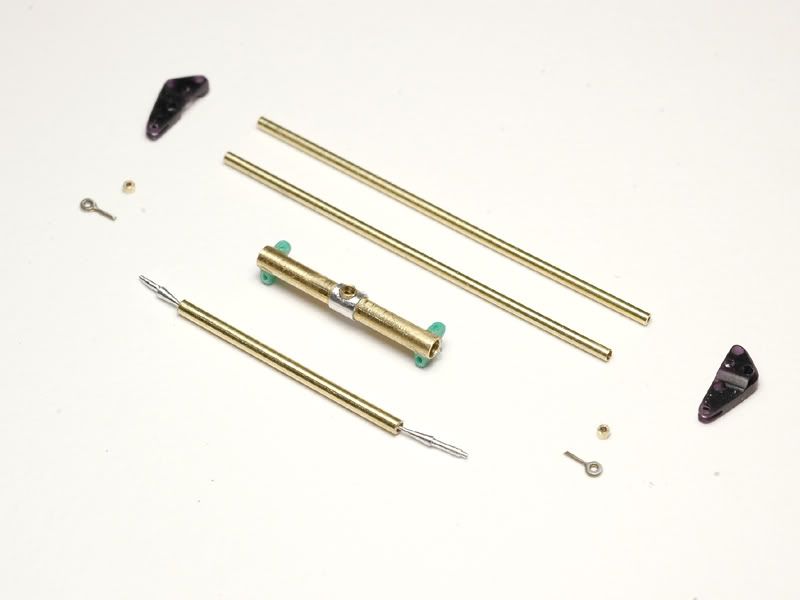 Photoetched rod ends will connect the steering arms to the uprights via those black pieces. These brackets are made from black plexiglass because without the need to paint them they are less likely to loose their details which took serious time to mill and then file/sand by hand. 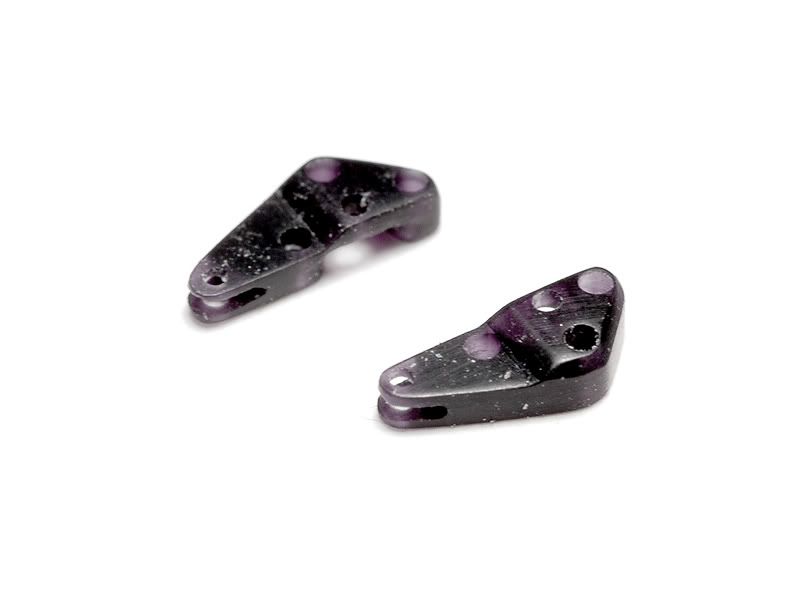 The brighter looking areas with very thin walls only show up under strong light like in the picture :-) The upper kit suspension arms had to be modified like the lower ones to be connected to the new brackets on the uprights and also on the chassis where I made two more tiny parts from plexiglass that should look better than the moulded in blobs on the kit arms once painted :-) 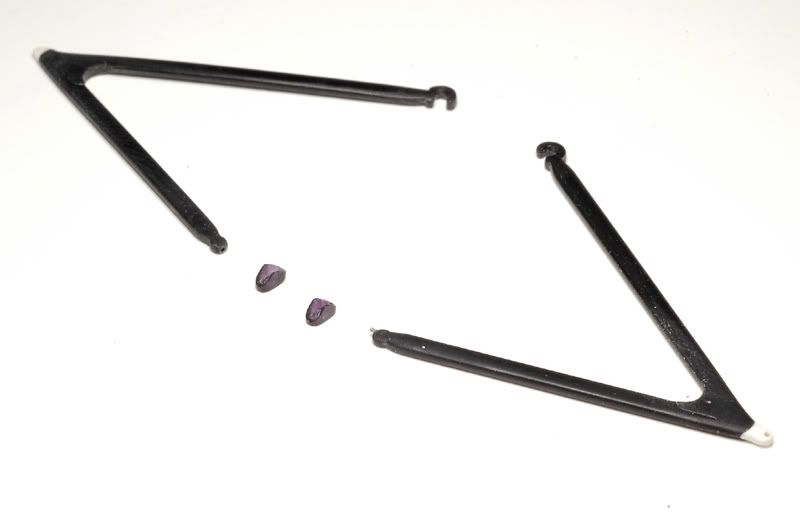 So finally here are some shots with all those parts dry assembled on the chassis. The jig proved to be of invaluable help while getting all the pieces aligned and sized right. 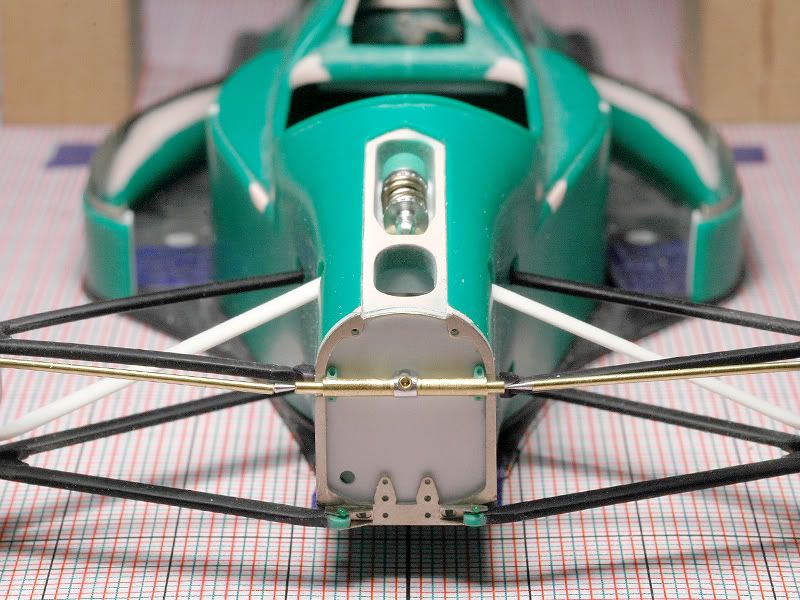 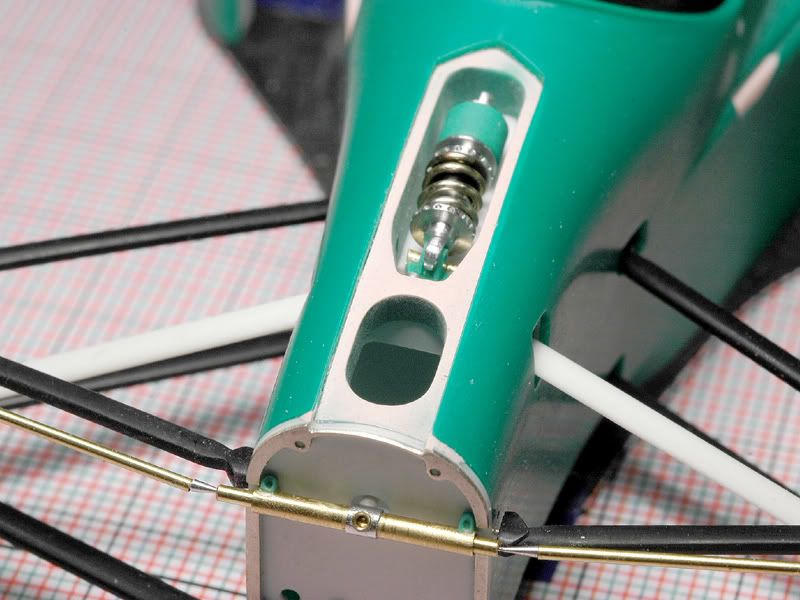 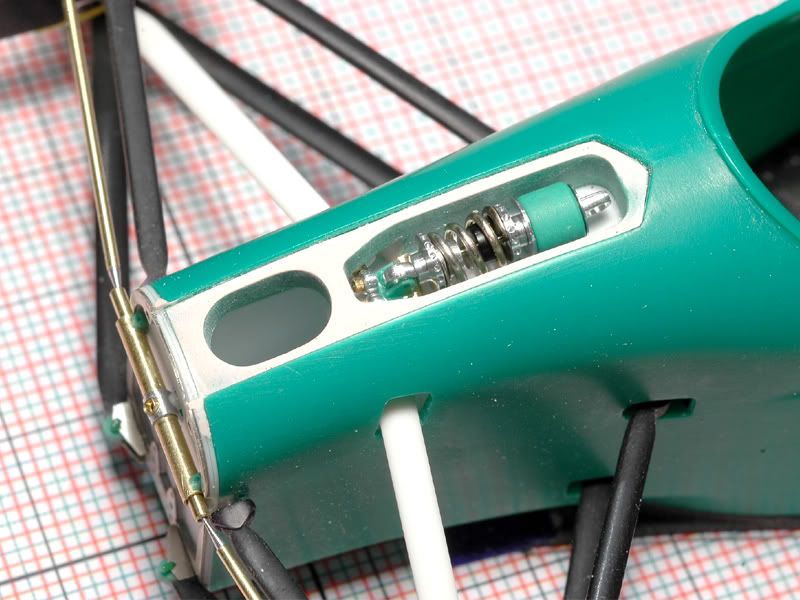 Making all those bits may seem somewhat silly but thats what I really enjoy ( much more than painting and polishing ) and I tend to get carried away with it. I already did some more parts that I will show in updates to come :-) It leaves me however with the cowling to fix and that has to be done before I can start priming and painting sigh :-)
|
|
#54
09-15-2009, 11:49 PM
|
|||
|
|||
|
Re: Jordan 191
So, when people drive near your house, is there a sign marked "Artisan" nearby pointing in your direction? You could charge a fee for people to gaze at your work. You capture the scale weight of the pieces to a remarkable level. Good eye and even better execution..updates, updates, updates!!
|
|
#59
09-17-2009, 08:50 PM
|
||||
|
||||
|
Re: Jordan 191
Stunning work, amazing strachbuilding. Cant wait to see how detiailed your engine is gonna be considering the lengths youve gone to on the suspension.
Are you going to display the finished model in a garage setting, ie with all the parts off, ready to assemble for raceday? Cant wait for the next installment
__________________
 It's Not wheather you Win or Lose, its how you look while you play the Game
|
|
 |
POST REPLY TO THIS THREAD |
 |
|
|


