|
|
| Search | Car Forums | Gallery | Articles | Helper | Air Dried Fresh Beef Dog Food | IgorSushko.com | Corporate |
|
|||||||
| WIP - Motorsports Post topics for any "Work In Process" motorsports vehicles in this sub-forum. |
 |
 Show Printable Version | Show Printable Version |  Subscribe to this Thread
|
|
|
Thread Tools |
|
#1
 02-08-2006, 04:43 PM
|
|||
|
|||
|
Tamiya Williams FW24
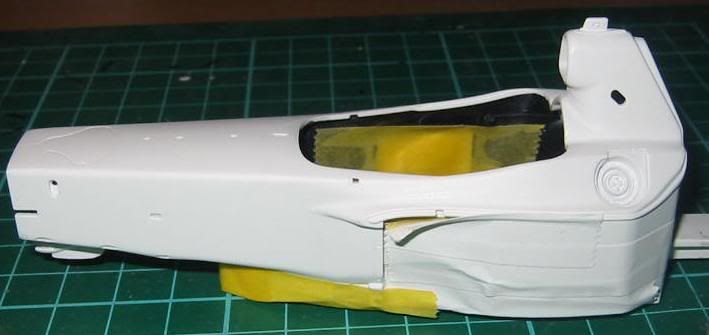
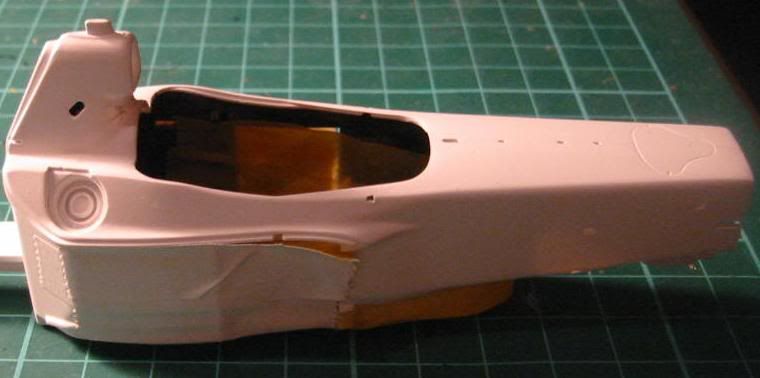
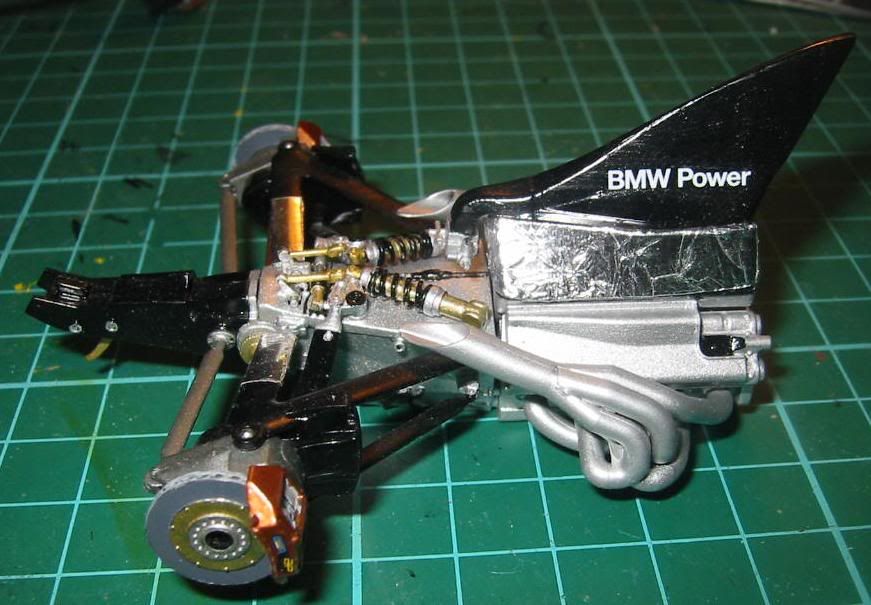
Hi I have started on the Tamiya FW24 its my first F1 model and 5th model over all so I am still learning loads. All parts are brush painted apart from the body. With this build I have some goals
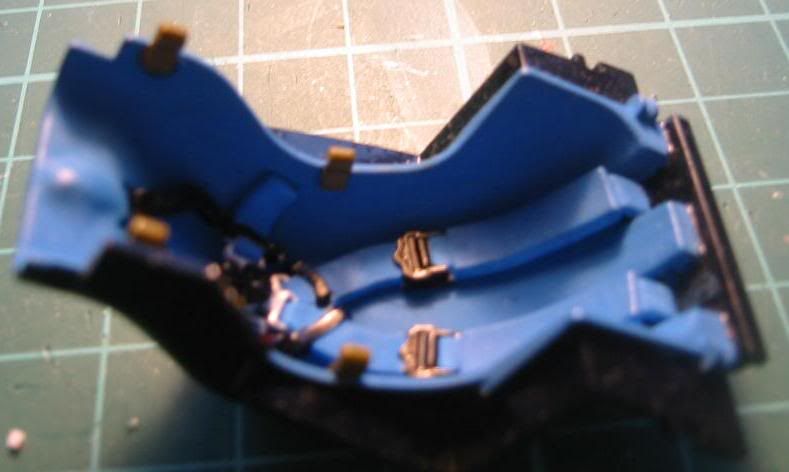
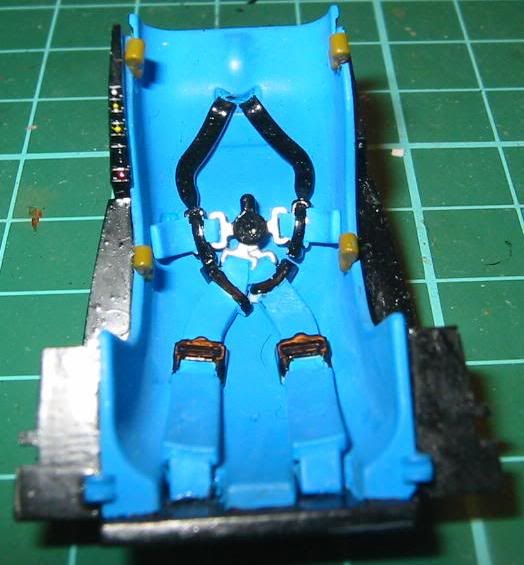
- learn how to use putty properly - get smoother finishes on bodywork using very fine grit sandpaper (Detailmaster polishing kit ordered) -learn how to use TS-13 over decals. Thats about it just a quick thanks to Toughbeard, Thesaint111 and Baxik for their great FW24 builds I read them a lot to get motivated! 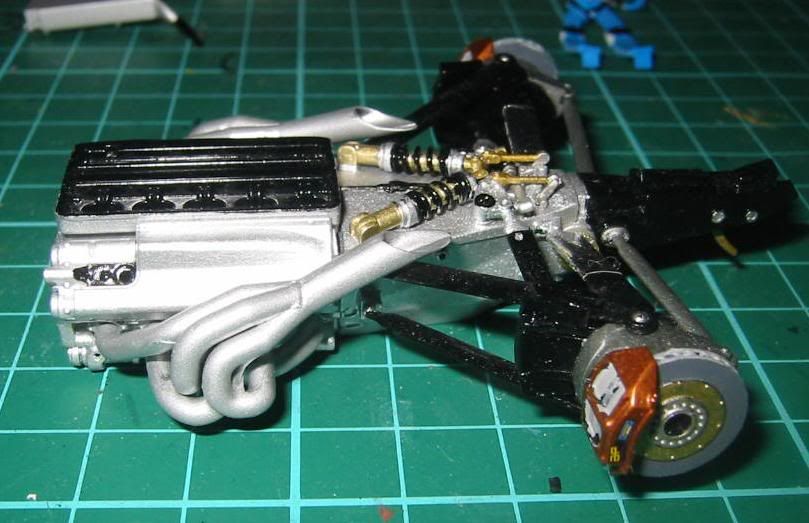 Engine - exhaust sprayed TS-30 but I wish I had used putty on them now! 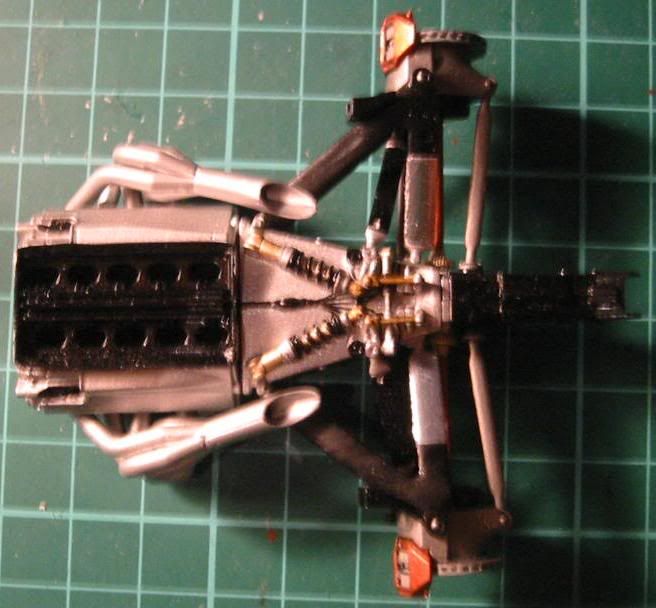  Front brakes I had some major problems with these I glued the air ducts the wrong way round and had to prise them off. 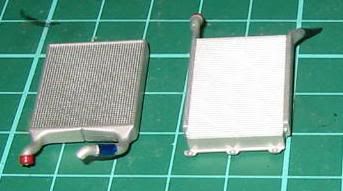 Radiators sprayed TS-30 and detail painted on, the blue looks very dark though.  The seat missing the notches that need to be painted a weird colour and the steering wheel mount. 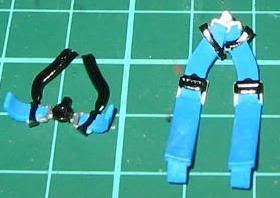 The seatbelts not finished yet as I still need to work on some of the straps and buckles. Thanks for looking! Deepraj 
|
|
#2
02-08-2006, 04:49 PM
|
|||
|
|||
|
Re: Tamiya Williams FW24
The body, I really was not sure the best way to get rid of the join down the front. I glued the two pieces together and then used putty to fill the join line down the front and near the filler caps. The body was then primed and now is waiting for the white coat.
   Deepraj
|
|
#4
02-09-2006, 03:46 AM
|
||||
|
||||
|
Re: Tamiya Williams FW24
Great start - looking forward to more progress shots.
__________________
 
|
|
#6
02-19-2006, 09:49 AM
|
|||
|
|||
|
Re: Tamiya Williams FW24
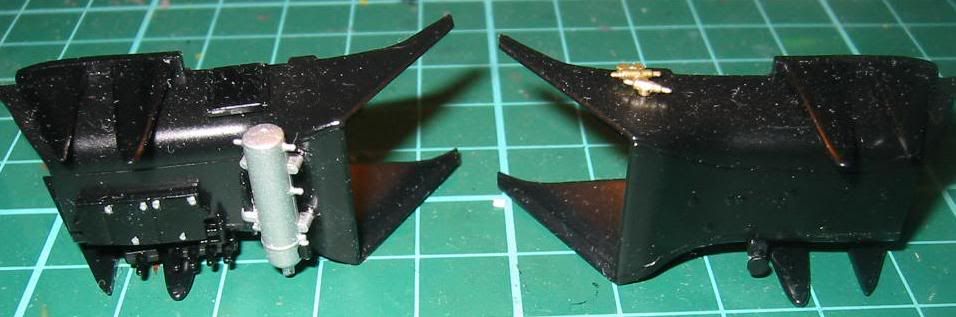
A small update finished the seat but I did not paint some parts of the seat correctly as it will not be seen and I was not confident of doing it correctly. The sidepods are finished and I gave foil a try on the engine cover and I think it came out ok I am going to try to use foil on the undertray too. I got my polishing kit too and made a start on the bodywork I have painted the white and masked and painted a few mist coats of blue. The blue is a bit tricky to work with so I am using very light mist coats and keeping my fingers crossed.
|
|
#8
03-01-2006, 10:13 AM
|
|||
|
|||
|
Re: Tamiya Williams FW24
Started to paint the body painted the white then masked and painted the blue had some problems and the masking leaked a bit but hopefully the stripe decal will cover it.
Also finished the tyres and wheels its my first time working with Tamiyas tyre decals and they are ok had a few that started to peel off but I used a dab of superglue to fix it. I sanded the body with 4000 grit sandpaper to remove the build up of paint from the masking. But I lost alot of the shine on the TS-51 hopefully the clear will make it shiny. I also tried out my new polishing kit on a BMW Z8 I had lost interest in the shine came out great! So now like mickbench and his porsche kit I am going to finish the kit. 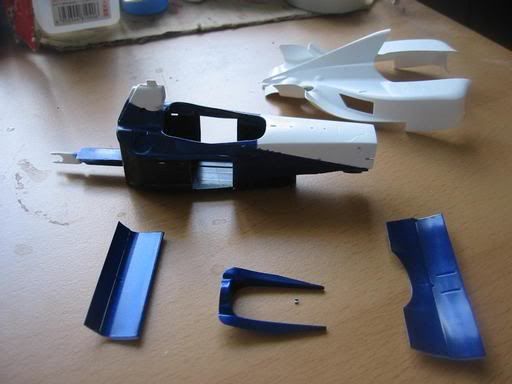 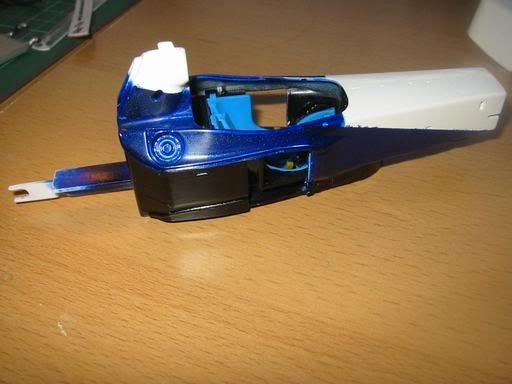 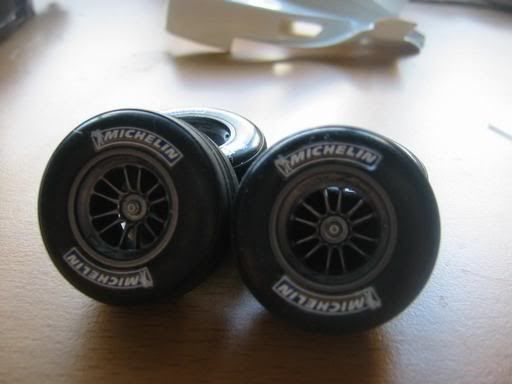 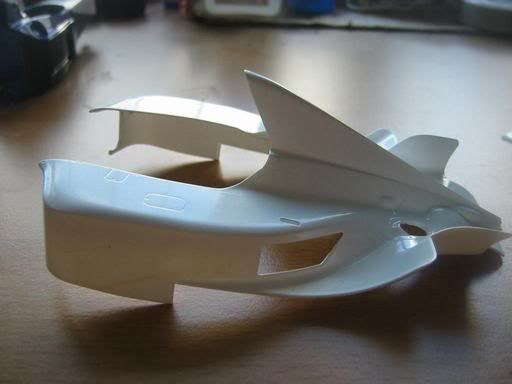 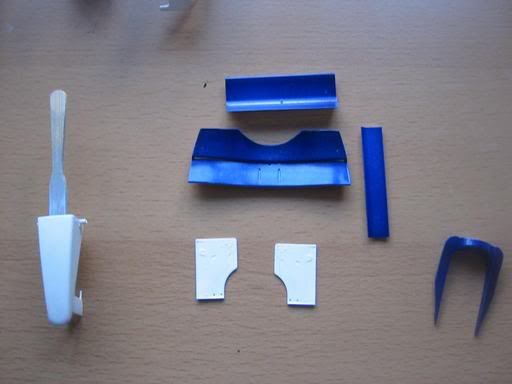
|
|
#9
03-02-2006, 12:24 PM
|
|||
|
|||
|
Re: Tamiya Williams FW24
Quote:
 and i hope start it soon. and i hope start it soon.I know what are you saying. For me, the shine is a nightmare. That's because i sometimes use weathering in models. Good job 
|
|
#11
03-06-2006, 03:27 PM
|
||||
|
||||
|
Re: Tamiya Williams FW24
Nice work on the FW24. I completed mine about 9 months ago. A few tips:
make sure your blue/white transition is smooth as although the silver decal is wide it is very thin and shows the line underneath(I speak from experience). Also dont forget that the front wing side fences are blue and black (leave them separate for painting). Oh, and there are black CF areas where the exhaust comes out! The rear cowling didnt fit properly on my model either so double check it now before its painted and decalled! All the very best with what is turning out to be a fantastic model. Billy Pee
|
|
#12
03-07-2006, 09:50 AM
|
|||
|
|||
|
Re: Tamiya Williams FW24
Thanks for all comments!
Great tips Billy Pee I sanded the whole body with 4000 grit sandpaper to level the paint. I have finished the decals for the front part and the line is not too visible. Thanks for the other tips. At the moment I am trying to figure out how to mask the rear cowl its stressing me out, I think I will photocopy the decals and use them as a template. Deepraj
|
|
#13
03-07-2006, 11:35 AM
|
||||
|
||||
|
Re: Tamiya Williams FW24
No worries.
The rear cowling does have a faint line in it where the blue/white transition is. You will be able to see it if you havent already primed it. I went with the photocopying the decals route and its okay, although I might be tempted to mask the bare plastic, prime and paint the white bit, then prime and paint the blue bit. SOunds wrong but I think it will work, and it will gve you a very precise tranisition. I'm considering this for painting the multicoloured B188. I just remembered another annoying thing, the Allianz and BMW Power decals that are part monocoque and part rear cowl. You have to put the rear cowl on to line them up, but the carrier film crosses the gap and so any movement to the rear cowl fouls up the decals. Make sure you dont move the rear cowl and be patient... when dry use a sharp knife to separate them. All the best, Bill
|
|
#14
03-24-2006, 09:55 AM
|
|||
|
|||
|
Re: Tamiya Williams FW24
Some updates front cowl decalled and cleared. Whole body sanded with 4000 and 8000 grit sand paper then polished with Tamiya compound. I had some trouble with the fuel caps not fitting then some of the paint being rubbed off due to the exposed edges
 But so far I am happy with it. Undertray sprayed with TS-29 and then XF-57 brush painted on, I still need to touch up the bottom though. But so far I am happy with it. Undertray sprayed with TS-29 and then XF-57 brush painted on, I still need to touch up the bottom though.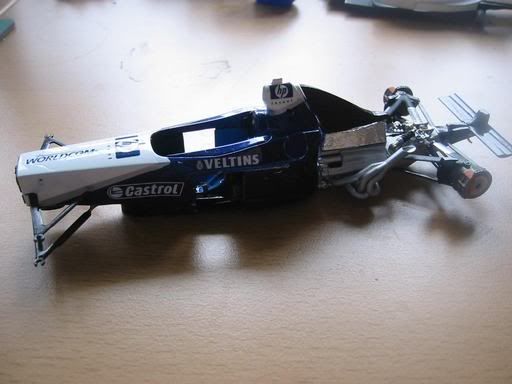 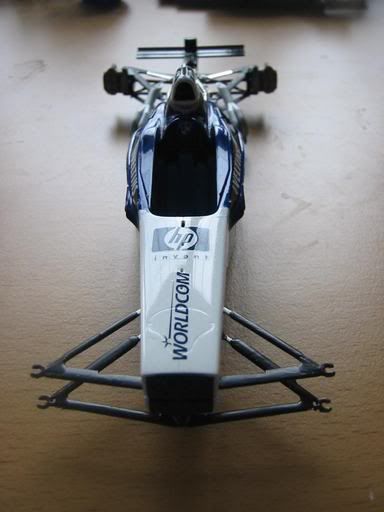 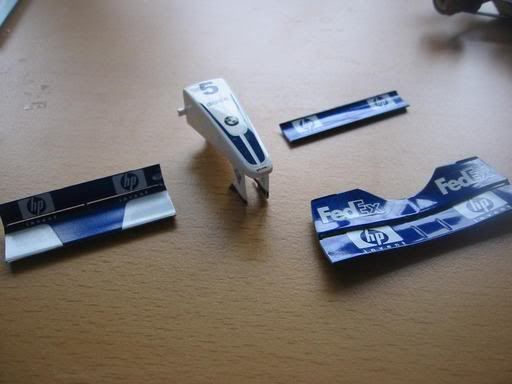 Here you can see the difference TS-13 Clear makes the larger rear wing piece is not cleared while the rest are. 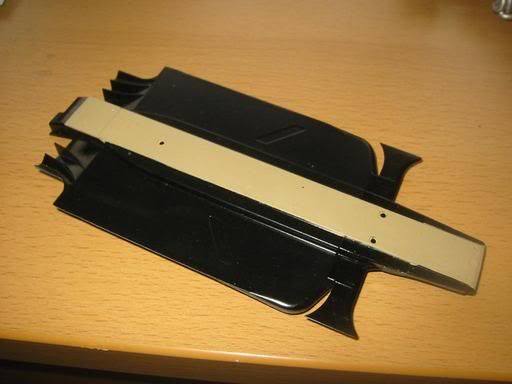 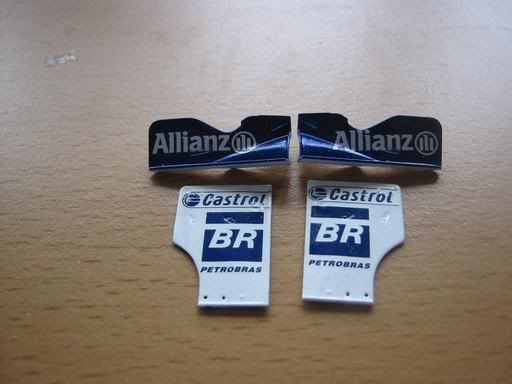
|
|
|
POST REPLY TO THIS THREAD |
 |
|
|


