|
|
| Search | Car Forums | Gallery | Articles | Helper | Air Dried Beef Dog Food | IgorSushko.com | Corporate |
|
|||||||
| WIP - Street Post topics for any "Works In Progress" street vehicles projects in this sub-forum. |
 |
 Show Printable Version | Show Printable Version |  Subscribe to this Thread
|
|
|
Thread Tools |
|
#1
 09-22-2013, 06:35 PM
|
||||
|
||||
|
WIP- Fujimi 1/24 McLaren F1
My first kit is delayed from AmiAmi, so I got another one from HLJ along with
some instant noodles, essential power source for Japanese modelers. (Not!) 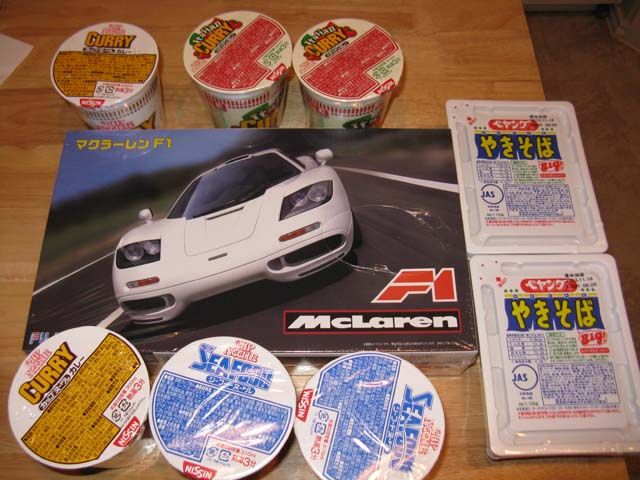 Originally we thought Fujimi messed up the interior, but now we know it's just a standard cost-cutting measure of parts sharing with the race version. Not only the door panels, but the dashboard has some engravings by using the expensive sliding mold. 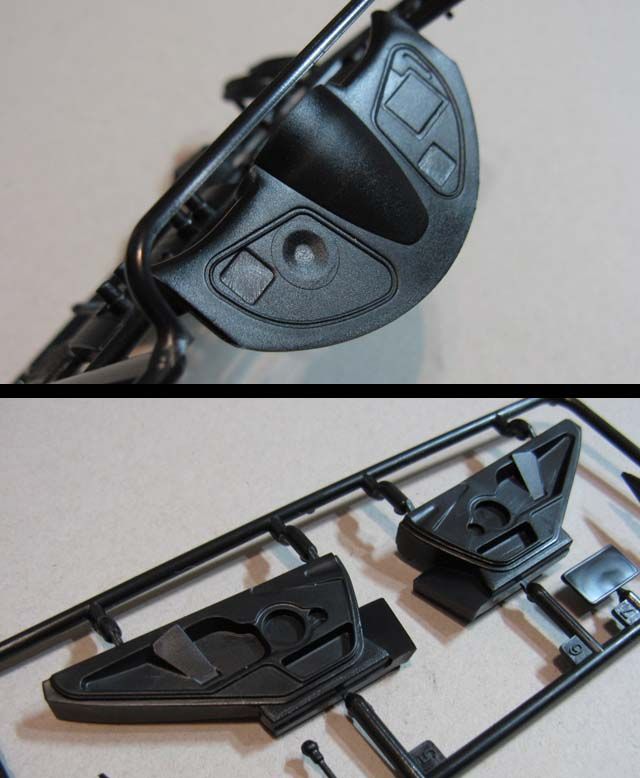 Tread pattern doesn't look anything I know, and I believe it's generic. I'll leave this as is for this build, but I might have to make 3D data for another kit. 17 inch tires show the car's age. 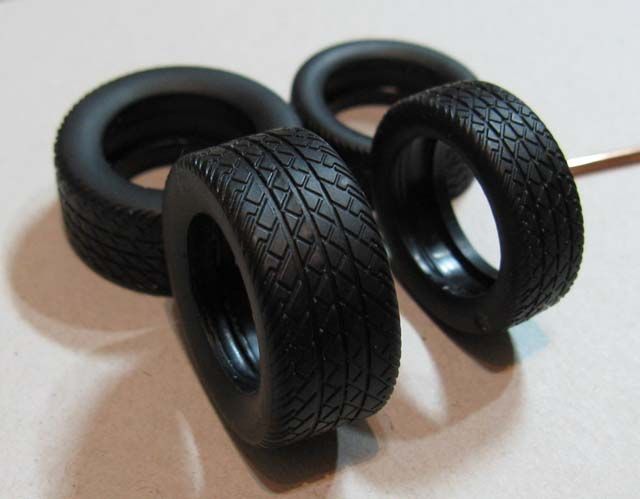 One of the clues of Fujimi actually studying the real car is show in the under-panel engraving, though it's just my guess. The problem here is that the lower front control arms are angled as if the car was on the lift! 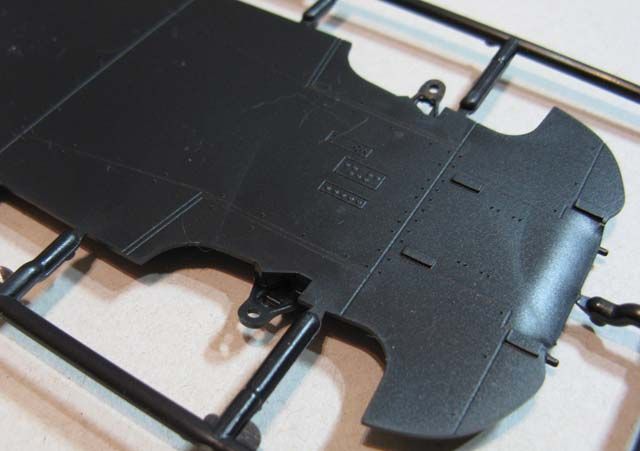 We know there's no engine details in this kit. The question is how much is visible. When there's enough light, you can see some poorly designed cables, which can be replaced with more realistic wires. 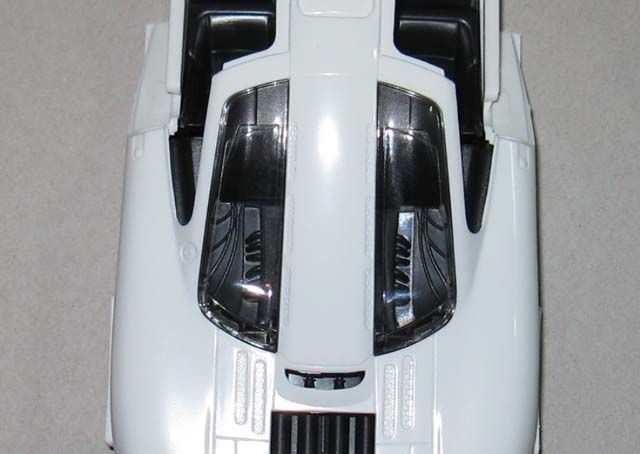 Fitment of door panel is a little loose, but not bad for its complicated shape. 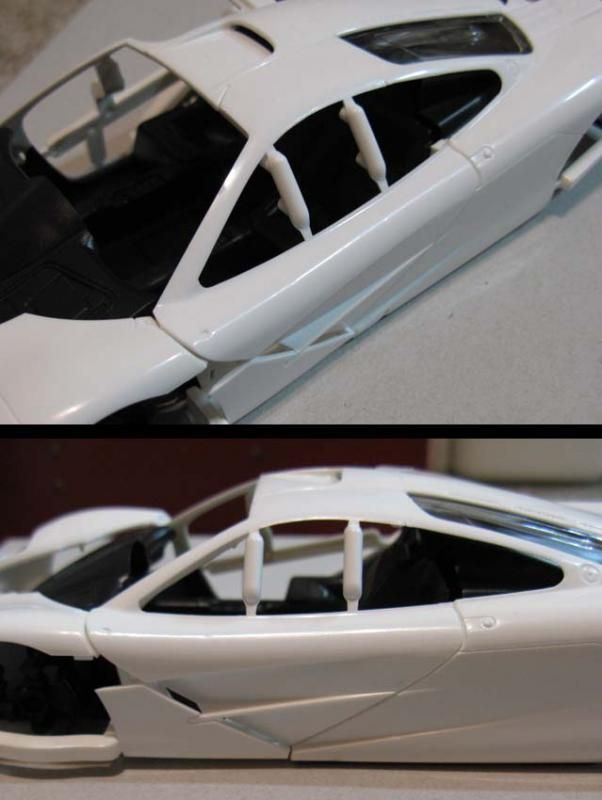 Front and rear tread width turned out too short, making the tires look pushed in. Luckily, all you have to do is to fabricate a spacer and place it behind the brake rotor. (unmodified top, corrected bottom)  Front ride height seems fine. Rear can be lower by about 1 mm. 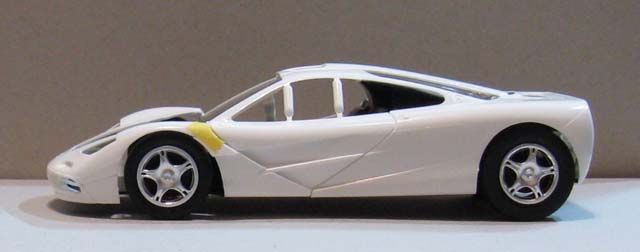 I enlarged the radius of the front panel corners by filing and sanding the corners on the separate panel. Then I filed off a bit on the body to help putty to adhere better. I forgot to take a picture, but I used Tamiya light curing putty to fill the gap. 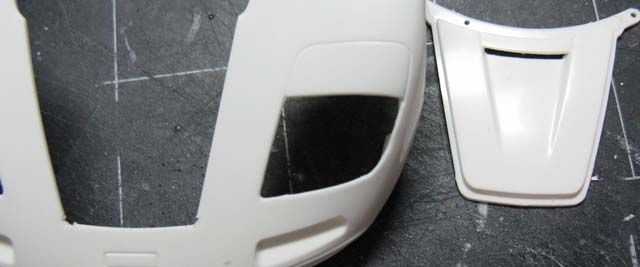 I noticed the side press line was too faint. I held a drill bit backward, and engraved a wide round line. Then I used a hobby knife, wide flat chisel and sand paper to blend the top part of the engraving with the body. 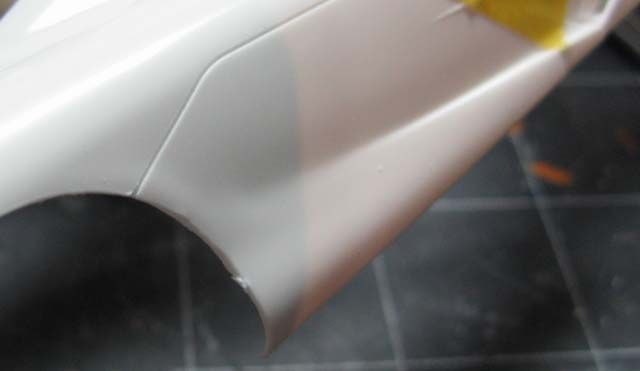 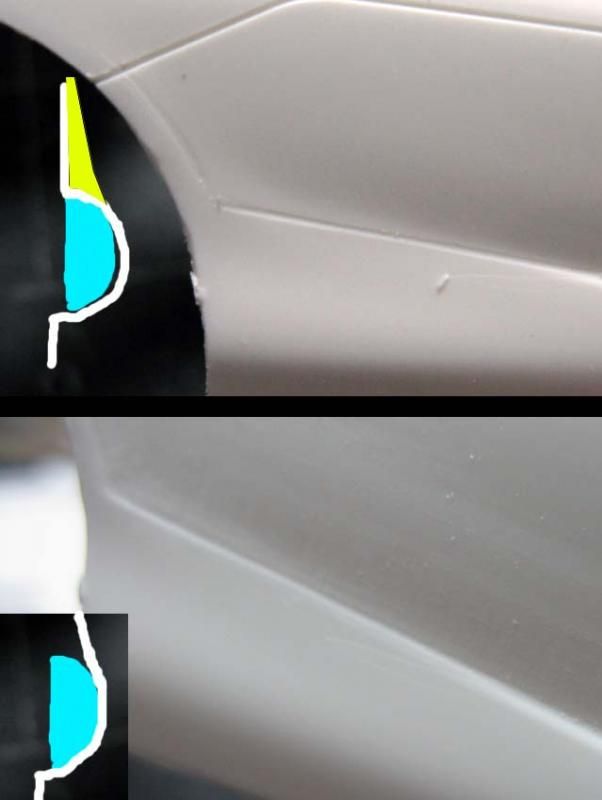 If you are planning to add hinges to the doors, you have to cut off the extra plastic that connects the top and bottom door panels. You'll also have to thin the top edge (where it meets the wheel arch), and a portion of the inner door panel.  There are a few noticeable sink marks on the doors, but they can be easily puttied, filed and smoothed. 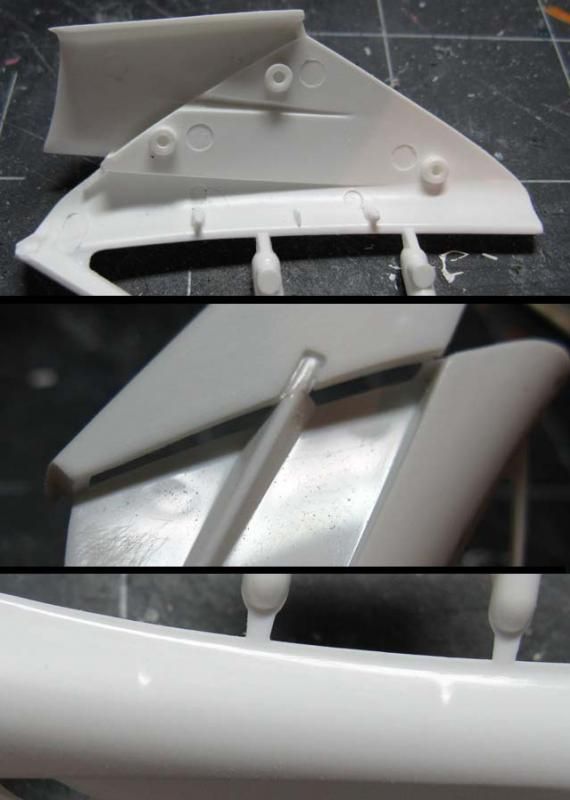 Engine room's side panels extend into the cockpit, so I removed them. Also, there's nothing behind the passenger seats, so they have to be filled with plastic sheet. This reminded me of the Spinner kit, which also has a problem with the bulkhead. Both kits might have been designed by the same clueless person. 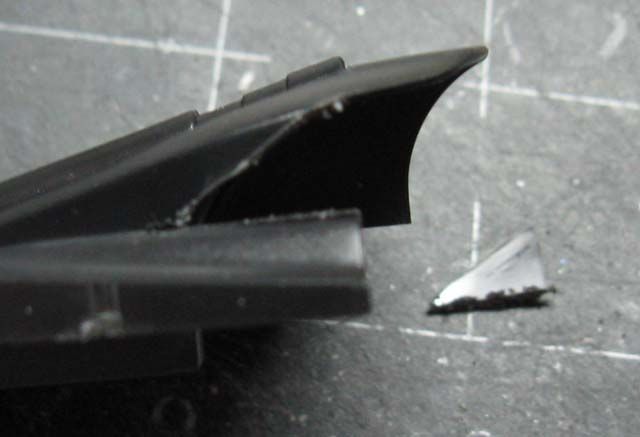 Not much to talk about the legendary S70/2 engine. Sigh... 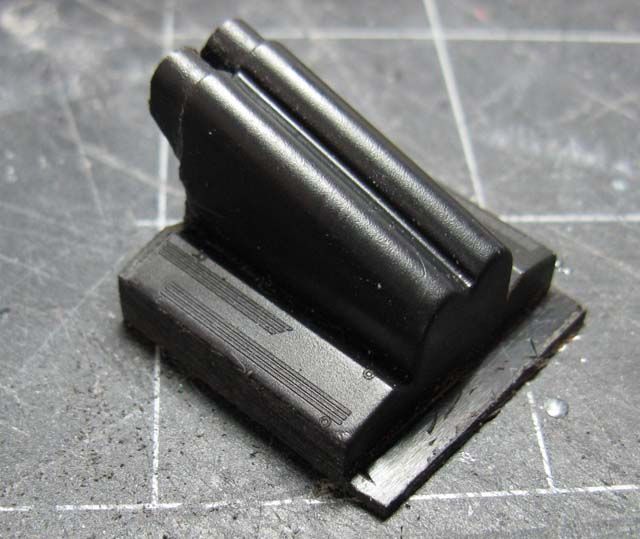 This is how the engine room looks like once the engine is removed. Notice also that the bulk head windows are cut out, and the removed pieces will be used for vacuum forming. 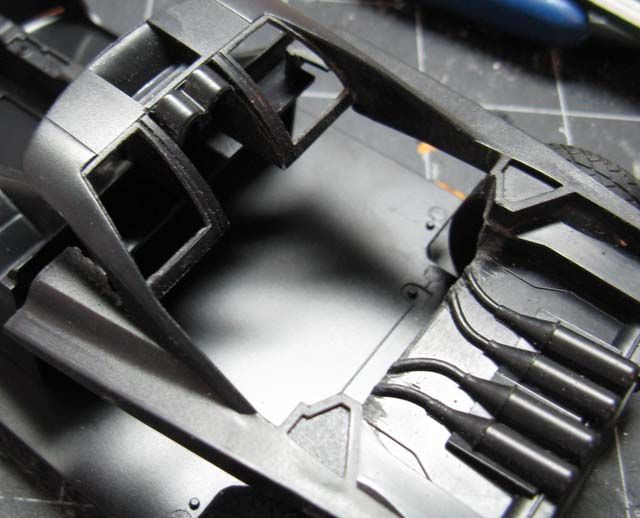 Intake chamber and engine top covers are separated to make minor detailing easier. 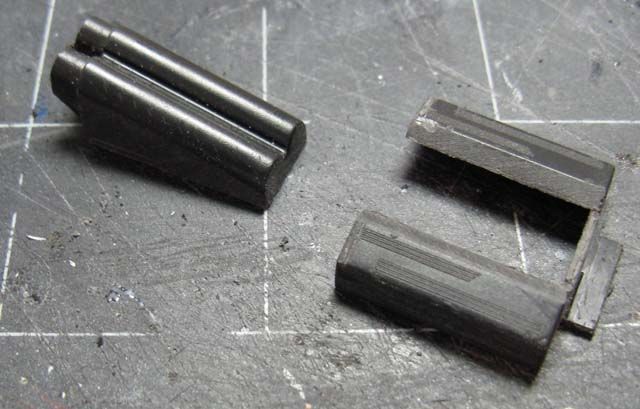 That's about it for now. If only the price was cheaper, this kit wouldn't be so bad. I already have some ideas of how to address the door panel situation. I'll also add only visible components of the engine, just like my snap-tire Enzo model. 
|
| The Following 4 Users Say Thank You to hirofkd For This Useful Post: | ||
|
#4
09-22-2013, 10:19 PM
|
|||
|
|||
|
Re: WIP- Fujimi 1/24 McLaren F1
I will consider this the definitive instruction manual for this kit! Please keep going and sharing what you do!
__________________
It ain't cool 'till your wife hates it. Imagine a world without Alabama Recent builds: Rocket Bunny FR-S and stock BRZ Toyota bB Bro-style Civic K20 powered SiR converted EK WIP I build slowly and poorly. 
|
|
#5
09-23-2013, 04:36 PM
|
||||
|
||||
|
Re: WIP- Fujimi 1/24 McLaren F1
Good start! Thank you for the thorough description of the kit's inaccuracies.
__________________
Best regards, Mikhail   
Last edited by stratos75; 10-30-2013 at 07:33 PM.
|
|
#6
09-24-2013, 12:33 AM
|
||||
|
||||
|
Re: WIP- Fujimi 1/24 McLaren F1
Sad to see so little kit for some much $ IMO, even more so that the copyright restrictions seem to now extend not just to sidewall markings, but also tread design, as being potential infringement of a particular companies design, and most likely the reason for those generic tires as they are
|
|
#7
09-24-2013, 02:57 AM
|
||||
|
||||
|
Re: WIP- Fujimi 1/24 McLaren F1
Interesting Project.
I like to follow this as a help to decide if i better get this kit or just improve my diecast 
|
|
#8
09-25-2013, 12:12 AM
|
||||
|
||||
|
Quote:
__________________
I'm a Marine, I got this!
|
|
#9
09-27-2013, 01:26 PM
|
||||
|
||||
|
Re: WIP- Fujimi 1/24 McLaren F1
I haven't decided the body color yet, but this project is a practice build for several F1 road car kits, and I have a few candidates:
Silver - I think the whole McLaren F1 sensation started with a silver prototype. Metallic Black - first real F1 road car I saw in person in Yokohama. Maroon - Mr. Bean! Today's highlight is a fabrication of the door hinge, but before that, I noticed that the sill (and the bottom of the body) was not tall enough, so I extended it by 1 mm. (This happens to be a part of an even greater problem.) I added a 3mm-tall plastic strip with a guide on the inside, so the body sits on the chassis more precisely. I also narrowed the chassis by 1 mm on each side to accommodate the guide. (not pictured) 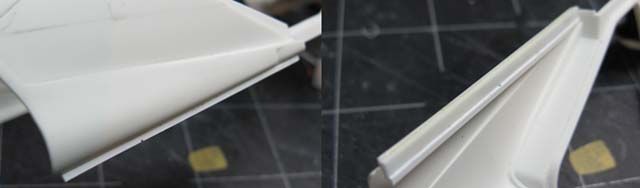 The bottom rear of the door was removed a bit, because it felt like it'd interfere with the motion of the door. Then I added 1mm-thick plate on the bottom of the door, and filled the corner with putty. I also filled a part of the front end of the door because it seemed too thin. 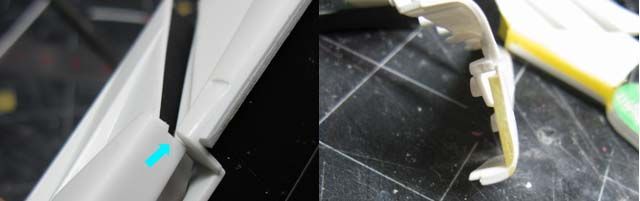 I noticed that the upper seam line between the door and the front fender wasn't smoothly curved, so I added a piece of plastic to reshape the curve. The curve on the body was corrected with putty accordingly (not pictured) 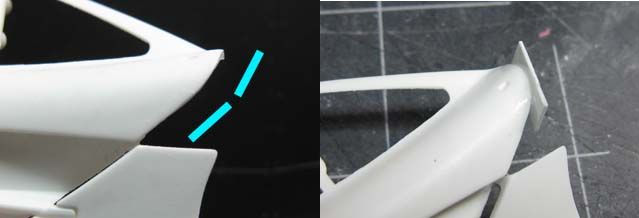 Here's another major issue; vertical splitters are too short in height.  One of the reasons is because the rear bumper comes down too low, so I removed the bottom portion as shown. 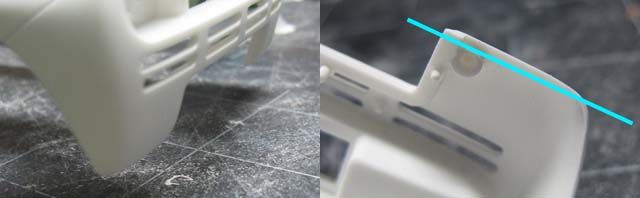 The lowered sill and raised rear bumper bottom created an extra space of 1 mm above and below the diffuser's rear end. This and the side sill issue made me think that the kit chassis should have been lower by approx. 1 mm. 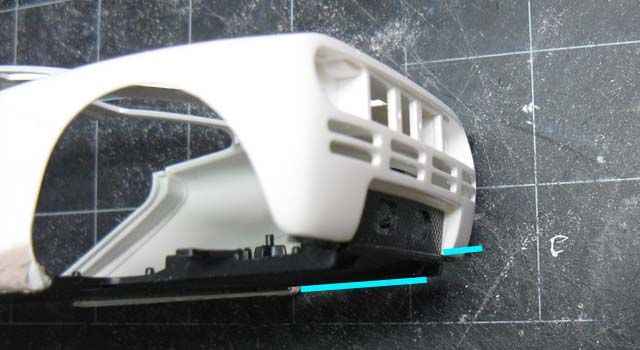 I cut the blue lines and bend the diffuser along the yellow line carefully. Rear tire housing will have to be modified accordingly. 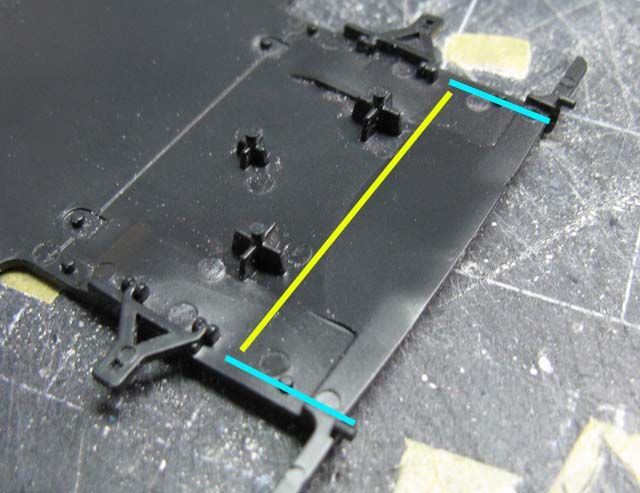 I also cut off 1.5 mm from the bottom of the exhaust mesh. This reminded me that the upcoming PE would have incorrect dimensions. Oh well... 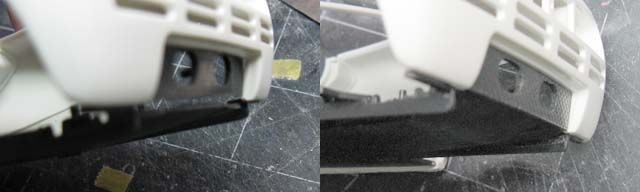 Another problem! The windshield and the roof top aren't flush. As it turned out, the tab on the windshield was not stepped properly. 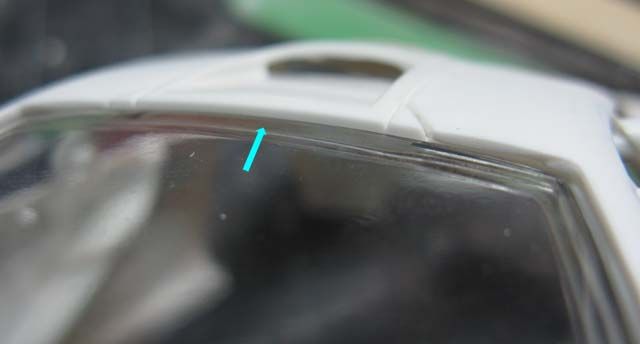 So I removed the tab, then I noticed something.  The flange on both sides are correctly designed, so once the top tab was removed, the windshield fit properly. 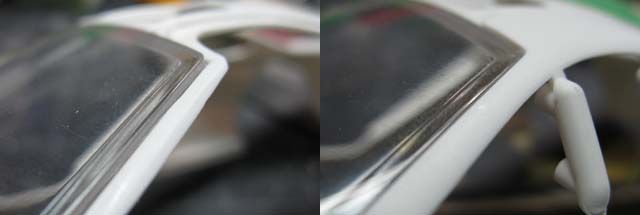 Another issue is that the roof protrudes too far forward. But when you modify, file off only a half of the protrusion (blue arrow), or you'll end up filling an unnecessary gap like I had to. oops. 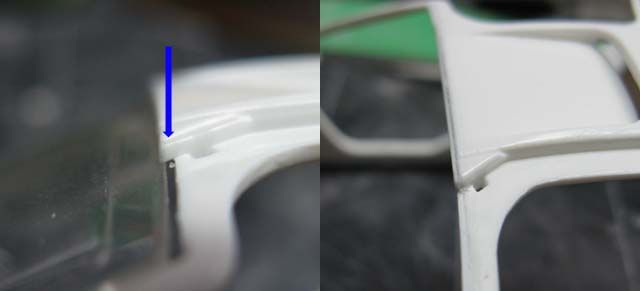 Door hinges are made by a low-tech approach. The top hinge is just a hook, made with 0.5mm brass rod. The body was modified to accept the hinge, and it's kept somewhat loose. 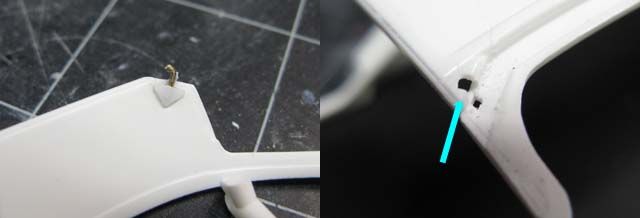 Bottom hinge was made with an L-shaped brass rod, which is held by Tamiya Light-curing Putty. The end of the rod is inserted into a piece of plastic, which is glued to the bottom side of the door's front end. (I'll take better photos later). 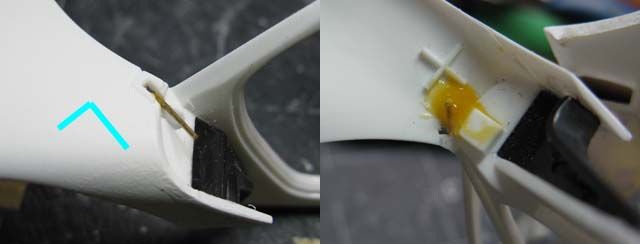 Once painted, no one would notice the hinges are made so simply with brass rod and putty. Whatever method you use, check the interference with the tire housing because the space is tight. 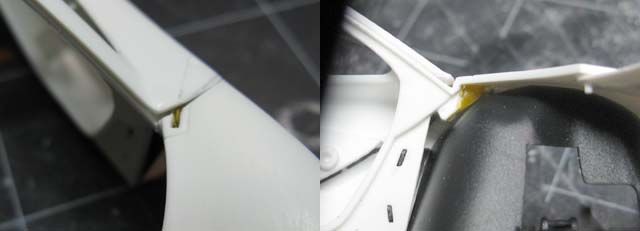 Checking the motion of the door. It still interferes with the body a bit, but not too terribly. 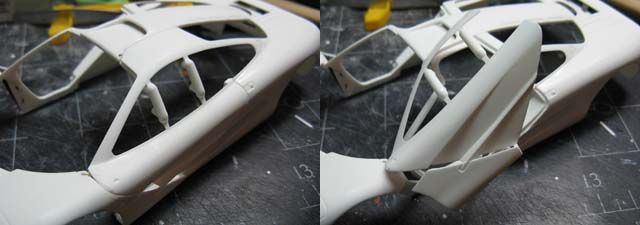 Now I have to figure out how to make the support, so the doors can be held open, but for now, I'm glad I found a simple solution for the hinges. 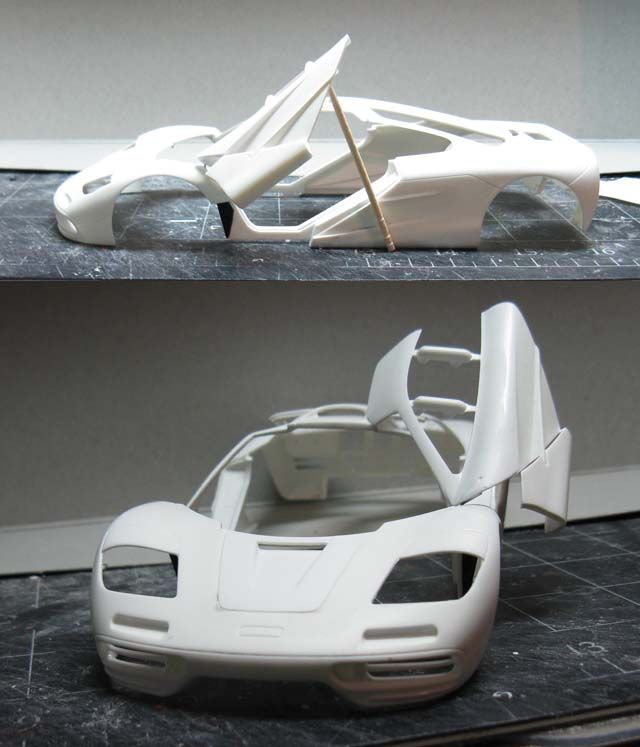 Next will be the interior, which I already know isn't trouble-free. Fujimi keeps modelers so busy!
|
|
#10
09-27-2013, 03:52 PM
|
||||
|
||||
|
Re: WIP- Fujimi 1/24 McLaren F1
The car shown at Monaco premier was indeed a bright silver, I also quite like the darker titanium silver paint they used (not sure how many cars done in that color?)
Wycliff's F1 had that unique dark blue/green paint color I don't think any F1 was painted in production, of the original Bruce McLaren orange (proper original shade/color), which might look good in that traditional sense Looking forward to more great work! Last edited by JeremyJon; 09-28-2013 at 10:47 AM.
|
|
#11
09-27-2013, 04:46 PM
|
||||
|
||||
|
Re: WIP- Fujimi 1/24 McLaren F1
Hiro, I see, you want to do this Mac as close as possible to the real one. What is the way you will do the tires? And the second question. Will you do an extension of the doors to the front? I mean this part.
 http://fotki.yandex.ru/users/mikhail...o/view/582293/
__________________
Best regards, Mikhail
|
|
#12
09-27-2013, 11:35 PM
|
||||
|
||||
|
Re: WIP- Fujimi 1/24 McLaren F1
Quote:
I'll use the kit tires for this project, but I'm thinking of 3D printing a set of new tires (like I did to another project as below). I intend to open the engine and luggage covers for the second McLaren F1 model, possibly with engine parts from Aoshima next year.  Shapeways completely changed the way how I solve problems. Inaccurate tires and wheels used to be difficult to correct, because you need fine engravings and perfect radial symmetry, but it's easier with 3D printing, and, and more than anything, the service is affordable now. I don't think I have to do anything with the extension. It's usually hidden, right? Oh, there's one more minor problem for those who're building this kit: the instruction mixed up the front and rear brake rotors. The bigger parts (E2) are for the front, and smaller ones (E1) are for the rear. Luckily, these parts can be swapped without any modification to the hub.
|
|
#13
09-28-2013, 05:24 AM
|
||||
|
||||
|
Re: WIP- Fujimi 1/24 McLaren F1
Wow it looks like Fujimi has given you a lot of work! Looking good so far, I'm sure this thread will become a reference for others building this "challenging" model.
|
|
#14
09-28-2013, 07:05 AM
|
|||
|
|||
|
Re: WIP- Fujimi 1/24 McLaren F1
Great start ! I also got mine first kit this week and will start it soon. But I promised my wife to actually finish a model(will be the first in 20 years or so...) so mine will be less modified
__________________
When the Boogeyman goes to sleep every night he checks his closet for Chuck Norris.  
|
|
#15
01-19-2014, 06:34 AM
|
||||
|
||||
|
Re: WIP- Fujimi 1/24 McLaren F1
Quote:
  When will we see a continued work?
__________________
Best regards, Mikhail
|
|
|
POST REPLY TO THIS THREAD |
 |
|
|