|
|
| Search | Car Forums | Gallery | Articles | Helper | Air Dried Beef Dog Food | IgorSushko.com | Corporate |
|
|||||||
| Register | FAQ | Social Groups |
| WIP - Motorsports Post topics for any "Work In Process" motorsports vehicles in this sub-forum. |
 |
 Show Printable Version | Show Printable Version |  Subscribe to this Thread
|
|
|
Thread Tools |
|
#1
 06-15-2009, 09:54 PM
|
||||
|
||||
|
1/12 Ferrari 641/2
Hello everyone,
I would like to introduce you all to one of the best models I have ever seen. It’s got hundreds of parts which fit like a dream. I got it when I studied in Korea, and went through a great hustle to transport it to London in my hand luggage (but that’s another story) I have been working on this kit for quite a while now but I only took some pics recently. I will start with a quick mock-up of what I have got sofar: 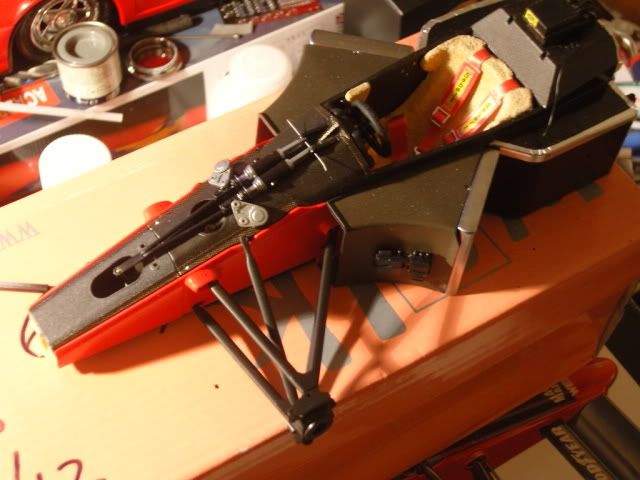 And some modifications I have made in this kit: Tamiya’s leather-like material on the seat was replaced with real leather (one single piece instead of 3 like Tamiya wrongly advices)  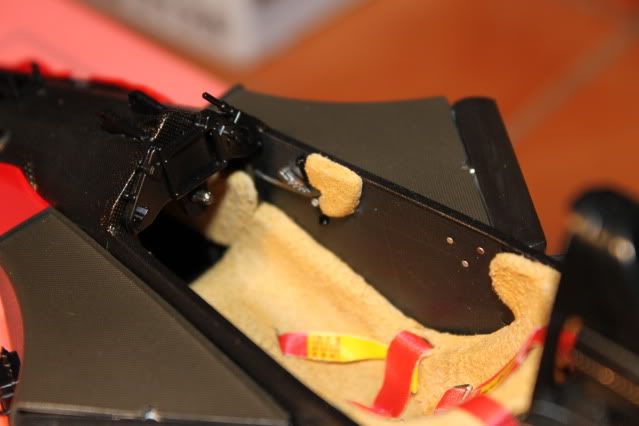 Entire monocoque was covered in various patterns and sizes of carbon fiber and Kevlar decals . In fact it took me several trials with different scales of decals until I got it right. Despite the large scale of the model, cf pattern shouldn’t be seen from more than 50 cm. since the older cars were using very fine patterns 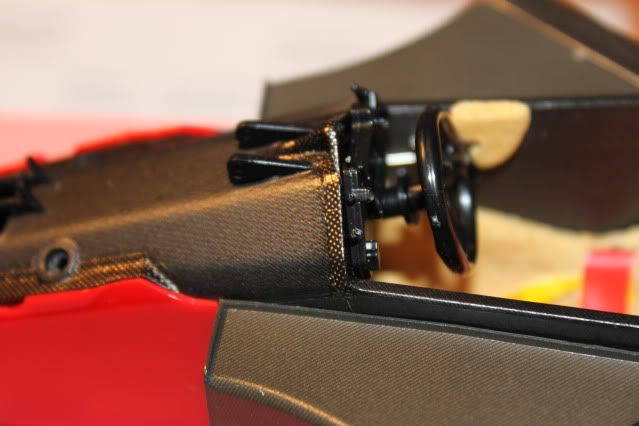 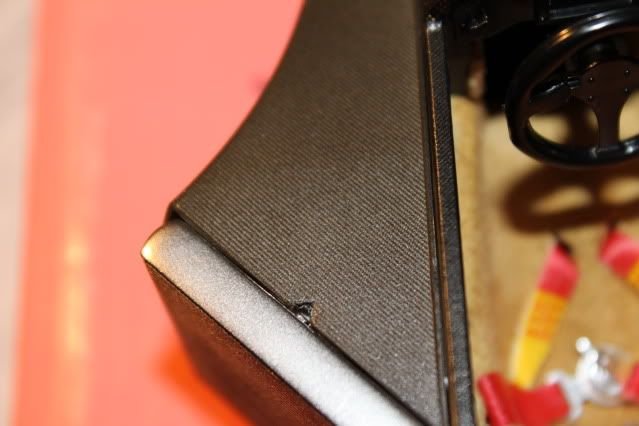 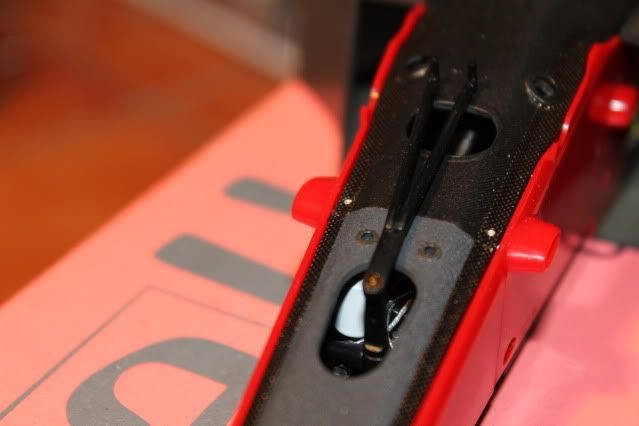 I added some plumbing for hydraulics 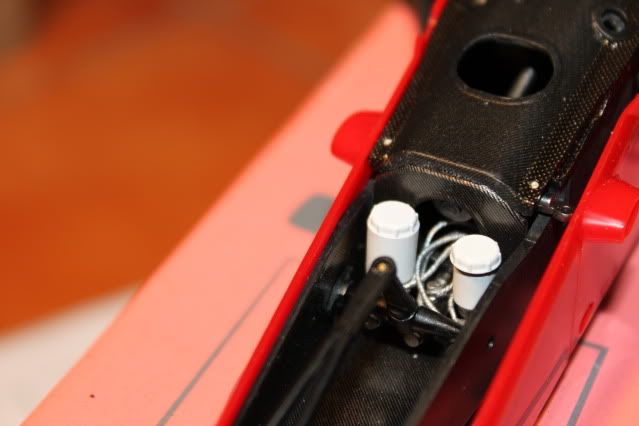 I also started playing with the electronic box, it is more-less half done. I’m pretty happy with it so far, especially that tamiya had only 5 thick cables in this area.  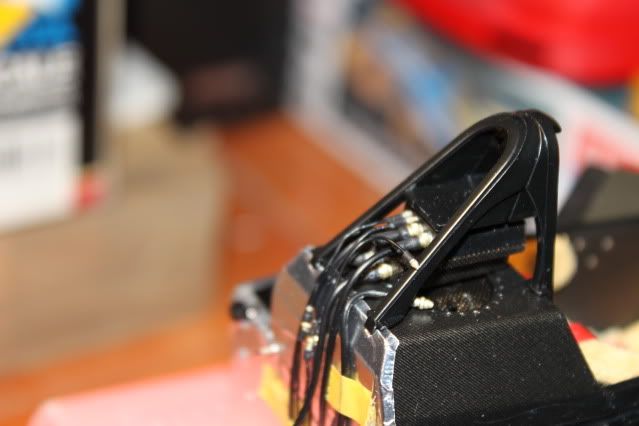 Steering wheel was given a baking flour treatment to simulate suede texture. I had some major disaster with a decal on the wheel so I will have to get some replacement decals (which I have to buy anyway since Marlboro decals in the kit are in completely wrong shade of red). It also have to be detailed with some nuts and washers. 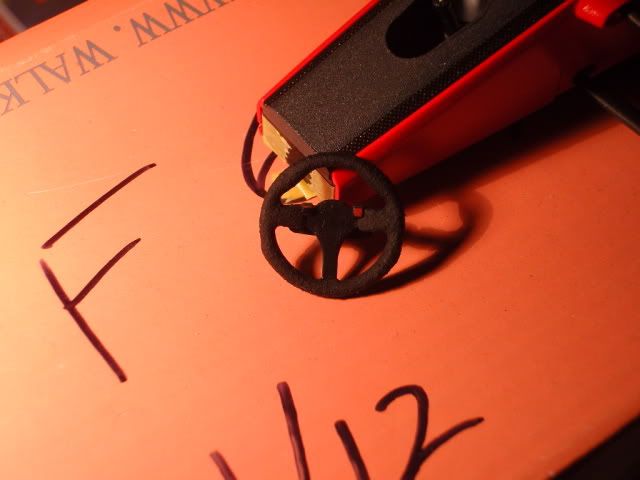 That's pretty much all I have accomplished so far but I am working on it almost everyday now so stay tuned for another update soon. I am looking forward to hearing your comments and advice P.S. My name is Emil – do not hesitate to use it Thanks 
|
|
#2
06-16-2009, 03:19 AM
|
||||
|
||||
|
Re: 1/12 Ferrari 641/2
I am very happy to see a WIP for this model here.
 I build it fourteen years earlier... strait of the box. As you see in this photo from my case.  I plan to build a second (more detailed model). So I follow your build.  Good luck 
|
|
#4
06-16-2009, 08:43 PM
|
||||
|
||||
|
Re: 1/12 Ferrari 641/2
Awesome Build, I am considering buying this kit tonight on an Auction Site, seems like a great kit, Ill be following this one!!
__________________
 It's Not wheather you Win or Lose, its how you look while you play the Game
|
|
#5
06-17-2009, 08:53 PM
|
||||
|
||||
|
Re: 1/12 Ferrari 641/2
Thanks for the encouragement guys, Im glad you liked my work. Ill try not to let you down and keep up working on the model as much as possible.
I hope you won the auction the Ashman. If you did you might want to look for this superb book as well. It is almost necessary when you build this kit: 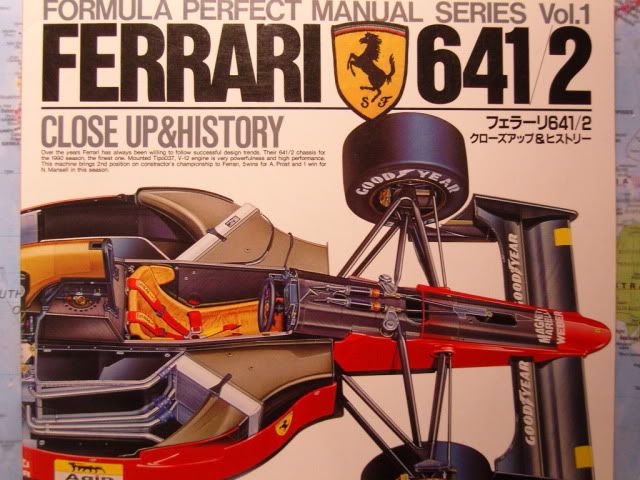
|
|
#6
06-17-2009, 09:17 PM
|
||||
|
||||
|
Re: 1/12 Ferrari 641/2
Ok time for another quick update.
This is what I have done today: First I assembled shock absorbers and front suspension. 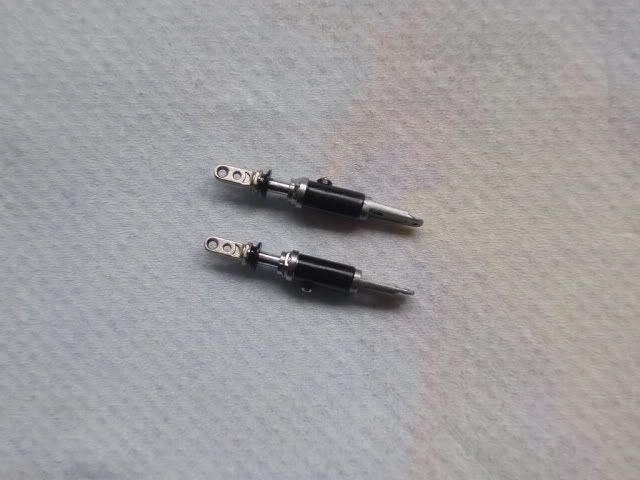 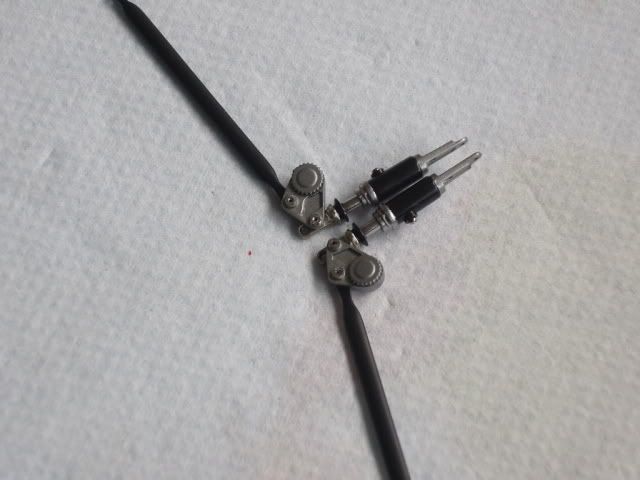 Then I finished the electronics. I am particularly happy with how the cables rolled in a tape on the left side of the box came out (although on the pics it looks a bit weird). 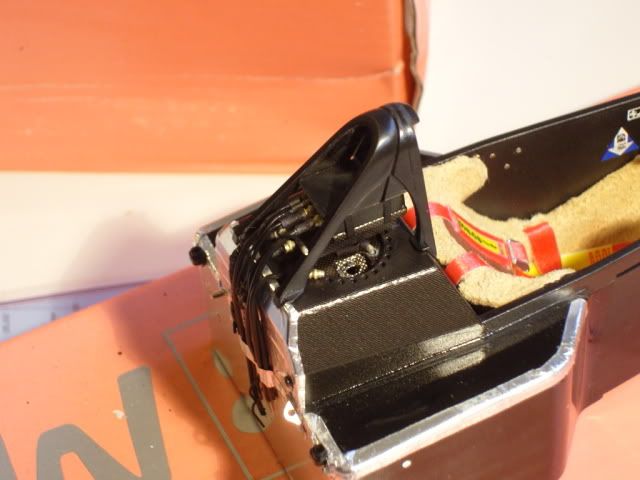 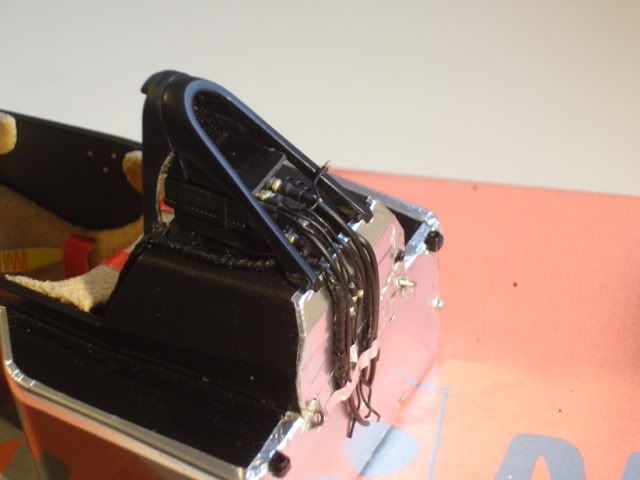 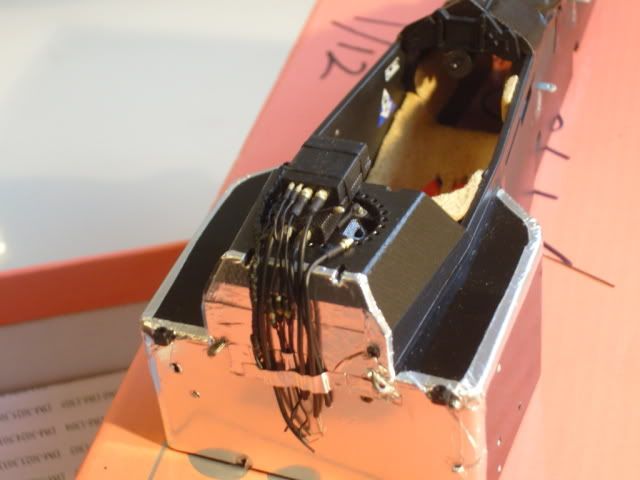 Thats it for now. Let me know what you think
|
|
#7
06-18-2009, 02:11 AM
|
||||
|
||||
|
Re: 1/12 Ferrari 641/2
Quote:
 of this book for this thread? of this book for this thread? Thanks a lot...
|
|
#8
06-22-2009, 08:29 PM
|
||||
|
||||
|
Re: 1/12 Ferrari 641/2
Hi Guys,
Another quick update. Today I have finally assembled the front suspension. 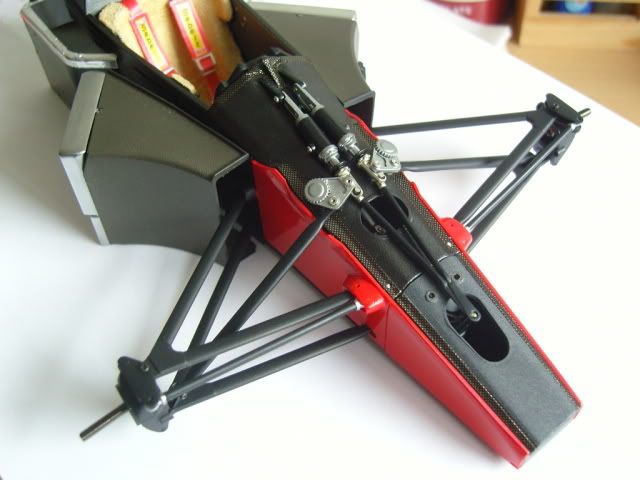 Also plumbed shock absorbers 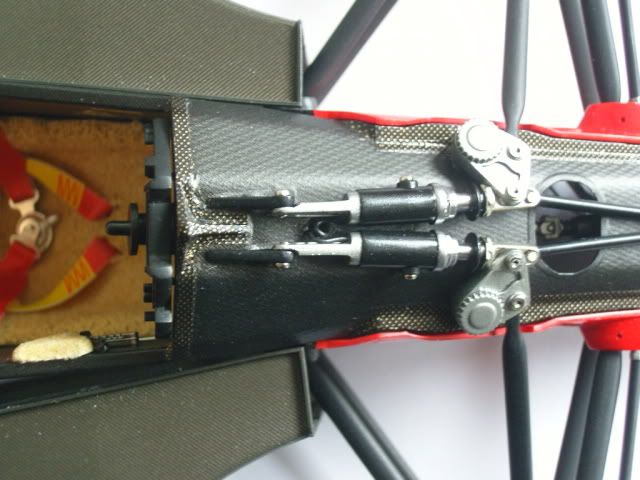 Panels were painted with Zero paints and while for some reason the colour looks a bit bright on the photos, in real life it matches my reference pics spot-on . This is the first time I used Zero paints but I think from now on I will use only Zero.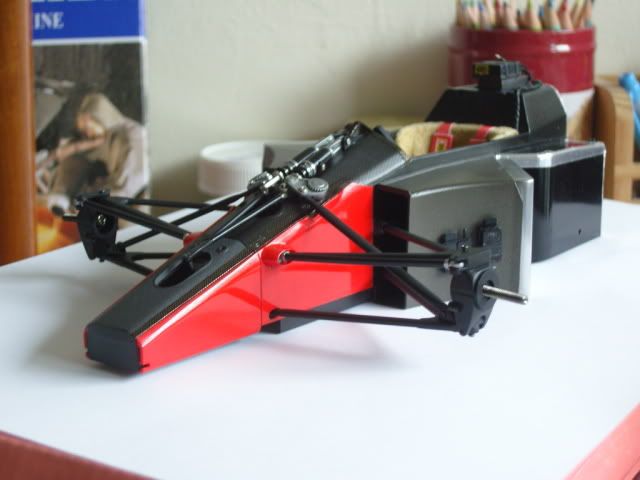 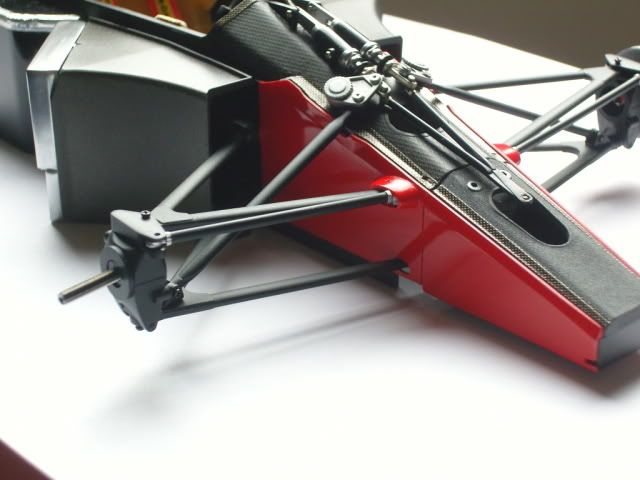 That's it for now. P.S. The fitment of shock absorbers seems to be the weakest point of this kit  . I tried my best to make it look more realistic but I'm still not too happy with it . I tried my best to make it look more realistic but I'm still not too happy with it . Also the fragile shock absorbers are to thick and fit to tight IMHO - so be carefull if you're building this kit . Also the fragile shock absorbers are to thick and fit to tight IMHO - so be carefull if you're building this kit
|
|
#9
06-22-2009, 08:33 PM
|
||||
|
||||
|
Re: 1/12 Ferrari 641/2
It 's any posibility to scan anyone, some reference
of this book for this thread? Thanks a lot... Sorry mate but my scanner is currently broken. I will try to post some reference pictures later along this thread perhaps
|
|
#10
06-23-2009, 01:06 AM
|
||||
|
||||
|
Re: 1/12 Ferrari 641/2
Very nice project and detailing work, Emil. Bravo
 Quote:
__________________
Guideline for happy modeling: Practice on scrap. Always try something new. Less is more. "I have a plan so cunning, you could put a tail on it and call it a weasel" - Edmund Blackadder
|
|
#11
06-23-2009, 08:03 AM
|
||||
|
||||
|
Re: 1/12 Ferrari 641/2
ALways a joy to see these big old kits being built, and this one is going together particularly nicely.
Just thought - this kit is nearly 20 years old, how did that happen?
|
|
#12
06-25-2009, 10:15 AM
|
||||
|
||||
|
Re: 1/12 Ferrari 641/2
Quote:

|
|
#13
06-25-2009, 10:38 AM
|
||||
|
||||
|
Re: 1/12 Ferrari 641/2
OK, time for another quick update.
During the last few days I managed to wire left side pod. Unfortunately Tamiya completely ommited it so I had to scratch build it myself. Unfortunately I couldn't find sufficient references for this area so I had to improvise a bit. Electronic boxes are from 1/20 scale Williams FW13b and Ferrari F189, decals on the box and the radiator are from F189.  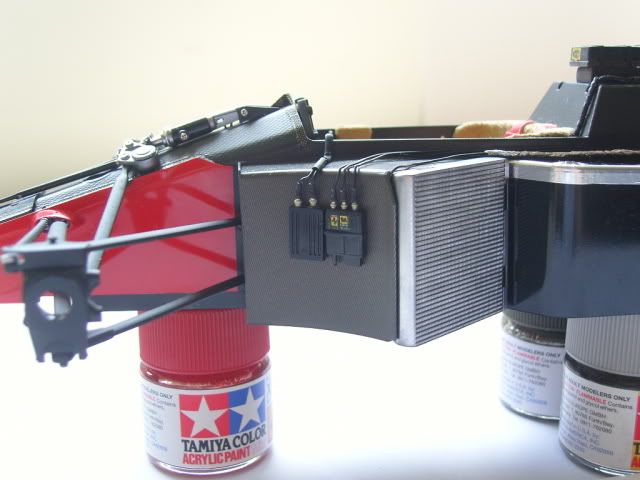 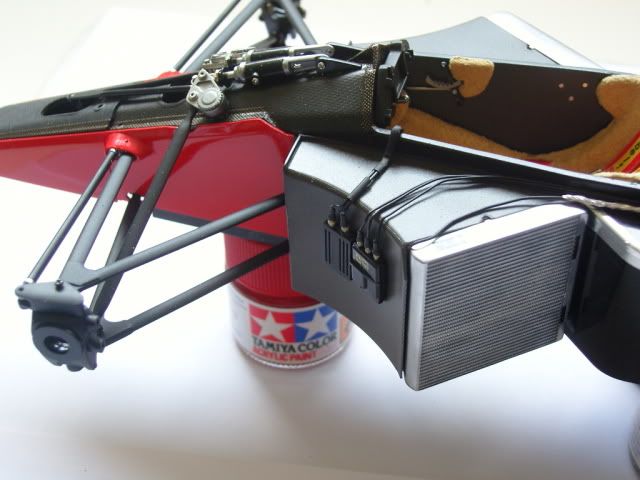 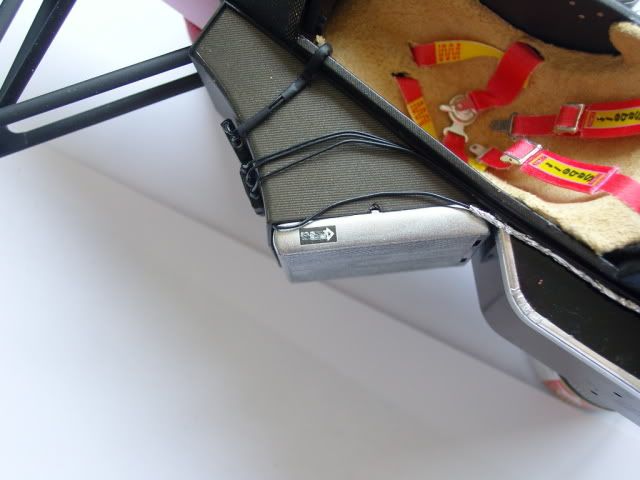 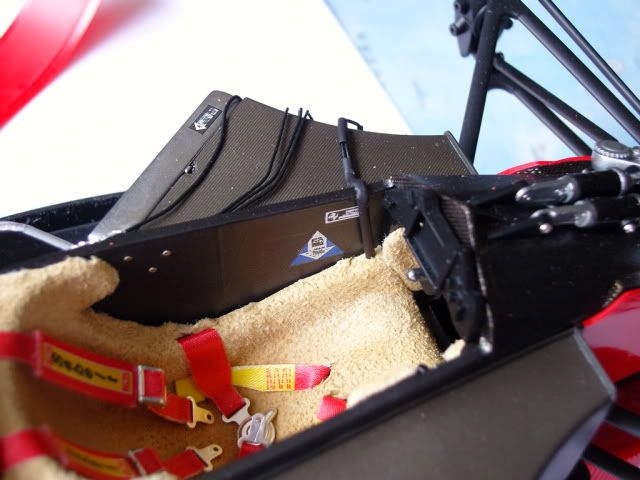 Tamiya chose to mold the floor in one piece but on most of my ref pics the car is serviced with the rear floor taken off. Plus it will look better when displayed with the floor aside the car to better show the engine detail. Also it would be a shame to waste all the great ref pics of the floor. So I decided to cut it. Luckily Tamiya's design allows you to do it pretty easily since both - front and rear floors are mounted with screws to the monocoque and the engine. Here are the results: 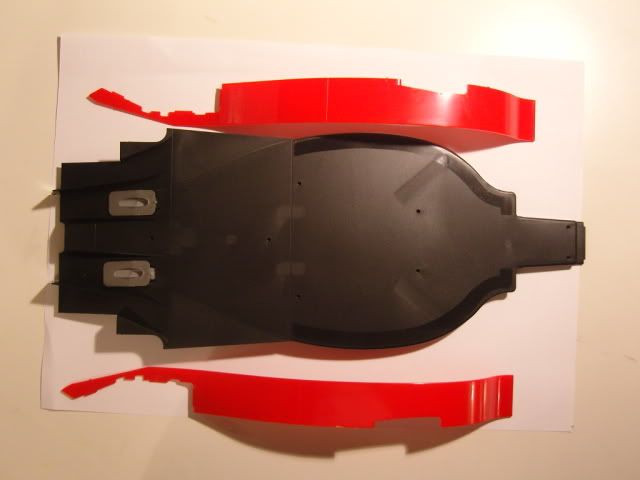 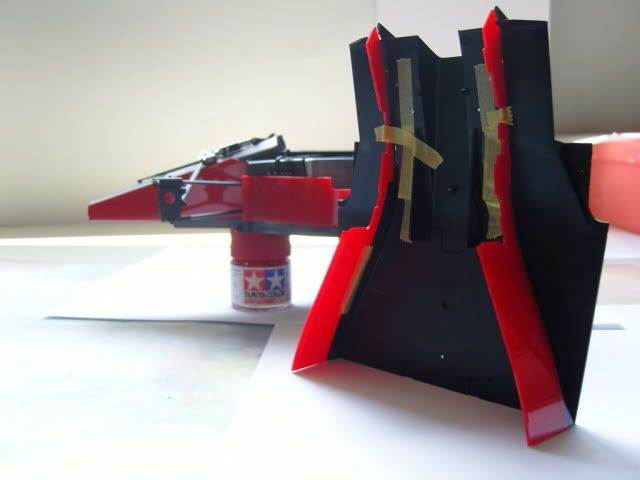 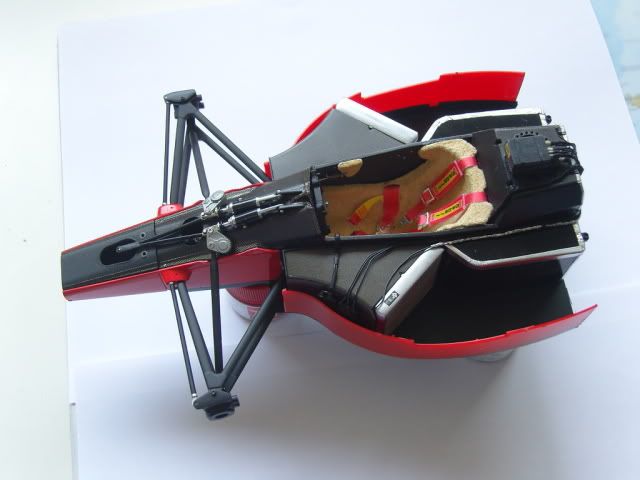 And couple reference pics: 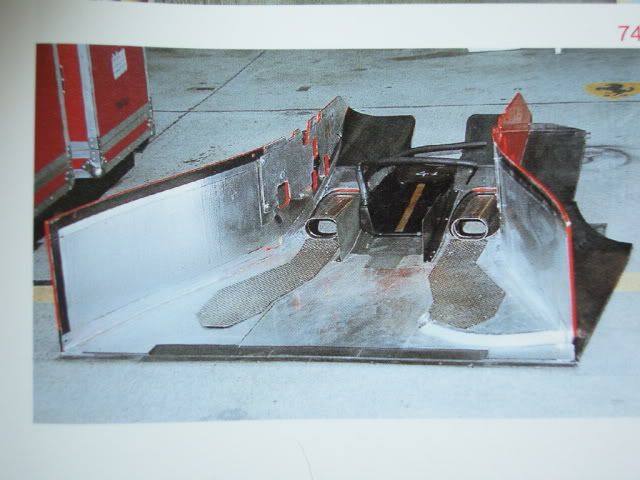  That's it for now. I'm looking forward to your comments Until the next update
|
|
|
POST REPLY TO THIS THREAD |
 |
| Thread Tools | |
|
|


