|
|
| Search | Car Forums | Gallery | Articles | Helper | Air Dried Beef Dog Food | IgorSushko.com | Corporate |
|
|||||||
| Car Modeling Share your passion for car modeling here! Includes sub-forum for "in progress" and "completed" vehicles. |
 |
 Show Printable Version | Show Printable Version |  Subscribe to this Thread
|
|
|
Thread Tools |
|
#1
 01-01-2010, 01:49 PM
|
|||
|
|||
|
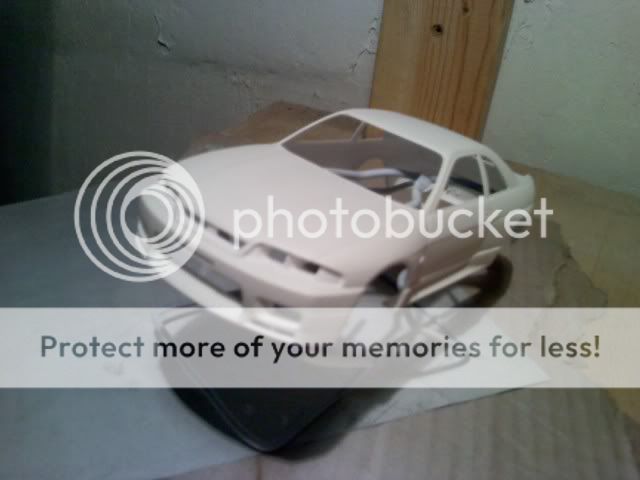
starting my Tamiya r33
I just got the Tamiya Nissan Skyline GTR R33 for xmas. I keep getting gradually better with each model I do. This one im going to sand all the molding lines and scribe the bumper/door/hood lines, flock the carpet, and maybe drop it lower. But I am going to need a little help.
1. What colors are closest to the stock gtr colors for the interior (seats, center console, etc..) 2. How did you guys do the GTR emblems. they look a lil hard to get perfect. 3. how did you guys drop this model? I was reading how to generally drop them but I'd like a little more info for this specific model. 4. are there any other little techniques you guys used on this one to make it look better? I'm sure I'll have more questions. Tamiya makes a great kit and I dont wanna screw this one up. lol thanks for any help 
|
|
#3
01-01-2010, 08:26 PM
|
||||
|
||||
|
Re: starting my Tamiya r33
Hey there, i'll try to answer your questions to the best of my ability since i've built several R33s. The tamiya guide is pretty good when it comes to colours on the 1/1. I've always followed the instructions and found the colours to be nearly spot on with the real life counterpart. As for the badge i've found the best way to go about it is using the tip of a paperclip, dip it into the paint and do the areas in their respective colours. As i've mainly built out of box I don't have any pointers in terms of lowering the car so i'm afraid I cant help you there. Finally for techniques I didn't bother doing anything too extravagent. However some members on this site have gone above and beyond, so check out some completed build threas or the skyline meet thread. Hope this helps!
__________________
Steve
|
|
#4
01-02-2010, 02:48 AM
|
||||
|
||||
|
Re: starting my Tamiya r33
3.
You have to dry-fit the parts, and you'll see how easy that is. All you have to do is to identify which parts determine the location of the wheel axis, and try to glue those parts higher than the normal. For example, on the rear of Tamiya R33, there are only two parts that affect the ride height: C27 and C28. Since the drive axle part (D3) can be easily bent, you only have to file off the guiding protrusions (where C27/C28 and D1 meet) on the sub-frame D1, and then glue C27 and C28 higher by the amount you want to drop (probably 1 - 2 mm). On the front, the easiest method I can think of is to cut off the top portion of C18 and C7 (C8 and C27 on the other side), drill a hole with a pin-vice and re-create the pegs with a styrene or metal rod. That will allow C3 and C4 to sit higher than the normal. Then fill the resulting gap between C3/C4 and the lower control arm on A7 by gluing a washer-shaped piece of plastic on the top side of the control arms. You might have to bend the front drive axles, as well as filing off a portion of the oil pan to give a room for the steering rod. Also, if you're going to use the stock wheel, the lower control arm might interfere with the inner wall of the wheel. In that case, you'll have to thin the control arm (or use a set of larger aftermarket wheels). In any case, each model is different, so lowering is a matter of trial-and-error. Besides, you have to dry-fit most of the suspension parts first in order to determine how much to drop. Good luck.
|
|
#5
01-02-2010, 09:58 AM
|
|||
|
|||
|
Re: starting my Tamiya r33
never thought of a paper clip. I've been using a toothpick to get the small areas. Thanks on that thought.
And thanks for the tips on lowering It. I might just BARELY drop it since that seems like a lot of hassle. But then again, thats how you get better. Could I get a link of a site where I can get styrene parts? (rods, sheets, and that stuff ppl use to make the intercoolers) Our hobby lobby doesn't have SQUAT. I just shaved all the molding lines and scribed the panel lines. ^_^ First Time I've ever done it on a model.
|
|
#6
01-02-2010, 02:38 PM
|
||||
|
||||
|
Re: starting my Tamiya r33
http://www.detailmaster.com/Merchant...egory_Code=EVG
Evergreen styrene is the stuff I use and its pretty good. Looking forward to seeing how the R33 turns out 
__________________
Steve
|
|
#7
01-02-2010, 04:05 PM
|
||||
|
||||
|
Re: starting my Tamiya r33
www.hlj.com has many evergreen stuff, and www.hiroboy.com the same. Beside, you have lots of stuff in there for your.
CHEERS
|
|
#9
01-02-2010, 09:45 PM
|
||||
|
||||
|
Re: starting my Tamiya r33
Looks like a great start, what colour will it be?
__________________
Steve
|
|
#10
01-02-2010, 11:04 PM
|
|||
|
|||
|
Re: starting my Tamiya r33
Quote:
 sorry for the cell phone pic. I'll take more once it's done
|
|
#11
01-03-2010, 05:23 PM
|
|||
|
|||
|
Re: starting my Tamiya r33
For the interior, the Dark sea gray, and field blue, should I get spray paints or brush paints? Also, for the middle of the seats, what would be the best way to tape it off to paint? thanks
|
|
#12
01-03-2010, 06:25 PM
|
||||
|
||||
|
Re: starting my Tamiya r33
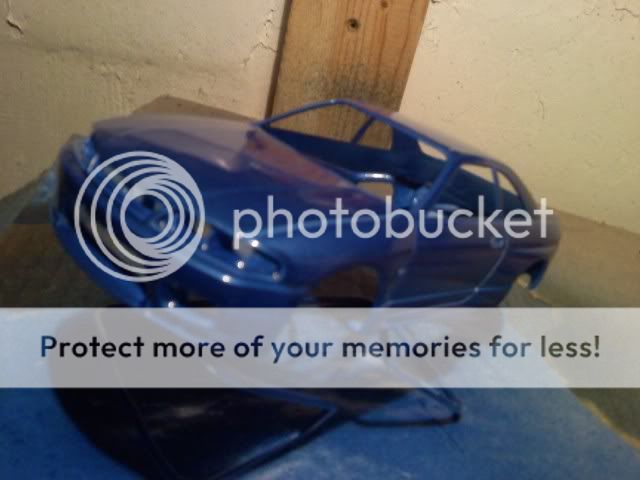
Seems like the blue paint is not laying down into the panel lines. Try more lighter coats. Remember don't rush. Also you local hobby store usually supplies evergreen stuff.
__________________
In Progress    
|
|
#13
01-03-2010, 07:18 PM
|
|||
|
|||
|
Re: starting my Tamiya r33
That's what I was thinkin. I'm waitin for it to cure and I'm gonna fix the runs and a few dirt spots and respray it. i was a lil in a hurry. idk y.. lol
and I checked hobby lobby and i cant find it... >_< any tips for my previous questions??
|
|
#14
01-03-2010, 11:40 PM
|
|||
|
|||
|
Re: starting my Tamiya r33
crap, I used a sharpie to outline the window lines, taped off the clear parts, painted them flat black, pulled the tape off and it looks like crap. a little black got on the parts i didnt want and some flat peeled off. how do I fix this? What's a better way of doing this? is there any thinner that wont ruin the clear plastic? help soon would be great.
|
|
#15
01-04-2010, 06:45 PM
|
||||
|
||||
|
Re: starting my Tamiya r33
For the seats what I did was tried to hand paint the two colours as closely as possible and then did little touchups with the end of a paperclip to do the edges. When it comes to windows I use a tamiya enamel paint marker, and very carefully go over the edges doing minor touchups as necessary. This method requires a very steady hand though. Not really sure on how to help you with removing the paint on there, sorry.
__________________
Steve
|
|
|
POST REPLY TO THIS THREAD |
 |
|
|