|
|
|

|
|
| Search | Car Forums | Gallery | Articles | Helper | Air Dried Dog Food | IgorSushko.com | Corporate |
|
| Latest | 0 Rplys |
|
|||||||
| Pathfinder | Terrano | QX4 | Xterra | Patrol | Safari | X-Trail Nissans greatest 4WDs and SUVs |
 |
 Show Printable Version | Show Printable Version |  Email this Page | Email this Page |  Subscribe to this Thread
|
|
|
Thread Tools |
 03-05-2003, 10:09 PM
|
#1 | |
|
AF Regular
Join Date: Oct 2001
Posts: 81
Thanks: 0
Thanked 0 Times in 0 Posts
|
I thought I would share my idea for PROPERLY mounting rock sliders to the Xterra. Everyone that has abused their sliders knows that the common problem that we all had was that they would flex upward into the pinch seam and some had even pulled the bolt holes out from the frame.
Some have welded their sliders to the frame to add support. I wanted the ability to remove my sliders in the event that body work or other issues arise. I solved this problem by adding c-channel to my frame mounts. This would be very difficult to do in a production environment due to the frame tolerances being sloppy on the Xterra. However, for anyone that has made their own, like me, or someone that wants a shop to modify their sliders I think this provide a very economical solution. I have lifted the truck off the ground with the bolts only finger tight without any flex. With the way the c-channel is holding the frame it makes it literally impossible for the slider to flex or pull the nuts through the frame. 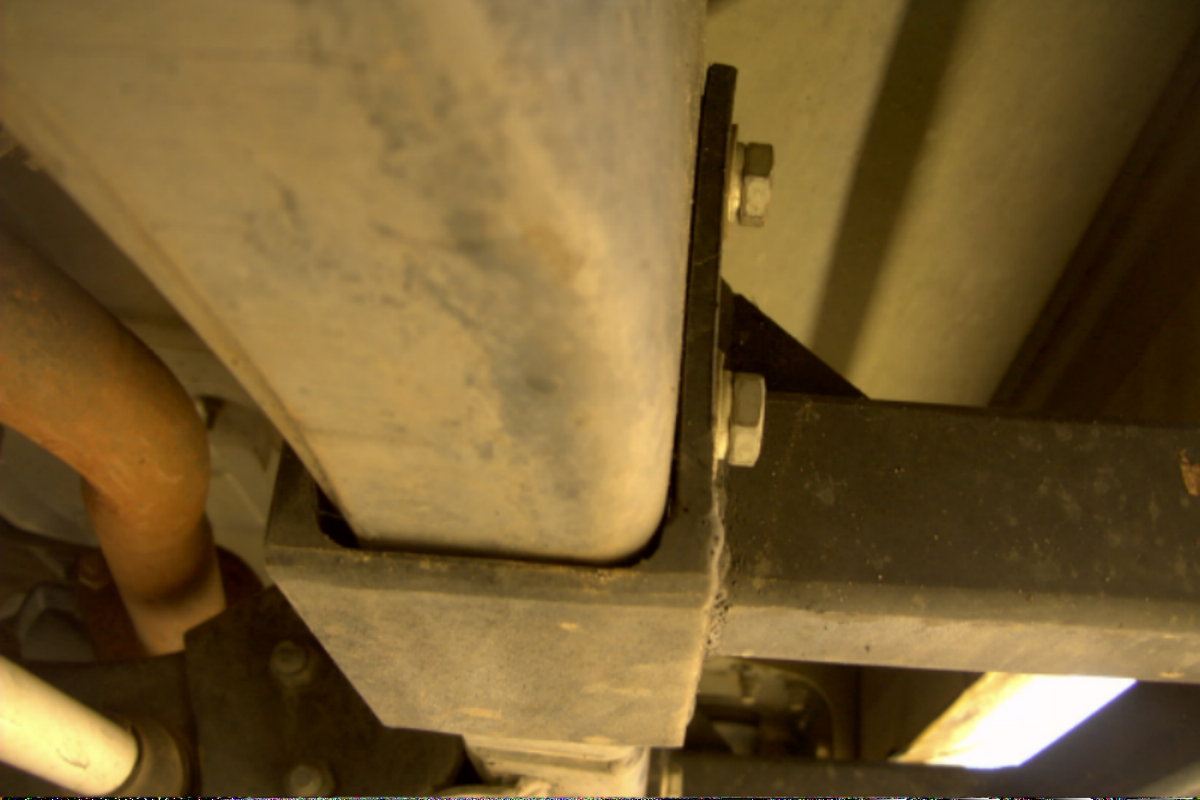 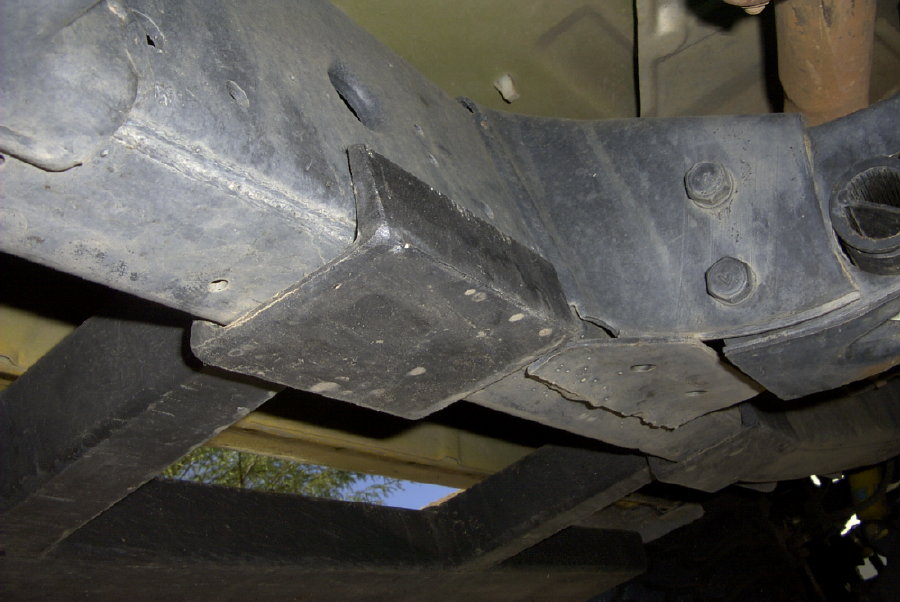  I only did this to the front and middle mounts since the rear mount is above the leaf spring hangers. These two provide all the support you need. Once you do this mod and test it as I have, you will find you don't need to drill through the frame or add any more metal. The c-channel exactly measures 3" outside and it's 1/4" thick. The inside measurement varies since it has a taper to it, but it just happens to fit snugly around the frame when slid all the way up. Depending where your existing mounts end up, you have to cut one side of the channel down so that it matches your mounting plate. I used a 4-1/2" grinder with a cutting disk. Then I tack welded them on, took the sliders off and welded the outside and inside. Make sure your inside welds are nice and flat otherwise grind them down. If you don't, the sliders won't slide up flush against the bottom of the frame. Let me know what you think.
__________________
SLR 3" Lift, SLR IV Intake, SLR Steering Stabilizer, 32" BFG MT km's, Warn Premium Locking Hubs, Gibson Exhaust, Custom Rock Sliders, Custom Safari Rack, CO2 Air Tank, Daylighters, CB, with more to come. |
|

|

|
|
03-06-2003, 04:37 AM
|
#2 | |
|
AF Regular
Join Date: Feb 2003
Posts: 154
Thanks: 0
Thanked 0 Times in 0 Posts
|
Craig -
Was this a mod to an existing [production/aftermarket] set of sliders, or did you fabricate the whole thing??? From the one pic it looks like the outboard "pontoon" would replace the sidestep, too... |
|
|
|
|
|
03-06-2003, 08:06 AM
|
#3 | ||
|
AF Regular
Thread starter
Join Date: Oct 2001
Posts: 81
Thanks: 0
Thanked 0 Times in 0 Posts
|
Quote:

__________________
SLR 3" Lift, SLR IV Intake, SLR Steering Stabilizer, 32" BFG MT km's, Warn Premium Locking Hubs, Gibson Exhaust, Custom Rock Sliders, Custom Safari Rack, CO2 Air Tank, Daylighters, CB, with more to come. |
||
|
|
|
|
03-06-2003, 10:31 PM
|
#4 | |
|
AF Enthusiast
 
Join Date: Mar 2001
Posts: 1,064
Thanks: 0
Thanked 0 Times in 0 Posts
|
Good work Craig!
I just took the easy way out on my EOE's and welded a cheater bead across the bottom....easy to grind off "if" I have to repair them.
Nice work Craig!
__________________
We don't give a damn how loud your stereo is! Did you read your owners manual yet? V.P. of PNWX |
|
|
|
|
| ||||||||||||||||||
|
POST REPLY TO THIS THREAD |
 |
|
|


