|
|
| Search | Car Forums | Gallery | Articles | Helper | Air Dried Beef Dog Food | IgorSushko.com | Corporate |
|
|||||||
| WIP - Street Post topics for any "Works In Progress" street vehicles projects in this sub-forum. |
 |
 Show Printable Version | Show Printable Version |  Subscribe to this Thread
|
|
|
Thread Tools |
|
#1
 05-02-2012, 10:29 PM
|
|||
|
|||
|
Toyota Land Cruiser, tamiya 1:24
Hey everyone. I'm new to this forum and also a rather inexperienced modeller. By inexperienced I mean a 2 years' period during which I've been experimenting with plastic kits.
Here's my most recent project - toyota land cruiser. It's a great kit, though, it could be a bit more detailed in certain areas such as the engine or the interior. I've decided to spice it a little bit. I intend to make it look like a well mentained vehicle, though, a 22 year old car. Body will probably be spotless, the chassis/suspension/engine - not so much. Here's what's been done: 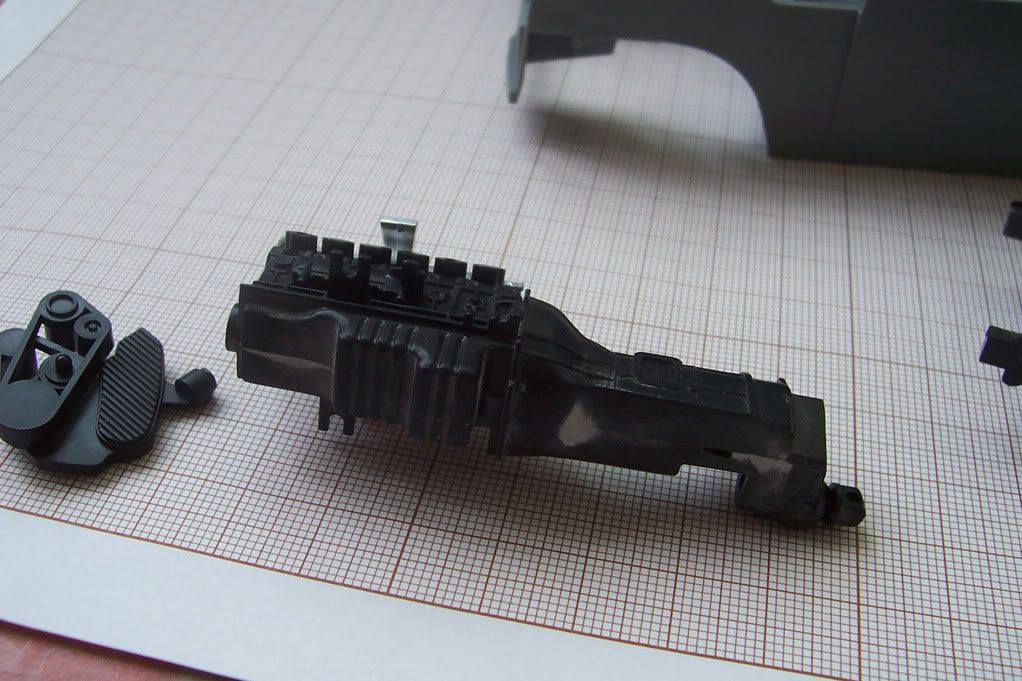 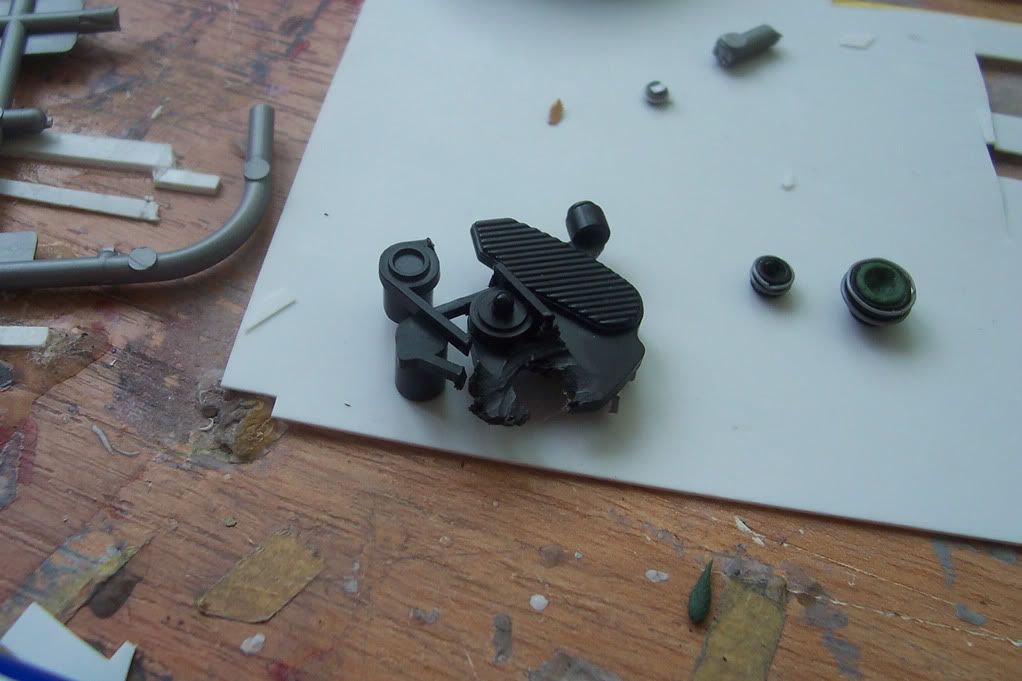 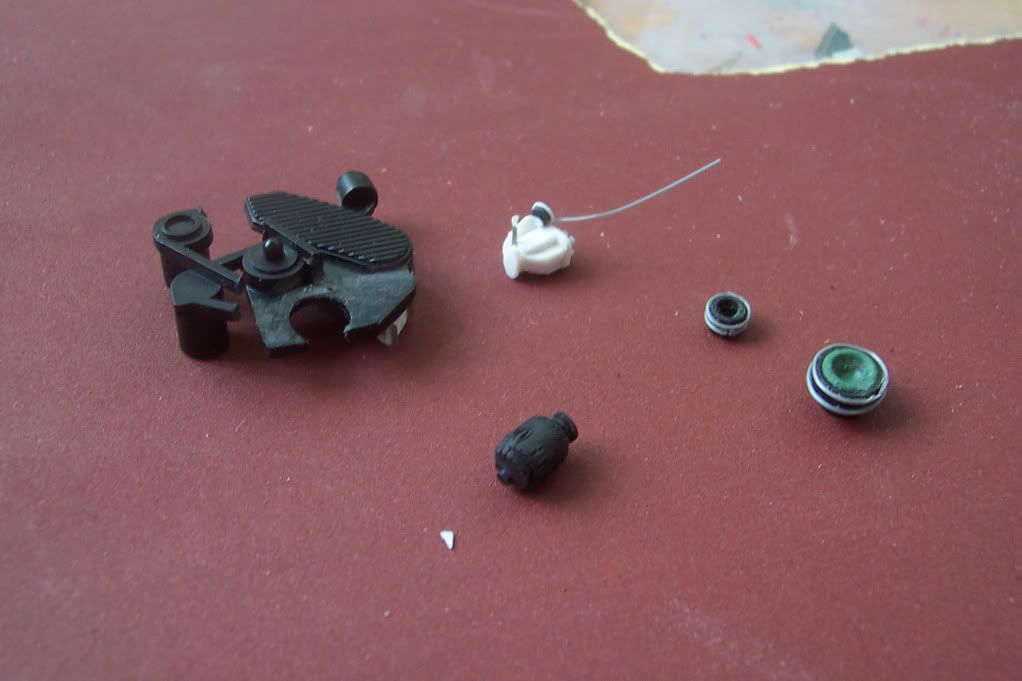 Have decided to add/ replace some stuff like A/C compressor or alternator 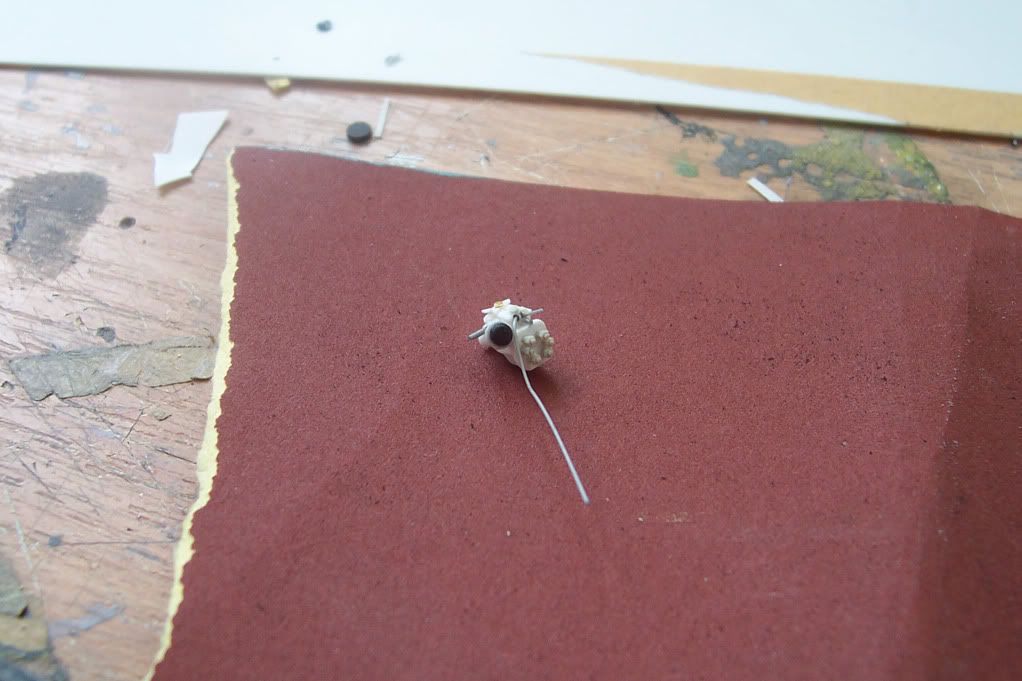 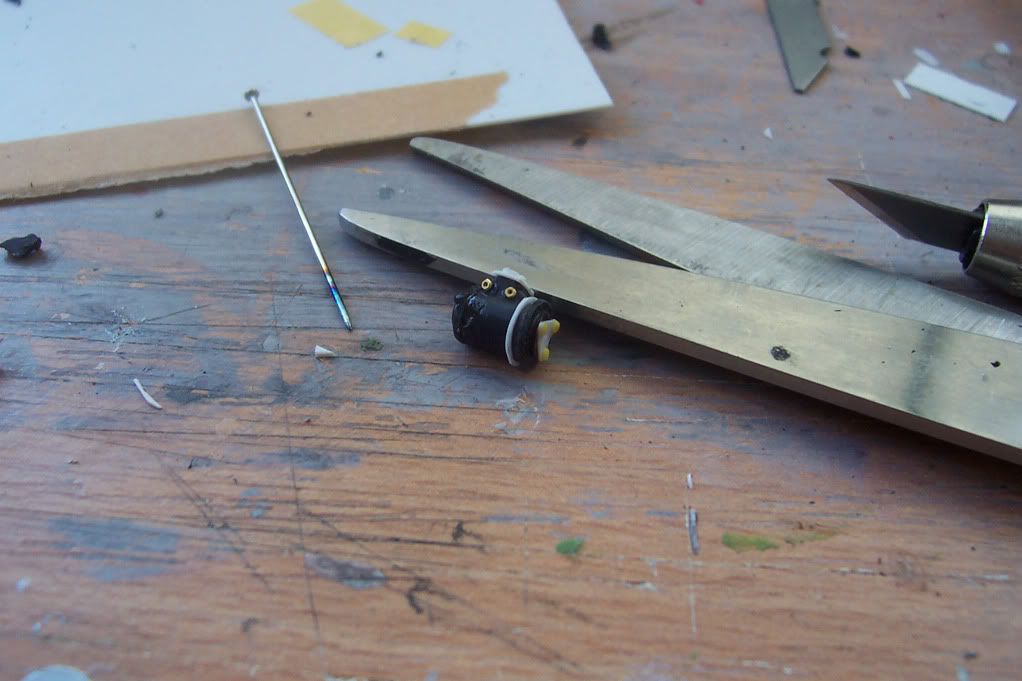 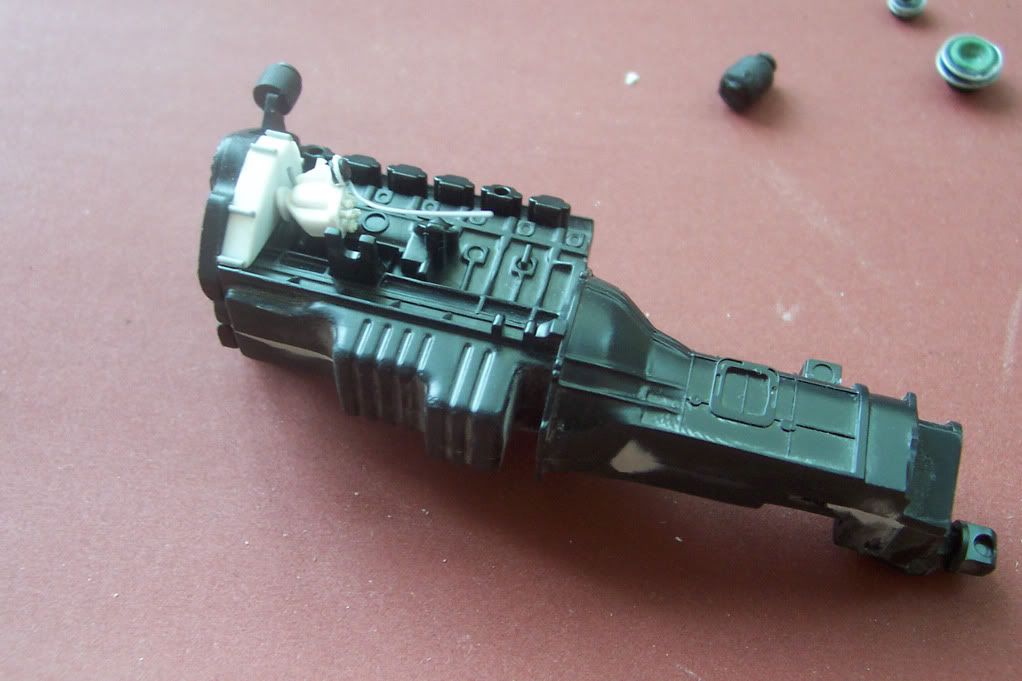 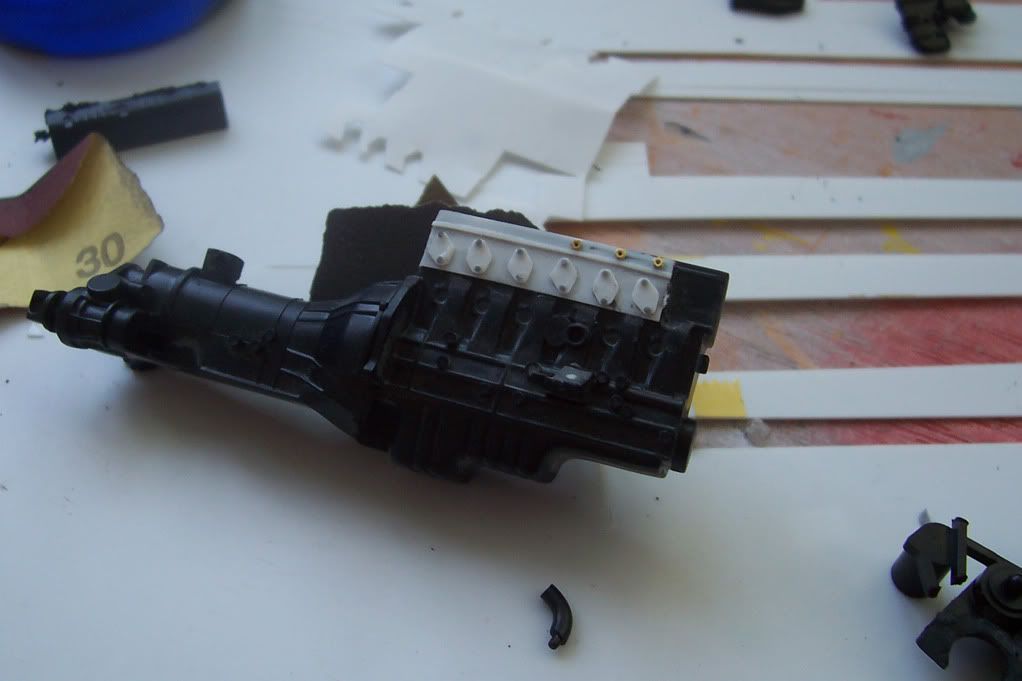 Originally, the turbo charger is one, long tube - nothing fancy. It had to go. 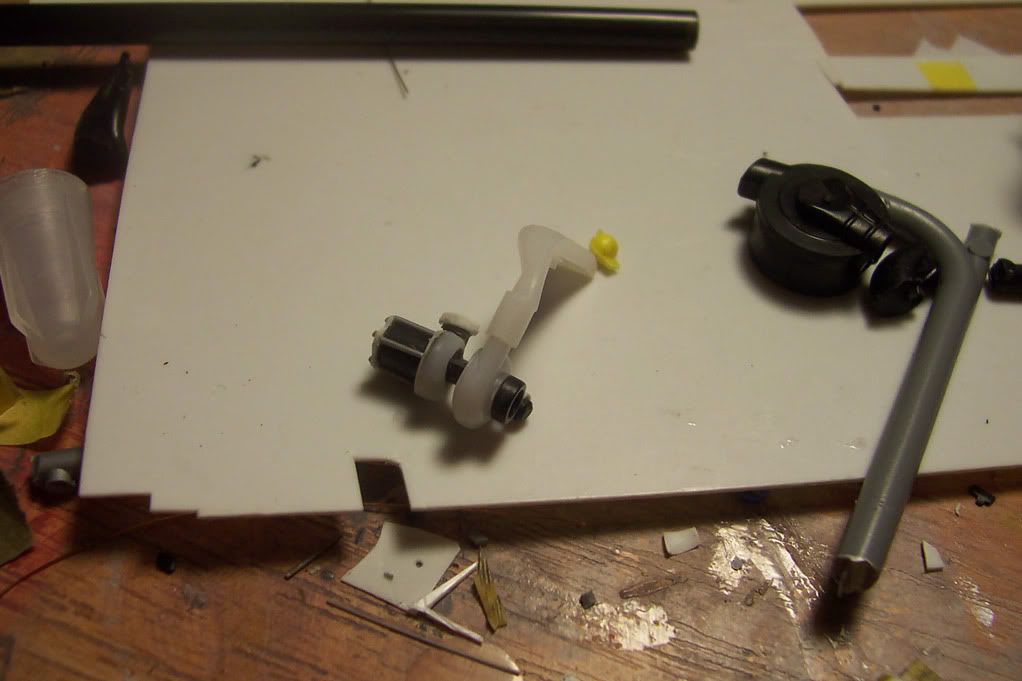 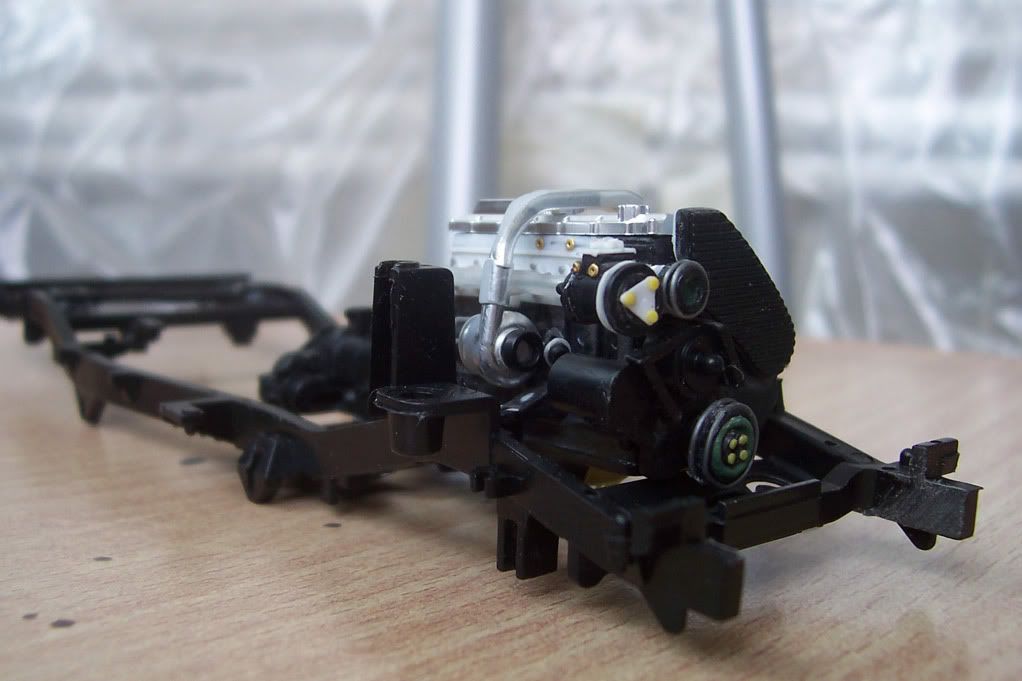 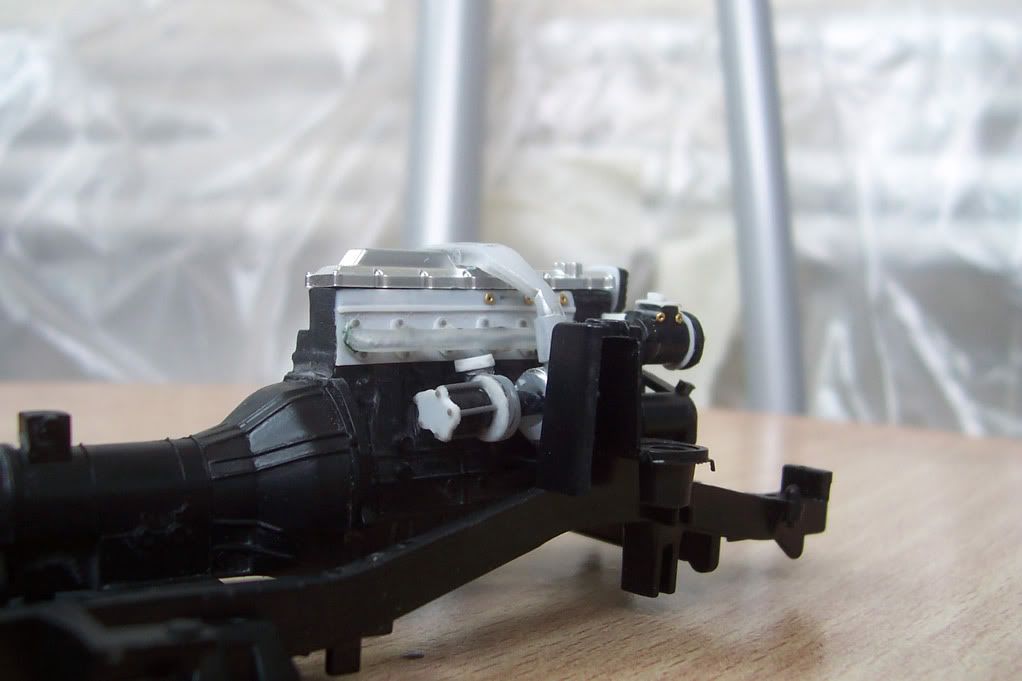 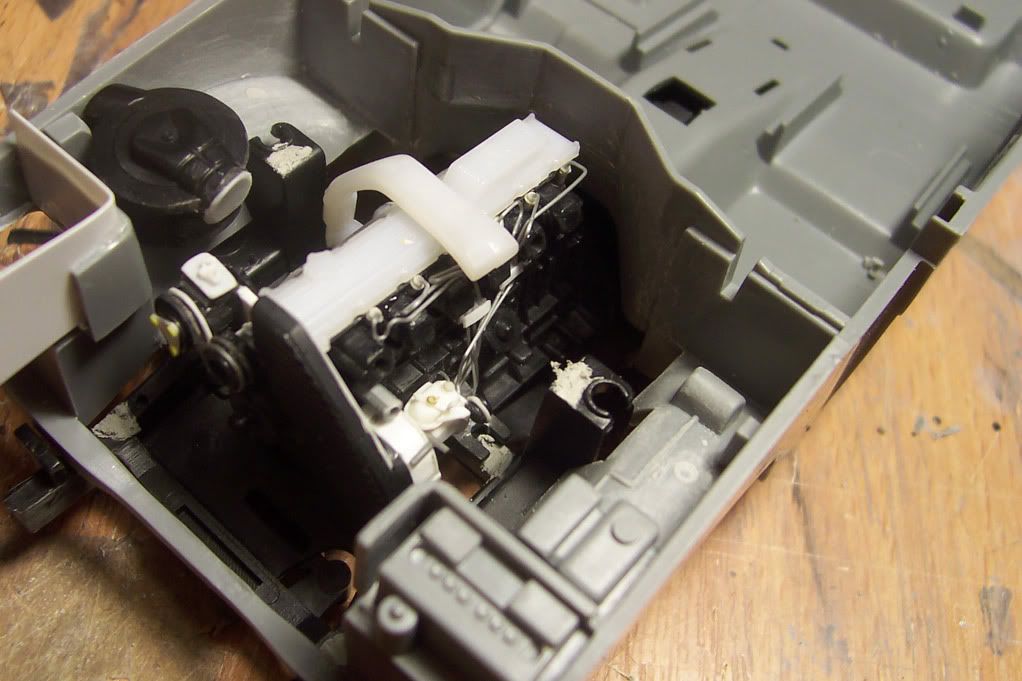 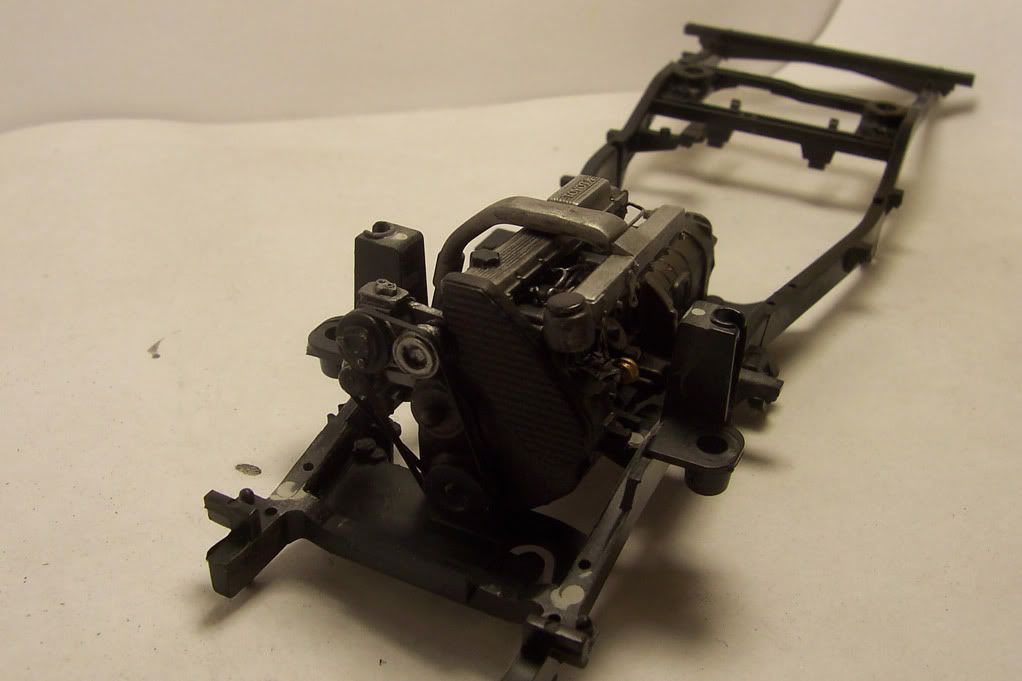 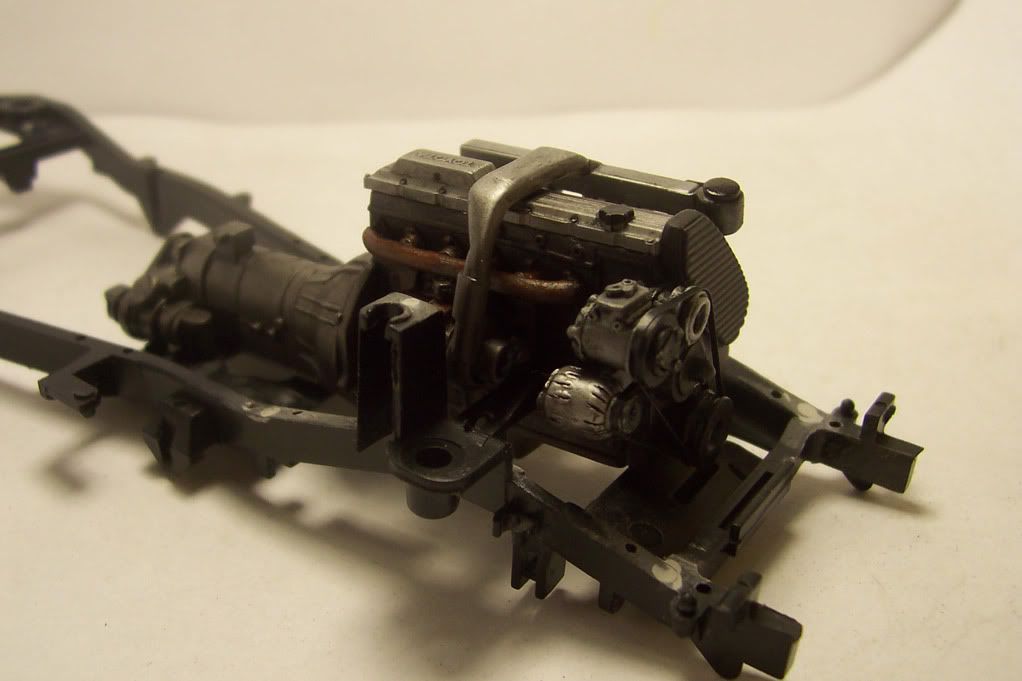 Didn't plant to detail the chassis to much - just a few cables 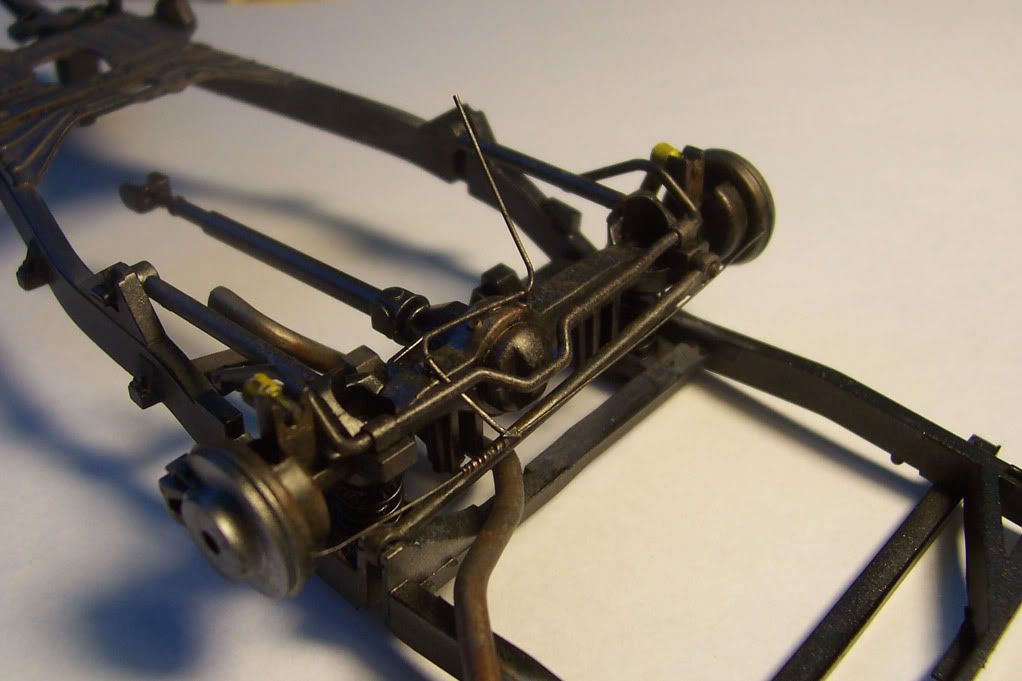 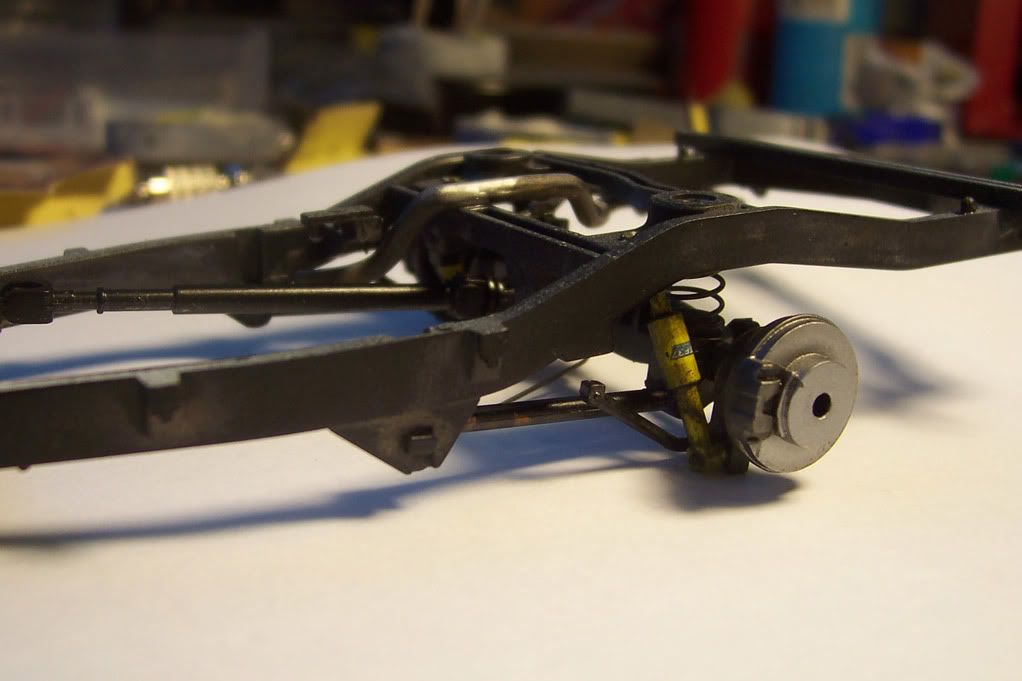 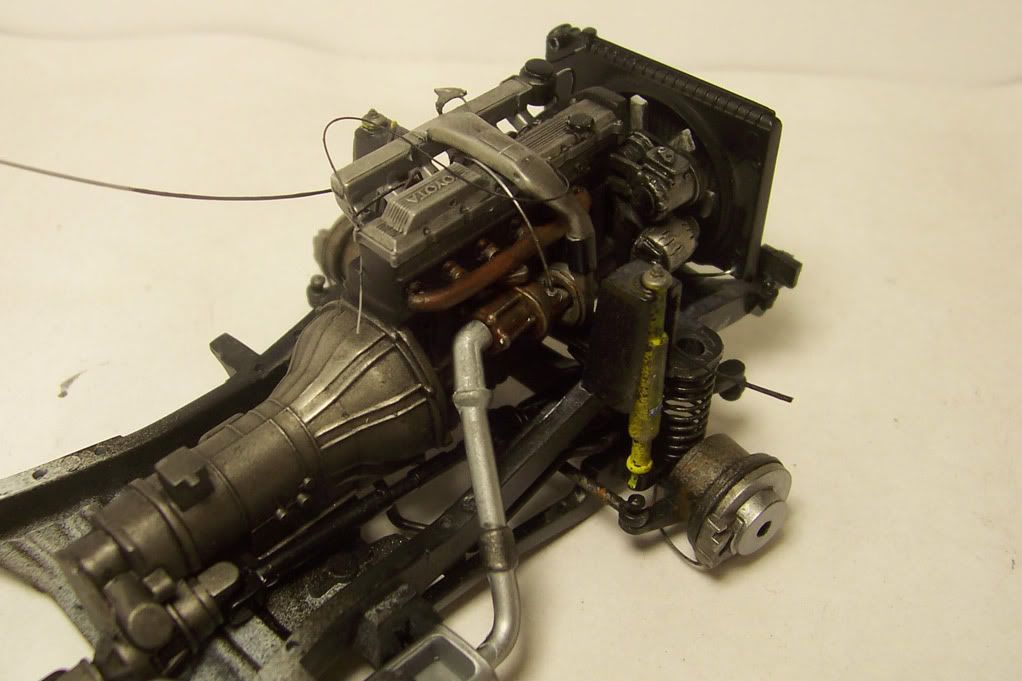 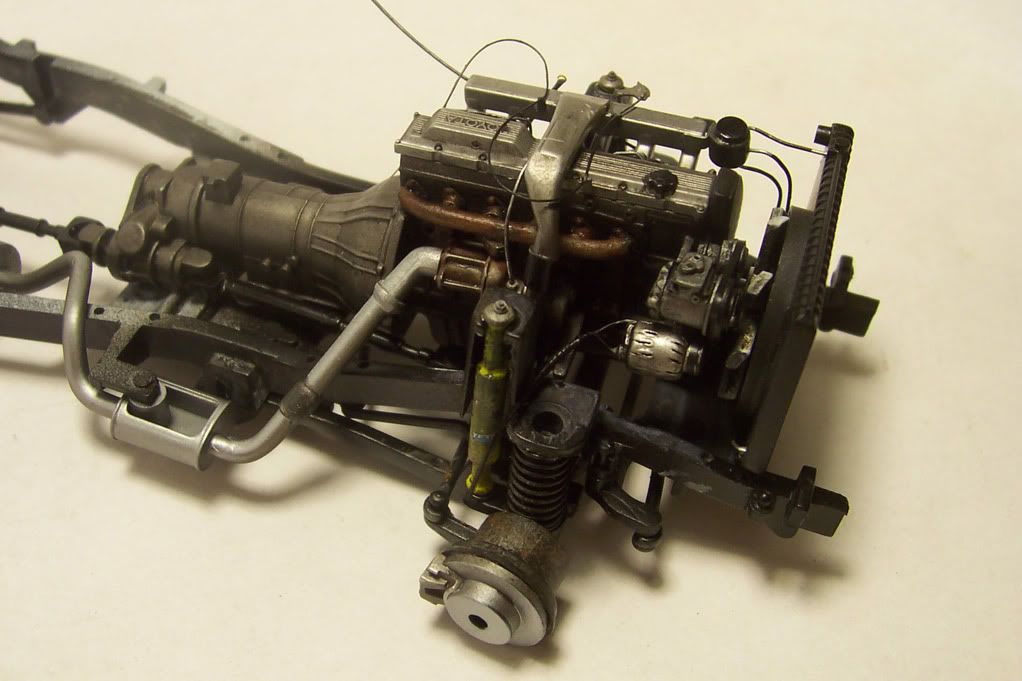 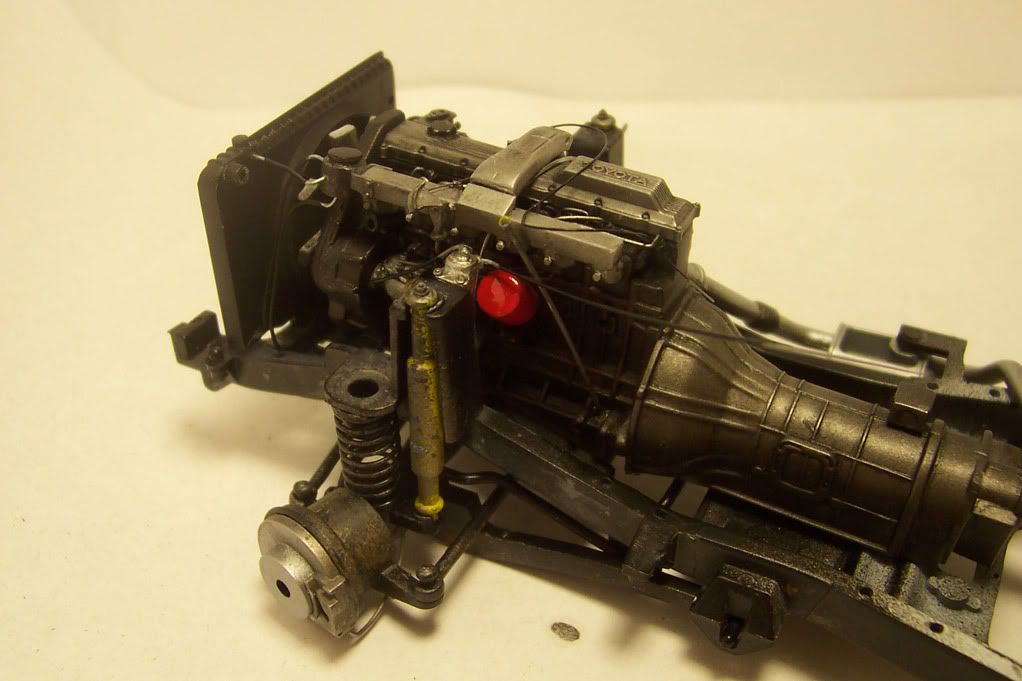 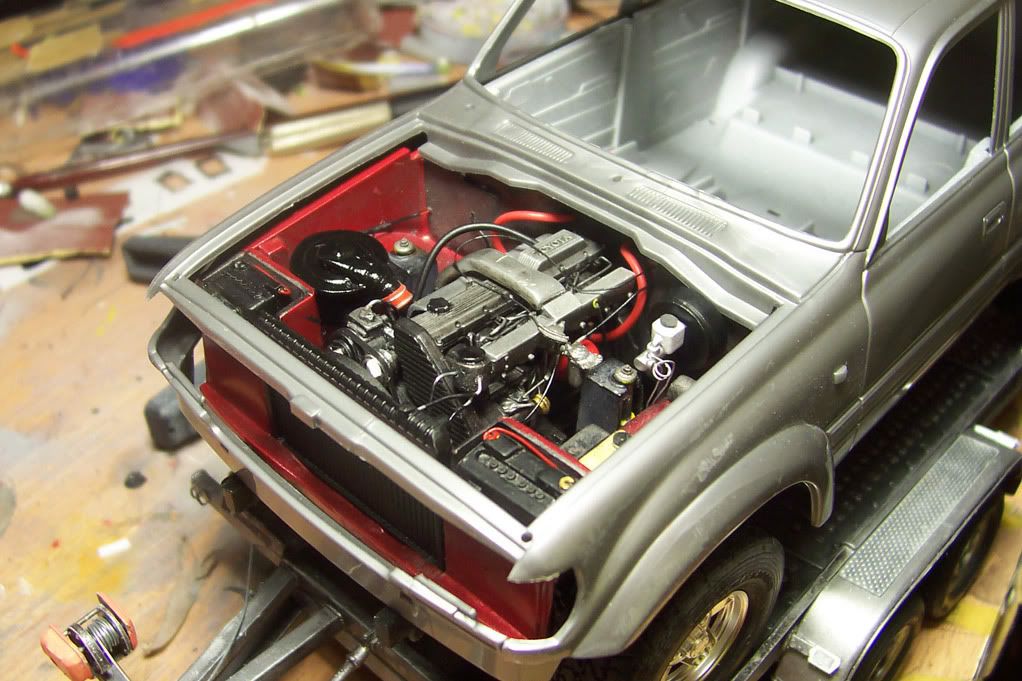 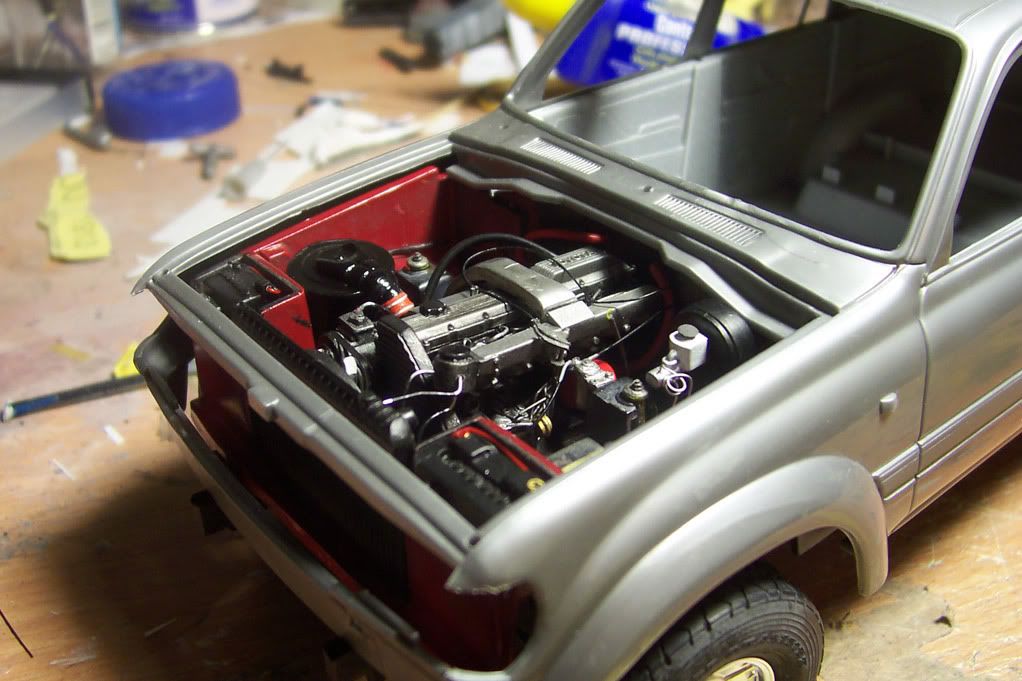 And the reason why I've decided to make the off-road. Didn't have any vehicle suitable for the job  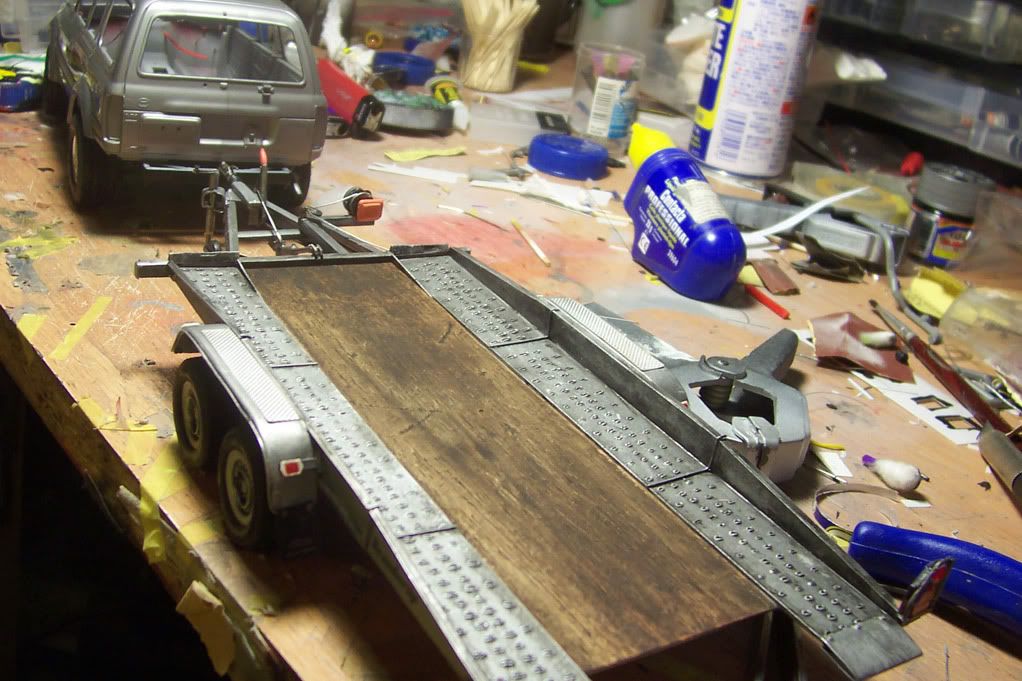 Priming and pannel lines 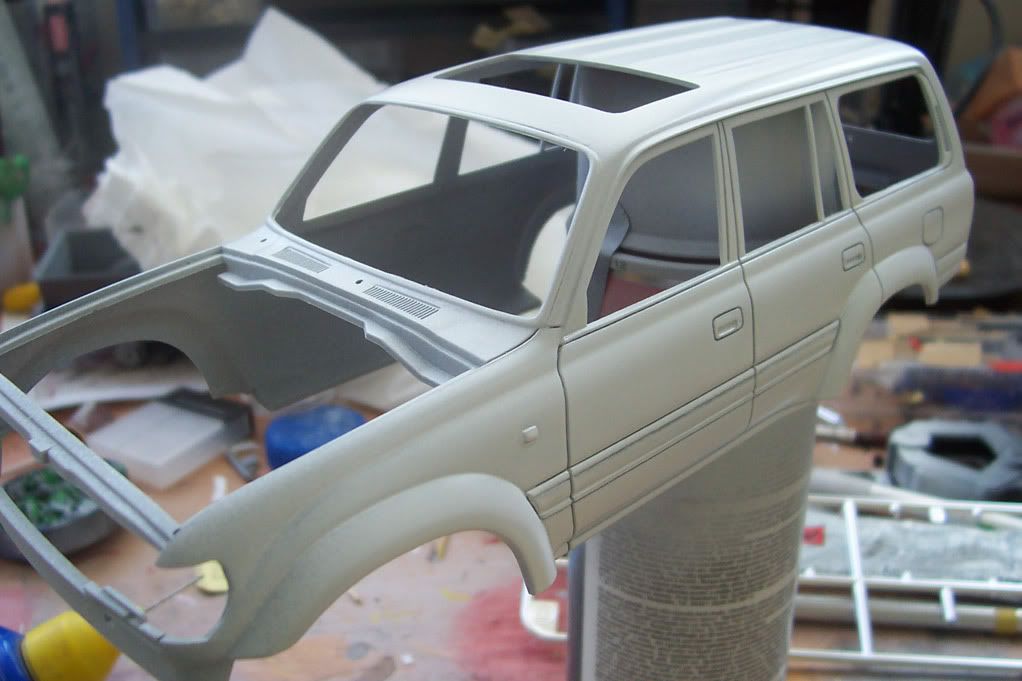 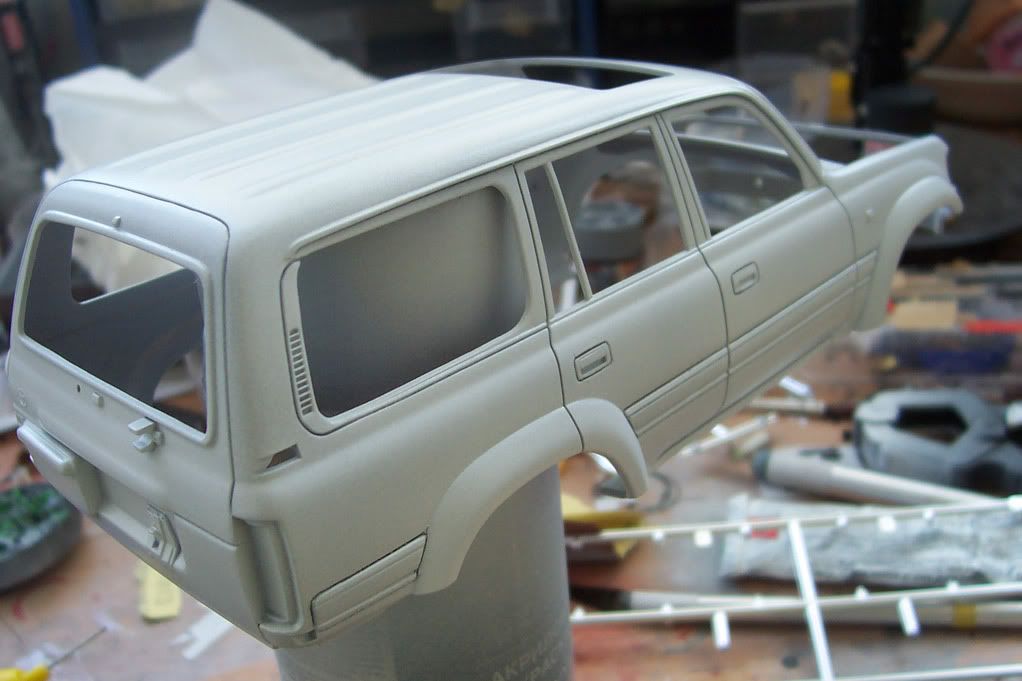 Also, I've decided to make the interior more interesting.  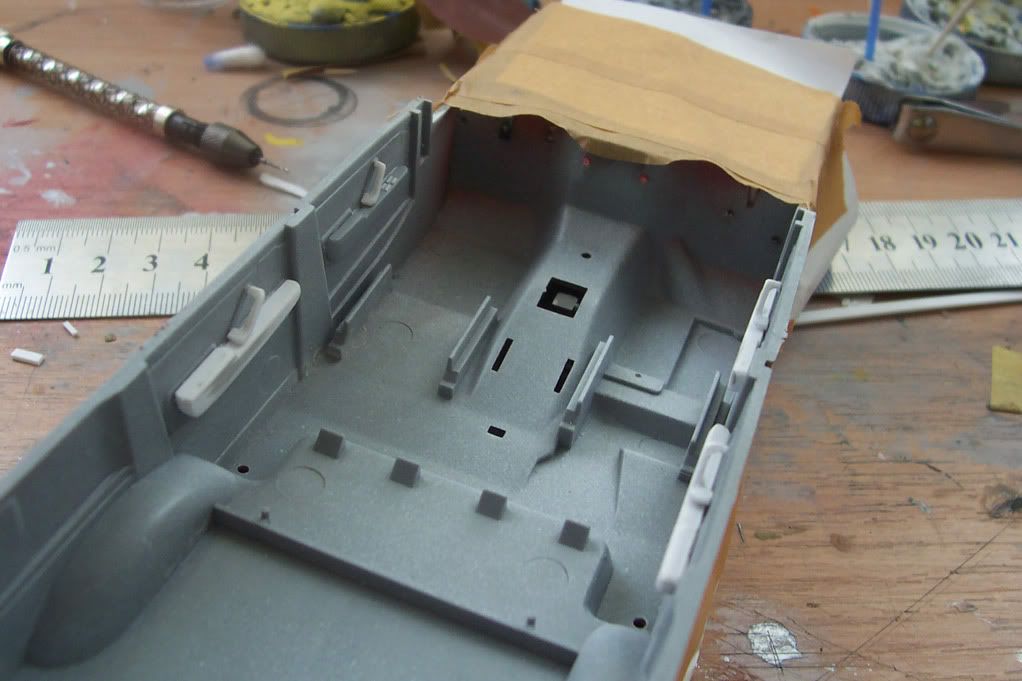 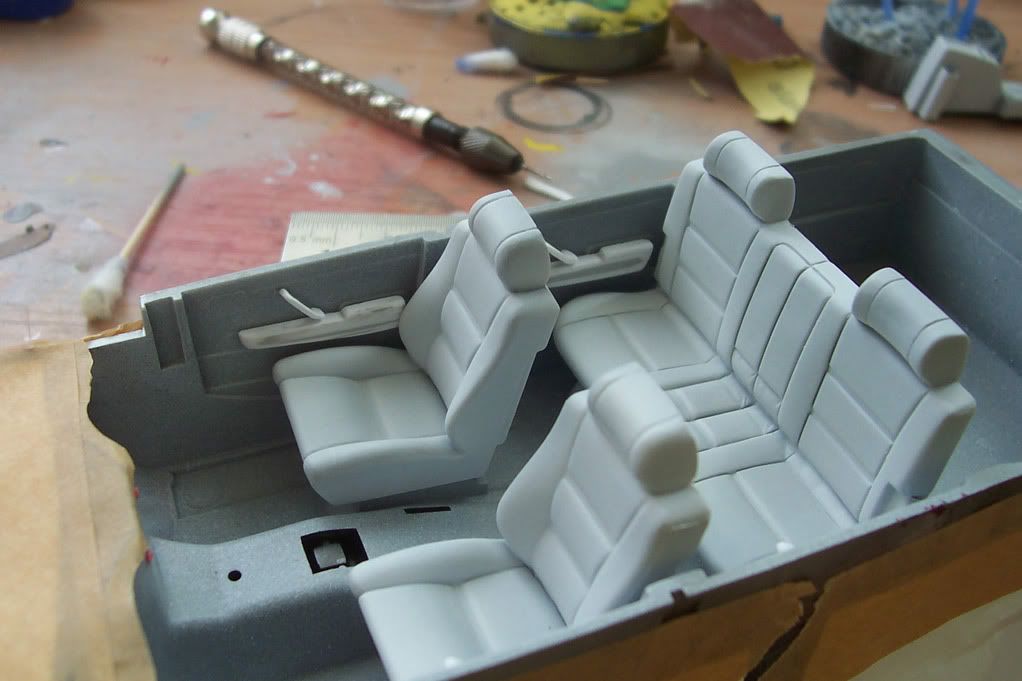 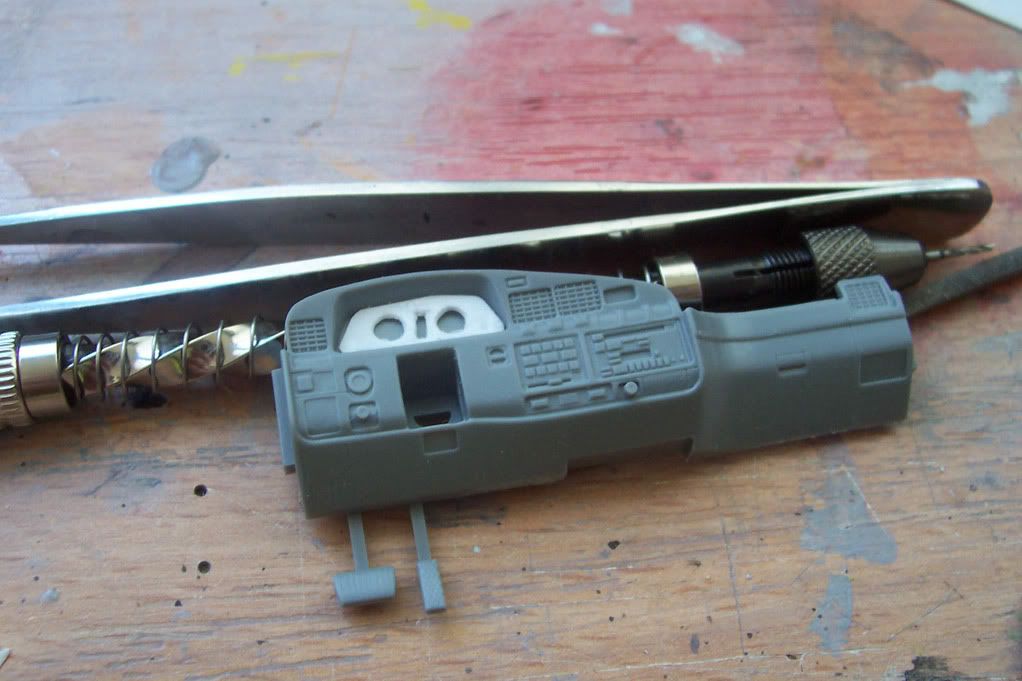 cheers! 
|
|
#2
05-03-2012, 06:08 AM
|
||||
|
||||
|
Re: Toyota Land Cruiser, tamiya 1:24
thats some pretty awesome detail!!
__________________
   
|
|
#3
05-03-2012, 02:59 PM
|
|||
|
|||
|
Re: Toyota Land Cruiser, tamiya 1:24
wow. nice details. love the engine/tranny weathering, and the trailer is way cool!

__________________
olly olly oxen free
|
|
#4
05-03-2012, 03:10 PM
|
|||
|
|||
|
Re: Toyota Land Cruiser, tamiya 1:24
thnx. trailer is a scratch. I made it some time ago to carry Alfa GTA but had no tractor for it. Hence, the toyota
Right. Ive done some painting and masking. I have to say I was disapointed with the surface i got straight after applying clear but i think I've managed to make it look so, so. After the first 2 layers of clear I decided to mask the black stuff to have better control of the edges. I'll paint them mat after the last clear coat.  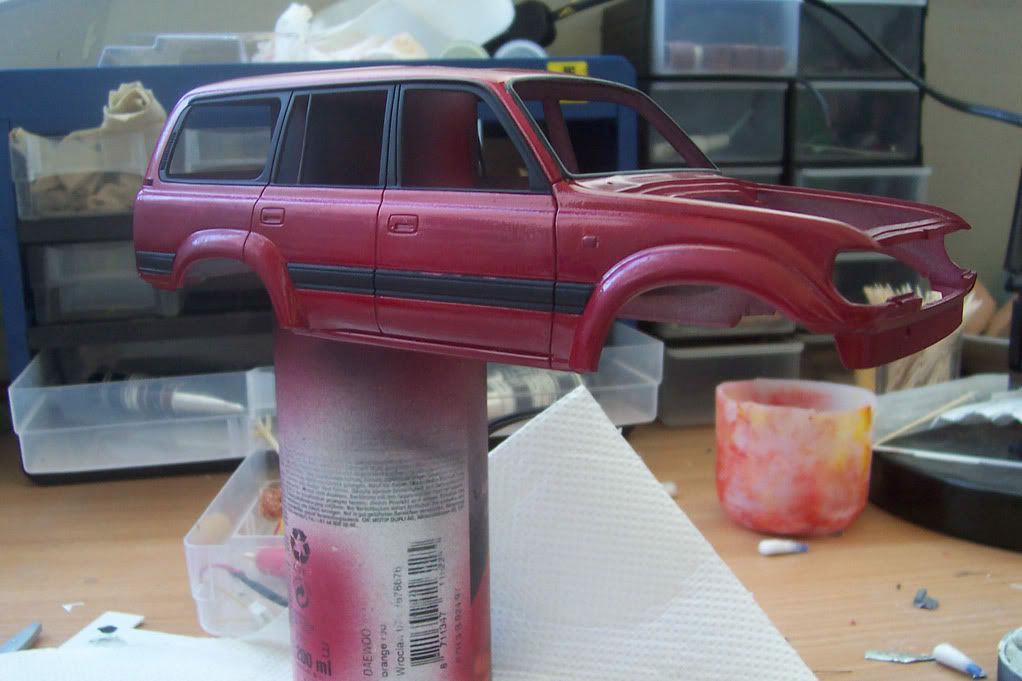 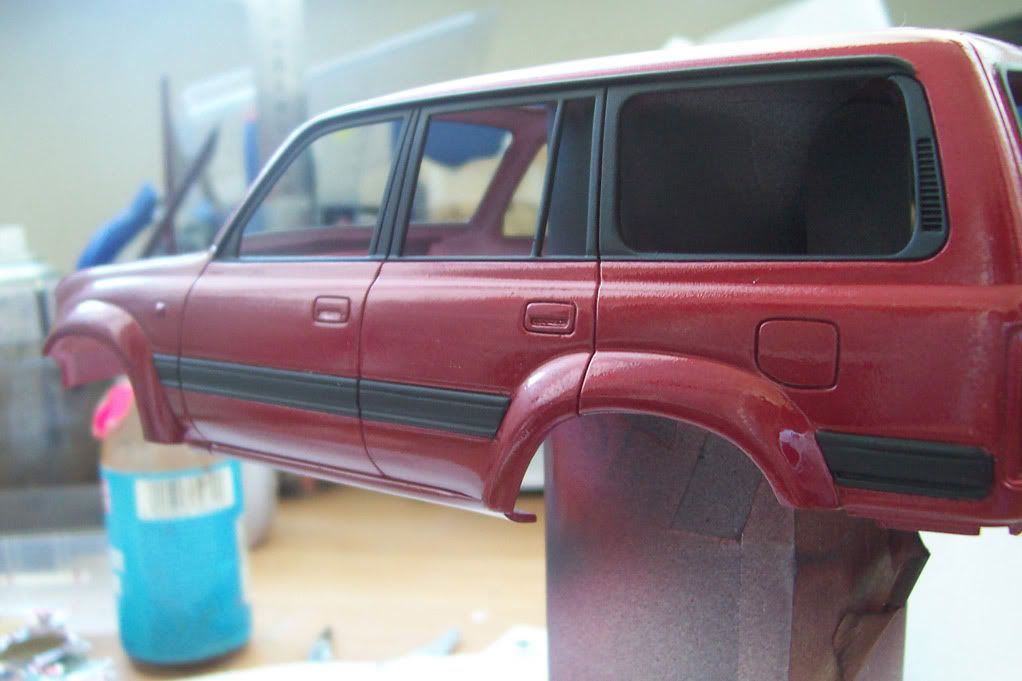 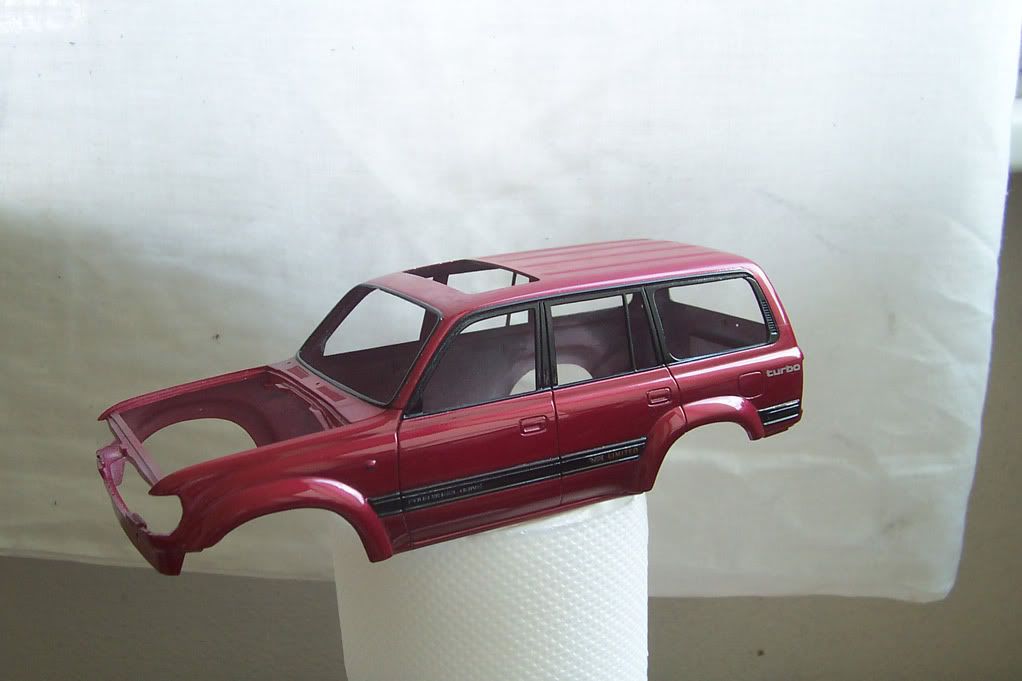  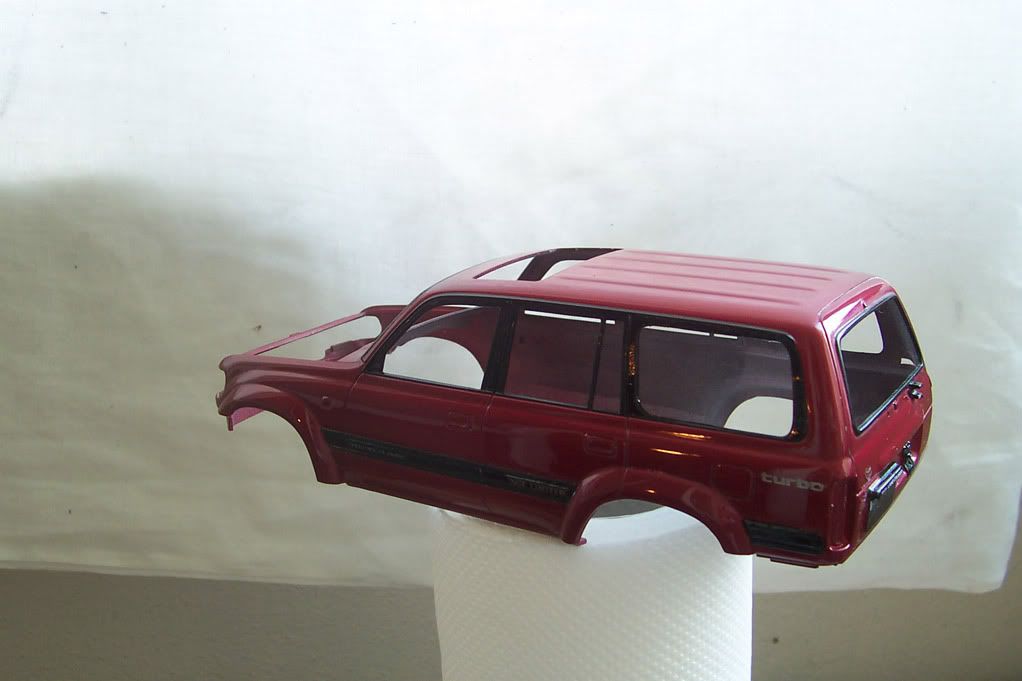 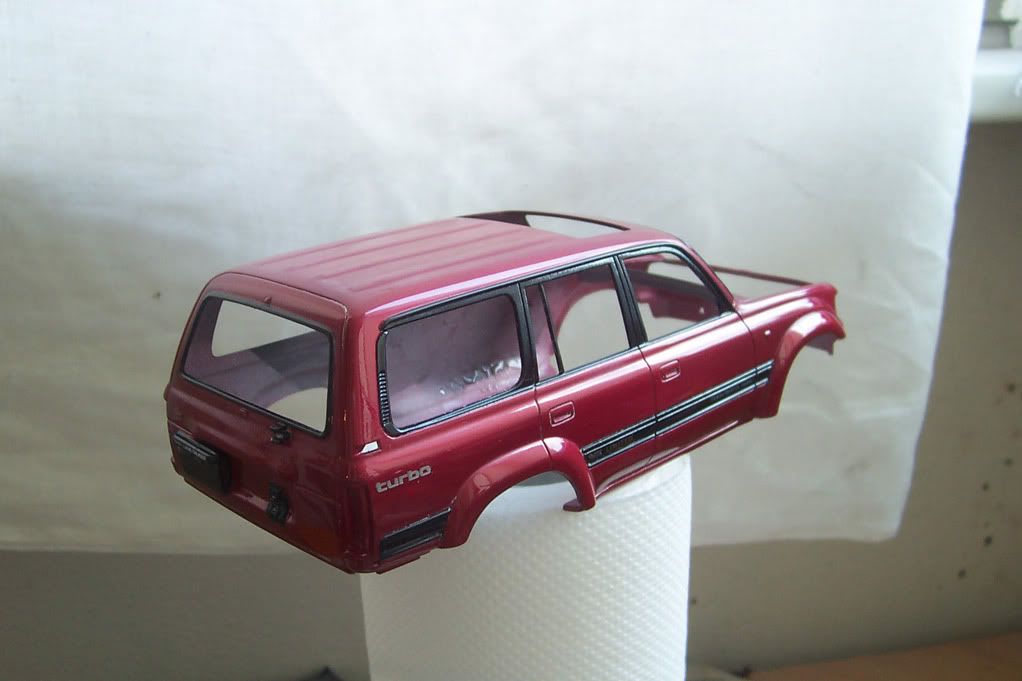 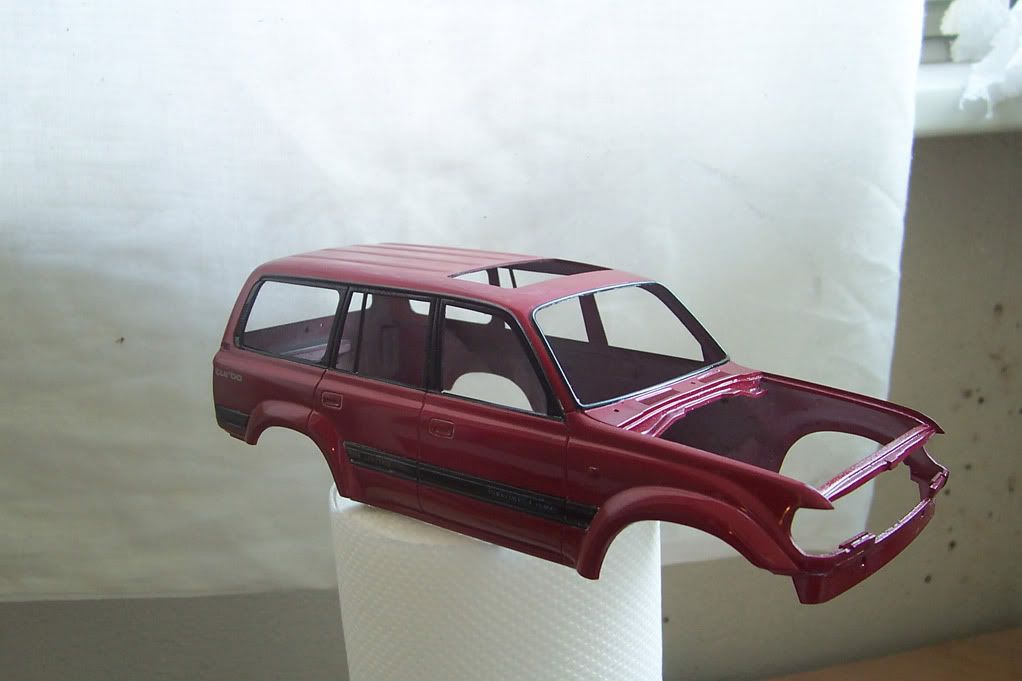 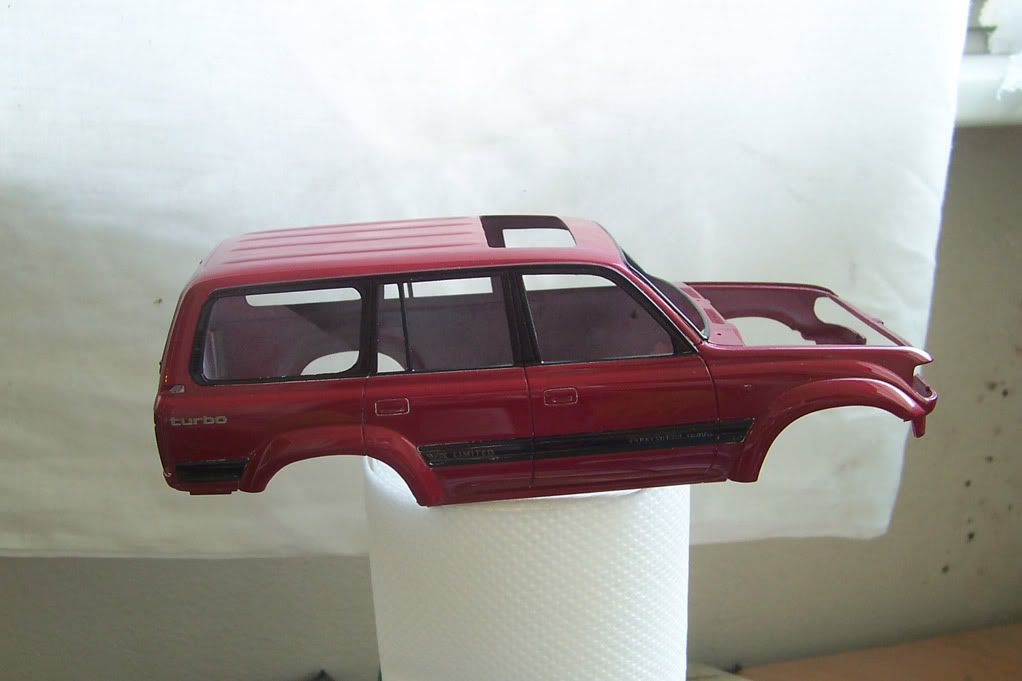 pzdr. Last edited by MartiniOCP; 05-05-2012 at 08:04 AM.
|
|
#5
06-03-2012, 12:35 PM
|
||||
|
||||
|
Re: Toyota Land Cruiser, tamiya 1:24
Looking good! I built this kit not long ago and the masking sure was about to make me go insane. Awesome job on the engine too although I believe the radiator hose should go into the engine behind the power steering reservoir.
|
|
#7
06-04-2012, 09:36 AM
|
||||
|
||||
|
Re: Toyota Land Cruiser, tamiya 1:24
Very nice start! I like how you applied dirt to the suspension (especially the shocks)- it looks spot on accurate. And that trailer looks terrific.
Looks like you had some paint chipping here on the front door when you removed the masking- To prevent this, after you have done the masking and before you paint, it helps to gently sand the areas to be painted with fine sandpaper (especially edges next to the tape). This gives the new paint more 'tooth' to grip, but the masking tape protects the covered areas from sanding. Also after painting and before the masking tape is removed, you can try gently running a toothpick along the edges of the tape. This helps break the edge of the paint free of the tape, before the tape gets the chance to pull the paint up with it.
__________________
PHOTOBUCKET SUCKS
|
|
#8
06-04-2012, 12:32 PM
|
|||
|
|||
|
Re: Toyota Land Cruiser, tamiya 1:24
Thnx very much for the replies guys
Quote:
) It was an easy fix tho. Thnx for the tip with the sand paper. I used it after masking but, as it seems, I wasn't thorough enough around the edges. To be honest, I got spooked by the level of your work here and decided to wait a bit with the updates on the build. Here's what's been done: Interior work Decided to get ride of the dividing line on the dashboard 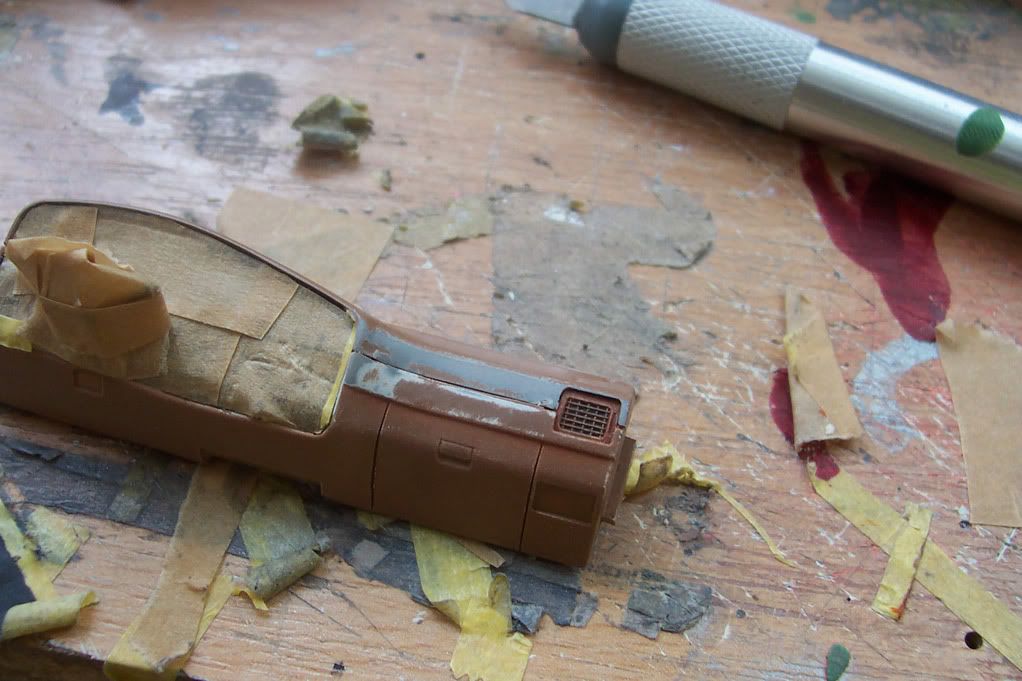 Here's my attemp to add some shodows to the seats. What i actually added was some dirt - looked nothing like shodows. Eventually, I got rid of it and decided to try pre-shading. Had some probs with my airbrush and it didn't go very well. Final effect: 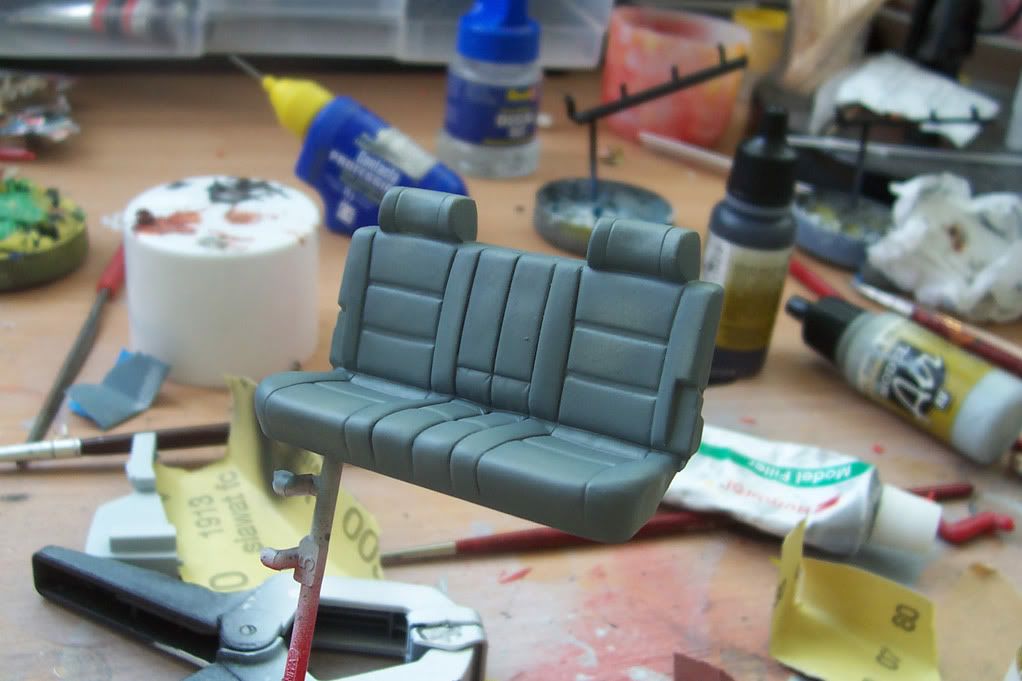 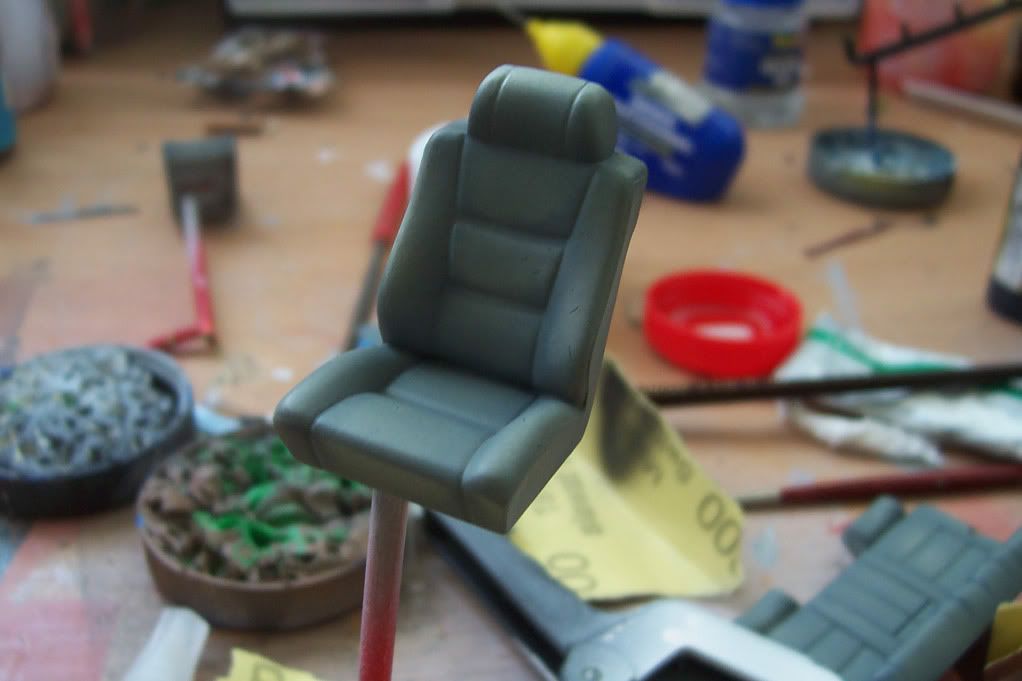 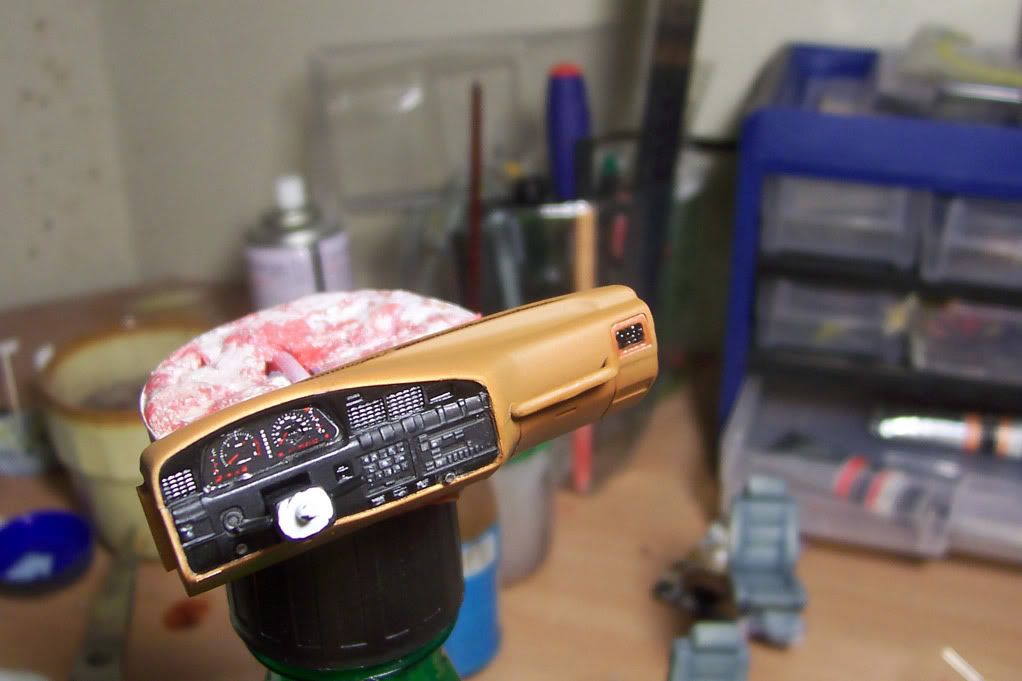 the whole interior: 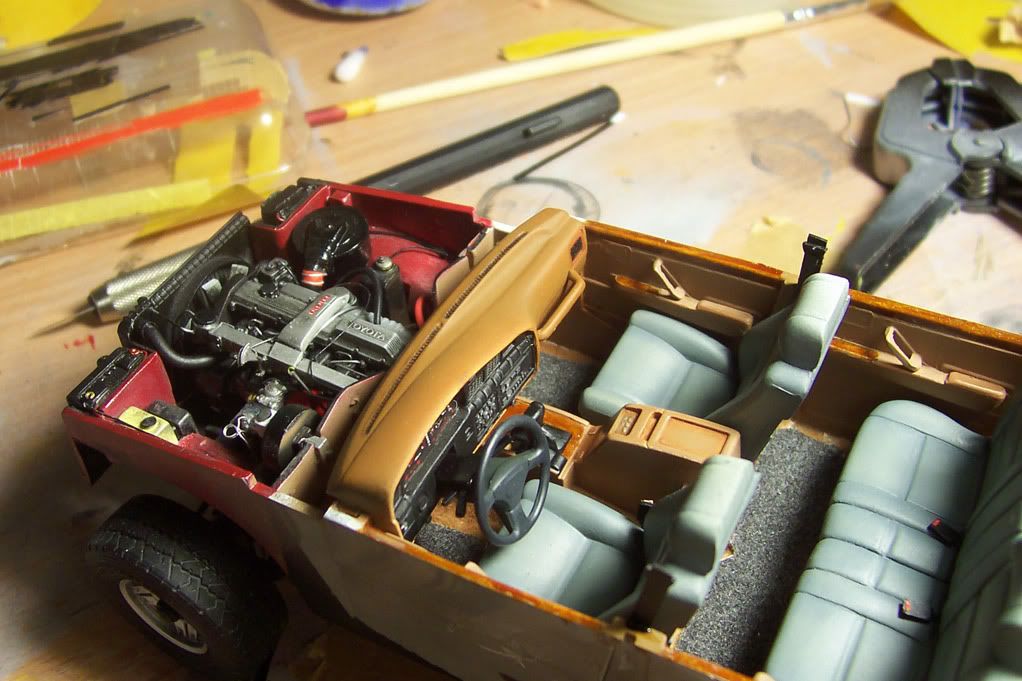 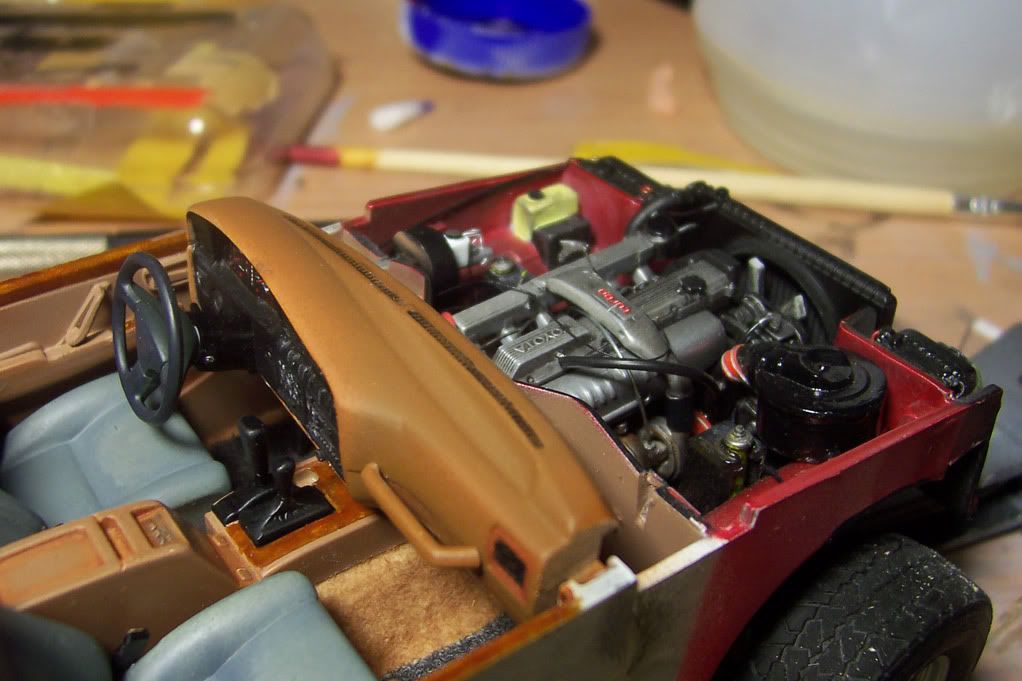 Body work story Did some polishing  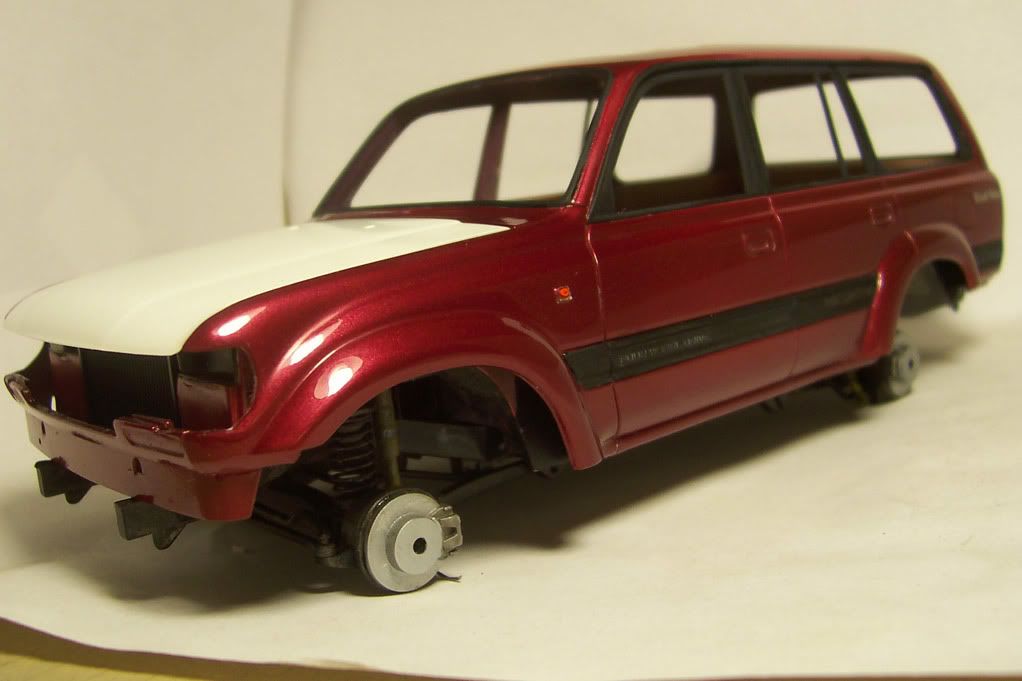 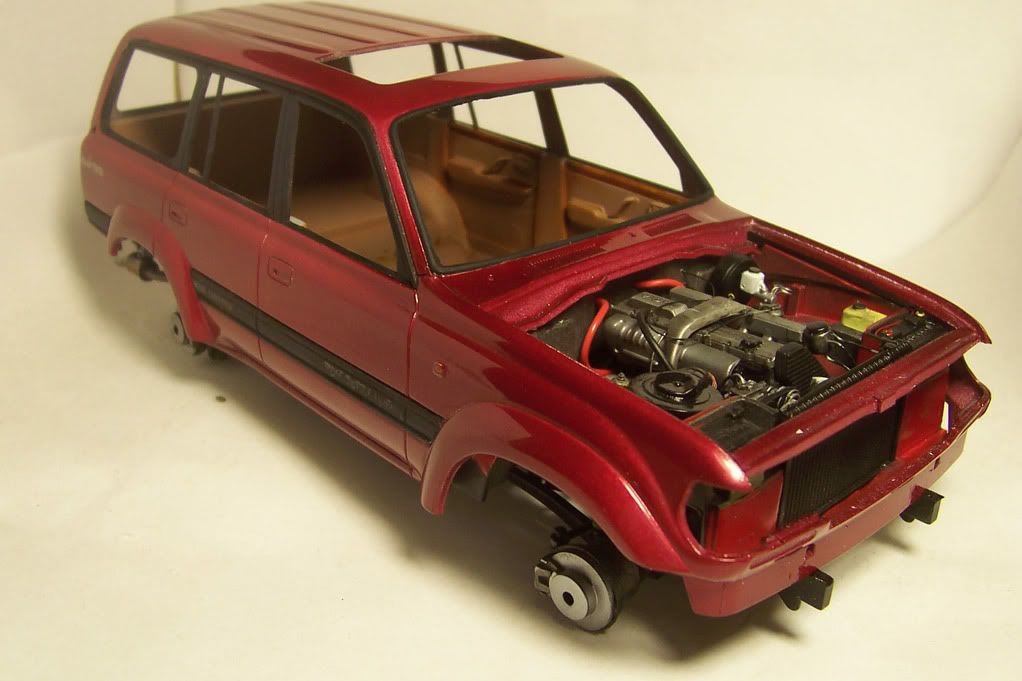 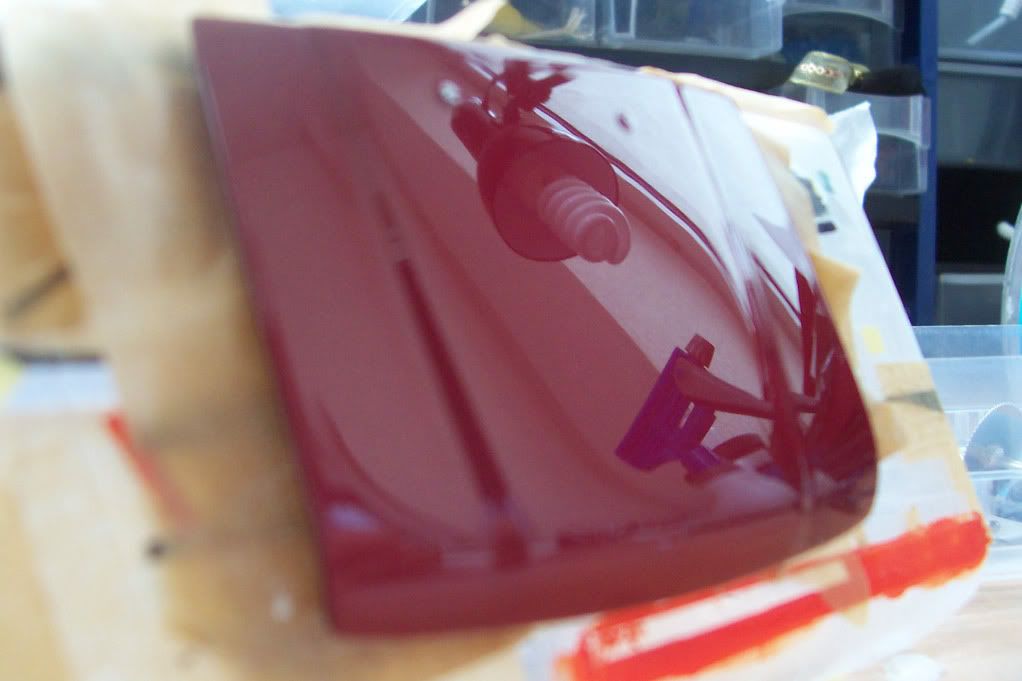 Dramatic events Unfortunatelly, I've noticed that one of the decals wasn't completely covered by the clear paint. Some air bubbles started to show through. 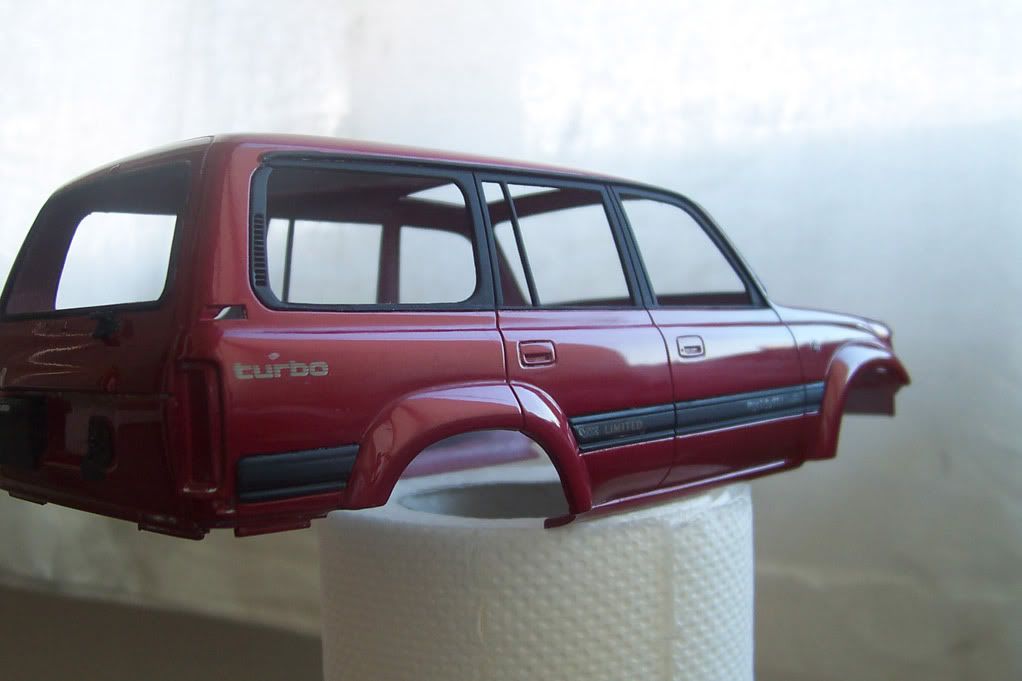 I wanted to sand the decal, hoped that the under-layers of the clear coat would be enough to protect the base coat - I was wrong. 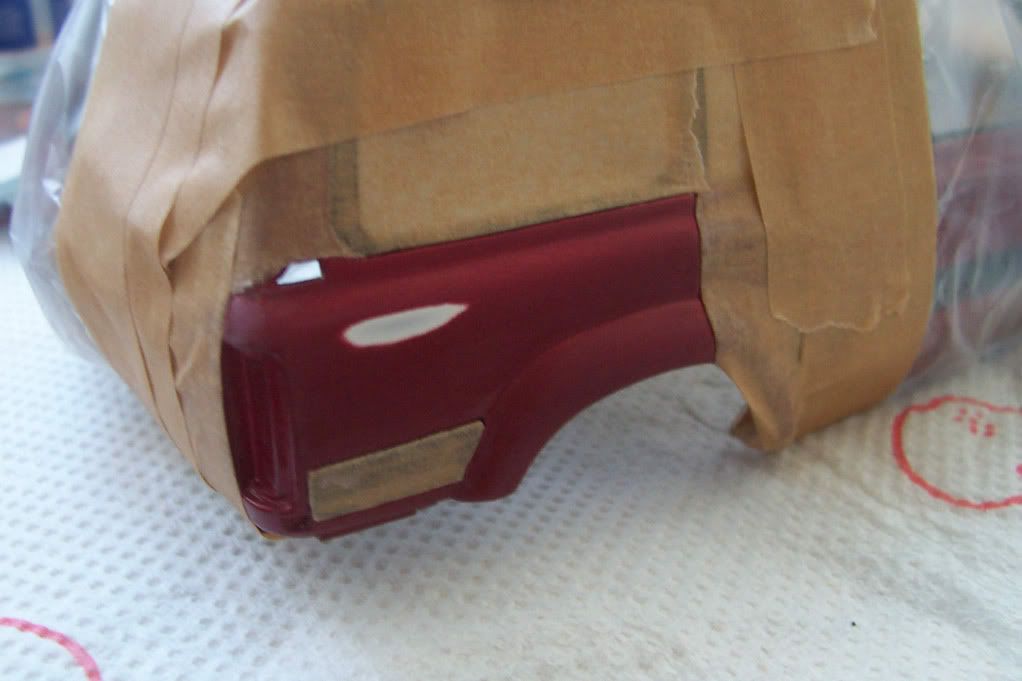 I had to paint the whole thing again and.....this happened 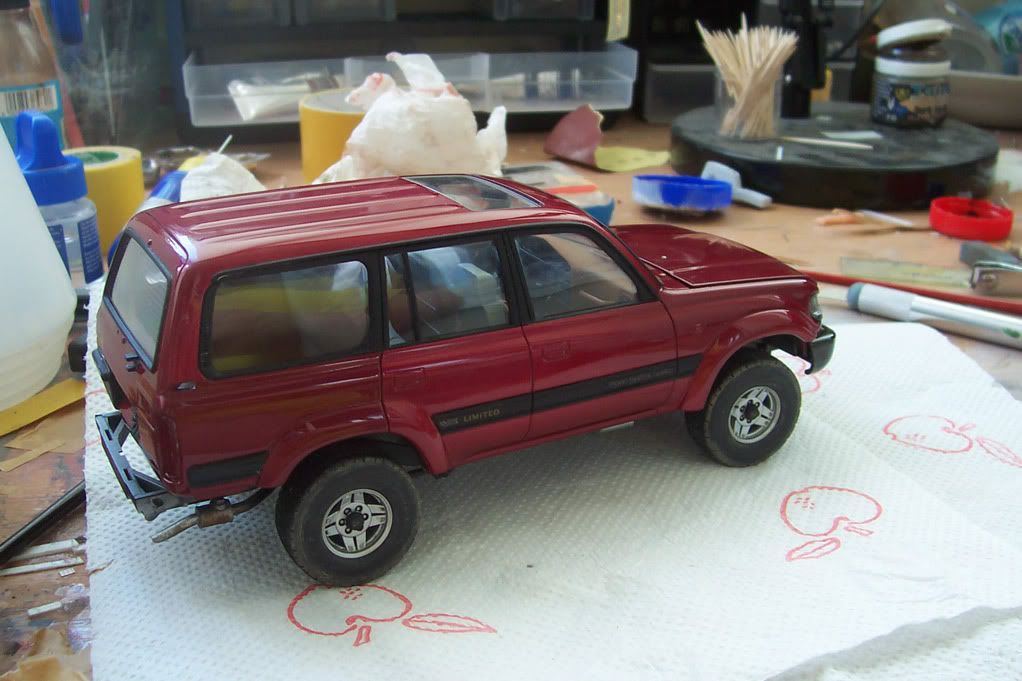 The color is absolutely rubbish and does not fit the rest of the car. I didn't want to paint it again, tho, as it would most probably flood whatever details there were left on that fender. So....apparently the car was carelessly painted after it had some kind of accident - I've made up that story and it's the best thing i could do  No matter, forwards. Started adding remaining parts: 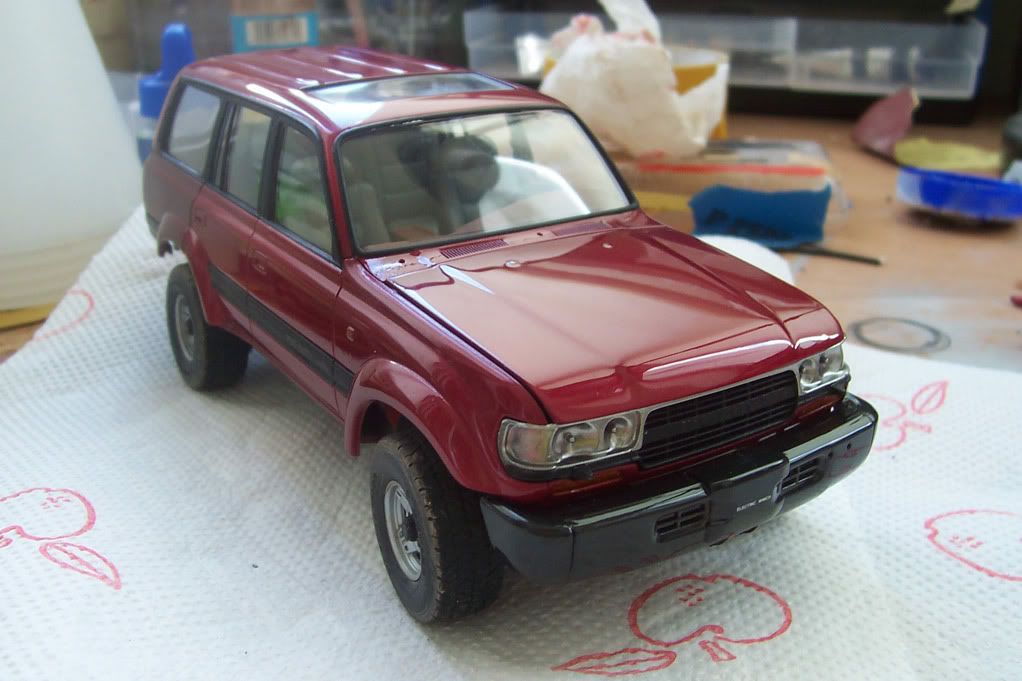 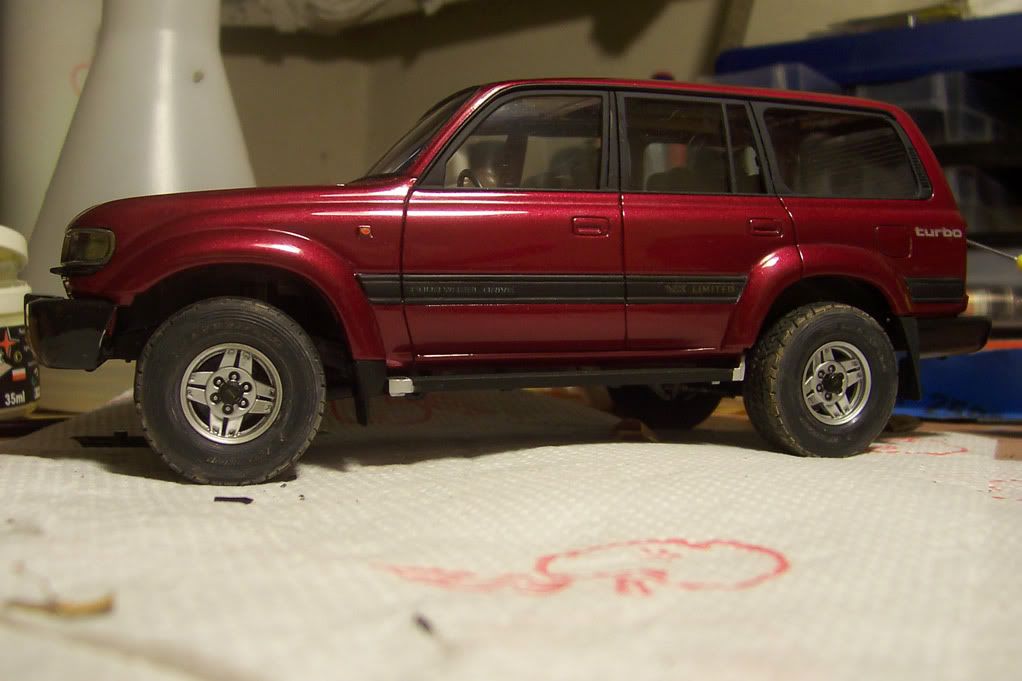 There was another problem with the hood. As you most probably know, Tamiya gives you a transparent hood with no hinges in this kit. I tried doing my own workable hinges but they looked horrible (tho worked). Finally, I decided to make some better looking hinges that would permanently keep the hood opened. 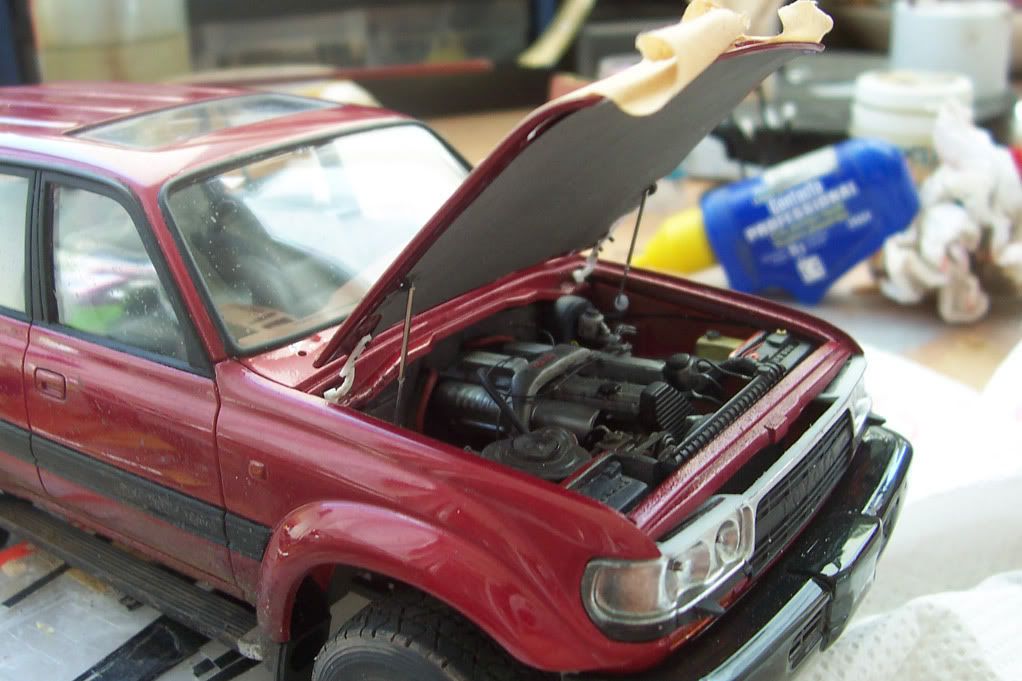 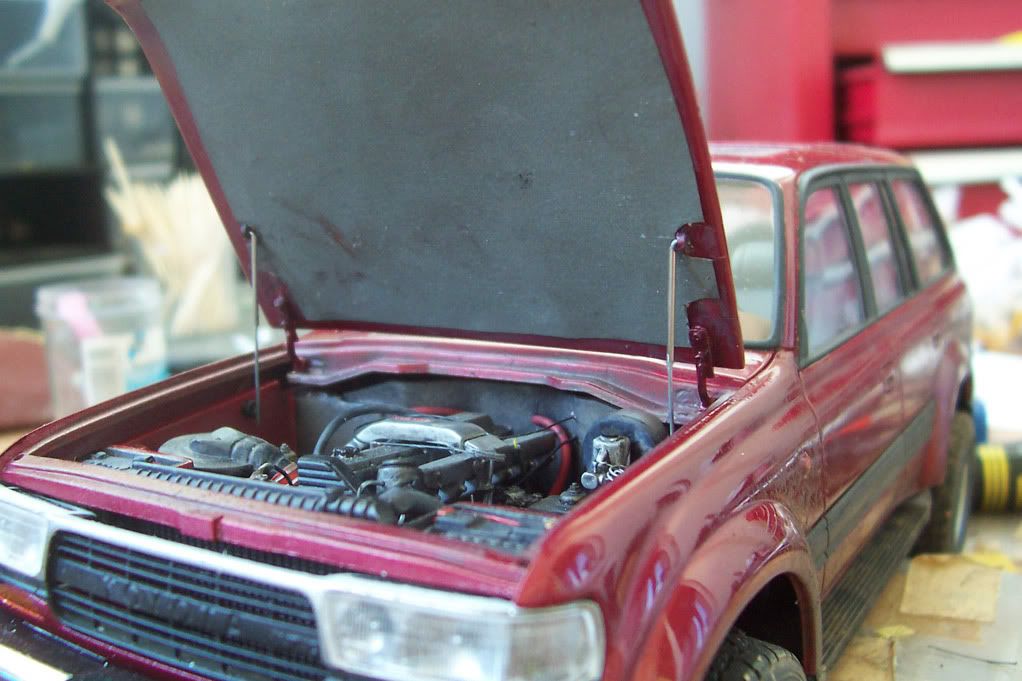 After the incident with the rear/ right fender I was furious and - in this moment of weakness - had decided that LC would be dirty 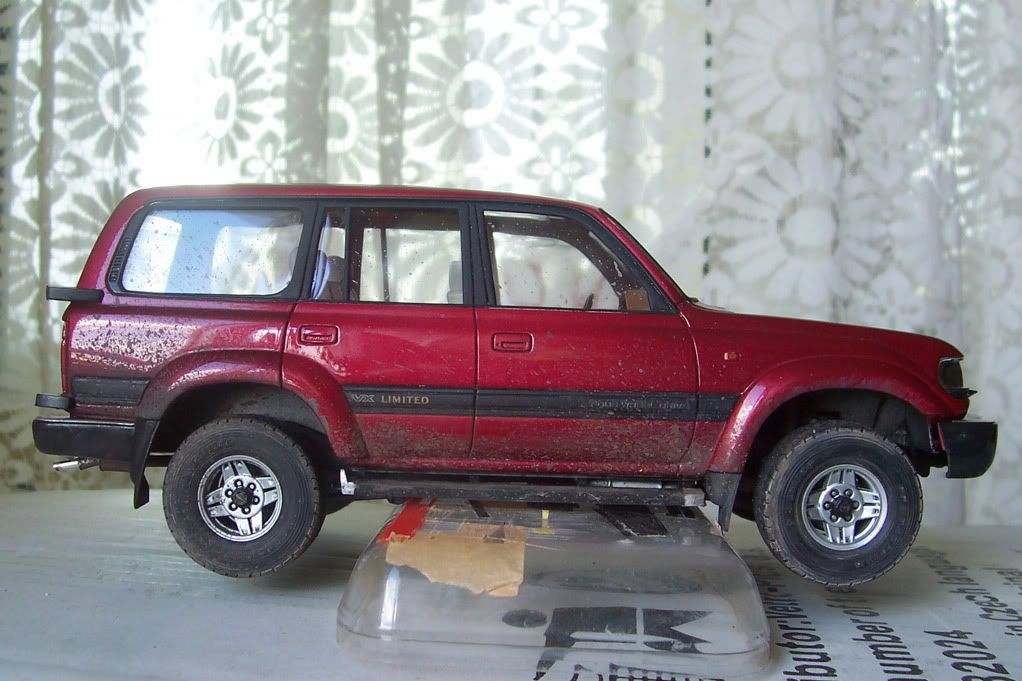 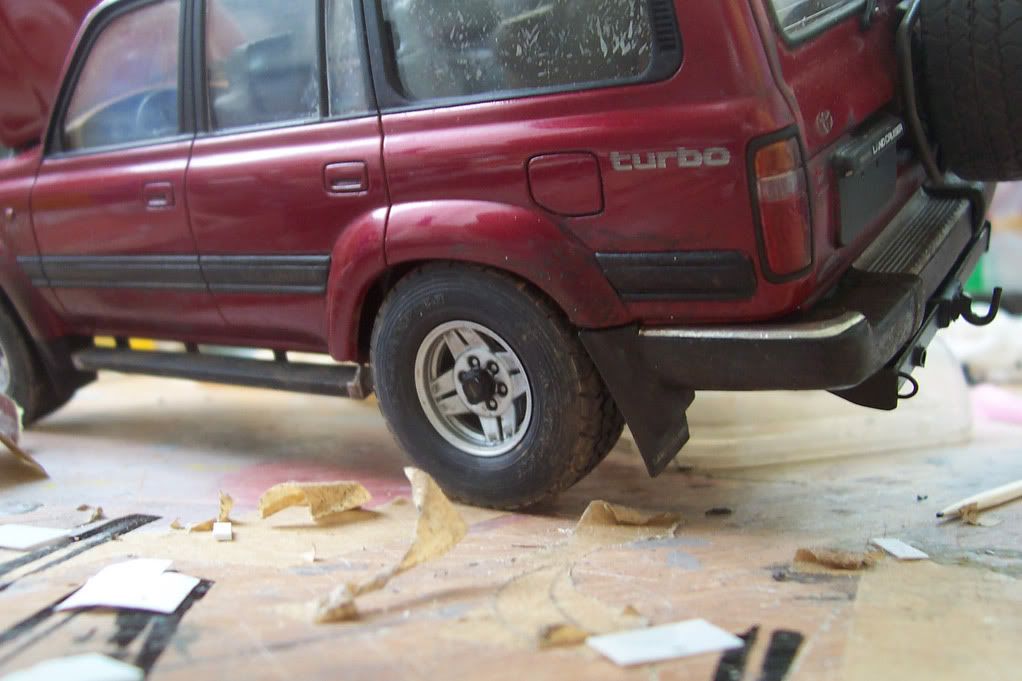 In the final stage I added the towing gear thingy (not sure how you call that in English) Scratch build: 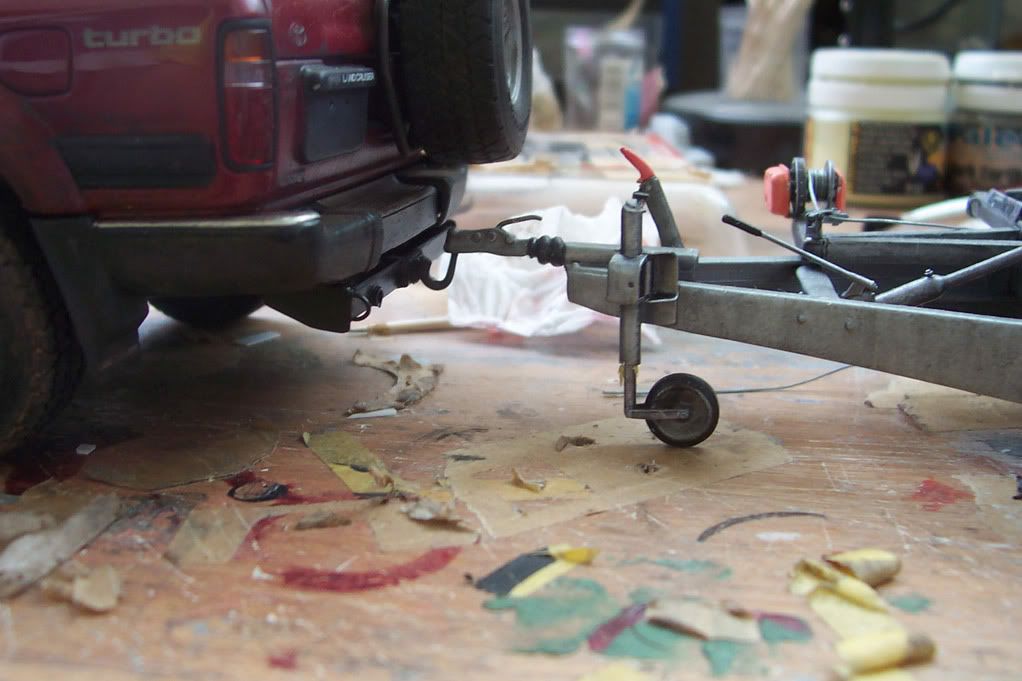 I believe that's all as far as the W.I.P goes. Time for some gallery. Cheers.
|
|
|
POST REPLY TO THIS THREAD |
 |
|
|


