|
|
| Search | Car Forums | Gallery | Articles | Helper | Air Dried Beef Dog Food | IgorSushko.com | Corporate |
|
|||||||
| '88 - '91 Civic | CRX | Wagon | Shuttlee Partnership with: LadyNRedSi.com |
 |
 Show Printable Version | Show Printable Version |  Subscribe to this Thread
|
|
|
Thread Tools |
|
#1
 04-29-2003, 09:30 PM
|
|||
|
|||
|
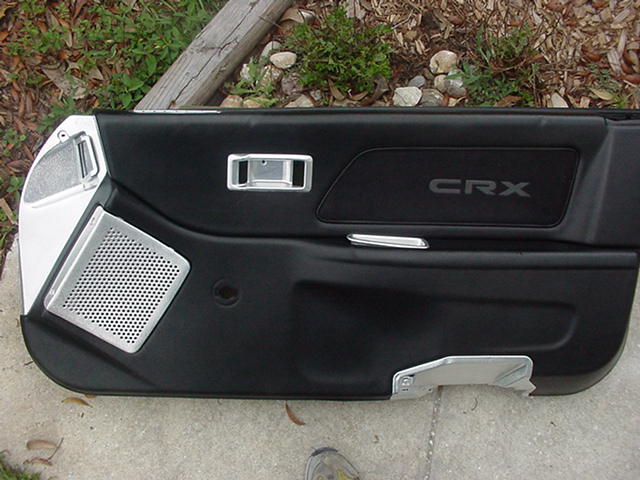
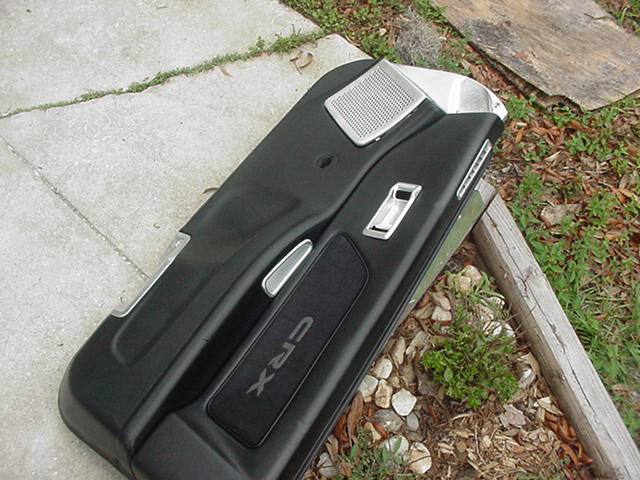
door panels
heres sum pics there not all together in my car cause i dont even have my doors on the car.........i just put the pieces where they went and took sum pics.........let me kno what you think

|
|
#3
04-29-2003, 09:47 PM
|
||||
|
||||
|
t-mo i think he just painted them.
but they look awesome bro, good work.
__________________
Name: Scott Stable Of Cars I have Owned: 1991 Honda CRX 1990 Oldsmobile Cutlass Supreme 2003 Honda Accord 1998 Chrysler Concorde 2007 Honda Civic 1997 Toyota Camry 1995 Saturn SC2 1996 Ford Taurus 1991 GMC Sierra 2002 Daewoo Leganza 1999 Dodge Ram 2007 Honda CR-V 2003 BMW 325i
|
|
#4
04-29-2003, 09:51 PM
|
||||
|
||||
|
oh, my bad I never really look that hard at CRX's. I never noticed the 'CRX' on the door panel
 I really wanted a CRX but couldn't find one, so it hurts my feelings to look at them for long. :o I really wanted a CRX but couldn't find one, so it hurts my feelings to look at them for long. :o
|
|
#5
04-29-2003, 09:52 PM
|
|||
|
|||
|
Quote:
|
|
#6
04-29-2003, 10:03 PM
|
||||
|
||||
|
in the first pic, what is that on the bottom right side of the door ? I got a sedan, all i have there is the lil' pocket thing. But i was just wondering what it was. But it looks nice. Like that metal look it has to it. Good Work
__________________
Civic - Trashed it Integra - Hit and run totaled my ride after a couple 360*'s.. hittin guard rail at 80mph, literally FLIPPING over guard rail, barrel roll 2 more times, crashed front into a tree.. New Plans : Teggy / or / Tiburon
|
|
#7
04-29-2003, 10:04 PM
|
||||
|
||||
|
I belive its where the seatbelt attaches to the door
|
|
#9
04-29-2003, 10:26 PM
|
|||
|
|||
|
did you clear coat them?
__________________
95 b18b new crank, eagle rods, je 10.5 : 1 pistons, 8lb flywheel, stage 3 act clutch, billet aluminium and urathane mounts, balanced rotating mass, 14.3 @ 93mph New additions, teo4h turbo, ssautochrome turbo manifold, custom piping, turboxs bov, dsm 450cc injectors, greddy e-manage fuel controller 13.07 @ 107 untuned
|
|
#10
04-29-2003, 10:42 PM
|
||||
|
||||
|
Damn!
 That looks really cool. You should start doing some of that for people for money! That looks really cool. You should start doing some of that for people for money!Some extra Bling Bling on the side. You know that with your car as bitchin as it is, your gonna have to match the styles dog. And yes im talking about Ice........ Damn I dont know where that came from.
__________________
 PeacE
|
|
#11
04-30-2003, 08:18 AM
|
||||
|
||||
|
I like it A LOT, nice job mate, should be shit hot when its all finished
cheerz jim
__________________
Jim - Your Resident EDM Biatch B16A1 I/H/E 4TH GEN UK SITE Honda Civic EE9 1.6-i VT
|
|
#12
04-30-2003, 08:24 AM
|
|||
|
|||
|
Quote:
|
|
#13
04-30-2003, 12:49 PM
|
||||
|
||||
|
Quote:
Here's the exact process that I used, and my interior came out looking proffessional. Hope it helps. Materials/Tools required: -- Primer. -- Krylon Interior/Exterior paint -- Clear Enamel -- 320 grit sand-paper -- Rubbing alcohol and Q-tips and/or cotton balls -- Masking tape (also good to have masking tape with attached drop-cloth) -- Various sockets/screw-drivers, etc. for removing pieces A few words about technique/safety: -- When spraying your primer, paint, or clear-coat, be sure to keep the tip of your finger out of the spray. Having your finger in the way will cause paint mist to build up on your fingertip, and the airflow will blow the built-up paint off your finger in the form of little droplets of paint. If these drops land on the piece you're working on, you might as well start over, cuz they look like crap. The same thing happens if you use a plastic pistol-grip attachment on your spray cans. -- I can't say enough how important patience is. If you rush, you are going to make mistakes, and if you don't fix the mistakes (which is a huge hassle), you'll have a horrible looking interior. So it's best to just do it right the first time. Do whatever you can to avoid over-spraying the pieces. Personally, I smoked A LOT of cigarettes and drank A LOT of beer between applications, just to keep myself from using too much paint all at once. -- I made the mistake of painting all my trim outside on my back deck. For some reason, bugs were really attracted to my paint and clear-coat, and kept landing on the pieces. They'd get stuck in the wet paint, and some of them are still visible in the finished pieces. If you have access to a well ventilated garage or paint-booth, I would highly recommend using it. -- If you follow these steps, you'll end up with a durable, professional looking painted interior. -- If you plan on painting your entire dash, or your gauge cluster cover, a really light color like white or bright yellow, be aware that on sunny days, it will be reflected onto your windshield, and in my opinion is a bit distracting, and can make it difficult to see sometimes. -- Always spray paint in a well ventilated area. -- This process is only meant to be used on plastic pieces. I have no experience painting vinyl-covered surfaces. The Process: Remove each piece that you want to paint (consult manual if unsure how to remove pieces). Use the following process on each piece you want to paint: -- Wash with soapy water to remove built-up dirt and grease. -- Sand each surface you wish to paint with 320 grit sandpaper. -- Swab each piece with rubbing alcohol to remove any left-over Armoral, finger grease, etc. -- Wash again with soapy water to remove rubbing alcohol residue. * at this point, be sure hold the pieces by the edges, or by surfaces that won't be visible. This is to avoid getting greasy finger-prints on the prepped surfaces. -- Mask off any areas that you do not want to get paint on. -- Apply 2 coats of primer. I used Rustoleum Primer. * When I refer to "coats" I actually mean LOTS of really light applications of primer/paint. remember to take your time, spray a little bit, give it a few minutes, spray again, etc. Do whatever you have to in order to avoid soaking the pieces. You'll just get runs and sags like crazy. -- Primer dries pretty quickly. -- Once each coat dries, it's a good idea to lightly sand the primer with 320 grit paper. And sand after the 2nd coat as well. -- After sanding each time, wash the piece again with soapy water to remove sanding dust. -- Apply 3-4 coats of paint. I used Krylon Interior/Exterior paint from the local parts supply chain. * Again, remember to take your time applying the paint. The Krylon takes a lot longer to dry than the primer does, so give it a bunch more time. -- Once the paint has completely dried (I would give it at least 24 hours to be on the safe side), apply 2-3 coats of clear enamel. I used Rustoleum Crystal Clear Enamel for this. * Same process as with the primer and paint steps. -- Let the pieces dry again for at least 24 hours before handling. It's the most frustrating thing to spend all this time and energy on painting the pieces, only to put a fingerprint in them or scratch them with a screw-driver trying to install them while they're still a little soft. BE PATIENT!
__________________
|
|
|
POST REPLY TO THIS THREAD |
 |
|
|


