Hello again,
Various bits and pieces in this update, so apologies if I bounce around from one thing to another.
First up, here's the piece of plain fibreglass I sprayed as a test for the Martini colours:
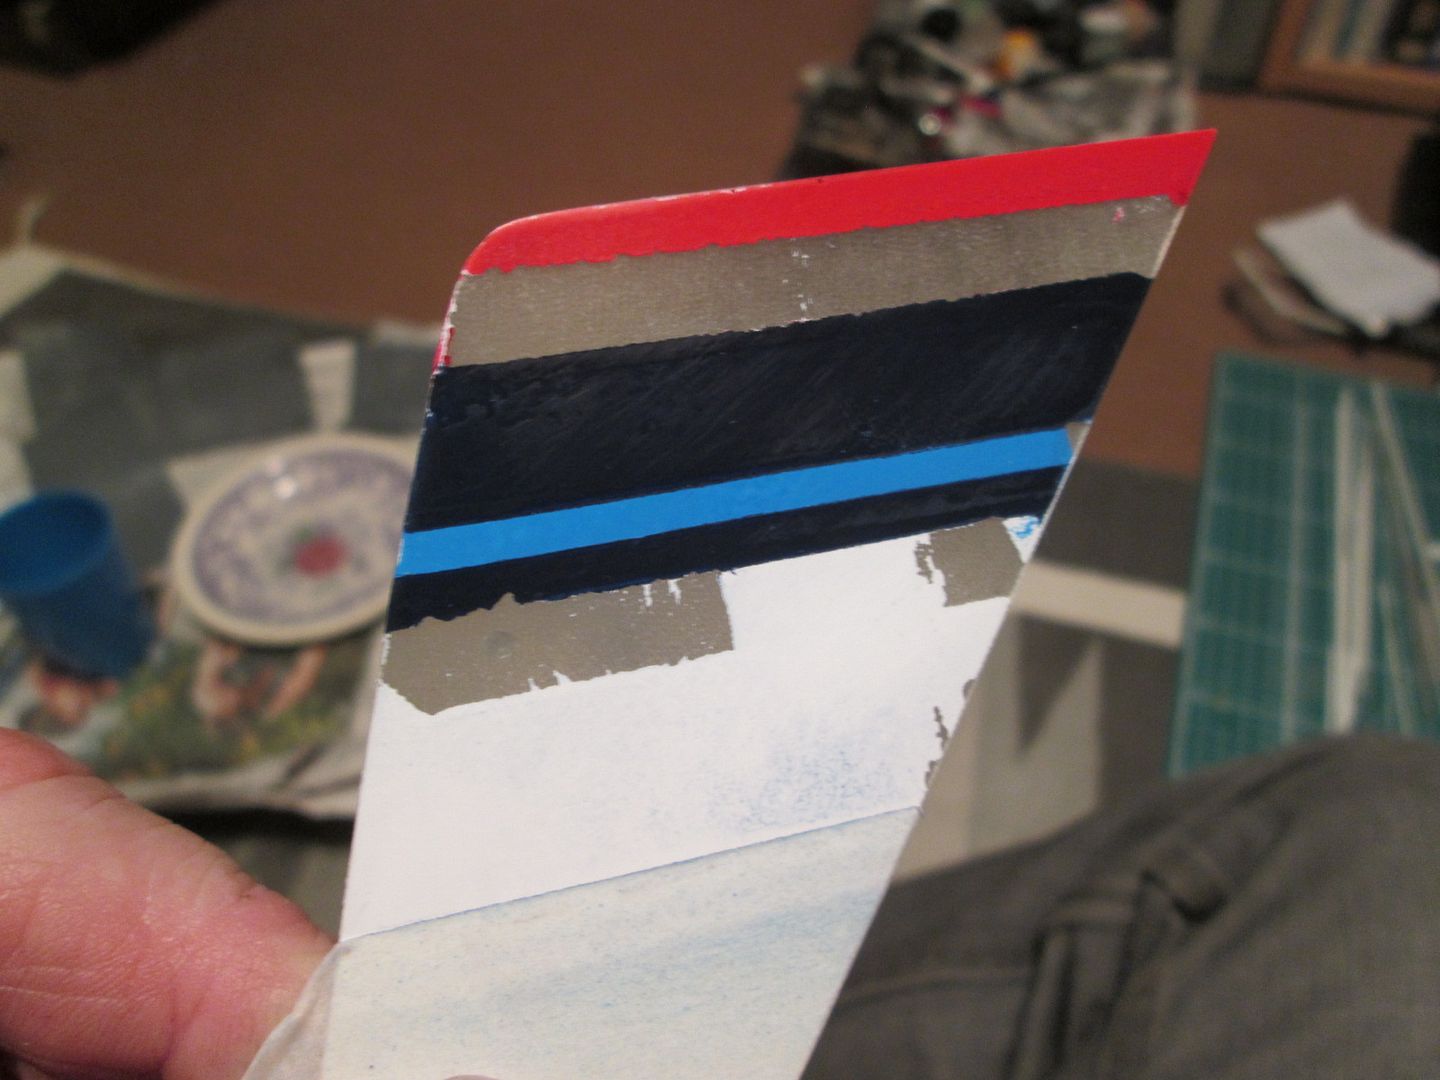
The colours I've used here are Tamiya X-3 Royal Blue, X-14 Sky Blue, and X-7 Red, over an X-2 White base. I'm quite happy with the colours themselves, but the obvious problem is that there should be white where there is now just fibreglass! I'll have to do more tests to check if it's the vinyl masking tape being too sticky, or whether the problem was masking it up too soon after applying the white base-coat. Either way, it's made me very nervous about how this is going to work out...
On a more positive note, however, here's a section of the 1:24 Tamiya decal sheet scanned and expanded to 1:8 scale:
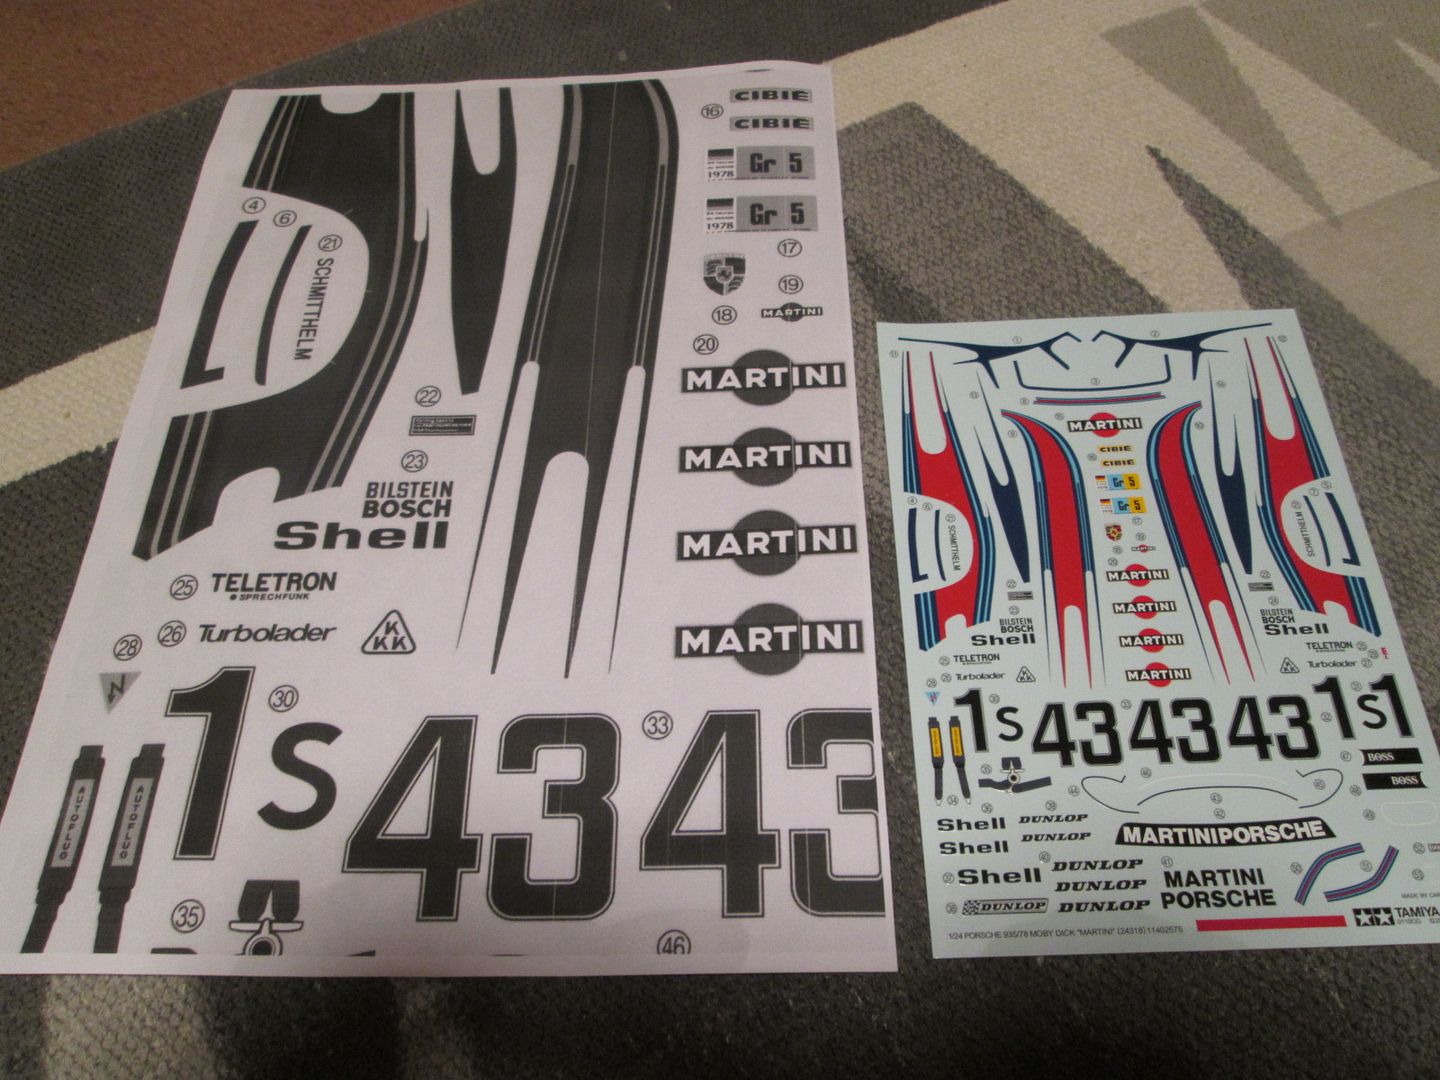
Although I won't be able to use the Martini stripes on my model, the various logos, etc, will be perfect once I've printed them onto decal film.
Elsewhere, I spent a lot of time working on the main nose section bodywork with filler and wet/dry paper before giving it a light coat of Tamiya white primer:

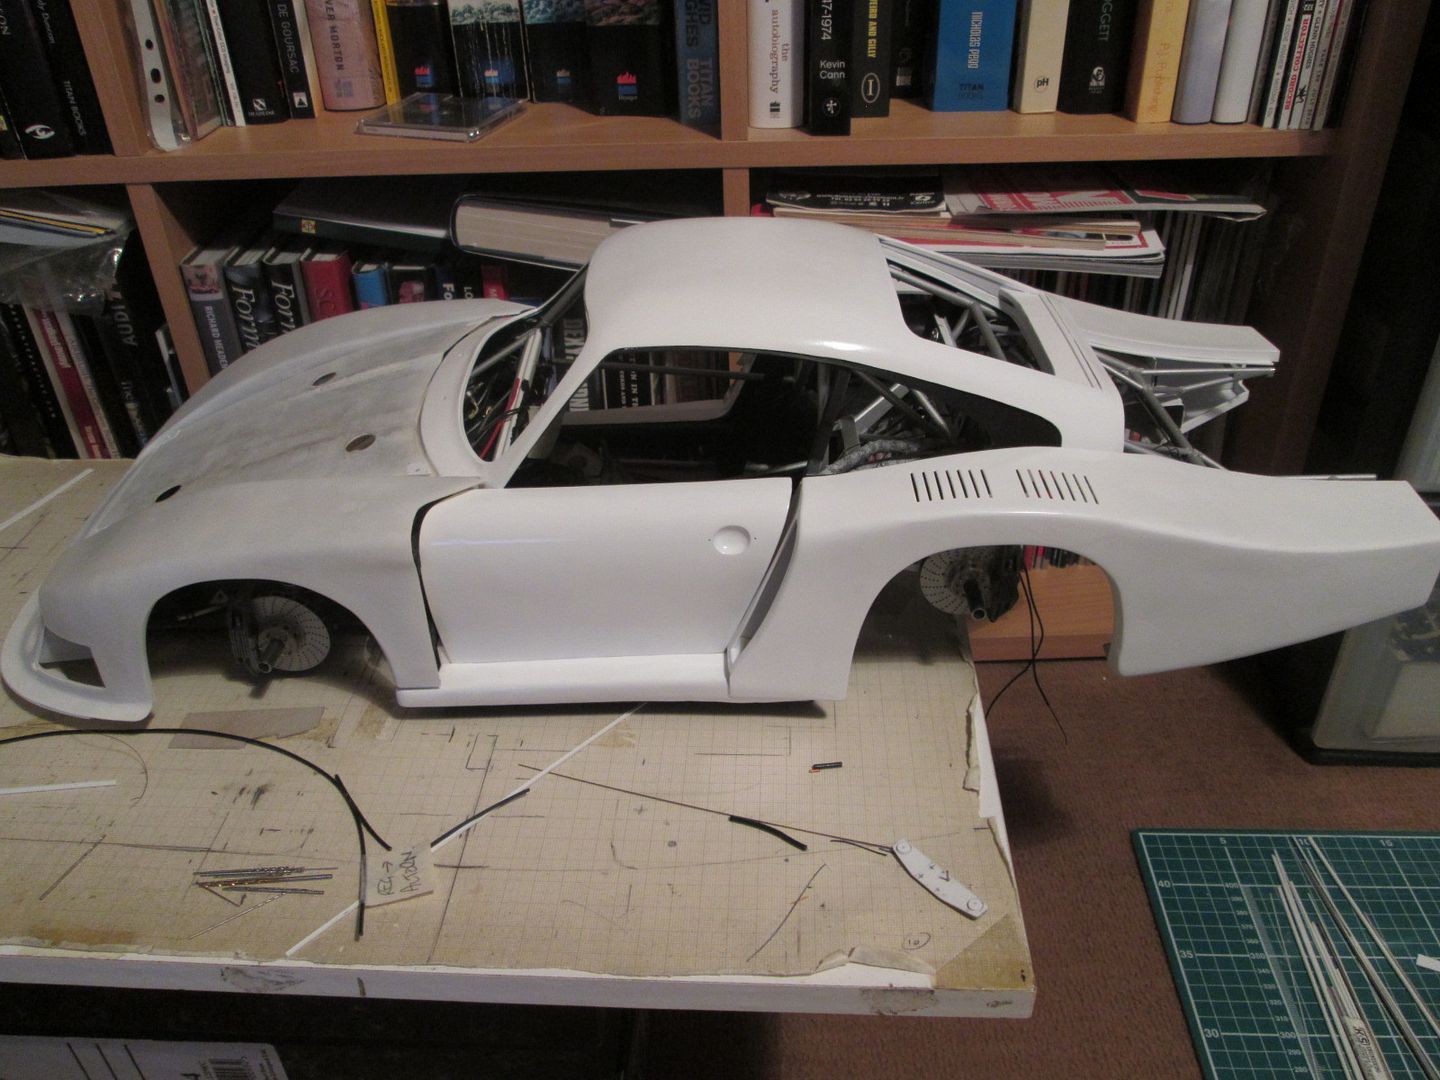
There's a handful of small faults which need to be addressed before further painting, but nothing major. I've made another template for the louvres but will probably wait until the Martini stripe issue is sorted out before deciding when to cut them. The bonnet panel will be sprayed at the same time.
Most of the last week or so has been spent working on getting the engine ready for fitting. There's so much going on in the back of this car, but access will be difficult once the drivetrain is in place. The starter motor has had some small wiring details added, and the main cabling back to the battery has been fitted:
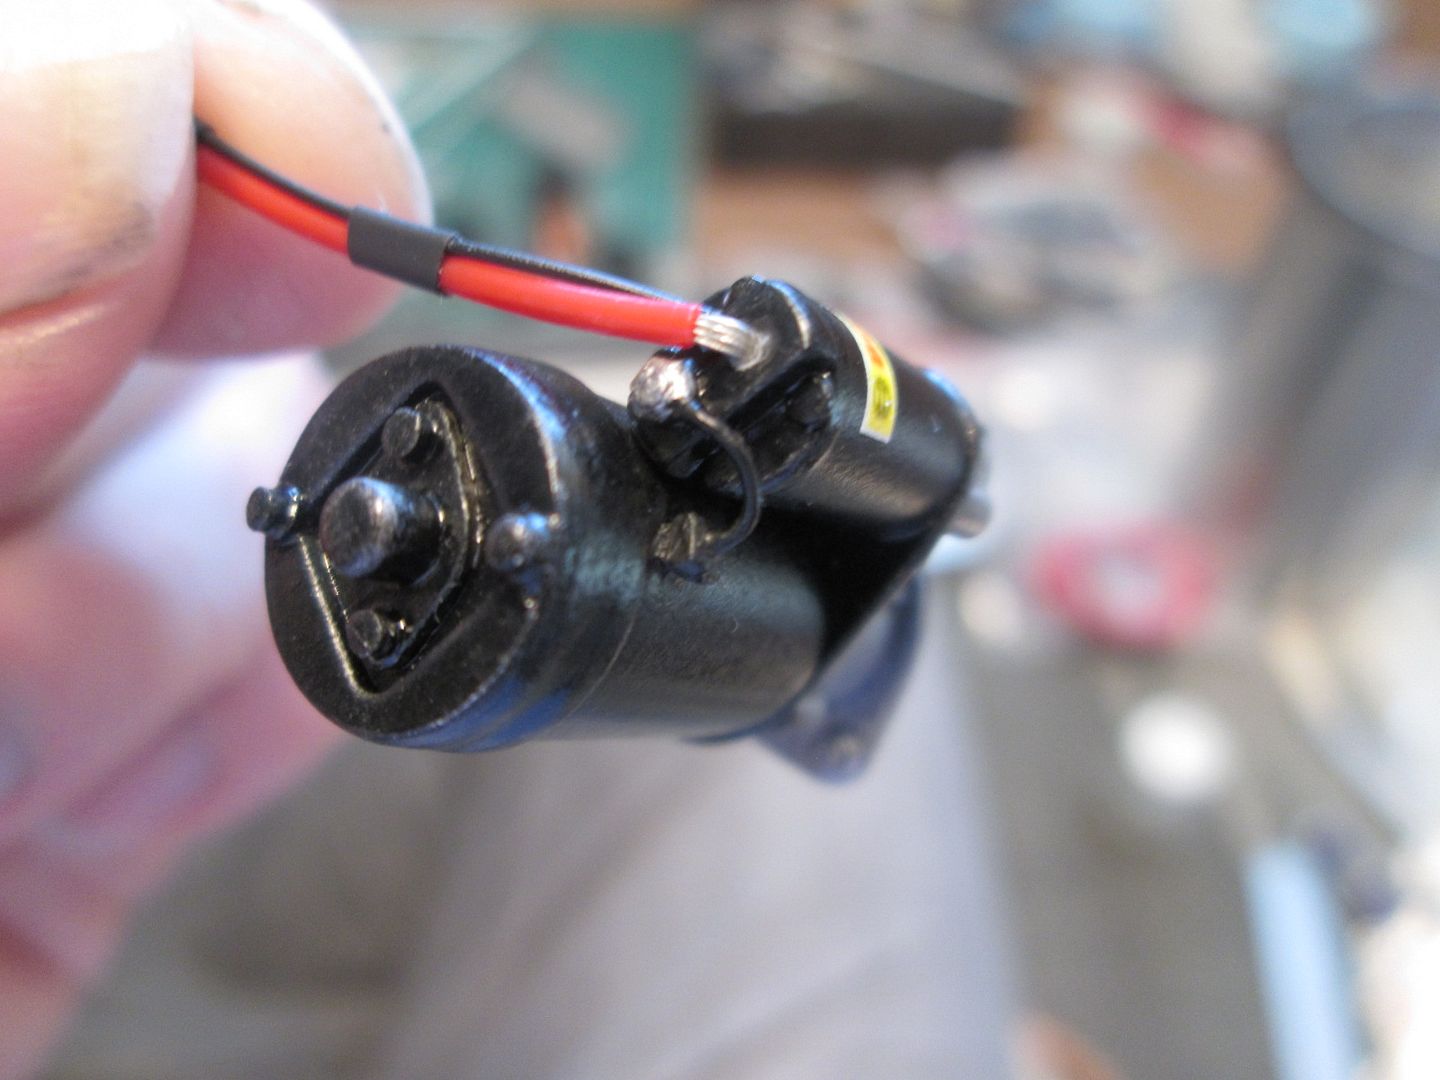
The wiring has been passed through the rear firewall panel and the starter is now effectively fitted to the chassis - it should be easier to now fit the starter to the gearbox, rather than trying to route the cabling through the car later.
The control cables were another potential problem area. I decided to fit everything to the main mounting point on top of the gearbox, connect the cables to the throttle mechanism and clutch lever, then all I have to do once the drivetrain is fitted is to plug the front sections of the cables to the back sections:
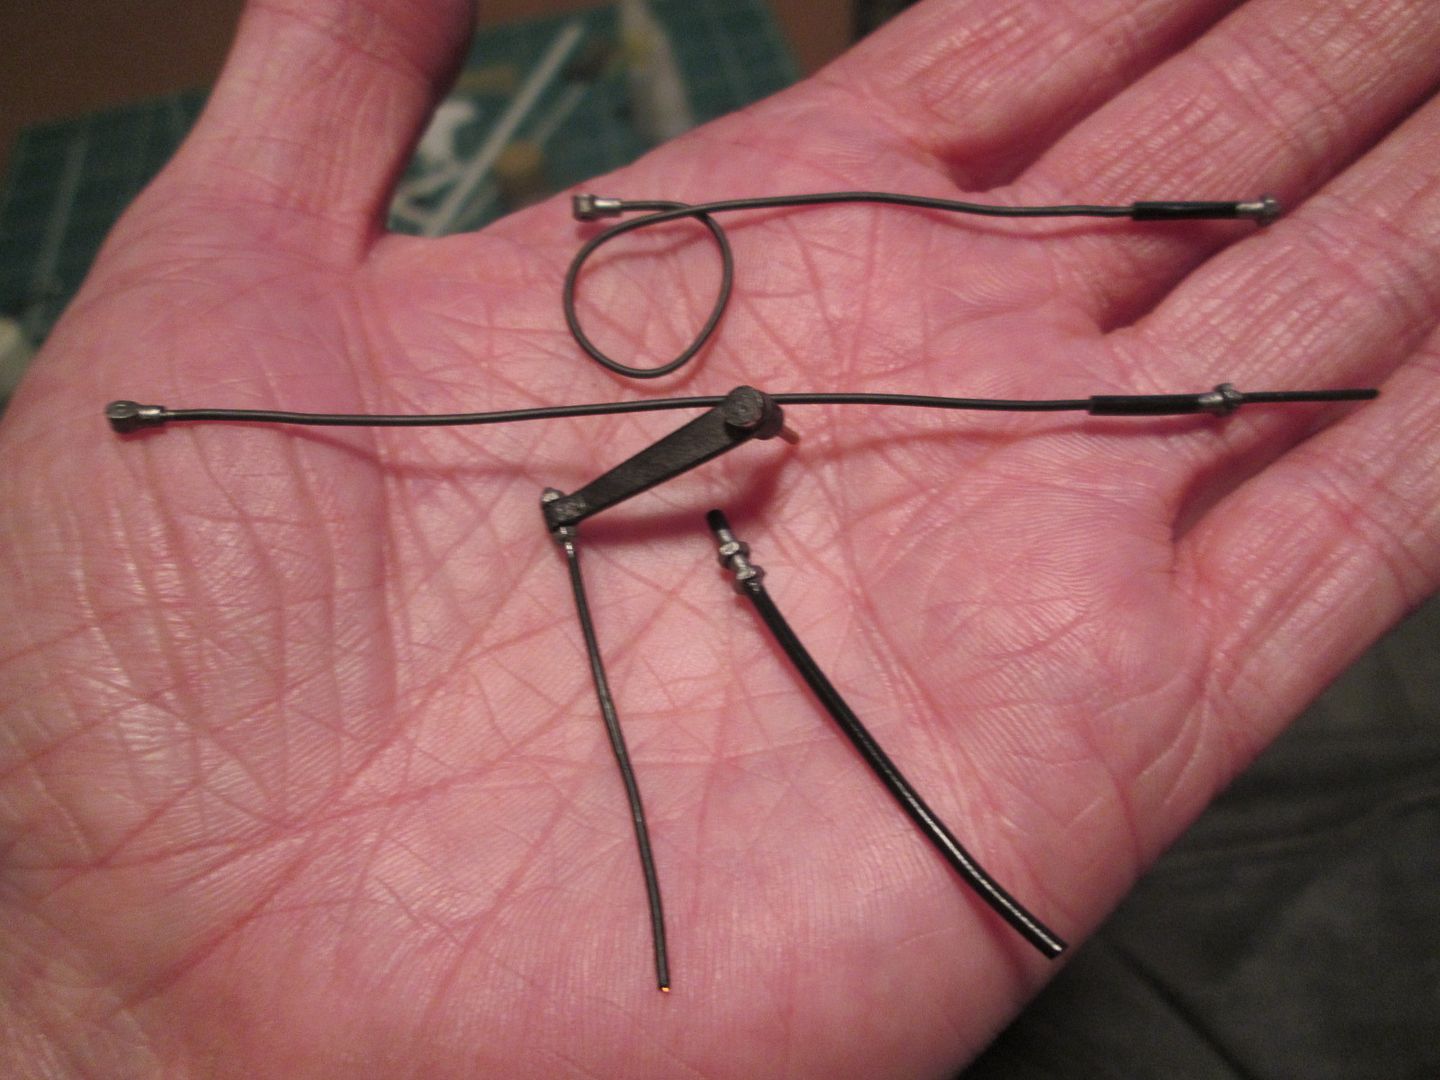
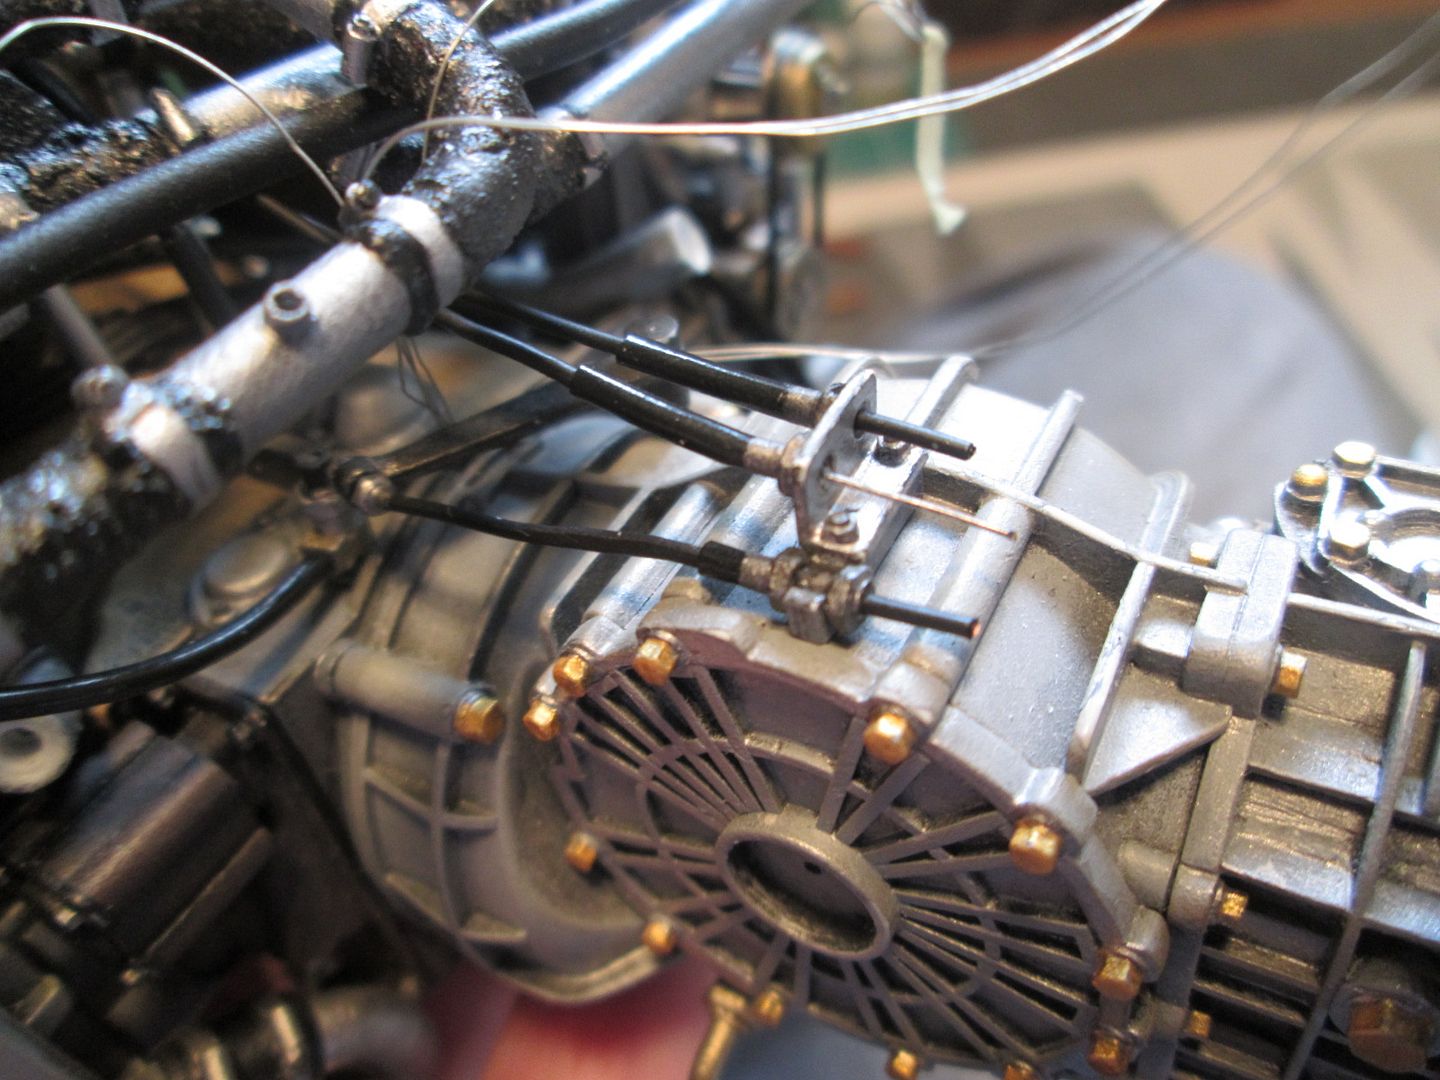
Access to the top of the gearbox shouldn't be too bad, so this approach should save me a lot of trouble later on.
The rest of the time has been spent on the engine and gearbox itself. Before gluing the two halves together I looped three lengths of thin wire around a pin and running up through a channel in the spacer plate:
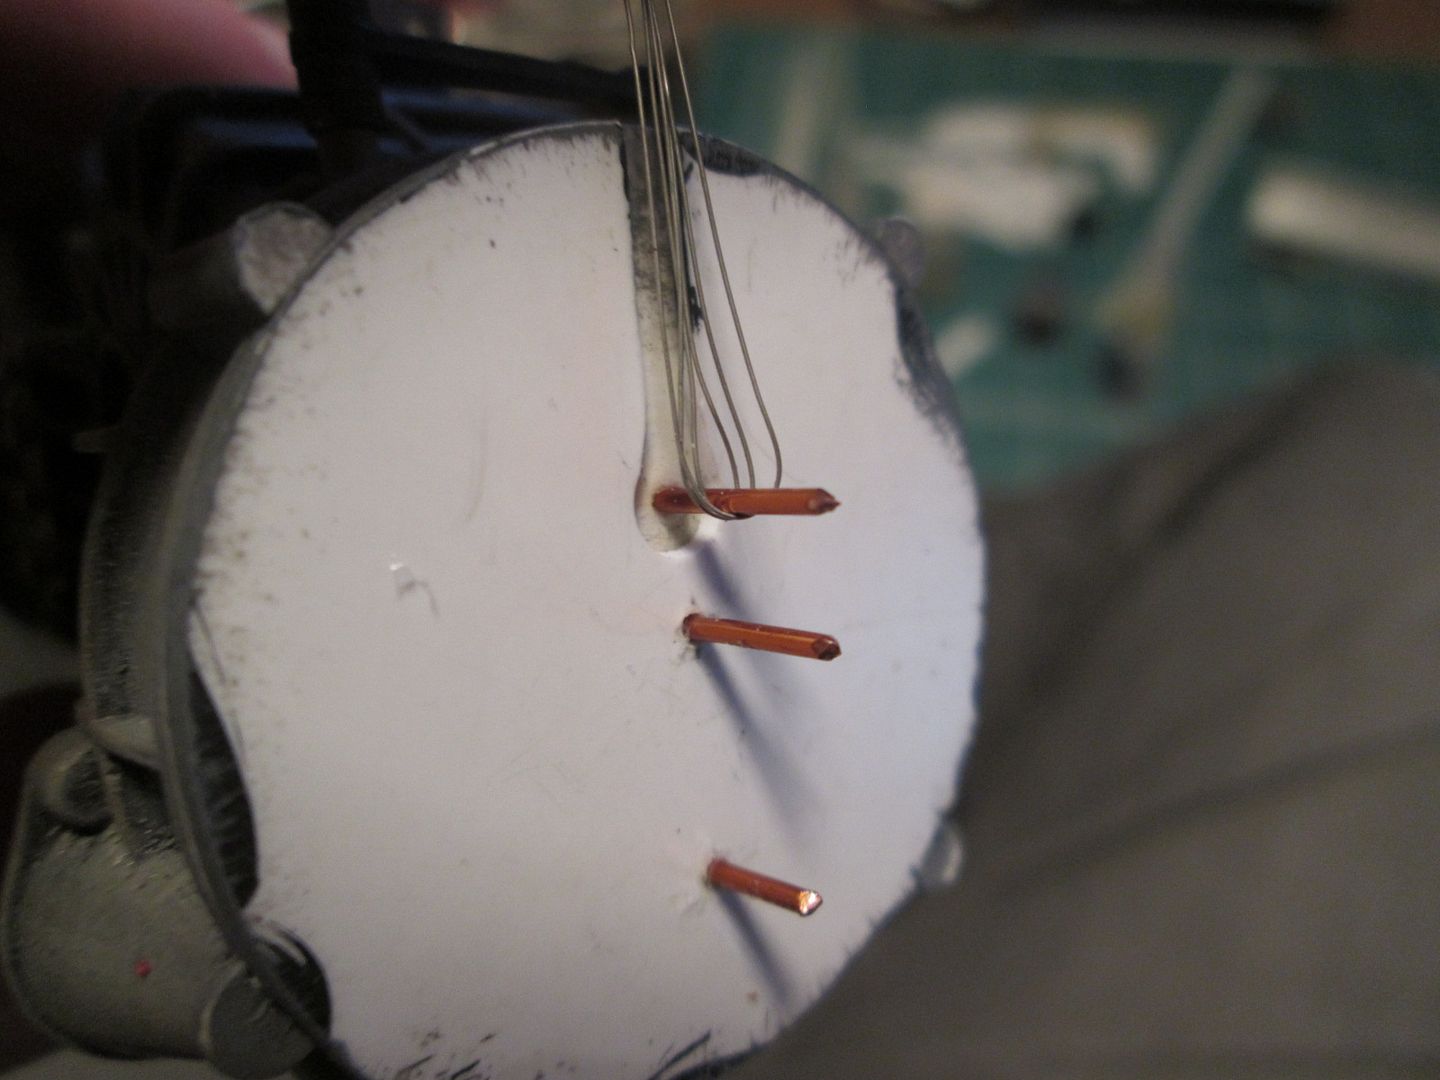
I plan to use these wires as extra support, but still don't quite know where I'll be able to connect them! I've attached the main oil pipes to the engine and trimmed the hoses to length, and finished the detailing around the fittings. The lines to the gearbox oil cooler have been trimmed and fitted, so now just need to be plugged in place on the 'box.
Assembly of the twin turbos is well underway - everything you see in this photo is now glued in place:
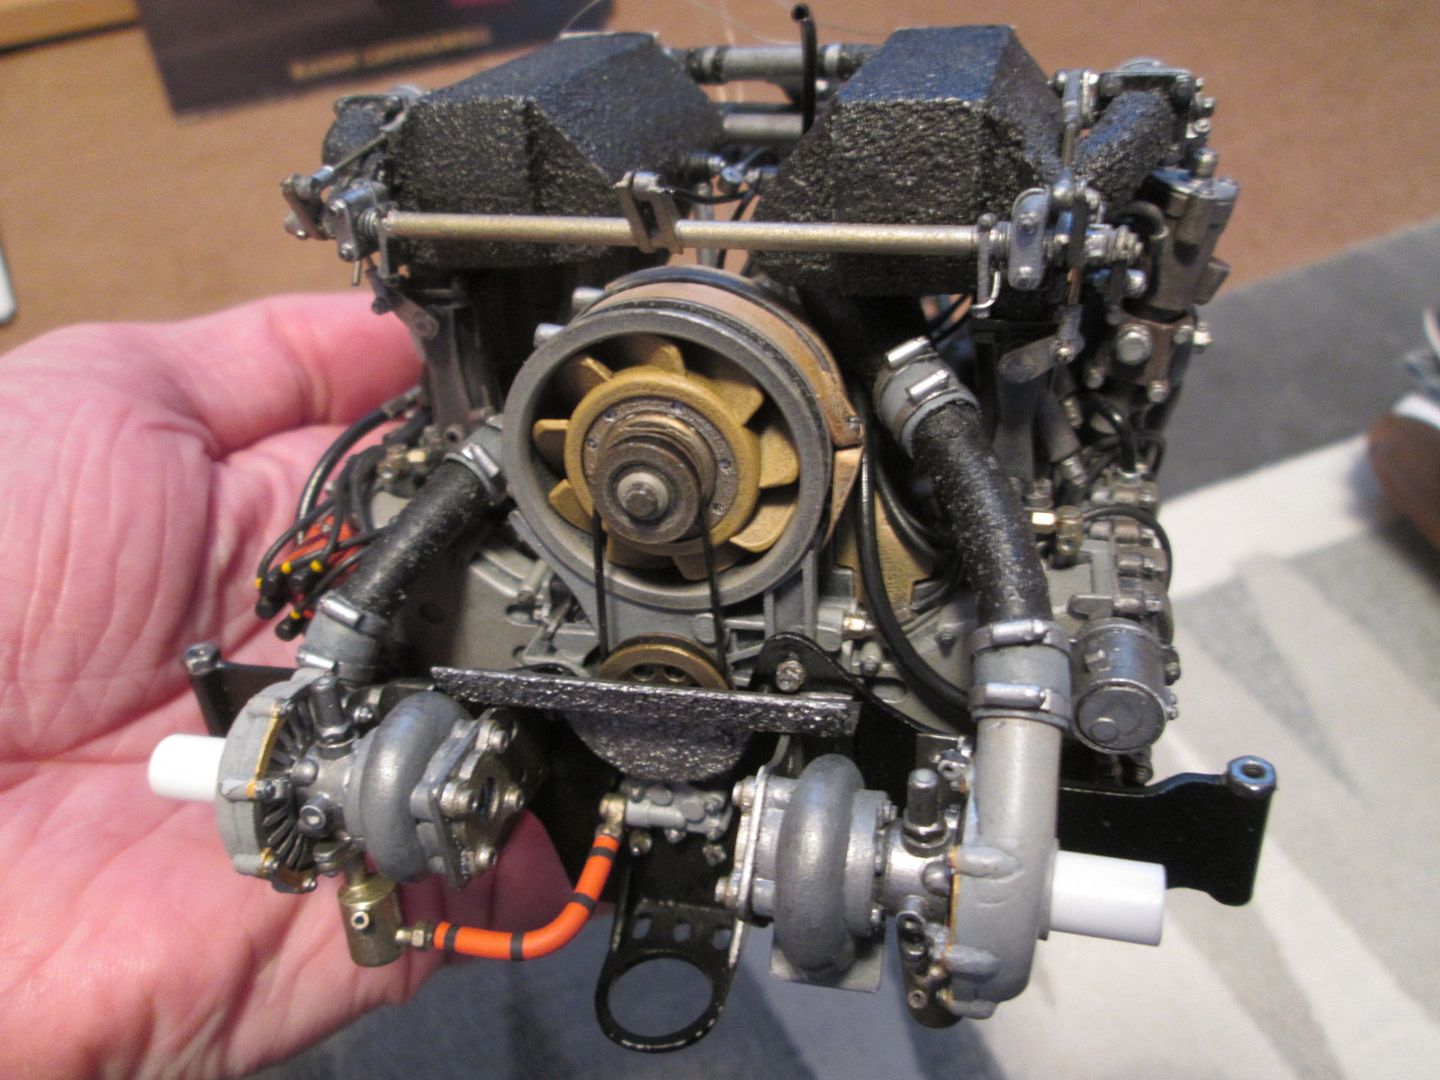
Note the drive belt for the cooling fan, the little oil pump at the bottom which connects to the turbos via the orange pipes, and the protective cover around the base of the drive pulley. The main support plate has been pinned and glued to the engine, and the large hoses between the turbos and the inlet manifolds have done a good job of stiffening it all up. There's a few more bits to add (alternator, exhaust primaries, turbo oil lines, pop-off valves, etc), but it's quite possible that I might be fitting this into the chassis at the weekend...
It's all coming together!
SB