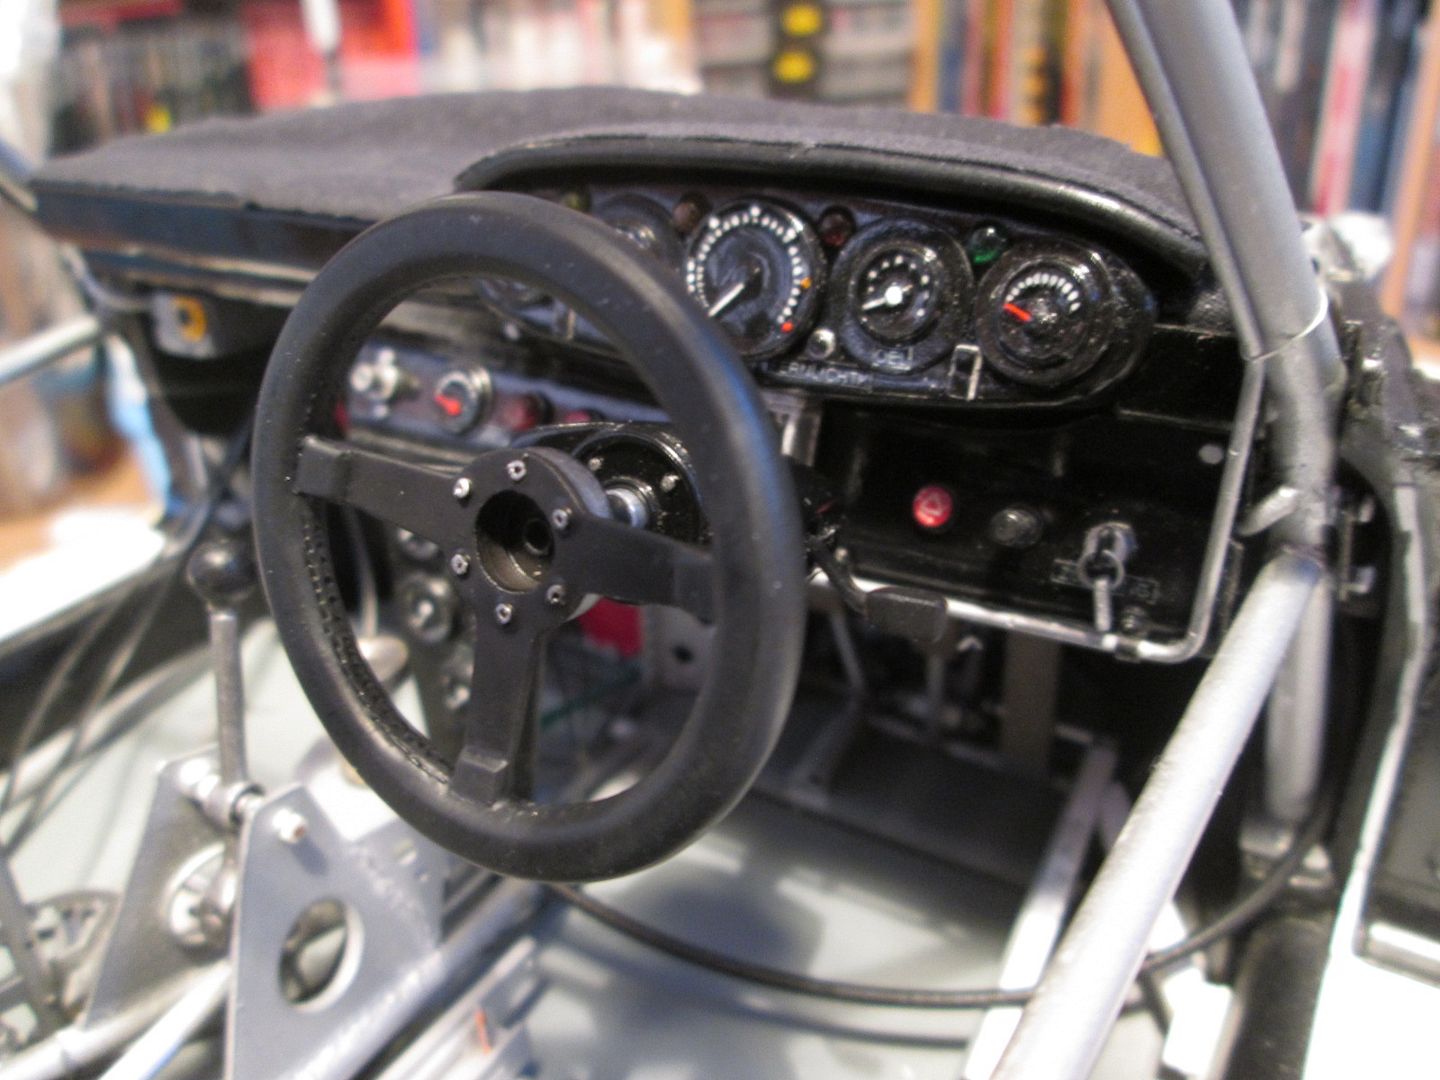
Sorry, Ian - no actual stitching on the steering wheel! I mean, that would be
ridiculous - almost as daft as making headlight bulbs with filaments inside them. I have my limits...
I airbrushed the whole steering wheel with a couple of coats of Tamiya semi-gloss black, then toned it all down by carefully drybrushing the centre with Citadel 'Chaos Black' and some Tamiya 'Rubber Black' for the rim. Note also the column stalks fitted behind. This is all now ready for final fitting.
Next, a bit more on the nose section. I mentioned last time that I'd added some styrene around the inside - you can see it better here:
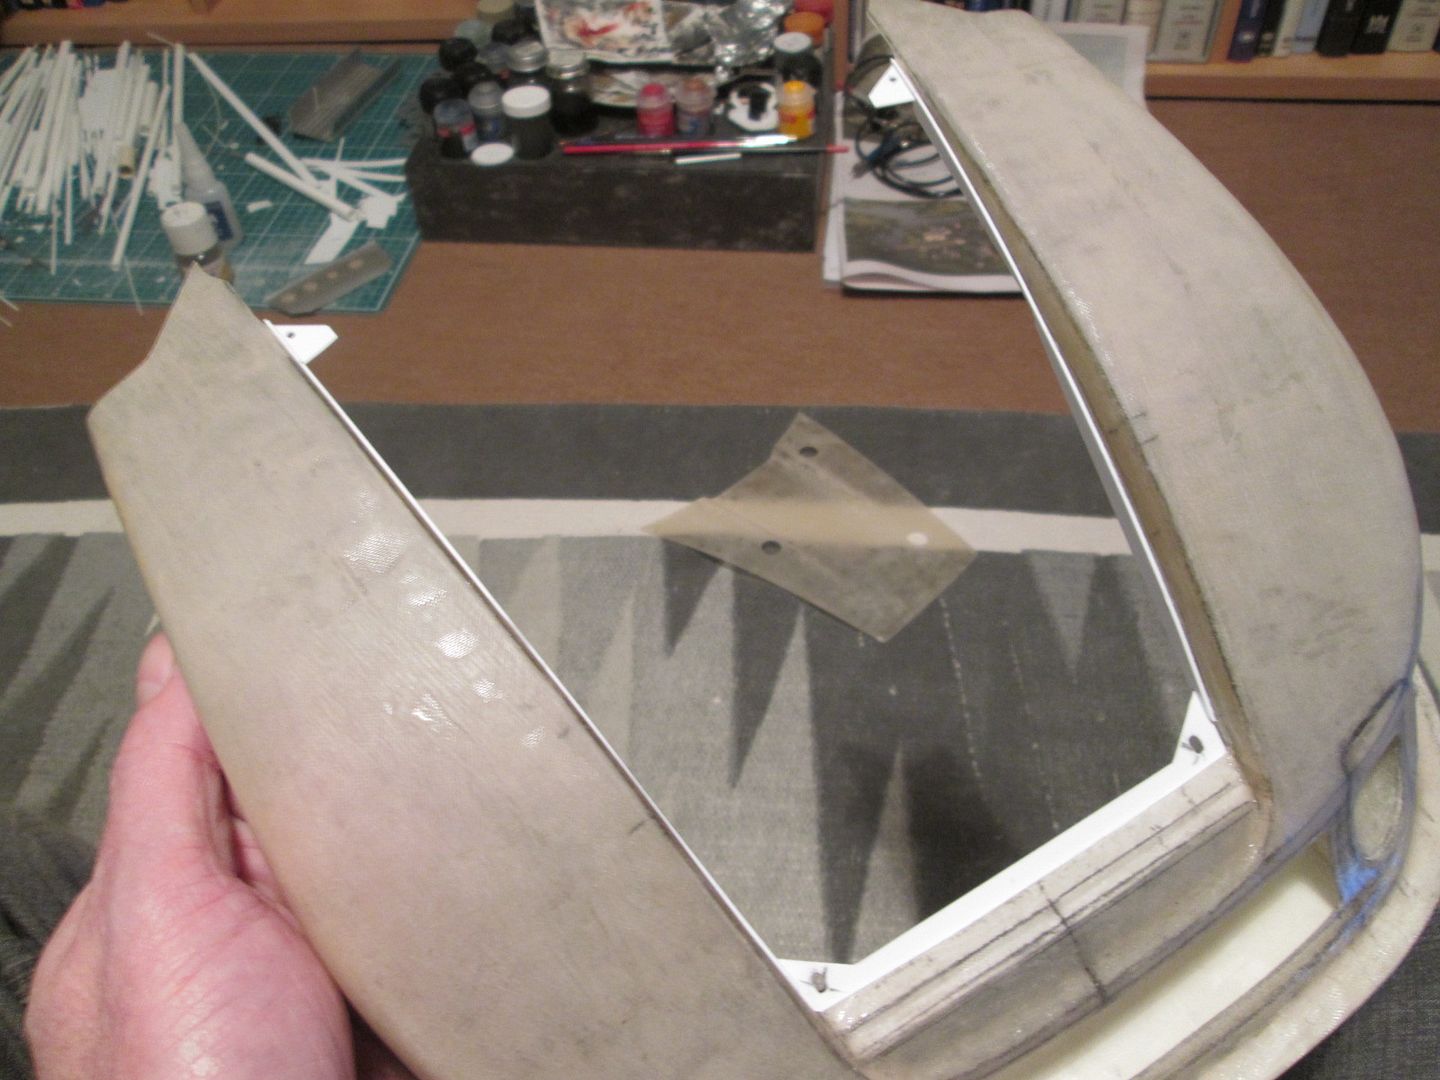
The two small triangular plates in the upper corners also have magnets underneath and will eventually fit over a couple of locating pins on the bodyshell.
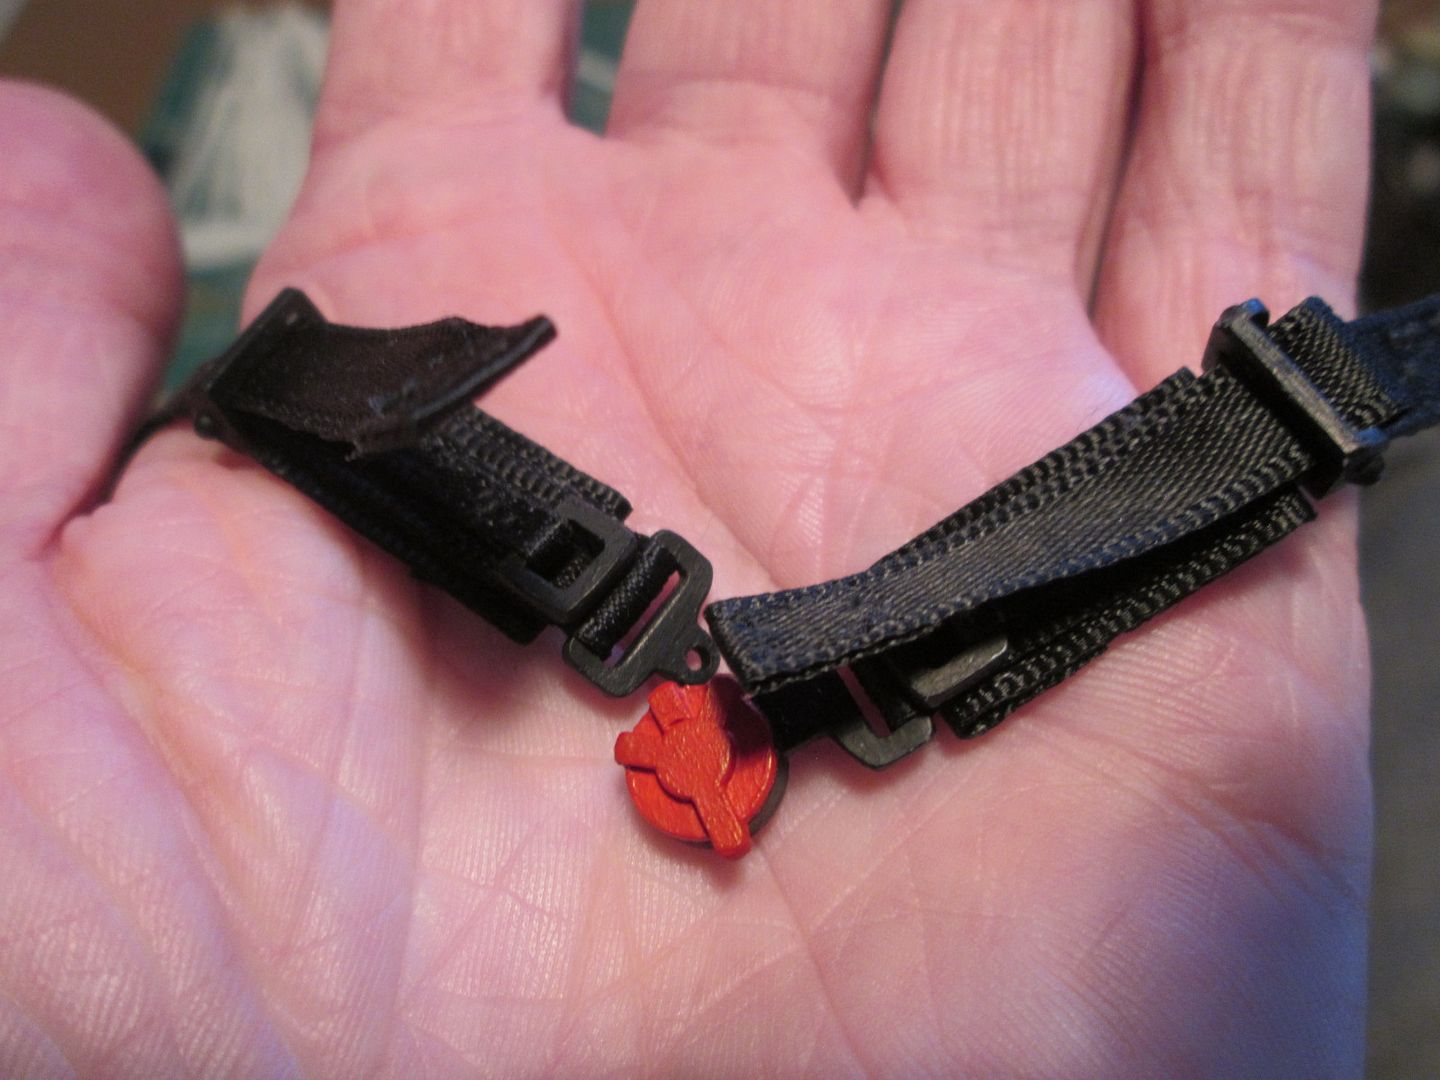
The seatbelts took the best part of a week to make. I had the various sizes of black ribbon from making the 908, so just had to stitch it all together with the various brackets, etc:
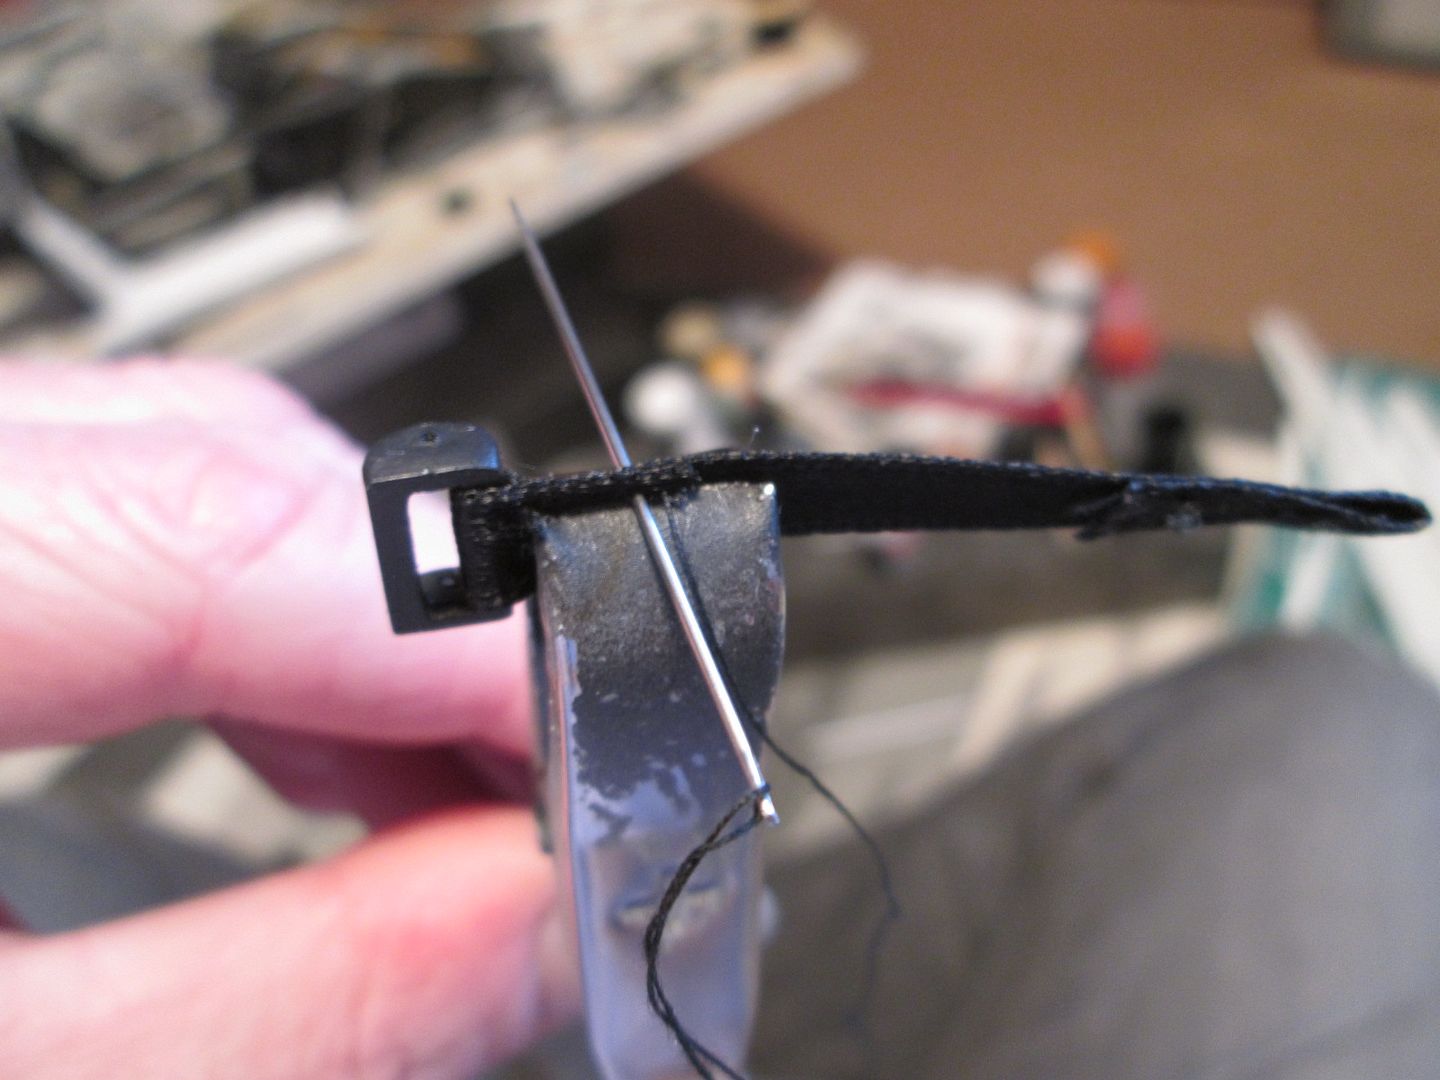

The main problem with the ribbon is that once cut, the edges tend to fray apart. In the past I've used CA glue to seal them, but this can result in them becoming stiff. So, all the ends have to be folded back and stitched together. No major wounds or physical injuries during the stitching, I'm pleased to say, although it took a bit of force to shove the needle through three layers when assembling the lap-belts:
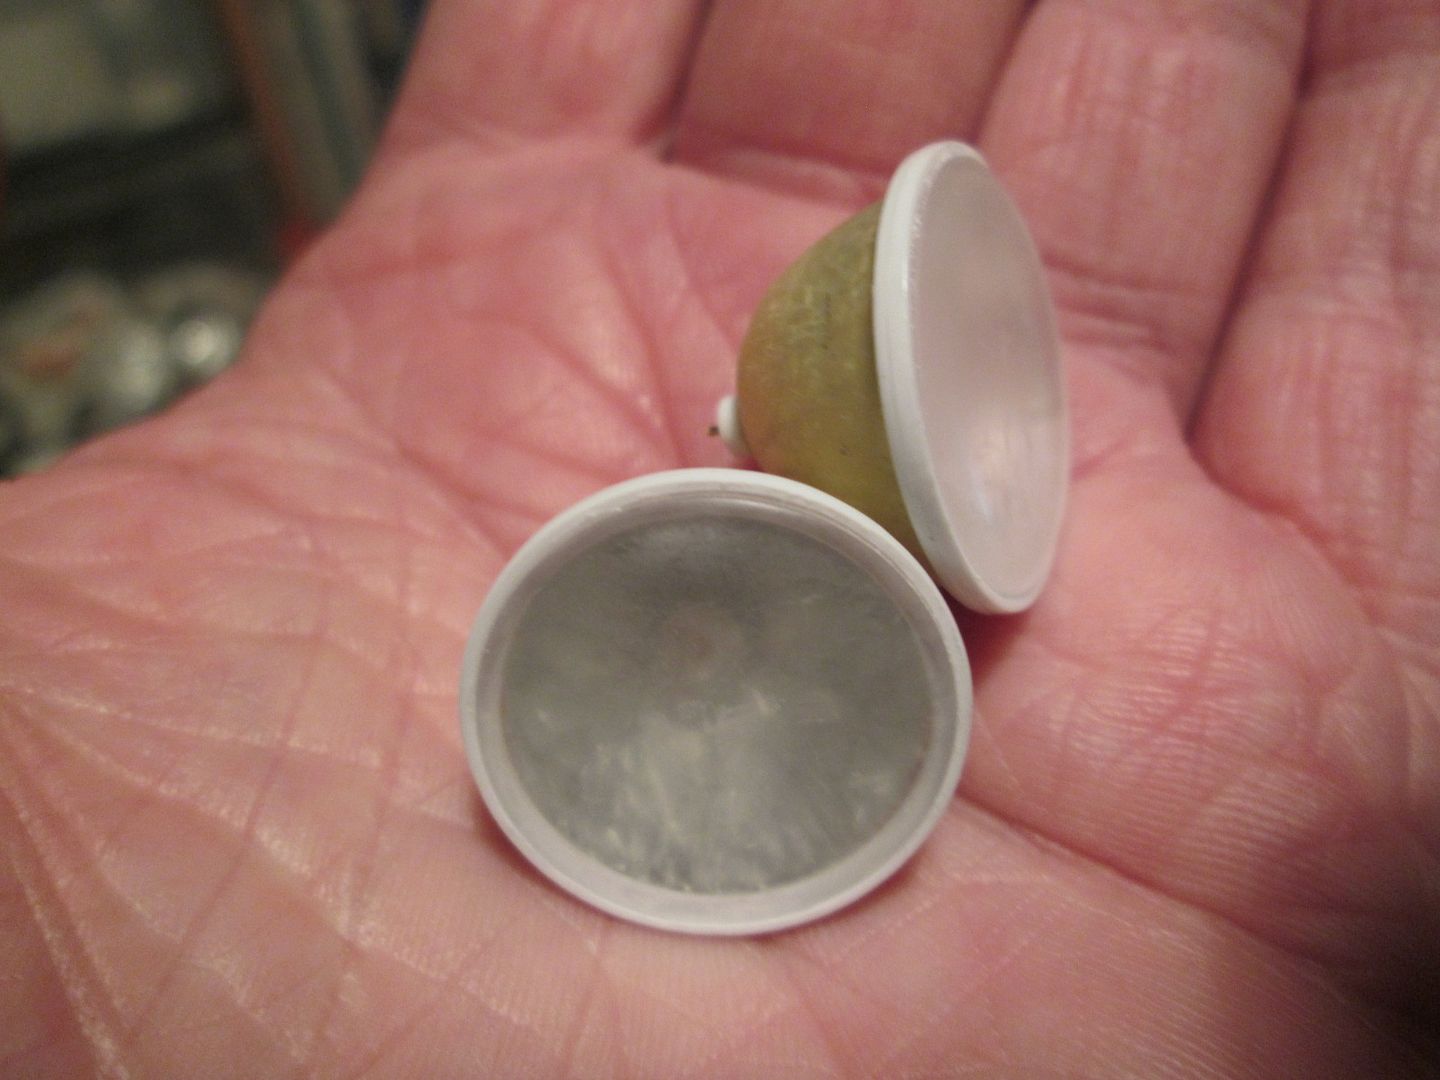
Last thing for tonight - headlights! So, the headlight bowls were laid-up in fibreglass a few weeks ago, removed from the moulds and trimmed up. Next job was to line the inside with aluminium foil to create a bit of 'shine' - I used one of the male patterns to press the foil into the bowl (without tearing) and then repeated the procedure when gluing the foil in place:

I'd already planned to use a length of 20m diameter clear acrylic rod as the starting point for the lenses, but once cut it needed a lot of work with various grades of paper to clean up - I even used a little bit of toothpaste as a polishing compound! You can see by the reflection that I've chamfered around the edges to get some shape into the lens, too.
Of course, having made the bowl, and the lens, I really
had to make the bulbs too. These are 4mm clear rod, a little shaping on each end, with two 0.5mm holes drilled into one end with fine copper wires inserted as filaments. A collar of styrene and aluminium tube around the base allows a 0.5mm pin to be fixed through the whole lot which in turn allows the bulb to be fixed into the bowl.

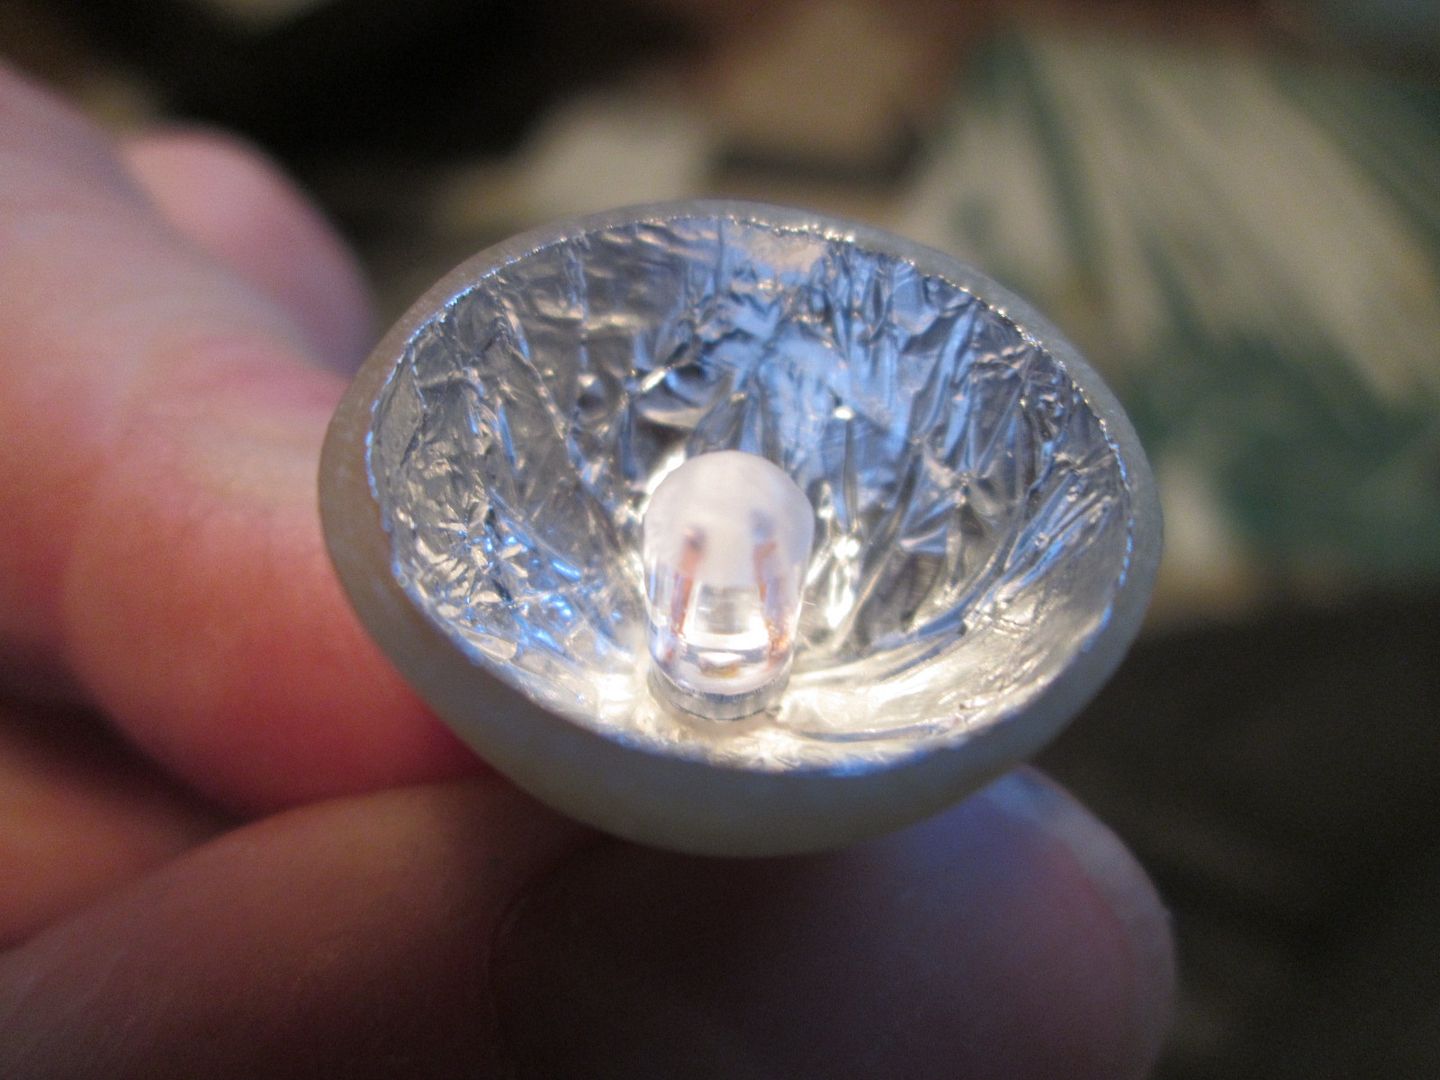
I glued the lens to the styrene ring with CA glue (having tried a test-piece first to make sure it didn't react. The styrene collar has then been filed and sanded down to a minimal diameter:
Now, two things to note here. Some of you will say that I have not put any pattern on the lenses - this is true. The factory car has this style of headlight, but the Freisinger car appears to have plain lenses. I also couldn't think of a good way to create the lens pattern accurately without risking damage to the part! Having glued these together last night, they have become somewhat cloudy. The photos aren't great, I know, but they look better in reality. I'm wondering if the CA glue fumes trapped inside the bowl have caused this - I might try drilling a small 0.5mm hole behind the lens as a breather.
Overall, I'm pleased with the result. I just need to make some small adjuster pieces which will be positioned around the outside, and make sure the whole lot fits inside the pod in the bodywork. There's also a couple of small indicator lights and marker lights to do.
That's it for tonight. I plan to do another update between now and Christmas, and probably another one at the end of the year - it'll depend on how much progress I can make! Still plenty to do...
SB