Hello everyone,
Odd time for an update (from me, anyway) but I've reached a good point in the build and wanted to show what I've been doing before getting on with the next job. I've certainly had a productive week, but I'll start with the mk2 bumper panel which made a brief appearance during the last update.
The extra height I added to the mould has allowed me to get a better fit where the outer ends of the bumper panel are wedged into the rear wings / fenders:
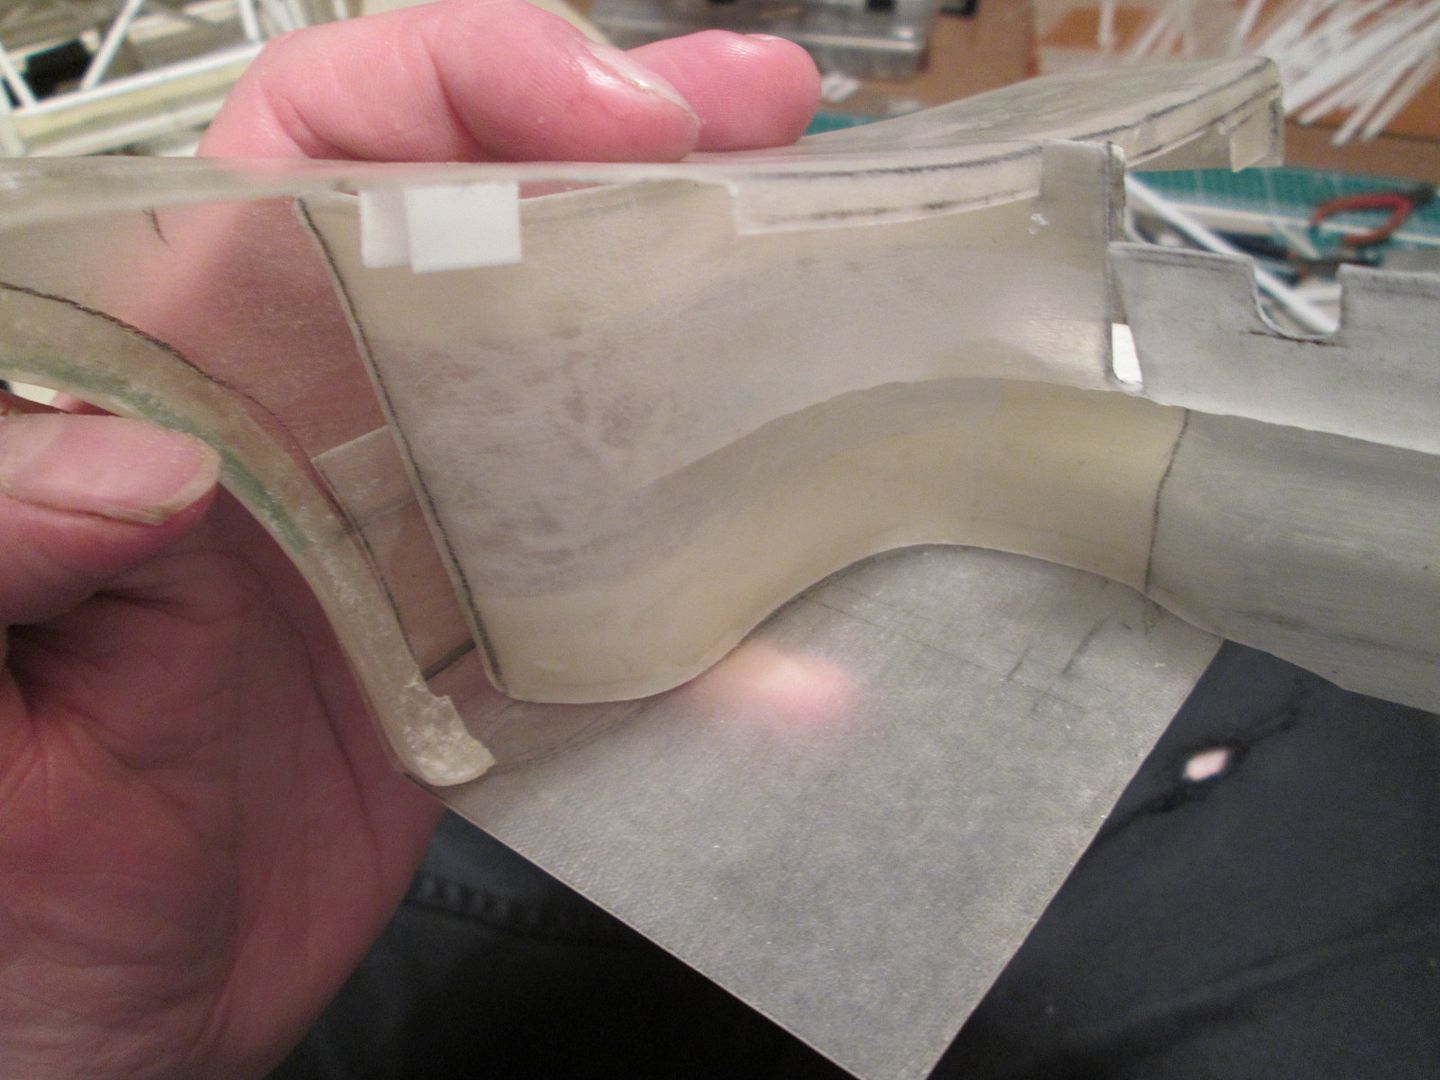
Getting this to work properly has been frustrating at times, and still needs more effort before I'm ready to start gluing parts together. I'm still reluctant to cut the bumper panel into the three sections just yet, as it's too useful to have it in a single piece. The angled panel over the top of the turbo units appears to work well - it should provide enough room for everything to fit. I'll return to these parts in a while.
Next, a piece of
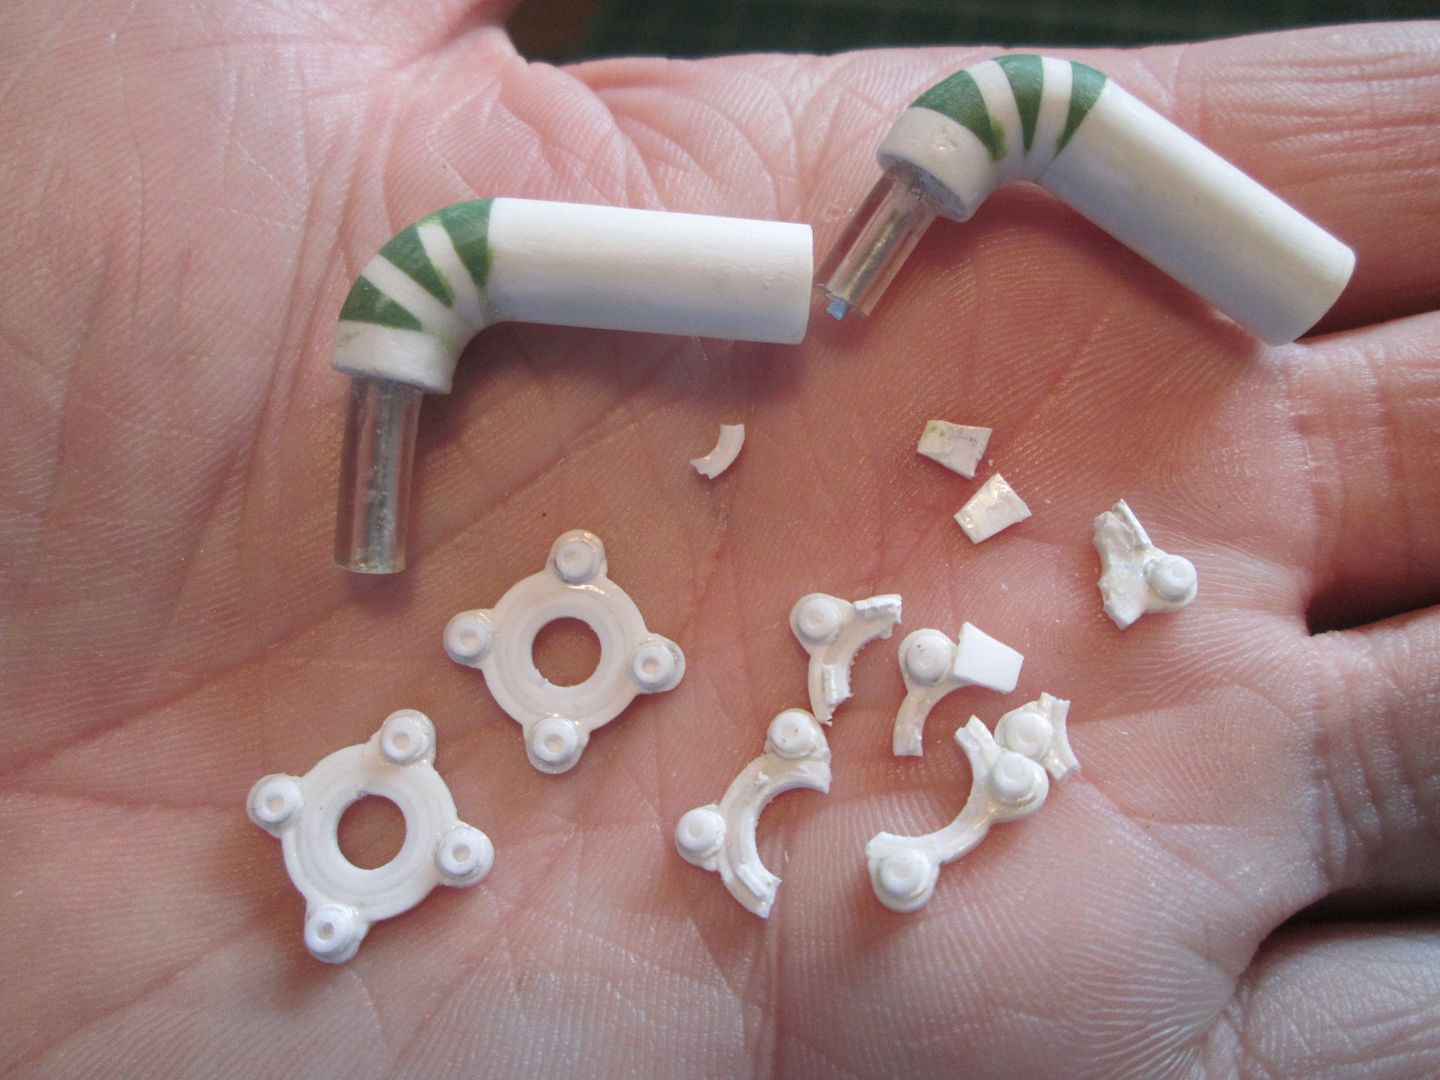
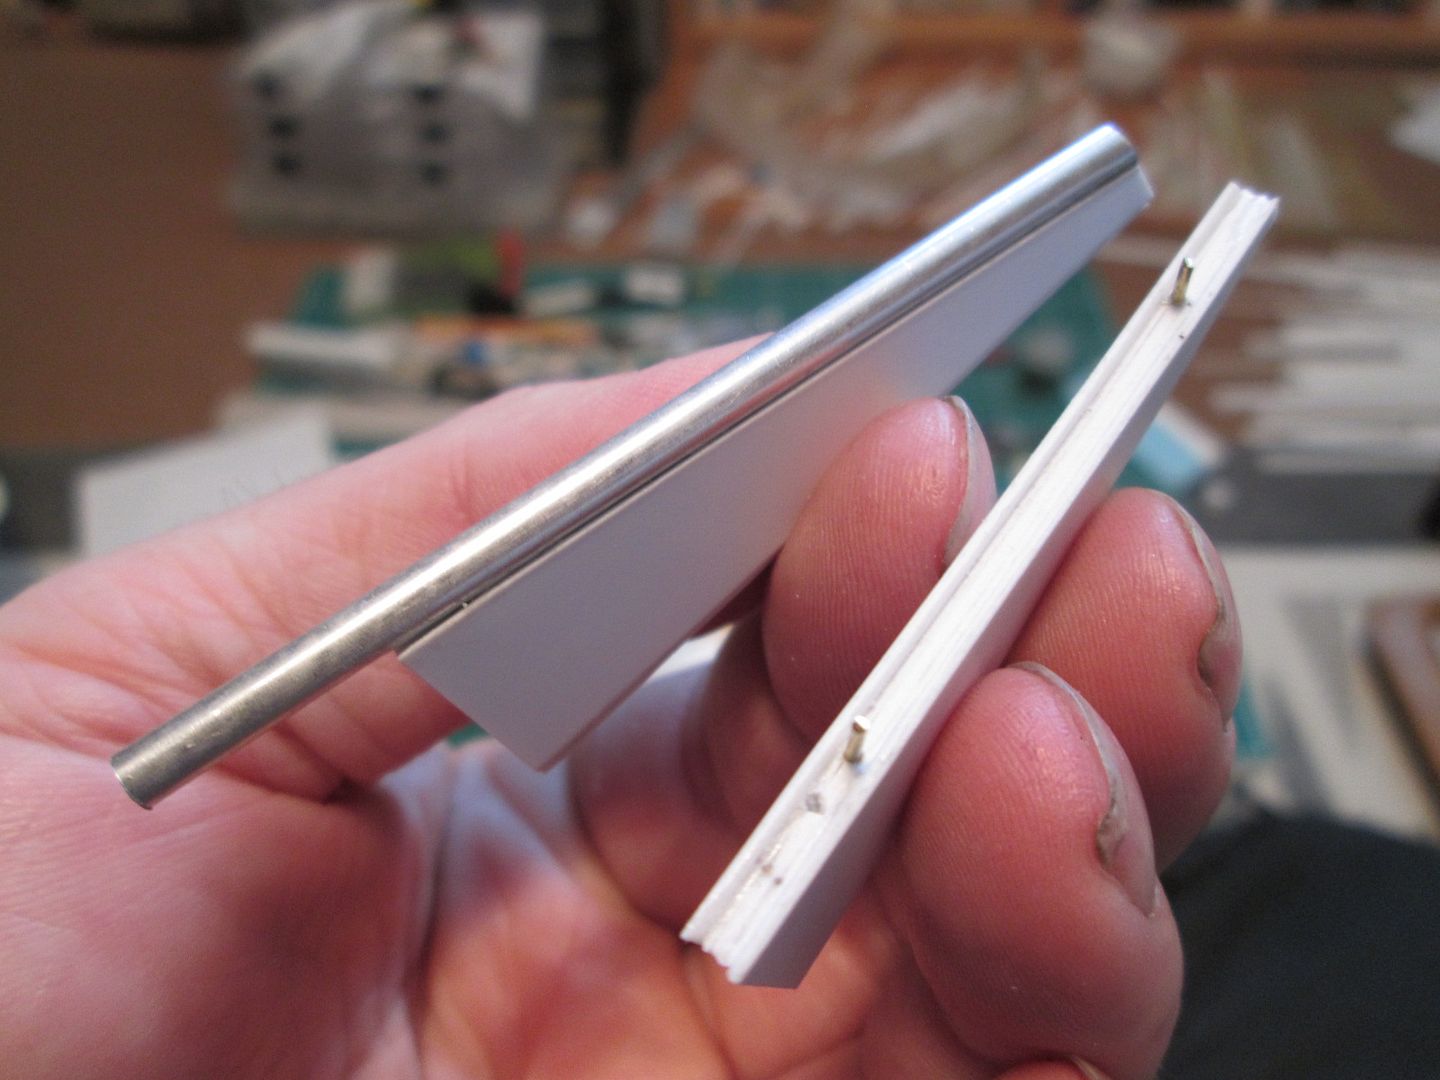
destruction rather than construction. When I had the mk1 version of the bumper panel I realised that the turbo exhaust pipes were not going to be in the correct position. I'd modelled them as being horizontal, but the engine actually sits in the car at nose-down angle - so the tailpipes were now pointing upwards. Now, I'm not claiming total accuracy for my bumper panel measurements, but I knew that I couldn't make it all work as it was - the best solution was to adjust the angle of the tailpipes. Rather than completely re-make these parts, I made a pair of new flanges from styrene tube and half-round section, then separated the old flanges from the tailpipes:
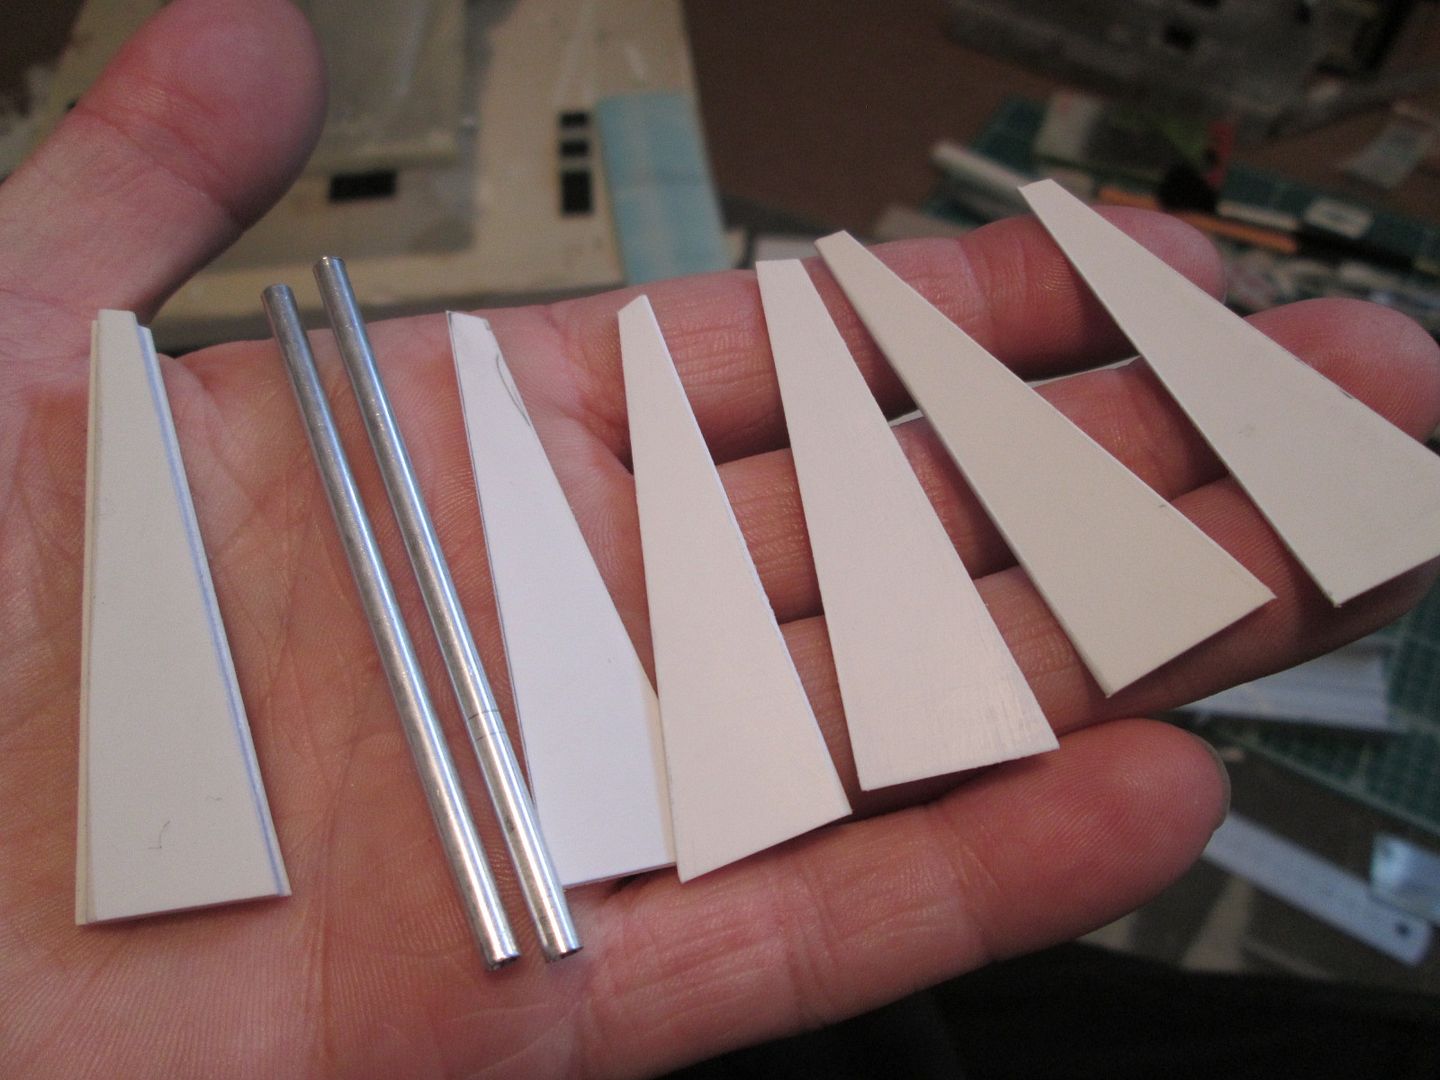
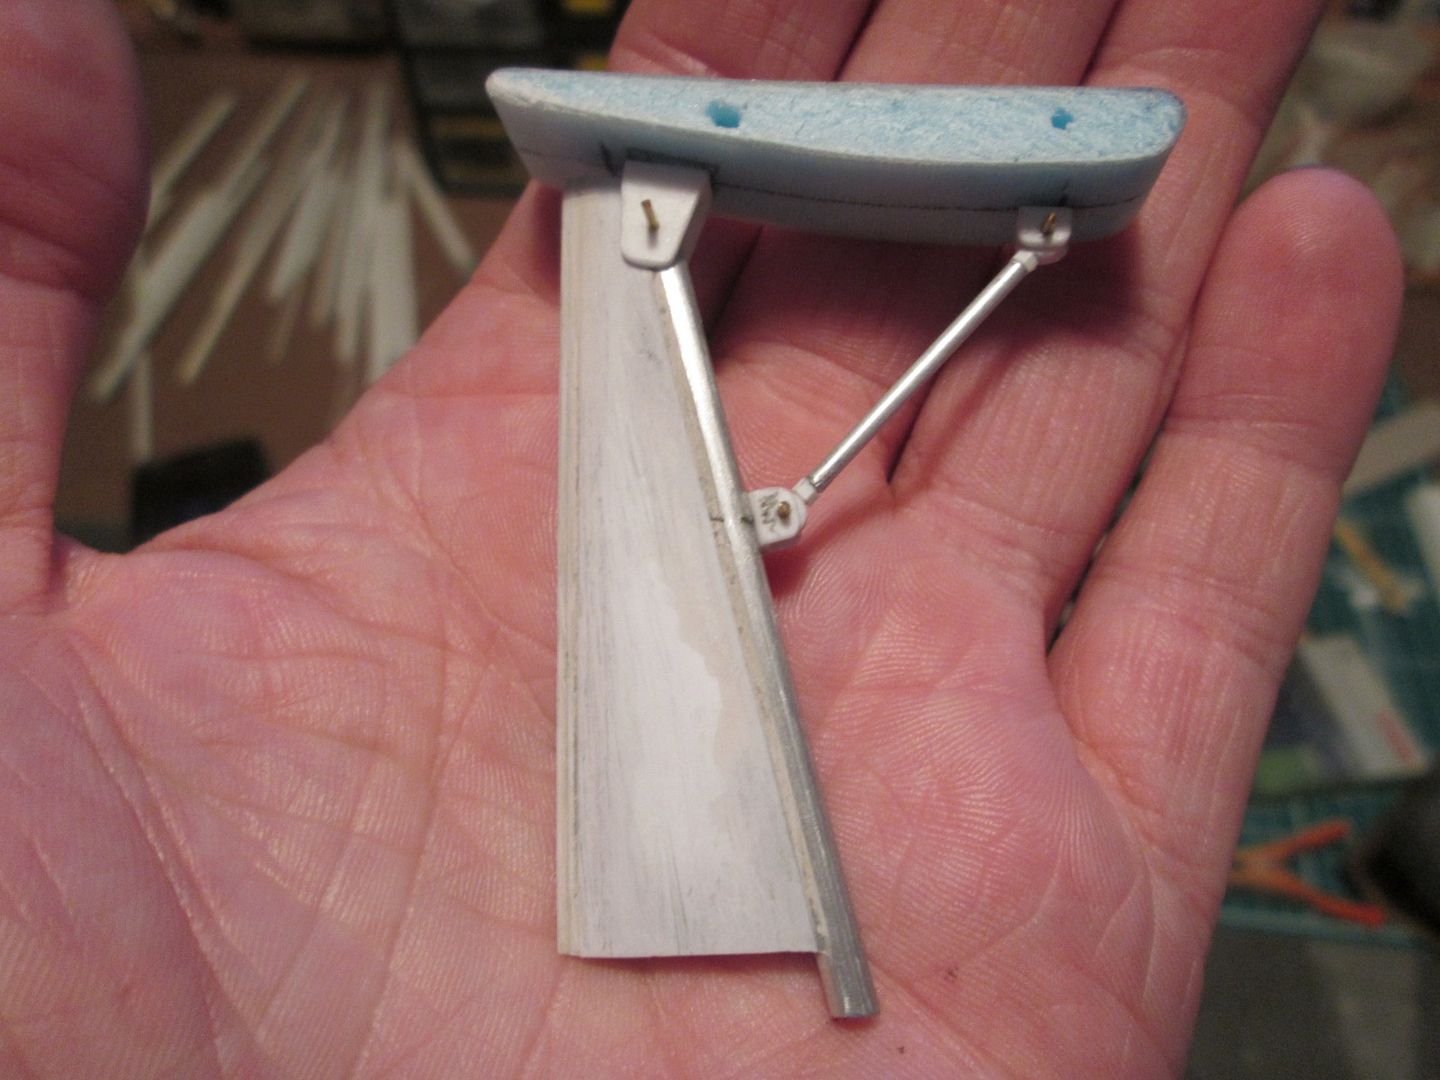
Moving on to this week, I decided to spend time on the rear wing - the mainplane was easy enough to trim to length, but that still left the main supports to work out. Once I'd settled on a shape for a template, I cut five panels for each support from a mix of 0.75mm and 0.4mm styrene, giving a total thickness of just over 3mm. I then added a length of 1/8" ali tube to create the leading edge, and to provide some strength and (hopefully) structure:
As I glued the styrene panels together I created a channel in the front edge, into which I could pin and glue the ali tubes:
From here it was a question of shaping and filling the trailing edge to create more of a teardrop profile, then adding brackets to attach the mainplane. The stay is small-diameter ali tube with a length of wire inside, with 3mm styrene rod and hex used to create the rod-end joint detailing. I kept a small piece of the left-over mainplane to use as a place-holder, rather than risk screwing up the actual part:
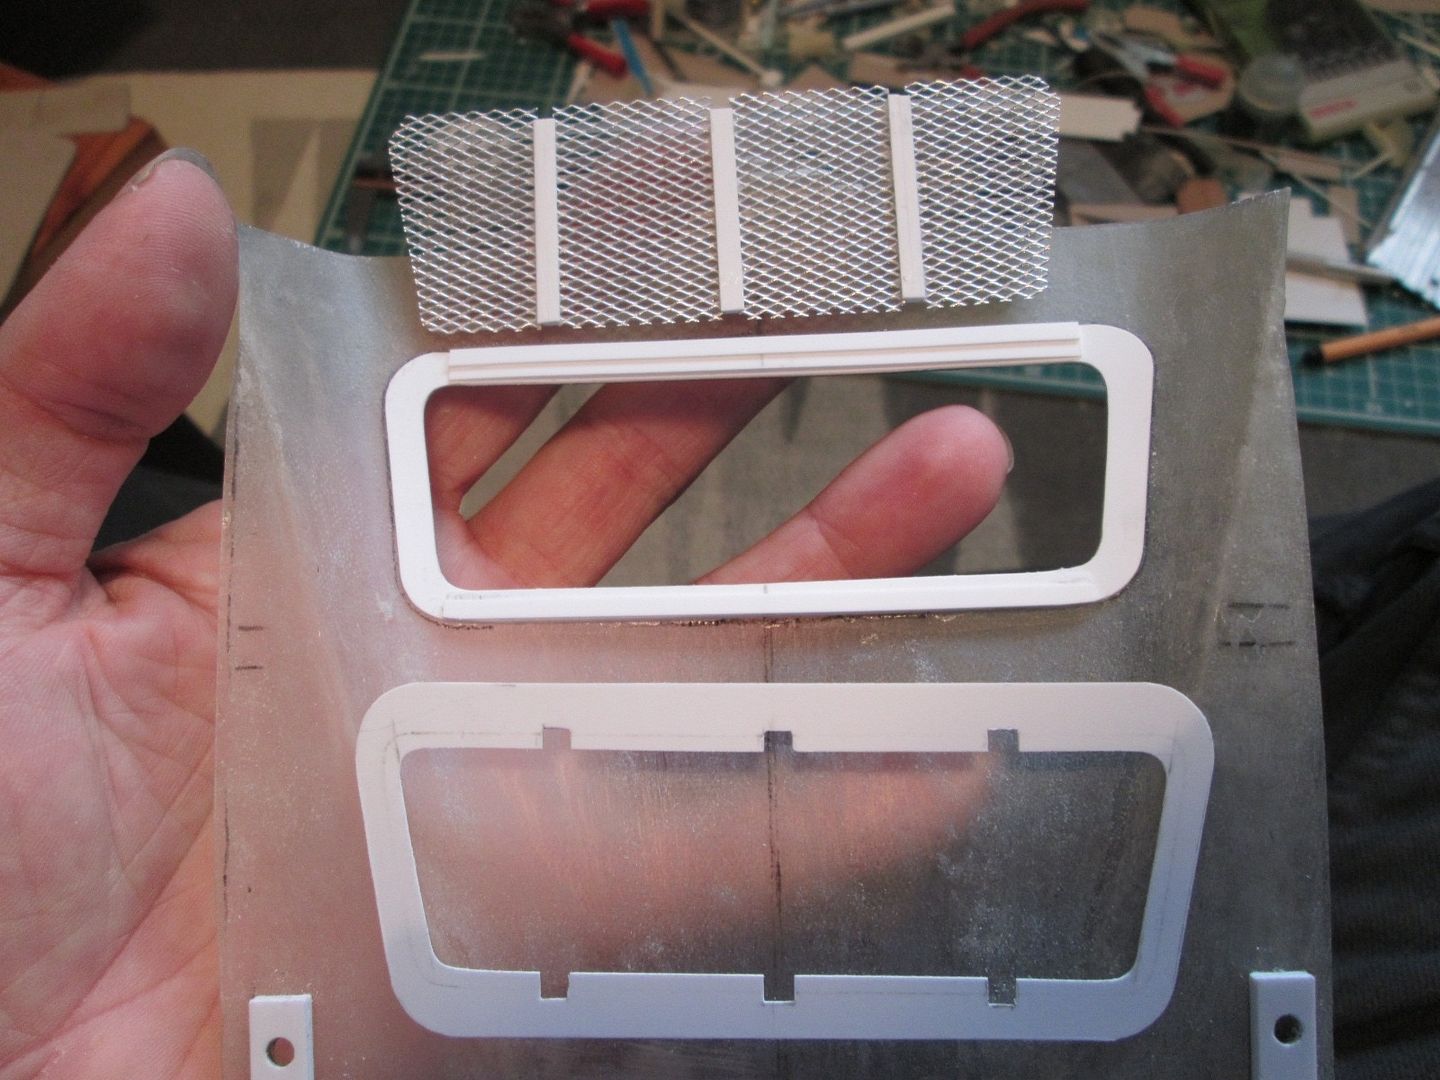
More of this later! Working on the wing and the engine cover extension panel gave me the impetus to tackle the rear grille. I worked out the basic measurements, and used one of my photos of the Silverstone Kremer 935 to get measurements for the spacing and the thickness of the grille slats. Thin styrene would have been ideal, but I was concerned about it distorting over time when glued together, so decided to use some of my flat-sheet fibreglass instead:
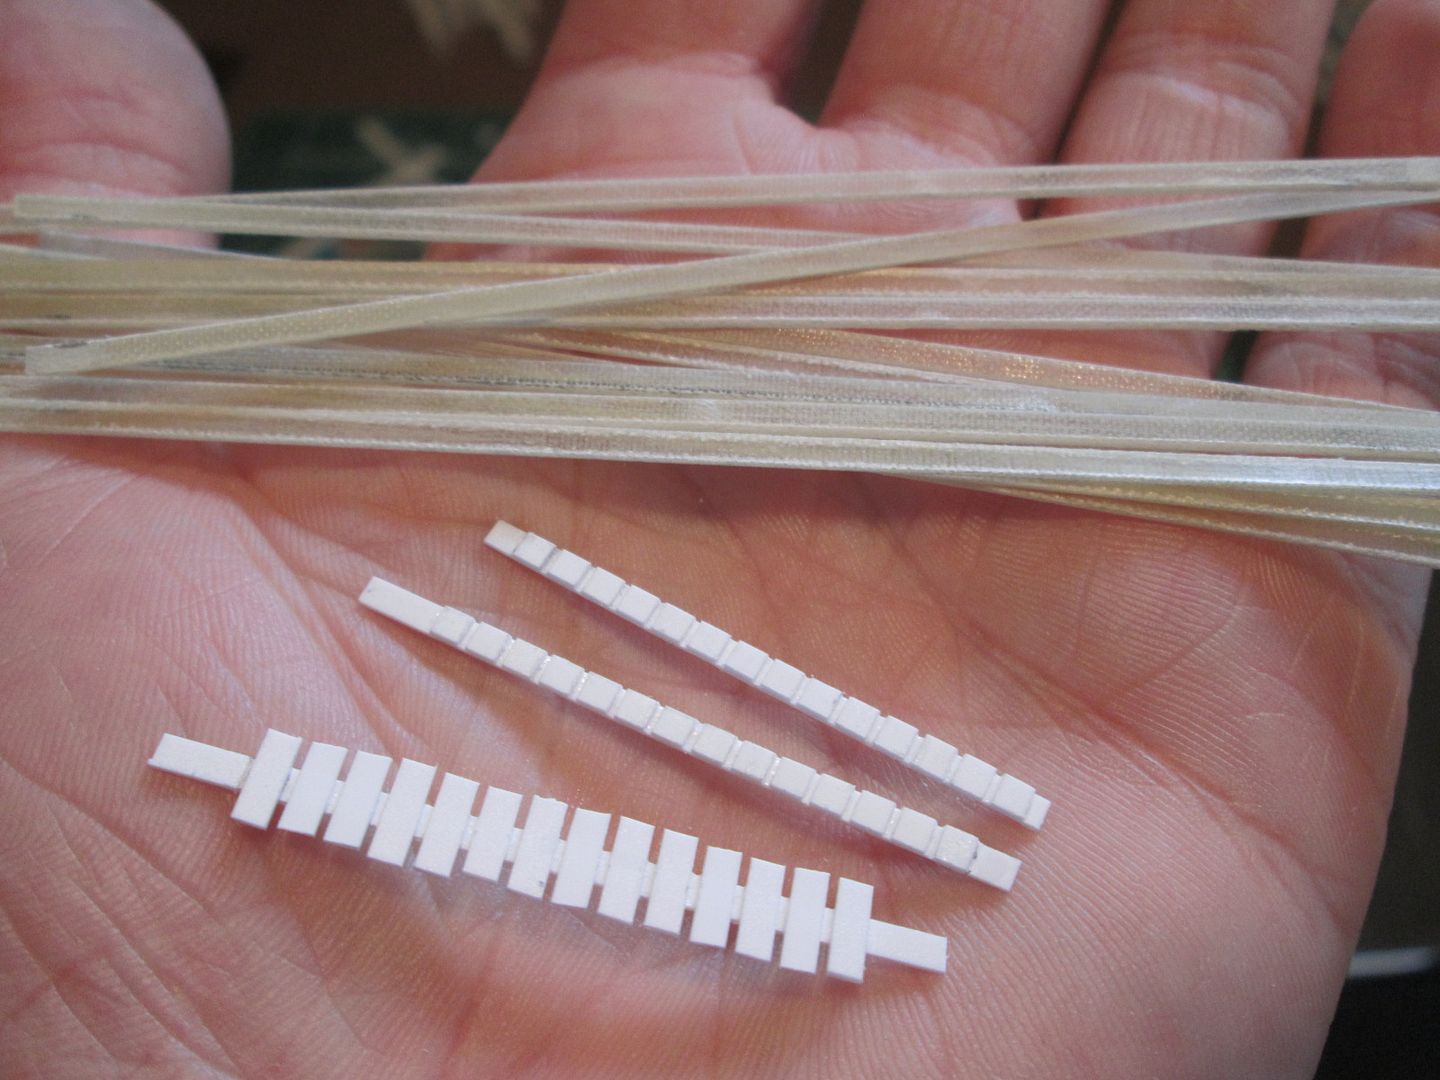
I cut the slats approx. 2.5mm wide by about 100mm long, then made the three supports from 2mm wide styrene. The fiddly part was adding the extra lengths of styrene across each support to create the correct spacing, but they were easy enough to trim to length afterwards. I then taped the three supports in place on a piece of cardboard, and started CA'ing the slats into position:
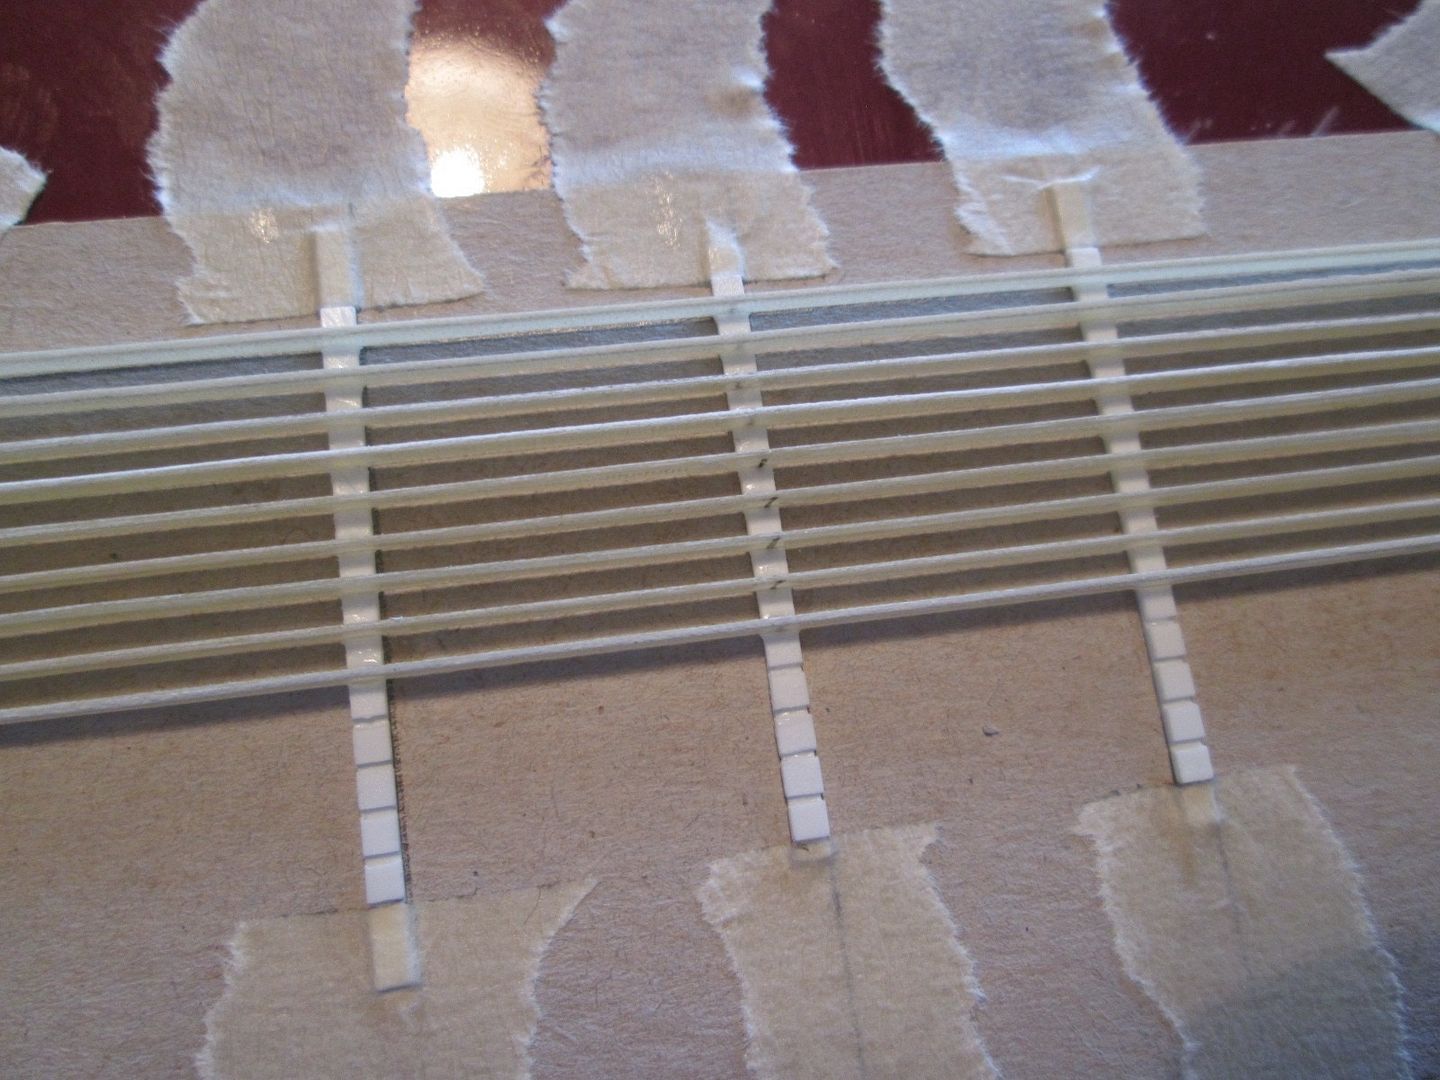
The slats were then cut to length to match the shape of the hole I was busy cutting into the rear deck. The hole edges were built-up with layers of styrene sheet and lengths of strip, as I worked out how to create the rest of the grille. Mesh was added to the underside and CA'd in place, with 3mm strip added as extra support. Finally, another styrene plate was cut which would fit around the whole lot and hold the grille in position:
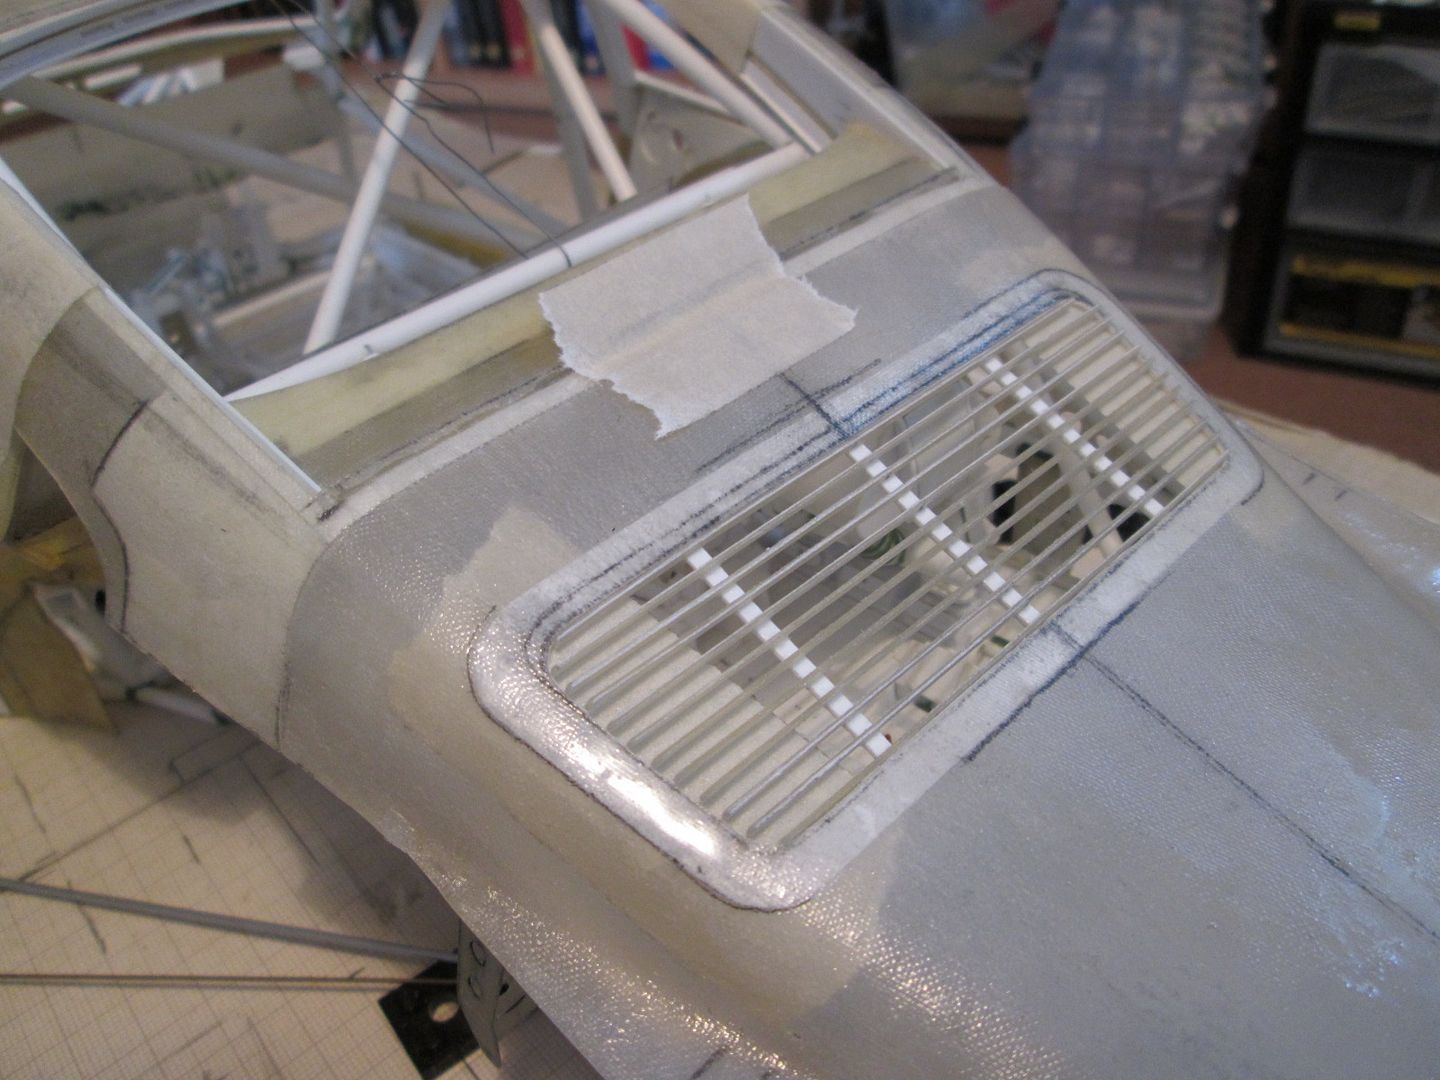
Eventually the grille section will be painted black and can be glued into the rear deck panel. I've shaped the outermost ends of the slats to follow the curve of the bodywork, too. So far, I'm very happy with the result - it's not a job I'd planned to do this week, but given the time it's taken I'm glad I did!
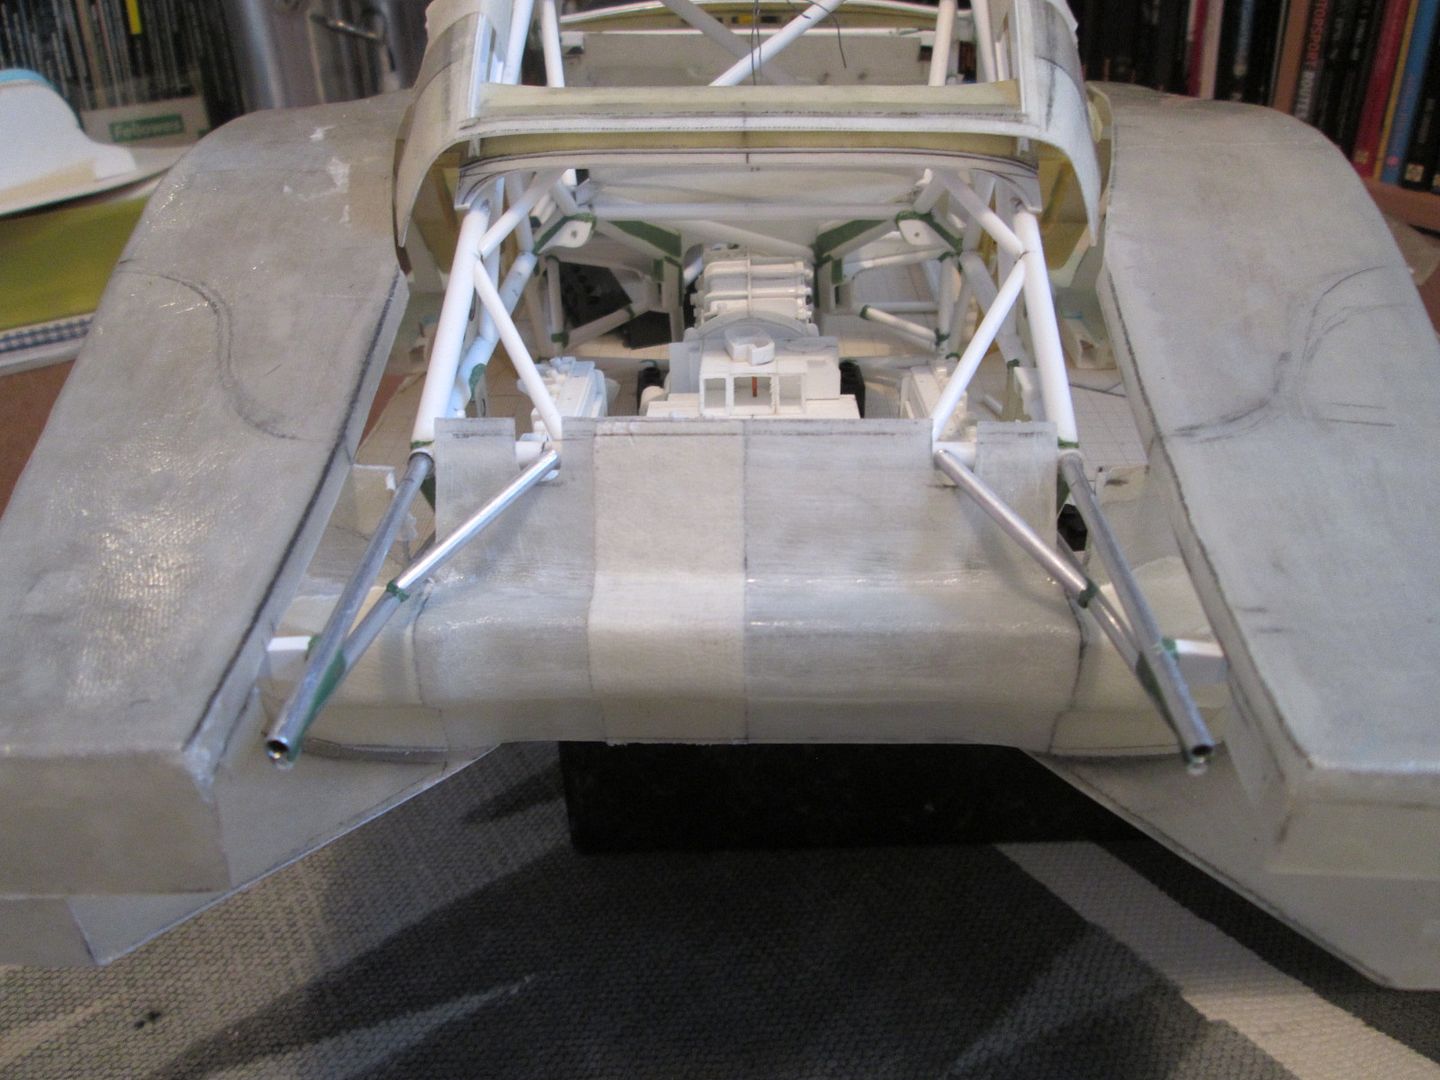
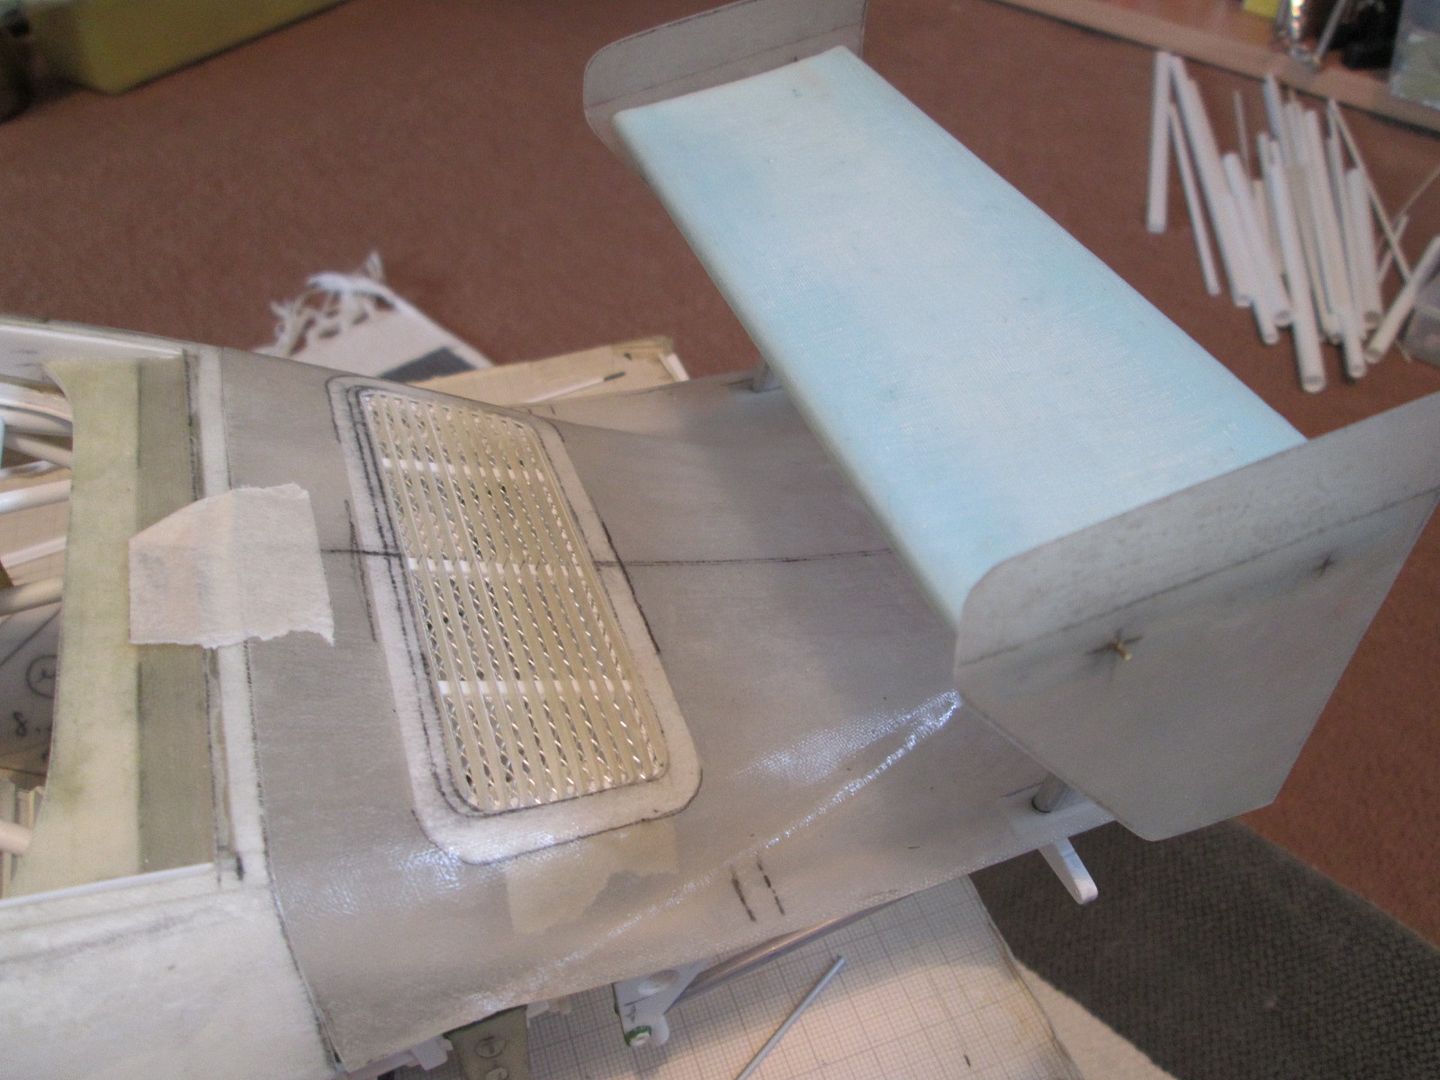
Here's a shot of the rear deck with both the wing and grille panel in place - I trimmed the wing end-plates to size and pinned them into the styrene inserts shown last time. I added two small lengths of 1/8" ali tube into the trailing edge of the mainplane to create sockets - I then glued small styrene pegs onto the inner face of the endplates so that they were held at the correct angle. In time the whole lot will be glued together properly, but for now it's staying loose:
...and here's the required shot of the full car, with nose and whale-tail in position!
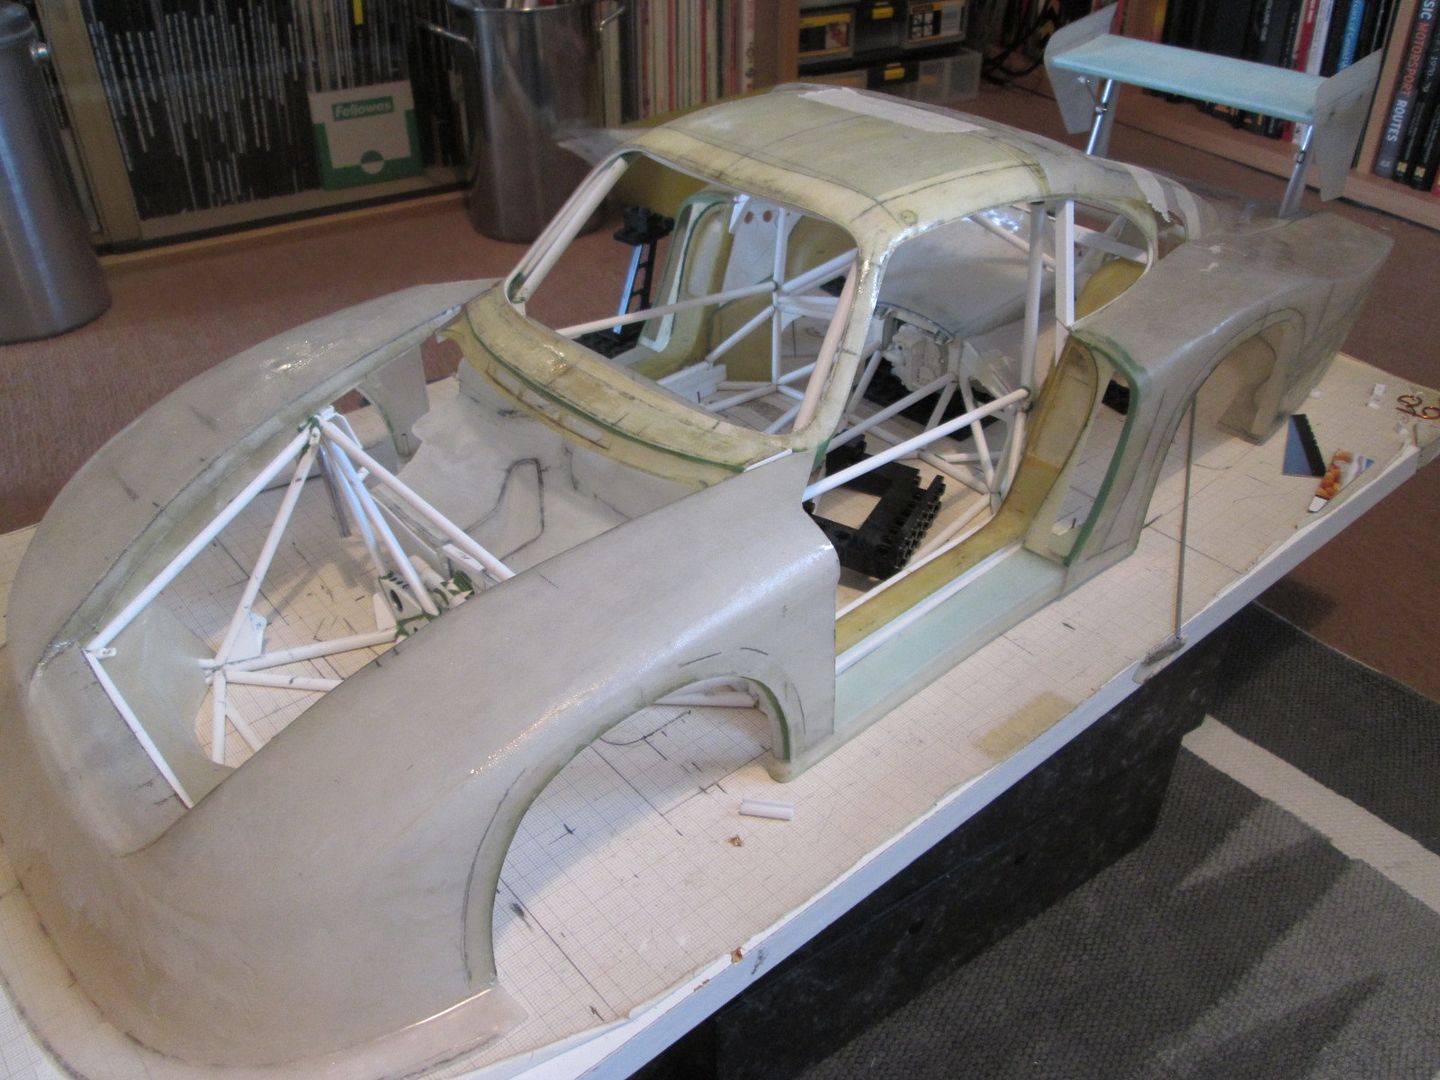
I have to do this from time to time, as it reminds me of what I'm working towards - getting the wing and grille sorted are both sizeable jobs crossed off the 'to do' list.
So, it's definitely been a productive week - and it's still only Friday. The next job I'm planning to tackle is the floor: I want to get some strength into the chassis structure, as the front end is vulnerable until the main roll-cage is added. Styrene sheet is too flexible, fibreglass is better but not good enough...maybe if I had a sheet of carbon-fibre I could use? More on this next time...!
All the best,
SB