Hello again,
Final stages of the gearbox - for now. There's a few small details to add (clutch lever, pipe fittings, etc) but these can wait until later. It's the sort of stuff that is guaranteed to get knocked off or broken before everything gets assembled into the car!
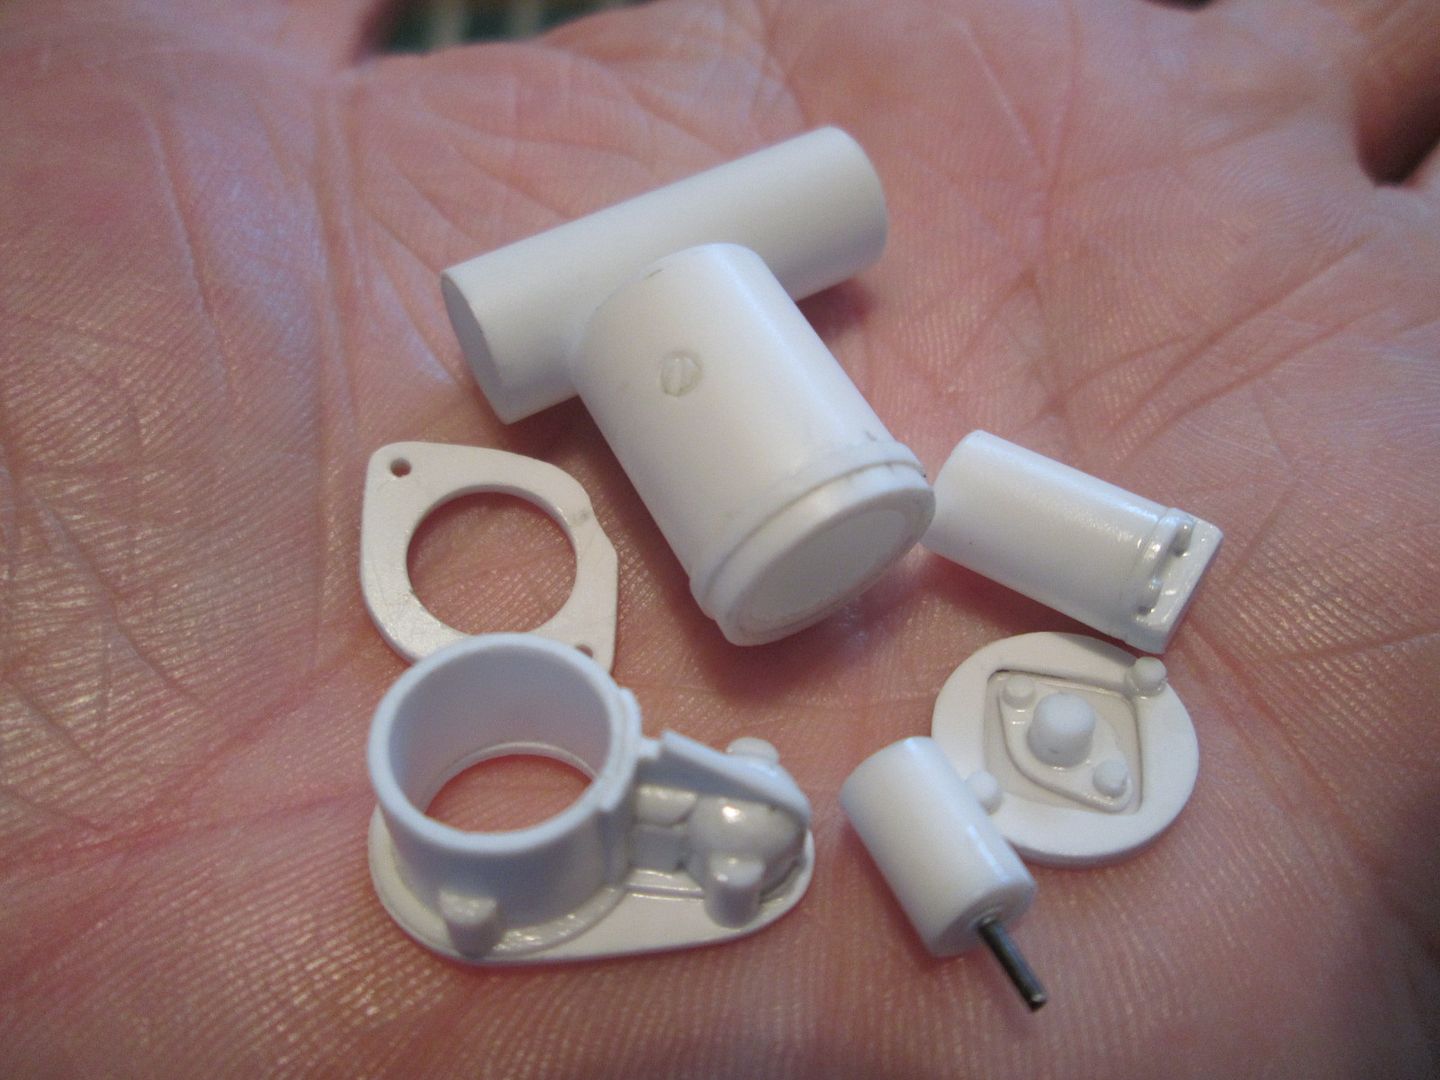
However, I wanted to get the starter motor sorted out, so that's what I've been working on. Firstly, here's a breakdown of the parts:
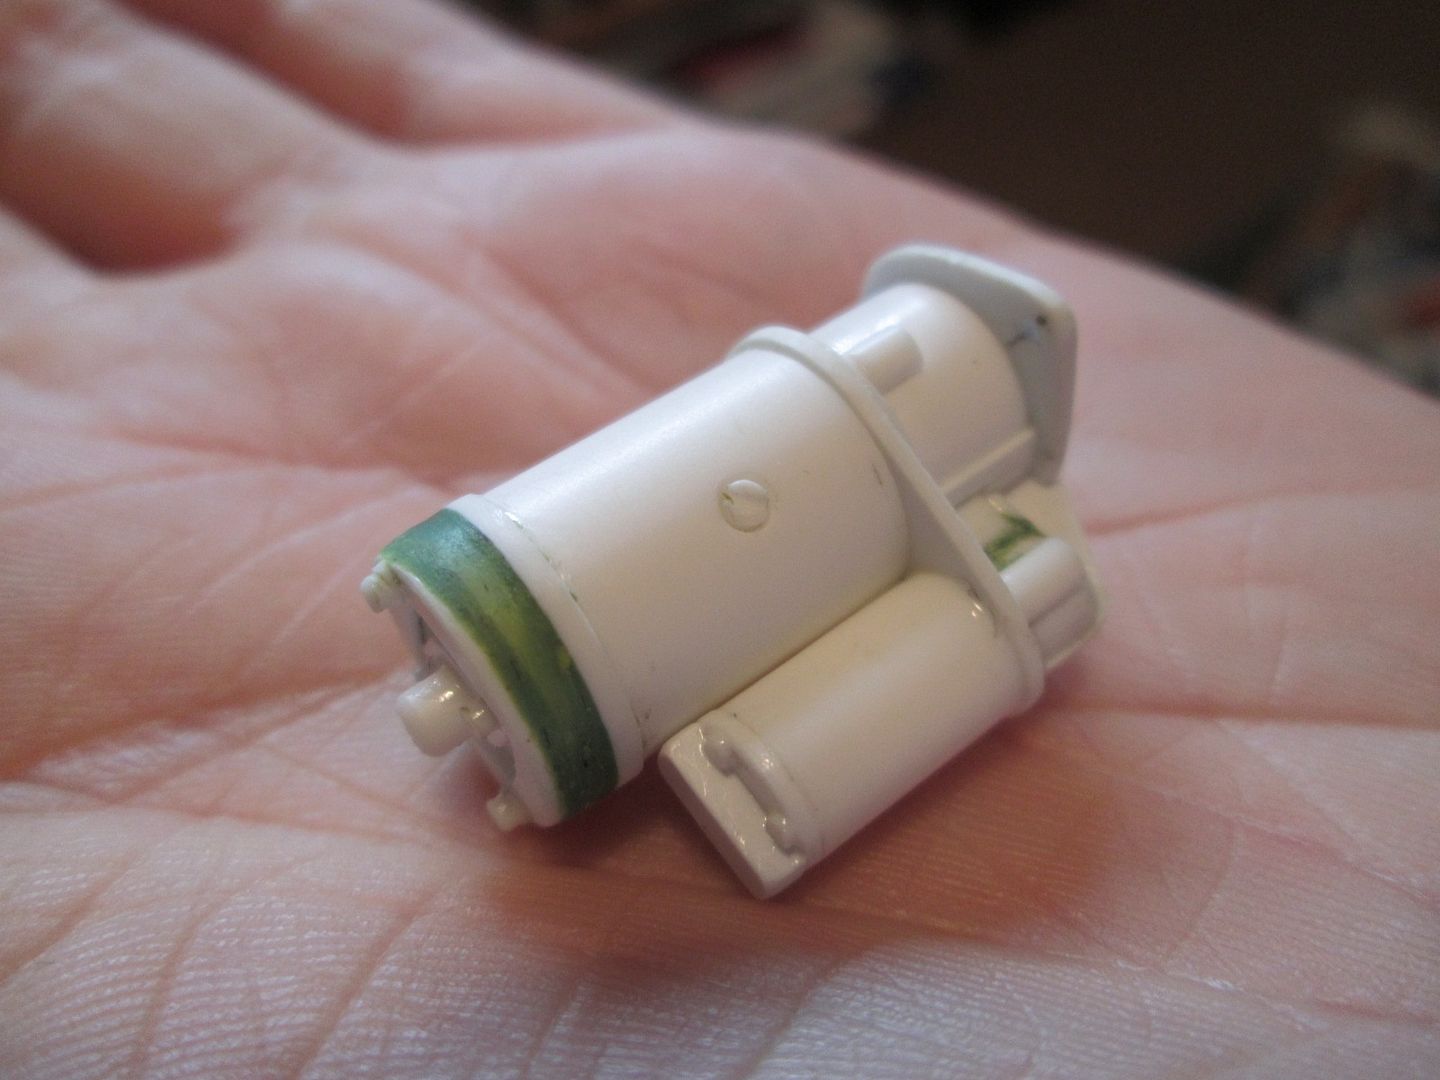
...and when it's all in one piece:
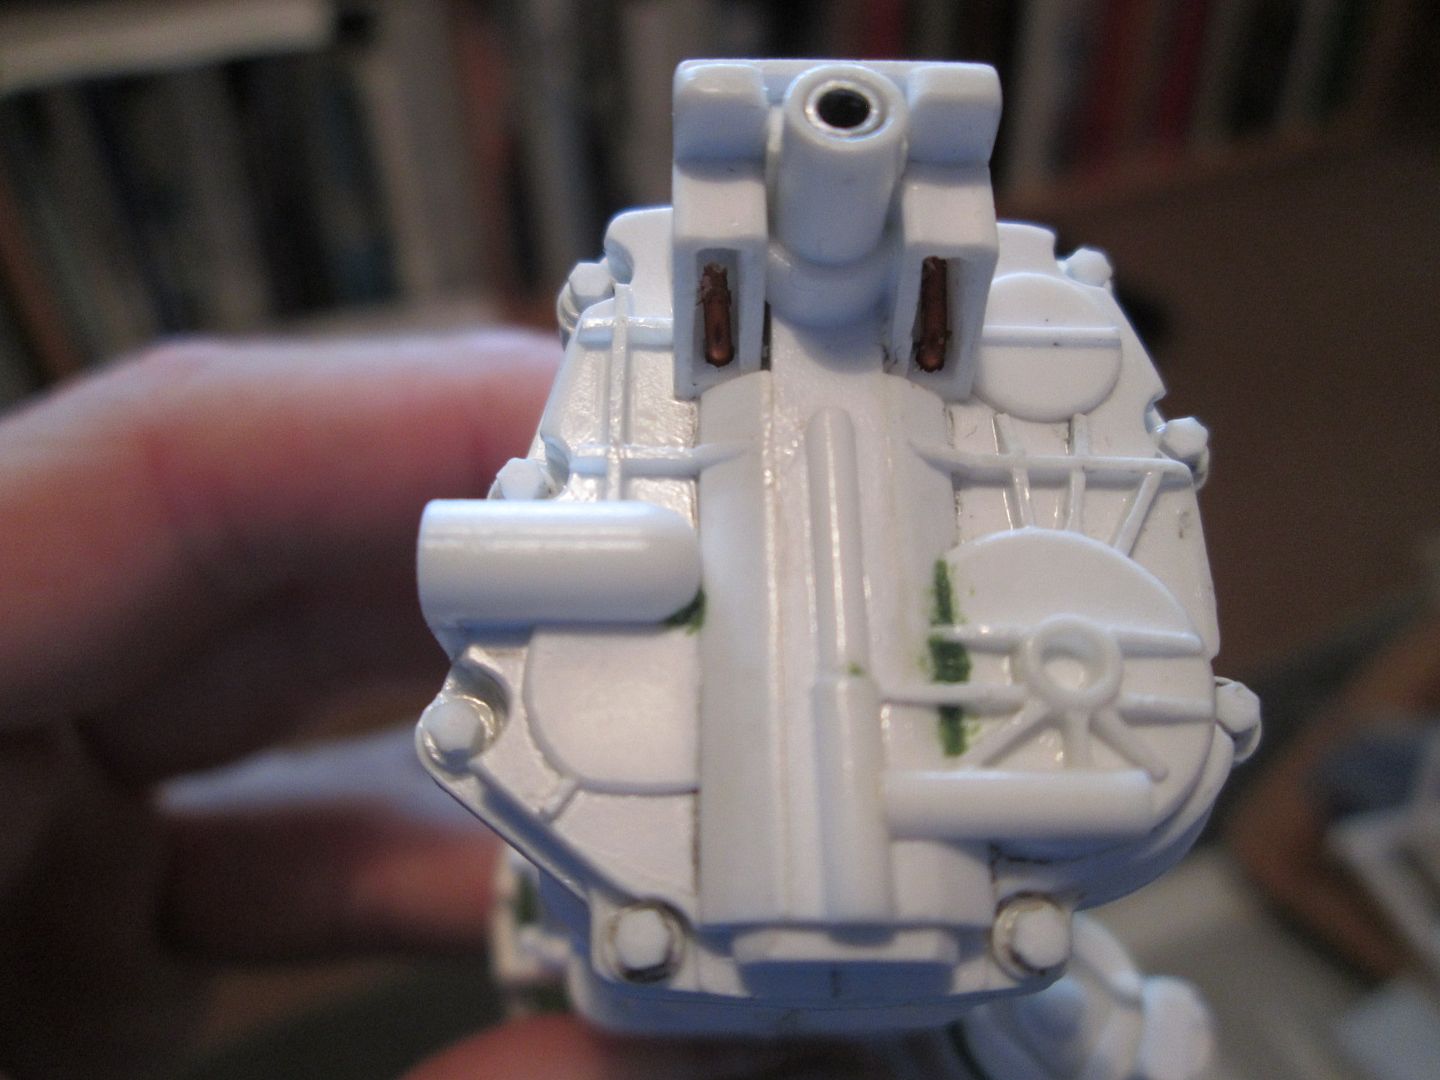
I'll add the wiring later in the build, but here's what it looks like on the gearbox:

Providing it doesn't foul the driveshaft when they're added, it should be okay.
Returning to the gearbox itself, I added some extra detailing to the end cover and hex-nuts all over the place. You can also see here where I've pinned the front mounting through into the main structure - eventually this will be filled with Greenstuff:
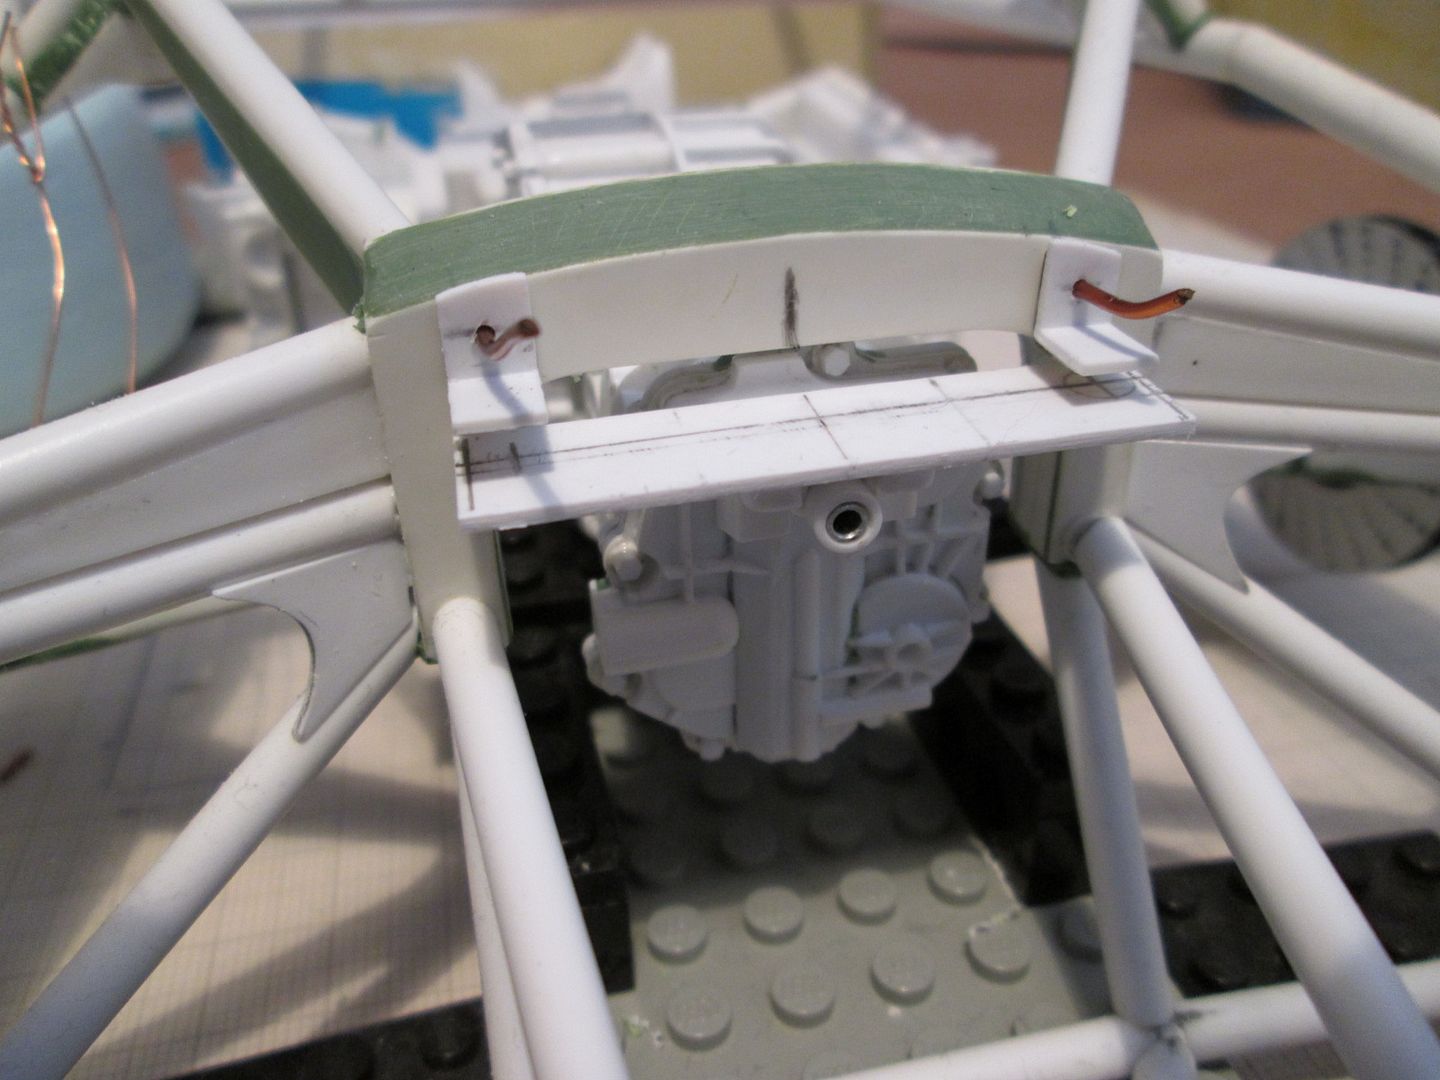
So, with that all done I wanted to start positioning the gearbox in the chassis. The small angle brackets you can see below are styrene with brass reinforcement, which will be pinned through into the chassis beam. The plate across the top of the gearbox is not the final part - I'm considering whether to make this as a styrene / brass sandwich, or whether to add some fibreglass to the mix. Or just to make it from a thin piece of ali...we'll see.
I'm tempted to drill into the top of the gearbox and pin through into the underside of the chassis beam, just to give it an extra connection. It would be much easier if the mounting was
below the gearbox, but I'm fighting gravity all the time with this one!
More on this next week...
Finally...thanks for the positive feedback, guys. Always appreciated, and I'm glad that you're still following along - it doesn't seem like five minutes since I started on the engine during the Christmas holidays, and now it's July and I've got a gearbox sitting here too! The chassis is going to need a good dusting-off before I return to working on it...
Yes, the putty I use is 'Greenstuff' from Citadel / Games Workshop. No significant reason, other than it's what I've always used from my figure-painting days (same with the paints, too). I'm always reluctant to start painting at an early stage, preferring to wait until most of the model is ready to assemble. The Citadel paints I use are not exactly hard-wearing (without a coat of varnish, anyway), so anything I painted now would have lots of white patches showing through before too long - particularly on something like the engine or gearbox which are going to get lots of handling. The big disadvantage of working like this is that I'll probably find most of my paints are solid lumps by now, as I haven't used them since I did the 908 in 2011...
Getting the ribbing straight is largely down to doing it by eye, although I did use a few offcuts of thicker styrene strip to act as spacers on occasion. The pieces are all pretty short on the gearbox, so it's easy to glue them in without going off-line - if they were much longer I would have to be more careful, as the styrene can flex slightly. As usual, most of this will be hidden from view when the model is assembled, but we all know the detail is there, right?!
All the best,
SB