Hi everyone
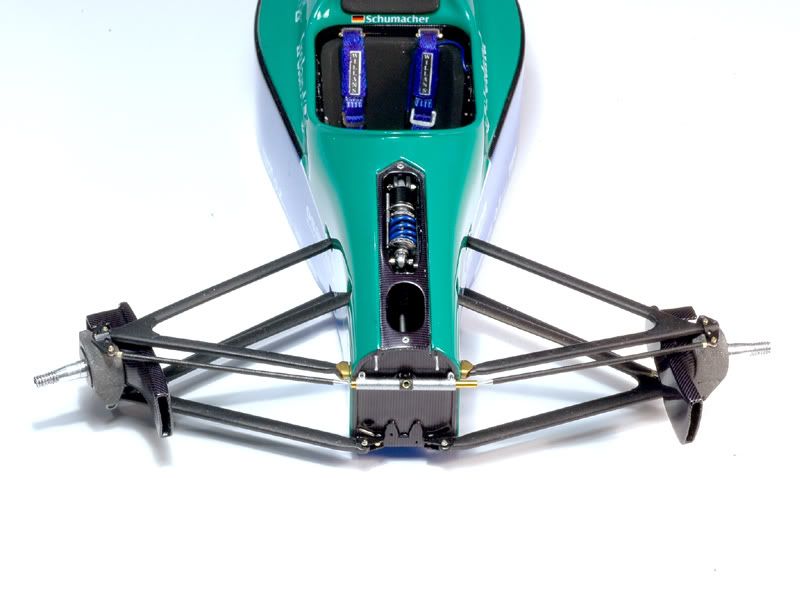
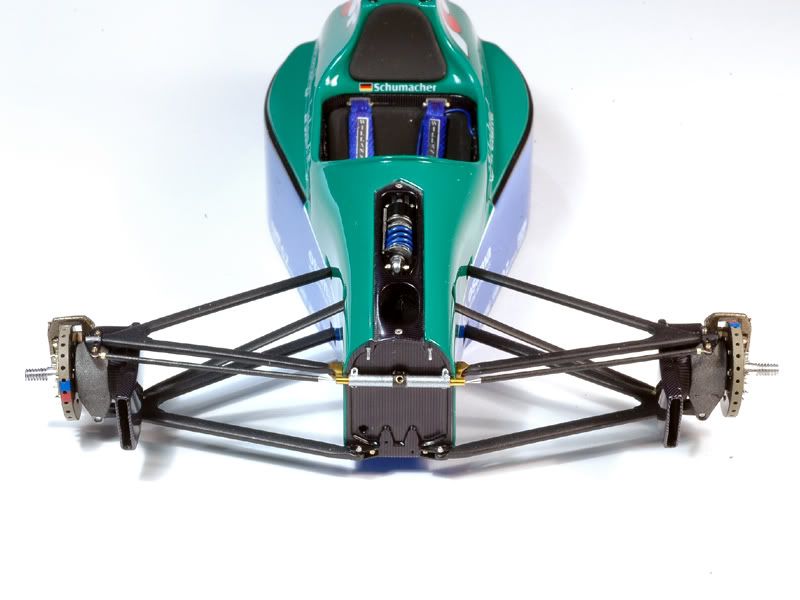
Heres some more progress, this time starting with the front suspension. I connected the uprights with the upper and lower A-arms and then mounted them to the chassis.
Trouble started when I wanted to install the pushrods. Again it seems the paint and glue compromised parts fit in several places and things got a bit nasty and annoying. Ultimately I came out the winner of the battle though with the damage to the paint mostly fixed and in less visible places :-)
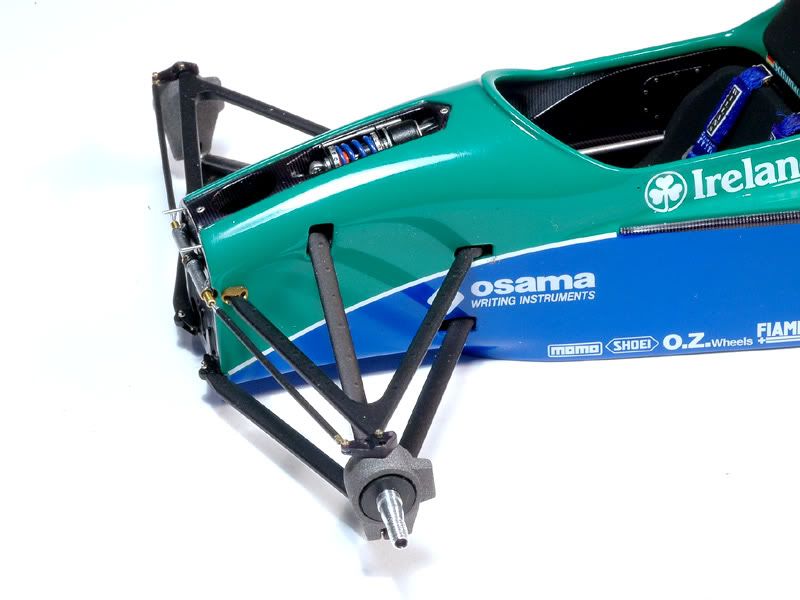
The front damper received some additional bits for detailing and to hold it in place. Its a bit tight around it and I doubt in reality it would have much of a chance to move, but it looks like serious business :-)
Then I mounted the steering elements, while the suspension parts were still held by the jig and the uprights in the correct angle. Afterwards I installed the stub axles and now the jig has done its job and doesnt work anymore.
You can also see the little turned aluminium pins above the steering which will hold the nosecone. I didnt just use wire because over time that might work loose and get pushed backwards. These pins have a slightly wider ring machined in where they enter the monocoque so this wont happen.
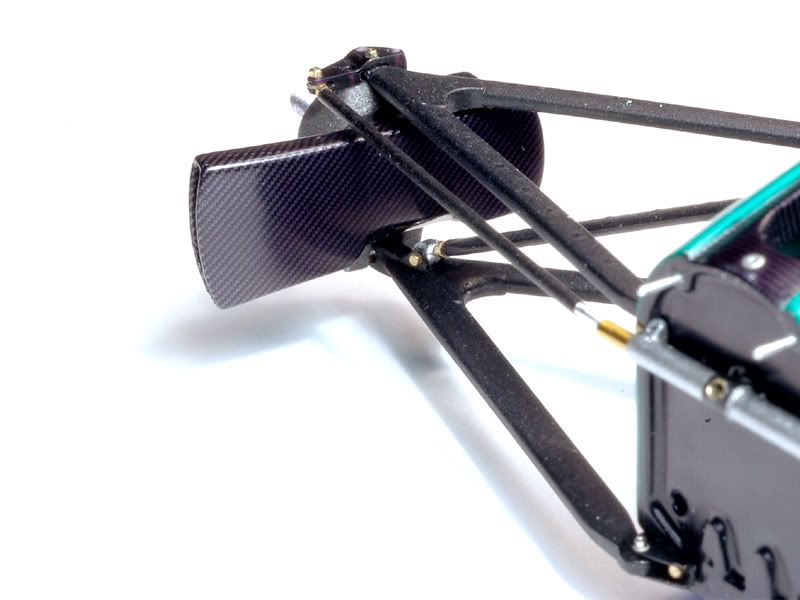
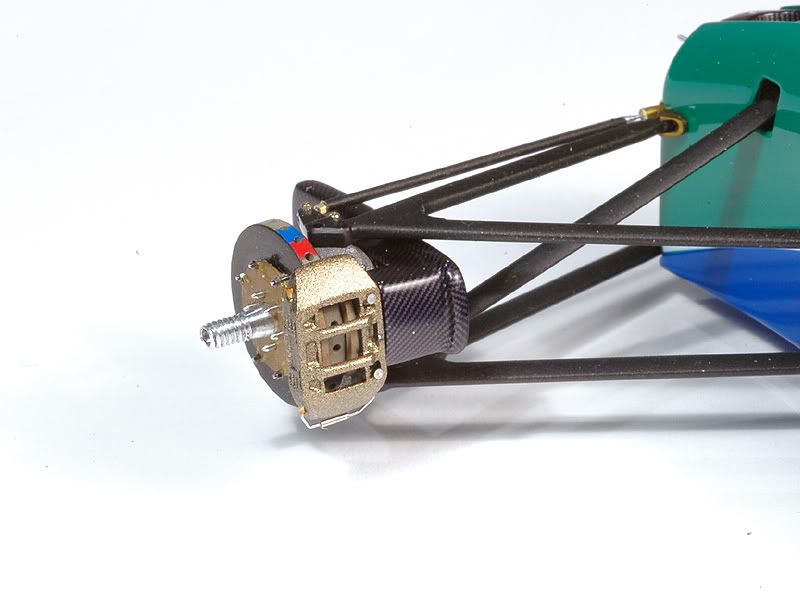
Next up I glued the front brake ducts in place using epoxy glue. They were also CFd painted and slightly polished.
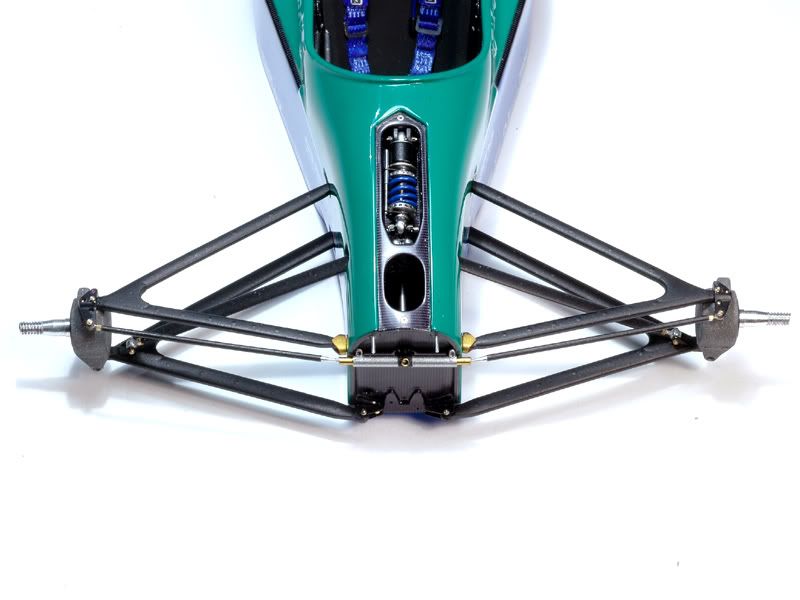
Another shot seen from the inside:
As you can see in the next picture the steering still moves. There is quite a bit more play in the steering than I had hoped for, but I cant really do much about it now. For a static model its o.k. but the straight line driving would be rather abbysmal :-) Now that Ive done it Ive come up with a an idea how to improve that, but Ill have to keep it for another build
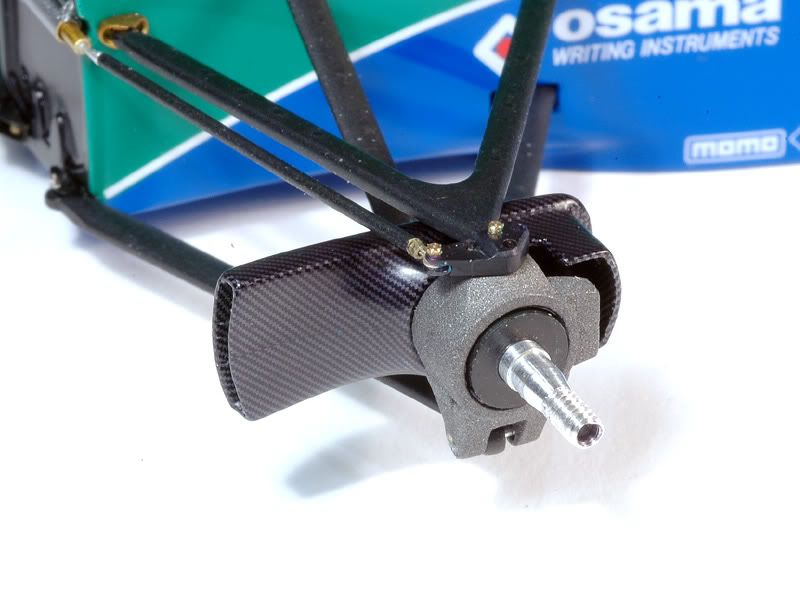
At this point it was time for the brakes. The discs were painted with a brownish matt paint mix at the edges. The sides were first painted with Alclad Steel and some Jet Black mixed in to darken it. Then I dusted over some Zero silver to get more of a glittering effect.
Its not exactly like the real carbon brake disks but looks convincing :-) Next time I may try another approach using custom made CF decals
The paint was followed by a good layer of 2K-clear and then sanded and slightly polished. This gives some extra depth to the look.
The orange disc parts received the same paint treatment as the suspension brackets on the gear box and were detailed with locator pins for the wheels made from 0,5mm nickel silver rods around the centre and 0,5mm nuts w/bolt stems from Scalehardware around the outside. On the back I added etched hex bolts.
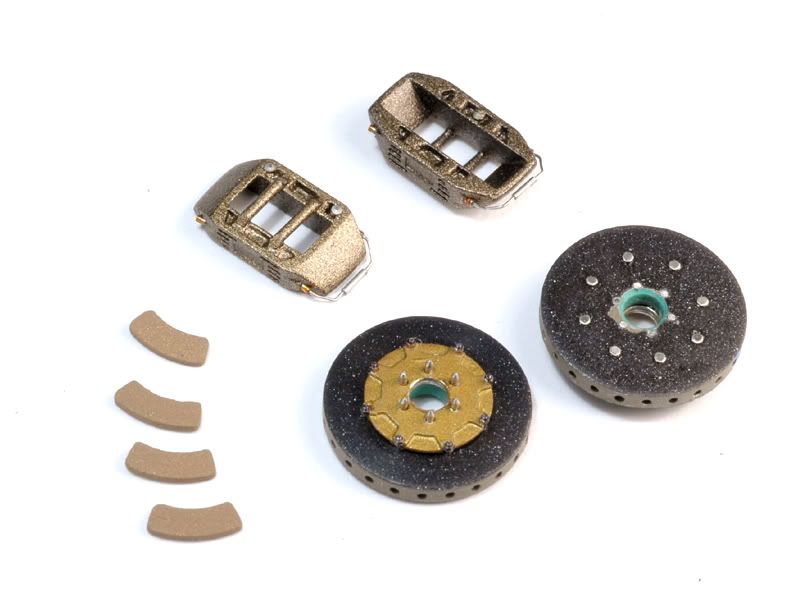
The brake callipers are painted Alclad Pale Gold. They didnt come out as crisp as I had wished but I added some extra details do distract from that on top of the individual brake pads :-)
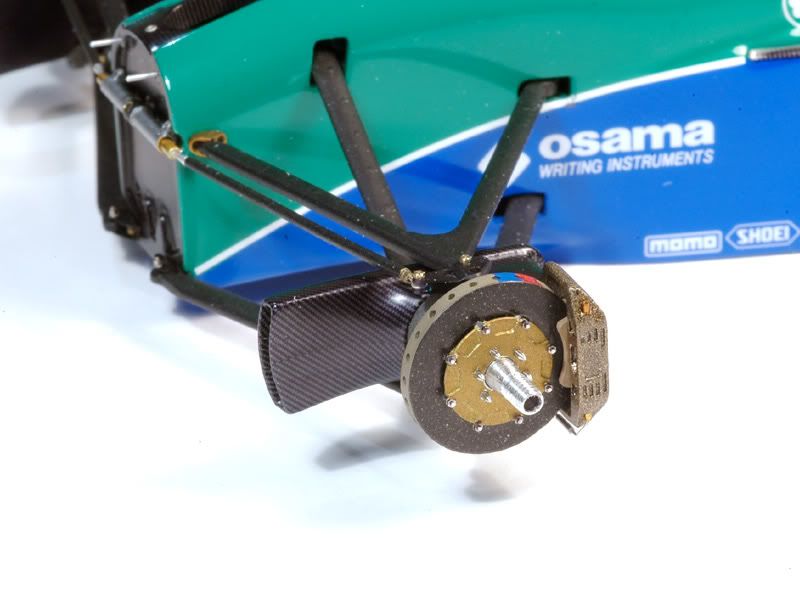
The wheel hubs and brake discs still move as planned though. I still have to add brake lines.
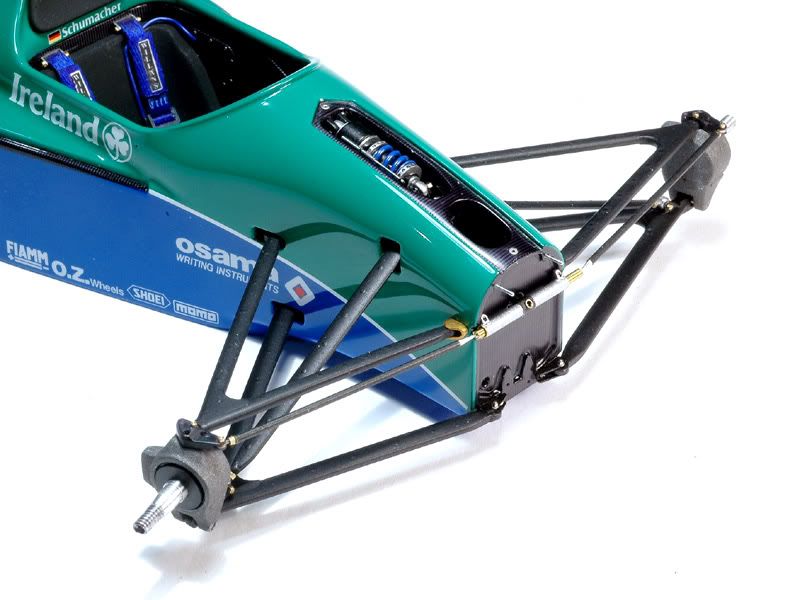
So heres a front overview with all the new parts visible:
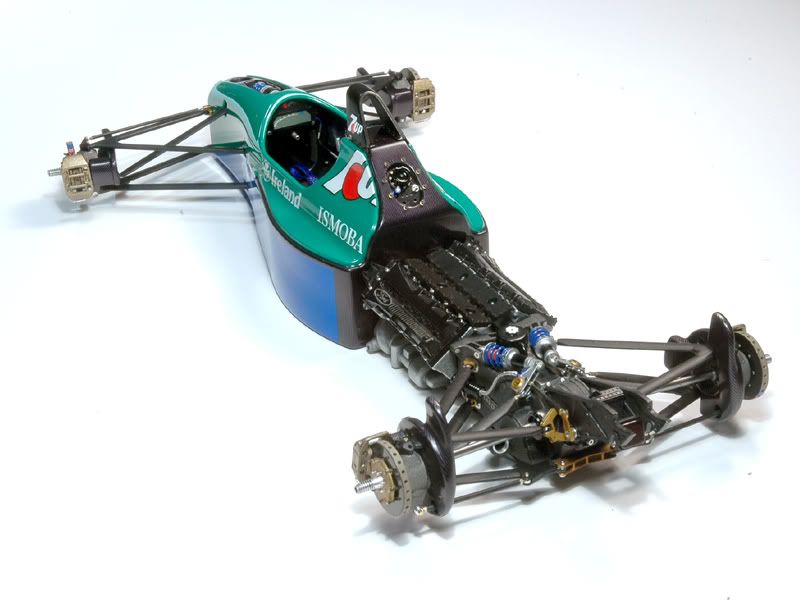
And finally a shot together with the rear part of the car. I also installed the brakes for the rear wheels obviously :-)
Now I have to carry on with the undertray so I can put them together for good. More about that next time!
P.S. I have one question for you: How do the pictures look on your screens? On mine they look fine but Im typing this sitting at my dads computer and the pictures look way too bright here. Question is
..which screen is not adjusted correctly? Do the pictures look too bright on your screen as well ( with the black parts looking very greyish )? Thx!