Hi everyone. Its been some time again and here is a bit of an update.
Im in the middle of the painting process which is as always time consuming and not really interesting to look at in pictures if you ask me, but here are some shots anyway.
The first one is particularly impressive
..body in white primer on white background :-)
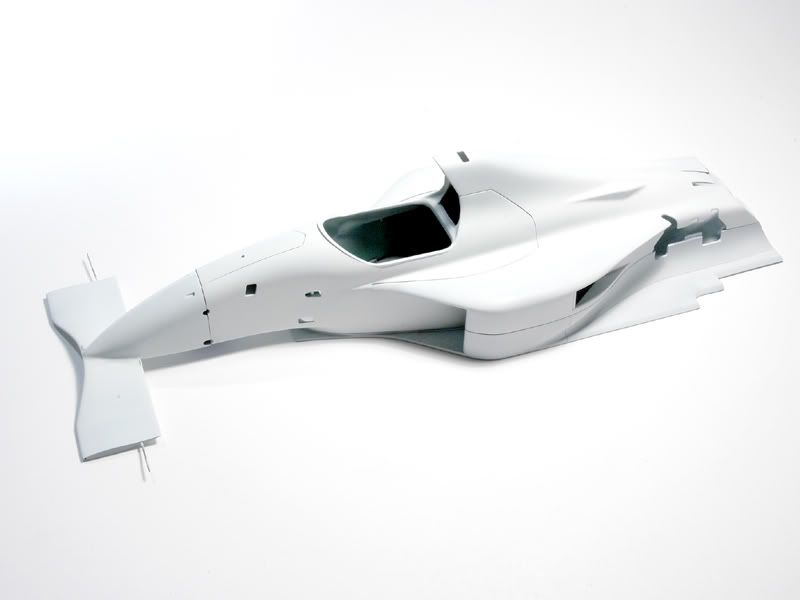
At that point the bodywork already had a layer of automotive primer/filler on and sanded, followed by a layer of 50% thinned grey ZERO primer with another session of sanding and this layer of white ZERO primer. I used the ZERO primers for the first time and Im quite pleased with them. They are no replacement for the urethane automotive stuff Ive been using for a while now. Thats thicker and better for smoothing out surface blemishes, but the ZERO stuff is very good as a final layer to show those last imperfections that require just a little sanding.
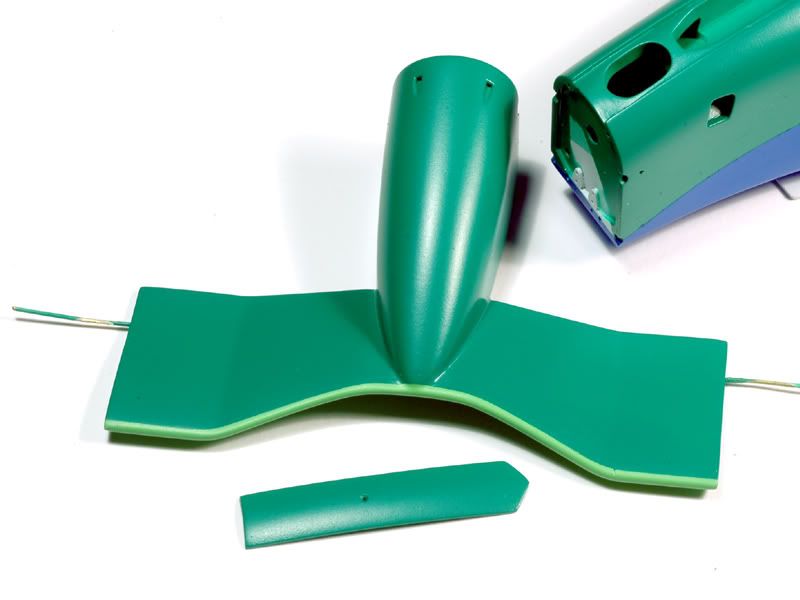
Getting to tiny imperfections I realized something at that point though ( and Lotus123 rightly pointed it out :-). The lower bodywork panels were just not blending into the undertray well enough. I had hoped for the paint to fix most of that but it didnt look like that was gonna work ( with only paint and clearcoat still to come ). So I brought out the polyester putty again and went to work. It took me quite a bit of annoying puttying and sanding ( while I wanted to see some paint on the bloody thing
) but the result is an improvement.
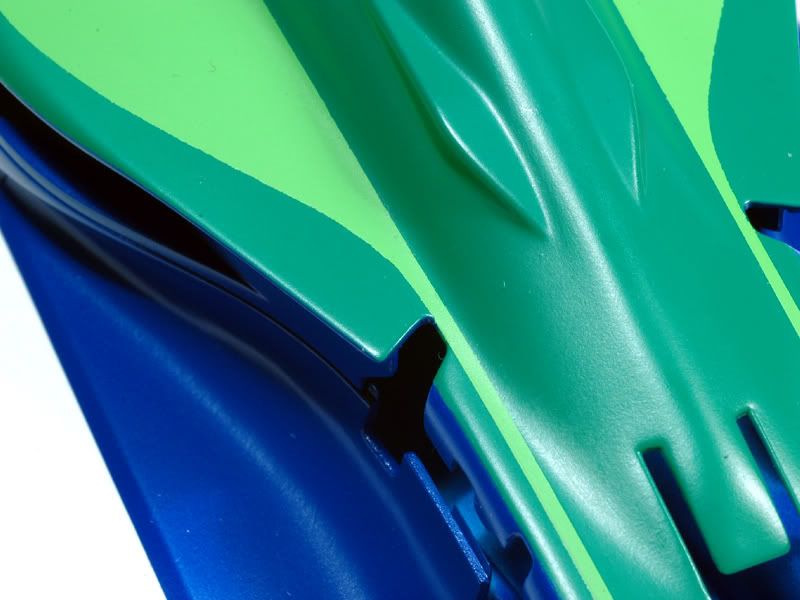
After going through the primers again in the reworked area the body was finally ready for paint. I used the ZERO Jordan set, spraying dark green first with the lower areas masked that were going to be blue in the next step. The paint wasnt thinned further and went on very well. Here its already complete:
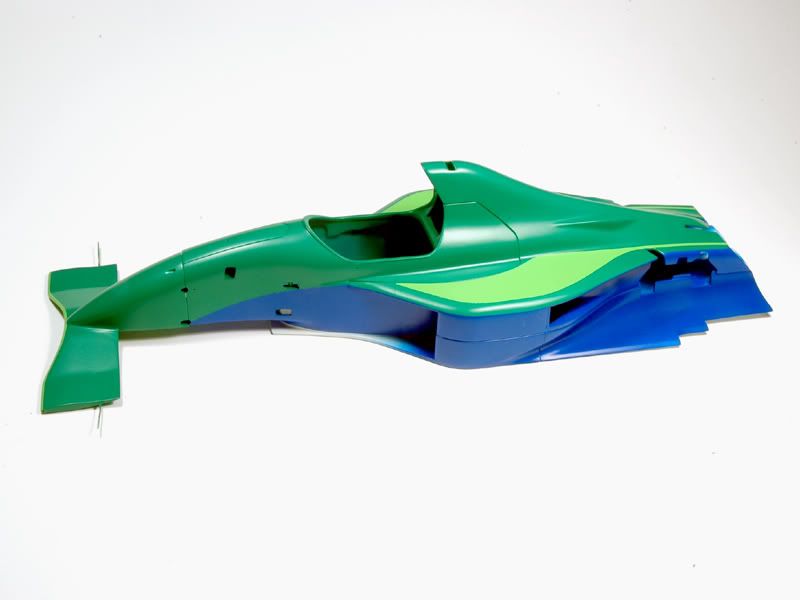
The blue is different in reality than it shows up in the pictures
not so ultramarine. I do wonder which drug was involved when that paint scheme was signed off at Jordan :-) The dark green and blue are quite a mismatch imho. It gets better with the light green bits and the sponsor logos will surely do their part but still
Another view from the rear:
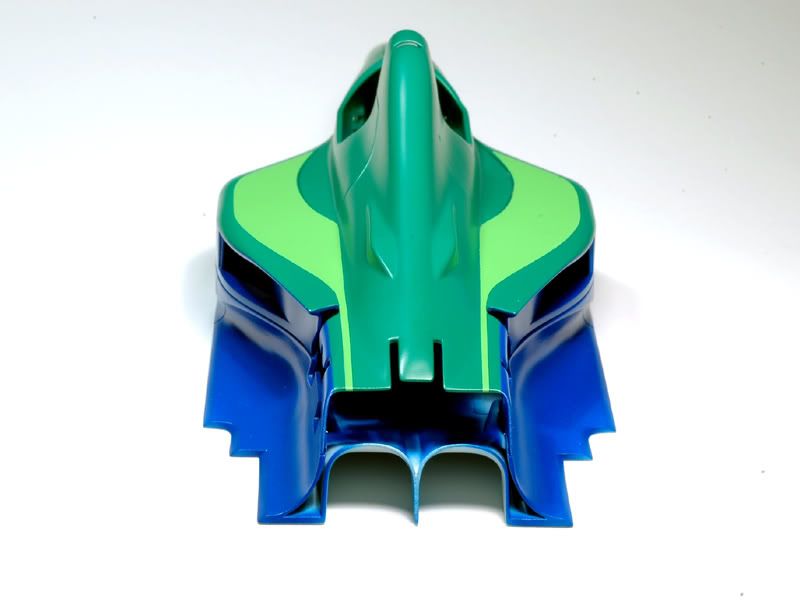
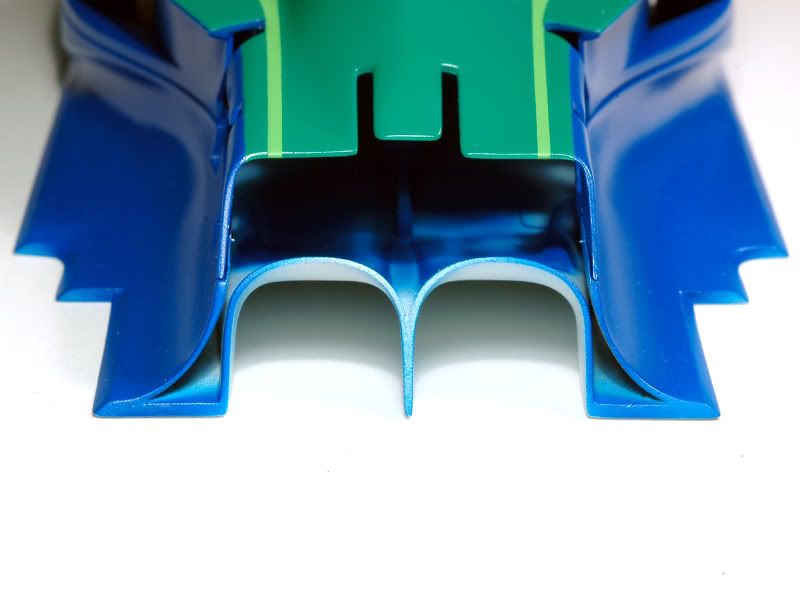
In the next detail shot you can better see how the panels are now smoothly connected to the floor ( compared to the unpainted picture ). Panel thickness is not as thin as should be, but thats how much I managed to do.
The question when painting this car for many builders is, what to do about the light green areas on the cowling and the strip on the front wing. Use the decals or paint!? Both Tamiya and Studio27 provide a straight strip which is a mess to get in place on the very curved front edge of the wing. Painting seems to be the better option. If you then use the decals for the cowling the colours most likely wont match though. Masking the light green areas isnt much fun either so I chose a different approach. I first masked and painted the front wing strip.
Then I cut out the light green Tamiya decals ( without the surrounding transparent strip ) and improved their shape according to reference pictures. ( The shape of the Studio 27 decals fit less
). Cutting out the decal with a knive will only get you so far. But the edges can be carefully smoothed out with sand paper at that point.
Then I took the shaped decals and airbrushed them with the ZERO light green. After drying I applied them the normal way. They get a bit stiffer and wont work on very curvy surfaces but that wasnt the case here anyway.
As a result I have matching light green areas on the front wing and cowling but there is a problem as you can see in the above detail picture. Just like the separation line where I masked between dark green and blue, the edges of the light green areas arent perfectly sharp. They are a bit rough just like on a 1:1 paintjob but there you never get so close that you notice. On a scale model ( and in close up pictures
) thats another thing :-) While a thin white line decal will hide that edge between green and blue the light green edge will stay. I will try to improve some of that. The unaltered decals would have had sharper edges but then the shape would have been wrong here and there. Its kind of a Catch 22 :-)
So for now thats it. A lot of work, but not much to show for it at this stage. Next up Ill have to paint some areas black and then its time for CF decals. Time consuming work again, so the next update may take a bit as well :-)
Cheers for looking!