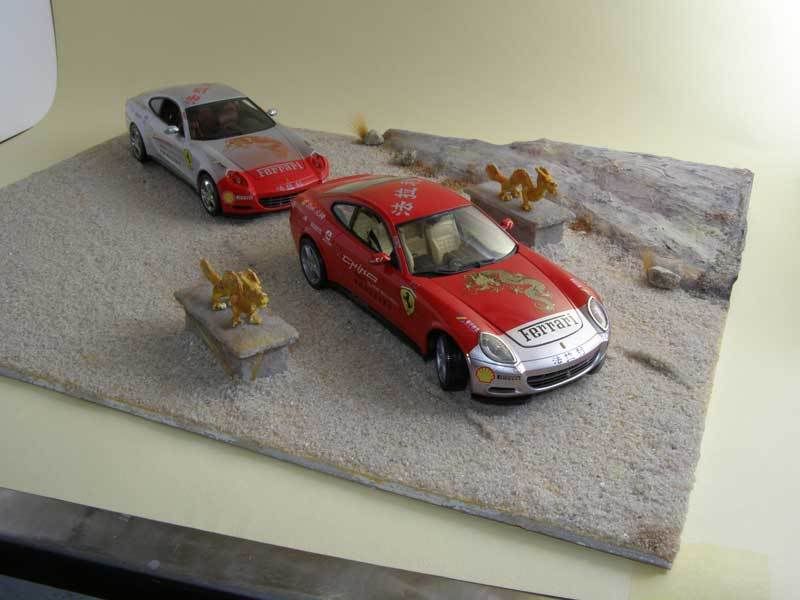
I have received several questions about how I made the display for my
"China Tour" 612s so here's a brief description of how I went about it.
This was the first time I have tried something like this and the biggest lesson I learned is to just "go with the flow" and experiment!
I did some general research beforehand looking through a wide variety of forums and articles - armor and railroad forums were the greatest source of inspiration.
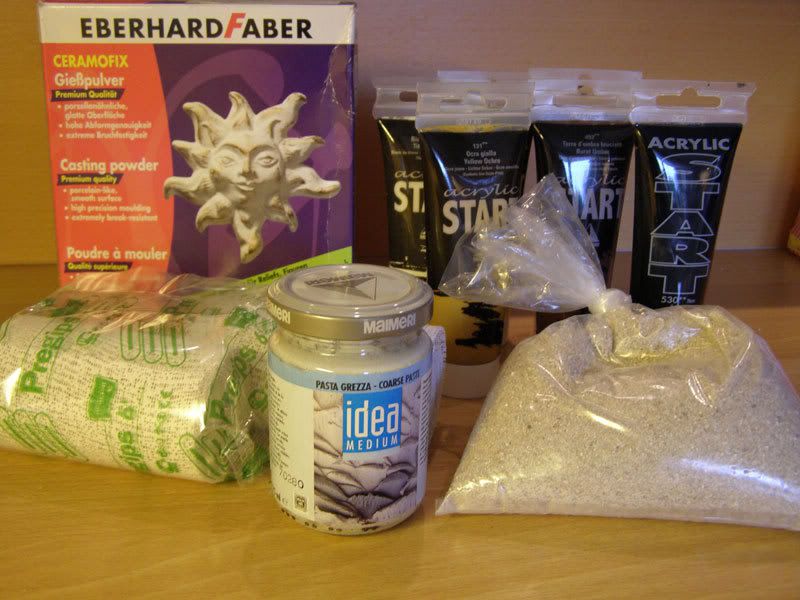
Materials used:- Cheapest picture frame I could find as a base
- Foam board (2 thicknesses)
- Plaster bandage begged from my local veterinarian
- Tub of pre-mixed wall plaster/filler mass from the DIY store (I bought a huge tub and will never use this all even if I live to be 100!!)
- Various colors of artist acrylics in tubes (cheapest they had in the store)
- White PVA school glue
- Bird cage sand from the pet shop (very fine grain sand
 )
)
- Some pieces of gravel from my driveway
- Field grass and scatter material
- Artist's acrylc stone paste
- Casting plaster
 1.
1.
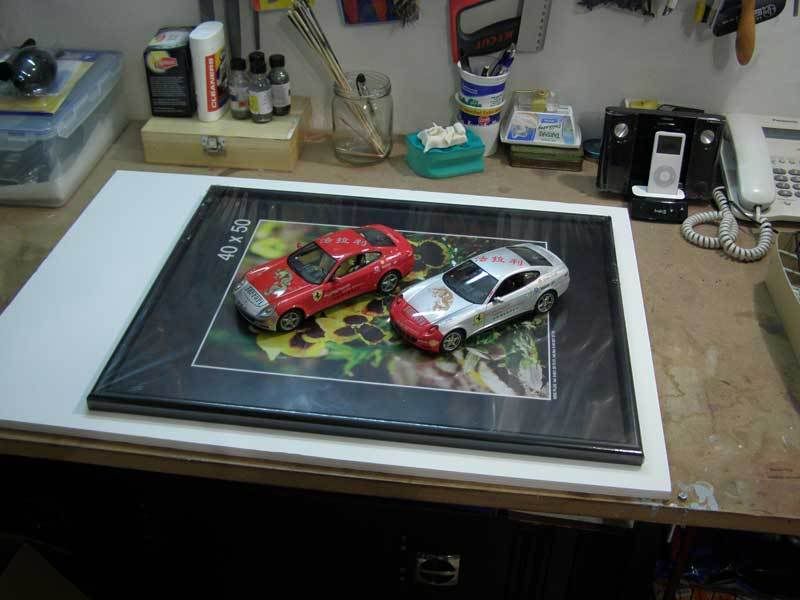
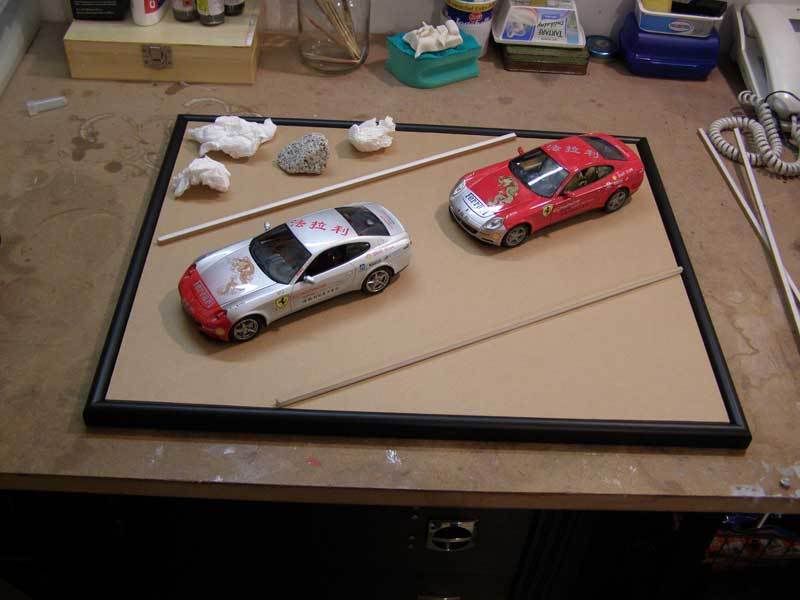
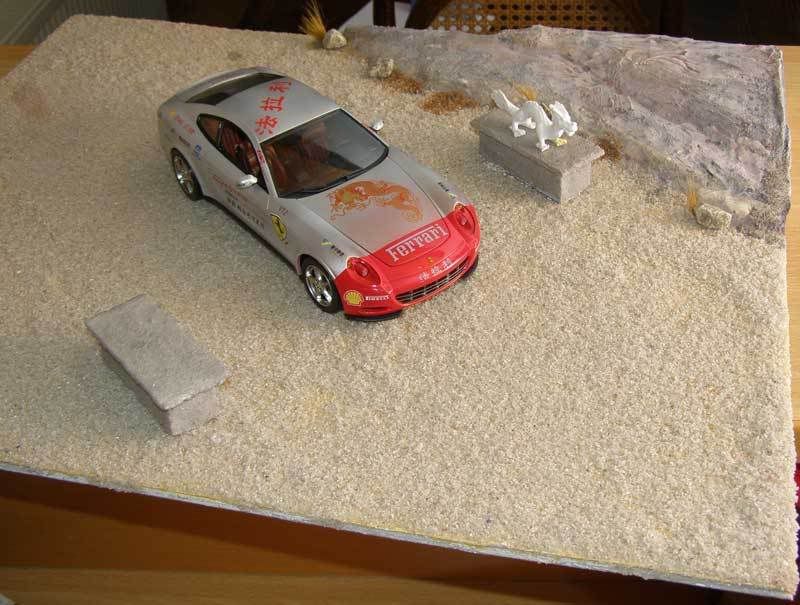
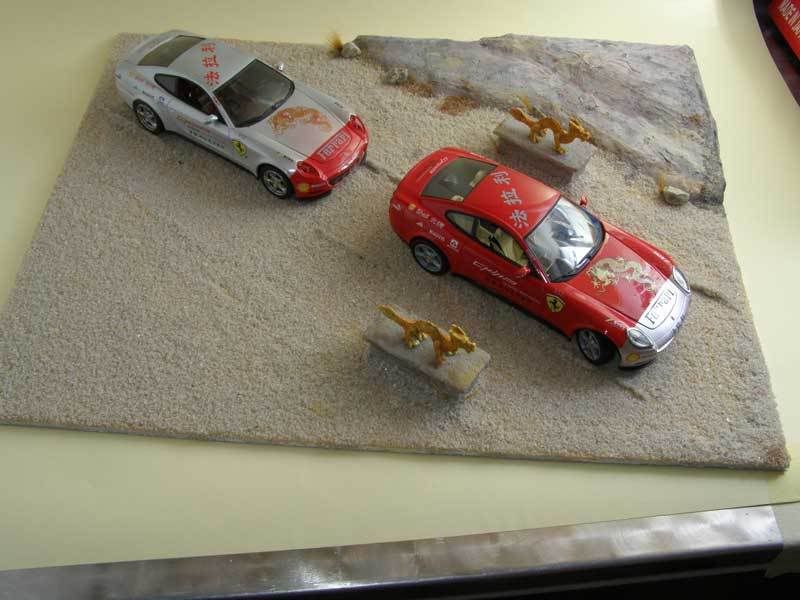
I started by removing the glass from the picture frame and cutting a piece of foam board to size so that it could just be dropped into the frame.
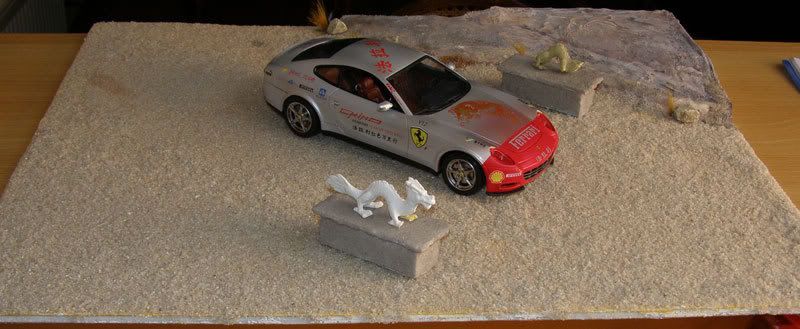
I then started experimenting with different possible layouts until I found one that I was most happy with. In my case I left a large empty are in the front left corner as this is where I planned to place a small plaque with information about the cars.
 2.
2.
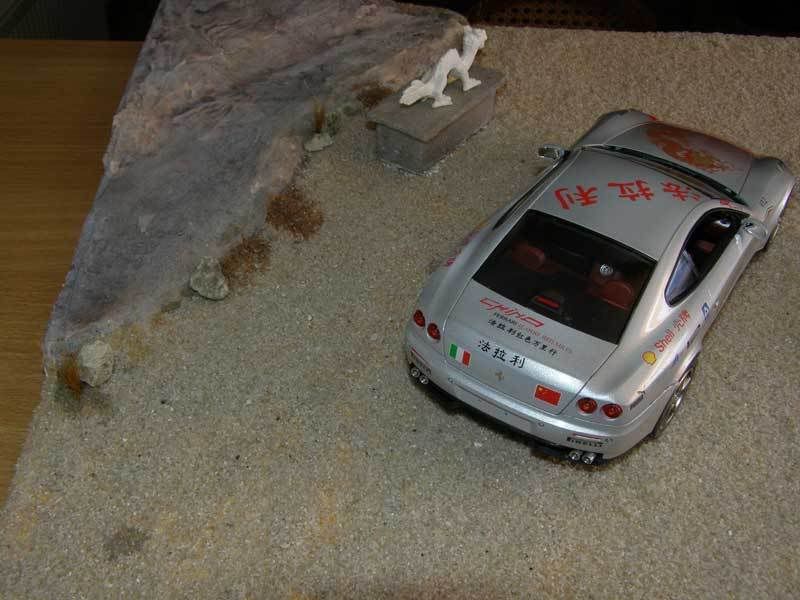
To build up the rock formation in the background, I cut out 2 randomly edged pieces of the thicker foam board. These were fixed in place with PVA glue and the edges roughly bevelled with a knife.
 3.
3.
The rock surface was made by cutting strips of the plaster bandage to size, wetting it and then laying it over the foam board structure. While the bandage was still wet I used my fingers to spread the plaster around and shape/mold the surface (as haphazzardly as posssible to avoid making it smooth and flat). The bandage dries pretty quickly and once it had dried, I "touched up" some small areas using the wall plaster mass.
 4.
4.
Once the plaster had dried out, I started adding washes of thinnned out acrylic paint. The washes were randomly and sloppily applied. This very quickly and easily creates a realistic effect which looks even better in 1/1 than in the photos.
 5.
5.
The sandy base was made by spreading a THIN layer of wall plaster over the base and sprinkling this with a first dusting of bird cage sand. Let the plaster dry out and if the base warps (as it did in my case), crack it back into shape. A very diluted mix of PVA and water was then washed over the base and more sand sprinkled over it. Excess sand was shaken off and then the process repeated until I was happy with the coverage.
 6.
6.
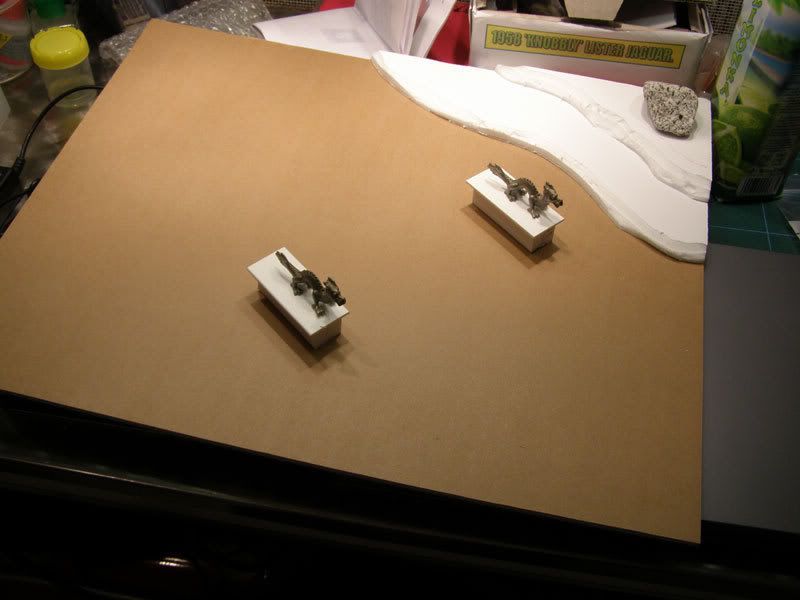
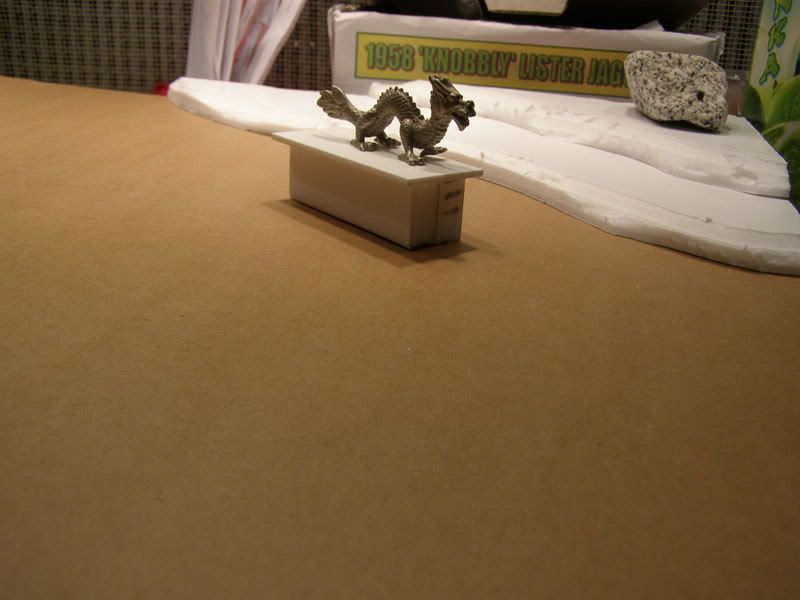
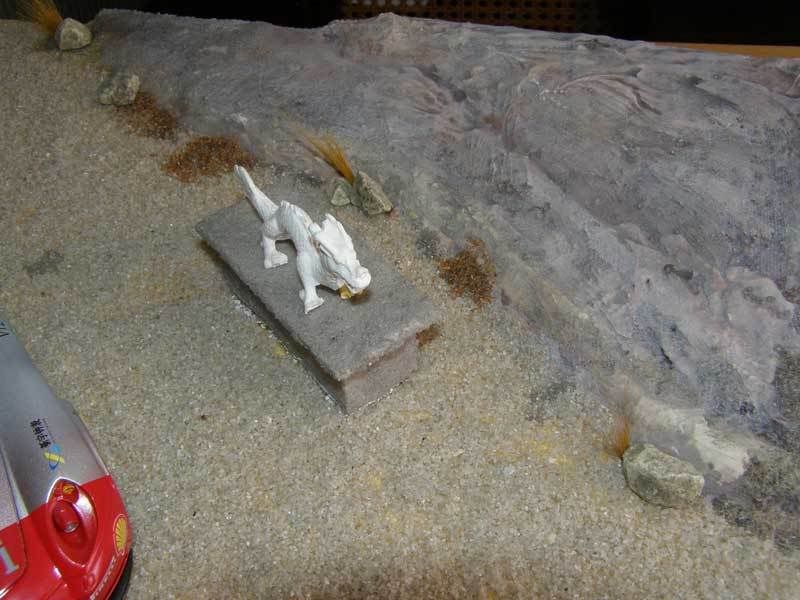
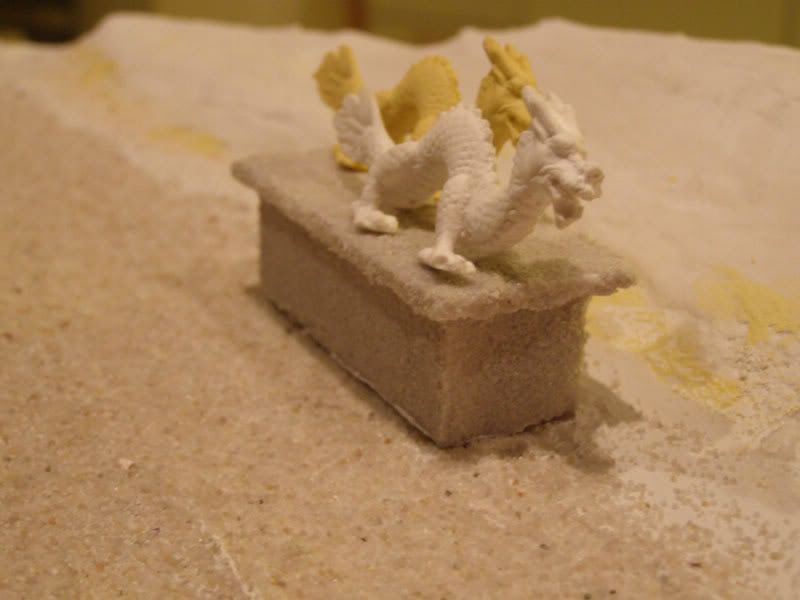
The statue bases were made with foam board glued together with PVA and topped off with a piece of styrene sheet. This structure was then covered with acrylic stone mass applied with a flat knife. When dry, I applied staining and dirt with artisit oil was and acrylic wash.
 7.
7.
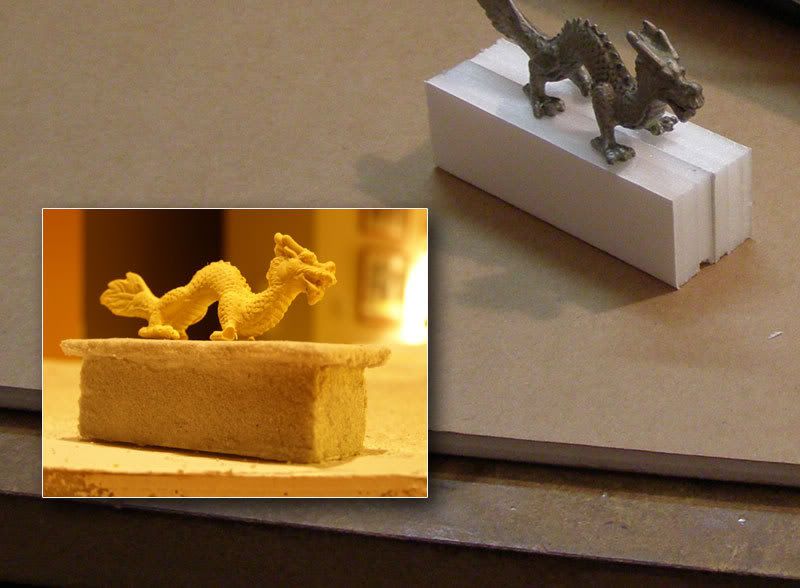
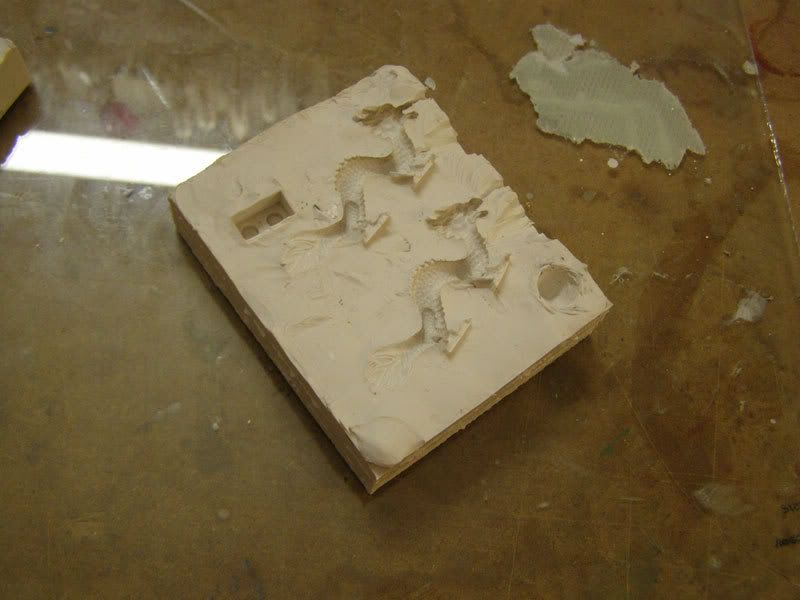
The dragons were made by making plaster copies of some chopstick holders I have at home LOL. I simply made an RTV rubber mold and filled it with casting plaster instead of resin (I used plaster as I thought it would be a better imitation of stone). Since I was trying toi give the impression of really old statues, I didn't pay the slightest attention to the quality of the casts - in fact, the more flaws they had, the better they looked! They were colored with very thin washes of acrylic paints and dirtied up with MIG pigment dust.
 8.
8.
Finally, I glued a few pieces of gravel in place with PVA glue and added a few tufts of field grass and some railroad scatter material.
Hope this helps.