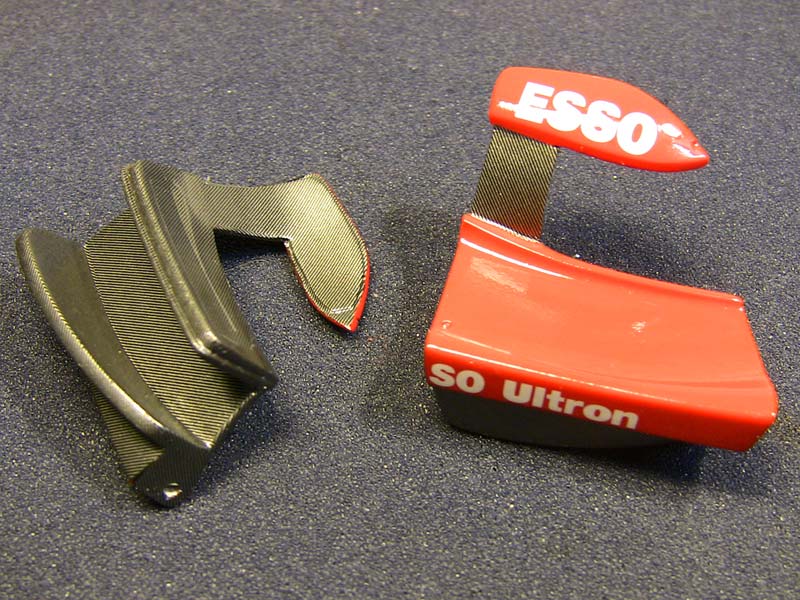
weee to make the kit a little more challenging I broke some parts in two :-(
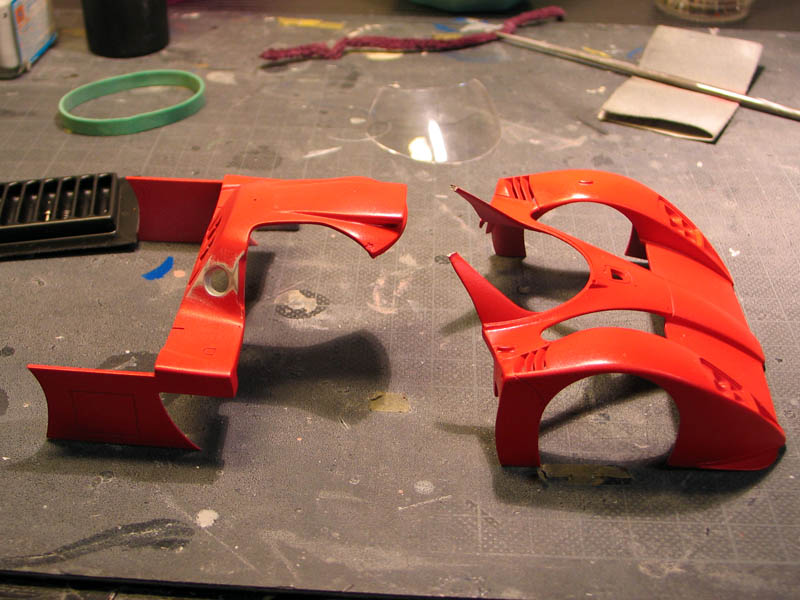
well I cut that part twice and now I leave it till the final assembly in two parts !
then I test fittet the turned fuell fillers just two learn I forgot to install the kitparts where they belong to...so I glued them in, sanded it smooth and have to paint the whole thing again !
sometimes it helps to work with the brain turned on...
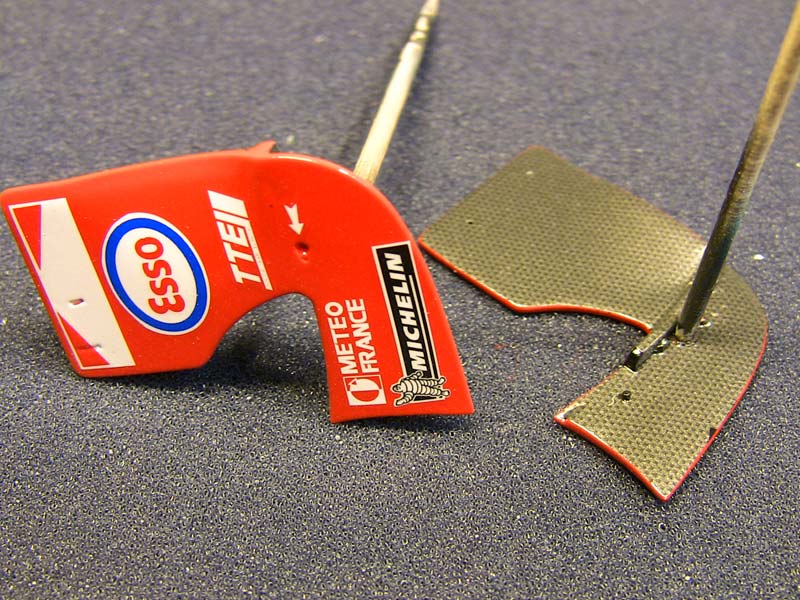
then I lost the two small covers that sit below the front lamps
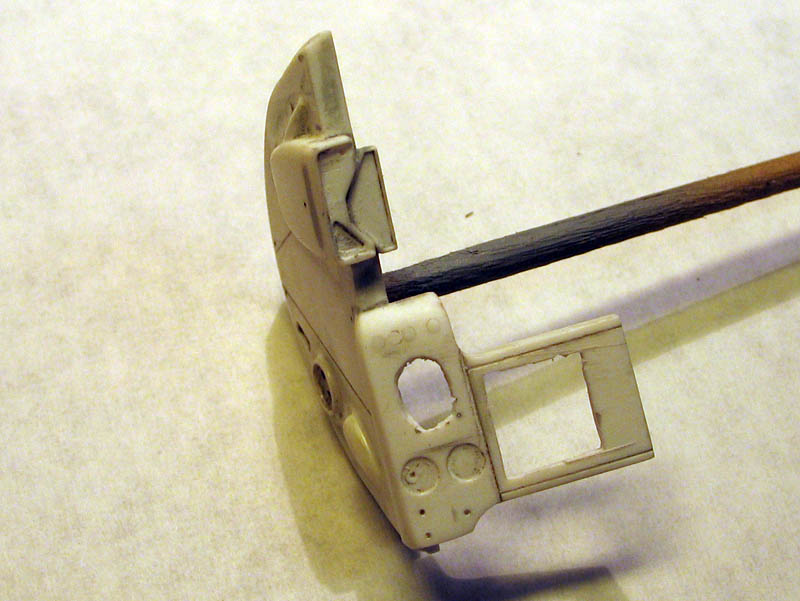
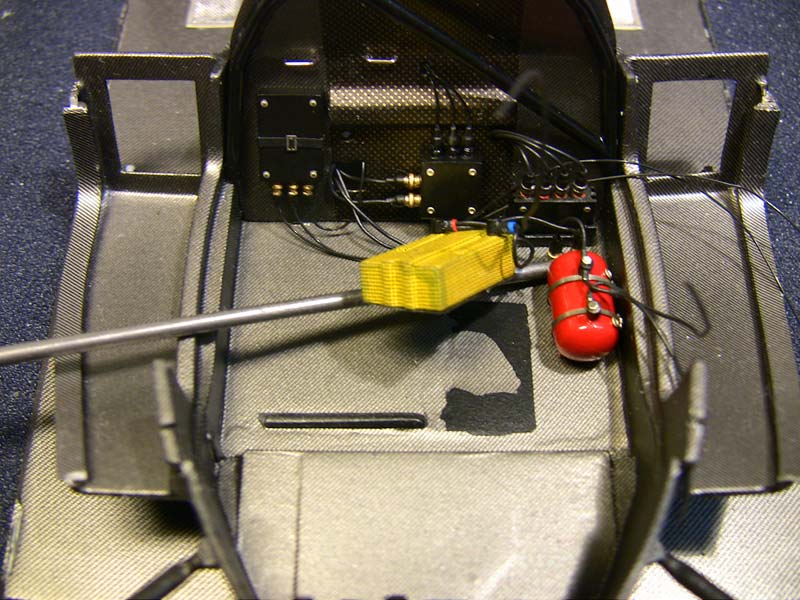
the dashboard ready to be remade
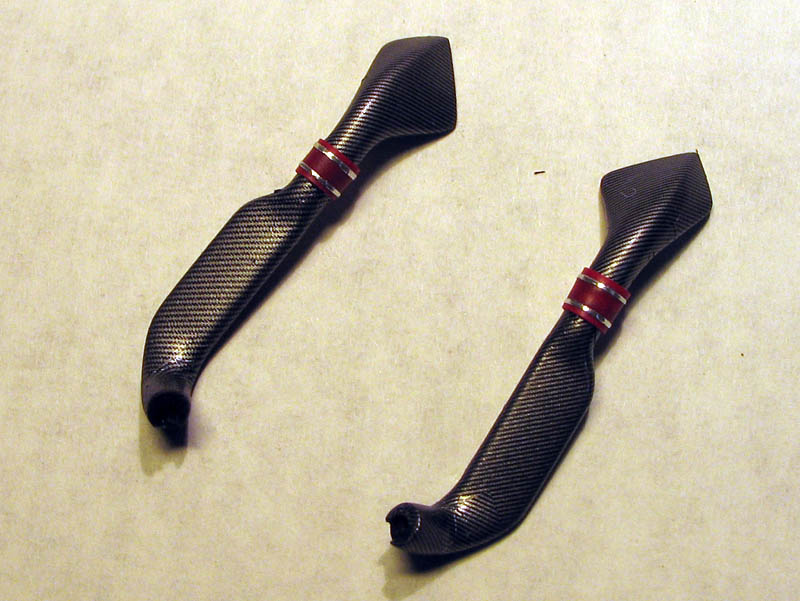
some detailing ...I added red and silver tape, looks cooler than painting and no need to wait for the paint to dry
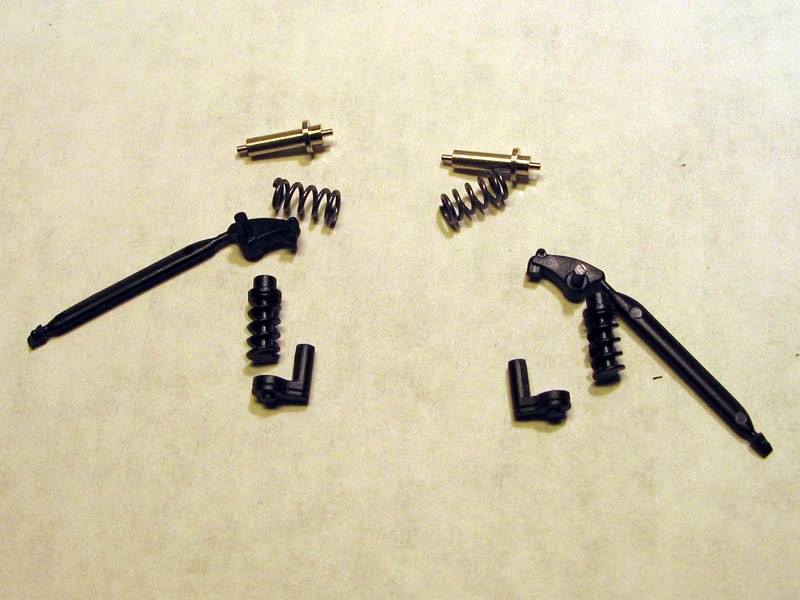
next comes the rear suspension..the metal parts are from the SMS kit, very simple but ok for me.
that's it so far..nearly a work of slooooow work
daniel
-germany-
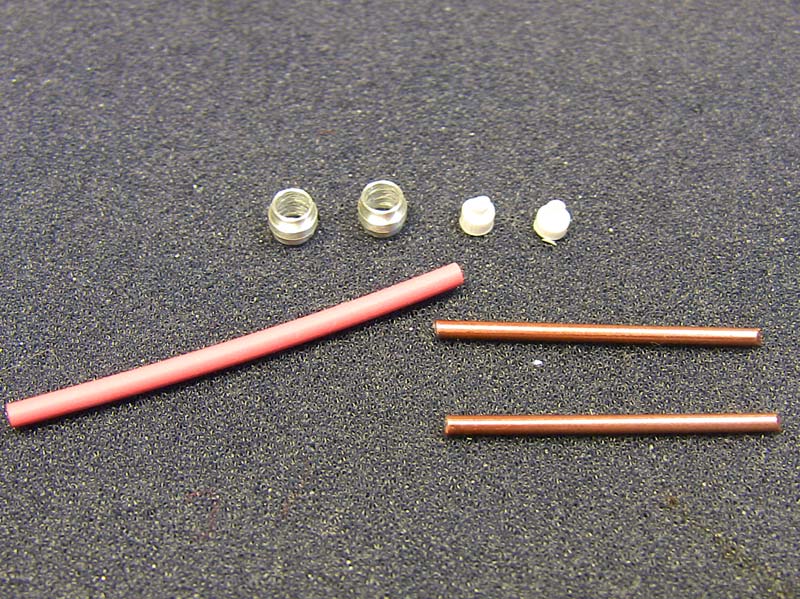
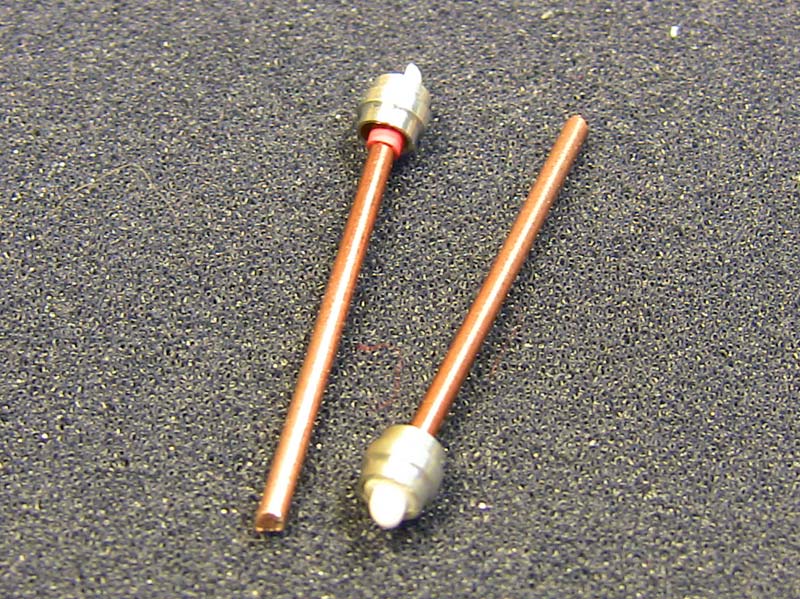
The drivetrains, made from turned Aluminum, stell rod painted clear red, some red shrinktube and the pins from the kit parts.
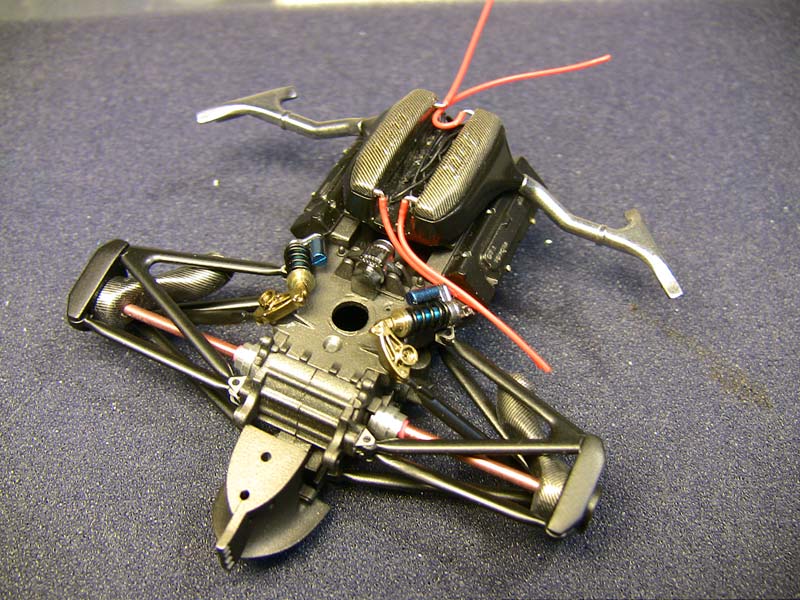
Here you can see the parts fitted to the engine. Some cable are allready added, the cable connectors are made from bent wire ans steeltubing...the engine will receive A LOT of detail in the future.
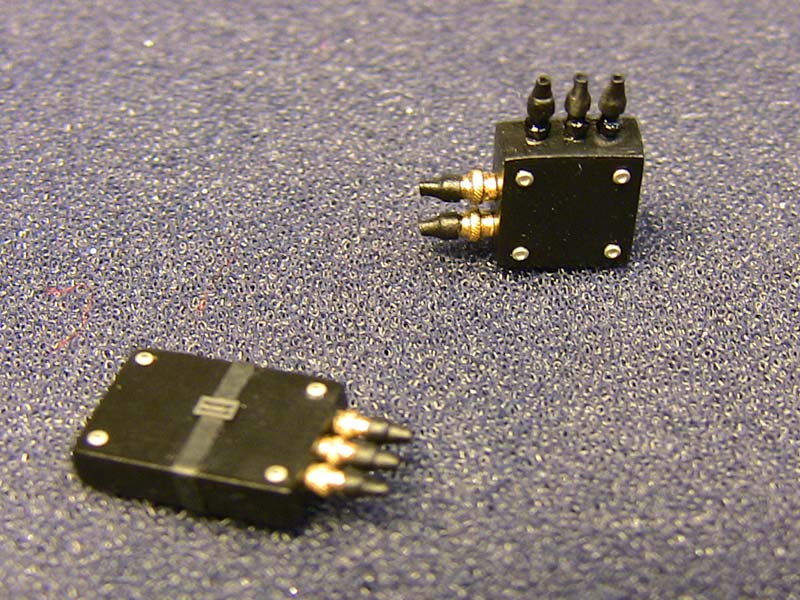

The electric boxes are cut from styrene and are detailed with PE nuts and TopStudio connectors.
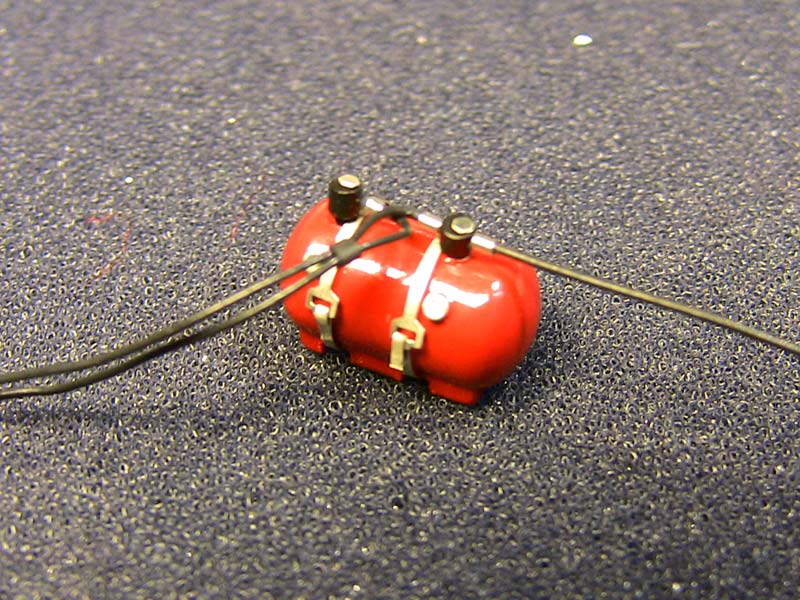
The fire extinguisher is also detailed a lot and I nearly got a heartattack while doing it :-) making those small steel wireconnectors was terrible. They are stainles steel and I had to cut them with my Dremel... Handling such small parts was nearly impossbile and many half finished pieces rest in piece somewehe on my basement floor.
A decission had to be made. CF right on to the red or paintign it black first..I went for the black and a lot of masking was necessary.
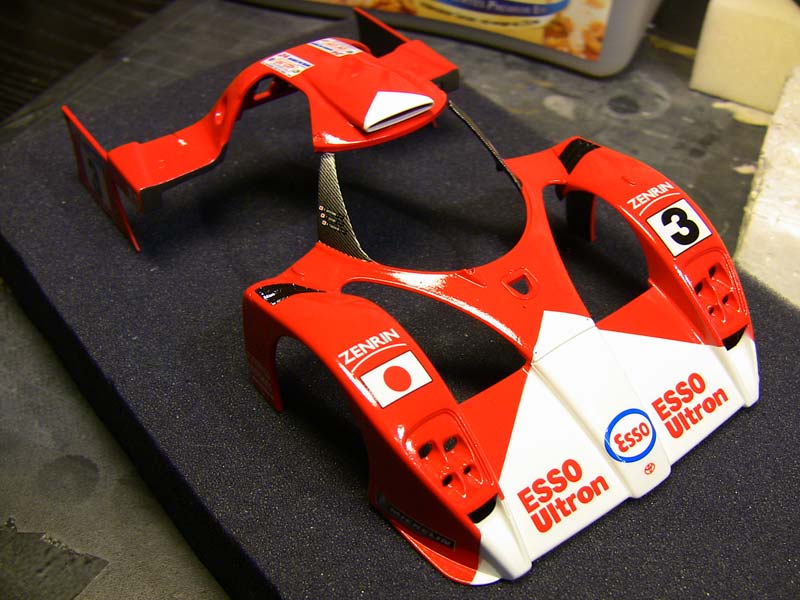
That's the final result, paint decals and CF decals
Jetzt wird alles matt geschmiergelt und poliert, dann abgeklebt und die CF decals mit seidenmatt überlackiert. The white nose, roof and numberplates are painted also.
red is TS49, clear is zeropaint 1K clear.
Now everything will be sanded matt and polished to a high gloss finish. The CF parts will be maksed and sprayed semigloss clear.
daniel
-germany-
P.S. I hope noone has a problem with posting a non F1 model here.
hello,
I'm still alive and building, although things are getting complicated and frustrating but here's a little progress
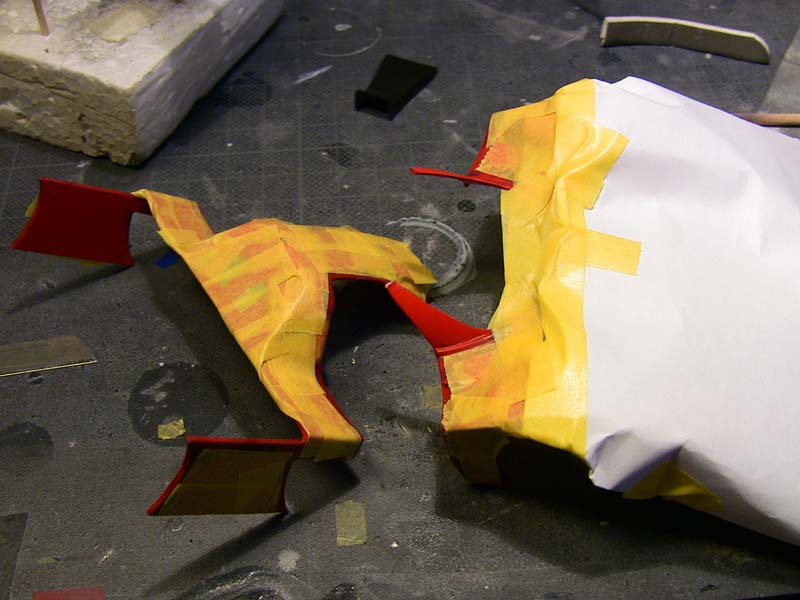
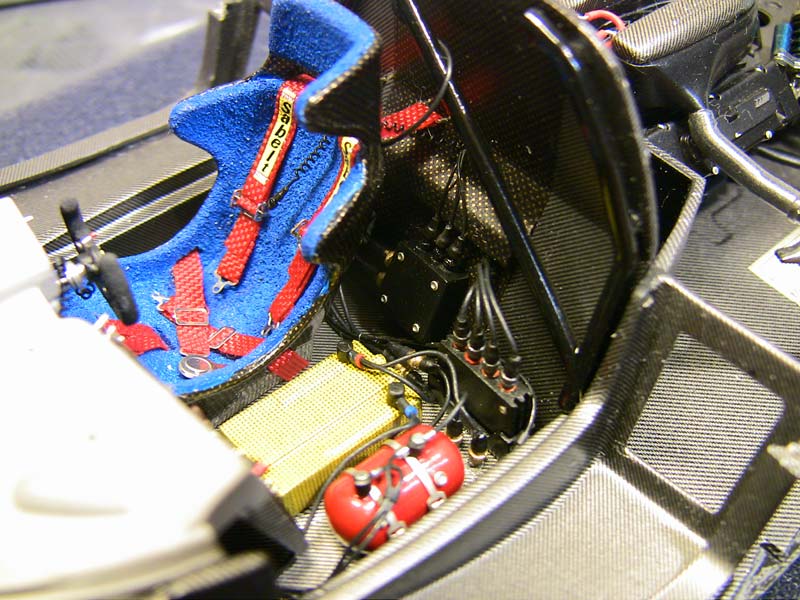
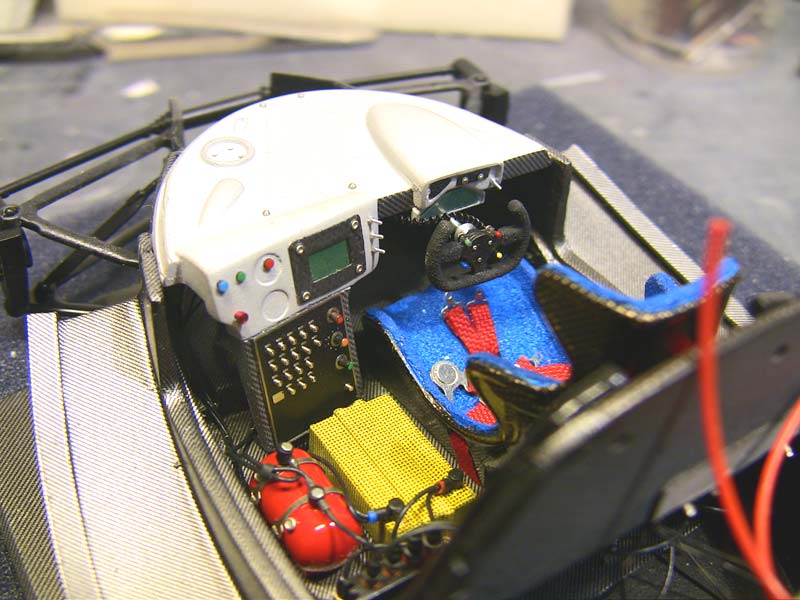
the yellow box had to be removed again because the dash didn't fit anymore...you can see the result :-(
I added a new piece of cf and hope it's not to visible in the end.
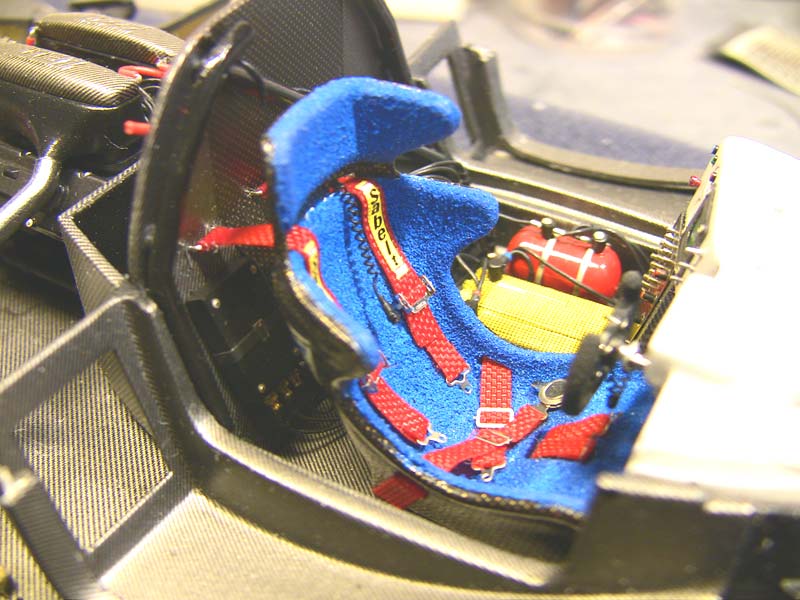
here some pics of the cockpit, it's pretty much finished
another step in the painted, right side is the airbrushed result the left is micromeshed with 2400 grit to eliminate the edge between decal and paint, will lay another coat of clear over all parts, sand back with 3200 grit or more and do the final polishing...if the edge is still visisble, it's sanding back again and a nother coat of clear :-)
daniel
-germany-