Before I start to detail up the engine bay and paint the body, I thought it would be a good idea to to test fit the suspension and check out the stance, track etc.
Good job I did because I ran into some big issues that had me really annoyed for a few days and they had nothing to do with Revel

I was actually pretty mad at Renaissance and Scaledesign for a while unjustifiably I guess, but none the less annoyed.
The Renaissance transkit makes the wheel arches so wide that you can forget about using the original kit wheels, they just disappear inside the arches and you need a telescope to see them in there. To modify them would take a lot of work and Renaissance offer no advice/solution for this in the guide sheet (you can't really call it an instruction sheet).
On the other hand, when I bought the scaleproduction set, they were OOP on the turned aluminum wheels and offered me resin casts instead. The quality of the casts are excellent but the backs of the rims are cast flat which means that if you try to use the kit rotors, the rims stick out too far from the body (even with the wider wheel arches). The alternative is to not add the rotors and then everything sits fine at the back, but at the front they still sit out too far. I wonder if the turned alu wheels are also like this?
The only simple solution I could come up with was to use the Revel wheels at the front with rotors and Scaleproductions wheels sans rotors at the rear. Devil's alternative or what?!!?
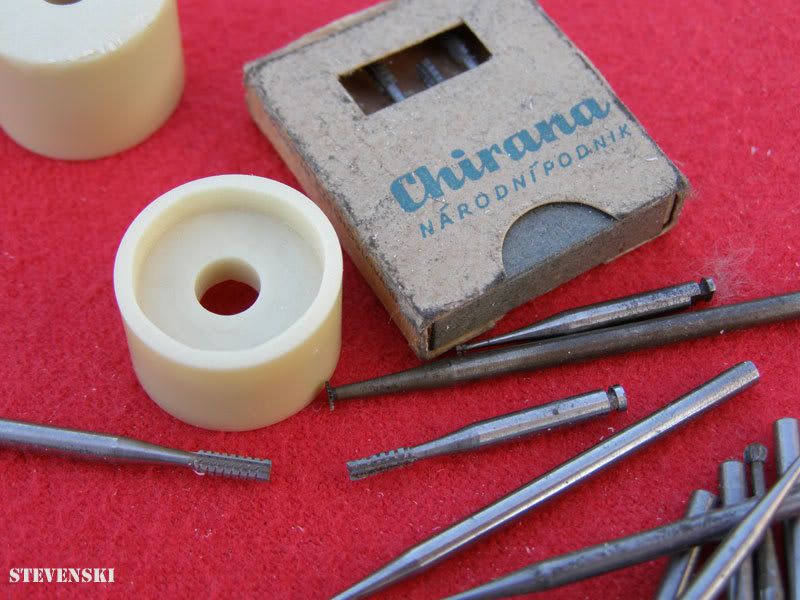
The fix I came up with was to use my Dremel to mill out the back of the resin wheels to allow the brake rotors to sit inside. To do this I used some dentists' drill bits that I got from a friend and the flexi attachment on my Dremel.
I just freehanded a line in pencil and made a frontal attack on the back of the wheels checking the depth every once in a while. I wasn't too worried about a perfect look as this won't be visible when assembled but actually the dental drills give a very fine and smooth finish!
Here's what I used and a shot of a finished wheel:
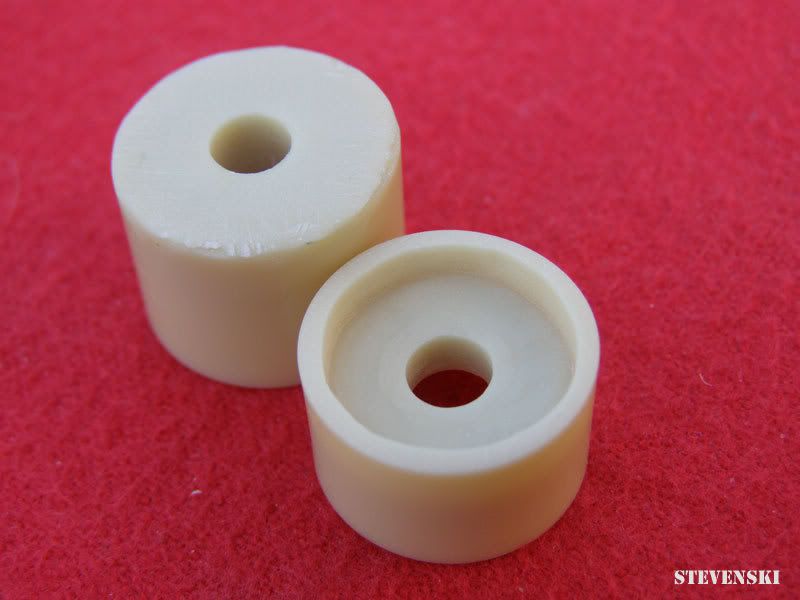
This is a comparison of the pre- and post parts:
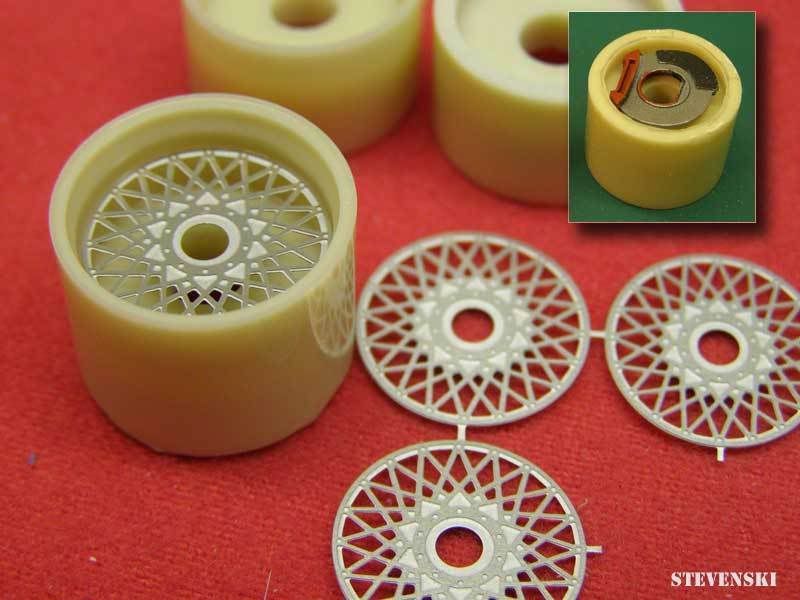
Here you can see a test fit with the p/e wheel faces and a rotor sitting in its new home:
And this is how the scaleprodcuction.de resin wheels will look using the Revel tires (the scaleprodcuction.de tires are too small IMO and have no mfctr name)

This should be OK now or at least have enough play to allow me to get a good set-up during
final assembly.
Thanks for looking in
Anyone need any dental work? I'm getting better all the time....
