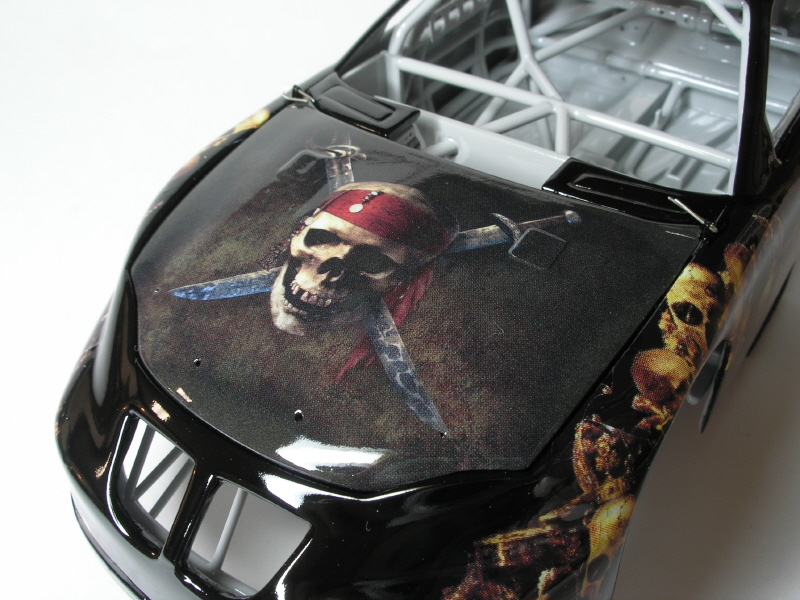
This is something I have been working on and off for a year on. Its Stacy Comptons 2003 Pirates of the carribean sponsored pontiac that was run at the Daytona Pepsi 400 under the lights. I am aiming to have this done for the 2007 NNL's in Atlanta. Thought you all might like to see it.
The 1:1 car

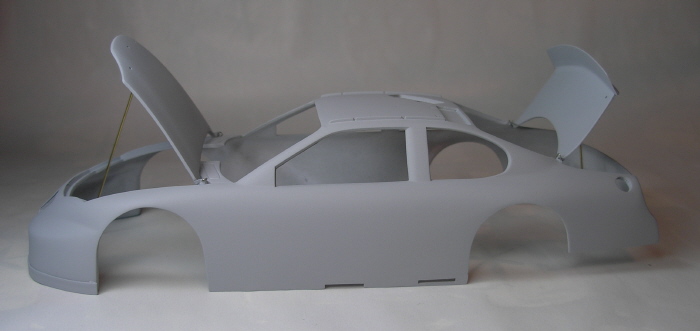
Since no Nascar model kit exists for the late model pontiac, I decided to make my own from a 2003-2005 Monte Carlo revell kit.I was on a mission to get the car as accurate as I could and still be able to do a superdetailer at the same time. I started with the front grill. I literally grabbed a fine point sharpie and marked the front monte grill up and grabbed the dremel and grinding bit and went at it. I figured hey, either I do it or I mess it up. Things started to fall into place. I was able to do the twin nostrils, add .015 sheet plastic to the hood to produce the slight hood bulge and it was looking like the pic below.


After a little sanding,2 part tamiya putty, and test primer.... it started looking like this:

For the rear clip I hacked the rear end off a 2001 DOdge kit and replaced the rear monte carlo tail with it. I decided to not attempt the talight bullett bulges on this build. Once the tailites are in place I think it will look cleaner without them.

Finally I did all the superdetail additions and mods Roof flaps cut out, I modified the c pillar windows to look like Poncho pieces, and sanded off the sideskirts flush and added a piece to the jack cutouts to lower the sides of the car. Then I added exhaust ports!

I drilled the fuel filler hole and overflow tube hole as well.

The rear trunk is a piece I scratch built from .020 sheet styrene. The reason for this was when I added the rear intrepid clip, it widened the rear of the monte slightly so the kit trunk was not long enough. I made a new one along with a nice "whale tail spoiler" Then I added under trunk detailing and hinges.

The front hood was als otreated to underside detailing and hinges.

Lastly a chin spoiler was addedto the front end.

Overall I got the look I was after on the body and once in paint decal and clear I hope to produce a fine example of this car. I have a soft spot for this car because it is my 6 year old daughters favorite movie and she is quite excited I am doing this car.
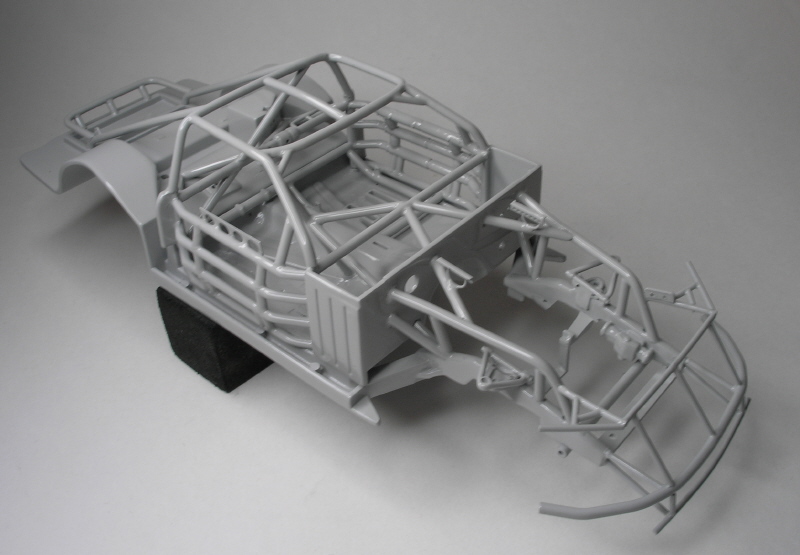
Moving on to the chassis....Actually I used the pro finish chassis I built and modified for the miller lite charger build (look in my fotki for detail on it). The chassis in the dodge and chevy are identical. All I had to do is rework the front end!! It is in basecoat chassis grey and 2 coats of omni.... Now its ready to be detailed...
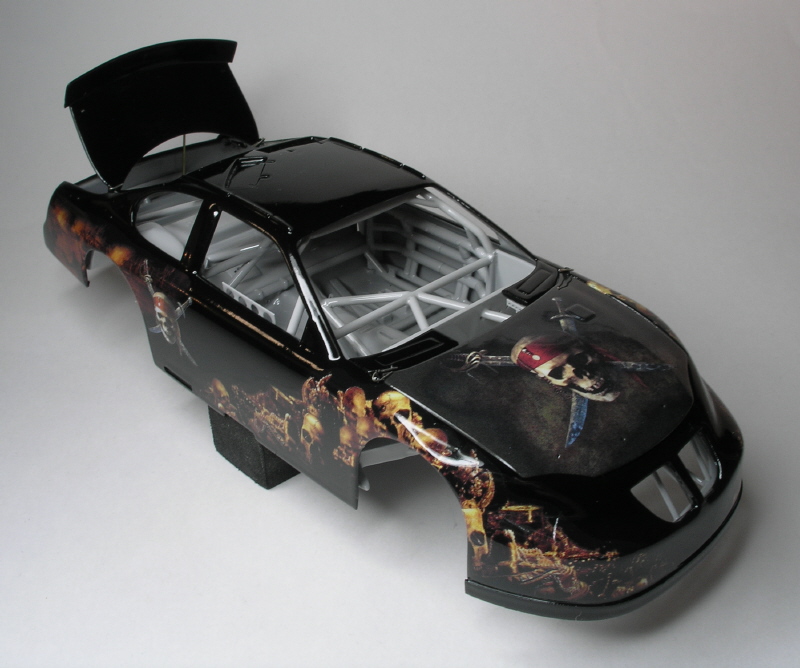
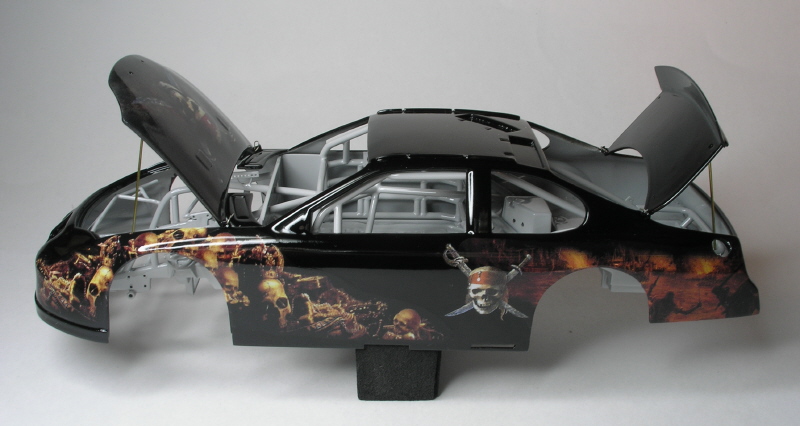
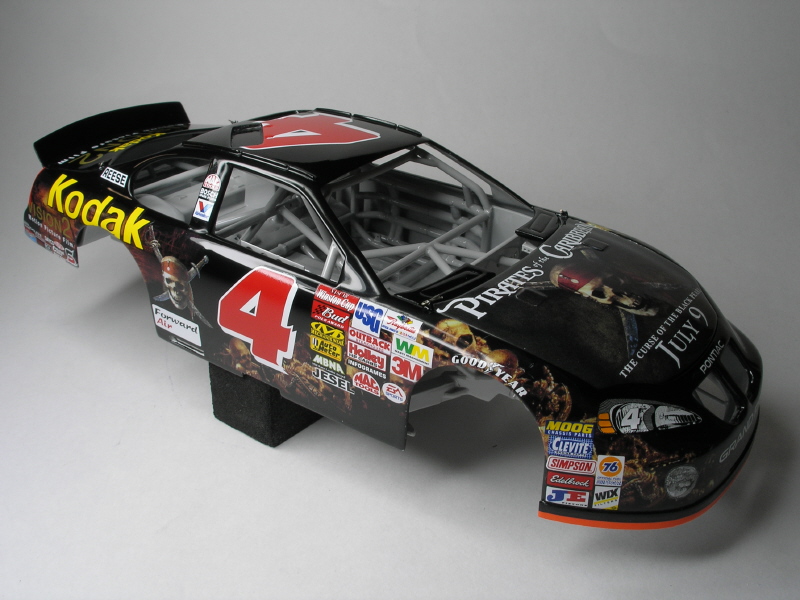
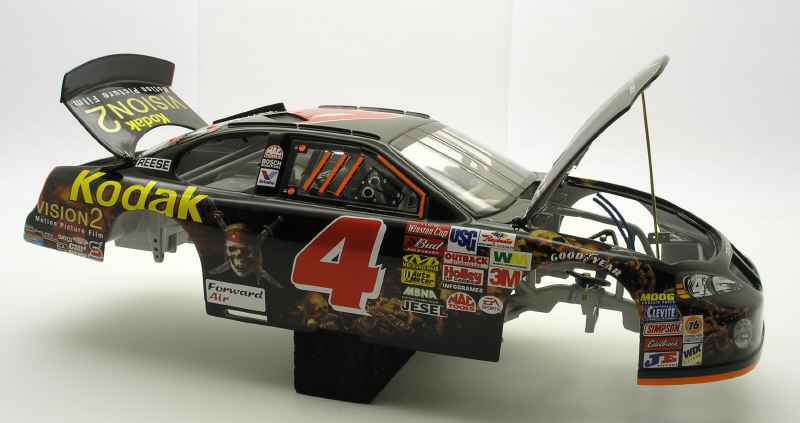
I have the body painted, large swatches added to the sides and large hood decal. I used Clay's side swatches of an extra alps sheet he sent me a long time ago. I think they look better in color and blend better than the ones on the JWTBM sheet. The skull on the hood is from the JWTBM sheet. The entire car was cleared with 3 coats of omni. Once the paint has cured I will polish it out and add the rest of the decals.
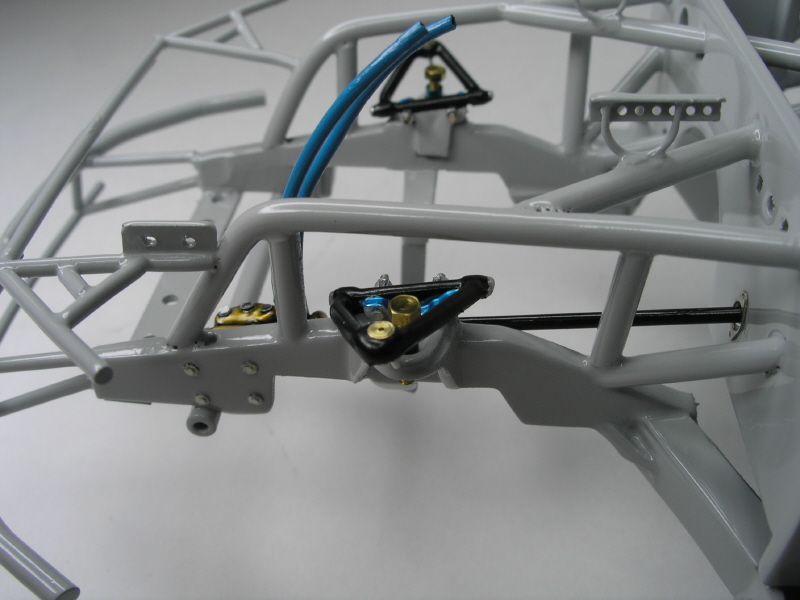
On to some chassis detailing. I had these real working ball joints from RB motion for quite some time..... I will not make them work, but I thought they would really dress up the pro finish a arms.....
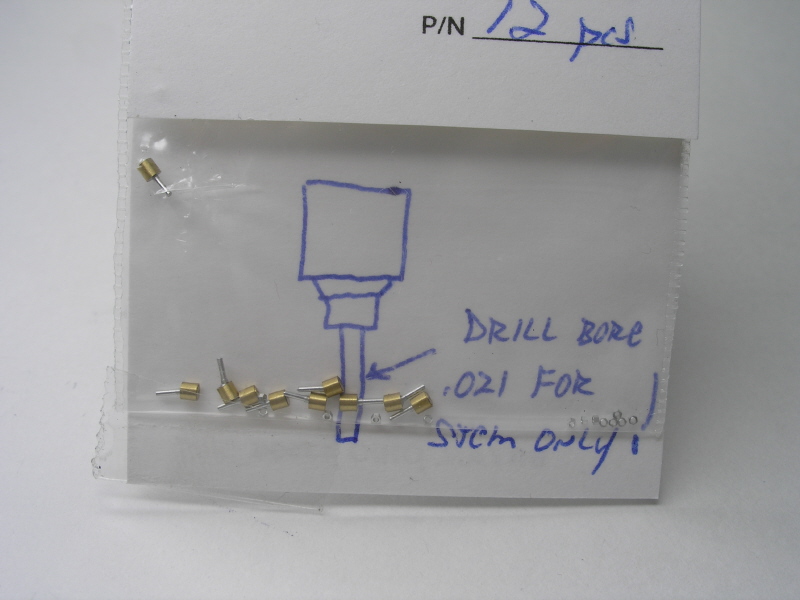
As you can see below, I drilled out the a arm ends and literally pressed the working brass ball joints in place. I think they really add to the realism of the front suspension. PRO TECH .32 hex nuts and hard line were used for the A Arm hardware as well. The steering shaft is made from #4 DM hardline. Model railroad Hex screws were used for the Front suspension wedge bolts.
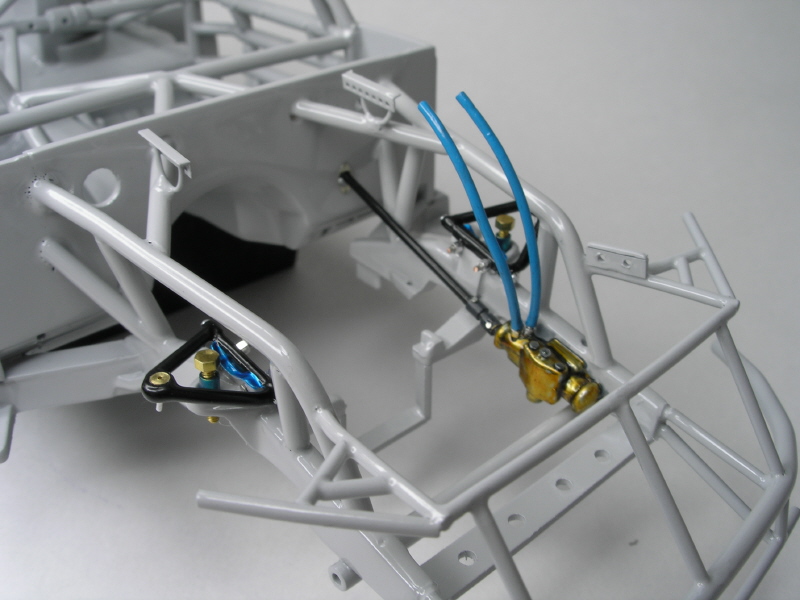
I detailed out the molded in power steering box with various silvers, black wash and clear orange. I plumbed it with PRO TECH .32 Hex fittings and hard line. I atatched rubber tubing painted light blue to represent the neoprene blue P/S line on the real cars.
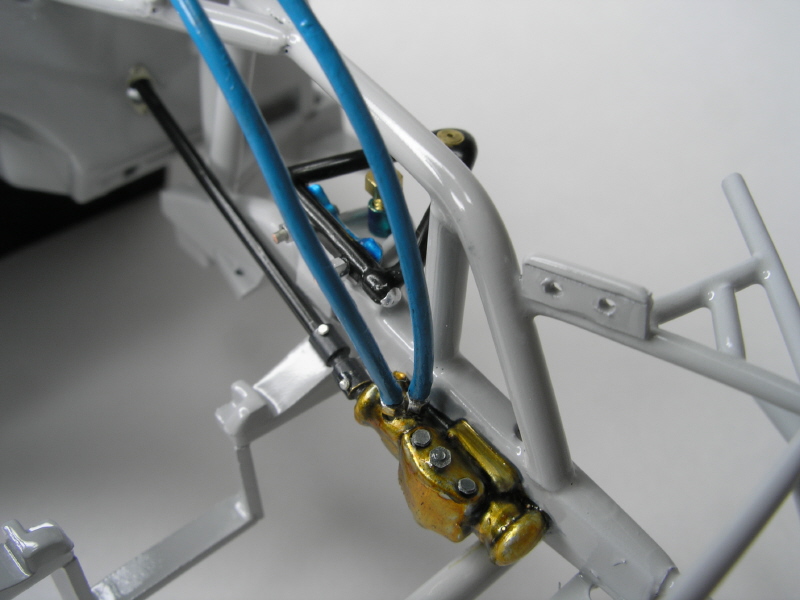
PRO TECH P/E Nut and bolt detail was used to represent the P/S pump bolts going through the frame..... if none of you have used them... get them, they are great for TONS of applications!! Especially rear spoiler bolts!!! Also note a good closeup of the RB motion ball joints pressed in the a arms...
The body has beem polished, cleaned, and decaling is complete.

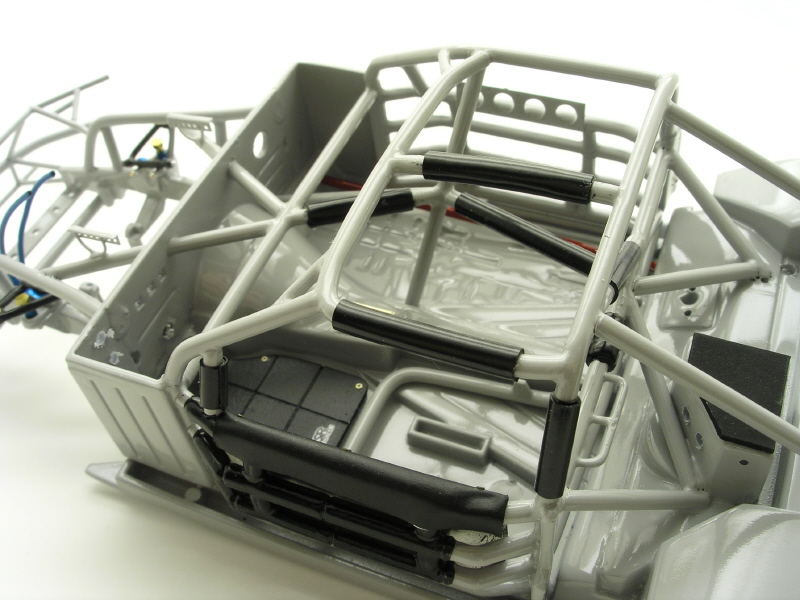
I did a little more detail to the chassis. Thermal blanket was made for the drivers door from embossing metal and painted flat black. Also all roll bar padding has been installed. I also added small metal tubing to the pass floor painted red to represent the fuel line.
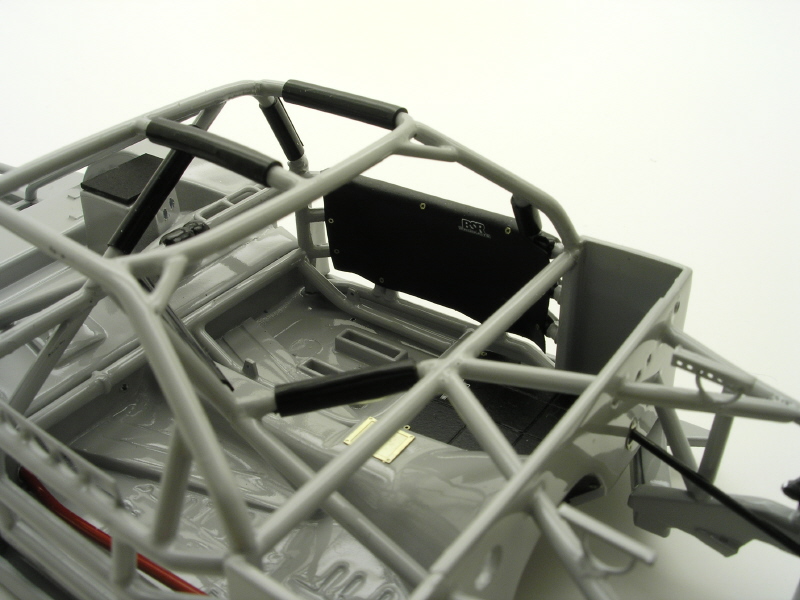
I fabricated a thermal mat for the floor from sheet plastic and painted it flat black and installed it.
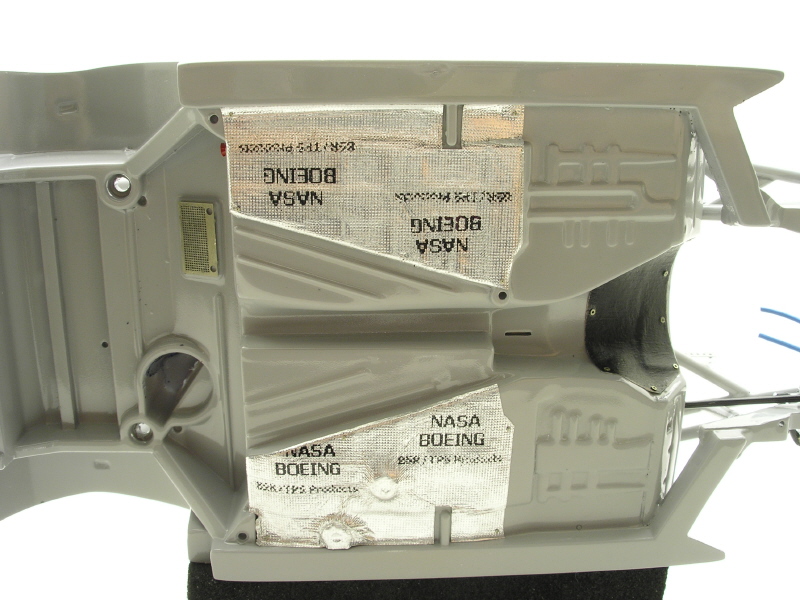
I added thermal foil to the chassis pan where the exhaust will hang. The NASA BOEING decals were printed on decal paper and applied to the foil. Masking tape was cut installed and painted flat black in the upper trans tunnel as well. PRO TECH bolts were used all over....
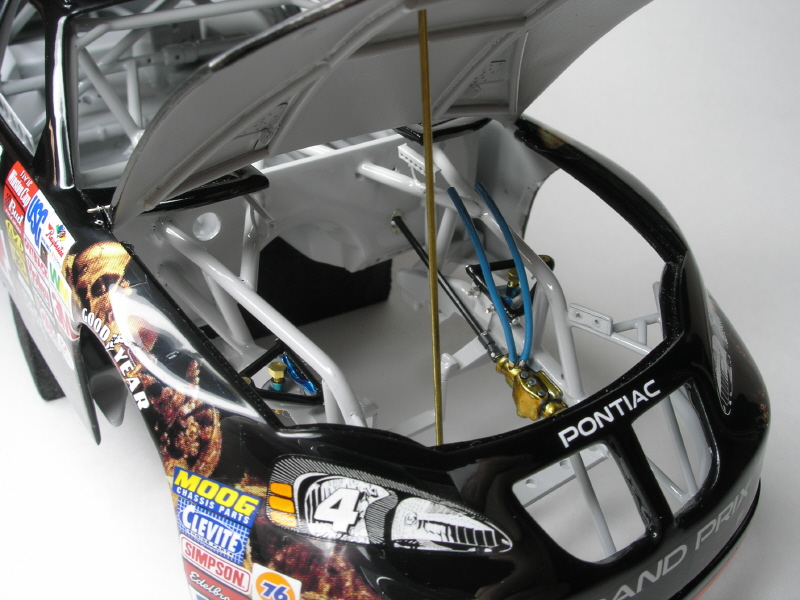
Moving on to the body, I polished and installed the windshield with testors clear glue.
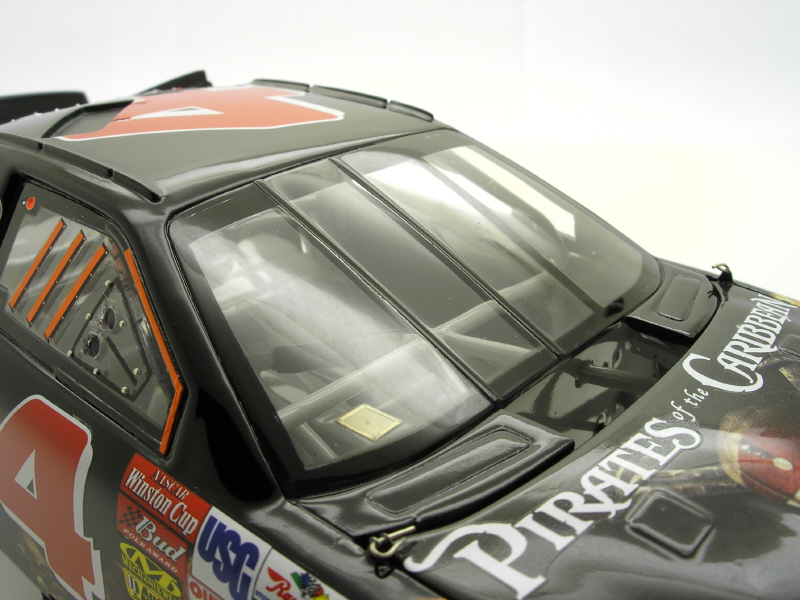
Side speedway glass was detailed and installed. I used the detail bracing off the JWTBM sheet. I also created NACA ducts based on ref photos.

Rear glass was polished and detailed as well. I added some bracing detailed out with PRO TECH bolts to represent rivets. I also added a rear aero foil larger than stock since this was a daytona car.

It is starting to take on a cool look!!
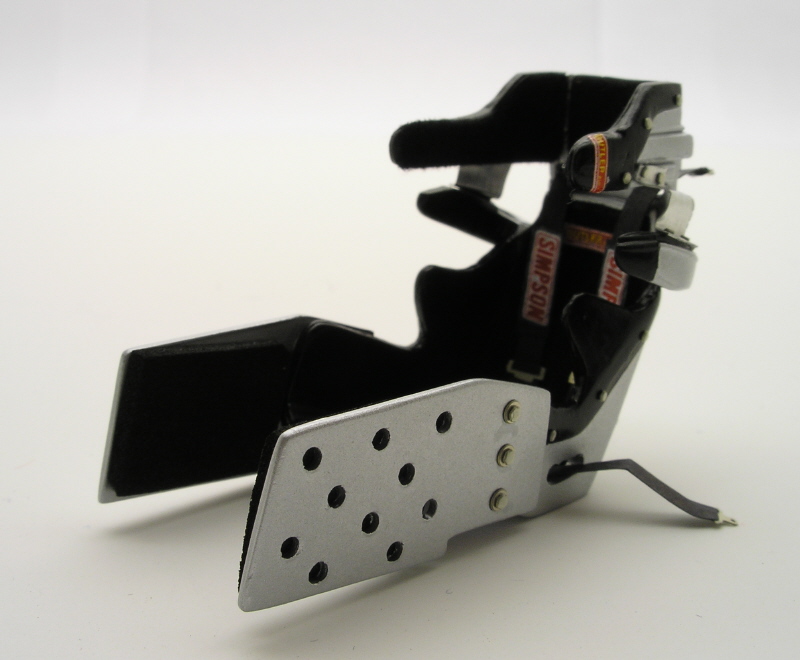
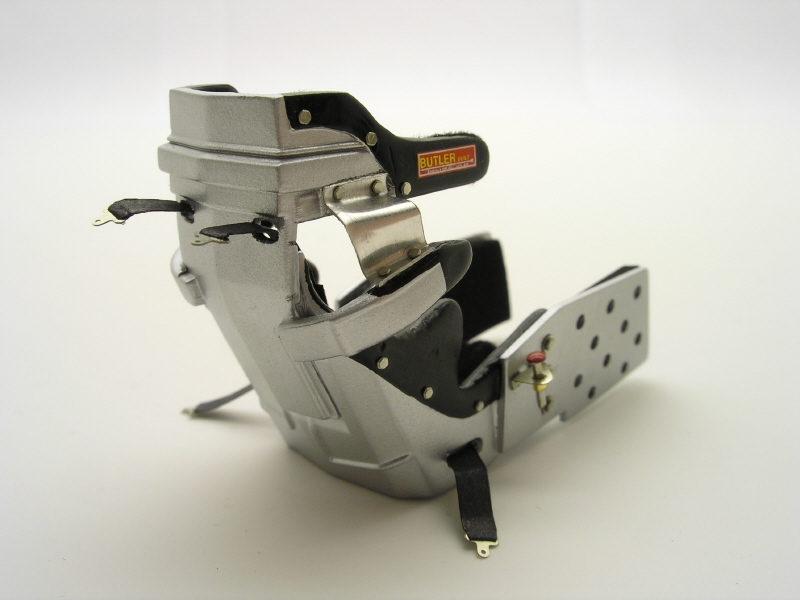
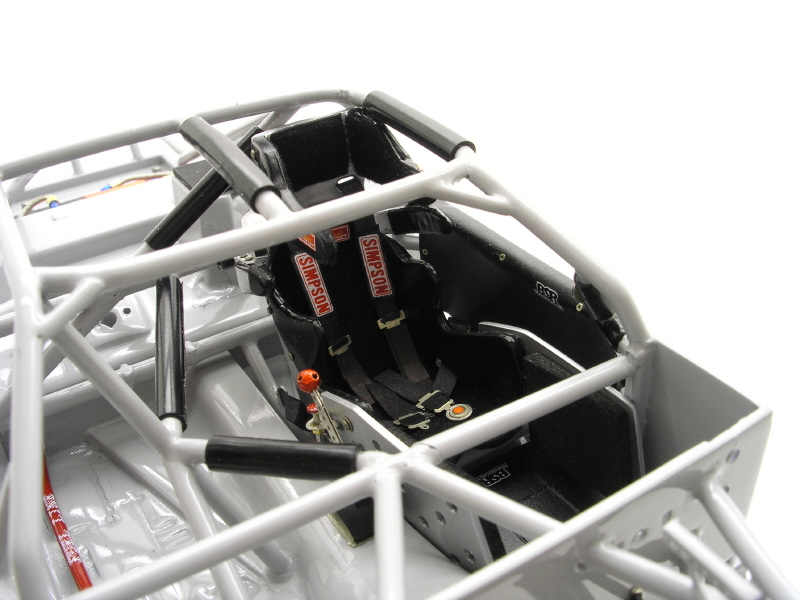
Moving on to the modern cup seat these cars have....I scratch built the leg extensions and painted it all TS-30 silver leaf. Then I painted all the padding semi and flat black and flocked the center and inside head rest. PRO TECH belts and bolts finish it off.....

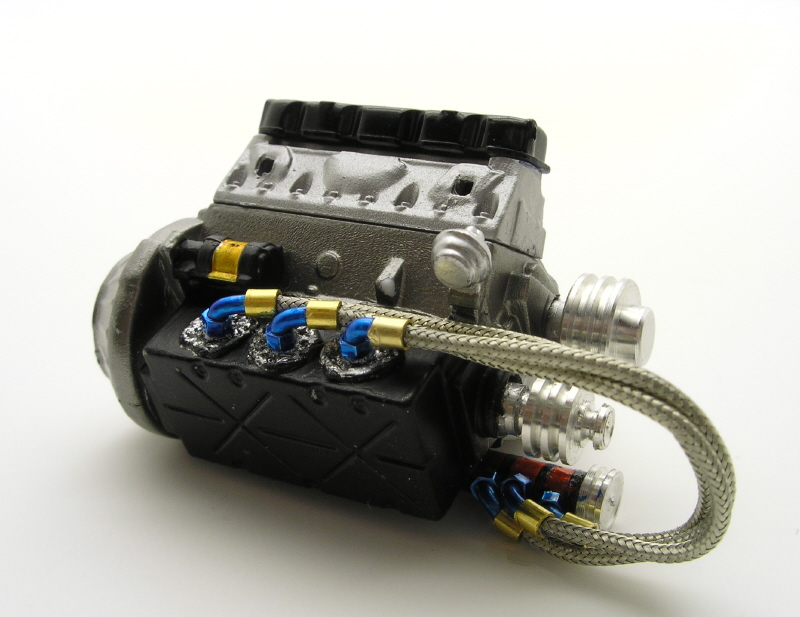
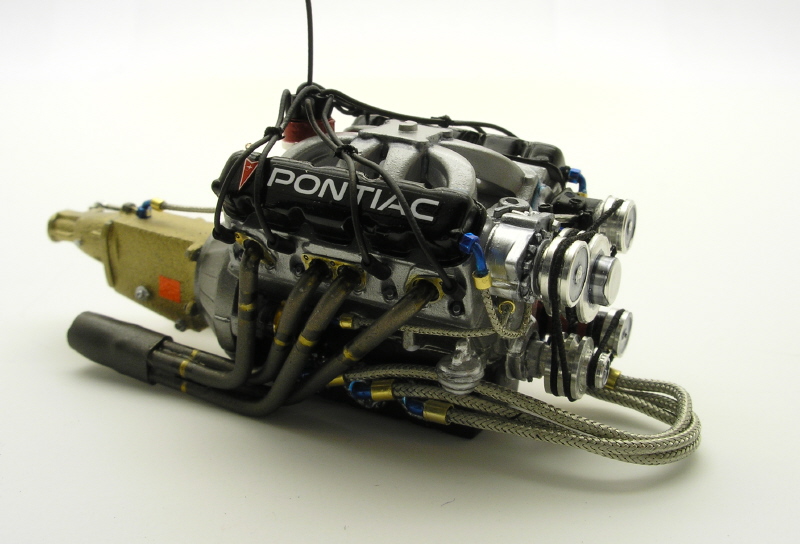
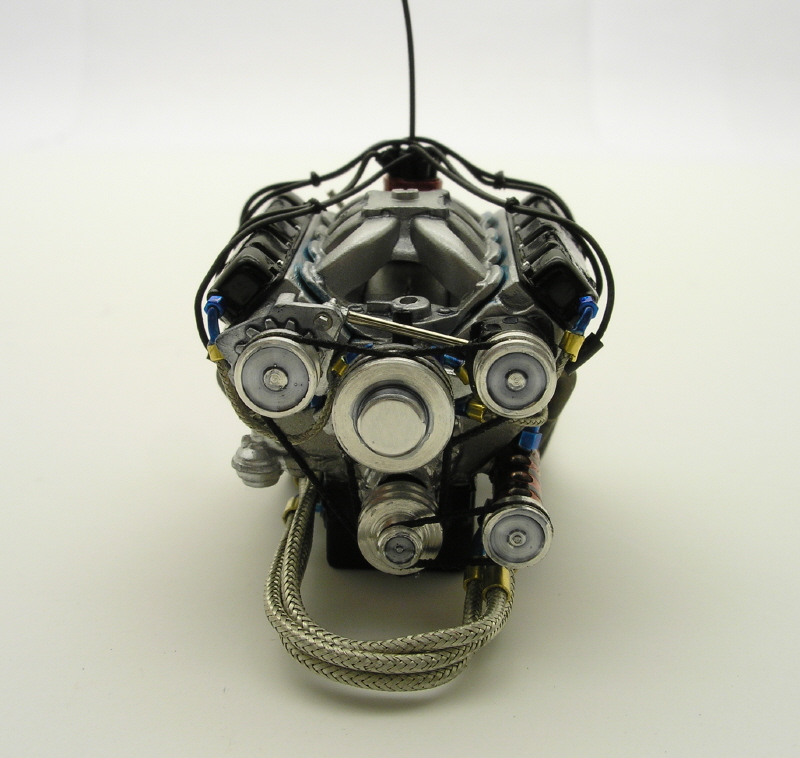
Here you see the beginnings of the engine. This is the engine directly from the kit. I hacked off the trans that will be replaced with a MCG Resin piece. The front crank damper was hacked off and holes were drilled to accomodate the pulleys which were made for me by MACHINE WORKS INDY, Clay K the sole proprietor
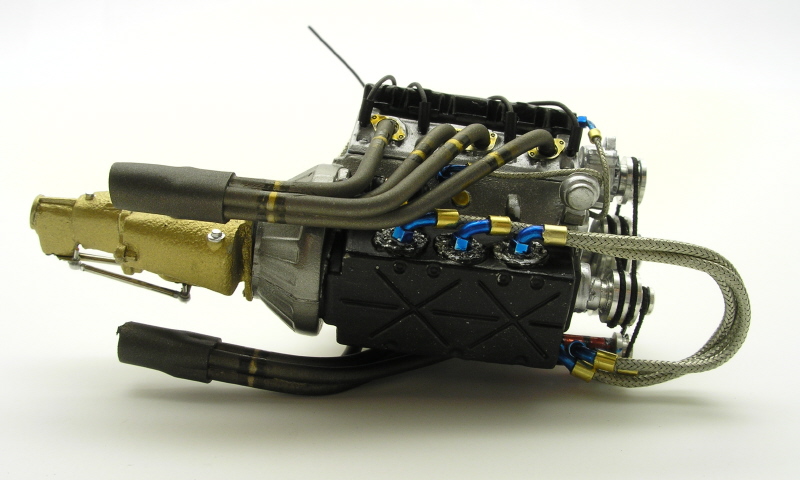
All the lines and hex fittings are from PRO TECH. The sump pump was made out of aluminum tubing. Valve cover decals are from a JWTBM goodie sheet. By the way, in 2003 MMM team made engines in house. Thanks to Clay emailing them directly.......

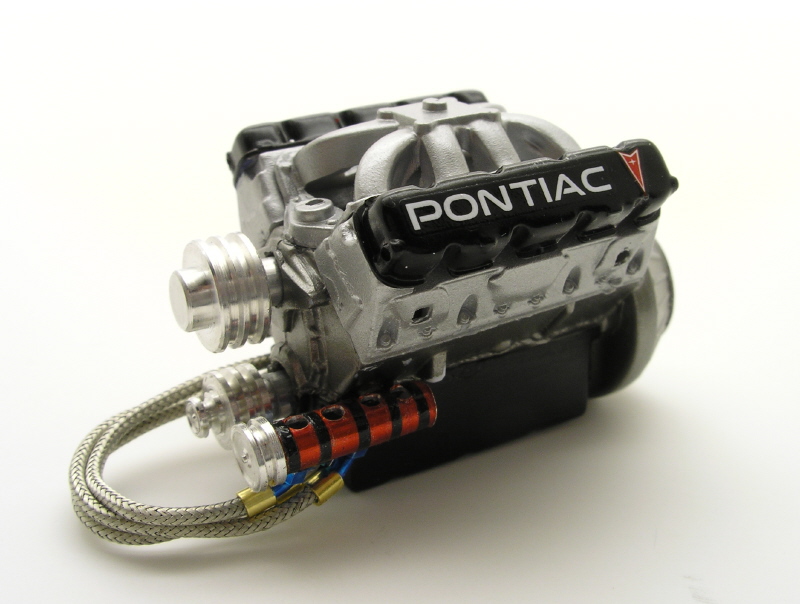
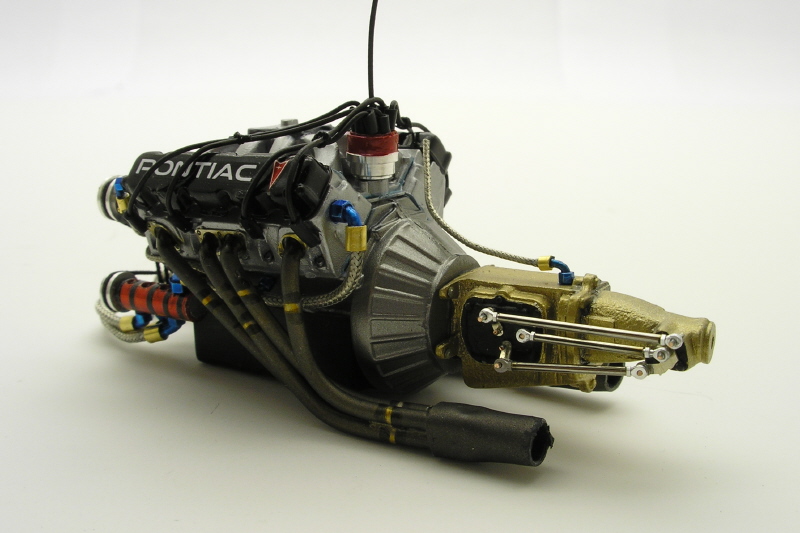
Engine with exception to the carb and fuel detail is done..... I made headers from solder, simulated weld lines and painted them with various alclads.
The trans is a MCG piece with RB Motion rod ends. Again the pulleys were made by Clay...... Thanks again buddy. Your lathe work really dresses these things up!!!!
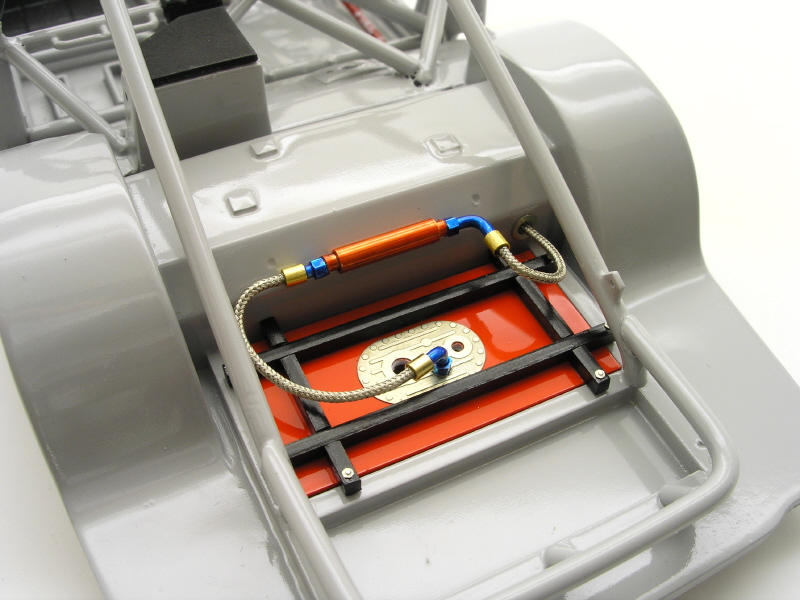
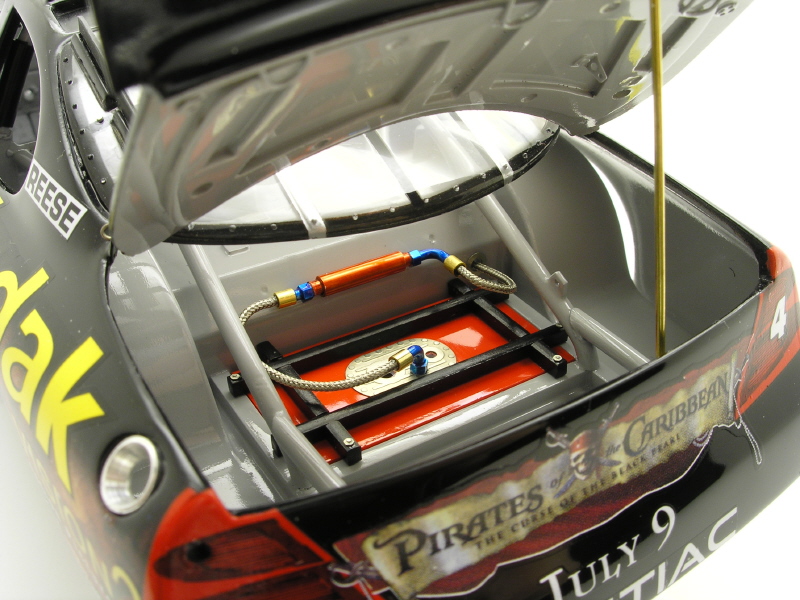
Rear trunk detailing is complete for now...I completed the fuel cell area. I decided to go with a red fuel cell to dress up the trunk area. I measured the opening, cut out the cell top and painted it with TS-49. Then I made the frame from square plastic. Painted it semi gloss black and installed it all!
Then I added PRO TECH bolts. The fuel filter is made from 2 sizes of aluminum tubing painted clear red. All lines and hardware are from PRO TECH along with crimp bead tubes and #4 hardline.
Seat is installed permanantly. I decided to put the fire bottle on the bars on the pass side of the car so there was nothing stopping me from installing the seat.
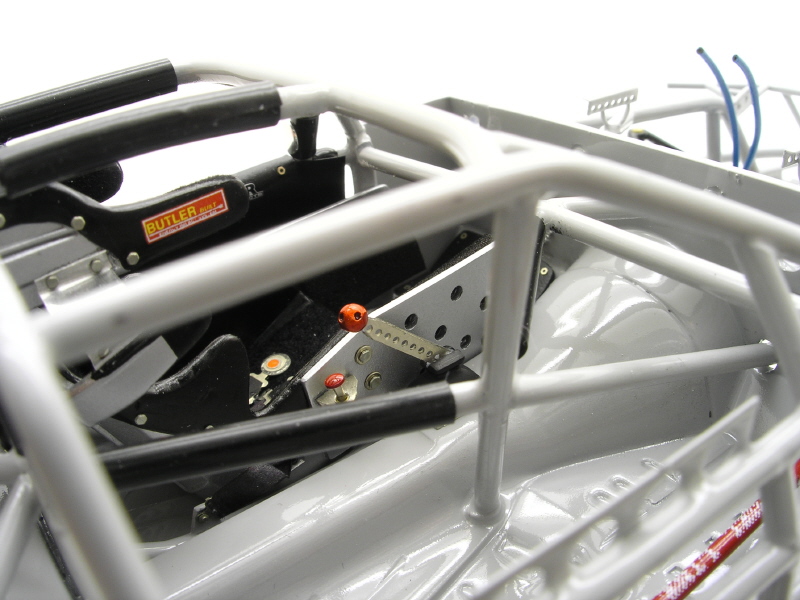
made a new gearshifter utilizing the kit ball and base. The shaft is made from 2 pieces of window bracing cut and glued together. Its something I think Clay and I were thinking about subliminally!!
I drilled holes in the ball, painted it silver and coated it with clear red to set it off.....
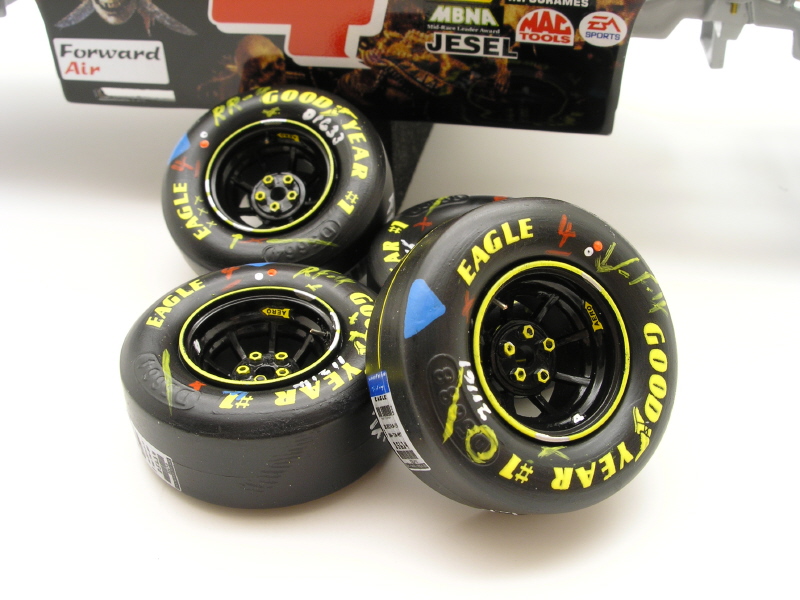
Finally, wheels and tires were detailed out.
More to come soon... this should keep everyone busy for now!!!
