Back from the drawingboard........
Repositioned the louvres so that they're more symetrical, managed to loose one in the process

Finally gave up looking for it and cut a new one
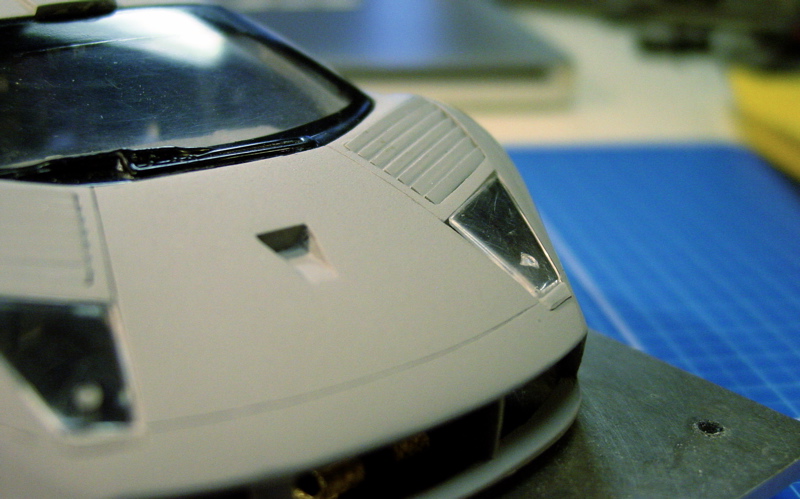
Also recorrected the edge where the frontfender joins the hood, looking at the pictures this edge is knife sharp and runs
in line with the headlights.
So with most of the body in its correct shape (or at least so I thought...more about that later) it was time to turn my
attention to some detail parts. Looking at the body for weeks now, I just couldn't stand it anymore....
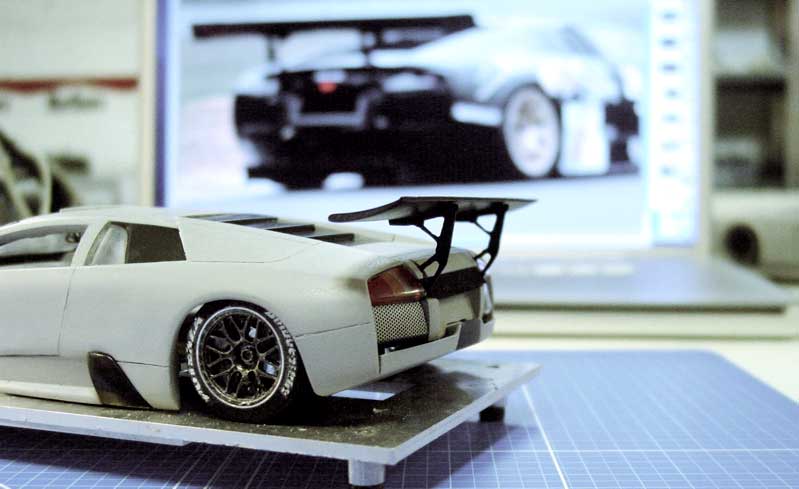
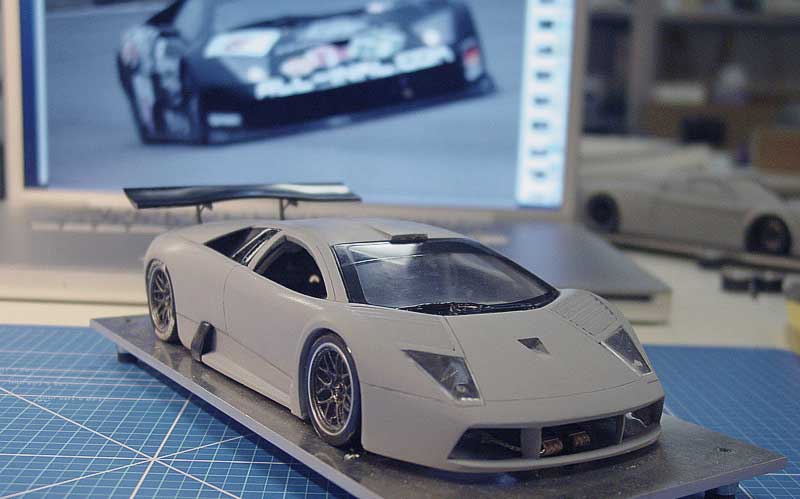
This car needed a wing ....badly!!!
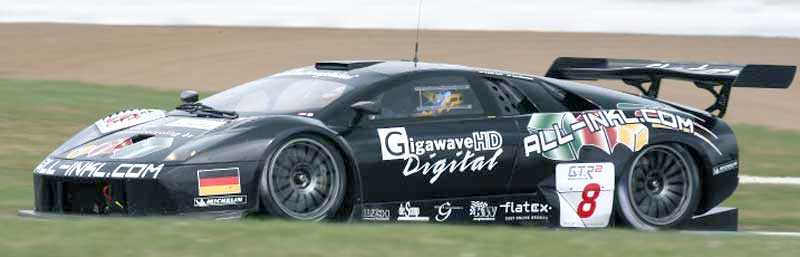
As you can see on the ref pic, the 2007 R-GT sports a full width rear wing with a raised centre section.
Should not be too difficult, a wayward Carrera C6R was happy to donate one....
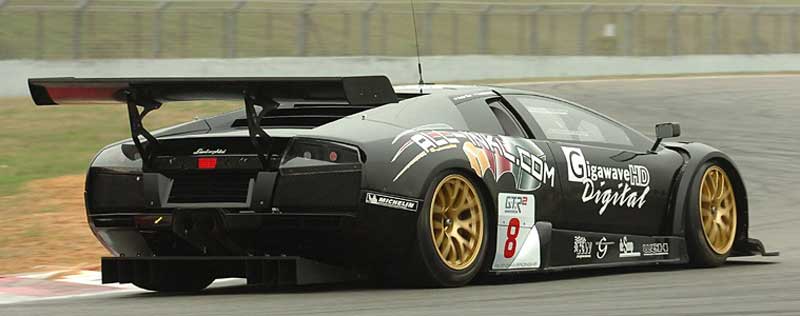
But a big problem with the R-GT is the way the rearwing is mounted......way out @the back, and look at those flimsy
supports, there's holes and brackets all over the place!

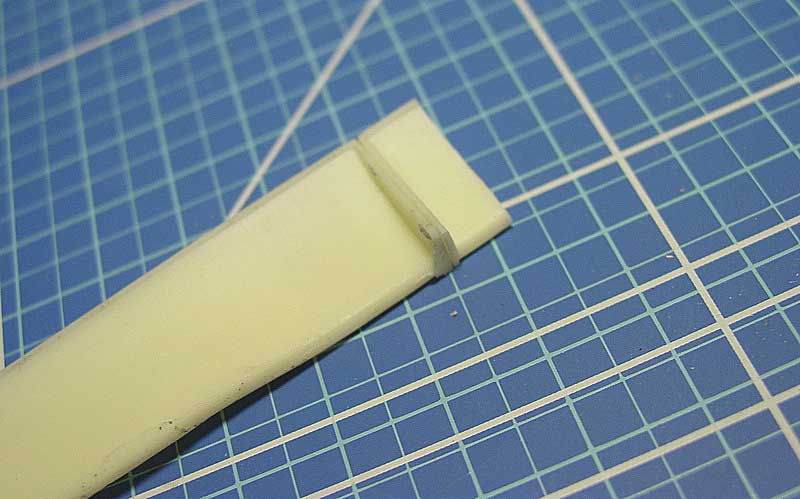
Ok first things first...the wing. Athough the shape of the C6R is ok, it is way to narrow (79mm) . Figures as the Carrera
is only 82 mm at the back, but to cover the Murcie's ass it needs to be 85 at least.
So I made a silicone mold of the spoiler and poured me 2 resin wings. Why 2, because that's the easiest way to extend
the spoiler and keep the correct profile.
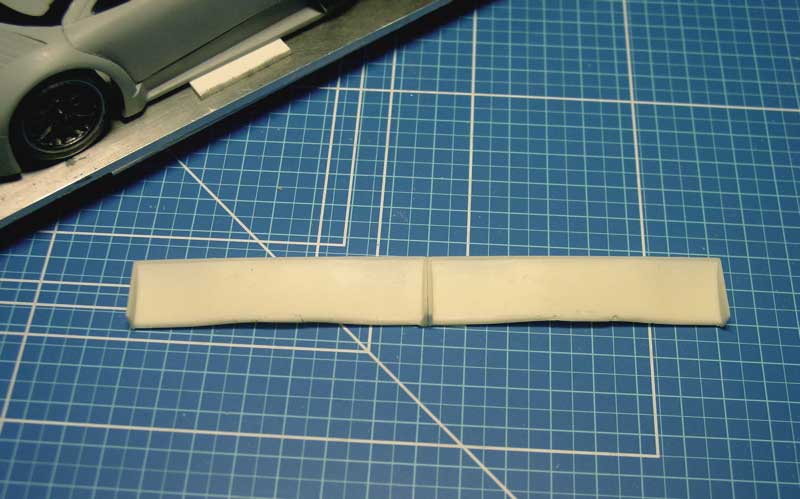
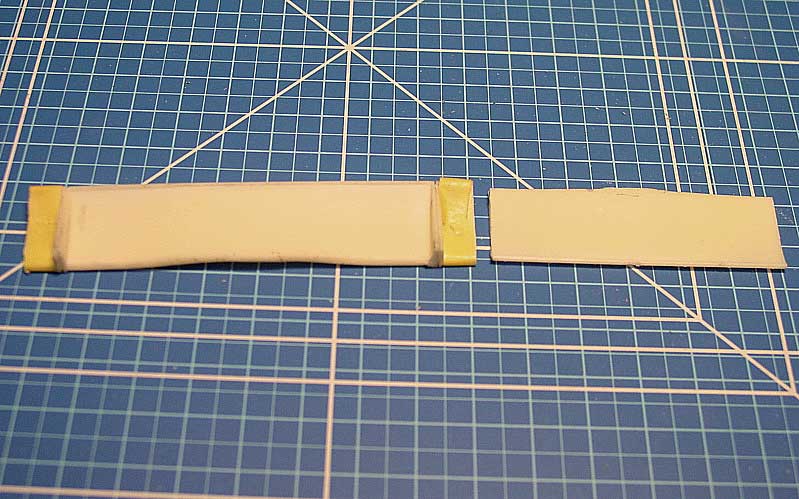
Here are the 2 resin wings. First step is simply to glue both spoilers together @ the endplates.
The wing needs to "grow" by 6mm so..mark 3mm from the endplate and cut!
Glue the part you've got left to the other endplate and cut again. The wing is now 87mm wide (forgot to compensate for
the thickness of the endplate

)
Sanding down the endplates was easy and with just a bit of thick superglue as filler the wing was ready for primer.
While I was waiting for the Primer to dry I thought ...what the heck, lets try to do the wing supports. So I took some
0,5mm carbon sheet and started to file and drill and shape..until the primer of the wing had dried....and dried, and dried.
In between I cut 2 slots in the wing for the supports and gave it a quick shot of black so that that could dry as I continued
on the wing supports.......
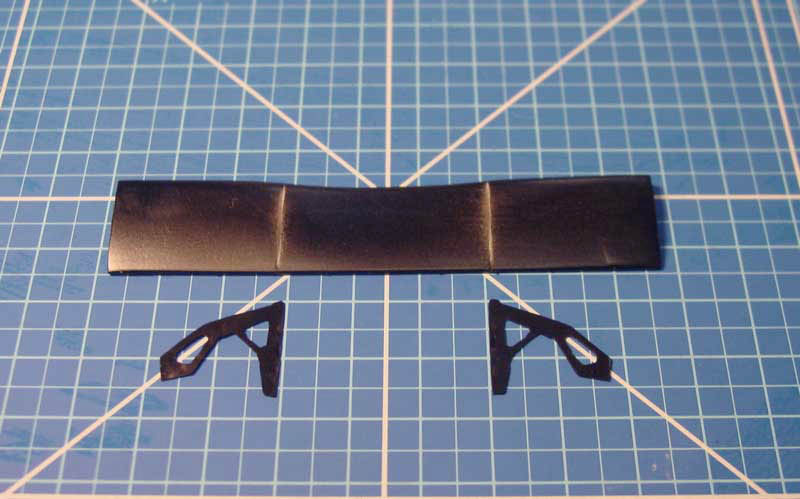
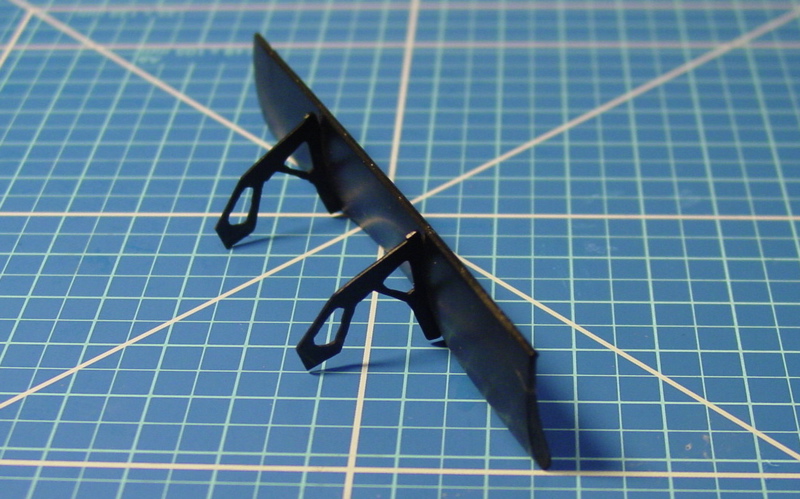
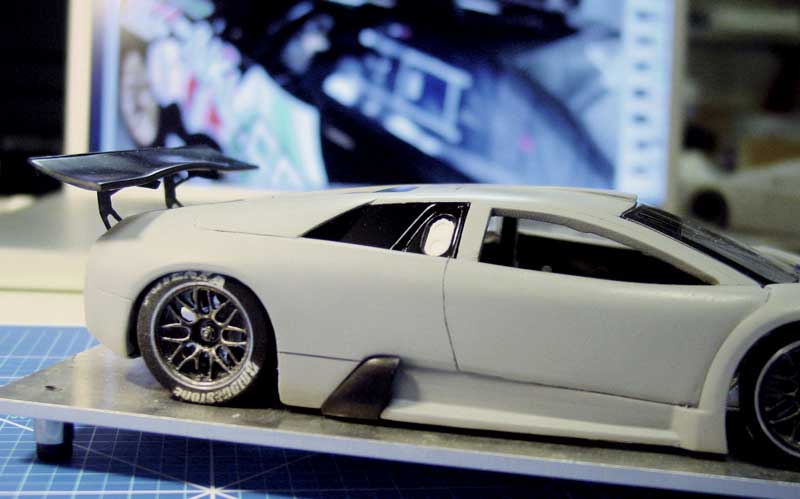
Here's a pic of the seperate parts, and the assembled wing, not really happy with the shape of the supports,
but then again...when did anything go well on its first try
Cutting the slots in the metal body was a pain...and to keep the wing in its place I stuffed some sponge between the supports.....
But hey...at least the car has a wing...I'll worry about how to make new supports..that are both strong and flexible later...
for now...I'm happy to enjoy the view
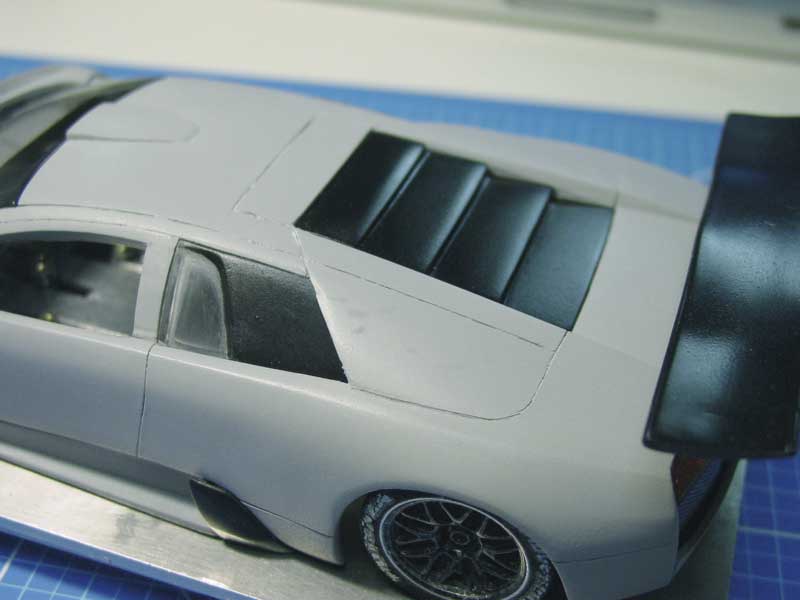
Other detail parts that were adressed were new louvres for over the engine bay.....
(the Burago louvres did not run over the full width of the bay)
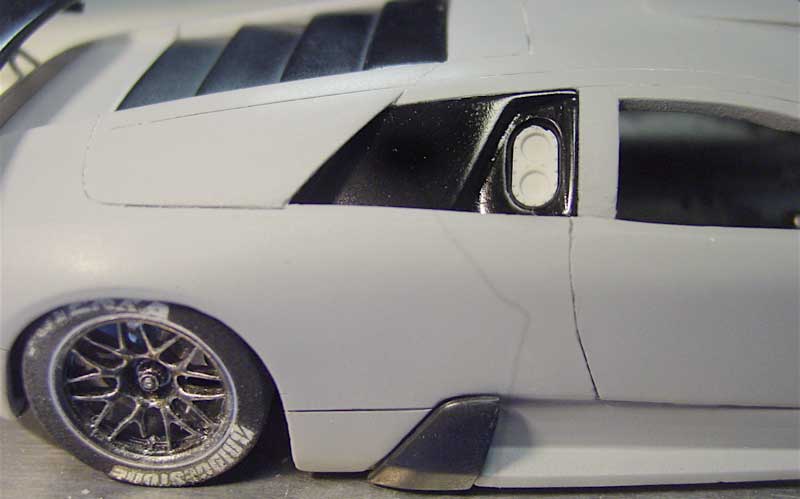
...and the recessed fuel filler. I glued some 2mm sheet styrene behind the window and cut the oval and shped the sides.
Fillercap came courtesy of an old Nissan 390 kit. Still needs some cleaning up, but not bad for a firsst attempt
Last major job is to build a front splitter and close the side windows, but only the side windows are neccesary before I
can start pouring some silicone. ...progress has been made.
So I'm happy...that is until I get an email that the Autoart Lamborgini that I ordered some time ago (see my post "stage 1")
has finally arrived.
As I get into the car to pick it up ...I think: Oh no...it's like that DBR9 nightmare all over again
(I once worked 2 months on a Renaissance DBR9 and then got my hands on the Spark Aston.....
after one look I dumped the Renaissance in the bin and the Spark in the sillicone

)
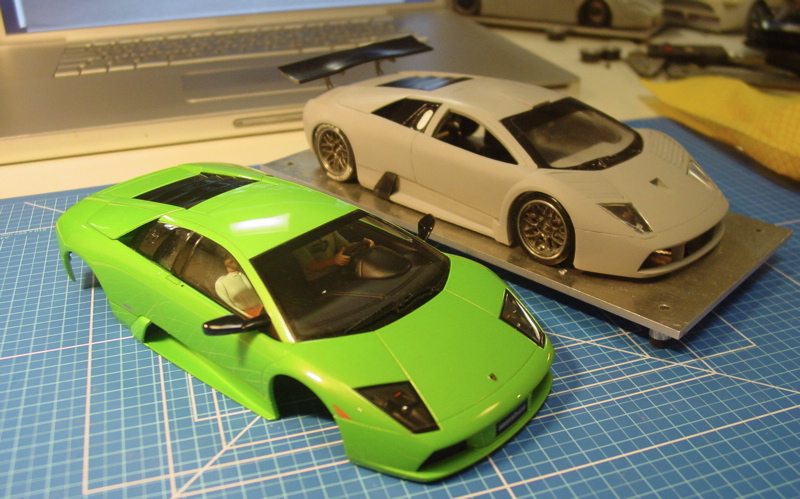
And indeed, the lines of the Autoart are much sharper, the nose is longer (more correct) the roofline is better and and
and...the detail.......

well back to the drawingboard...again!