Step 1: Artwork.
Everyone here still using great PE stuff from good manufacturers: you know already how your PE shoud be! Anyway you need to know very little to start. The narrowed line you will do (as also for the smaller hole) is approx (to work in safety) 0.1mm plus 25% tolerance, I know some great manufacturer do smaller, but we, at home, aren't they LOL.
So 0.1-0.2 mm minimum with a great printer device and good tools and acid, and a great eye to overlap slides: if you do it wrong of 0.1mm you already screwed up you job!
I'm speaking of 2 sides etching: so we'll design different details (ex. engravings) in front and back side: following you'll see that I designed sprues just in the back side to allow part's removing.
Just 2 words on the design: if you haven't any CAD/graphic design skills, meanwhile you learn, feel free to use this file (4 point harness/belts) to do your experiments:
www.gionc.it/gioseatbelt.pdf
(sorry Mods, I need to host in my site since photobucket don't allow pdf or other vector upload, if you have a solution to host here just let me know.)
So: design our shapes. In that case I'm designing something for my 360CS build: basically I want to add pulleyes, belts and details and Tamiya offers a timing part's cover melted with belts and stuff... so I designed mine: overlapping as a template a 1/1 tamiya part's scan and next overlapping a detailed ferrari technical draw:
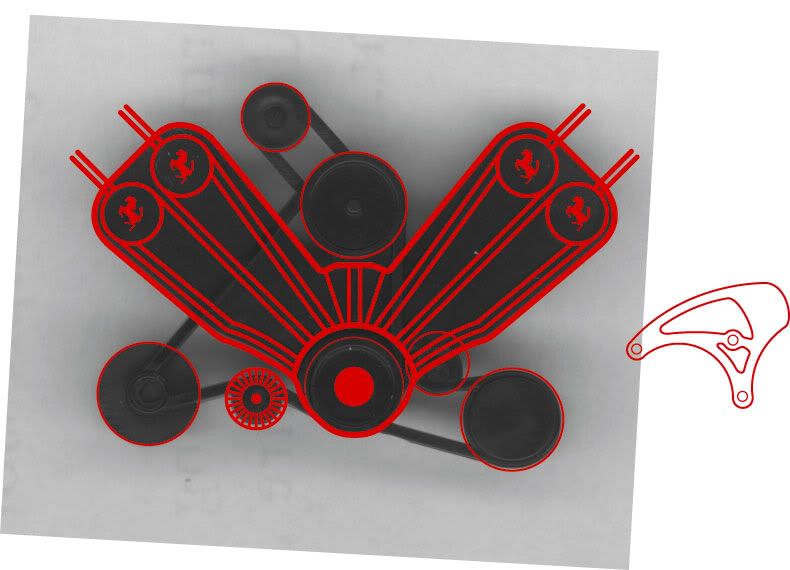
first step:

I designed my stuff as a sketch just over the Tamiya 360 modena part's scan.
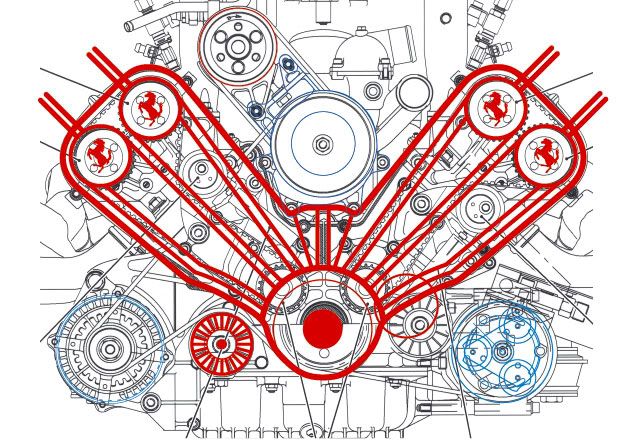
Followin the almost completed job:
There I overlapped and detailed my job on a Ferrari tech, draw: like you'll see shapes I drawn match the draw: tamiya people done a great job! I started to add details like alternator and pumps backings. At least alternator was designed out of 11 parts: in 6x6x6 mm!
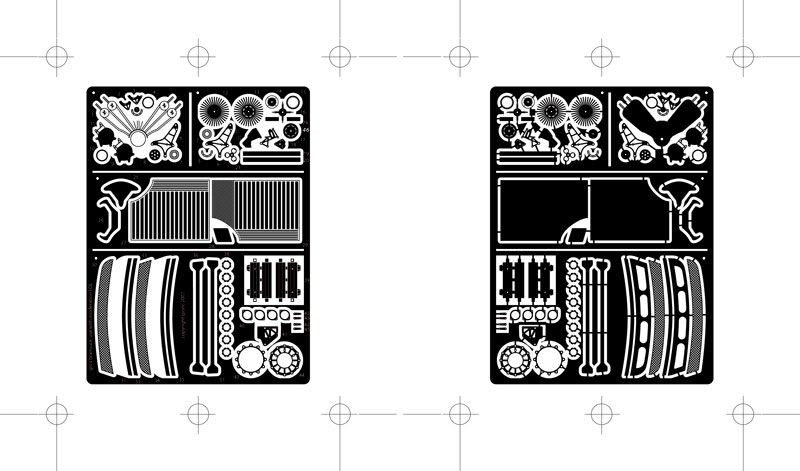
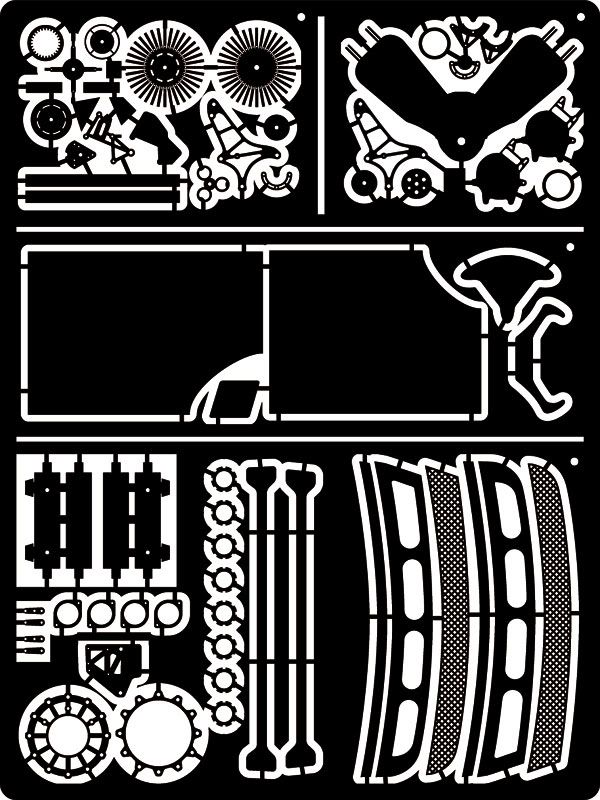
This is the finished job, front side:
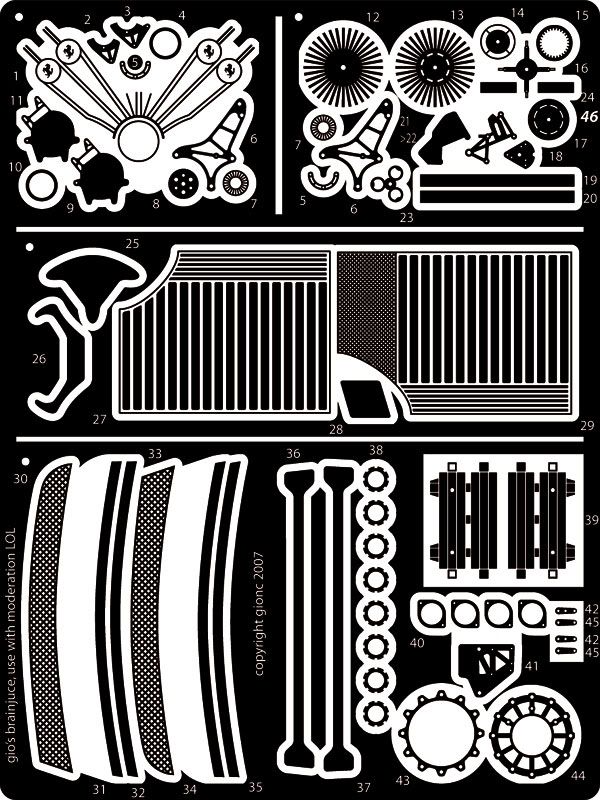
Important thing: less is the stuff that acid have to etch, less is the time, the acid and plate temperature, more the quality. So is good stuff to surround all and fill any space you don't need to etch.
So I mirrored the job and added stuff like sprues to keep all toghether.
Doing the mirror job you need to draw some cross to allow next step: overlap's setup.