How-to, Simulate Fiberglass in Scale
While working on the 1/12th scale Tamiya Porsche 935 Turbo I thought the parts in the kit would lend themselves well to an actual fiberglass pattern or effect. After several tests, this is the method that I came up with which seems to best replicate the scale-look of fiberglass.
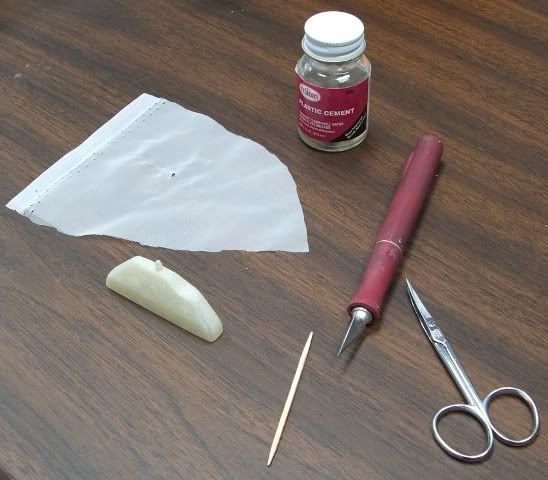
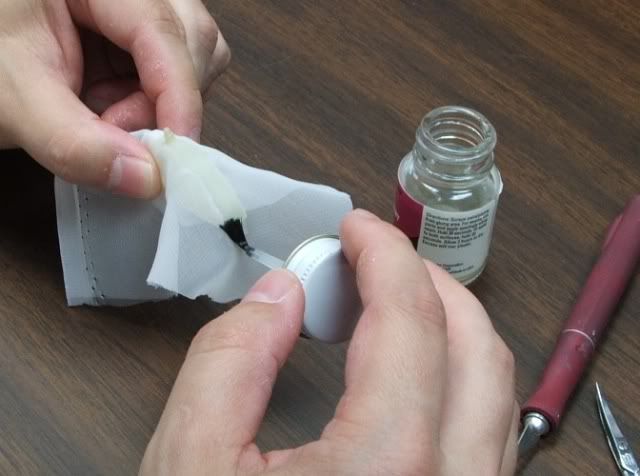
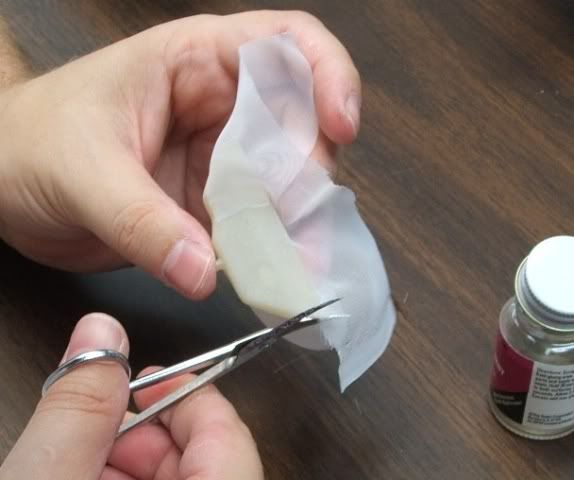
In this first picture you can see the tools and materials needed for this process. The cloth I used is just a simple sheer cloth picked up from any fabric store. Its the type that would be used for making curtains or something similar. Youll need liquid cement for plastic, scissors, an x-acto knife and toothpick or other tool for pressing the cloth into the crevices of the plastic part.
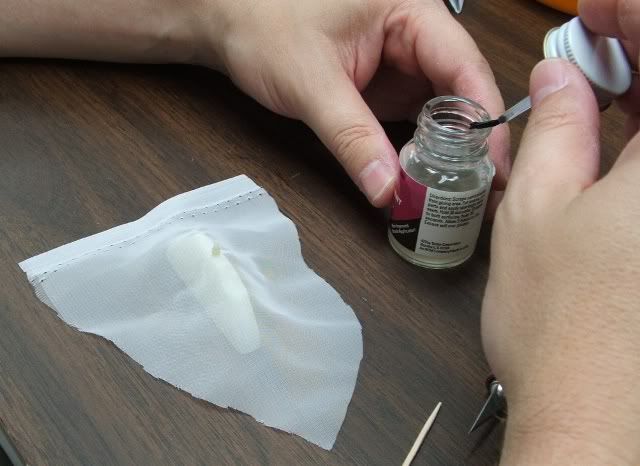
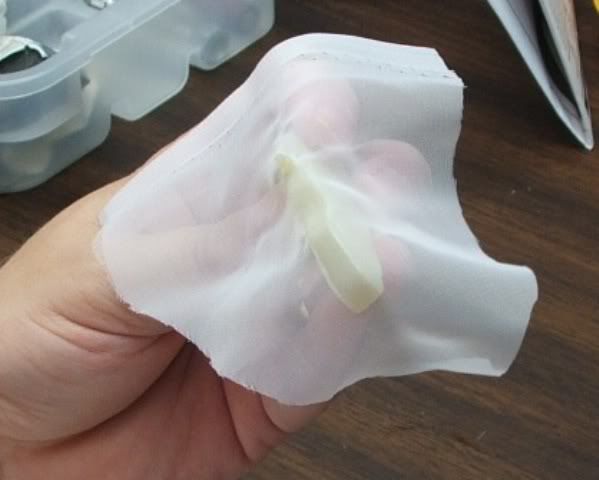
Here, you can see that Ive cut a hole in the cloth for the mounting pin of the kit part to protrude through and then simply draped the cloth over the part. Keep the mounting pins and holes of parts as clean as possible to avoid difficulties attaching the parts during your assembly.
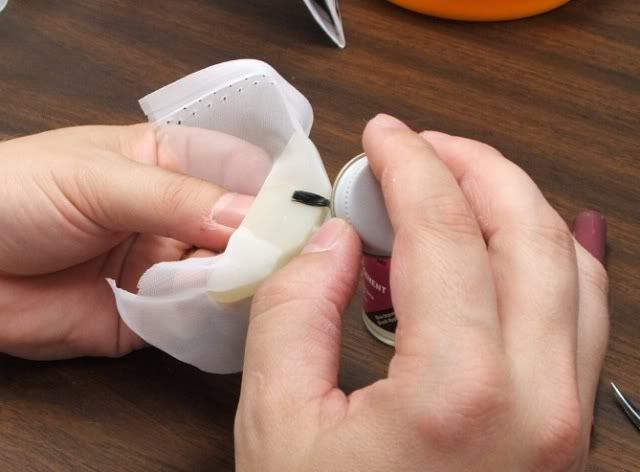
Choose your starting point, pull the cloth back and apply a layer of liquid cement to the kit part. Apply a generous amount of cement and give it a minute to soften the plastic. The brand of cement and the amount applied will determine your wait time for the plastic to soften. What you want to achieve is enough softening for the cloth to actually press into the softened plastic without the plastic really oozing through the cloth.
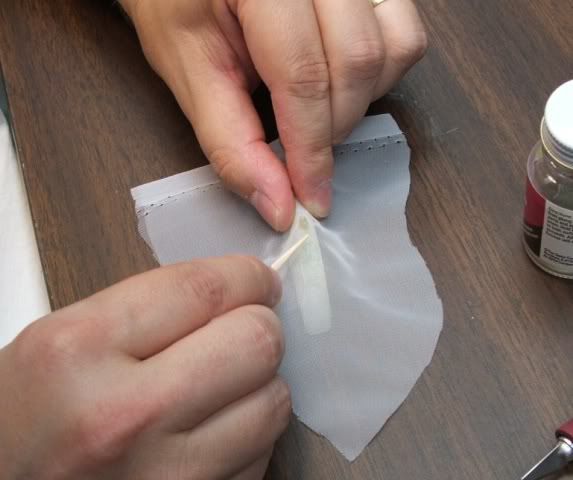
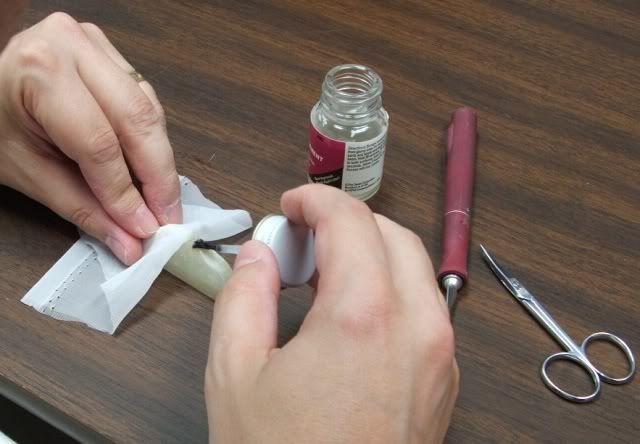
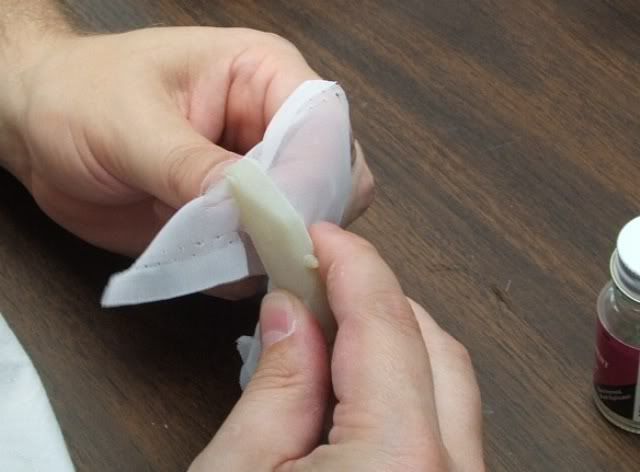
Pull the cloth back over the softened plastic and begin pressing and working the cloth into the plastic with a toothpick. You may have to work with it for a few minutes until the plastic starts to set-up or harden again to ensure the cloth doesnt pull away as you move to the next section.
After the plastic has begun to set-up and harden, paint a thin layer of plastic cement over the cloth. This process just seals the cloth to the plastic and smoothes out the texture a little bit.
Heres the result of the process to this point.
Continue the above steps working your way around the part. Work in sections as you soften the plastic with the liquid cement and pressing the cloth into the plastic.
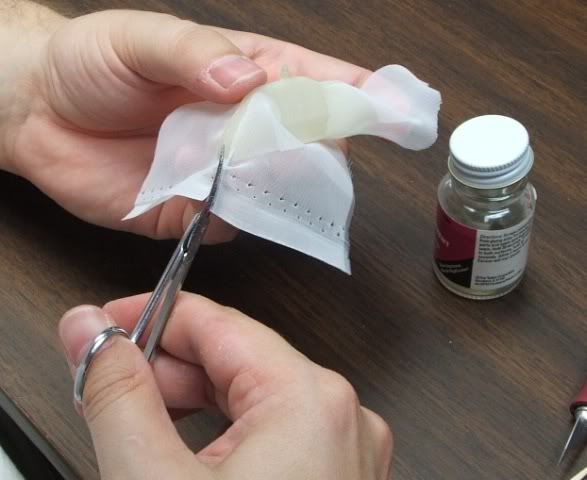
Inevitably, just like working with a flat decal on a curved surface, you may have to make small cuts in the cloth to get it to conform to the part. Just apply a little more cement and keep working it in until the cloth stays where you want it. Keep in mind, real fiberglass is worked in sheets and cut where necessary also.
A little more cutting and one side is almost complete.
After the cut mentioned above and working the cloth around the corner.

One side completed. Just repeat this process of applying the liquid cement in small sections to soften the plastic, press and work the cloth into the softened plastic making cuts in the cloth where necessary to make it conform then apply a thin layer of cement on the cloth to even out the texture and seal the cloth to the plastic.
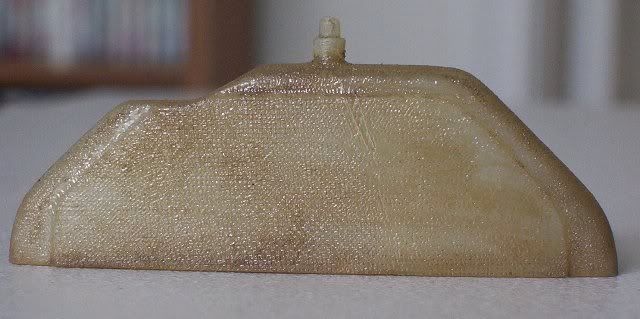
Heres the completed part with a wash of Tamiya X-19 smoke, X-22 clear and some dirty acrylic brush cleaner as the thinner. I washed the parts with this mixture to get the effect you see here. You can mix your wash to get the effect you desire from very clean new fiberglass to very dirty used fiberglass.
As a note: this particular kit part was molded in a translucent tan color which helps with the overall look. Parts molded in other colors will have to have a light coat of primer (I recommend tamiya Fine White primer as it wont cover up the texture youve worked hard to achieve) then apply a wash of Tamiya XF-59 Desert Yellow or XF-60 Dark Yellow directly to the white primer to get the basic tan color. After that wash has dried thoroughly you can then apply your dirty wash for the final effect.
Hopefully, some of you will find this helpful to achieve that extra texture and detail we all strive for while trying to duplicate realism in our scale models.
Thanks for looking
..