edit by jay: in case you missed part I: Resin Casting Part I - Making the mold
Okay folks as promised Part II
In Part I we discussed making the mold. 1 piece flat molds are pretty easy. For multiple piece molds you need to think about how the mold will come apart to allow the master and subsequent cast parts to be removed. Don't follow me? Take a look at a kit body for example. Those unsightly seams we all have to sand off are actually mold lines where the pieces of a mold meet. Now visualize all the pieces that would be required.
Another thing about multi piece molds is that you need a way to pour the resin in and a way for the air it displaces to get out ( vent ) otherwise you will have huge air pockets in the finished piece.
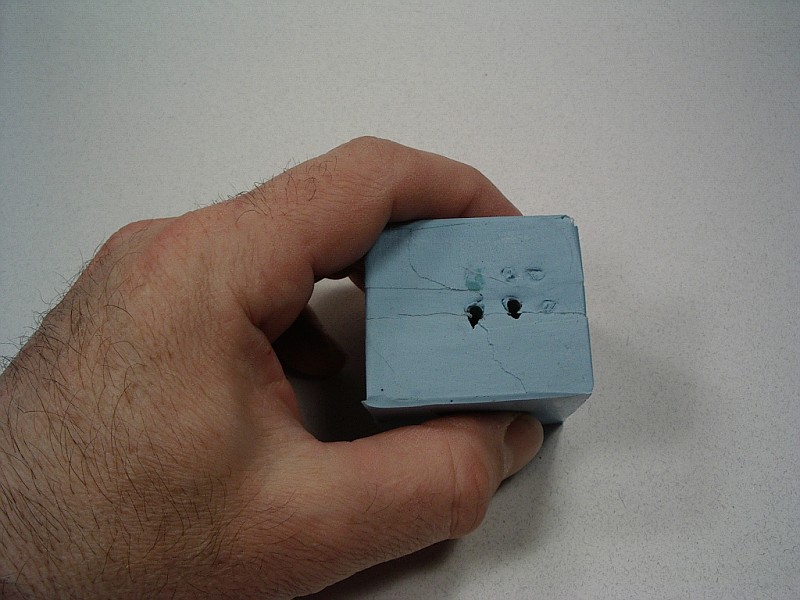
Lets look at the 2 piece tire mold I made. Remember the nails that held it in place while I poured the first half? I left 2 in when I did the second half and now its time to enlarge the holes they left and clean them up a bit.Carefully cut the groove wider with an Exacto

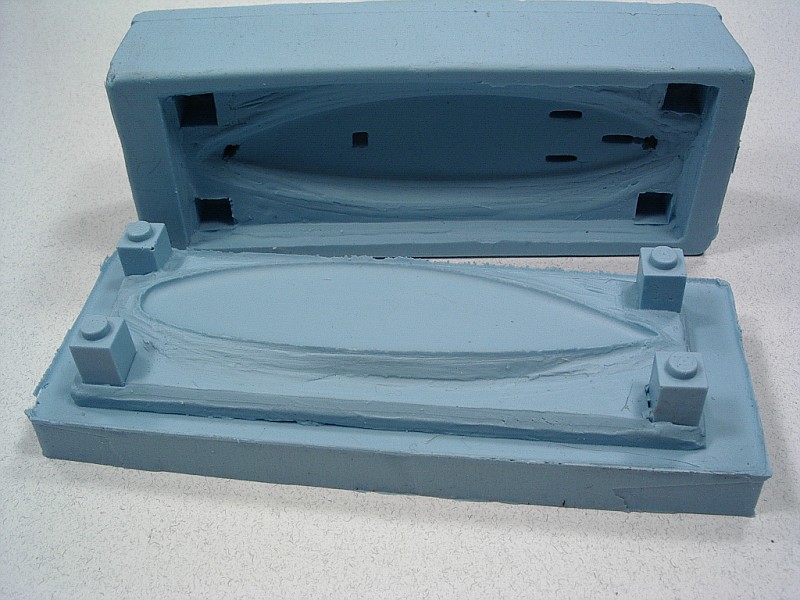
When the halves are rejoined they should look like this
Now that that is ready a few more words on mulit piece molds. Sometiems even with a 2 piece you need a way to hold the piece up while Part 1 is poured, for this surfboard I made a 1/4 thick slab of clay on my glass and buried and blended the surfboard into it right up to the part ( halfway ) line.I poured the first half then turned the piece over, removed the clay added a few more legos to make the form deeper and then poured the second half.As you can see I also used a few small Legos as keys to hold the 2 halves together
If you want to learn more about multi piece molds I suggest you do some research into sculpture techniques and so on, theres way more than I can cover here.
Allright time to pour. The same rules apply here, clean work area, clean molds, air bubbles are your enemy. Oh wait did I mention air bubbles are bad?!? LOL
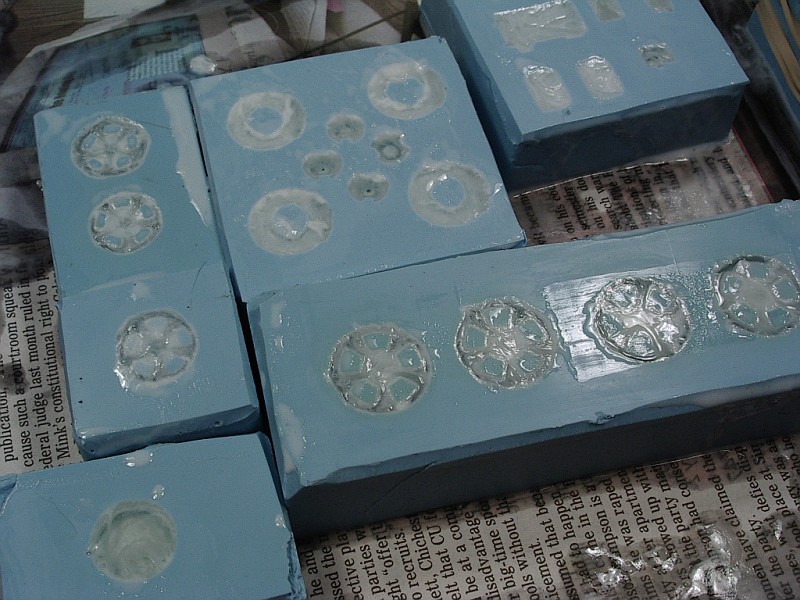
Prep all of your molds, check for dirt, stray bits of RTV, Cat hairs ......
You don't wnat anything to mess up your part.
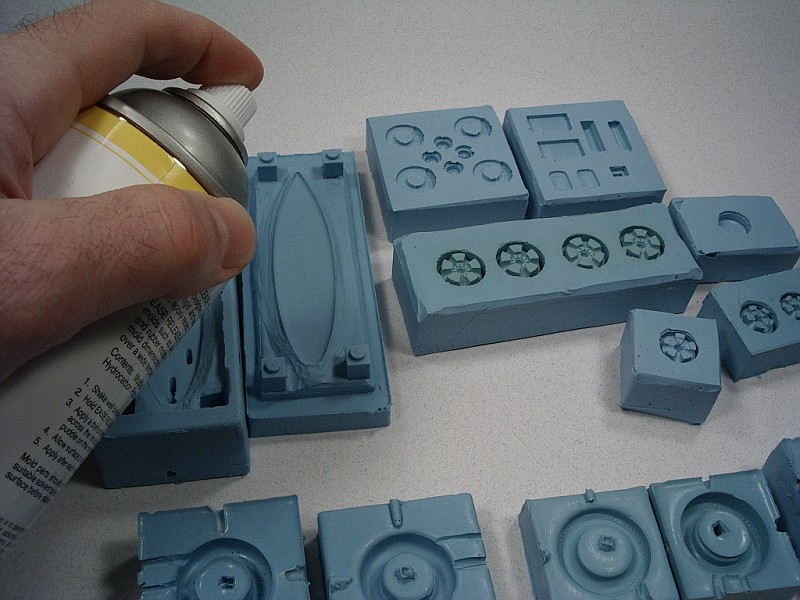
Now its time to add the mold release. Careful not too much, if it puddles it willl create a pocket in your completed part. And as always spray in a well ventilated area and use a mask. I should point out DO NOT DO THIS ANYWHERE NEAR YOUR PAINTING AREA!!!!!m Airborne silicone spray particles in your paint area will really screw up a good paint job.
I like to hold the 2 piecers together with a few rubber bands, not too tight you don't want to distort the mold

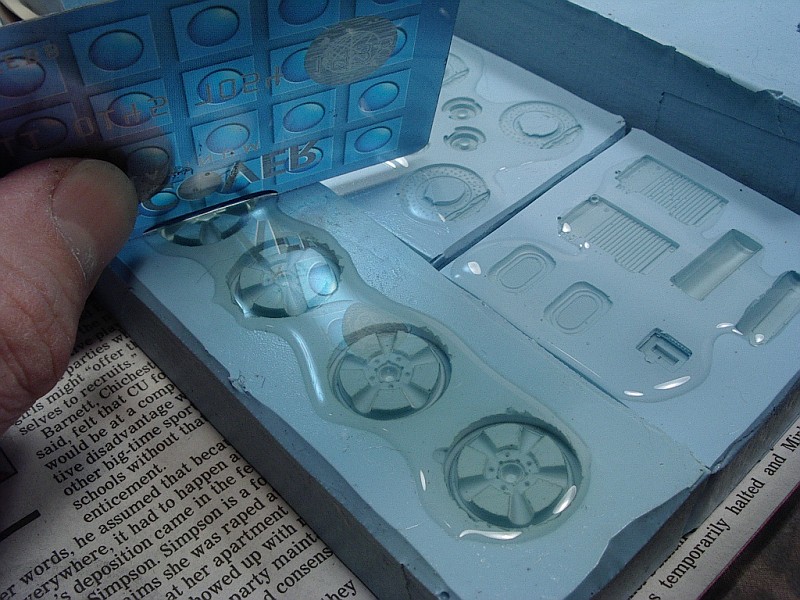
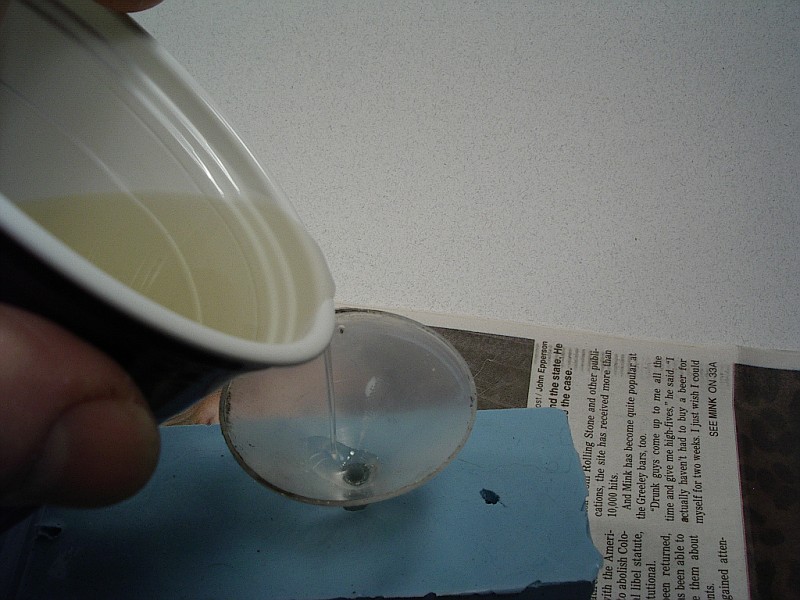
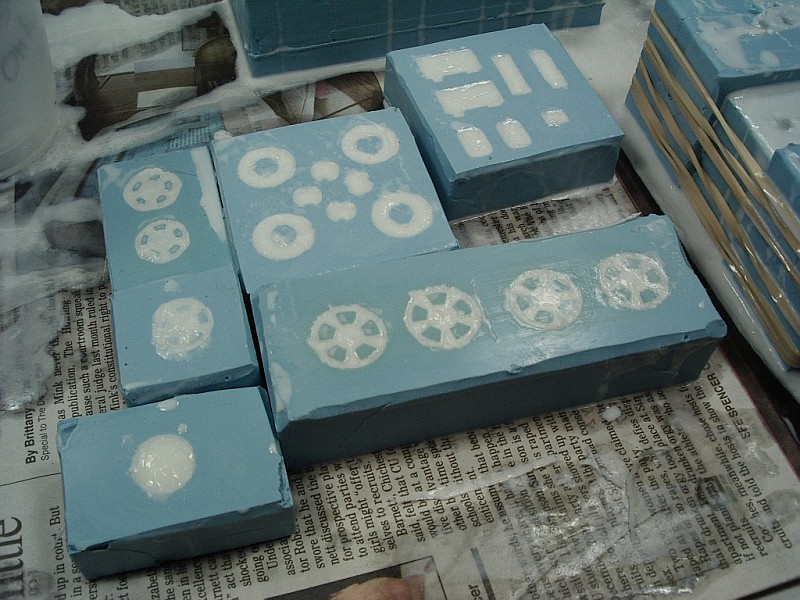
I am currrently using a 1 to 1 thin clear resin ( cures white ) that sets in about 40 minutes. Again accuracy is the key, if it says 1 to 1 it means 1 to 1. Pour equal amounts in seperate containers and then combine in a third. Gently mix with a craft stick and avoid introducing any air into the mix.It should be poured in a thin stream just like the RTV, remember this helps to eliminate any smalll air bubbles.
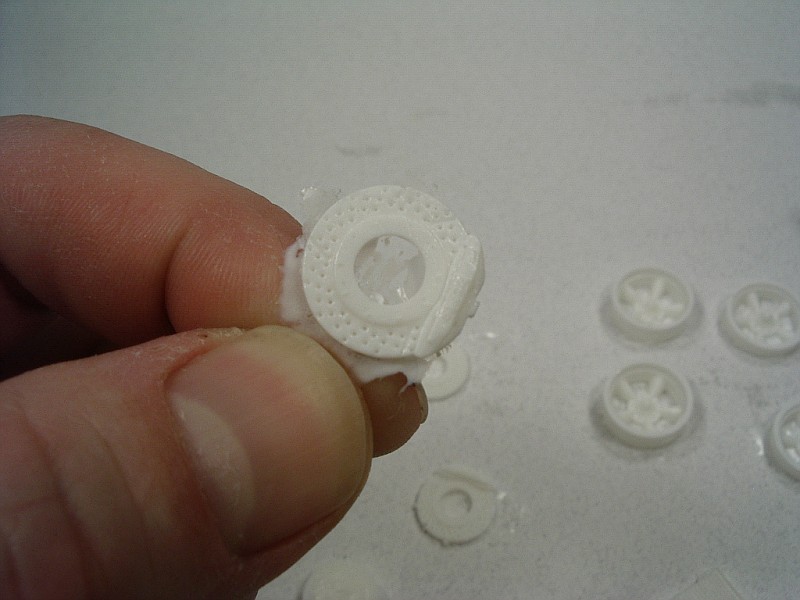
If any do occur-such as this wheel that seems prone to air pockets in the center cap- I found you can use a big straight pin to coax it to the surface

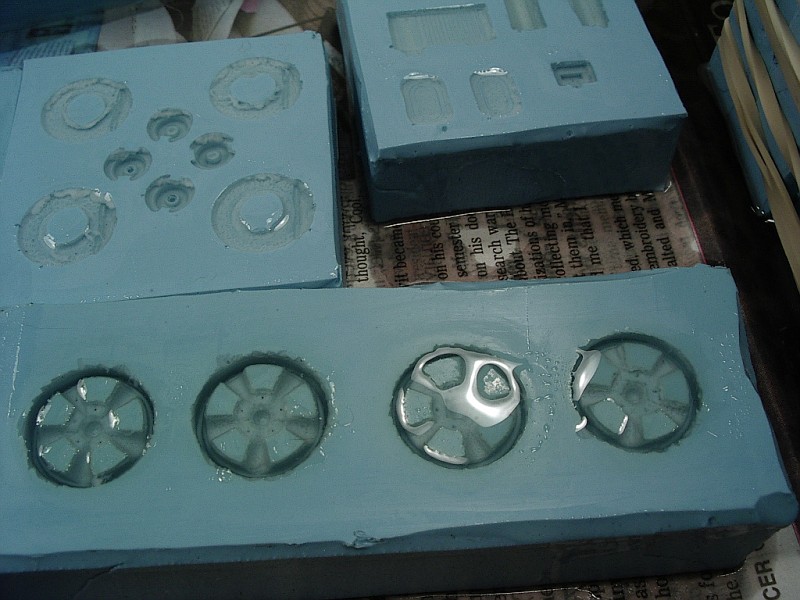
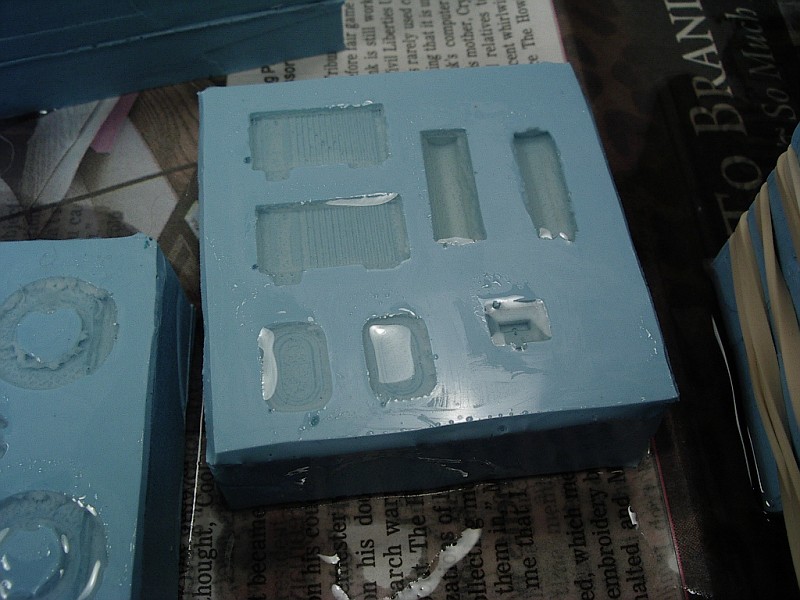
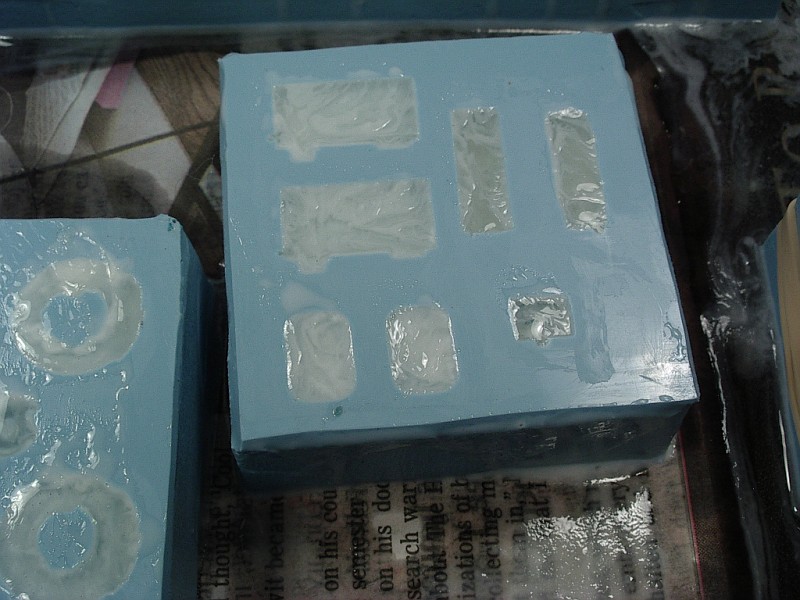
As you can see I overfill the one piece flat molds slightly. Then I take a credit card ( save the fakes that come in the mail with all those annoying credit card offers ) and gently scrape off the excess leaving a nice clean flat back

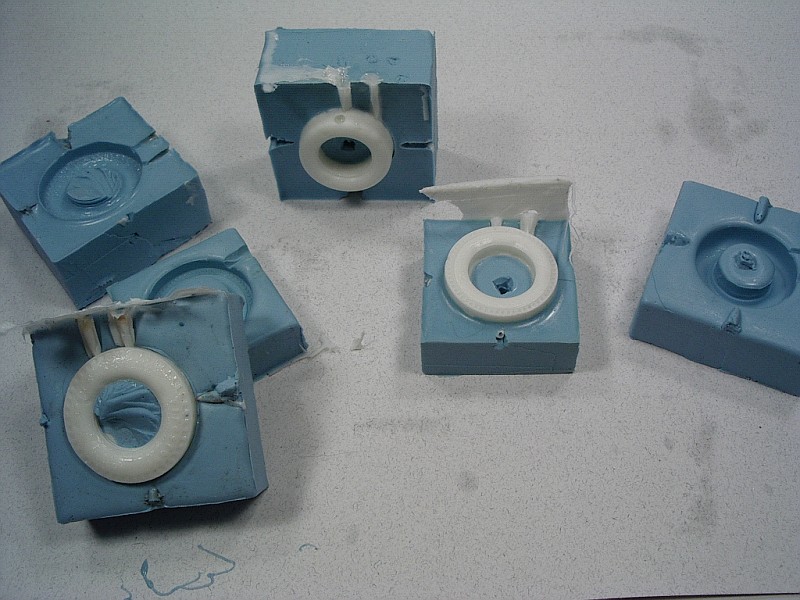
For multi piece molds I like to use a tiny funnel to direct the resin into the hole
Fill until the excess comes out the vent hole(s)

Sit back and wait, this is where the patience comes into play.
Soon you will notice the resin begin to kick and turn slightly white
a little more but not quite cured
When it turns completely white its almost done. Just to be safe wait another 10 or 15 minutes because if its still warm from the curing action when you remove the part it can warp.
Tired of wating? Gently demold.
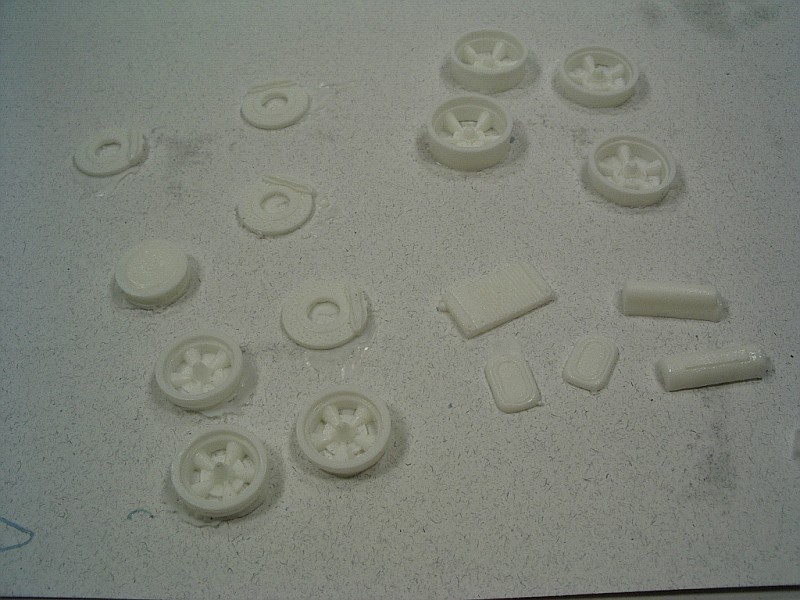
Big Brakes anyone? The light flashing can easily be sanded off
Did you say slicks ?
There you have it, now its time to clean em up and paint em. You will need toi remove the mold release, I do this by washing several times in a degreasing dish soap.
You may have some very thin flash on the back of the pieces from the 1 piece flat molds, this can happen when you scrape the excess resin. Its easily taken off by sanding the back of the piece on a flat surface. Fill any pinholes with putty ( I use Bondo Glazing Putty ) Sand any seams flat.
Follow your normal painting steps.
I have been thinking that since the tires are cast in white I could paint them the correct shade of black and then sand back through to the white where the lettering is. Hopefully producing a nice tire with raised white lettering.
Peace and Good Luck
Dag