|
|
|

|
|
| Search | Car Forums | Gallery | Articles | Helper | AF 350Z | IgorSushko.com | Corporate |
|
| Latest | 0 Rplys |
|
|||||||
| WIP - Motorsports Post topics for any "Work In Process" motorsports vehicles in this sub-forum. |
 |
 Show Printable Version | Show Printable Version |  Email this Page | Email this Page |  Subscribe to this Thread
|
|
|
Thread Tools |
 11-06-2009, 09:01 AM
|
#91 | |
|
AF Regular
Thread starter

Join Date: Jul 2003
Location: Avon, Indiana
Posts: 164
Thanks: 0
Thanked 0 Times in 0 Posts
|
Re: Wip:kyle Busch's '06 "cars" Kellogg's Monte Carlo
I spent the last two nights trying to think of a way to handle the rear shelf area. Nothing was working. My last two were OK, but only really touched the rear window in the middle and left big gaps on the side. This time I was determined to make it right. First try in plastic failed. Try number two was in brass and worked better, but still wasn't right. Try number three was in thin brass again, and this time worked perfectly! I added SMS textured paint followed by flat black Krylon to match the textured look I've seen usued before. That was a big hurdle to clear.
I also got the inner tin panels done up in embossing metal and added the oil breather tank.   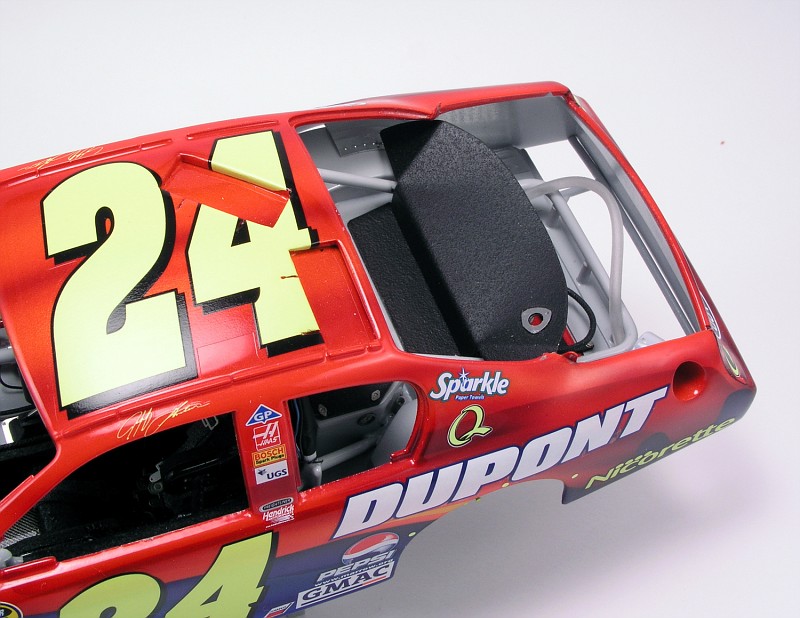 I also got my dash started. So far I've removed all the kit stuff I didn't want, and started blanking everything off with sheet plastic. Now it can be primed painted and detailed. 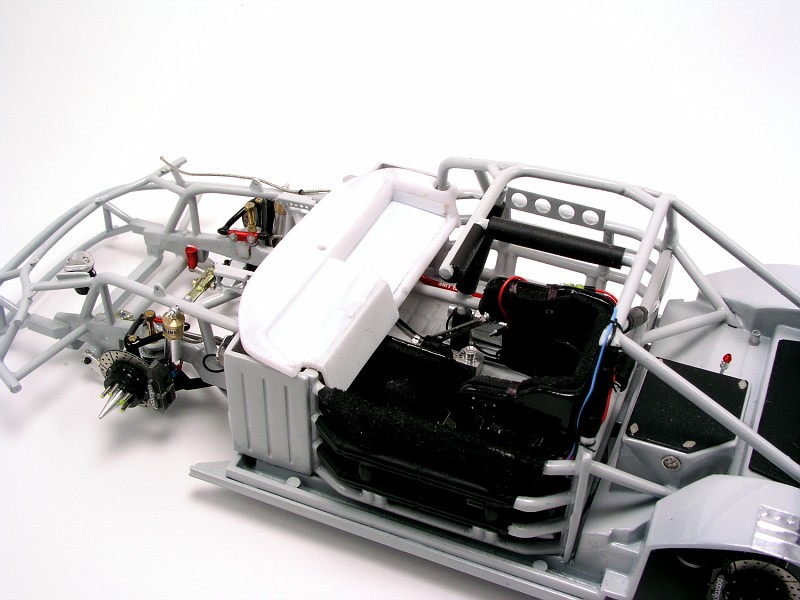 And while I was at tackling hard projects, why not make a stand too! When I first built this chassis I planned on having small pins hit spots on the bottom to hold it, like the real ones have to move them around the shop. While I was starting to work on it, I got an idea. I wanted to see what it would look like if my stand set the car at an angle. My theory was it would maybe help people see a little better at shows, and more than anything else, it would look different. After I got it done, I wasn't sure. I kinda like it, but I don't know if I should do a straight one too or what. It will still rotate on a mirror base, but now it kinda looks like he's on the banking. Or almost like Superman flying!!! 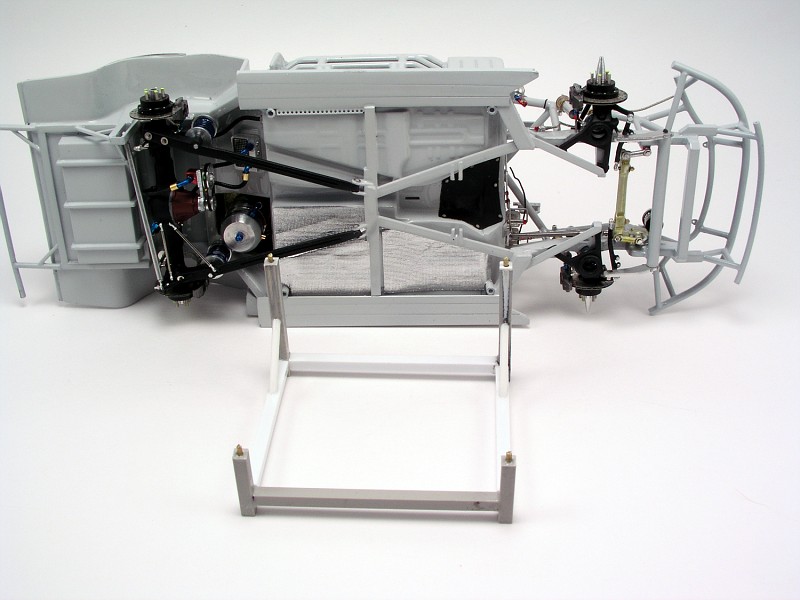 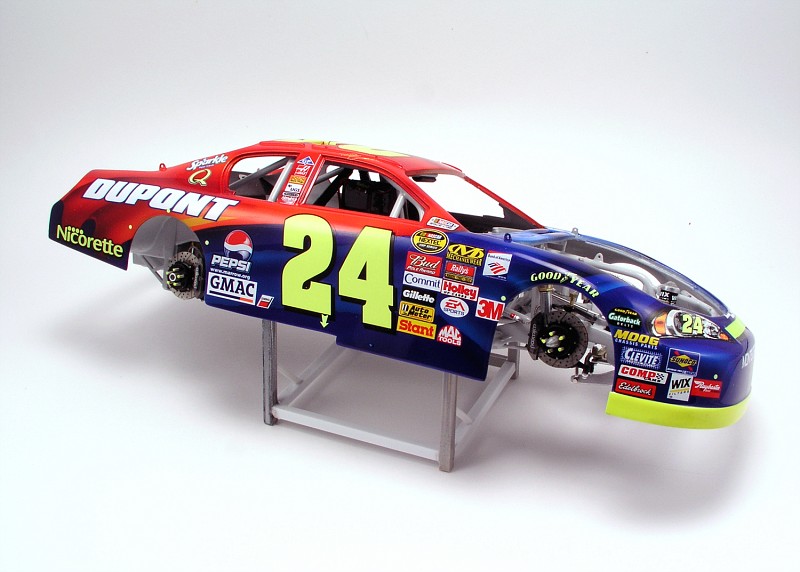 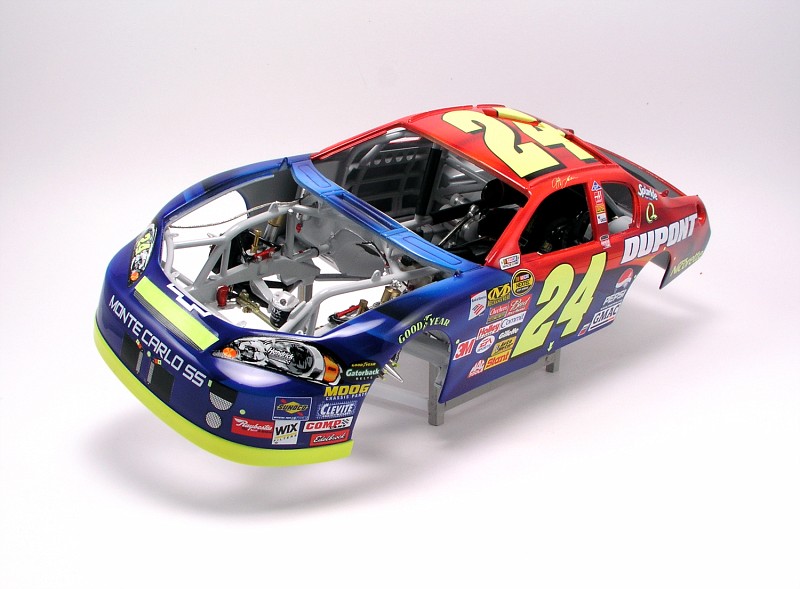 I finished up adding my remaining oil lines, and started in on the headers. I used Radio Shark .062 solder, heat shrink tube, and aluminum tubing. Once built I spray the collectors with Kustom Kolors Chrome to cover up the heat shrink, then heat stained them with Alclad Sepia, Violet, and Clear Yellow. I could have spent more time on them, but it was too damn cold outside! Also got the tranny linkages and tabs on using RB Motion #1501 rod ends. Now I am ready to get the engine installed for good. then I can hook up oil lines, fuel lines, water lines, get the radiator in, all that good stuff. Getting that engine in is a huge step. It opens all kinds of doors for more work.  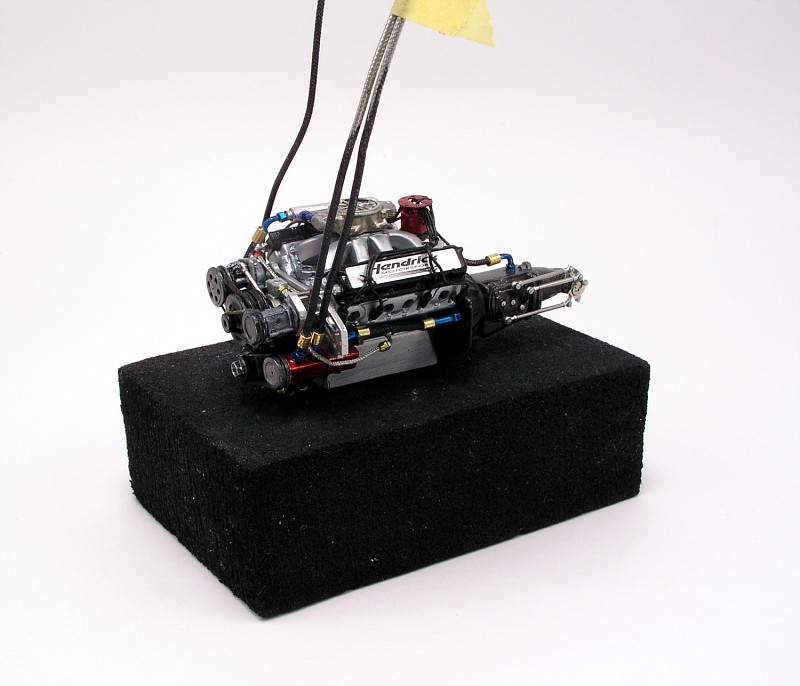  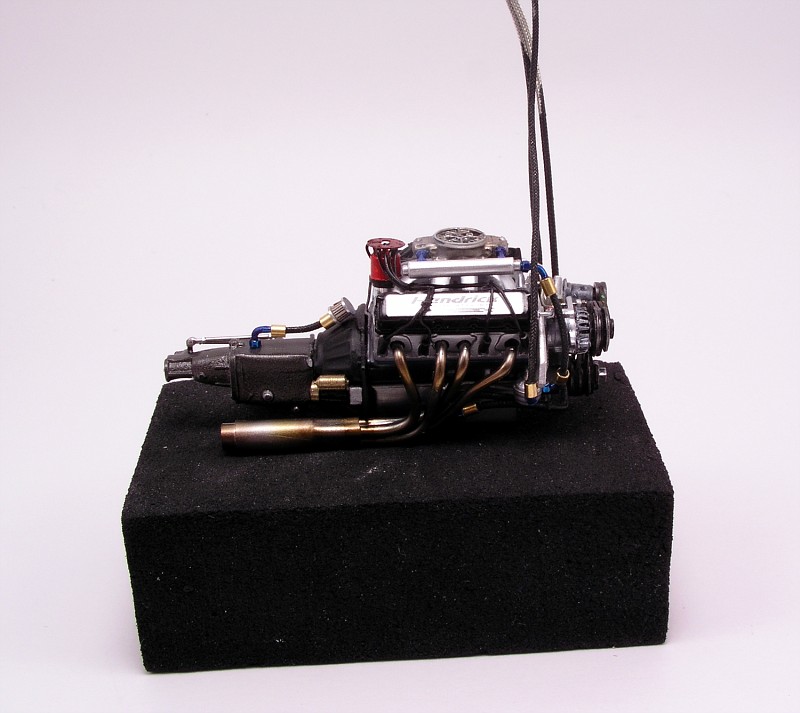 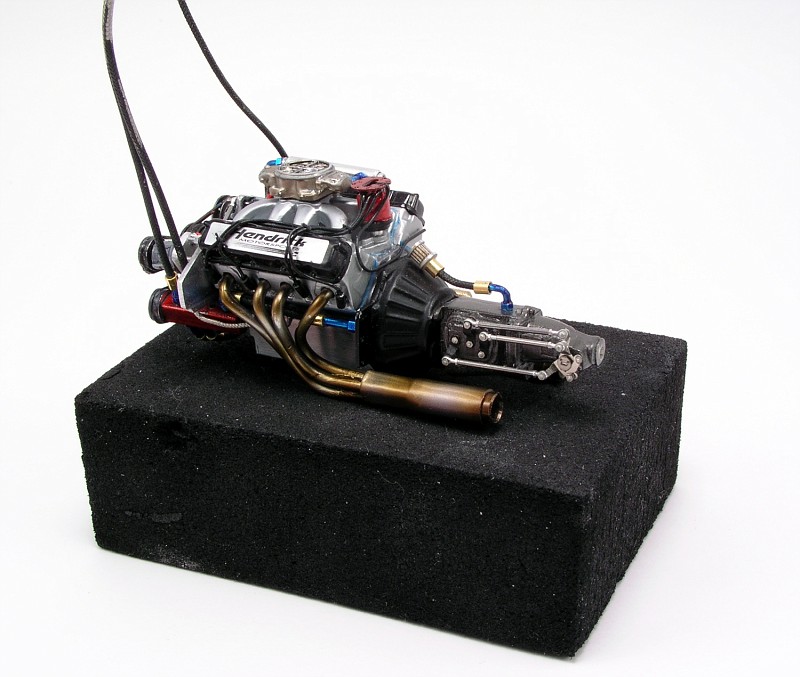 Thanks for looking! Clay
__________________
http://public.fotki.com/ClayK/ |
|

|

|
|
11-06-2009, 09:53 AM
|
#92 | |
|
AF Enthusiast

Join Date: Feb 2003
Location: F1...
Posts: 1,410
Thanks: 3
Thanked 3 Times in 3 Posts
|
Re: Wip:kyle Busch's '06 "cars" Kellogg's Monte Carlo
fantastic stuff!
I really like the idea of the angled stand and it should look great at shows. |
|
|
|
|
|
11-06-2009, 01:51 PM
|
#93 | |
|
AF Enthusiast
Join Date: Aug 2005
Location: where "sky grey" is a colour
Posts: 822
Thanks: 3
Thanked 32 Times in 29 Posts
|
Re: Wip:kyle Busch's '06 "cars" Kellogg's Monte Carlo
Fantastic! Nothing more to say :-)
Er...one thing maybe...:-) I'm really surprised how you have all those super clean and neat things assembled to the chassis and interior and then start to scratch build the dashboard. Not my kind of workflow! Lots of potential for disaster...but obviously it works for you :-) |
|
|
|
|
|
11-06-2009, 06:22 PM
|
#94 | |
|
AF Enthusiast
Join Date: Sep 2005
Location: Greenville, Illinois
Posts: 540
Thanks: 1
Thanked 1 Time in 1 Post
|
Re: Wip:kyle Busch's '06 "cars" Kellogg's Monte Carlo
Definitely a super build! Love the work!
Mark |
|
|
|
|
|
11-06-2009, 07:39 PM
|
#95 | |
|
AF Vendor-TBT's Owner
 
Join Date: Jul 2008
Location: Calgary
Posts: 940
Thanks: 0
Thanked 1 Time in 1 Post
|
Re: Wip:kyle Busch's '06 "cars" Kellogg's Monte Carlo
Do you even need to start with a kit when you build these?
 |
|
|
|
|
|
11-06-2009, 08:29 PM
|
#96 | |
|
AF Regular
Join Date: Jul 2003
Posts: 446
Thanks: 5
Thanked 1 Time in 1 Post
|
Re: Wip:kyle Busch's '06 "cars" Kellogg's Monte Carlo
Clay,
That angled stand works. Looks great and certainly is fitting for the Superman Returns theme. It represents a car capable of flying. Your work is always a pleasure to view.  Nens
__________________

|
|
|
|
|
|
11-09-2009, 01:13 PM
|
#97 | |
|
AF Regular
Thread starter
Join Date: Jul 2003
Location: Avon, Indiana
Posts: 164
Thanks: 0
Thanked 0 Times in 0 Posts
|
Re: Wip:kyle Busch's '06 "cars" Kellogg's Monte Carlo
Thanks guys!!!!!!!!!!!
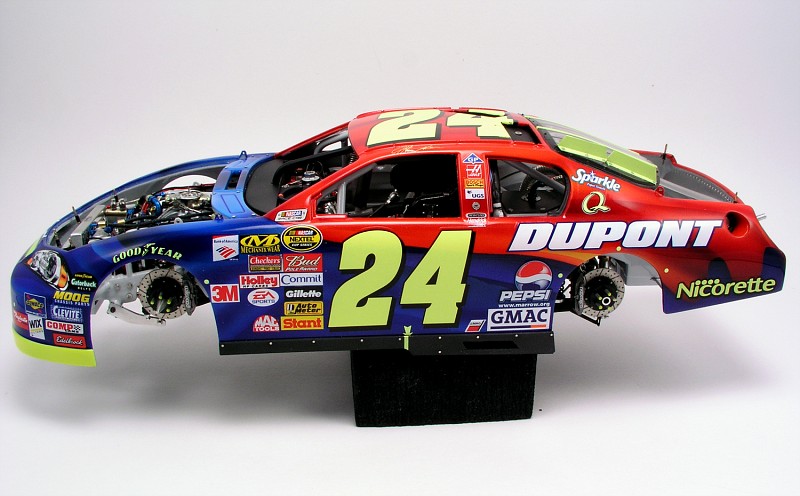
This thing is finally starting to look like a race car! I got the engine in, and started hooking up the oil lines, power steering lines, and water lines. I got lucky and the engine fit in there really well. That always speeds this part up. 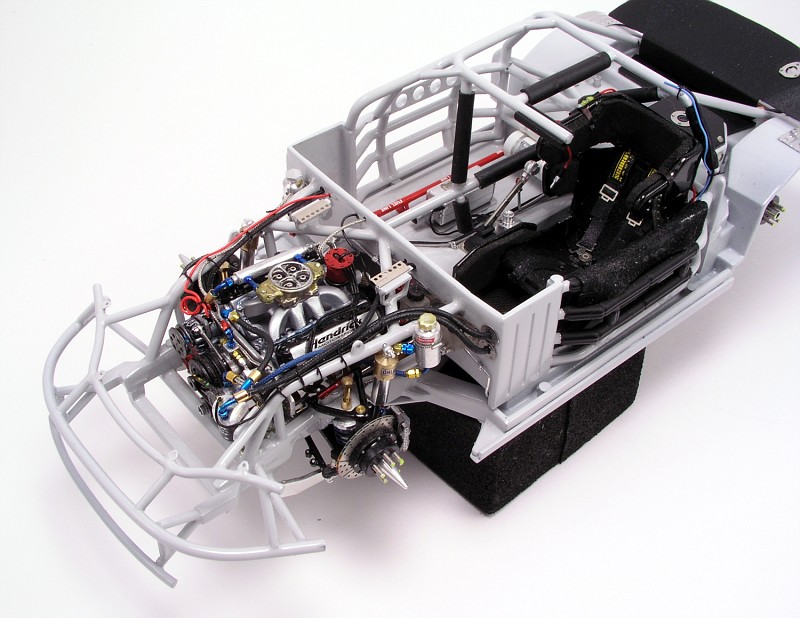  Every now and then you gotta throw the body on for some motivation.  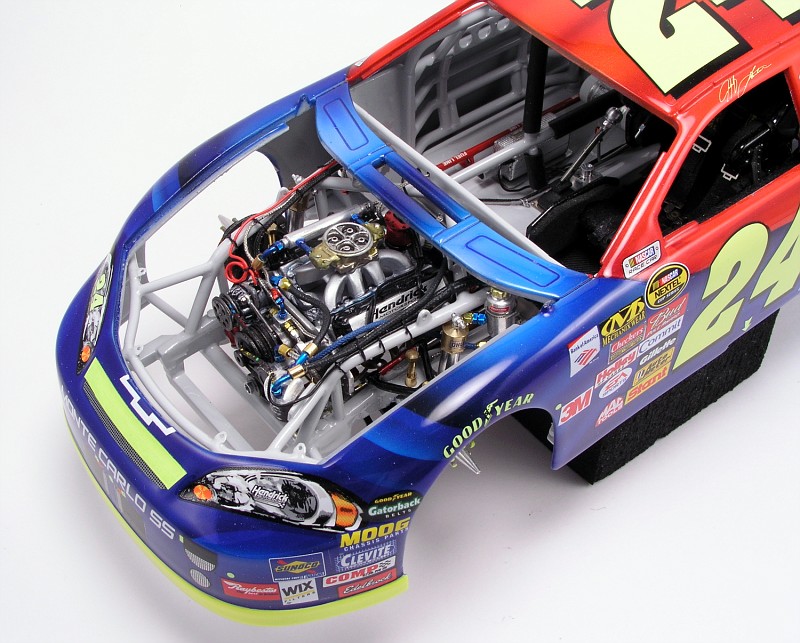  With the engine held firmly in place, I started working on the super speedway exhausts. I started with two pieces of plumbers solder bent up exactly to the same shape. Then I start boxing them in with sheet plastic to finish off the shape. Once everything is together I fill in all my gaps with zapagap, and hit it with kicker to make everything totally cured. Then a sanding stick smooths it all out, and blends things together. I laid my weld holes, and drill them out and it's ready for paint. 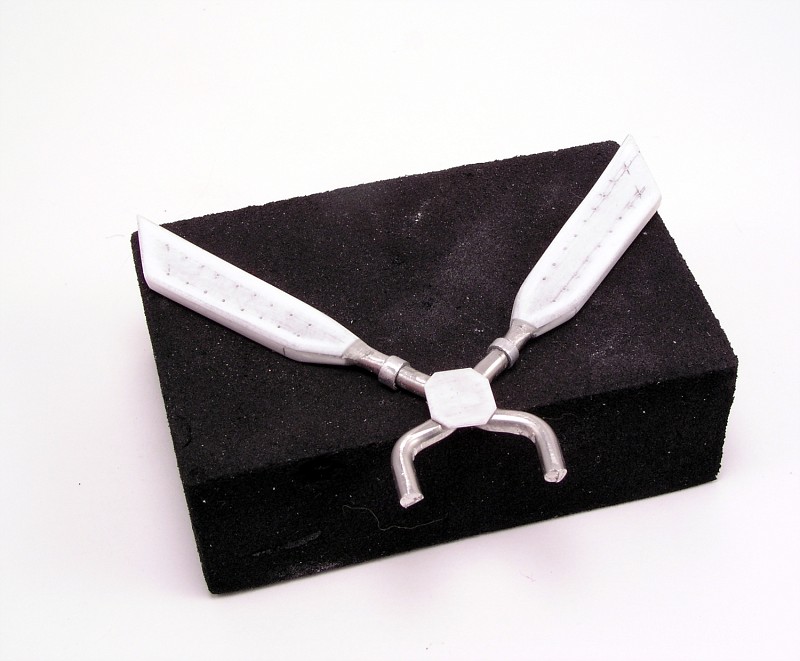   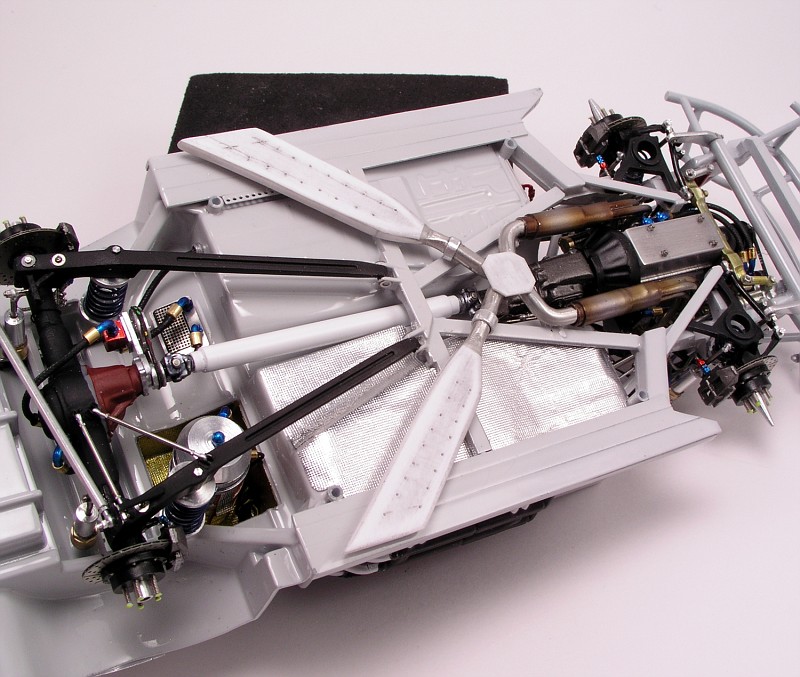 Still some big things to go, but I'm getting really close to being able to put the body on for good and do my final outer details. My original machined radiator wasn't going to work after all on this car. I tied making a new one from plastic to save some time, but I just didn't like it. So I decided to machine a new one that would work in this car. I did it the same was as last time, but moved the holes around. A quick electric fan and some wiring, and it was ready to be installed. 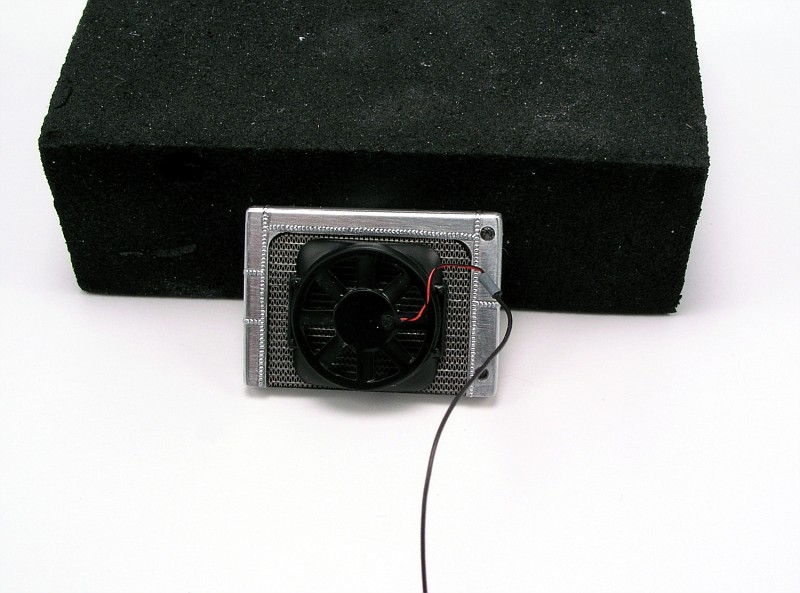 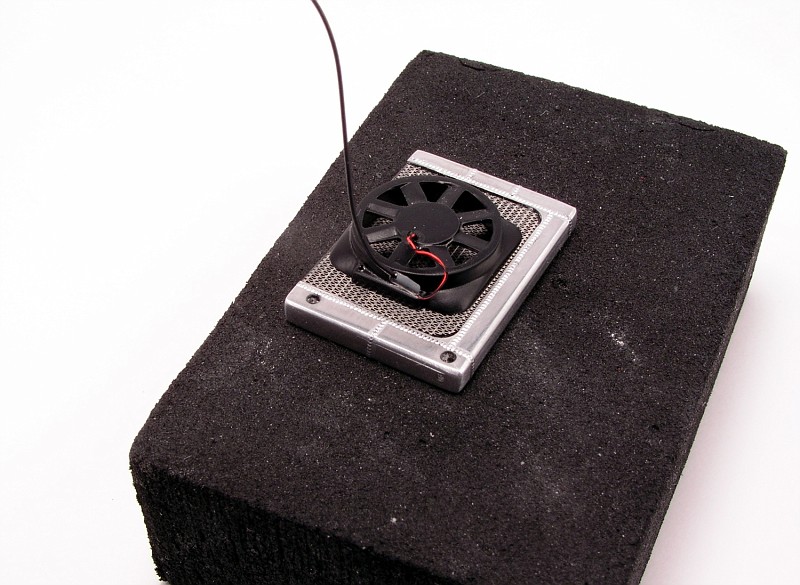 The exhaust was first covered with Kustom Kolors chrome, then I did a bit of Alclad work to it. All the weld holes were touched with a tiny dot of Detailer's black to shadow them a bit and then it was installed. I also made up a new drive shaft and got it installed.   I added my knee knocker, and then got to work on the dash. I used gauges off of the new Powerslide goodies sheet, and machined 7 new bezels. I'm only half way done with it, but I gotta say I think this is the best of all the dash faces I've done. I was really happy with how the bezels turned out. I hate making those things! All the electronics will be done on a separate plate and dropped in later. 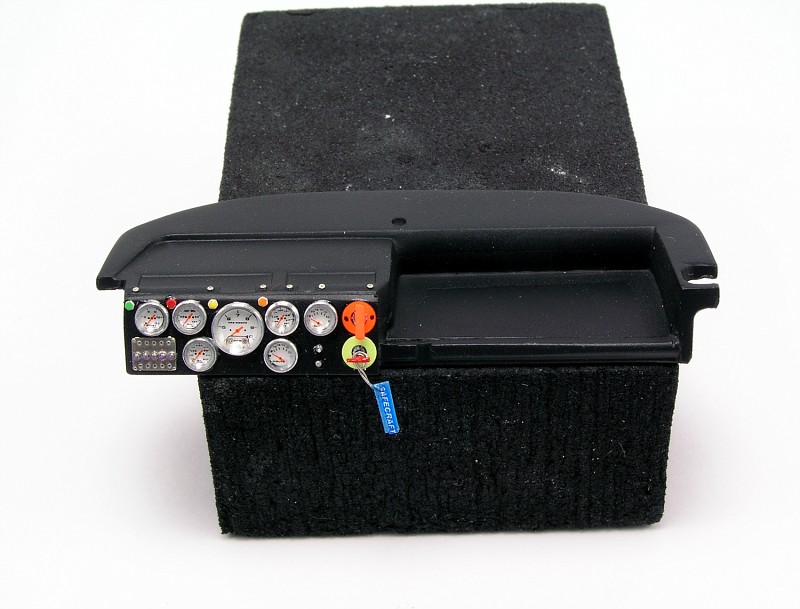  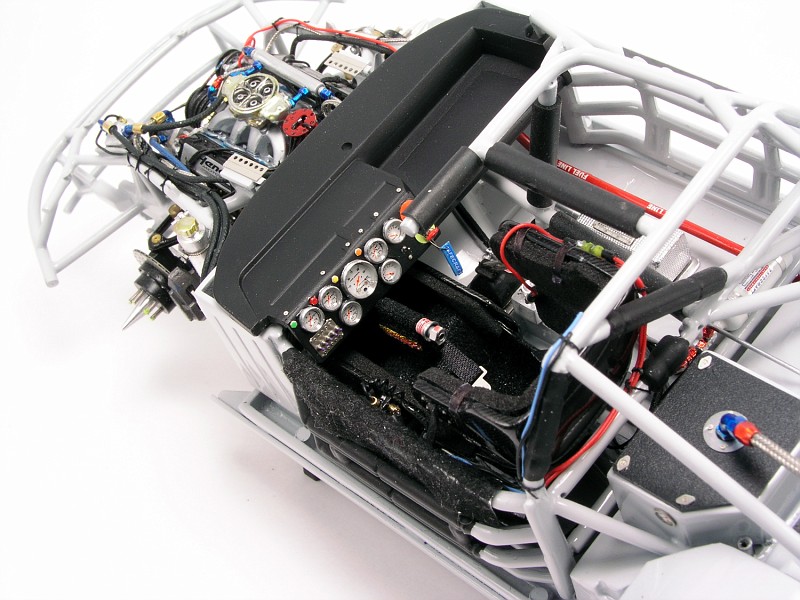 And of course, I had to make another Gatorade bag. No Colada Cooler gum this time, It's Wintergreen!! 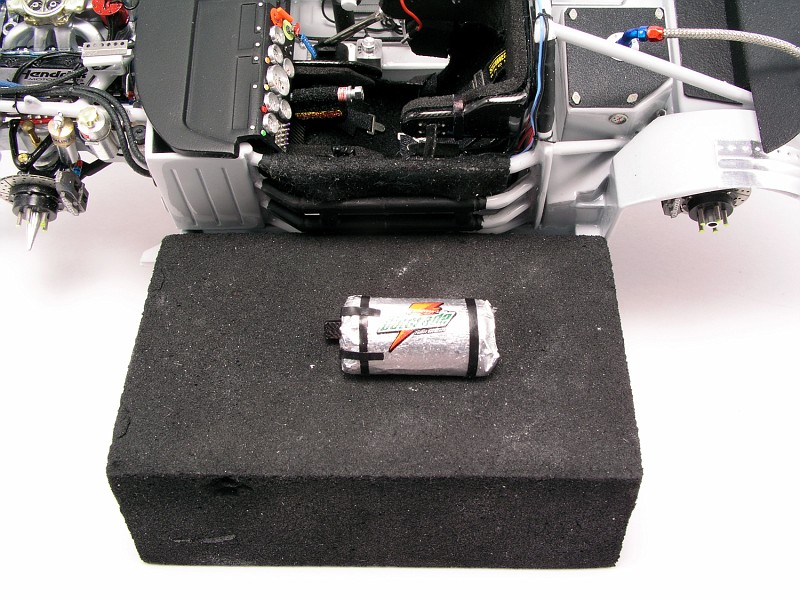 The next three days will be busy ones, so wish me luck! Clay
__________________
http://public.fotki.com/ClayK/ |
|
|
|
|
|
11-09-2009, 01:27 PM
|
#98 | |
|
AF Enthusiast

Join Date: Dec 2004
Location: Germany
Posts: 3,431
Thanks: 28
Thanked 79 Times in 73 Posts
|
Re: Wip:kyle Busch's '06 "cars" Kellogg's Monte Carlo
A masterpiece !!!!!!!!!!!!!!!!!!!!!!!!
__________________
Micha       
|
|
|
|
|
|
11-09-2009, 01:58 PM
|
#99 | |
|
Captain Over Engineer
 Join Date: Feb 2003
Location: New York, New York
Posts: 6,711
Thanks: 27
Thanked 29 Times in 23 Posts


|
Re: Wip:kyle Busch's '06 "cars" Kellogg's Monte Carlo
Great work Clay, will we see you this weekend?
__________________
-Mike AF Director of Media / Photographer  mike.lawrence@automotiveforums.com | AutomotiveForums.com | Flickr Gallery |
|
|
|
|
|
11-10-2009, 05:45 AM
|
#100 | |
|
AF Enthusiast
Join Date: Feb 2003
Location: F1...
Posts: 1,410
Thanks: 3
Thanked 3 Times in 3 Posts
|
Re: Wip:kyle Busch's '06 "cars" Kellogg's Monte Carlo
sensational stuff, love it!
|
|
|
|
|
|
11-10-2009, 08:08 AM
|
#101 | |
|
AF Regular
Thread starter
Join Date: Jul 2003
Location: Avon, Indiana
Posts: 164
Thanks: 0
Thanked 0 Times in 0 Posts
|
Re: Wip:kyle Busch's '06 "cars" Kellogg's Monte Carlo
Thanks!
I got all my final bits done and I'm ready to mount the body for good. I added the radiator and got it all hooked up. Did the ducting up front with embossing metal as usual. Actually had to do it twice. I did it the first time and didn't like it so I ripped it all out and did it over! Same with the rear crush panels. I bet I made 5, 6 right side pieces before I got one that I liked. And I got the left one done on the first try. I added the carb linkages and return spring......water system is done.......Gatorade bag has it's hose as well as the koolbox. Steering wheel and cords are on. And I scratch built a mirror and CF'd it and coated it with Future before getting it installed. Oh,the MSD boxes aren't done yet. Still some more wiring to go on those. I think that's about it......it's all starting to run together. :o Anyway, last shots before the body goes on..... 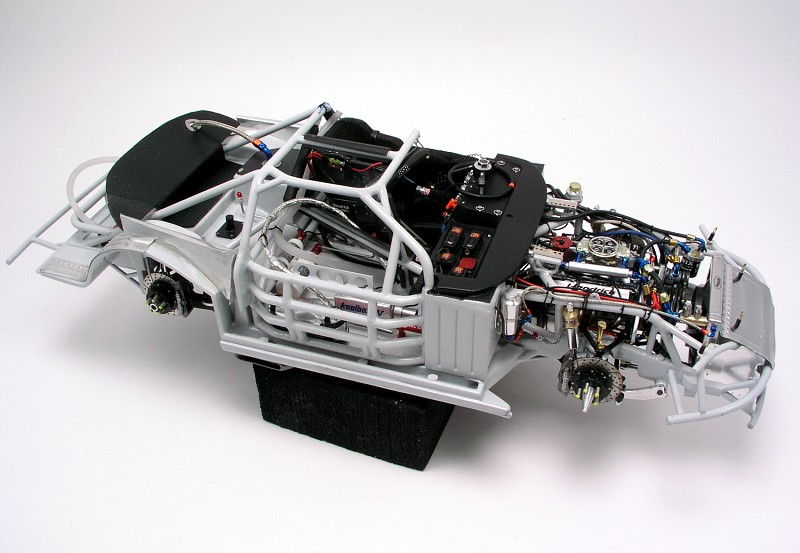 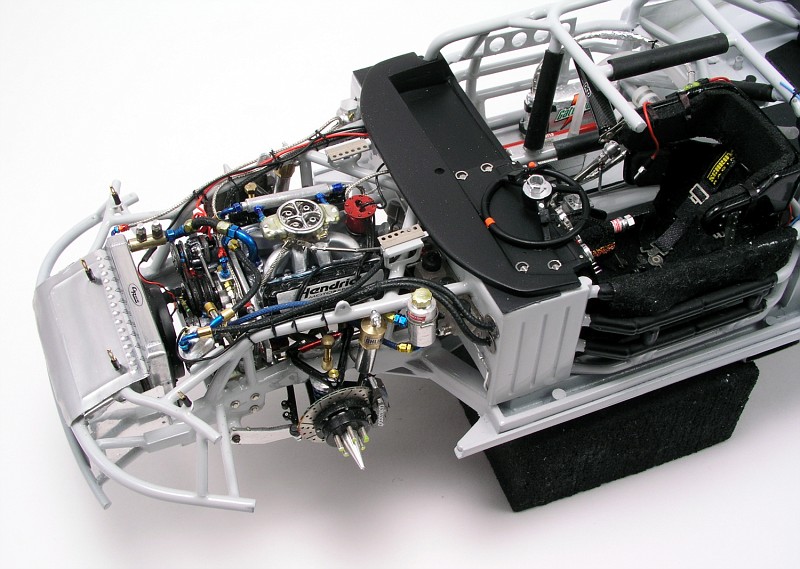 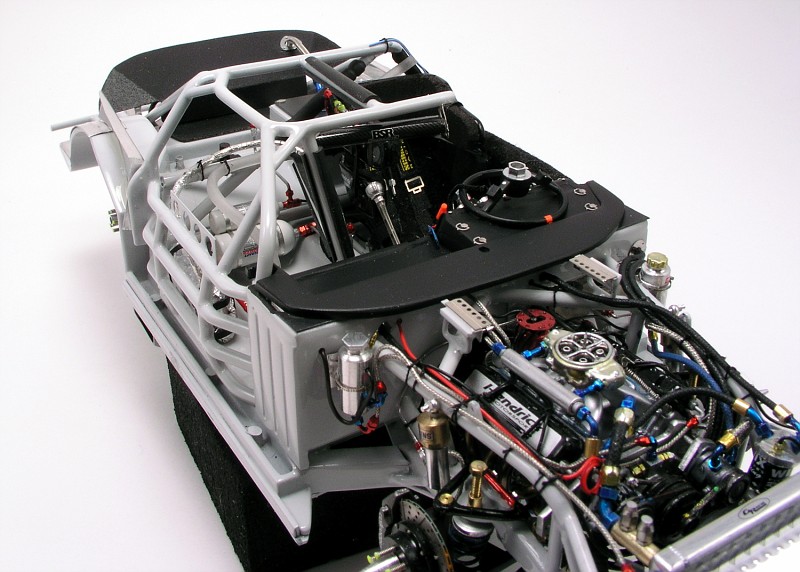 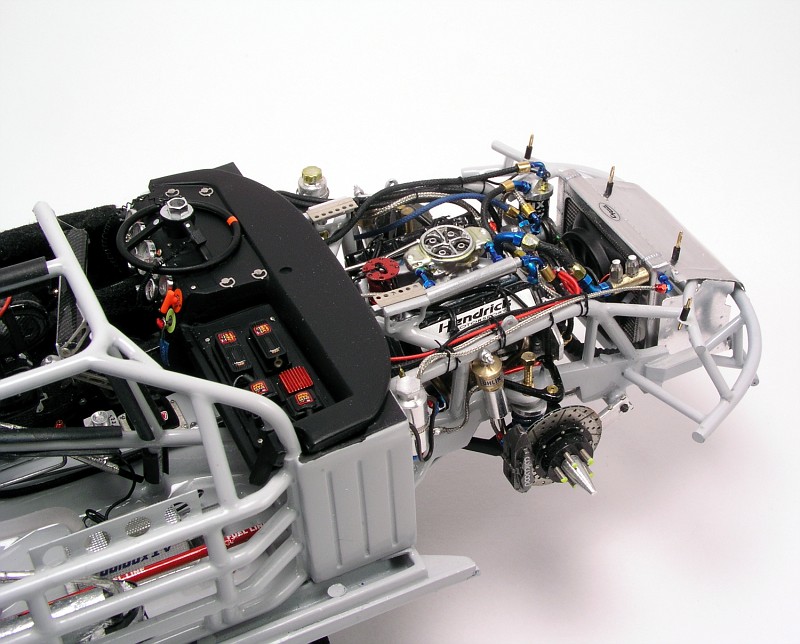 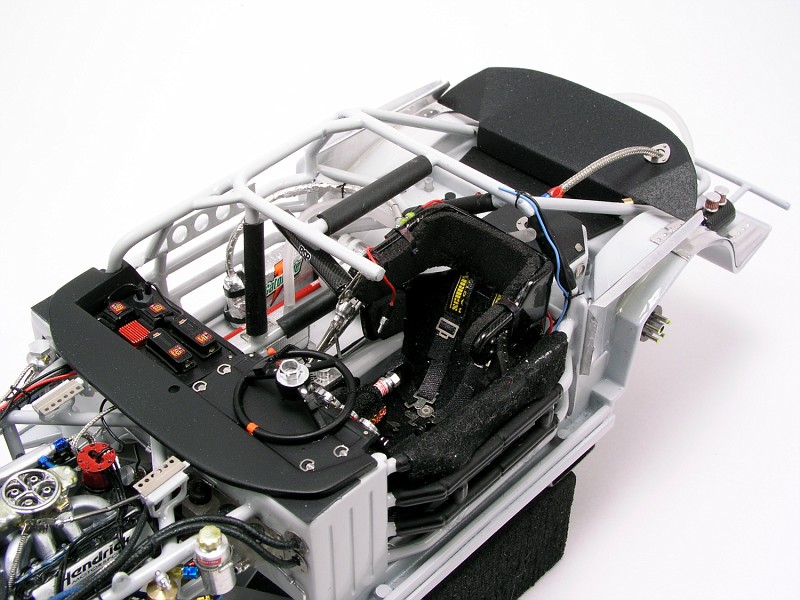 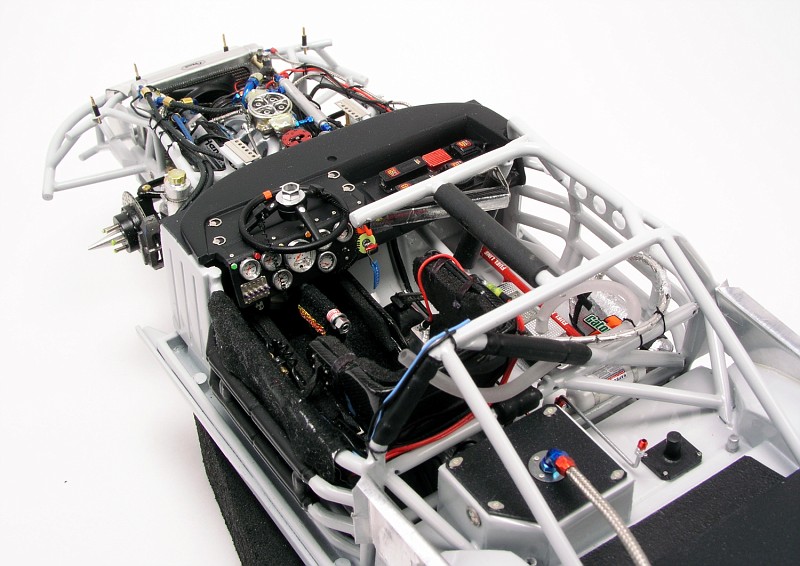 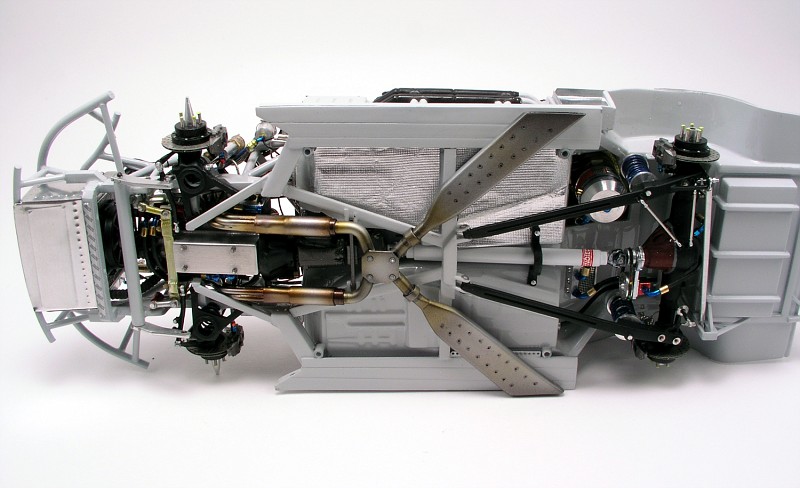 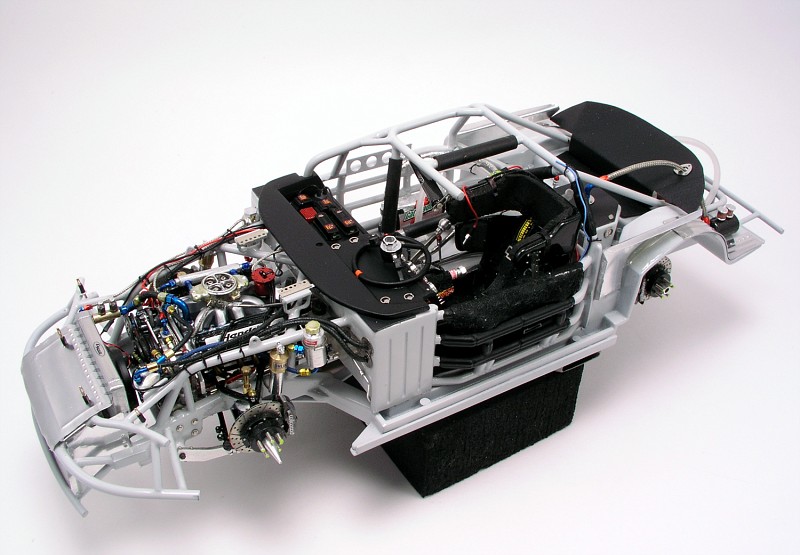 Thanks for looking, and the comments!
__________________
http://public.fotki.com/ClayK/ |
|
|
|
|
|
11-10-2009, 09:12 AM
|
#102 | |
|
AF Regular
Join Date: Jul 2003
Posts: 446
Thanks: 5
Thanked 1 Time in 1 Post
|
Re: Wip:kyle Busch's '06 "cars" Kellogg's Monte Carlo
Are we allowed to say THIS IS BLOODY AWESOME? I hope so, because it is bloody awesome. Oh yeah, good luck, but you wont need it. But I hope it all goes well for you. Love all the details, the craftsmanship, the bodywork, the painting, the cleanliness, the passion of your posts. It's really inspiring stuff dude. Thumbs up!
Nenad
__________________
|
|
|
|
|
|
11-10-2009, 02:01 PM
|
#103 | |
|
AF Enthusiast
Join Date: Aug 2005
Location: where "sky grey" is a colour
Posts: 822
Thanks: 3
Thanked 32 Times in 29 Posts
|
Re: Wip:kyle Busch's '06 "cars" Kellogg's Monte Carlo
Top notch stuff all around! Great fun to follow this build!
|
|
|
|
|
|
11-11-2009, 02:03 AM
|
#104 | |
|
AF Regular

Join Date: Sep 2006
Location: Zaragoza
Posts: 232
Thanks: 3
Thanked 0 Times in 0 Posts
|
Re: Wip:kyle Busch's '06 "cars" Kellogg's Monte Carlo
Incredible work!!! Where do you buy all those aftermarket pieces?
|
|
|
|
|
|
11-11-2009, 09:05 AM
|
#105 | |
|
AF Regular
Thread starter
Join Date: Jul 2003
Location: Avon, Indiana
Posts: 164
Thanks: 0
Thanked 0 Times in 0 Posts
|
Re: Wip:kyle Busch's '06 "cars" Kellogg's Monte Carlo
The Man of Steel is beat today. Too many late nights in a row! I've got one more night to go and I think I will make it. Last night was mount the body for good night. Once it was on I made up a new set of side skirts from black sheet plastic and added Pro Tech bolt heads. Then I began to finish up all of my tin work. New inner fender tins in the rear, and the part I have been dreading, the rear tin filler panel. I made a template from some thick paper and was amazed that I got it to fit in there on the first try! I pulled it back out, added the rivet details and the bead rolls, and installed it for good. I was stoked at how well it fit in there, and how clean it looks. Definitely made things go a lot smoother after that!
   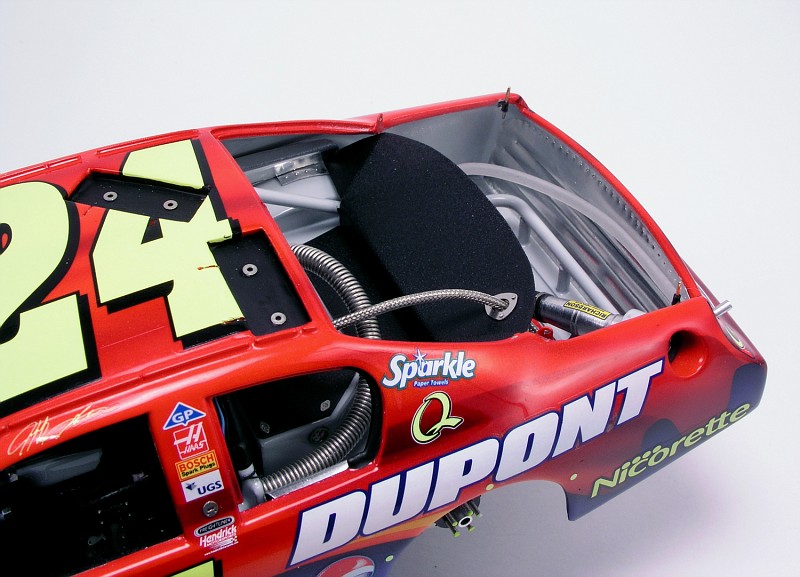 Front crush panels are also in. 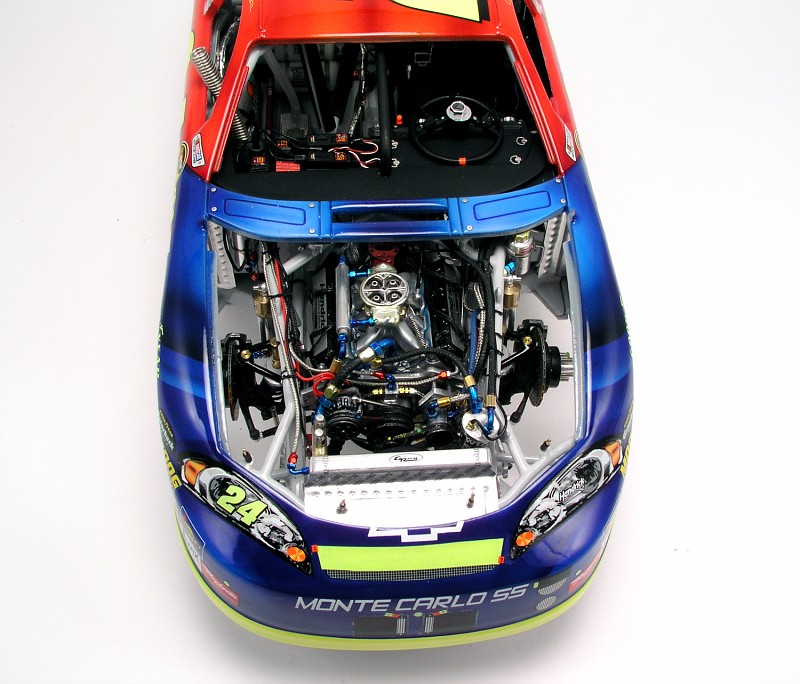 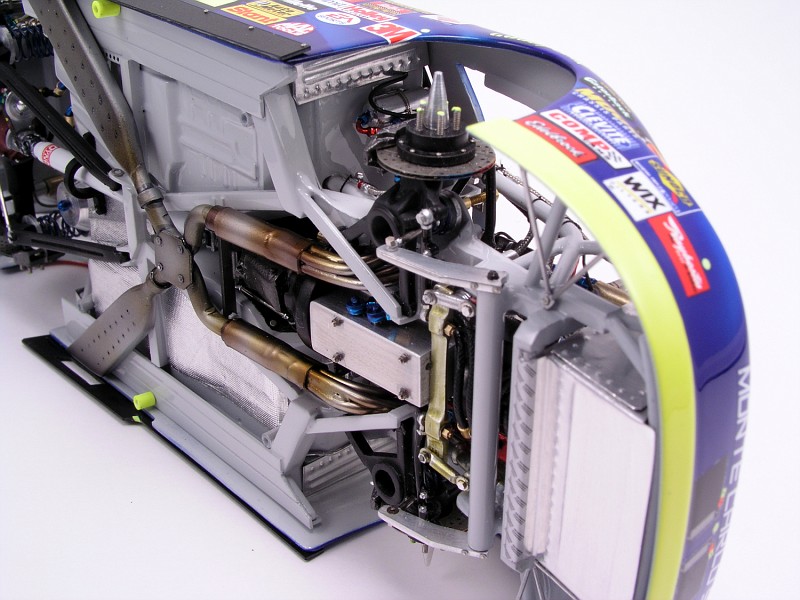 I also finished up a few other loose ends. Got most of my rear window detailing done, jack posts added, and all the fuel filler and overflow lines are in and hooked up. Now I need to get the hood and trunk on, finish the windows, and get a window net in. I think I will make it! 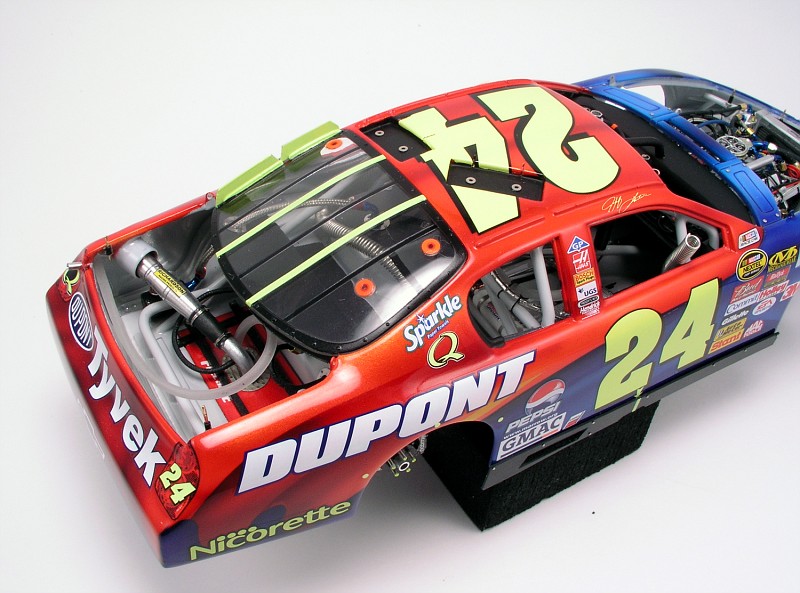 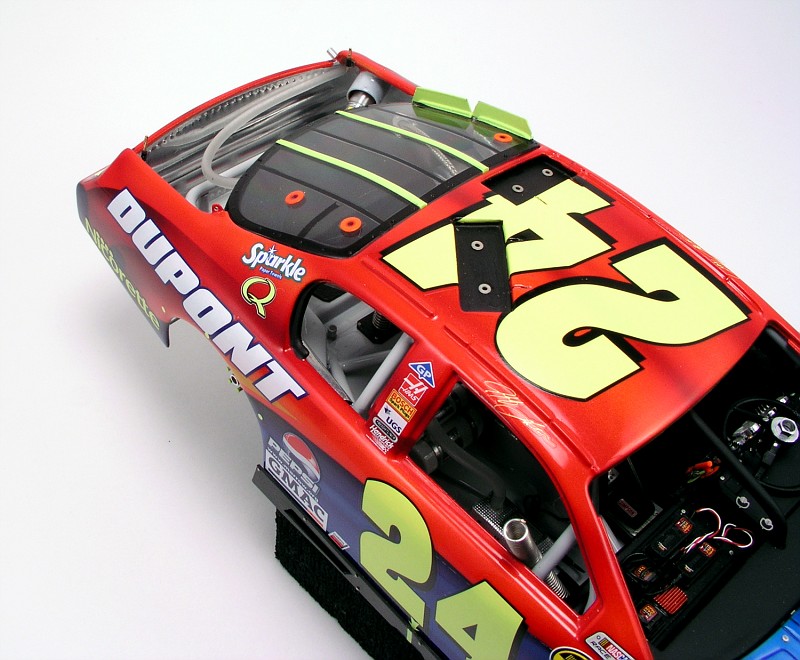 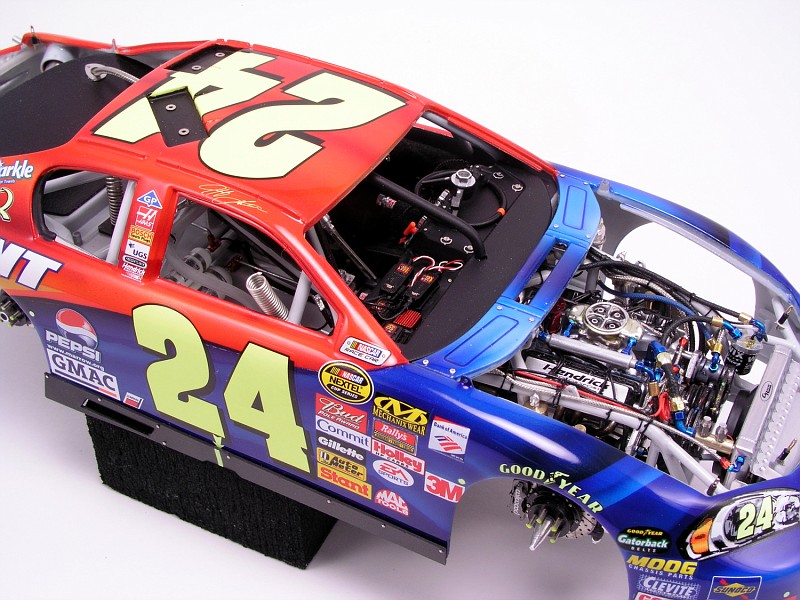 Thanks again for all the comments, I appreciate you guys hanging in there with me for so long. Clay
__________________
http://public.fotki.com/ClayK/ |
|
|
|
|
|
|
POST REPLY TO THIS THREAD |
 |
|
|

